week 13: composites
This week was composites week. Our group assignment was to produce test coupons for the composite fabrication process. Individually, we had to design and fabricate a mold and use it to produce a fiber composite part.
During Make Something Big week, I made a rocking horse, and when I made it, the TA Grace suggested that I make a seat for it during composites week, so that's what I decided to do. I started the week by designing a seat for my rocking horse in Rhino. I based it on the dimensions of my original rocking horse, and tried to create a relatively simple design. I was planning to machine the foam so that I could completely cover it with the composite material and leave the foam inside.
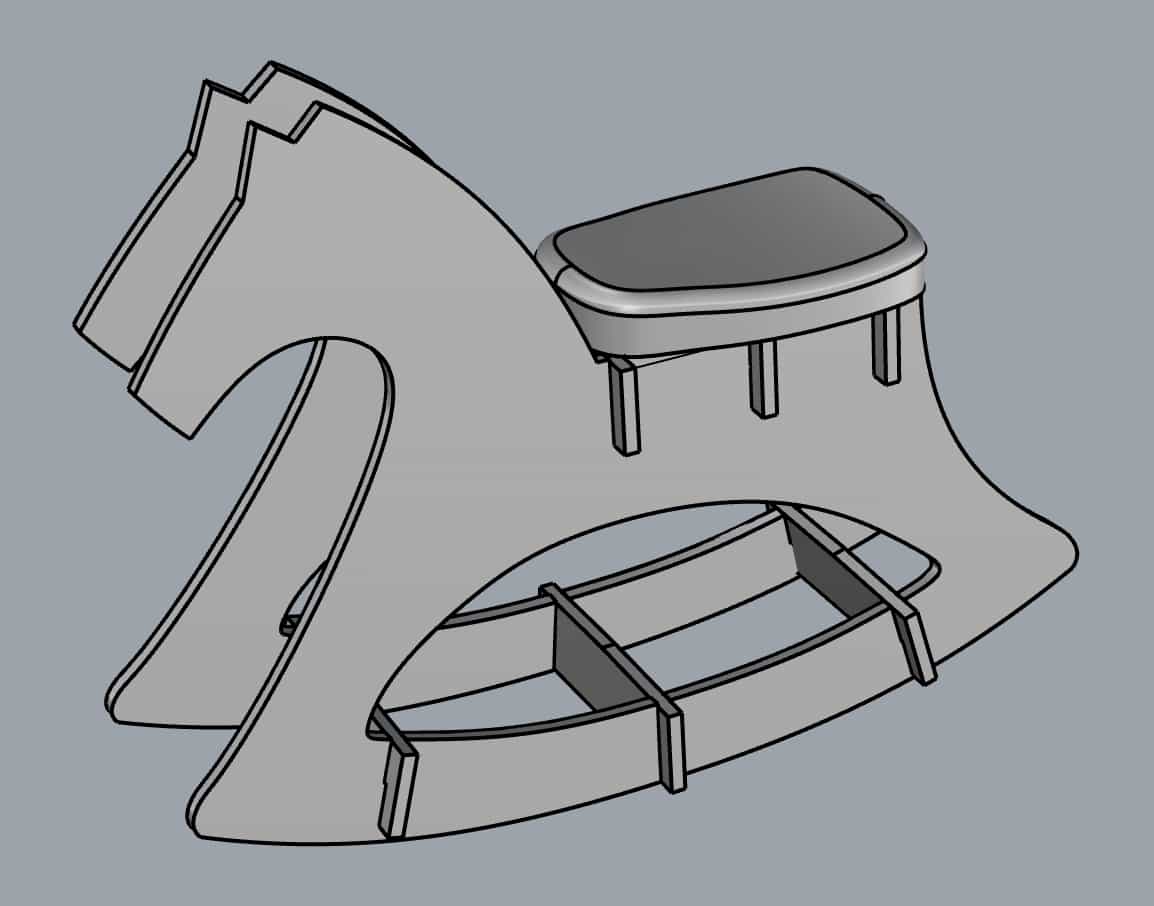
I designed a seat for my rocking horse.
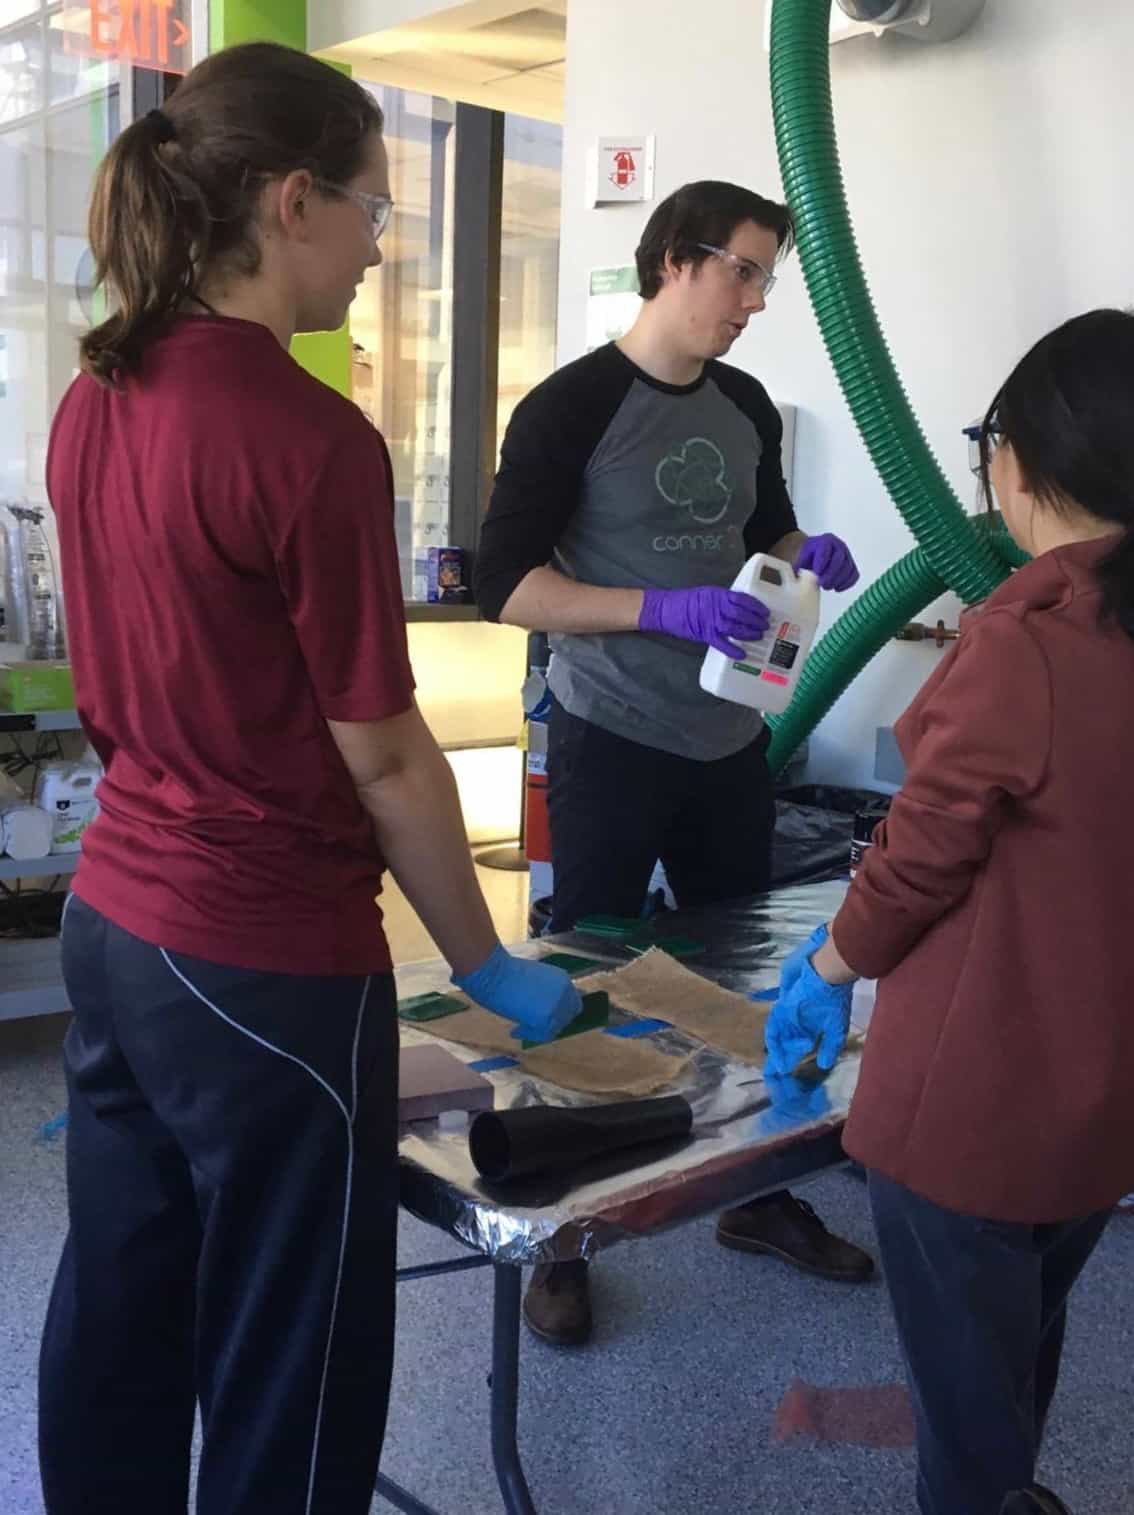
On Sunday, Priya, Xin, and I met in EDS to do the group assignment. We had each watched the video Gavin sent out of the composites training session from last year, and the TA Sam was there to help guide us through the process. We used a small square of foam to create a test coupon. The process was much quicker/easier than I was expecting. We learned how to measure and mix the two substances and got practice spreading the mixture on the burlap material. We didn't have enough of the epoxy mixture, so we had to measure a small second batch so that we could fully saturate the burlap. Then we laid the saturated burlap pieces over our foam, followed by the bleeder and the quilt batting (the breather). We put everything in the vacuum bag, sealed it, and vacuumed out the air. You could actually see the epoxy coming through the tiny holes in the bleeder. After 10 or so minutes, I felt our composite in the vacuum bag, and it was warm, which is expected because the reaction is exothermic. We left our test piece in the bag overnight.
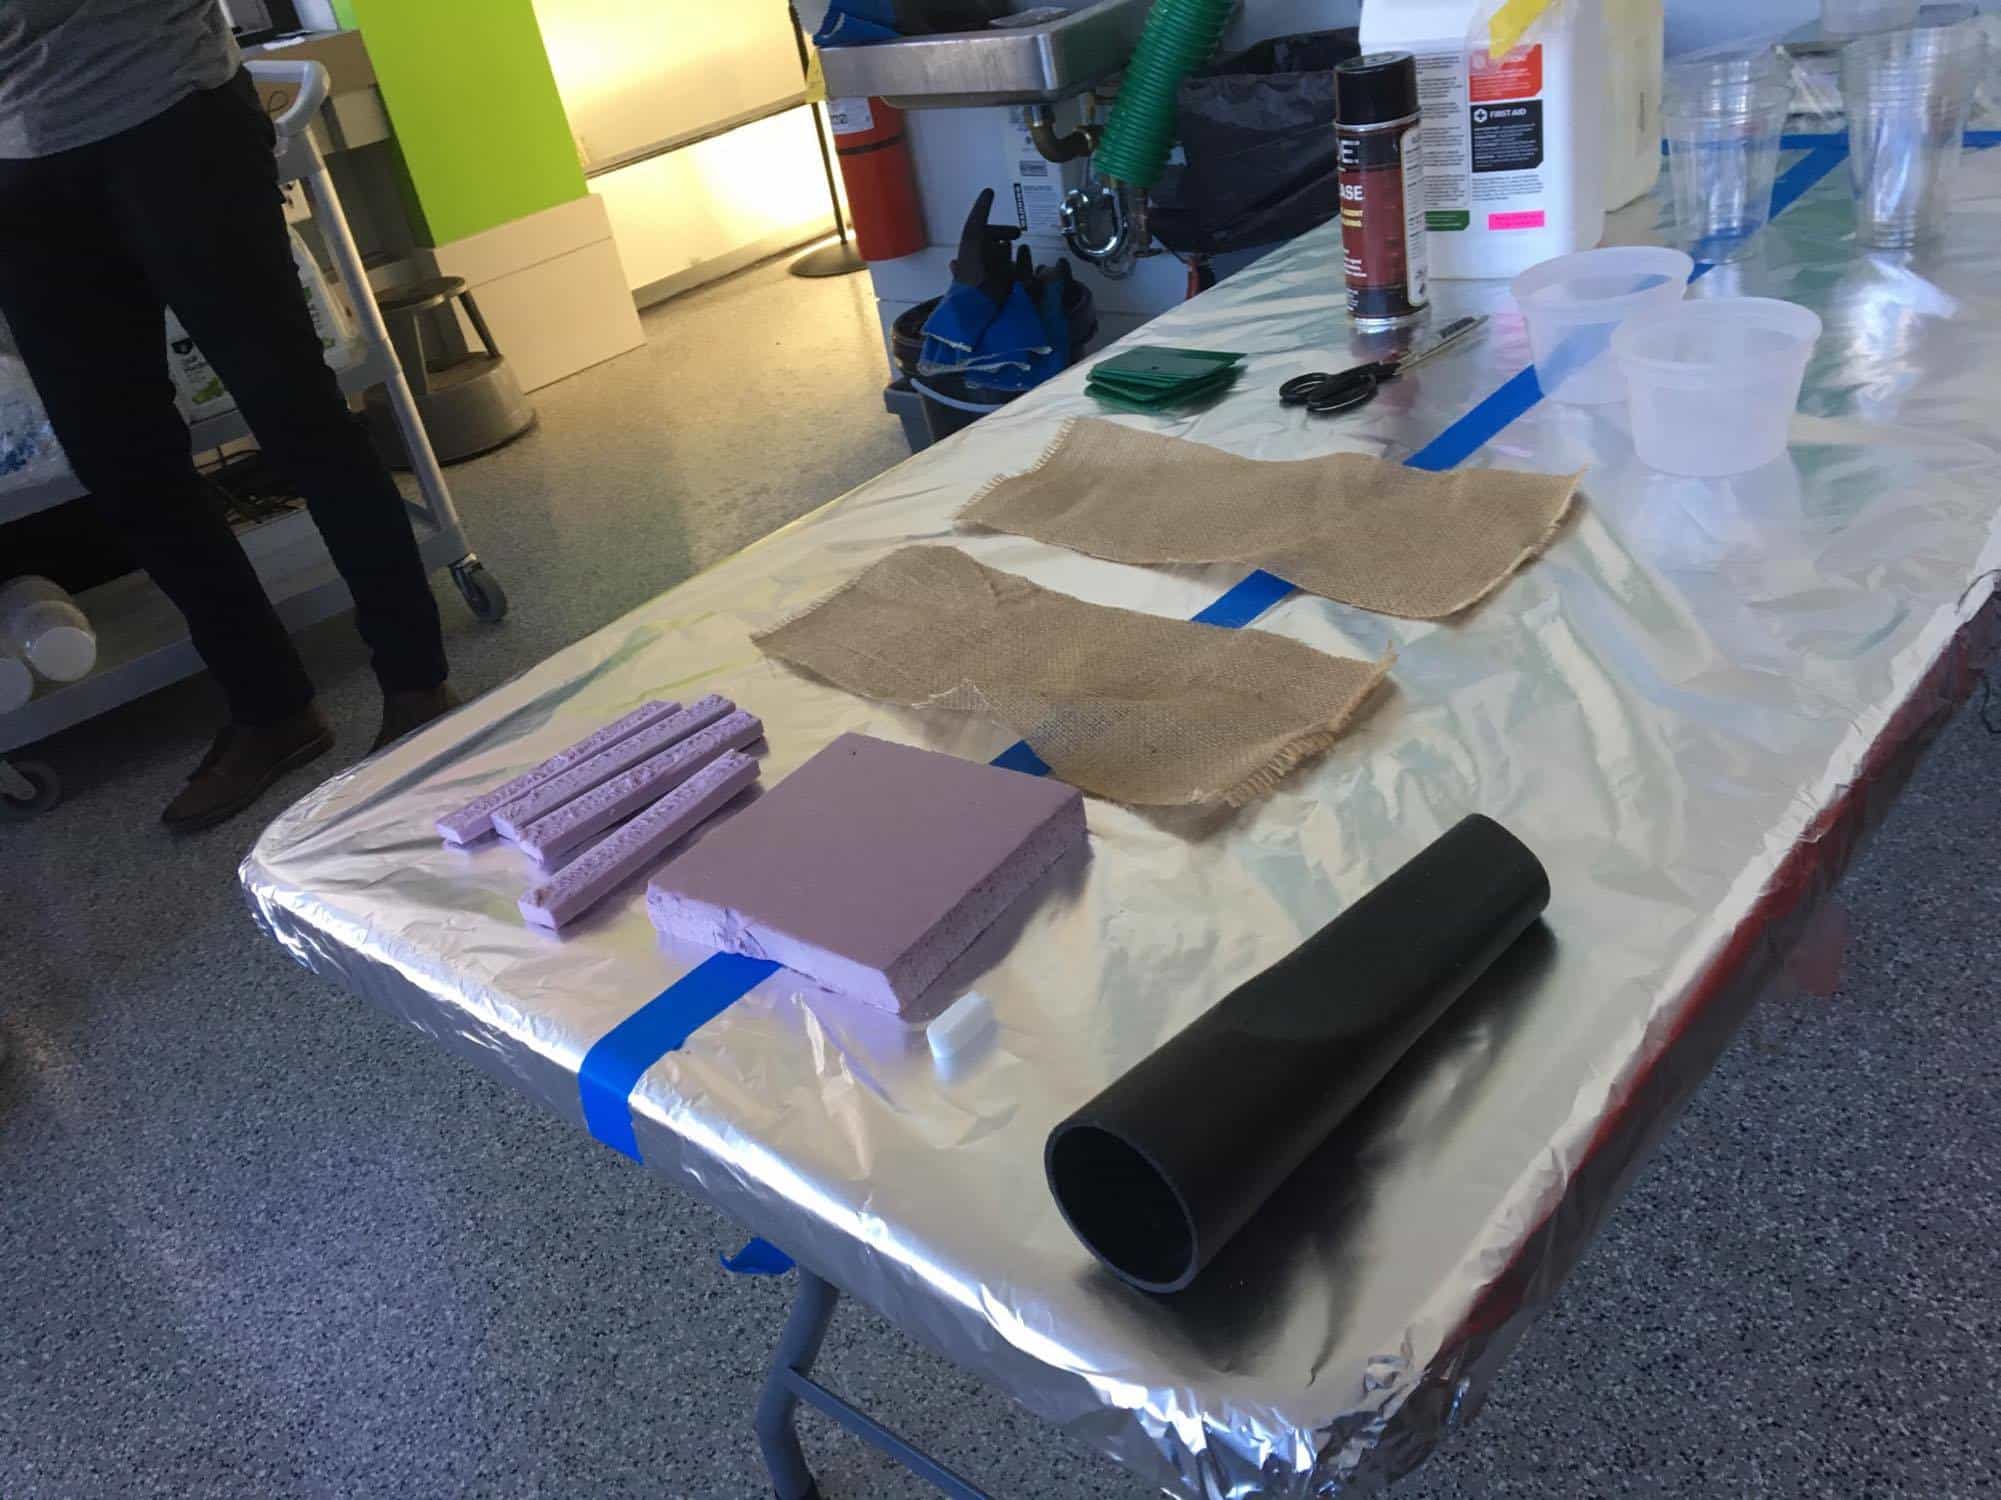
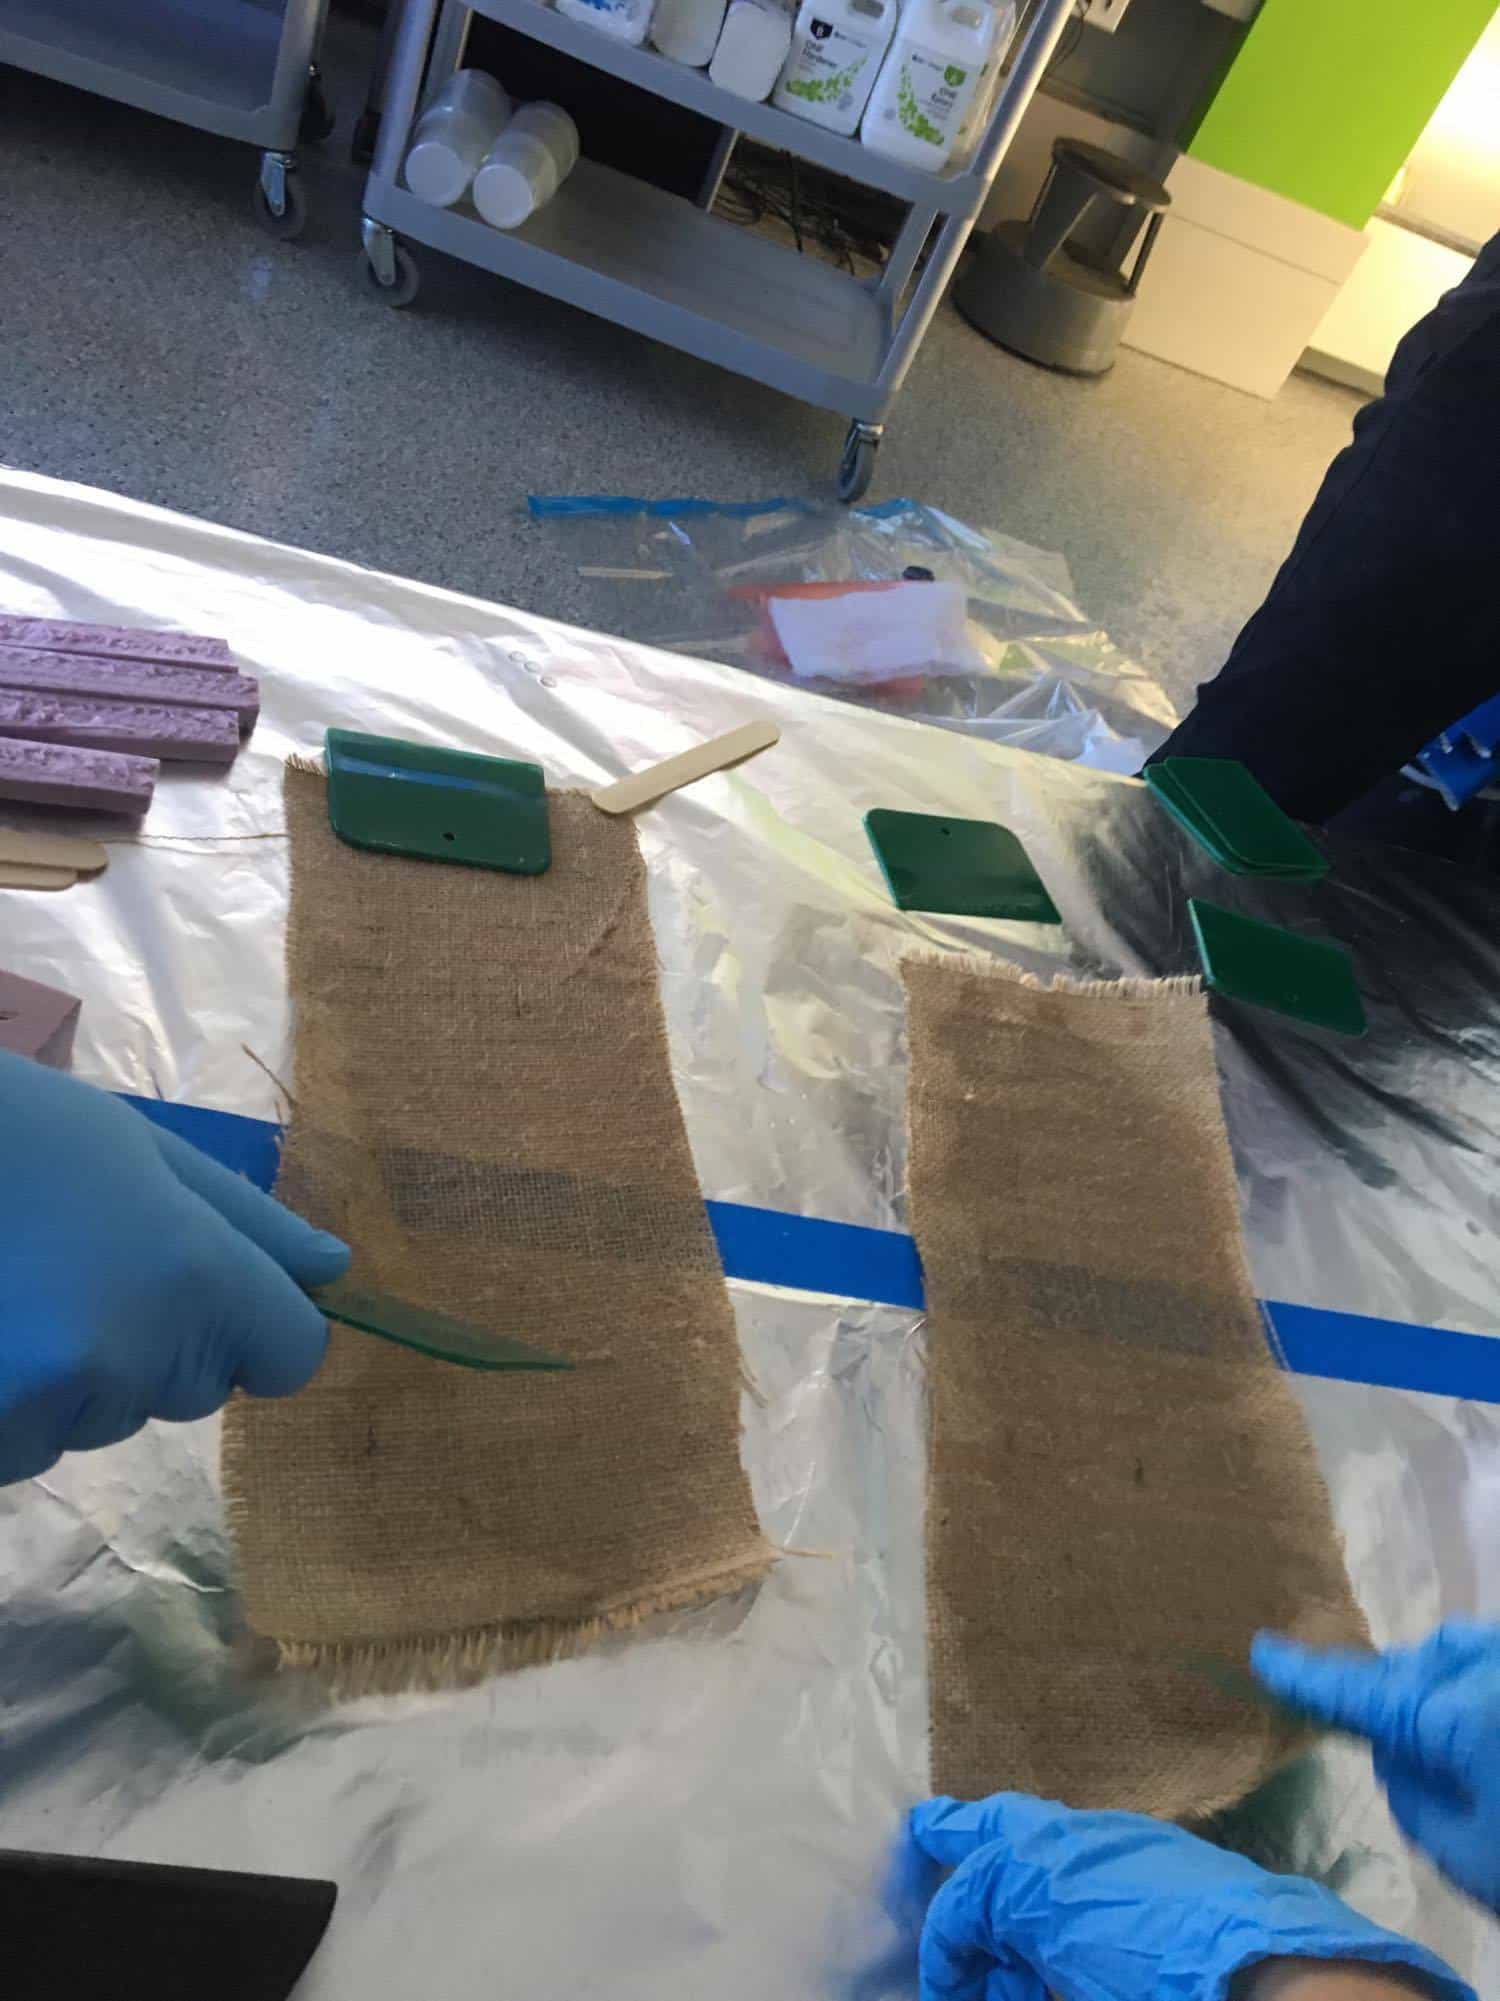
Some setup and process photos of creating the test coupon.
Vacuuming while making our test coupon.
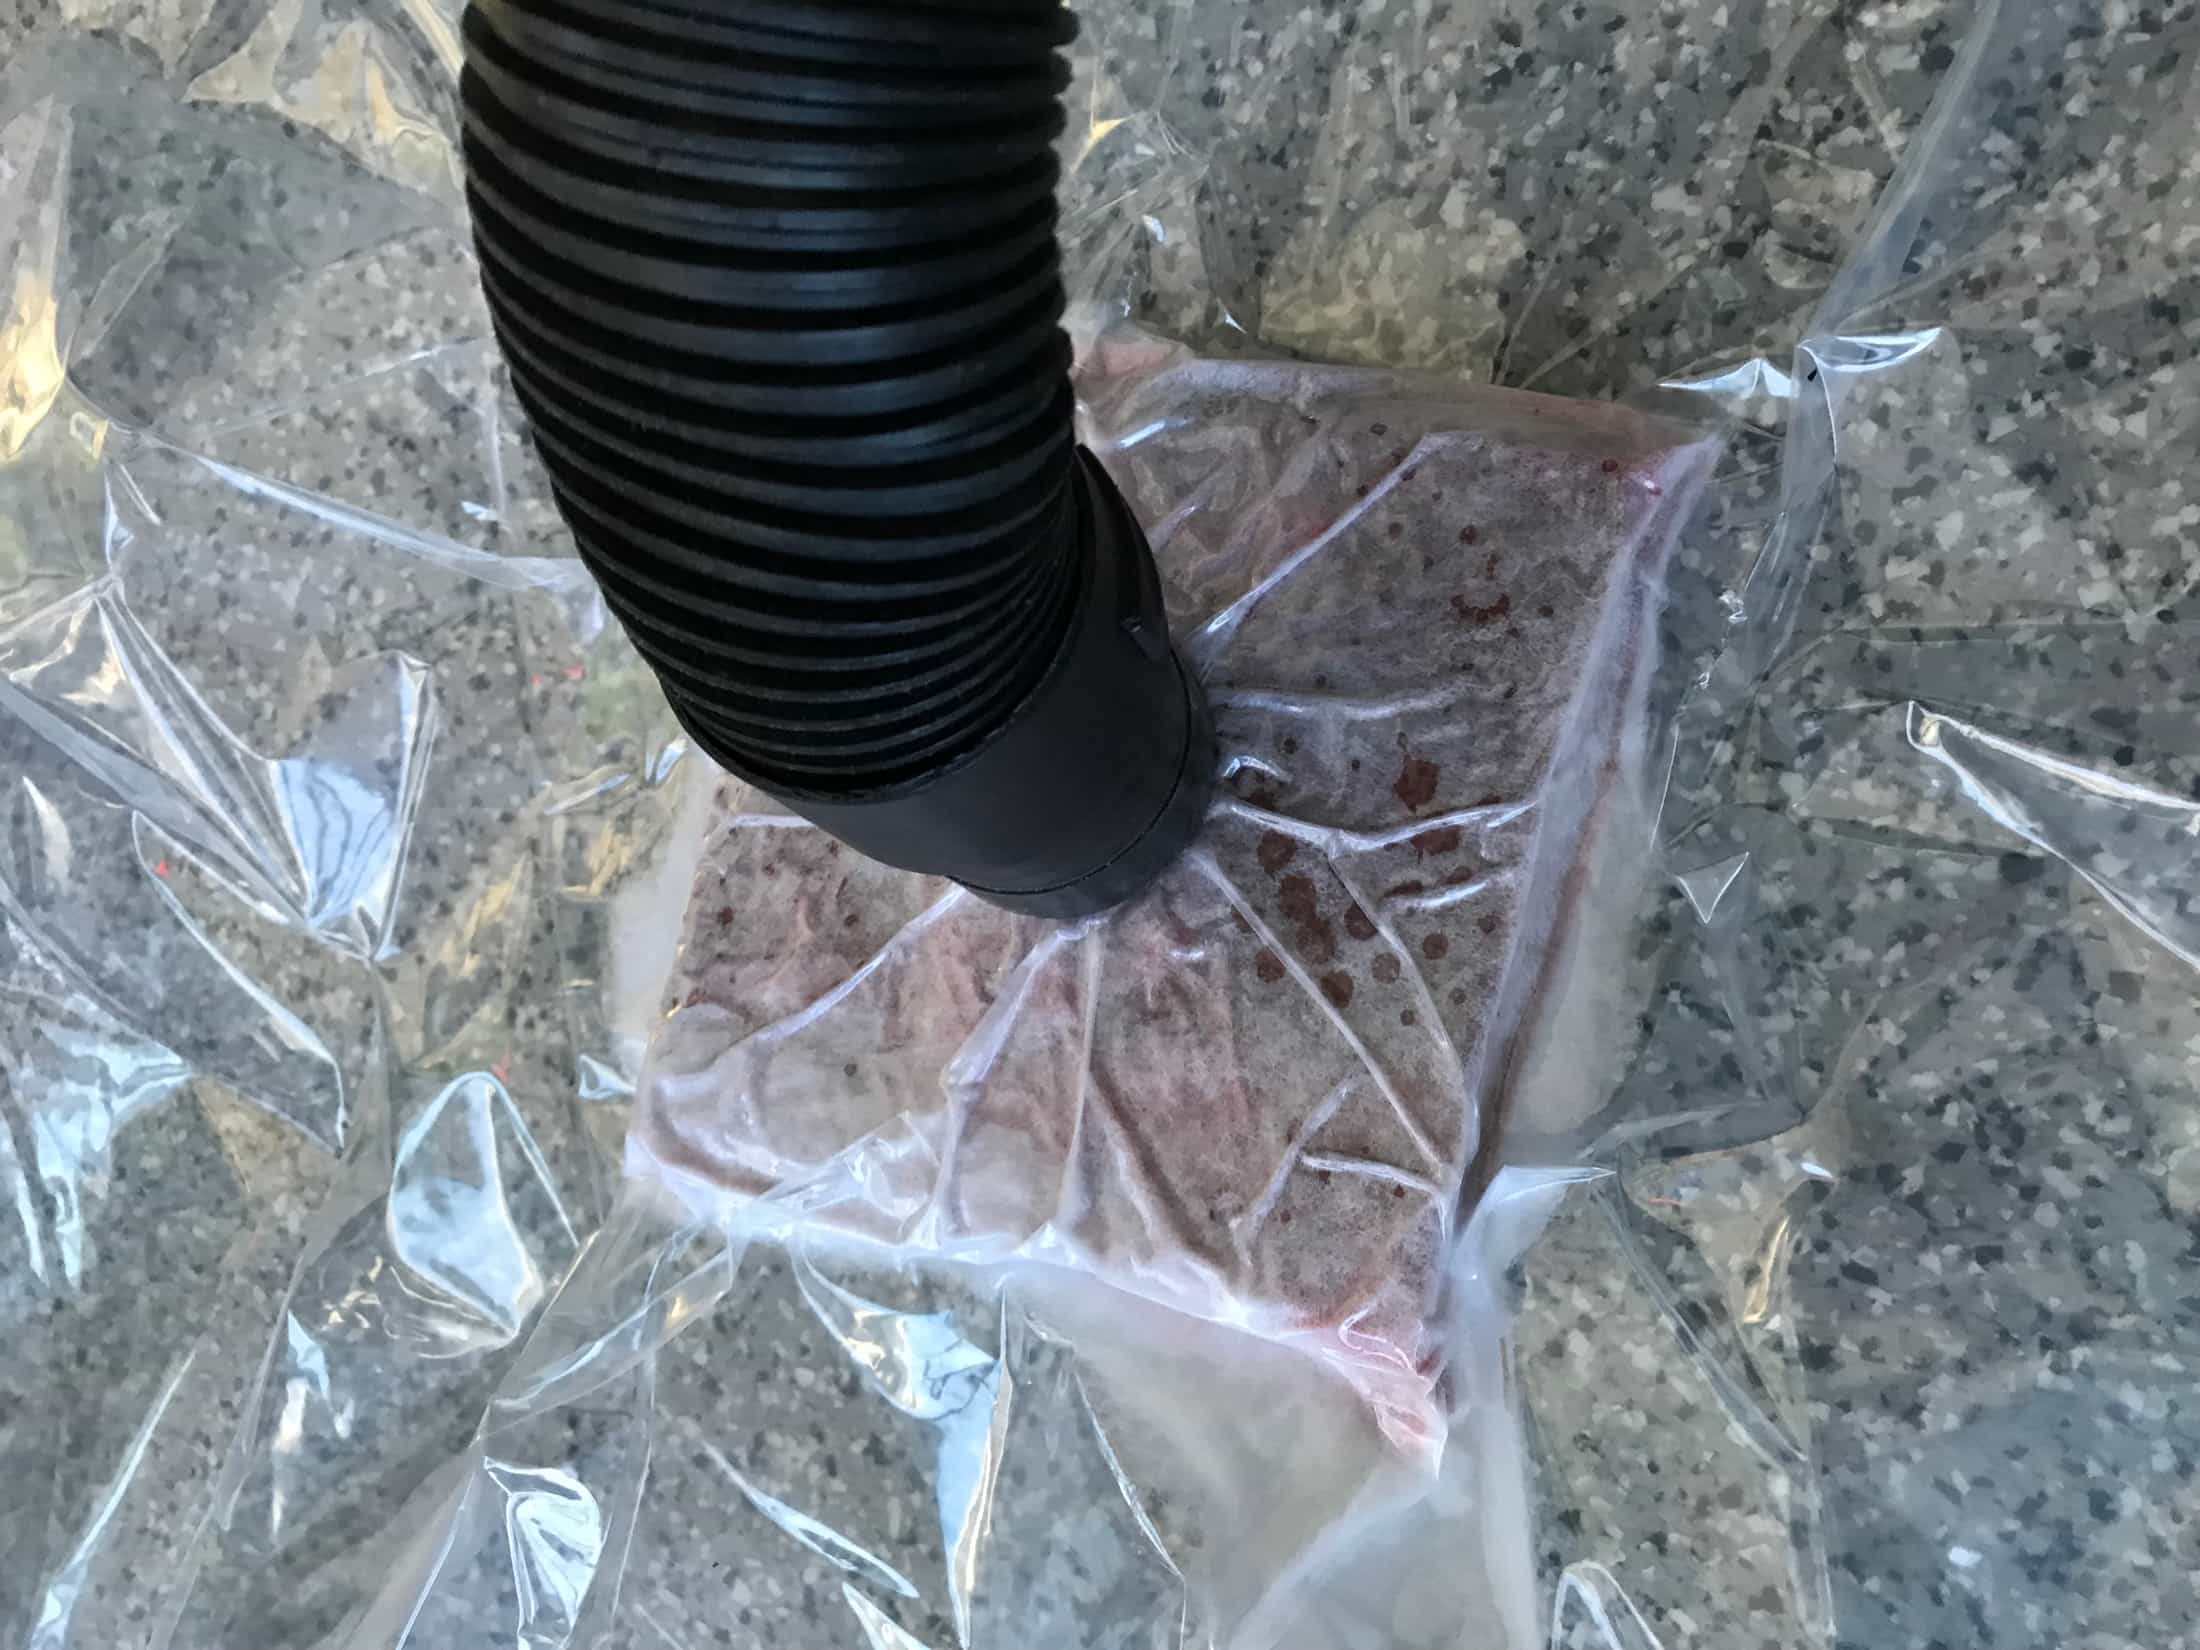
You can see the epoxy bleeding through.
Back to planning for the composite I wanted to make individually, I had already designed the part, but I wanted to know how to cut pieces of burlap to make the seat. I attempted to use ExactFlat but didn't end up being successful with it. I took notes during lecture when there was a brief demo of the software, so I followed the steps I had written down. After importing my STL file into the online version of ExactFlat, I attempted to remesh my object, because that was supposed to simplify the mesh. However, when I remeshed, it created odd triangular gaps in the bottom of the seat that were definitely not part of my design. I reverted to my original version, and skipped to pre-flattening. All the choices of pelt, fracture, and press gave me error messages that the software was unable to pre-flatten my object. When I tried to flatten without having pre-flattened, the process was 3% done after 3 minutes, and there was a 10 minute limit. I eventually gave up on ExactFlat, although I am interested in learning how to properly use the software.
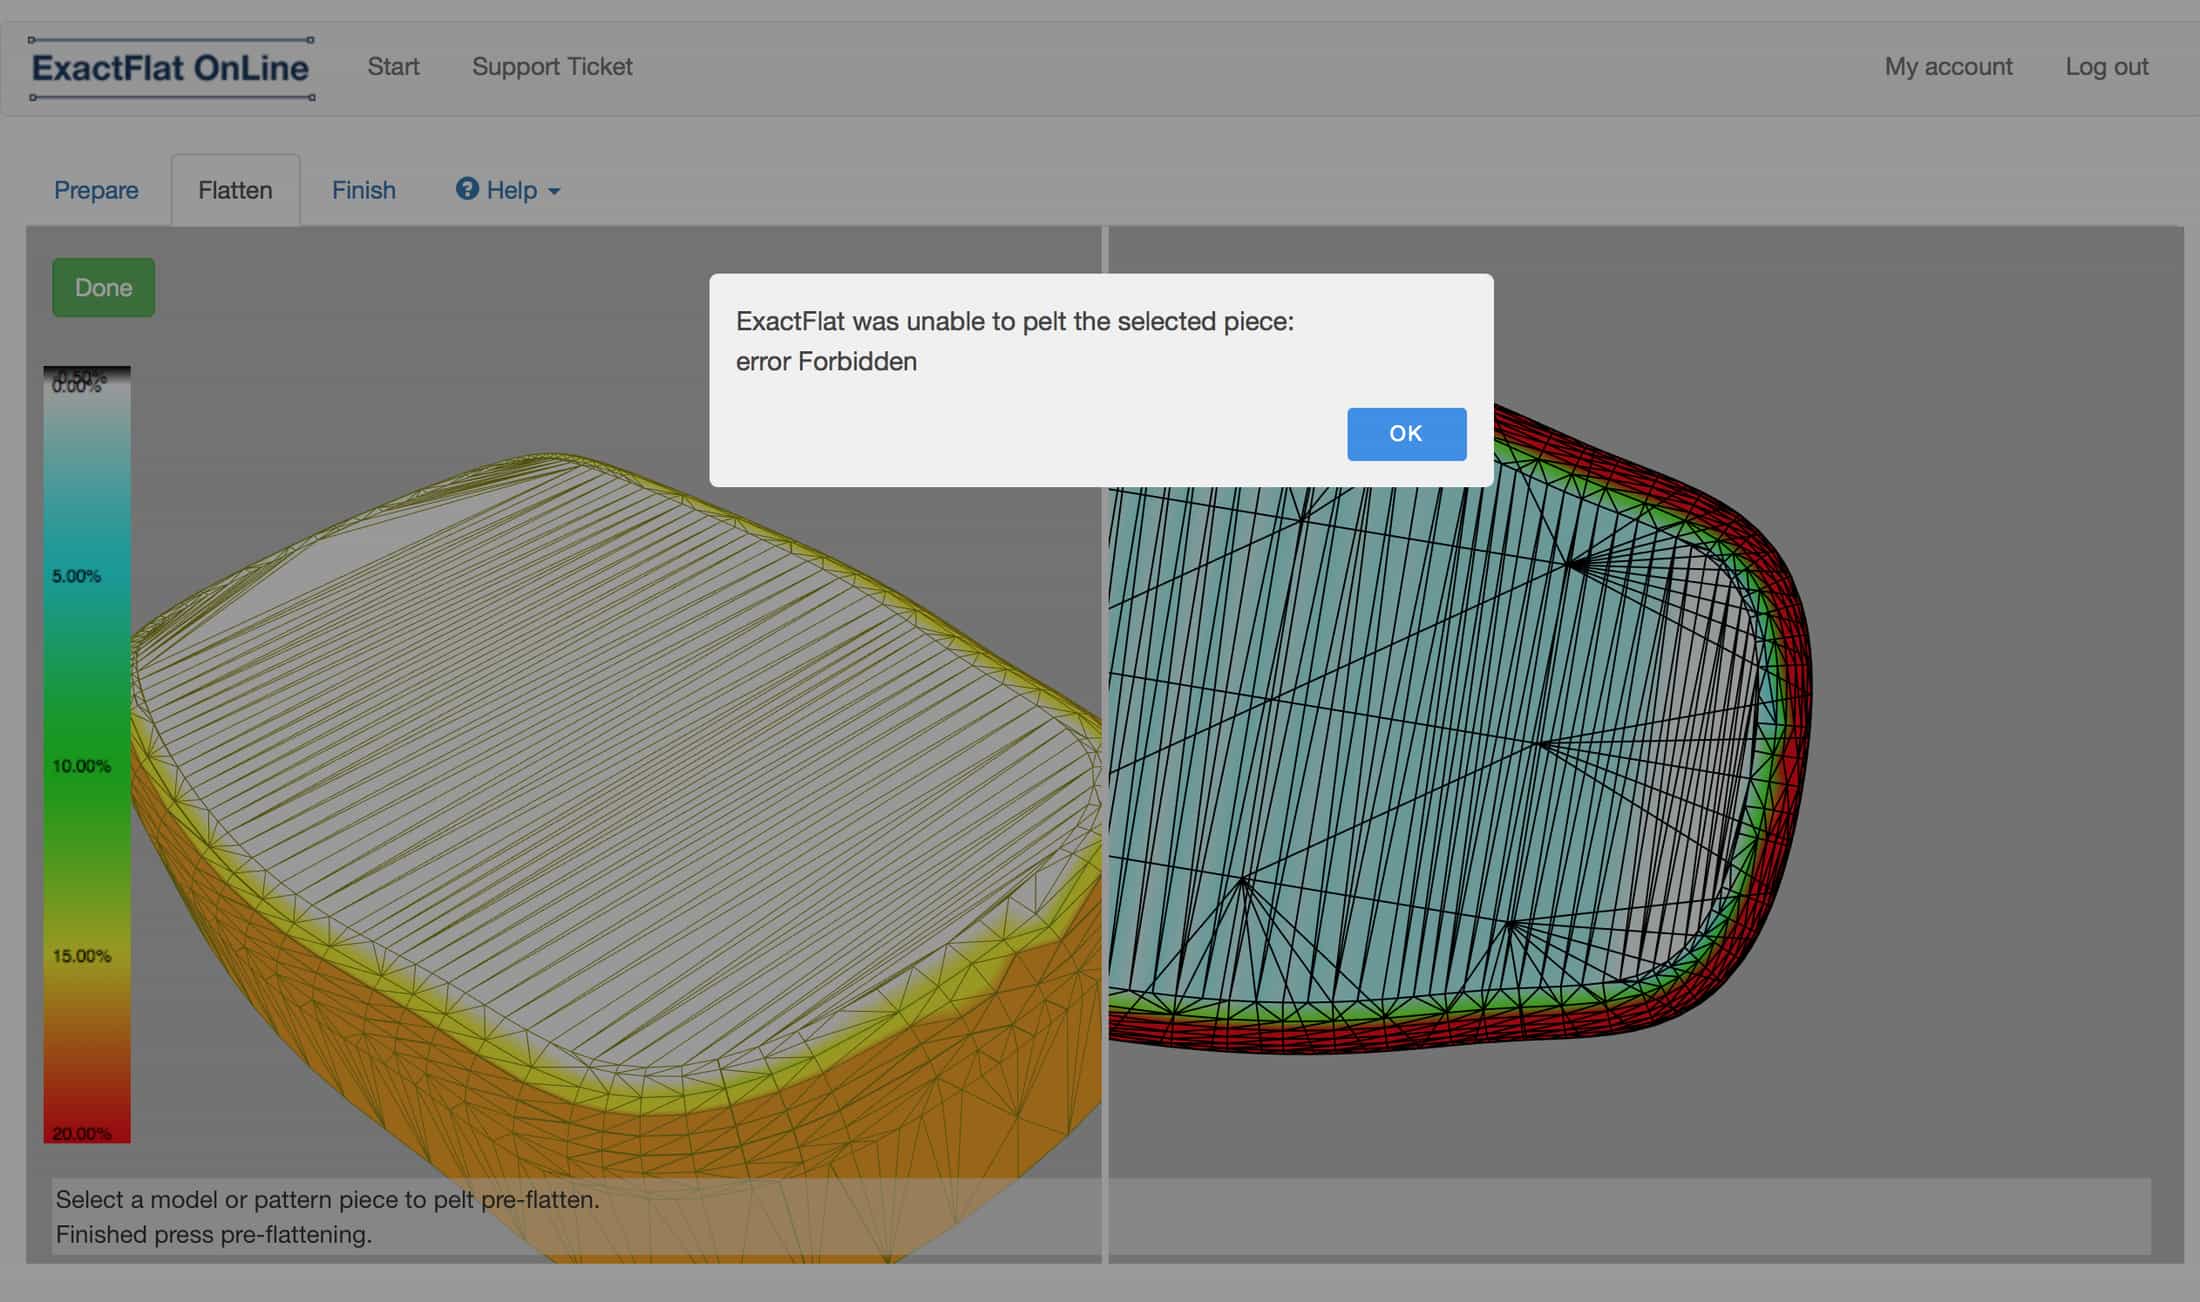
I struggled with ExactFlat.
I was probably doing something wrong in how I tried to use ExactFlat, but I wasn't sure and decided my time would be better spent trying to size my own pieces of burlap to cut. I returned to Rhino and settled on a a few shapes that I thought would make sense to use for the composite. Two shapes were the outline of the overhead view of the seat, just increased in size. One would be for the top of the seat, and the other would be for the underside. I planned to make slits in the edges of these pieces to allow the fabric to fold. I also unrolled one side of the seat to get the shape of a strip which I would use for the sides. Neither Gavin, Dave, or John were in EDS on Sunday though, so I would have to wait until Monday to machine my foam and laser cut the burlap.
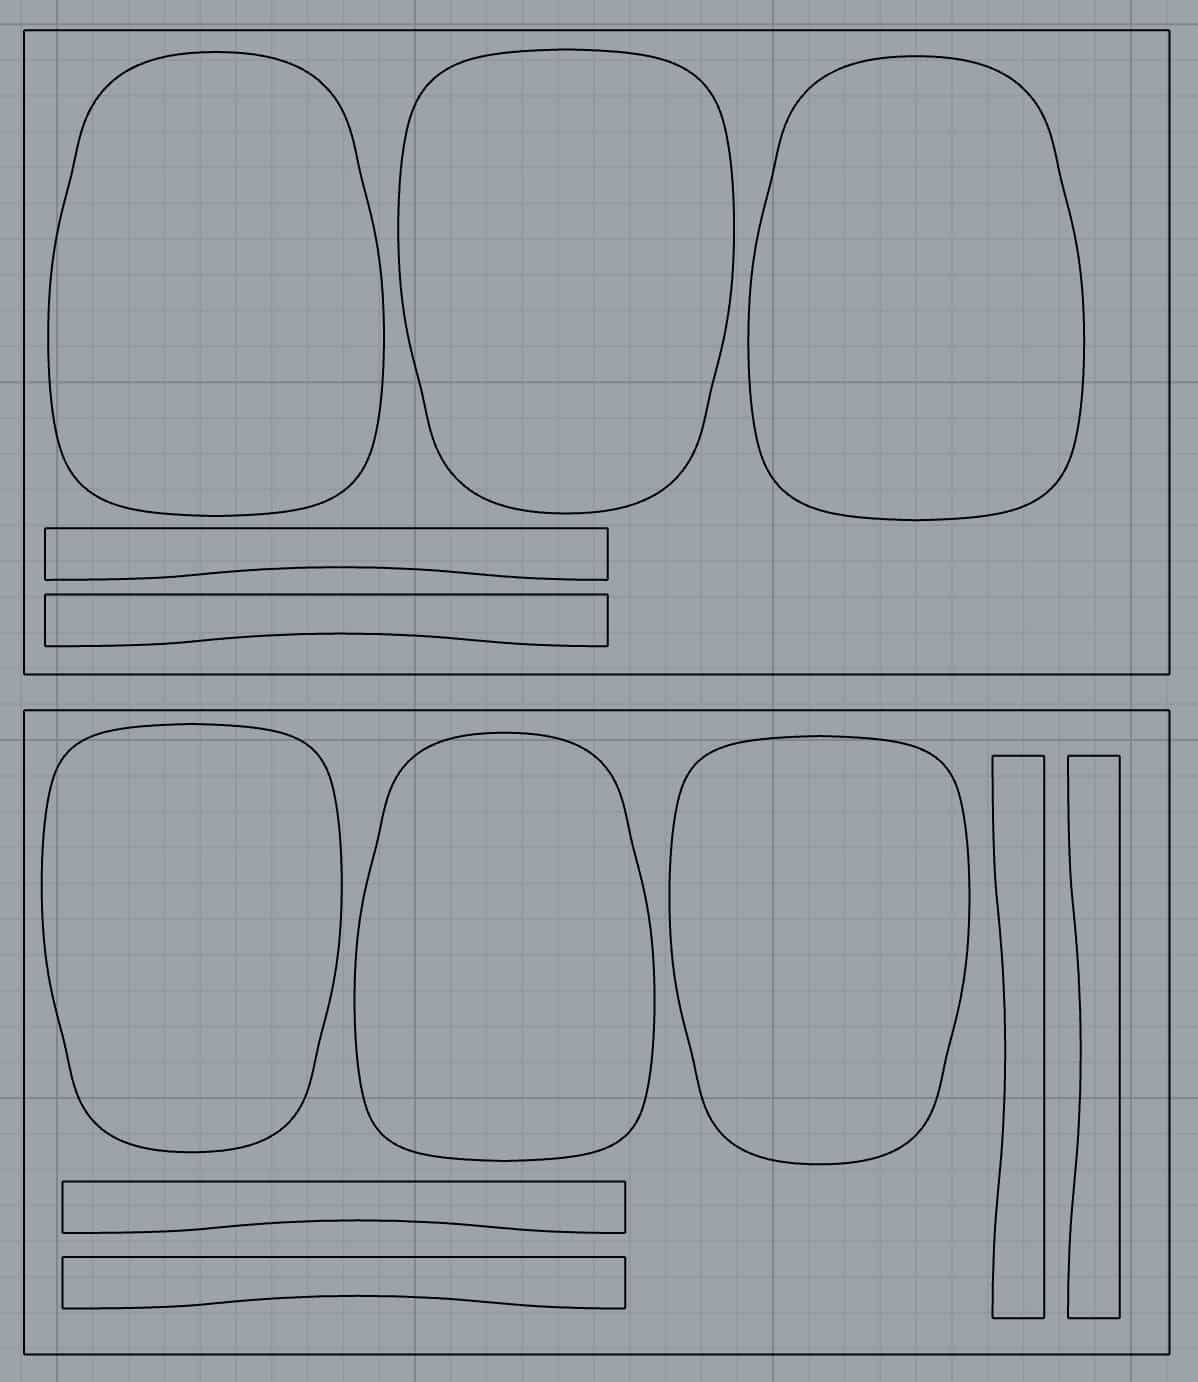 The cut sheets I designed for burlap pieces for my composite.
On Monday morning, I went to EDS and the first thing I did was check on the test coupon with Priya. We removed it from the vacuum bag, and attempted to remove all the bleeder and breather. We got most of it off and were left with a really hard composite square. The material wasn't super tight around the edges of the square, but it seemed to have worked relatively well. We were impressed with how hard the composite becomes.


Cleaning our test coupon and testing its hardness.
I used the Shark in EDS to machine my mold on Monday. Dave helped me generate the toolpaths from my STL file and prepare the job. We struggled to get the foam to stick securely to the bed of the Shark, and ended up using through a significant amount of two different types of double-sided tape. The first time I put the foam on, it wouldn't stick because the bed of the Shark was dusty. Once I vacuumed it and tried to put the foam on again, it bowed up in the middle. I added more tape to the middle of the foam, but it was still higher in the middle which made zeroing the z axis not work right. Then I tried a different, thicker type of tape which helped a bit, and we also manually adjusted the zero of the z axis to be a little lower than the top of the middle of the foam. Once we had the foam positioned and secured, we started machining the foam and it went smoothly, albeit much slower than I was expecting. The job took a total of 2 hours 15 minutes to finish, and there was purple foam all over the inside of the machine by the end.
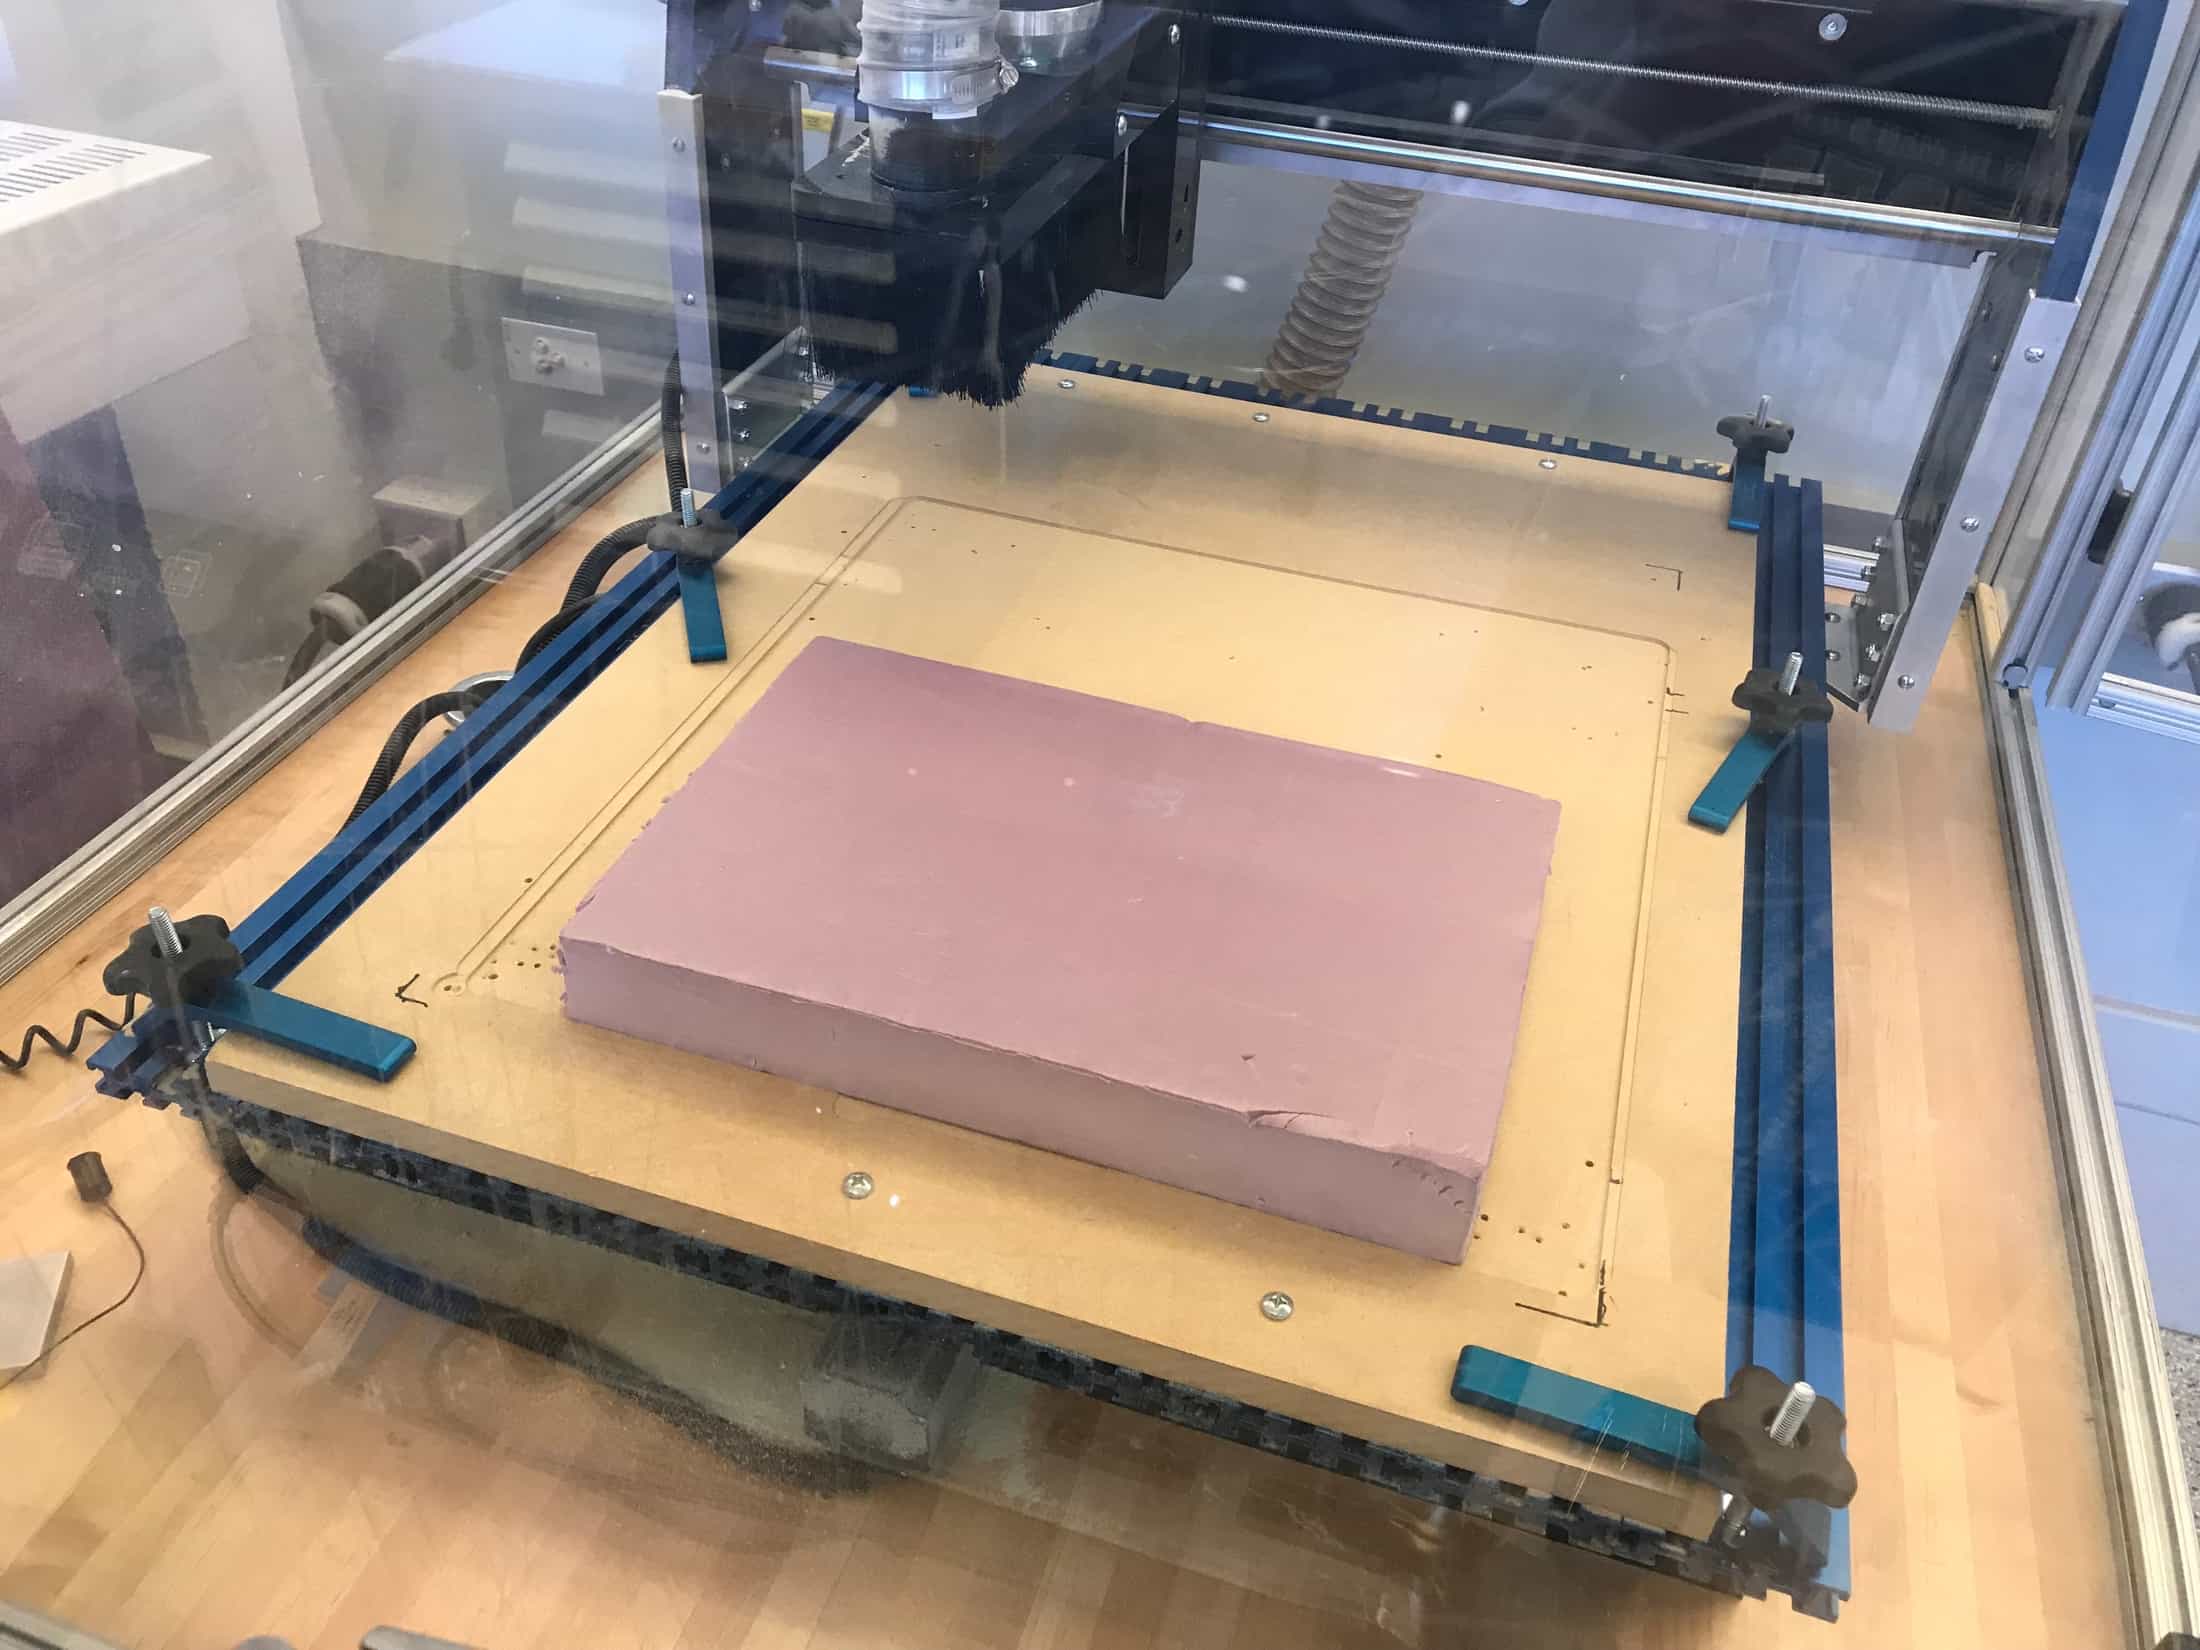
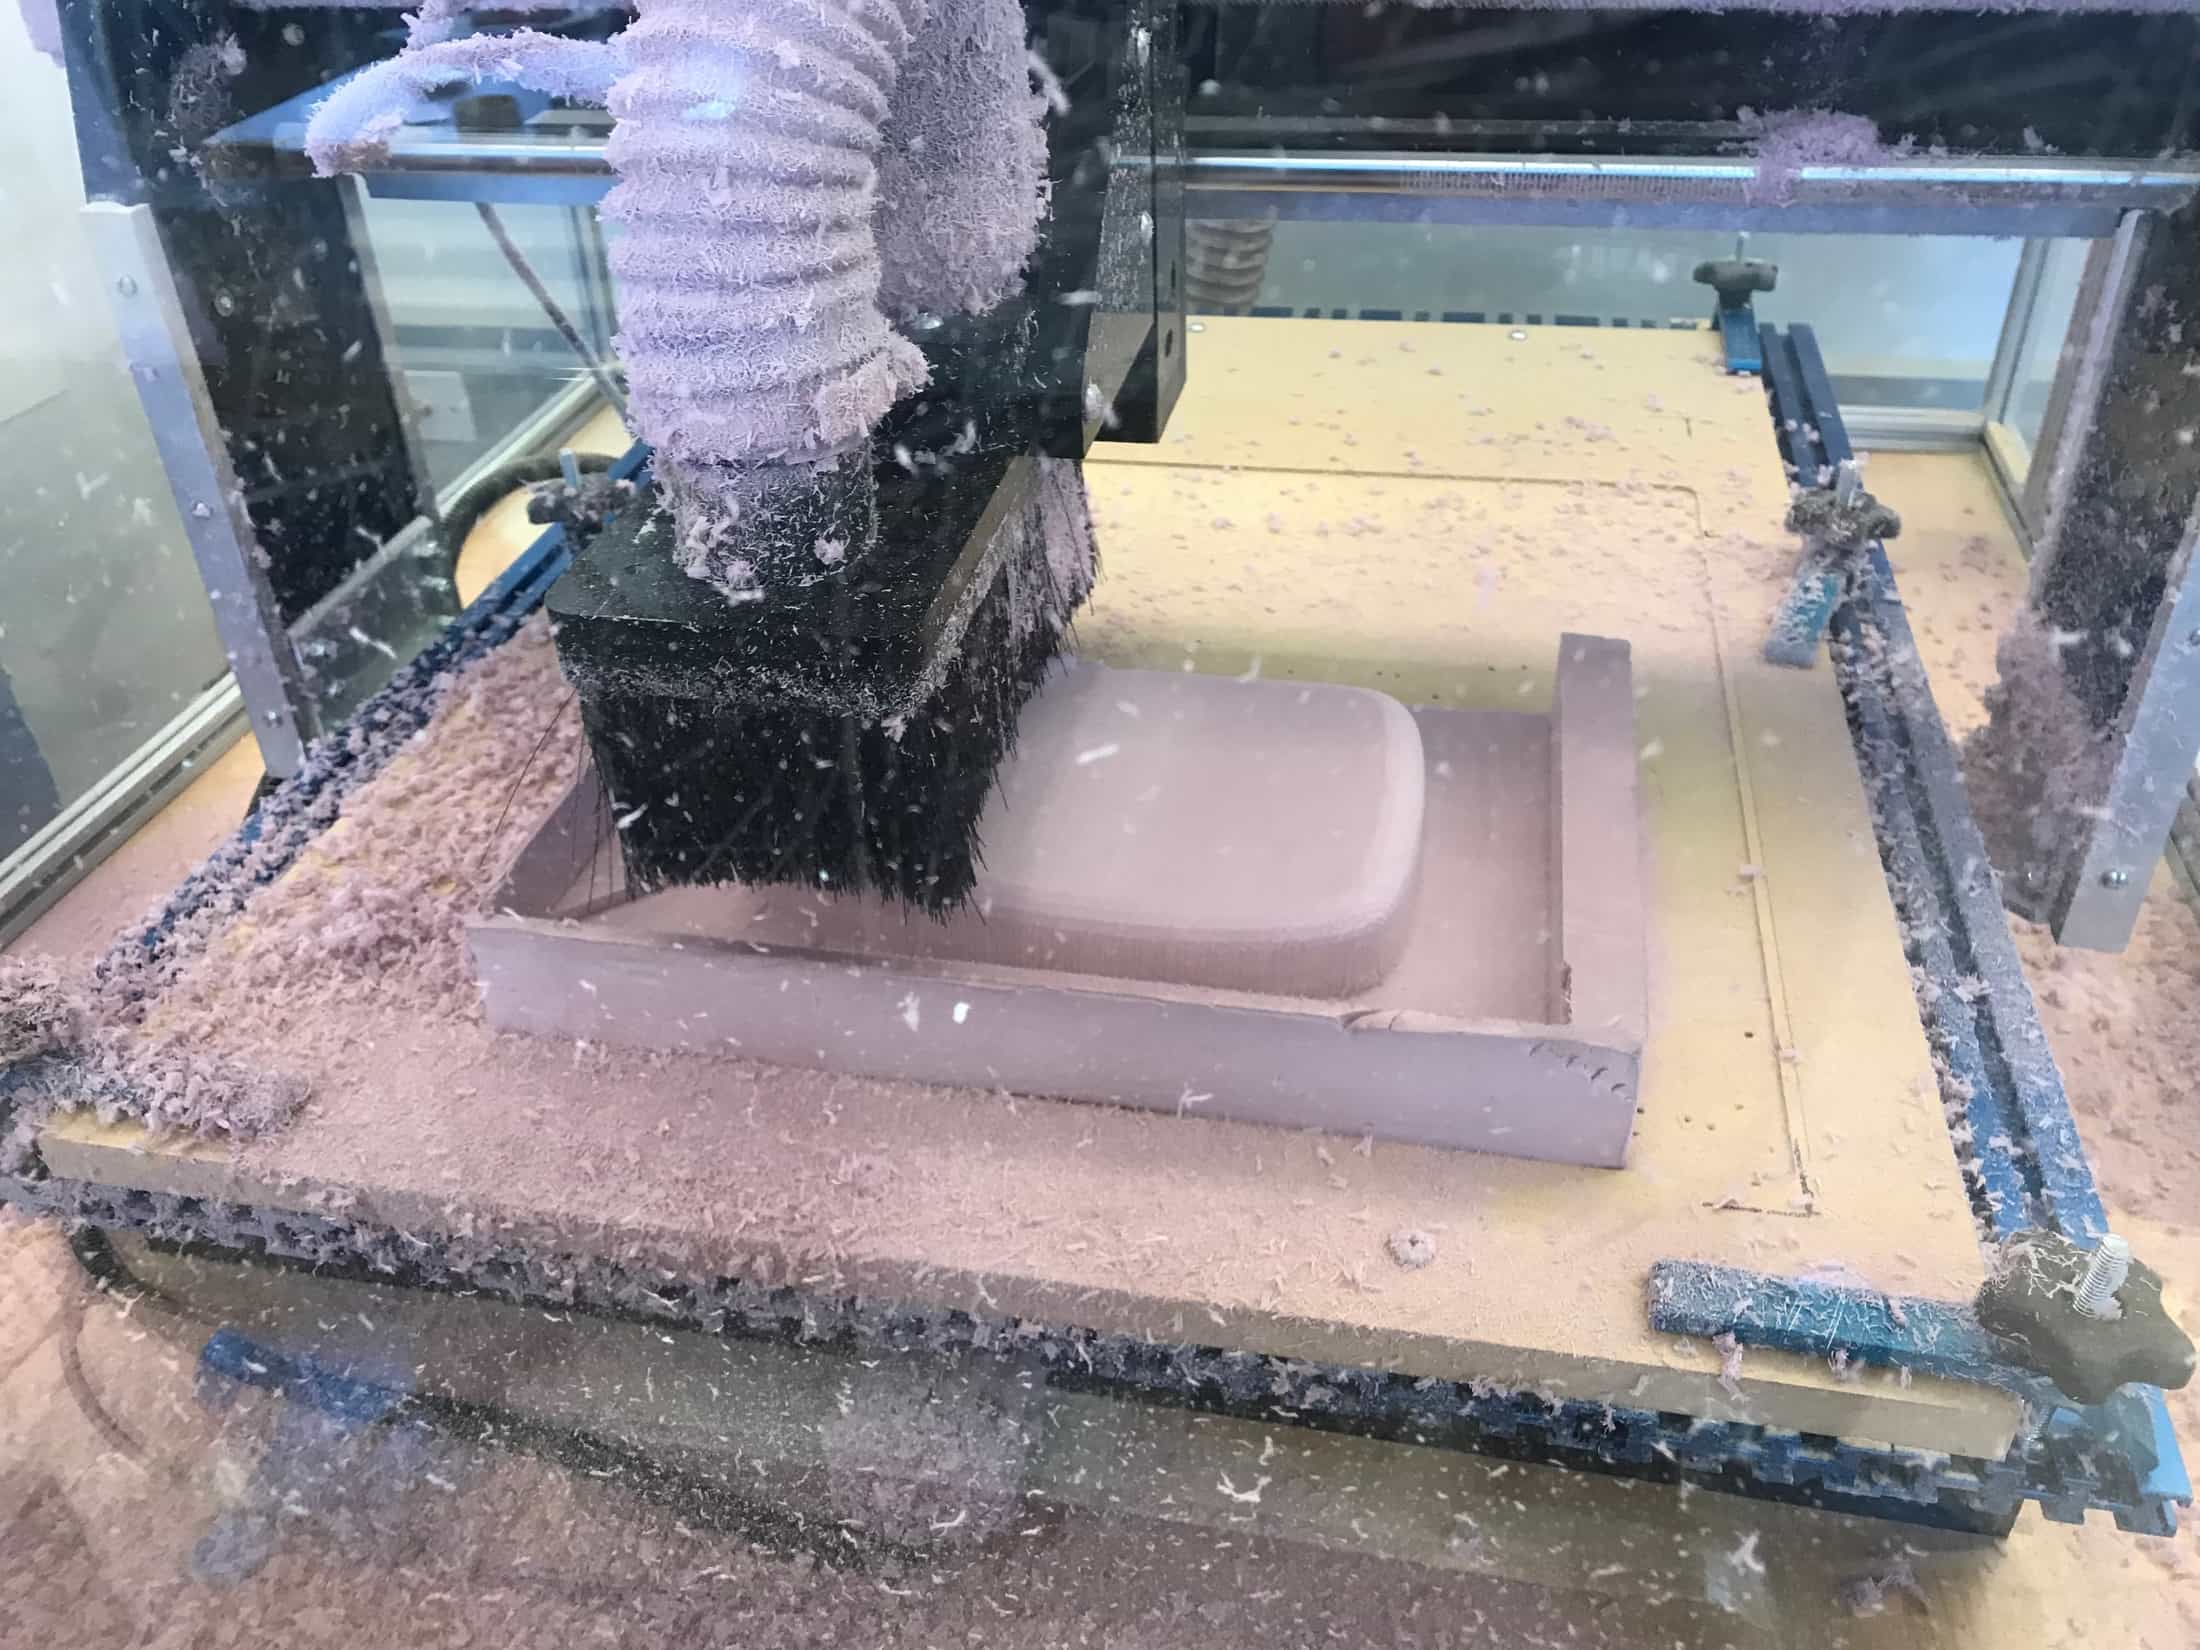
Before and during the machining process.
My foam came out really nicely. The shape of the seat was exactly how I had designed it in Rhino. I wanted to surround the foam entirely with composite, so I removed the excess foam with an X-acto and sanded the foam to smooth out the parts. I was happy with the mold.
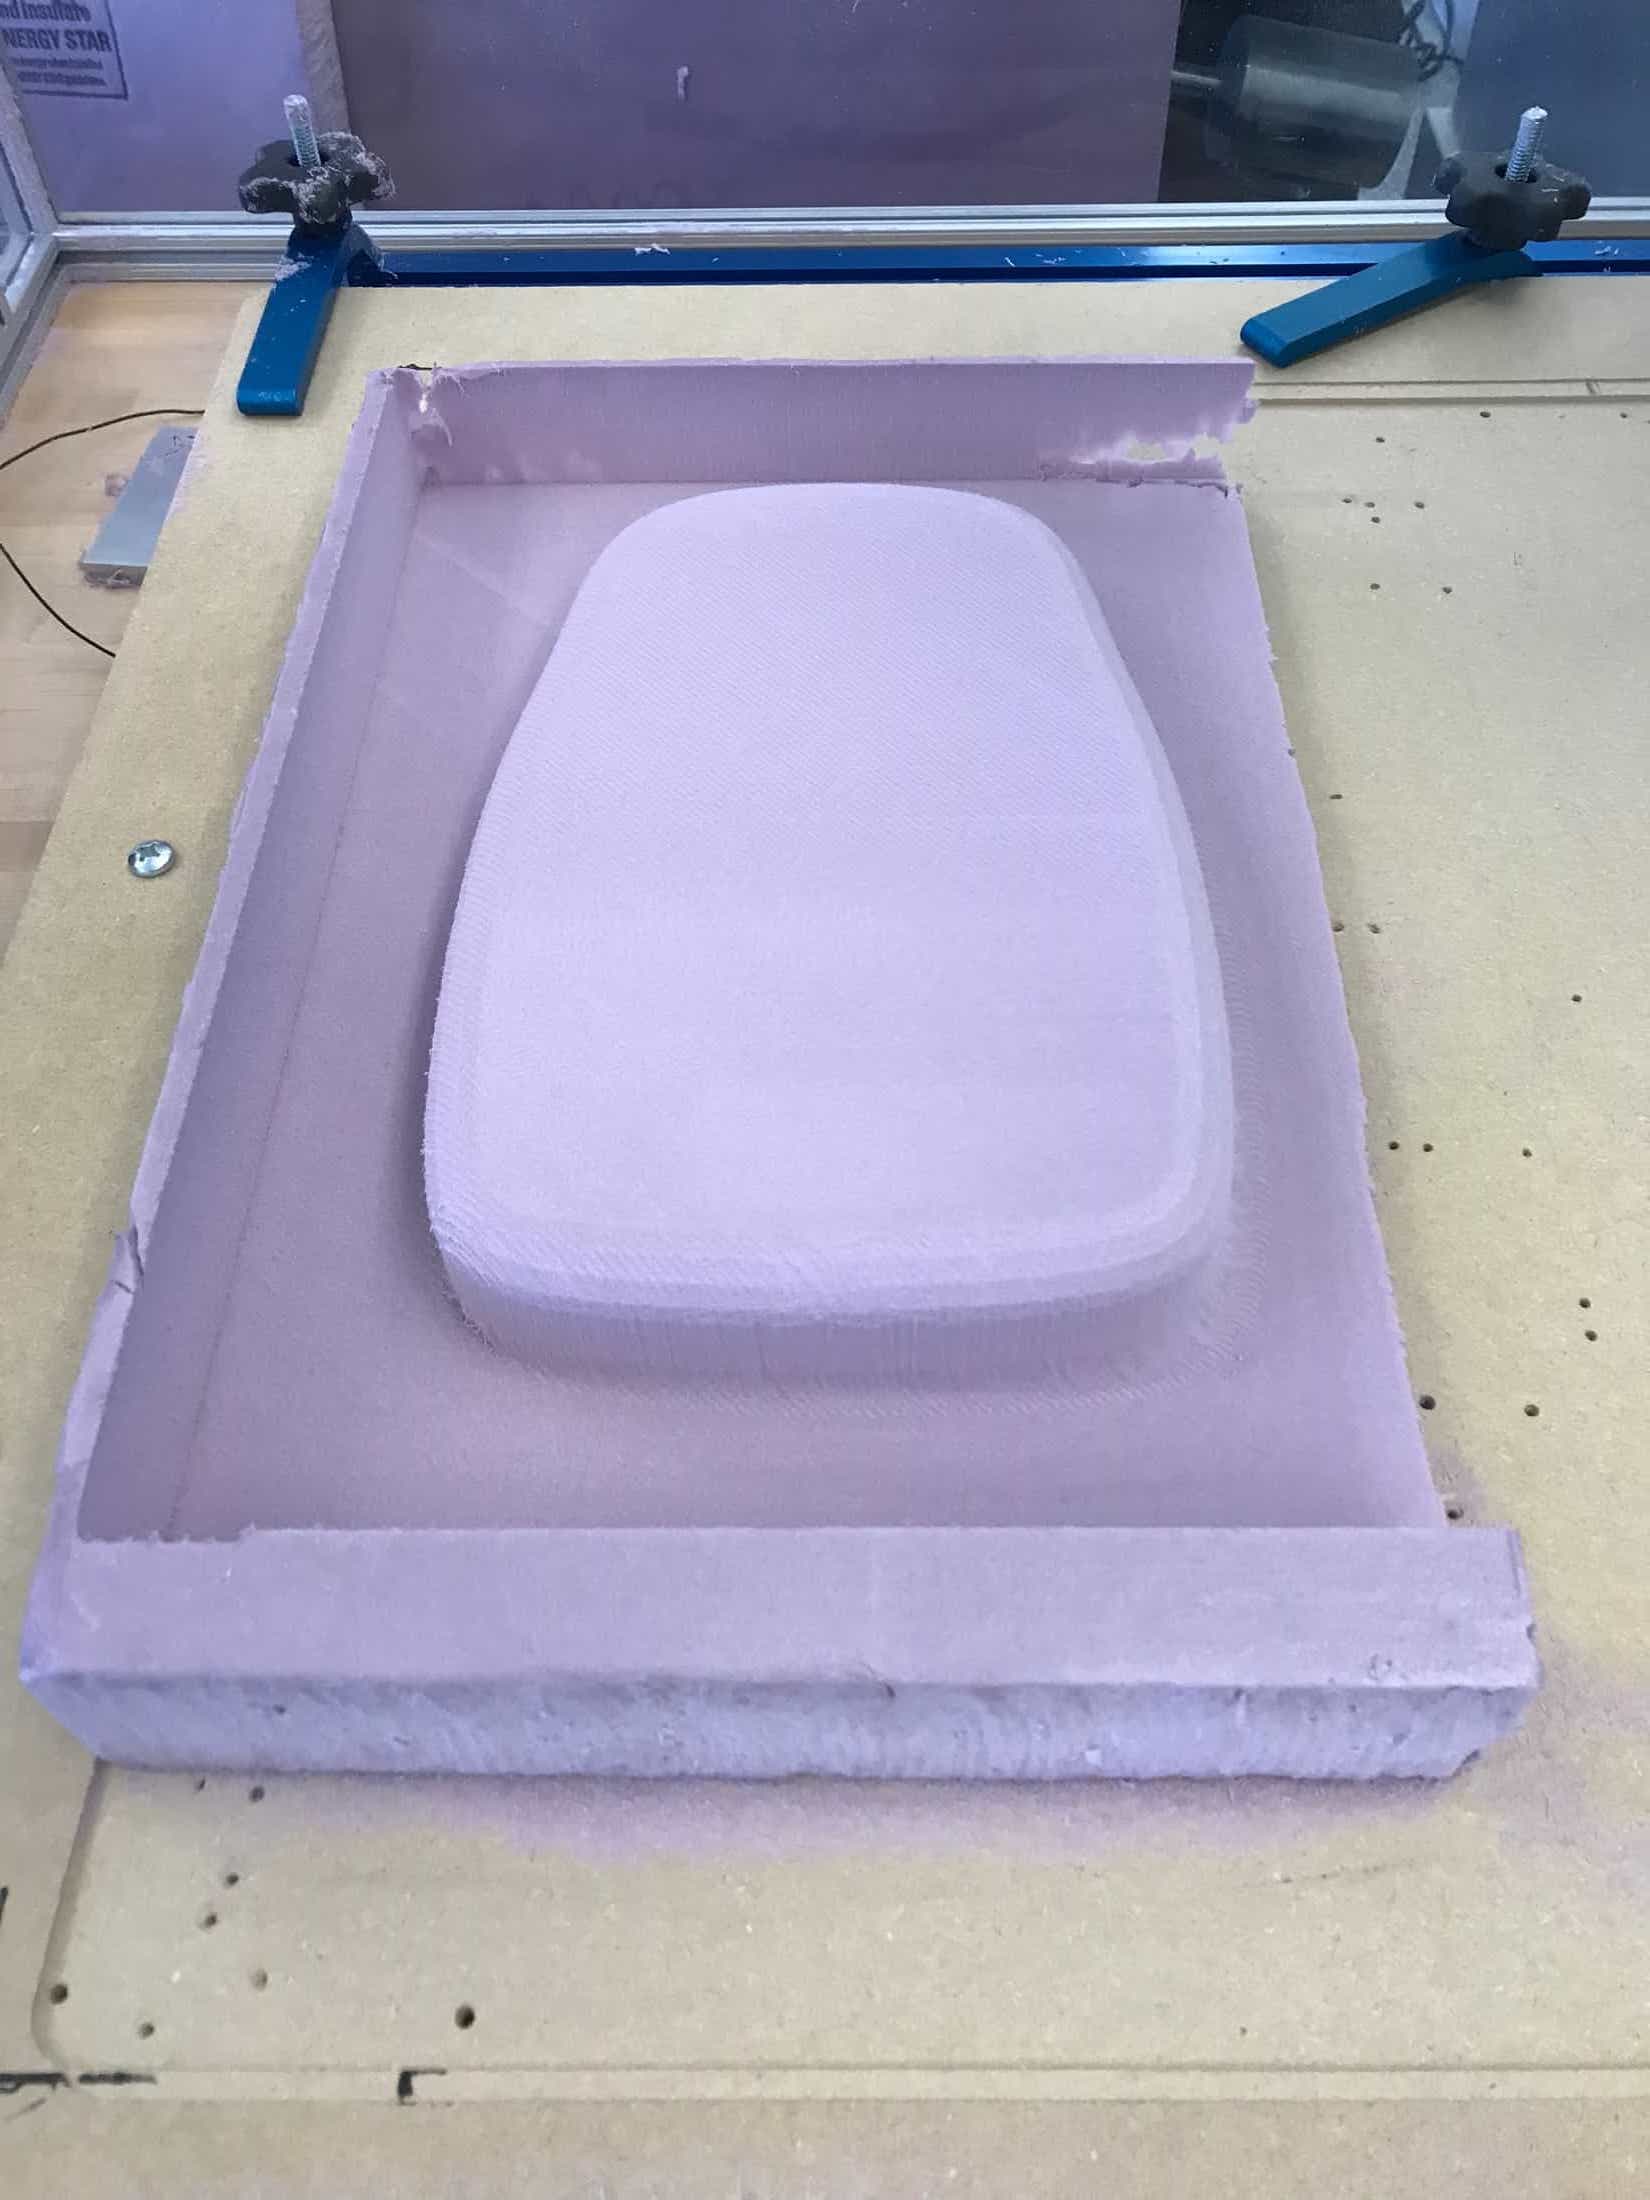
My mold immediately after machining, and after trimming and sanding.
I decided to use the thin material for compositing that was more like fabric than burlap. I cut some large pieces of it and used the laser cutter to actually cut out the shapes I had designed in Rhino for compositing my seat. I didn't have the settings high enough, so I had to finish cutting out some parts with scissors. I also added slits in the edges of the top and bottom pieces because I hadn't included those in my cut file.
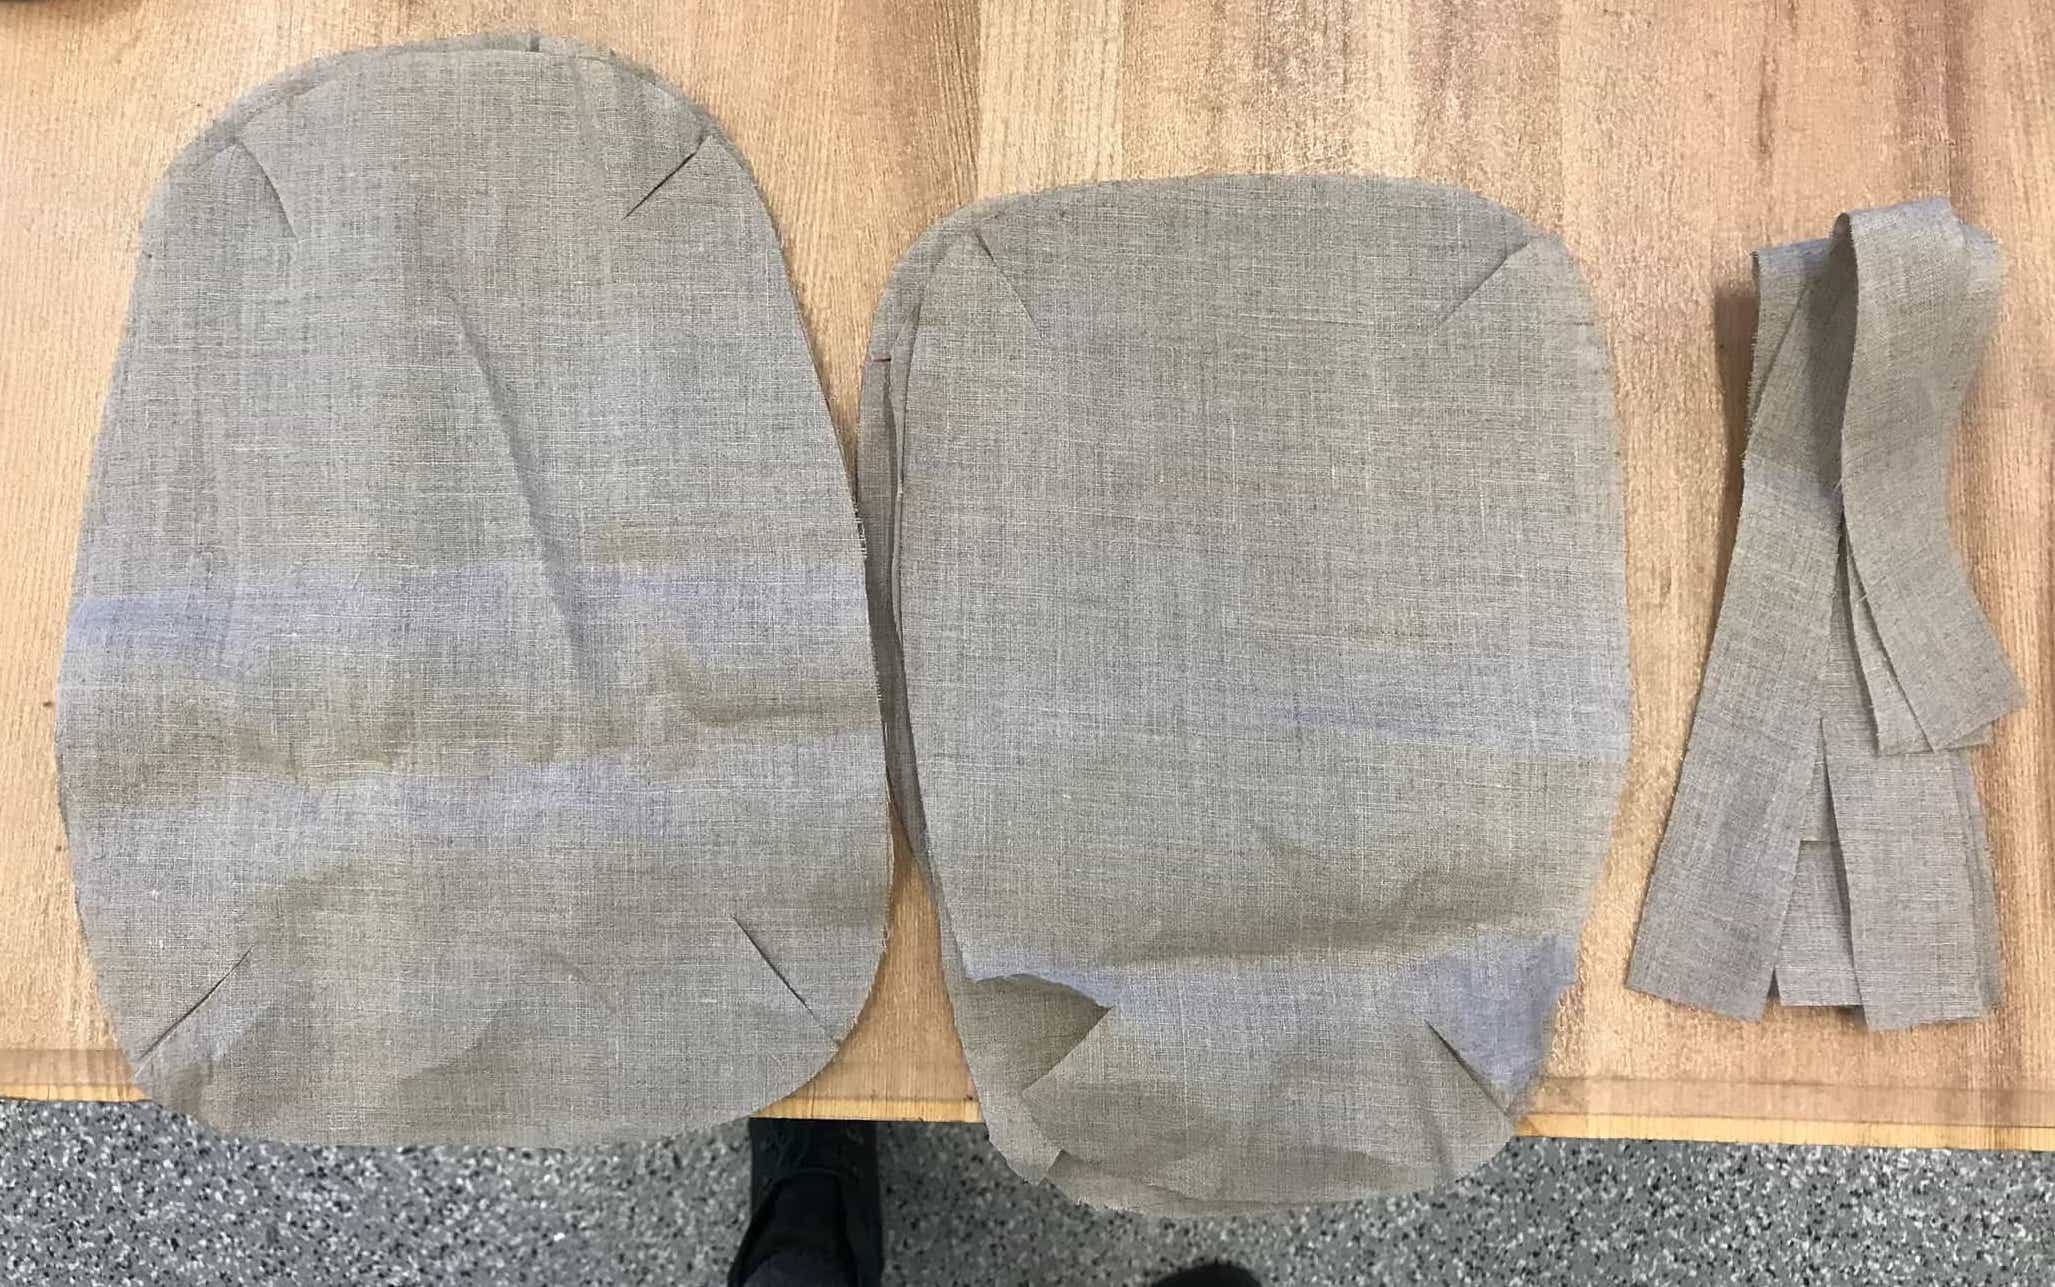
My burlap pieces ready for compositing.
Andrew and I worked together to do the wet layup of both of our parts. We followed the same process I had gone through to make the test coupon. For each of our parts, we laid out the fabric, mixed the epoxy, spread the epoxy over the parts, covered the foam in the saturated fabric, laid on the bleeder and the breather, and then vacuum sealed it in a bag. Andrew's shape was small and had a lot of indentations which were impossible to maintain when covering it with the fabric. I had some trouble getting the sides of my seat to not go out.
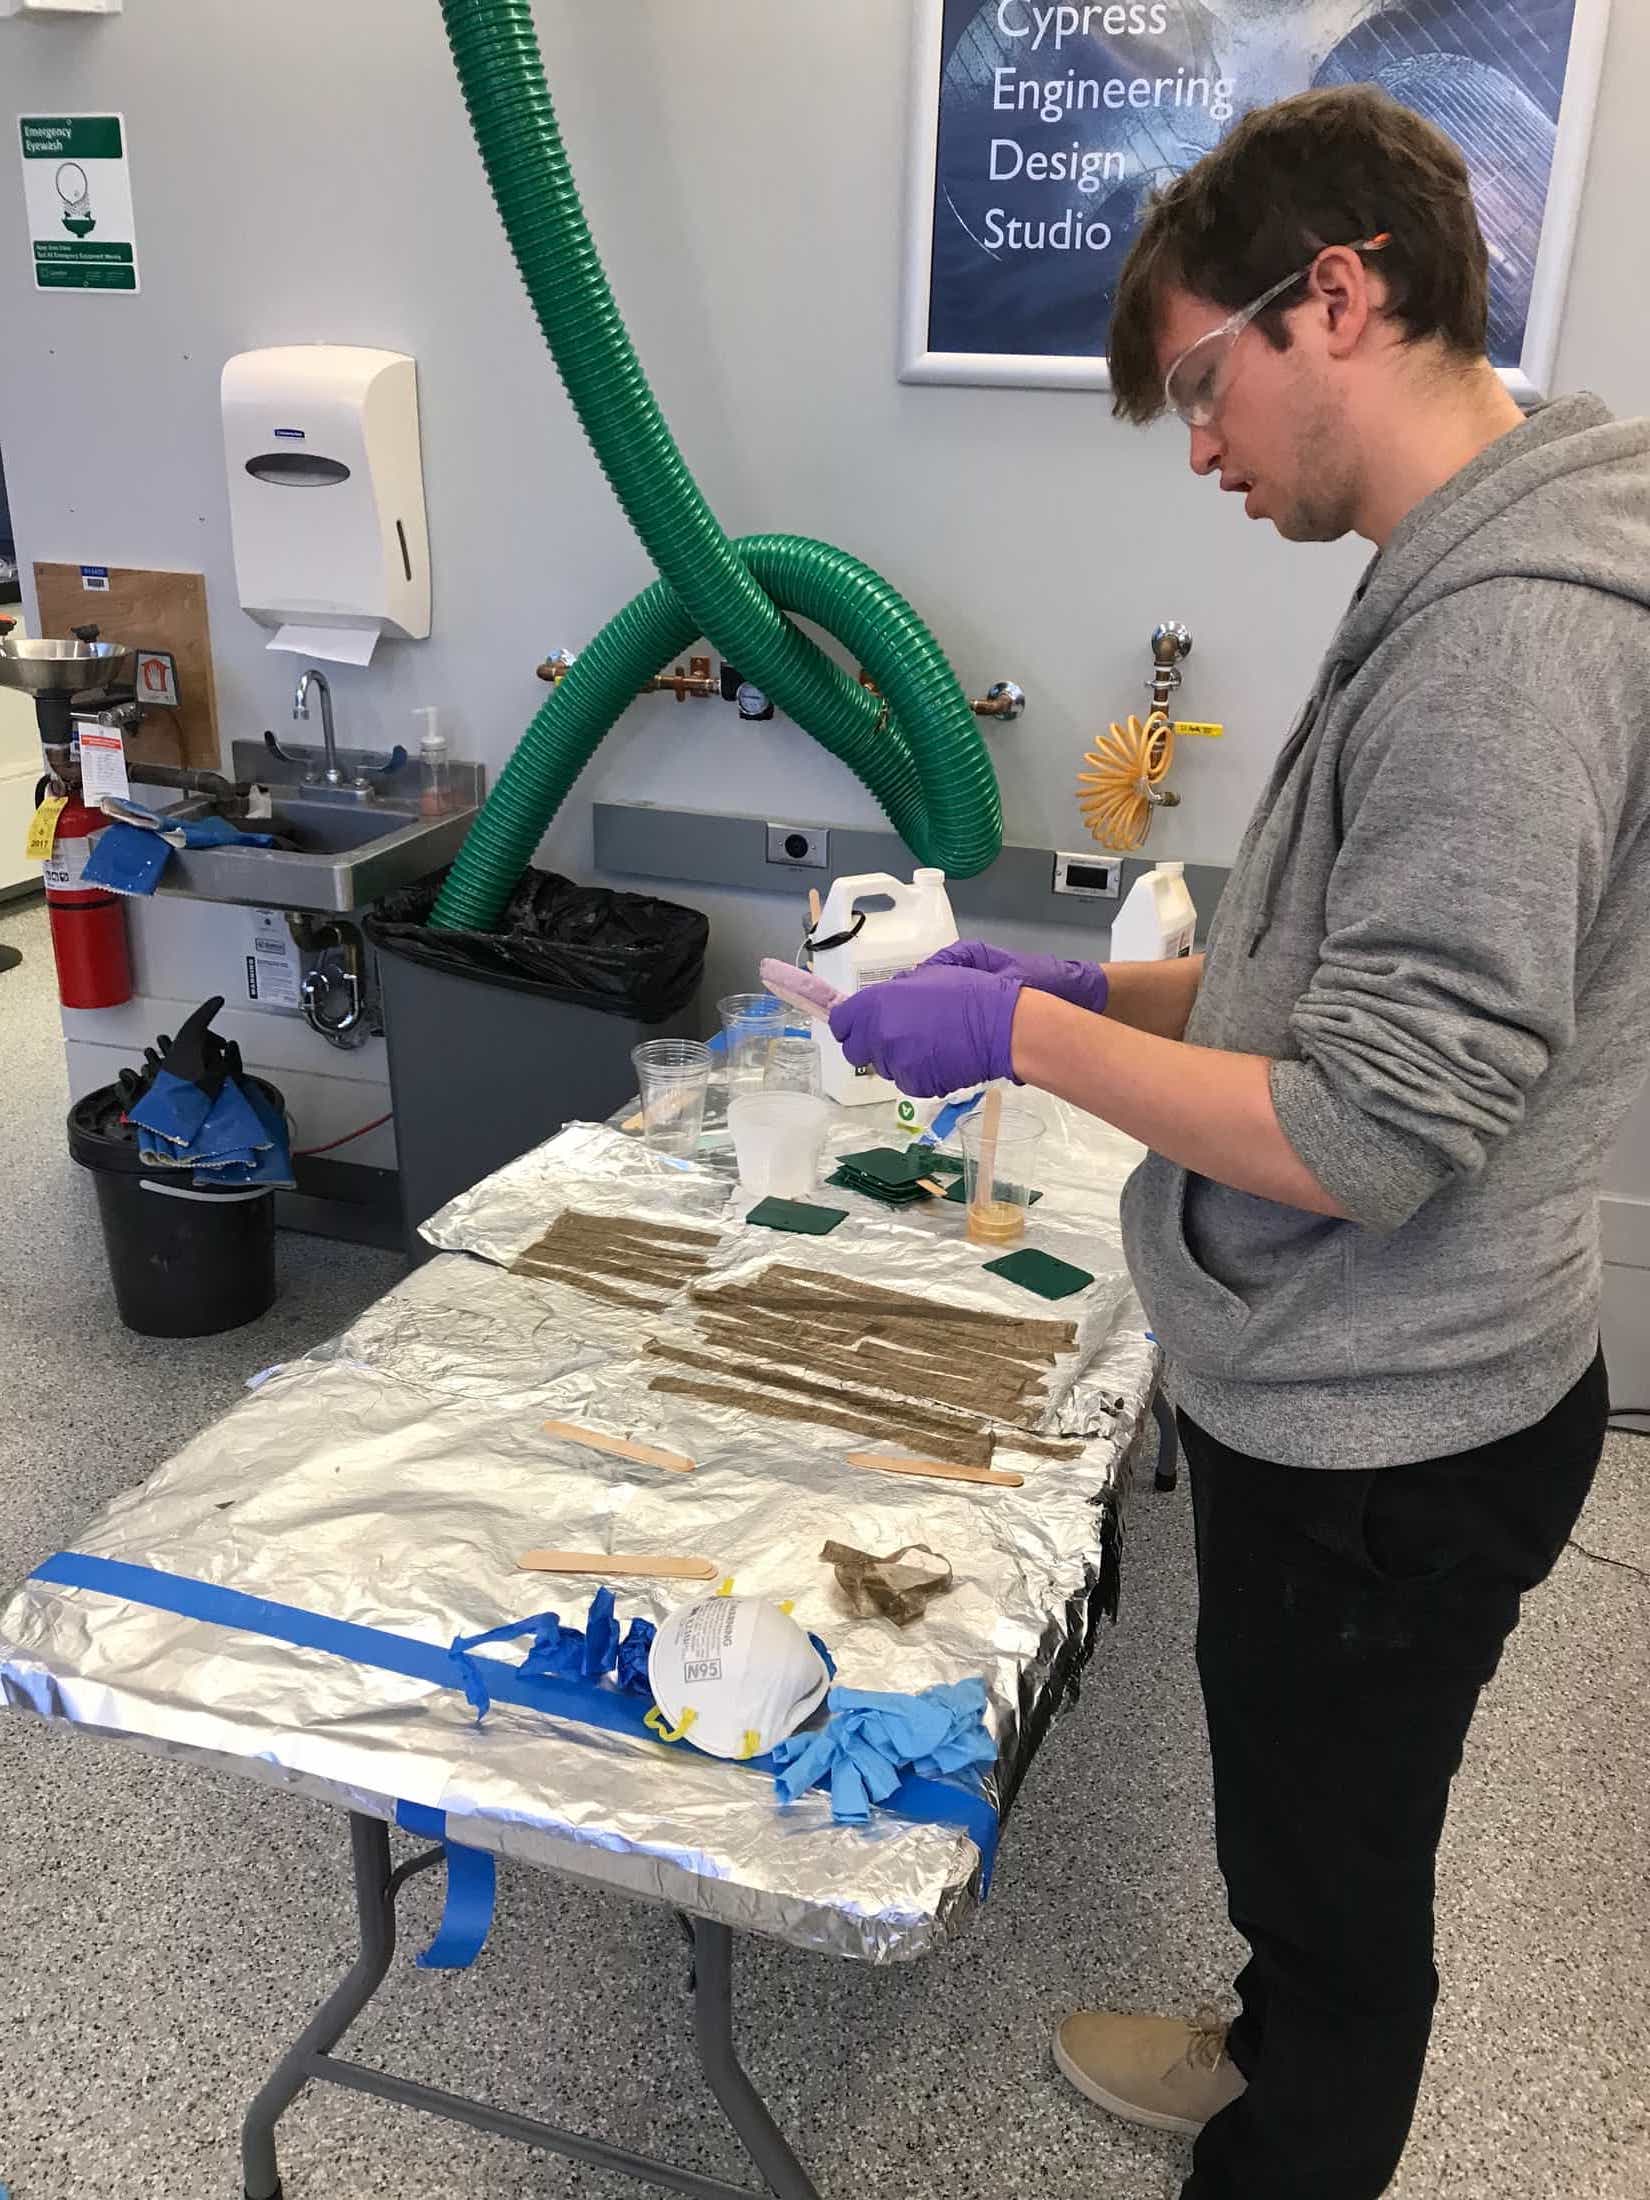
Andrew while we were working on wet layup of our molds.
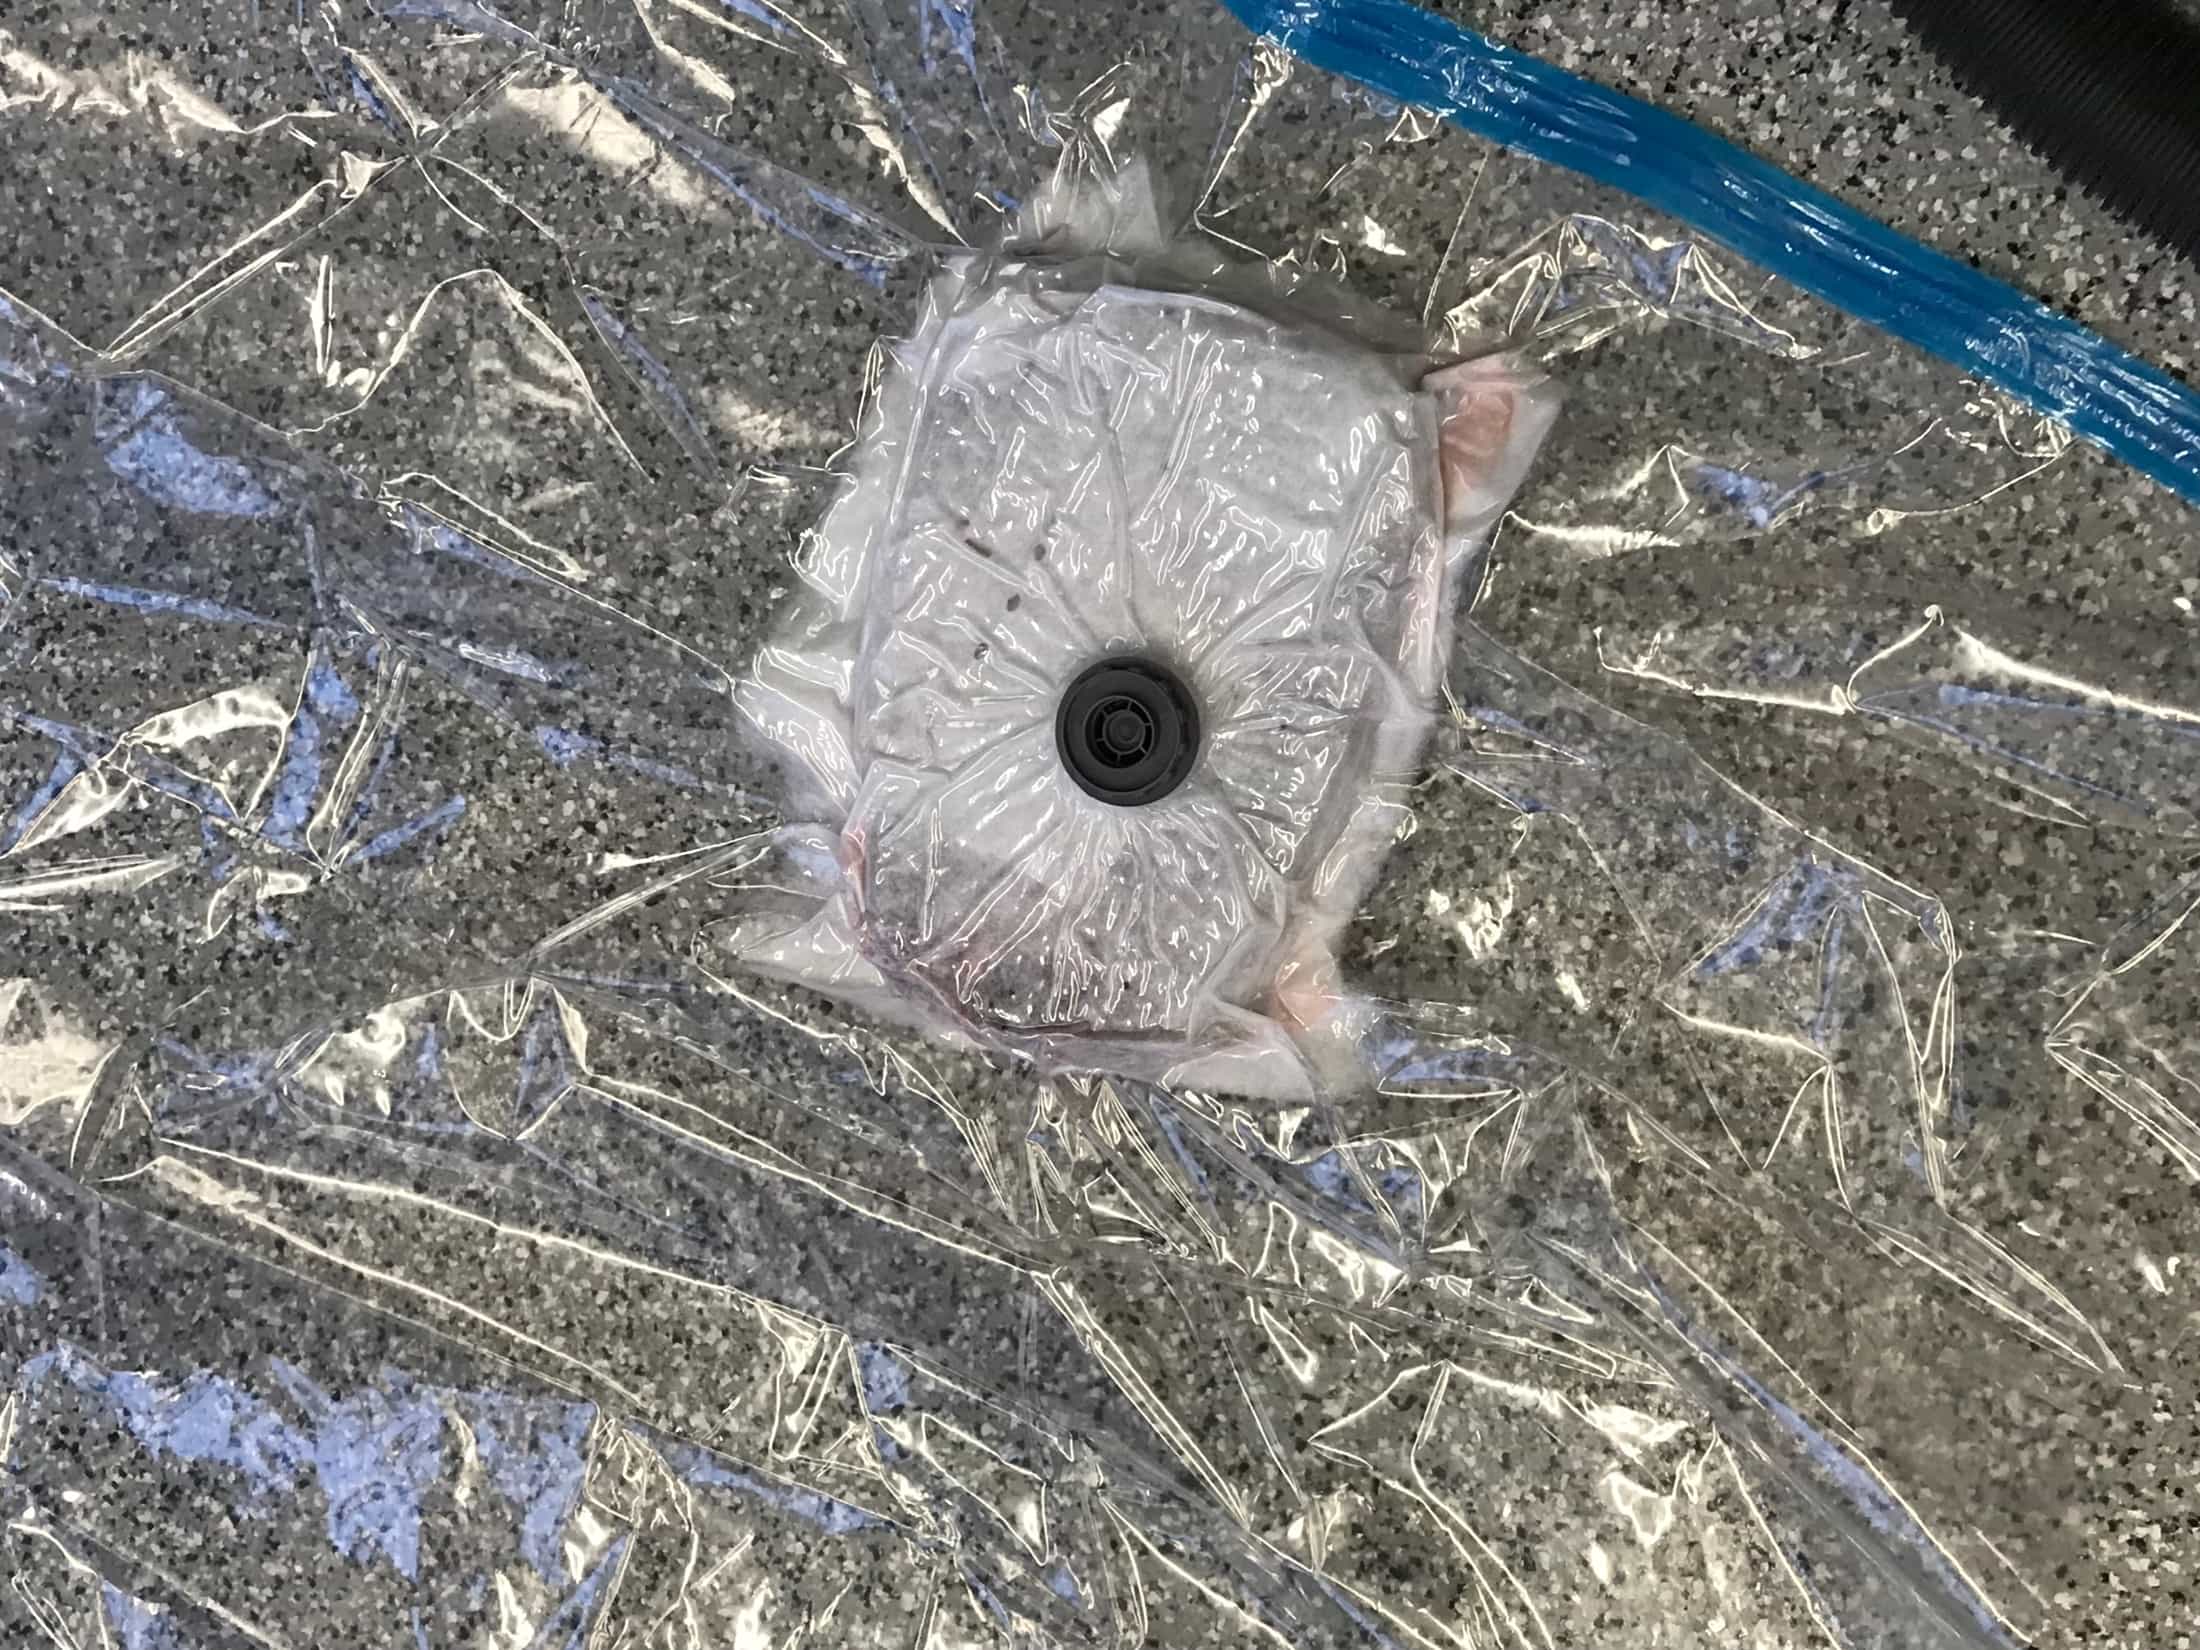
My composite vacuum bagged.
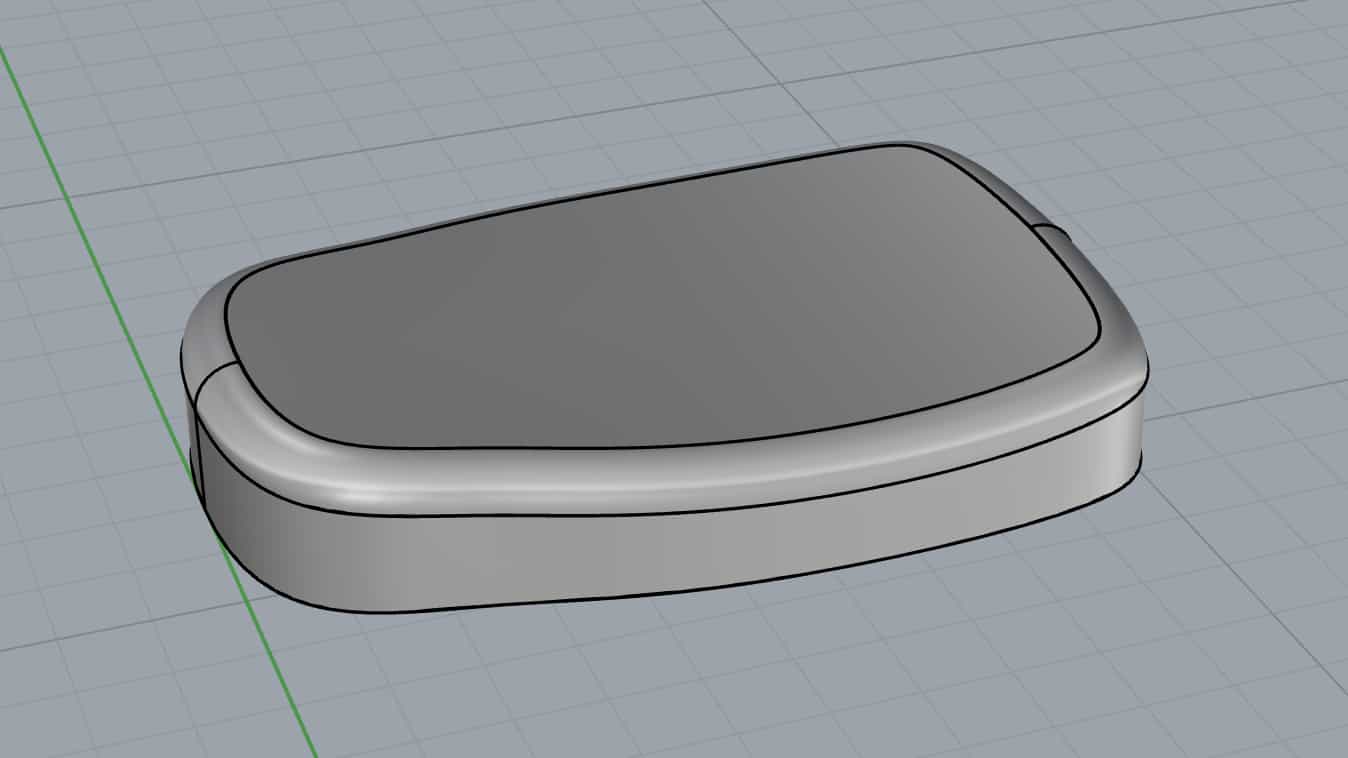
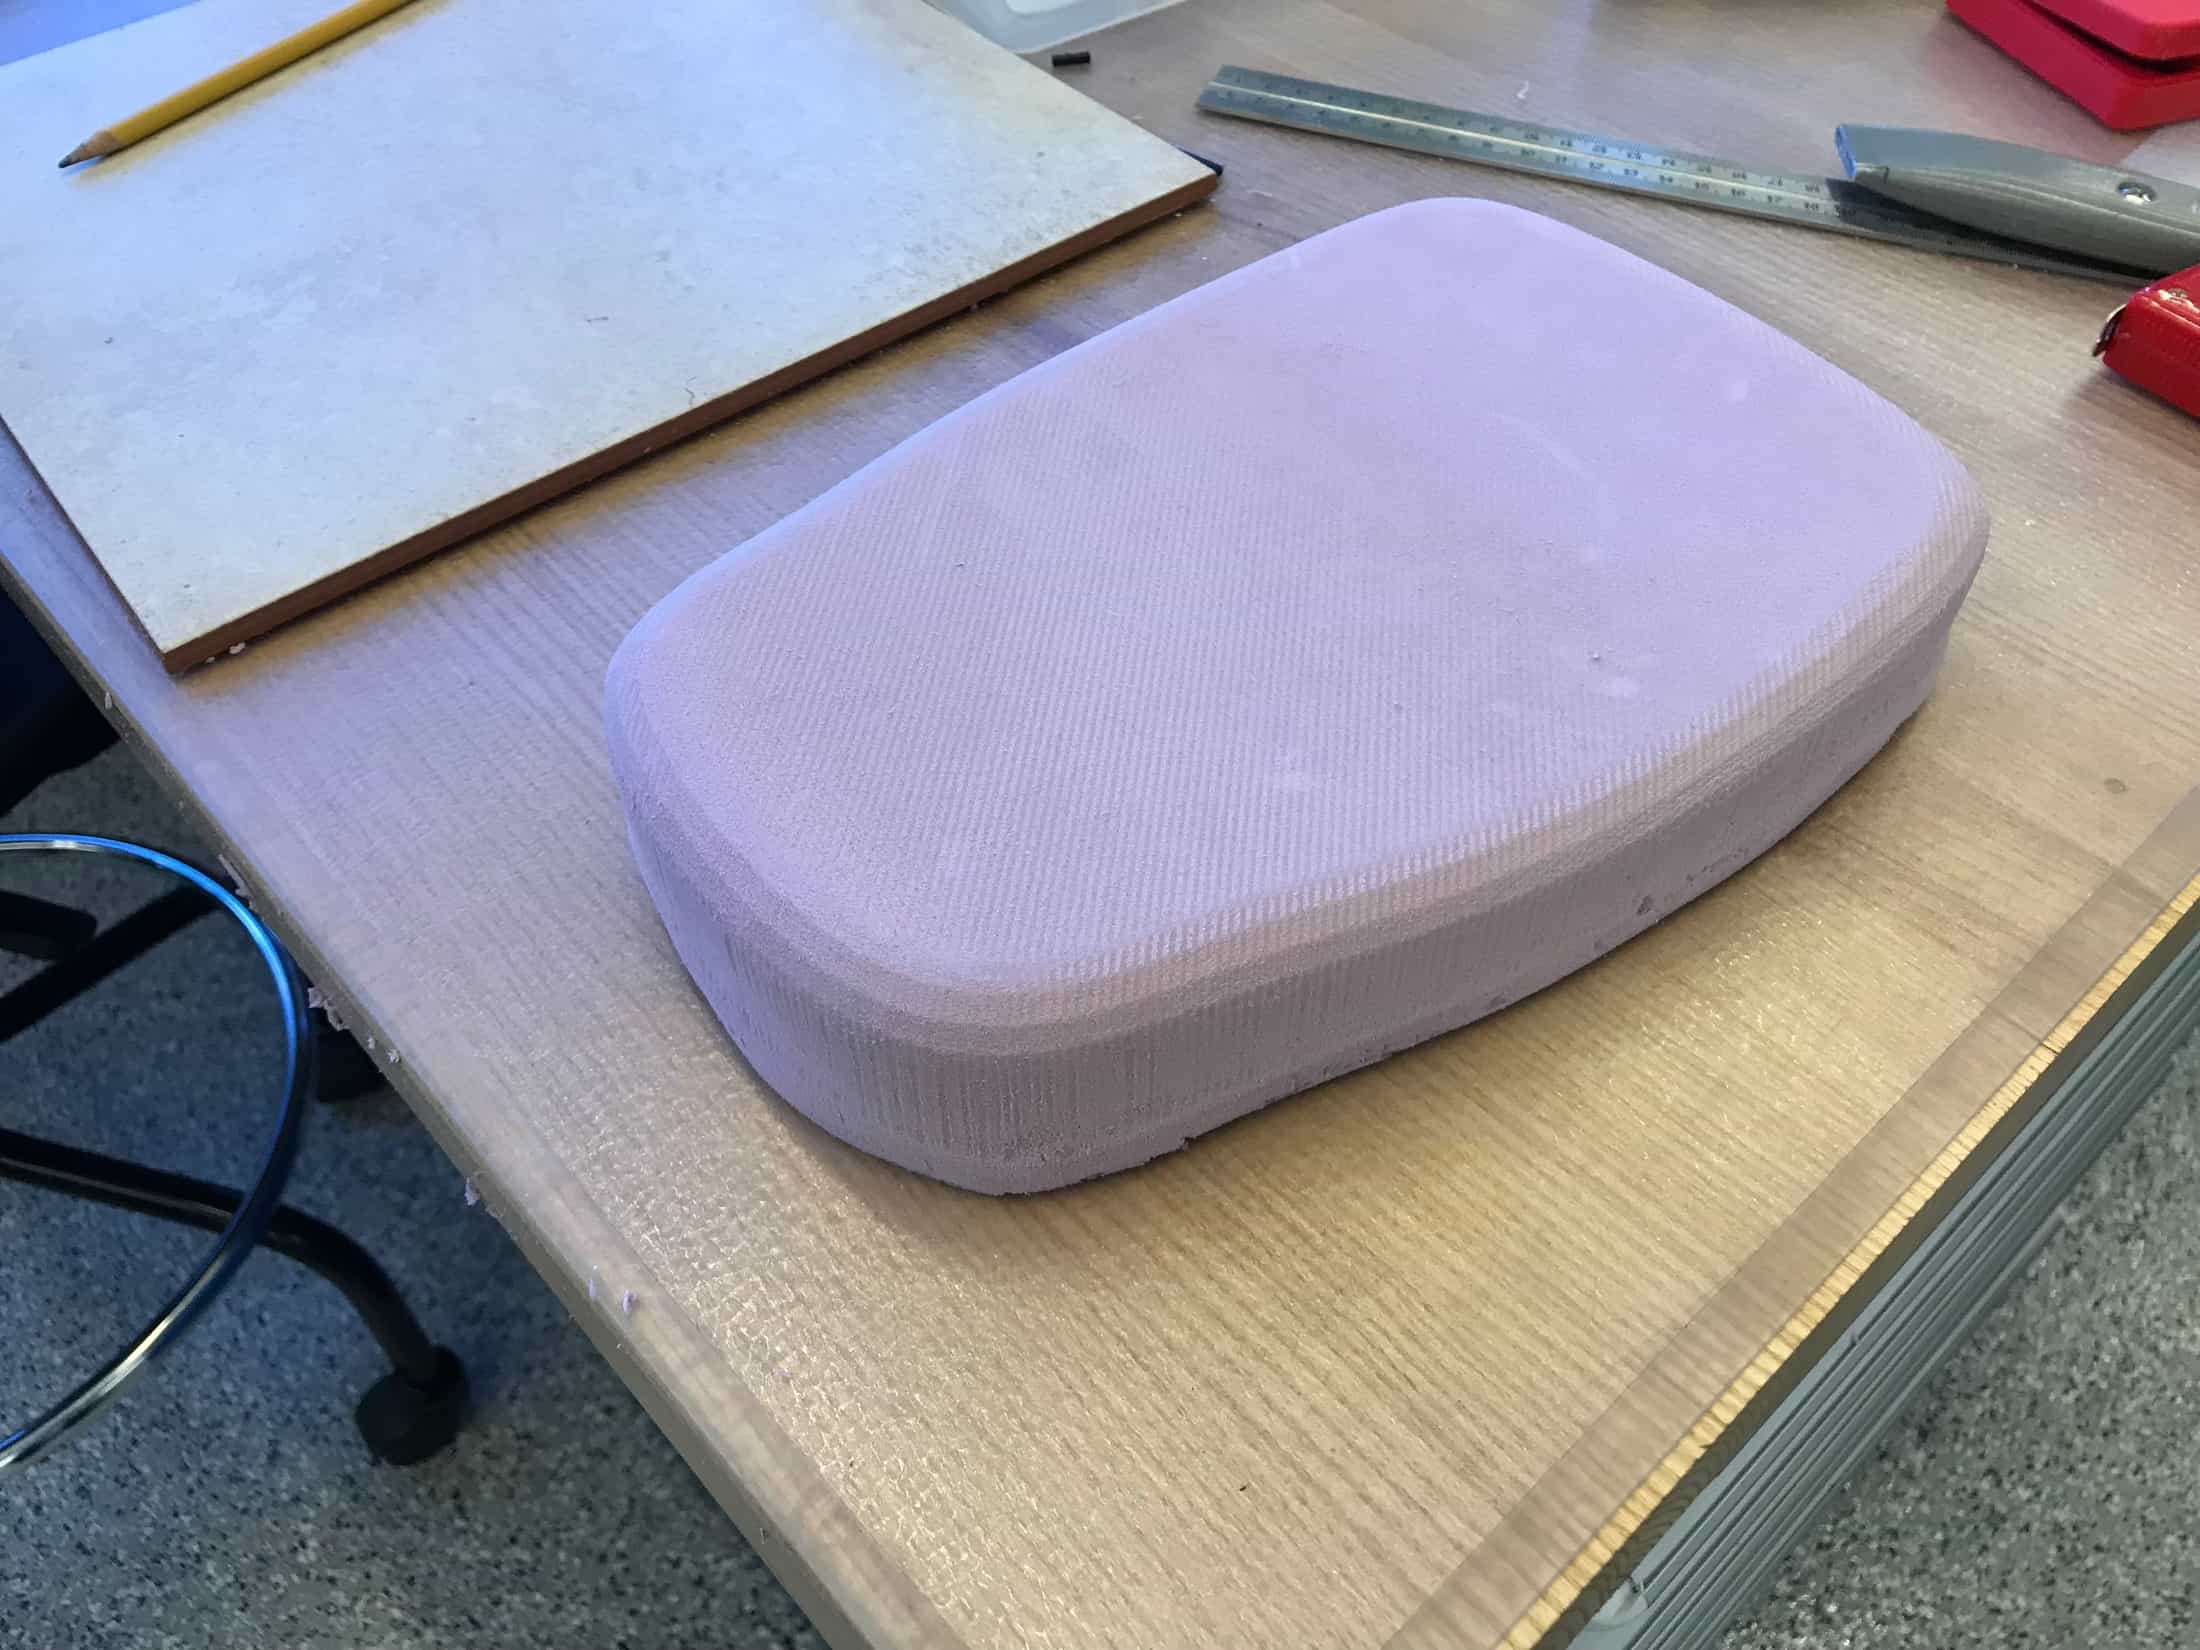
About eight hours after doing the wet layup, I went back to get my composite. It worked pretty well. The fabric wasn't smooth at the sides of the seat, but it had definitely hardened completely. I'm not entirely sure what the finish is supposed to be. There are a few areas where the fabric texture shows through, but the rest is shinier, almost like it's still the bleeder material. I don't know if I should try to remove or sand away that layer so that the fabric material is what is exposed.
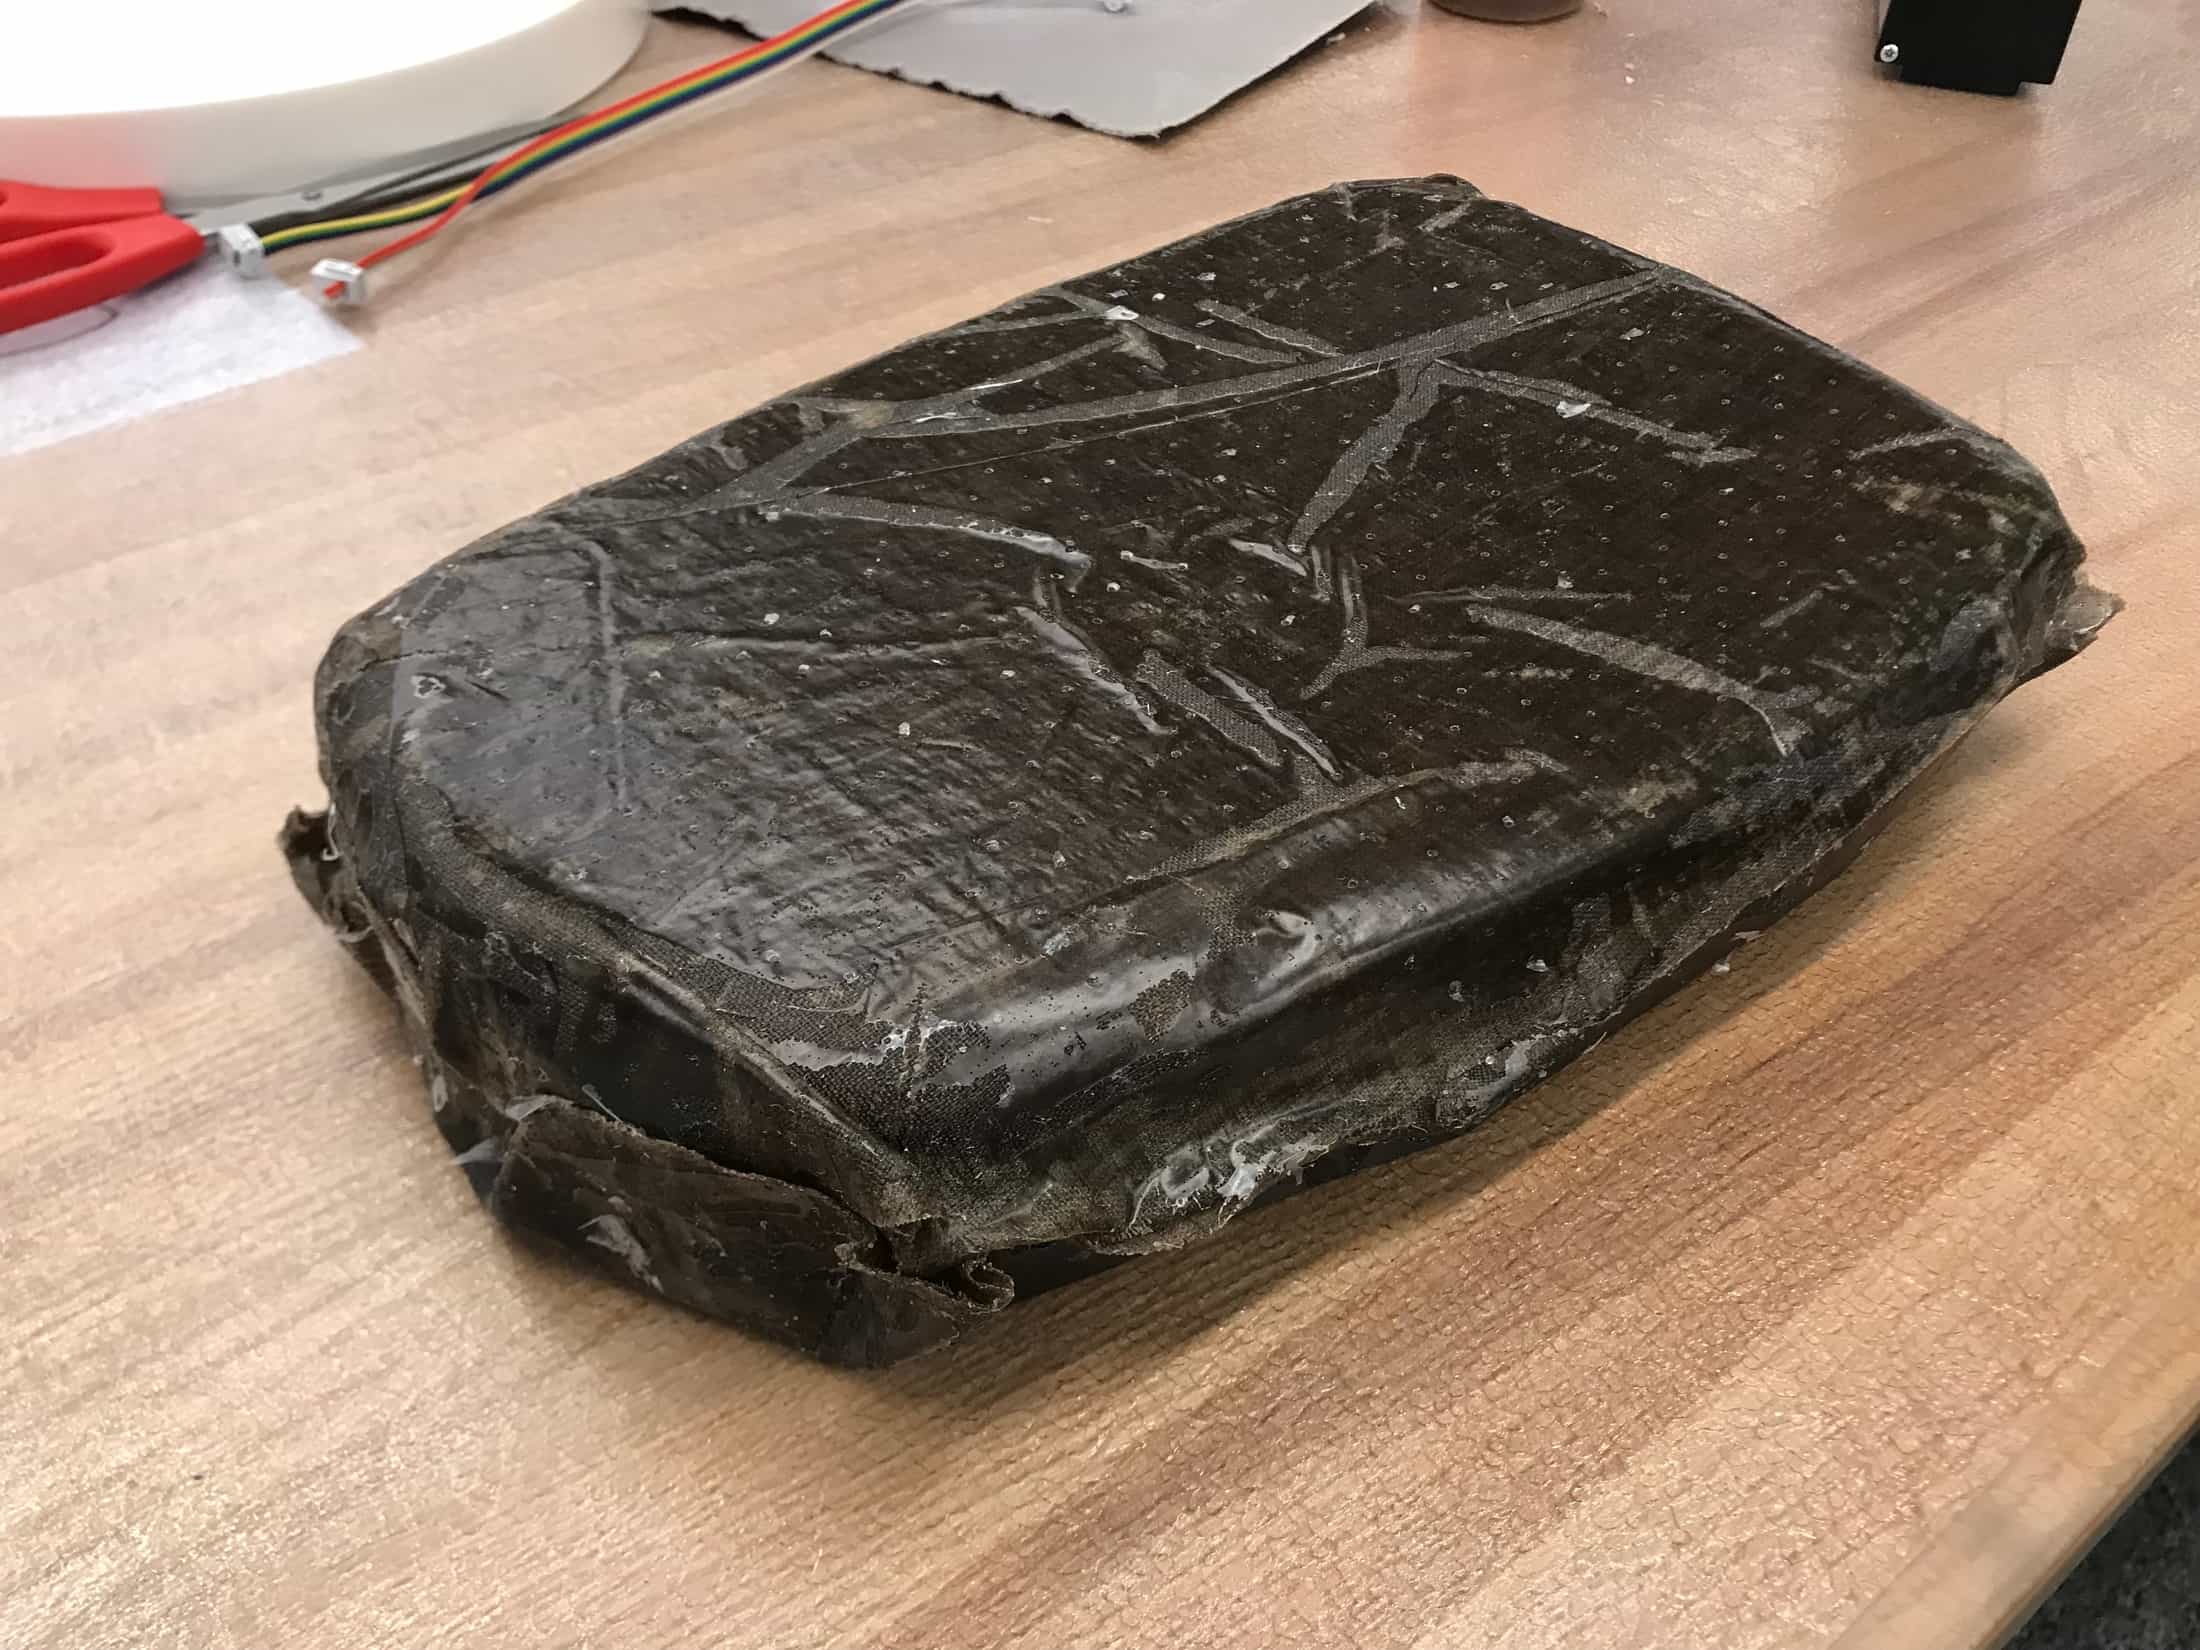
My composite rocking horse seat.