software I attempted not to break: iterm, sublime
hardware I attempted not to break: mill, soldering station, laptop
----yay buttons!----
This week we're adding a button and LED to a board. I'm a little nervous to have to use Eagle - I've never used it before or designed my own circuits at all, so it should be interesting. I was able to download Eagle and get the fab library after looking through posts from previous years explaining how exactly to do that. After watching a few tutorials, I actually found it pretty easy to use Eagle. I didn't run into any problems with spacing/sizing, which I'm sure helped a lot. I started by just making the normal board, and then adding the LED/button/resistor according to how Neil said to do it during class. After a bit of fiddling, my schematic looked like this.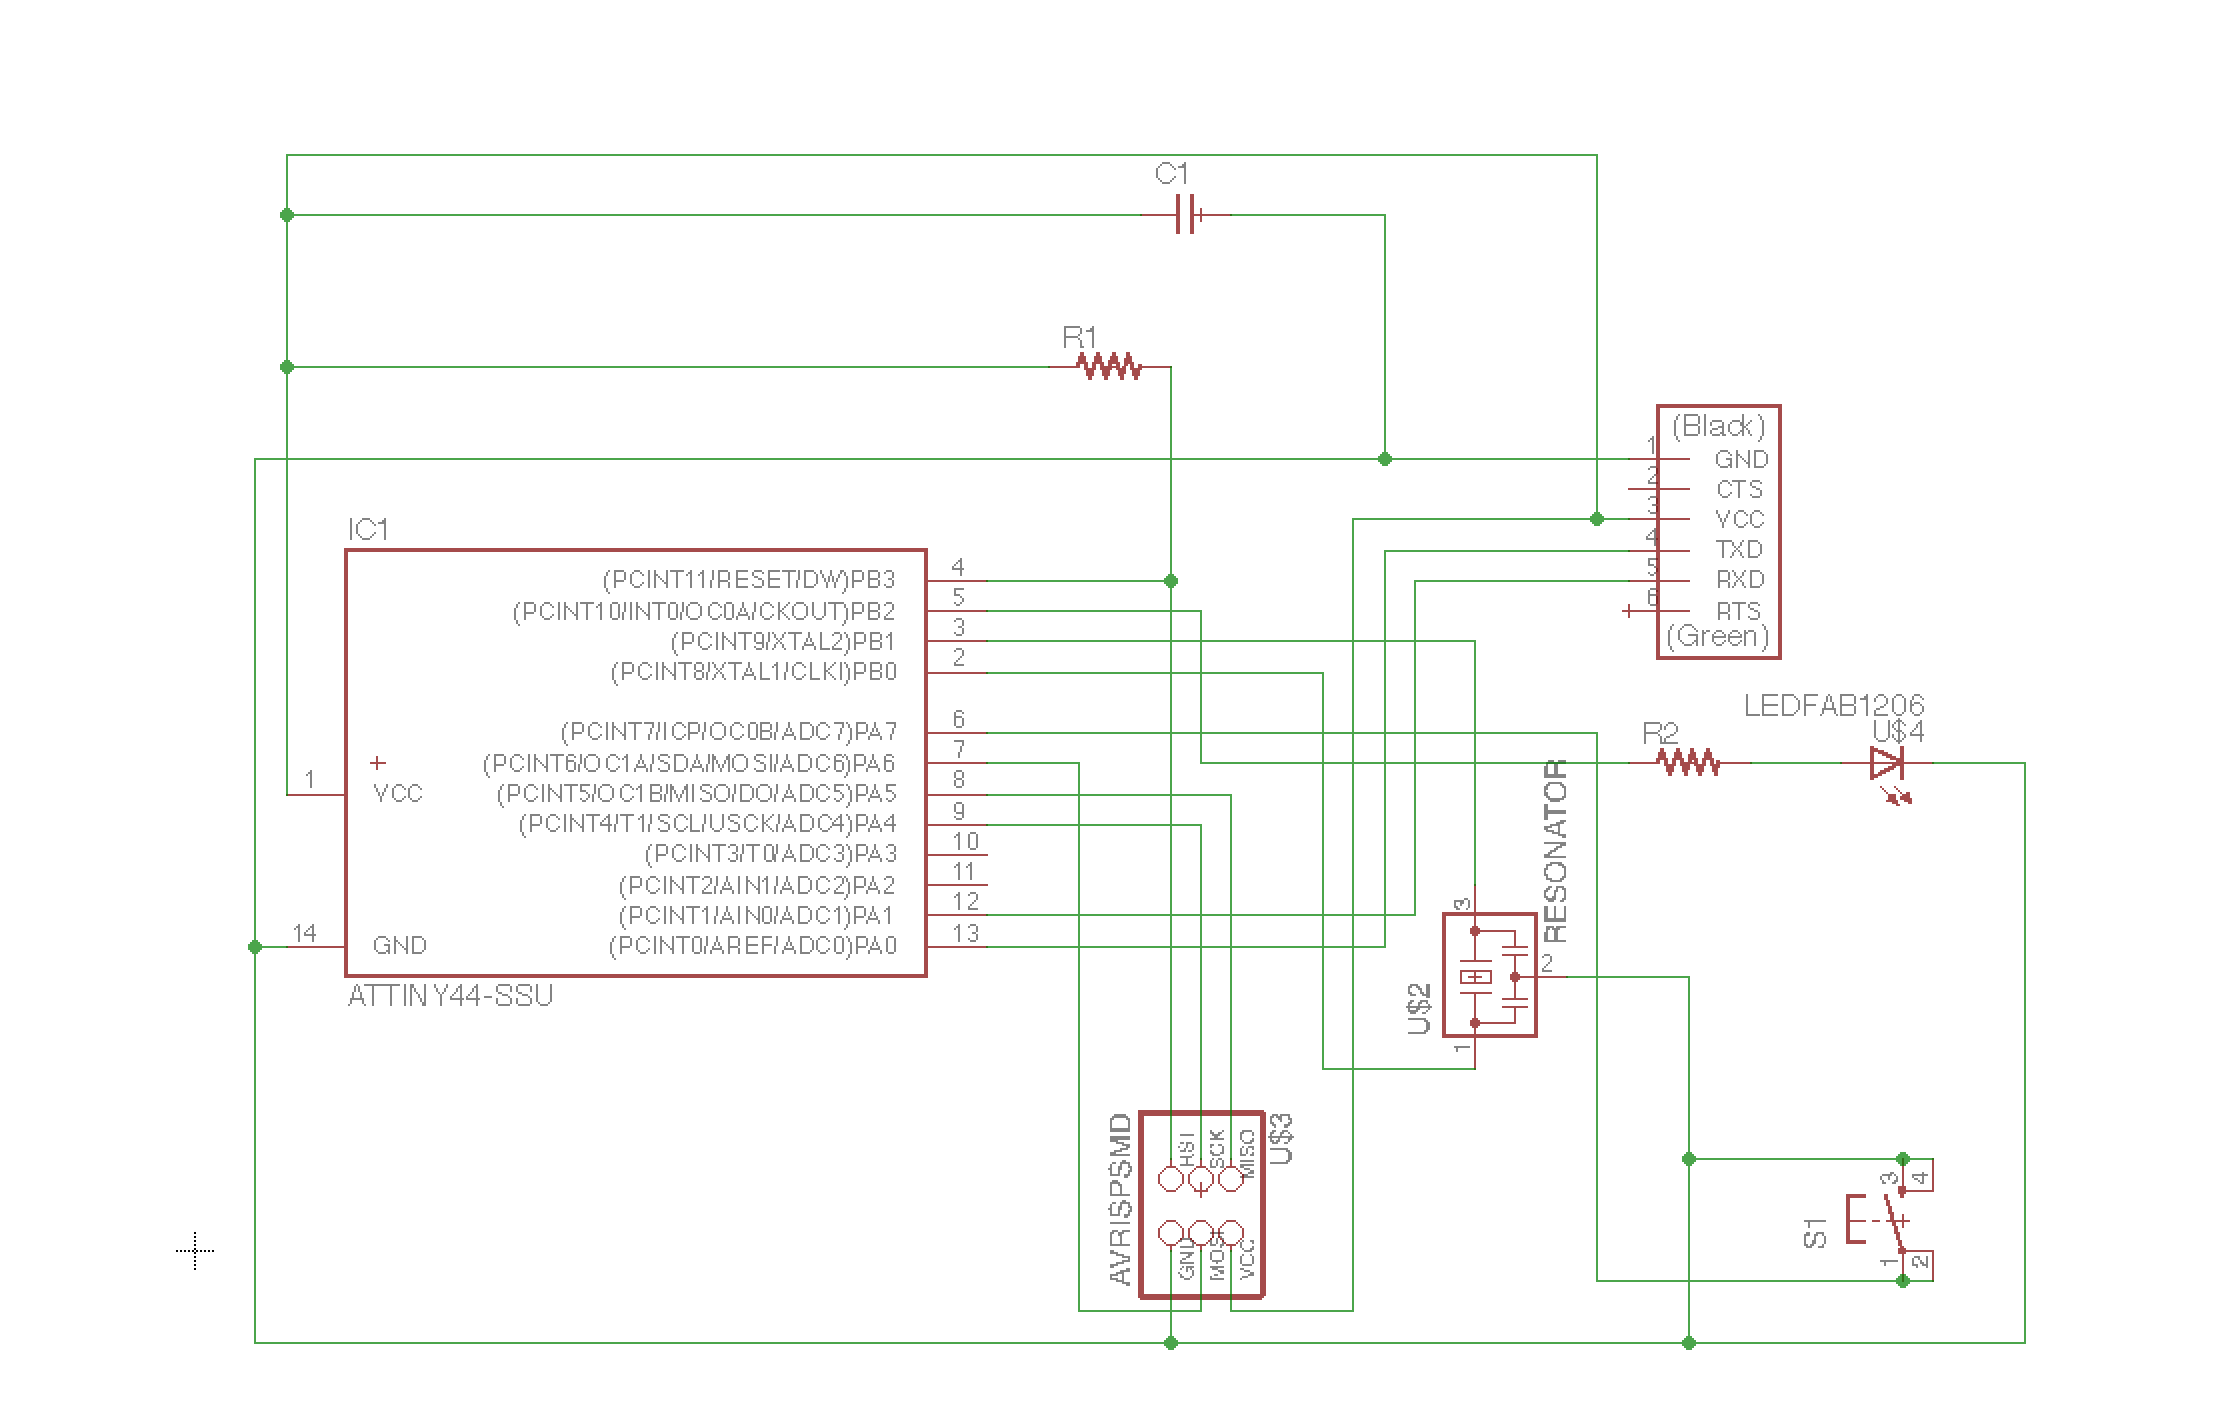
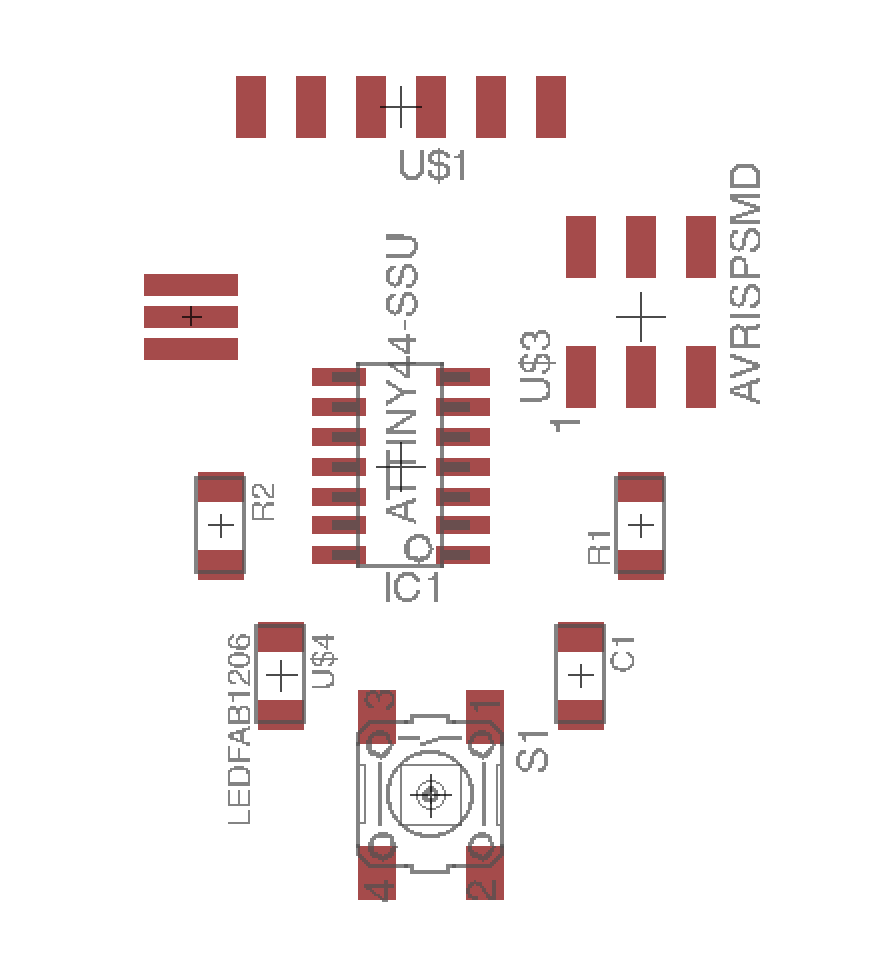
It's not the cleanest, but I think it's okay. I then switched to the board layout and tried to lay it out nicely so it looked symmetric and well-designed, but I was having problems routing it. I ended up doing what Natalie suggested, which was finding the design rules that had been posted on the HTMAA site previously and importing those, then autorouting the routes, and this worked out fine.
----stuffing----
Next came milling and stuffing! Milling worked out fine this time - everything turned out well the first time and no routes looked too small or close together, which was amazing. Stuffing also seemed easier this week, which was great.
For programming it, I just ran the code provided in this week's assignment. It worked at the beginning, but then the button presses stopped registering. I tried to resolder it but it still wasn't working, so I think that something else must have gone wrong. I'll look into it more later.