Molds and Mazes
At least I'm not allergic to this type of mold.
My exposure to molding and casting actually came the night before at Project Night where we were given the opportunity to play around with some body-safe molding silicon. Julia wanted two more opposable thumbs (who doesn't?), so we cast her thumbs as well as a part of her hand to create the upper part of the mold so she could attach them to her hands as seamlessly as possible.
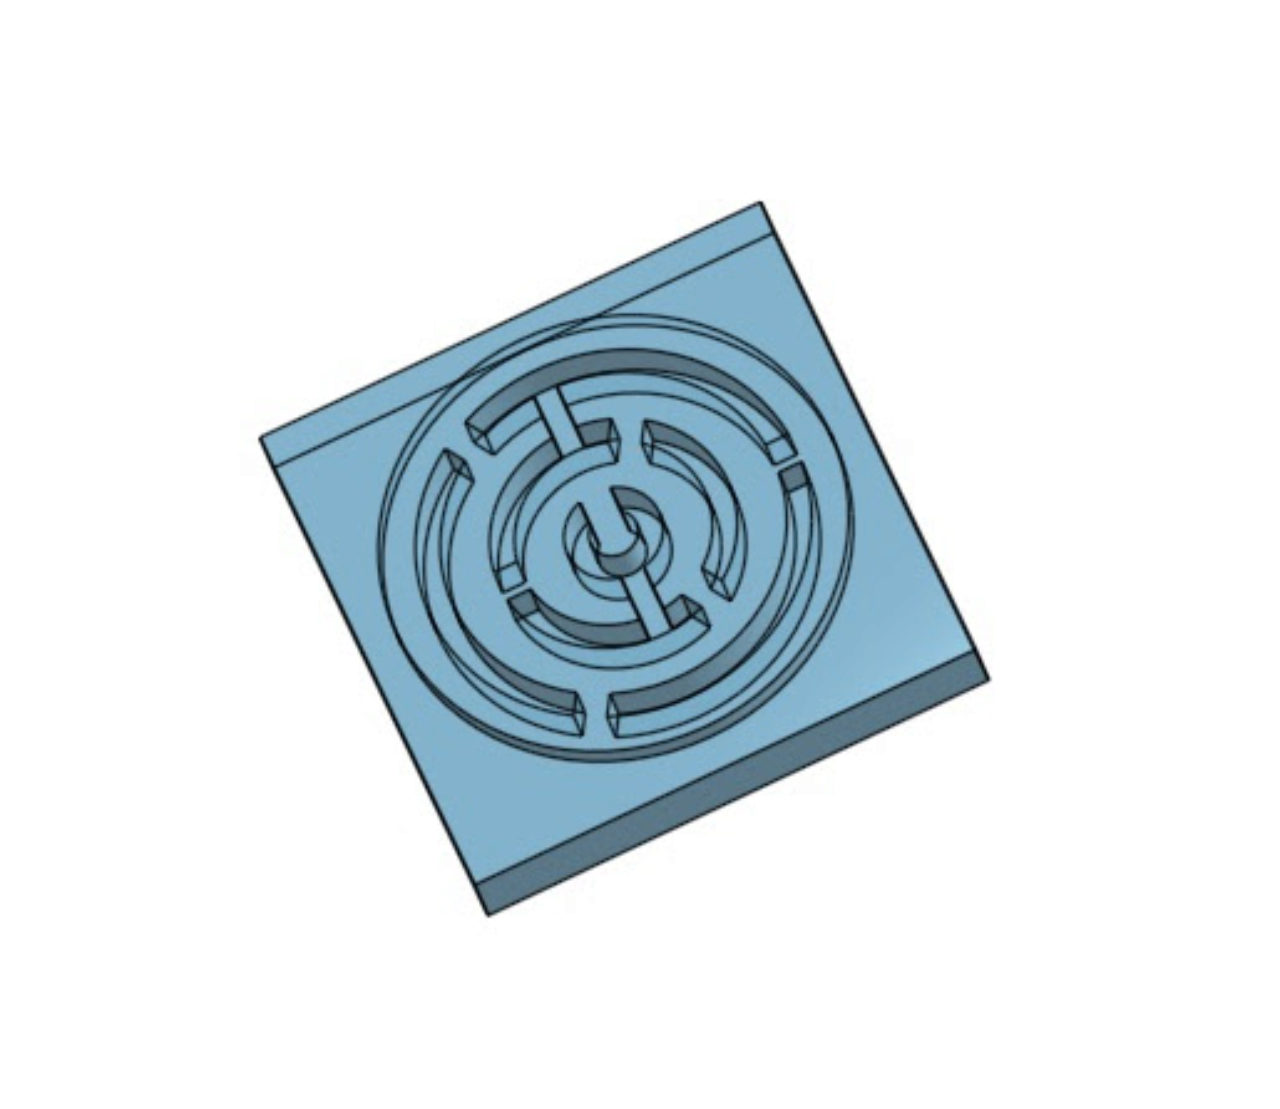
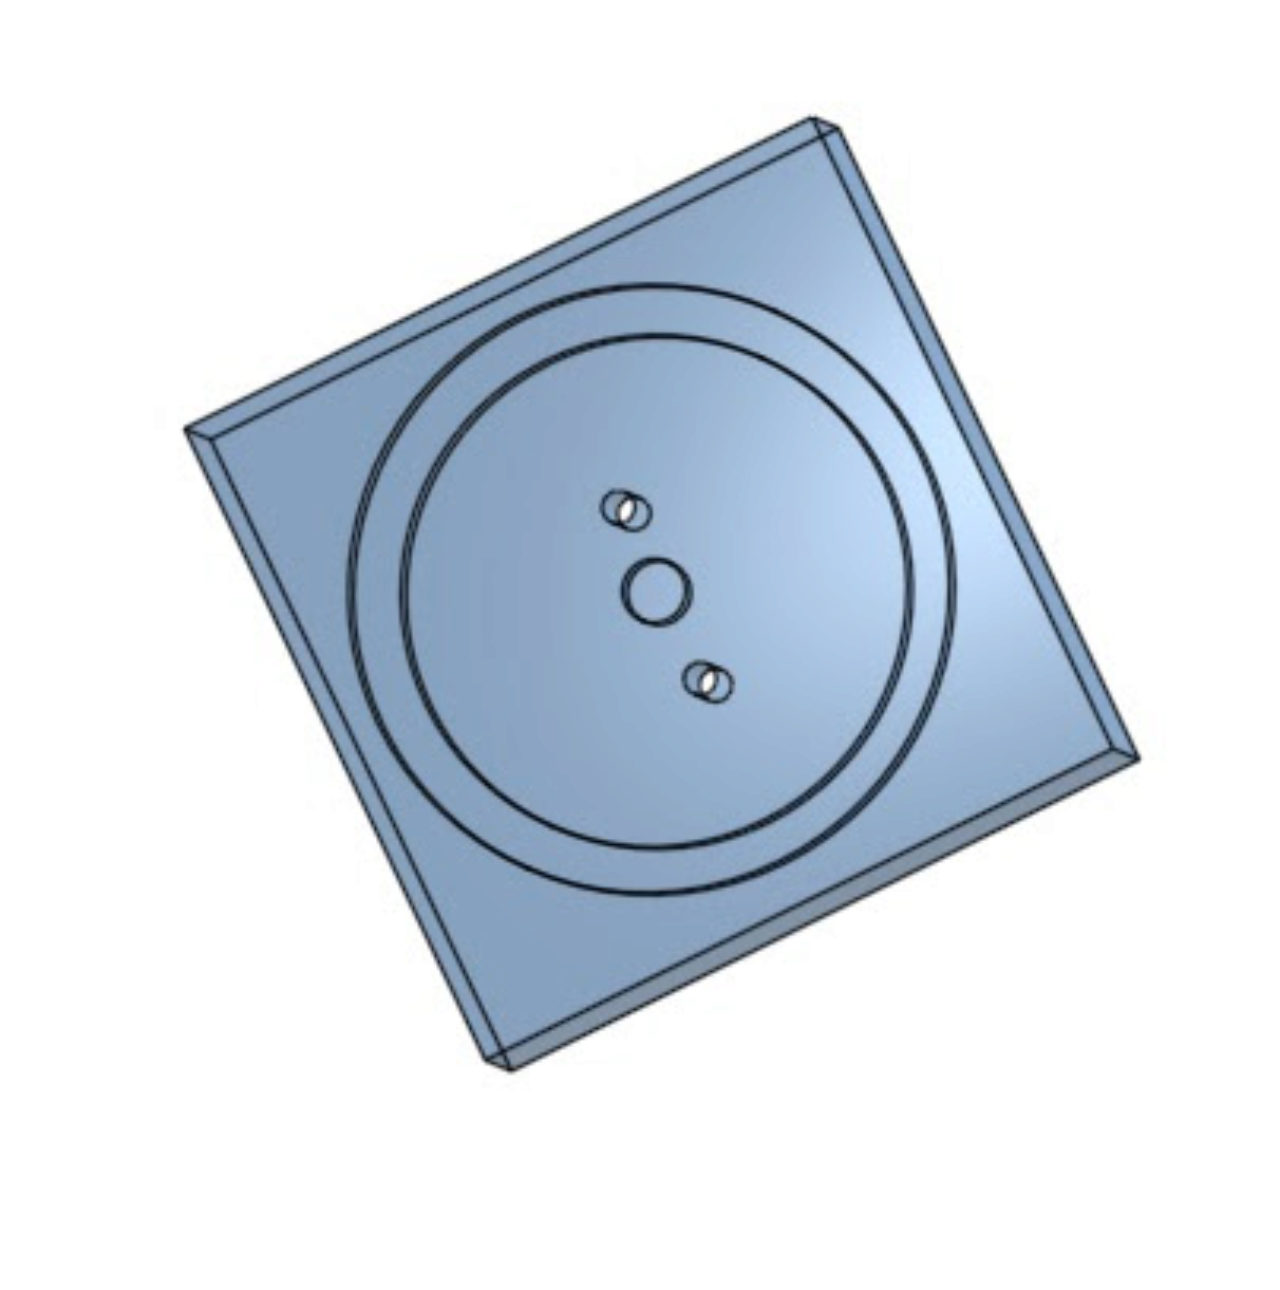
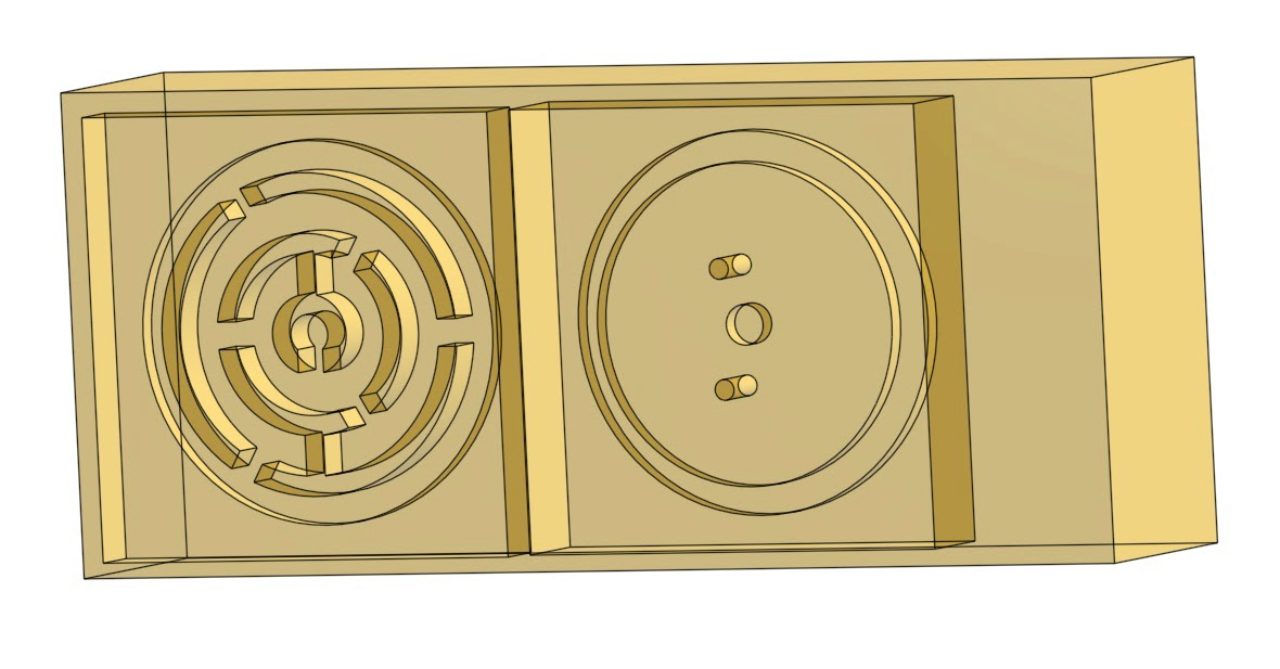
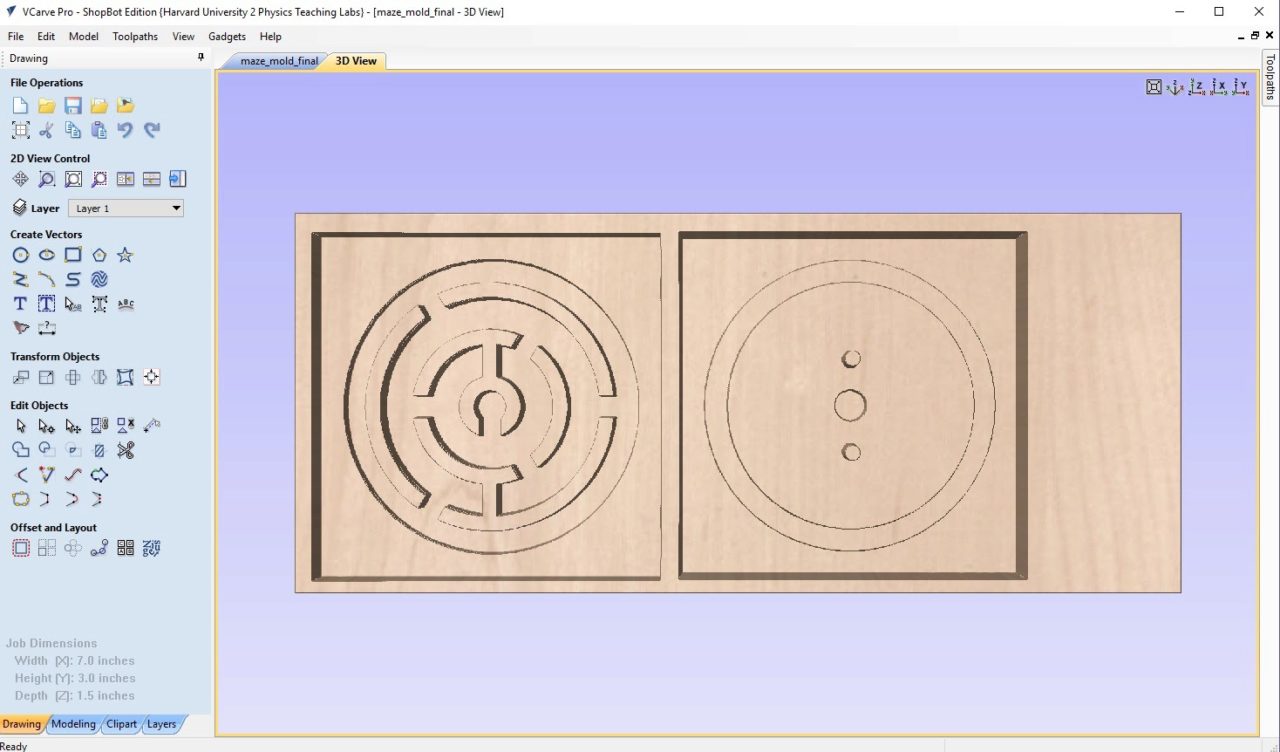
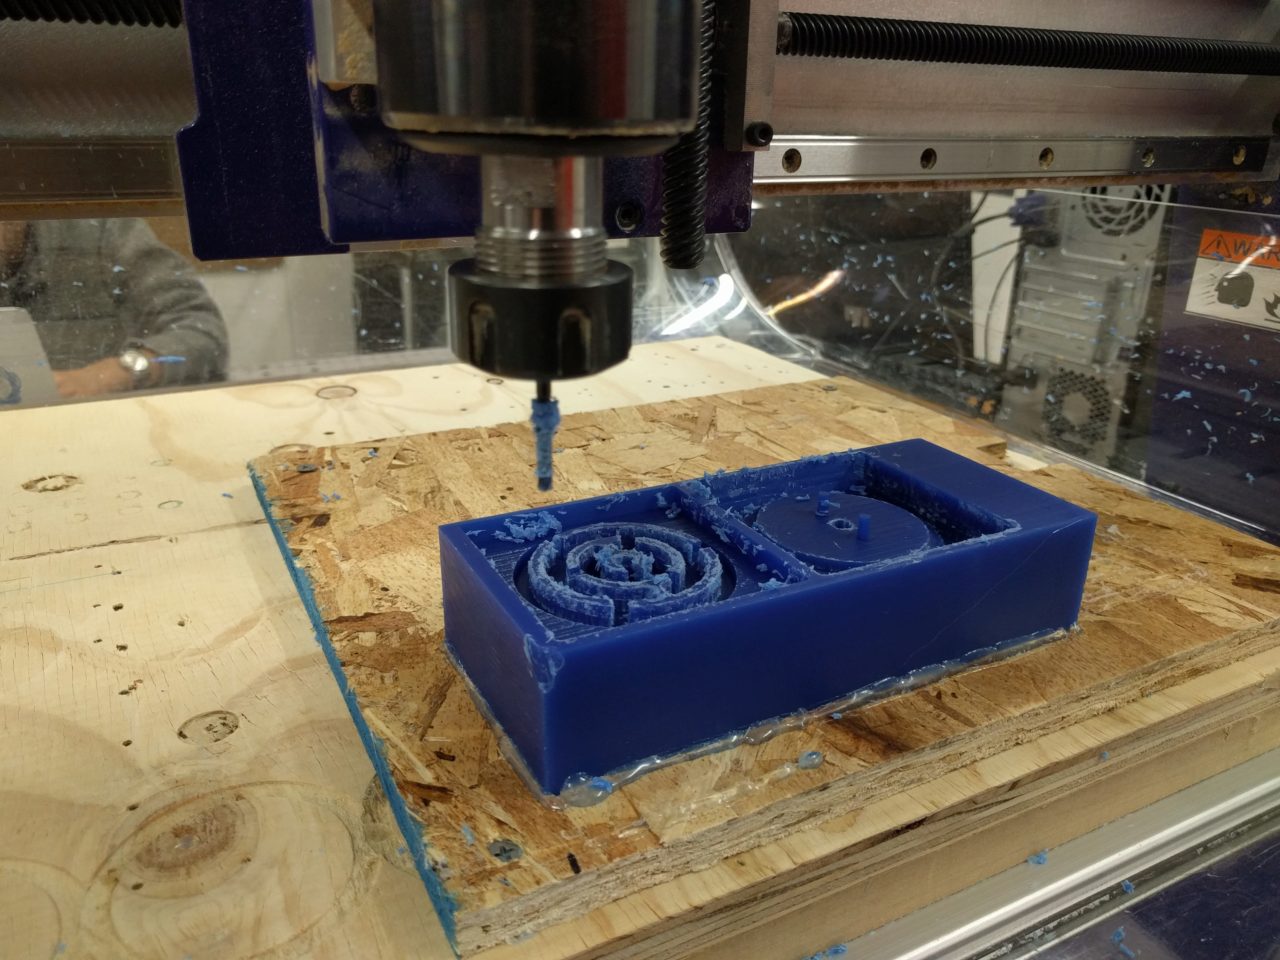
I decided to try casting one of the parts for my final project. Since I wanted a better finish on the maze face than what I could get via 3D printing, I decided to try to cast the actual maze part. Taking my lessons from the previous shopbot week, I designed my part with a better hierarchy and attention to the parameters and their definitions. As was inevitably the case, I had to tweak measurements for the final shopbot file, but this time it was a lot less painful because I simply changed a few variables and the dimensions remained intact. I followed Julia's advice, and I first designed the part that I wanted for my maze and then did boolean subtract on the part from top and bottom to get what I wanted the actual, flexible mold to look like. I next boolean subtracted the mold faces from a rectangular piece that was the piece of the wax blank we were given.
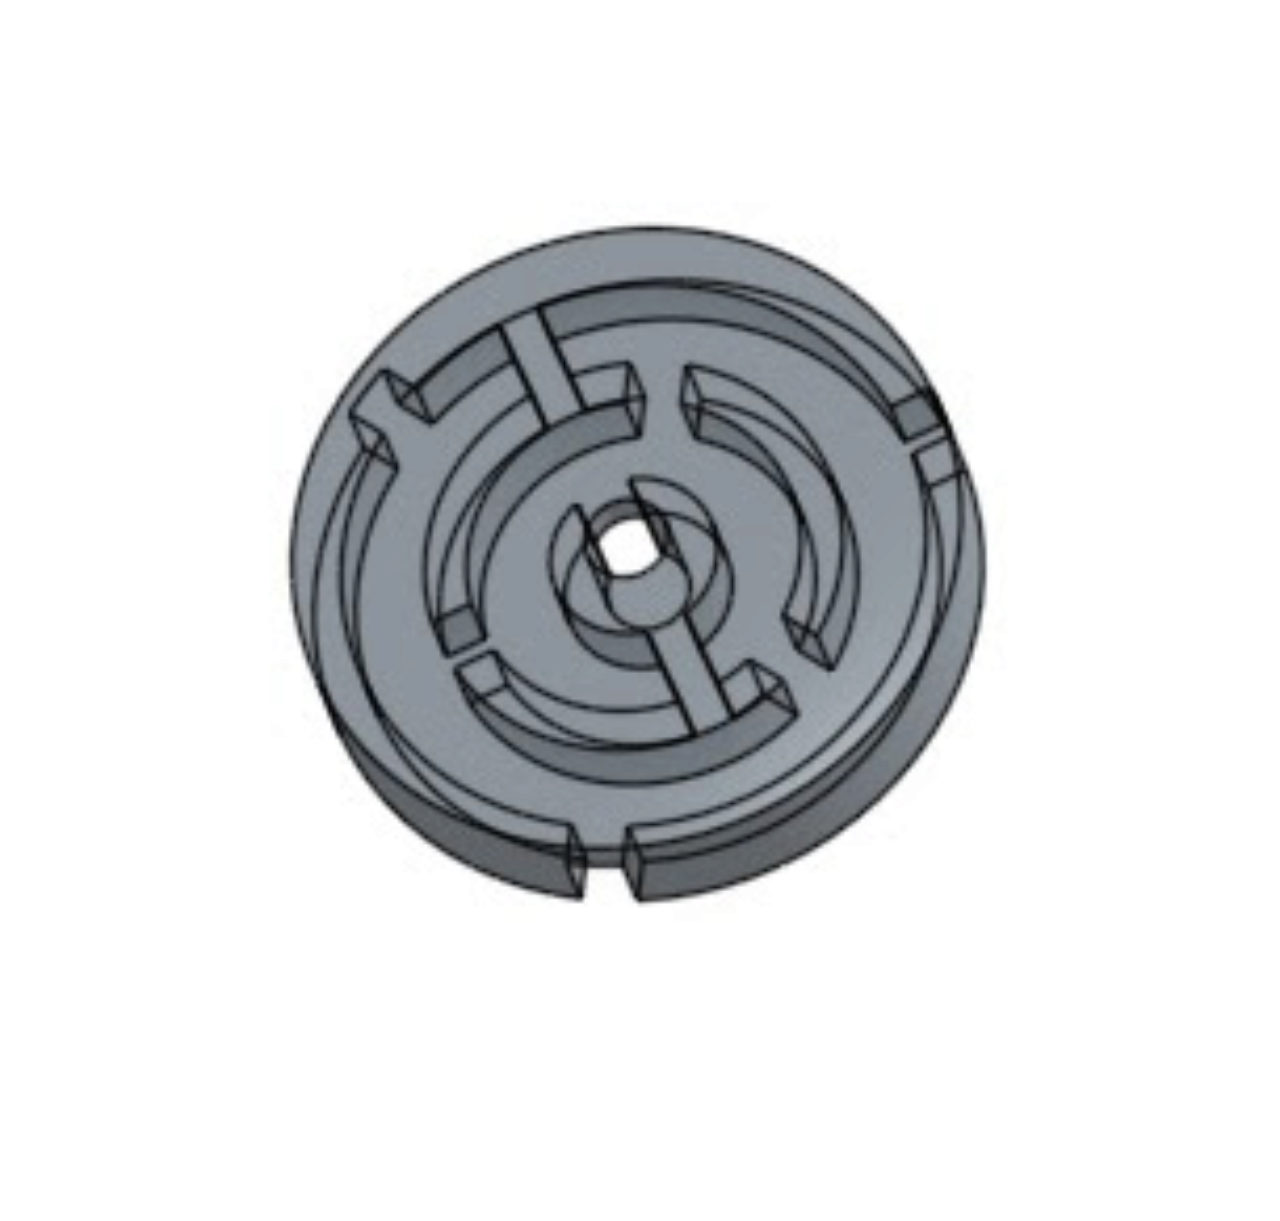
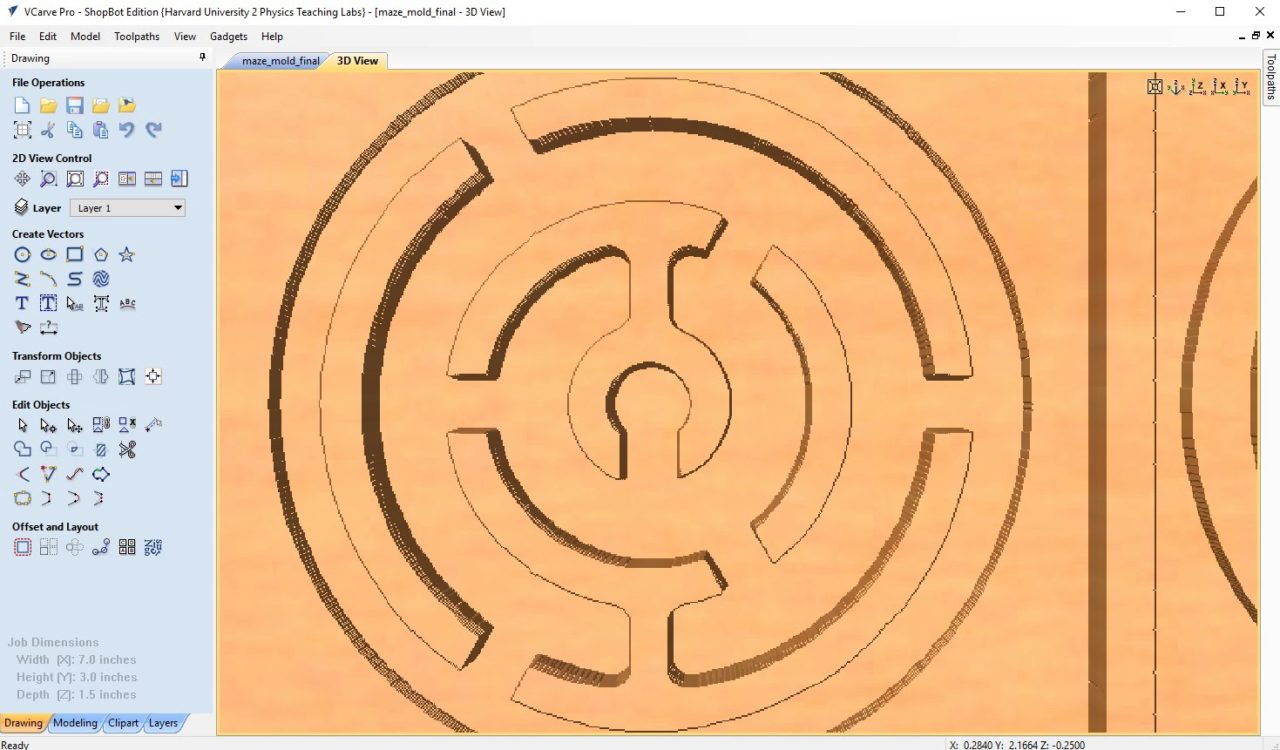
A major problem that I ran into this week was that although my part was designed to be able to be cut with a 1/8th in bit (narrowest clearance was 1/6th of an in), when performing the calculations, Vcarve would not allow the bit to pass through these areas, regardless of rough or finish cut. I initally tried changing the bit, and although this worked nicely on the simulation, Diana warned me that since the cutting depth of the 1/16th in tools were much shorter, it wouldn't be able to access certain areas (in particular my sprues). I'm not sure if there is a better way to do this, but I ended up just scaling my parts up until the machine was able to pass through the most narrow parts. Also, I found that for my design, the finishing cuts actually left a much rougher texture along the edges than I wanted due to the raster. I tried to repeat my rough cut with smaller stepover, but it didn't appear that it was making much of a difference. In the end, I decided not to use the finishing cut, since for this particular design, it looked like it was going to be worse for the wax blank.

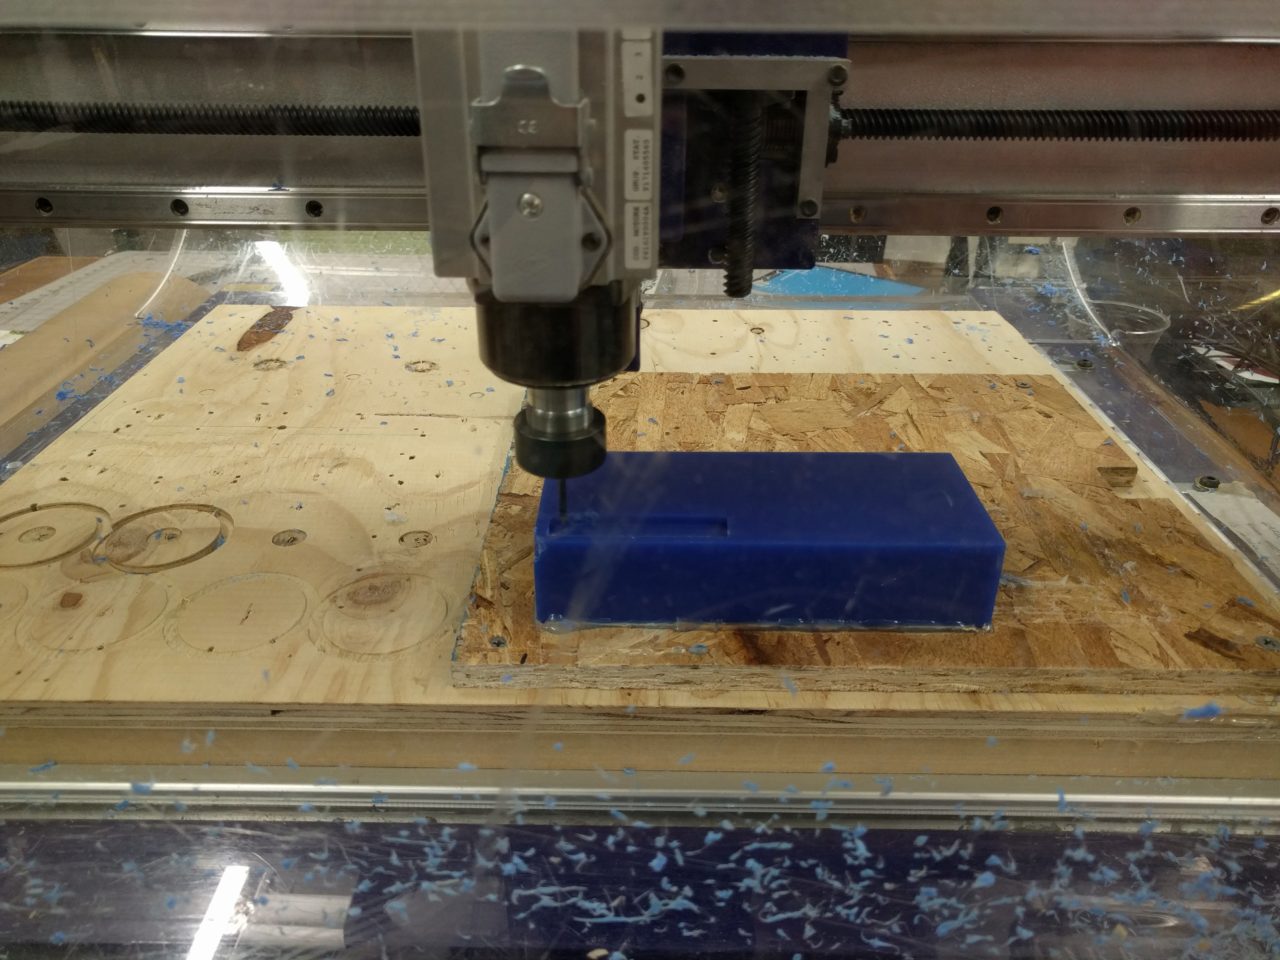
I fixed my wax blank on the OSB sacrificial layer with hot glue. A little goes a long way here as I learned trying to remove it later. After I zeroed my machine, I did an air cut at 1in above the wax blank. Things looked pretty good, but when I attempted to re-zero my z-axis to just above the blank, the bit ended up plunging about half a cm into the wax, and it broke! I'm not sure exactly what happened here, but I suspect because I was doing the air cut at 1in above the stock and the bit moves up during the cut (to jog) that it maxed out the possible Z height (it made an angry noise when it was lifting). Perhaps during this phase, it got confused or felt that it was higher than it actually was, leading to an inaccurate reading on screen. In the future, I will just re-zero the Z-axis manually after the air cut. Furthermore, I will be more attentive to see if it maxes out on a particular axis.

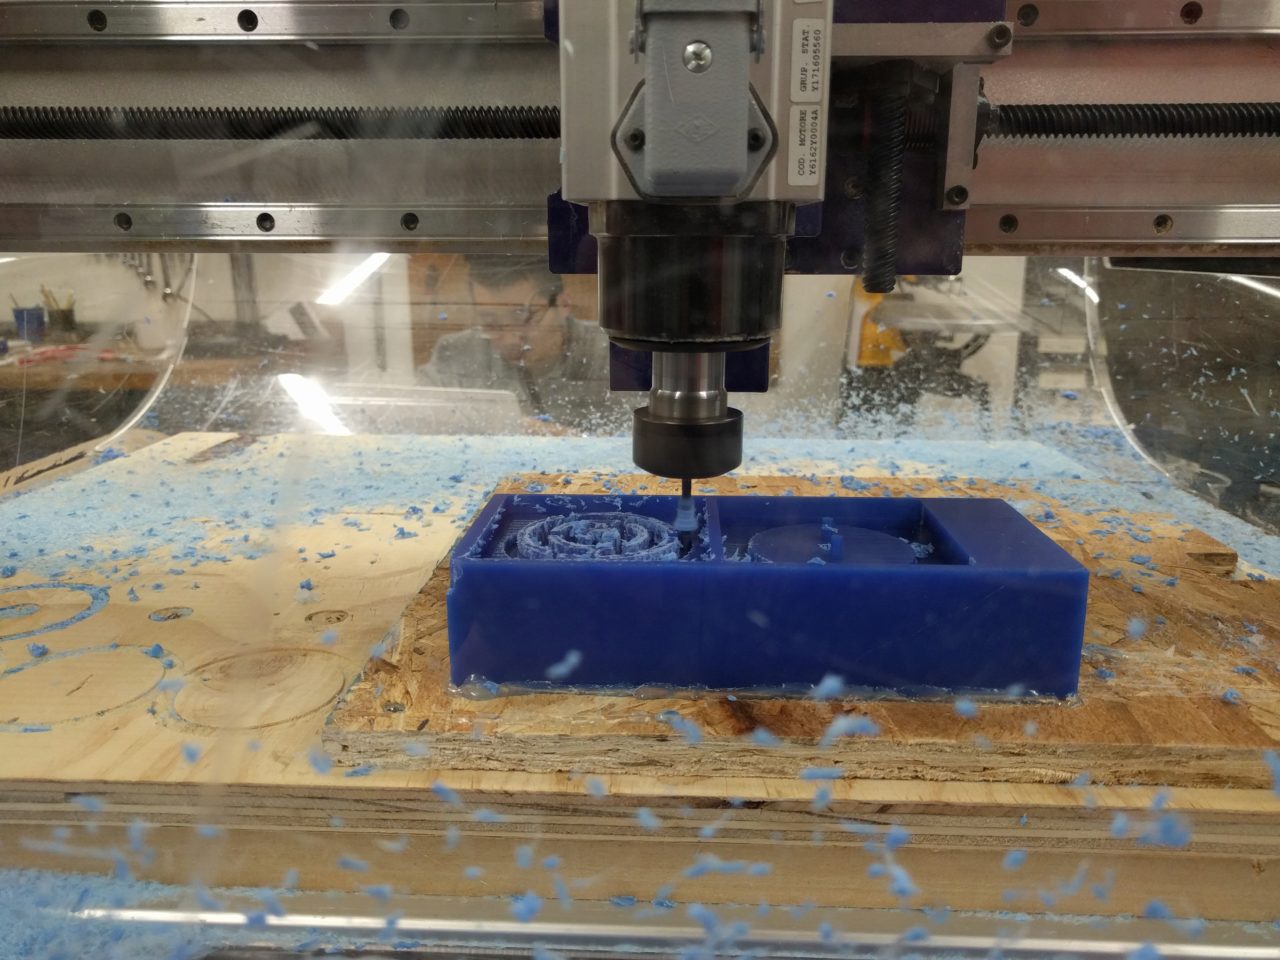
I switched the broken end mill out for a new one and started milling. At first everything was working pretty well. The lines were neat and the wax was flying out of the little pockets created by the mill quite nicely. After it started doing the more intricate and curved sections, however, wax started to build up on the end mill and while it was cutting, it smeared melted wax on the sides of areas that had already been cut. I didn't really want to stop the cut, because it was still going pretty well and I figured I could probably scrape it off after. After it had stopped, I noticed that the wax had really melted into the end mill, which was protecting the blade from cutting smoothly. I'm not sure what the best way to deal with this. I figure faster rpm and a faster feed rate might improve the result. While I was able to remove most of the smeared wax, some areas were more problematic. I think the finishing cut probably would have helped with that, although it would have ruined the nice edges on the sides that did turn out okay. I will probably play around with this some more if I do end up deciding to cast my final piece.
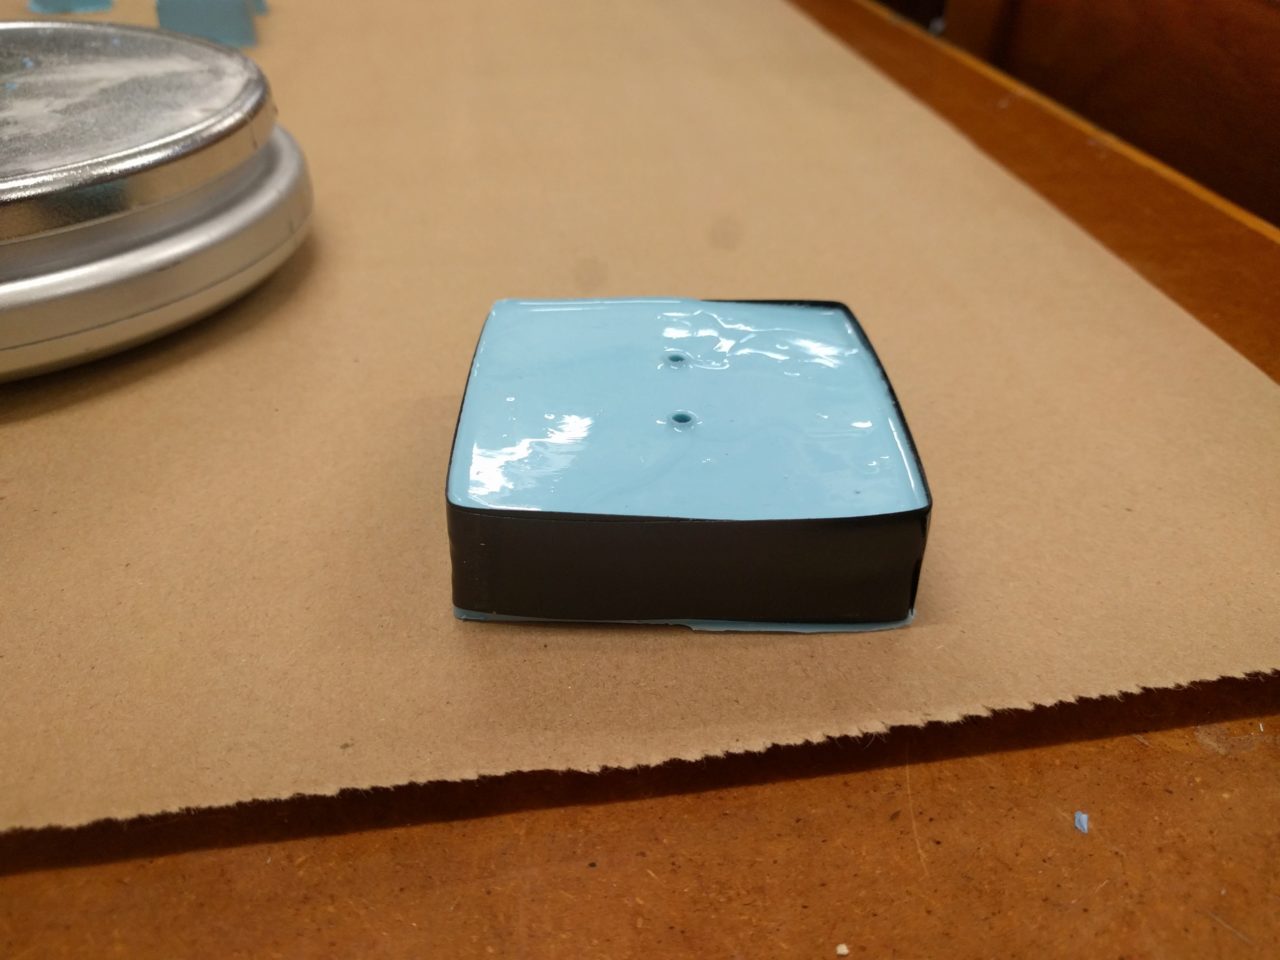
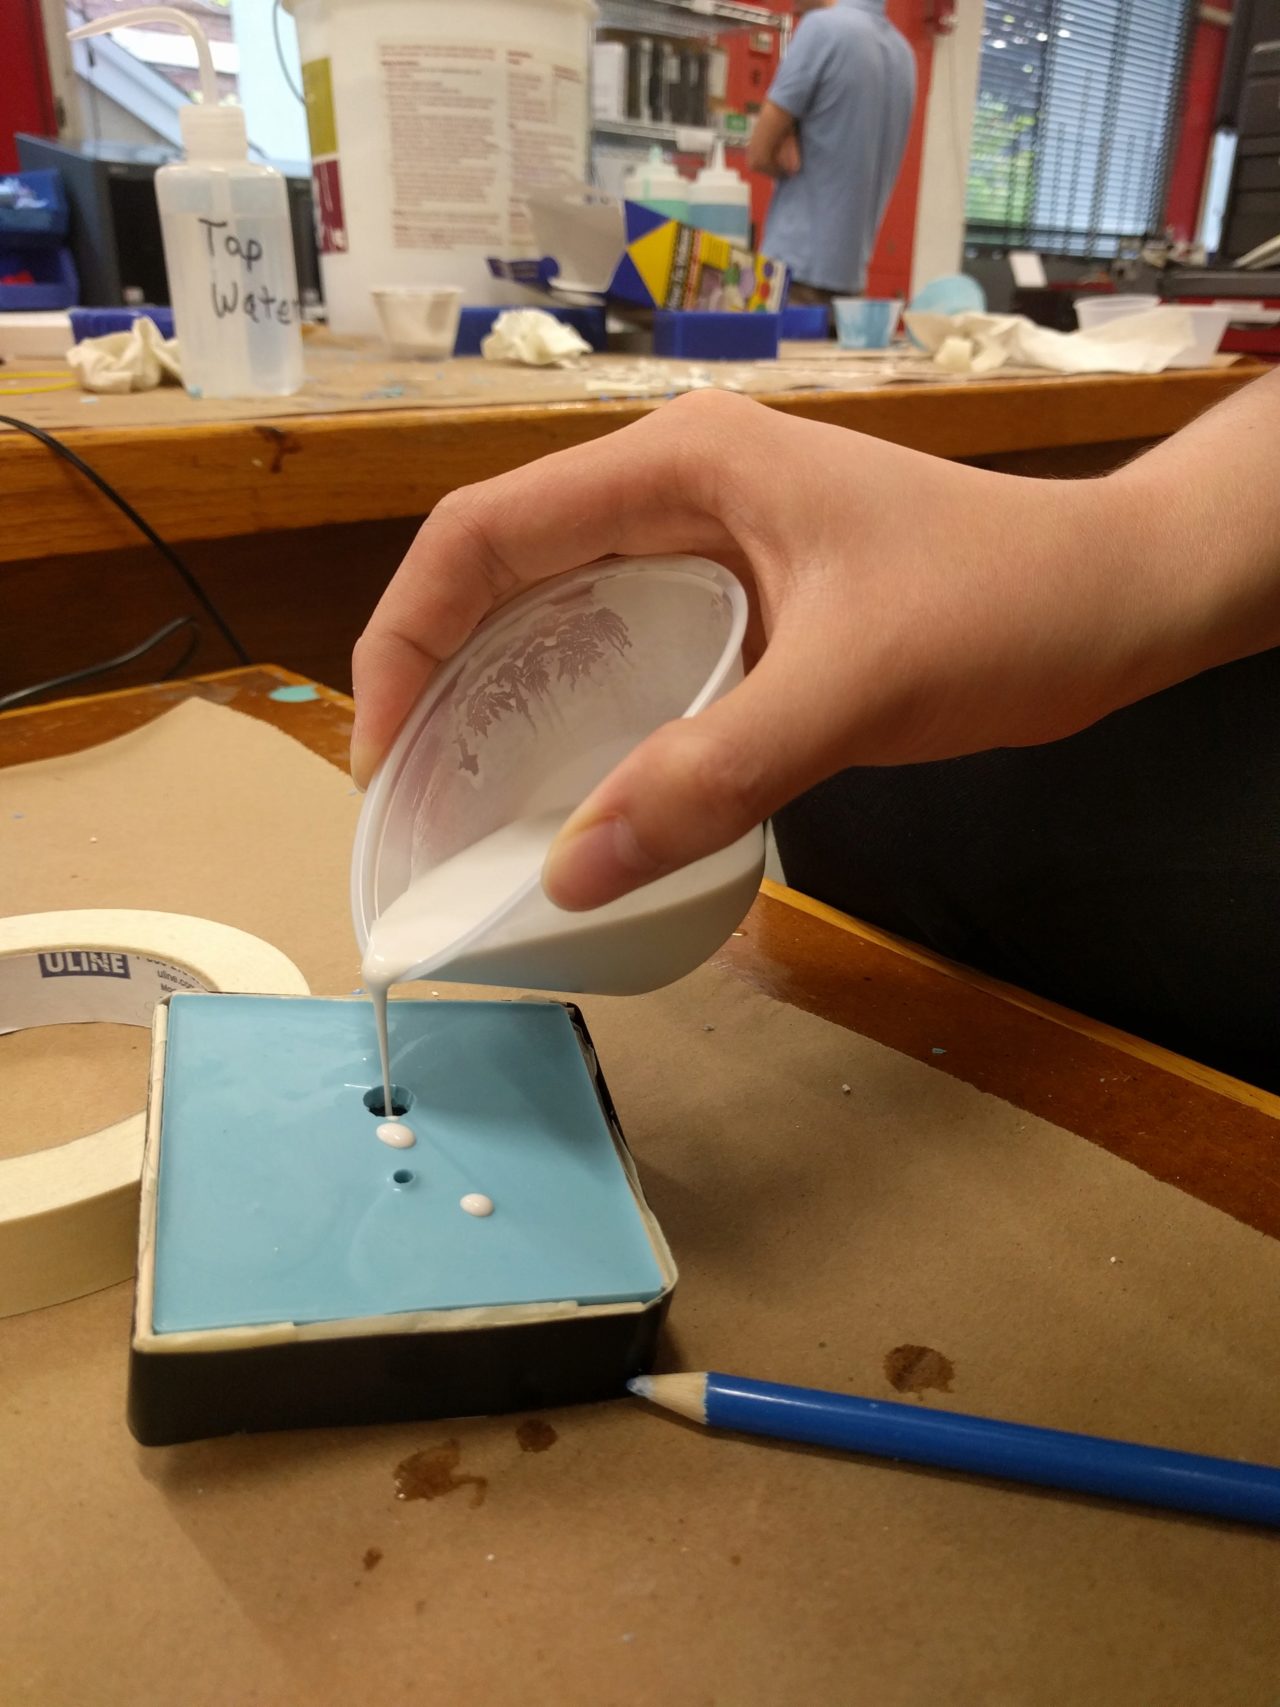
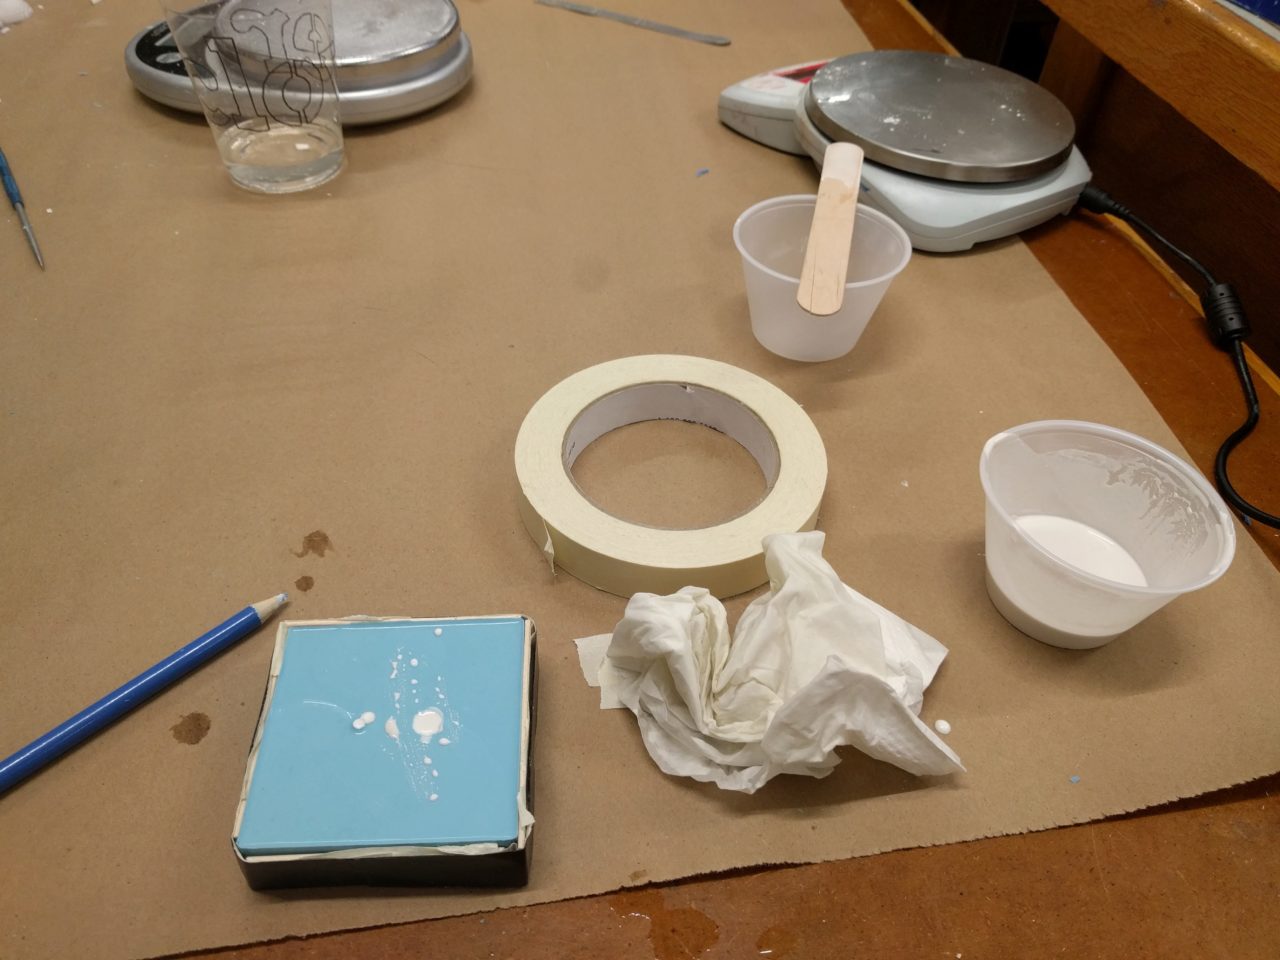
I filled the mold with water to see the approximate amount of Omoo that I needed and measured out the two parts. Perhaps it's just the chemist in me, but I preferred tareing the plastic container and adding Part A to the desired weight, re-tareing and adding Part B to the desired weight. That way, there was only one container to clean up and I don't have to worry about scraping the contents from one cup to another. I tried to stir by shearing the stick as Rob had demonstrated, but I still seemed to be incorporating many bubbles and it was also super slow. In the end, I'm not sure if I actually prevented that many bubbles from forming, and my hand was really tired. I lifted one end of my mold up on one side and poured from a corner, allowing the Omoo to run down to fill the cavity. This worked really well for the less intricate side, however, on the more intricate side, I had to direct my pouring more to ensure the entire cavity was filled. This led to some air bubbles. I tapped the mold on a hard surface to get out as many as I could. I let it set up overnight.
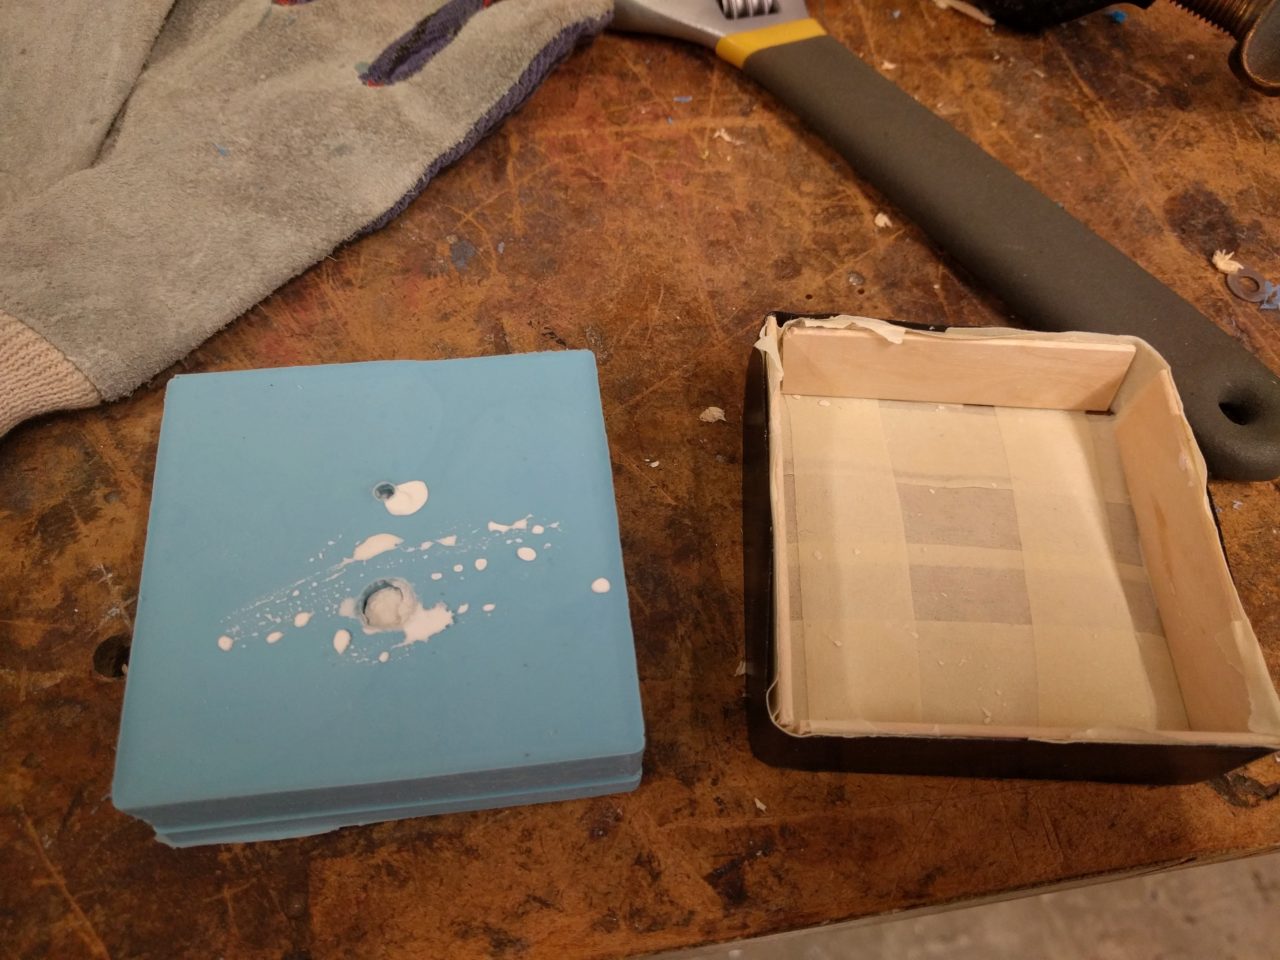
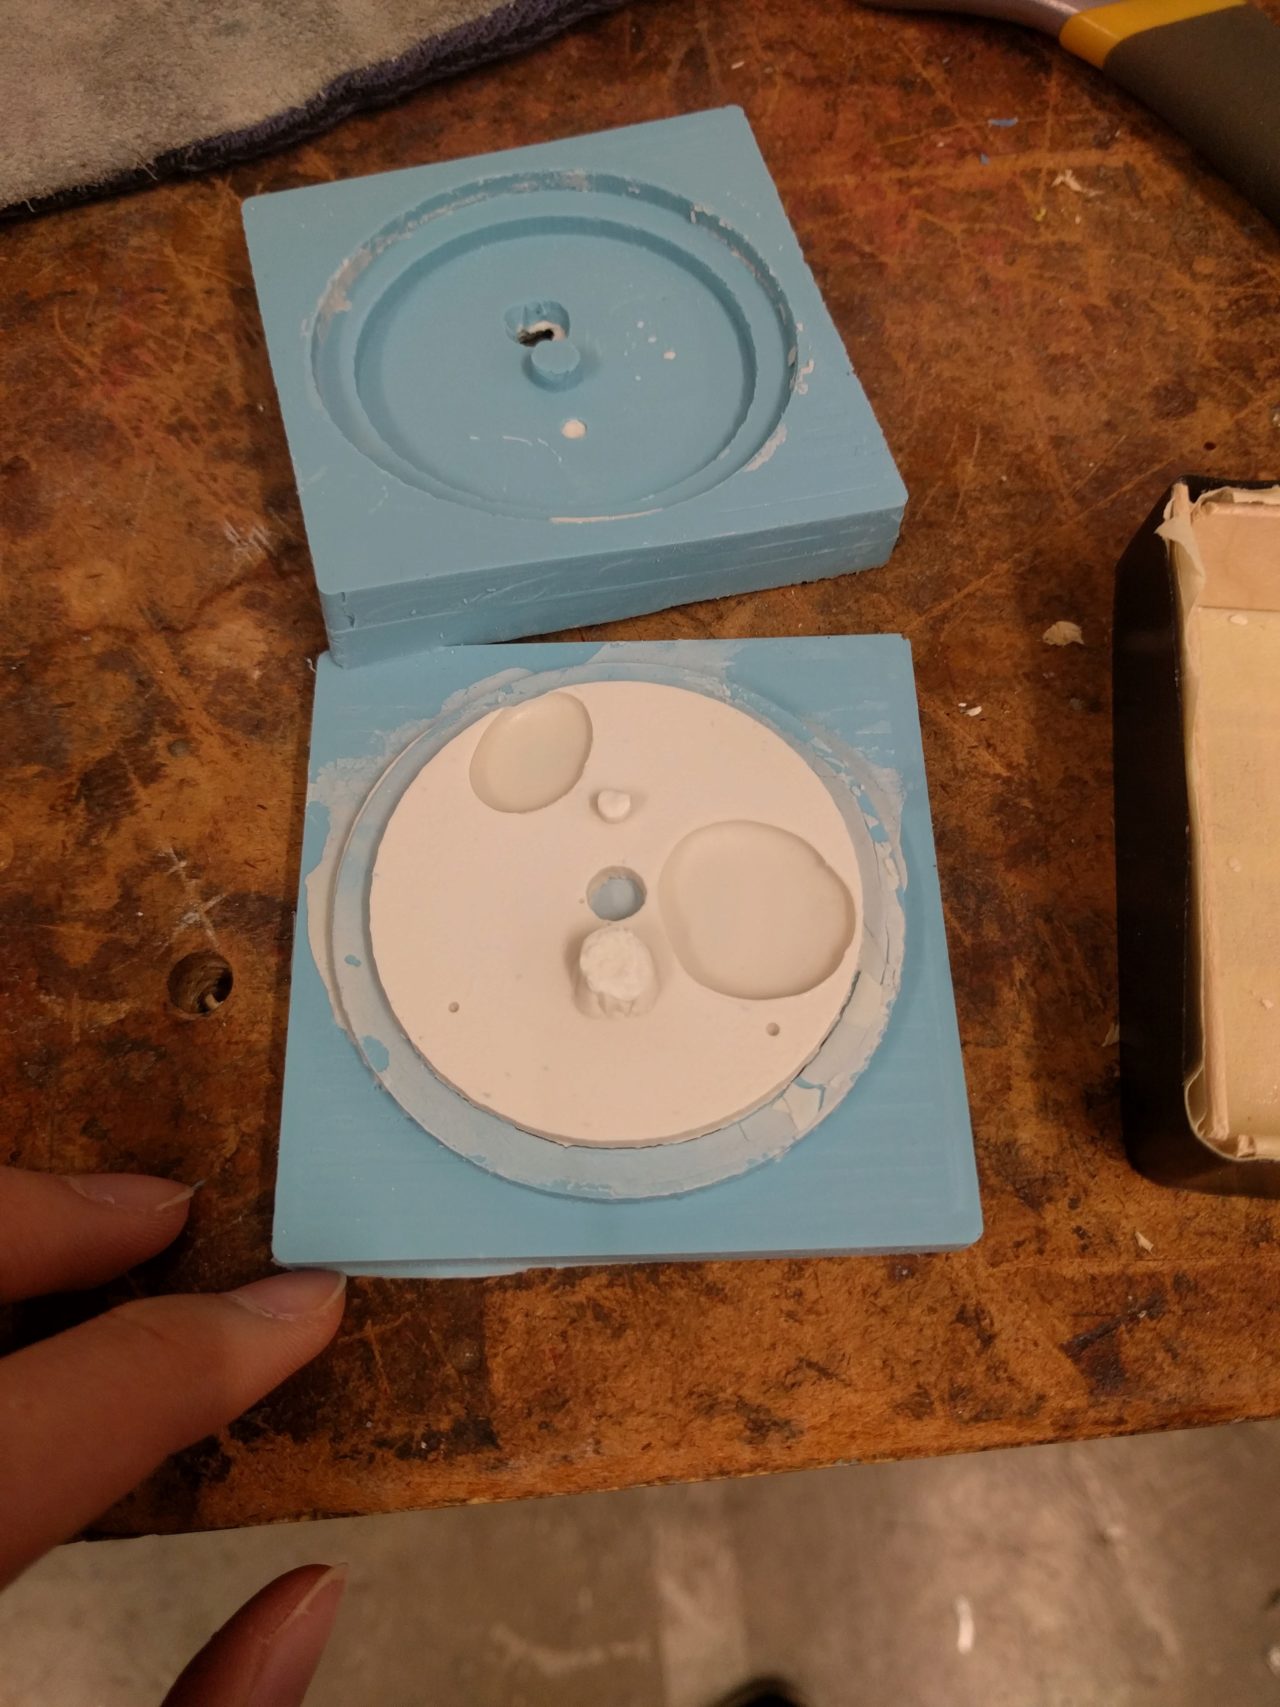
The next day, I unmolded the Omoo piece from the wax, which released quite nicely. The silicon captured the uneven texture of the wax blank very well. If I do this for my final project, I will make sure the wax looks smooth before casting the Omoo. I naively tried to cast some drystone but mixing it up according to instructions and pouring it into the mold which I had just taped the sides together with electical tape. I ran into 3 problems, first, the sprue hole was much too tiny for the drystone slurry, the dryston was way to thick to pour, and the electrical tape was far too flimsy to hold to mold together, so the slurry seeped out of the edges and caused the Omoo to buldge upas I added more slurry. I was too impatient to wait for this to cure, so I just scraped out the semi-solid drystone cast and cleaned things up with a wet paper towel and a pencil for the tight corners. I made a makeshift rigid container for the mold out of stirring sticks, electrical and masking tape. I widened the sprue hole with an exacto knife and I added maybe 3mL more water than the directions suggested. This set up worked so much better.

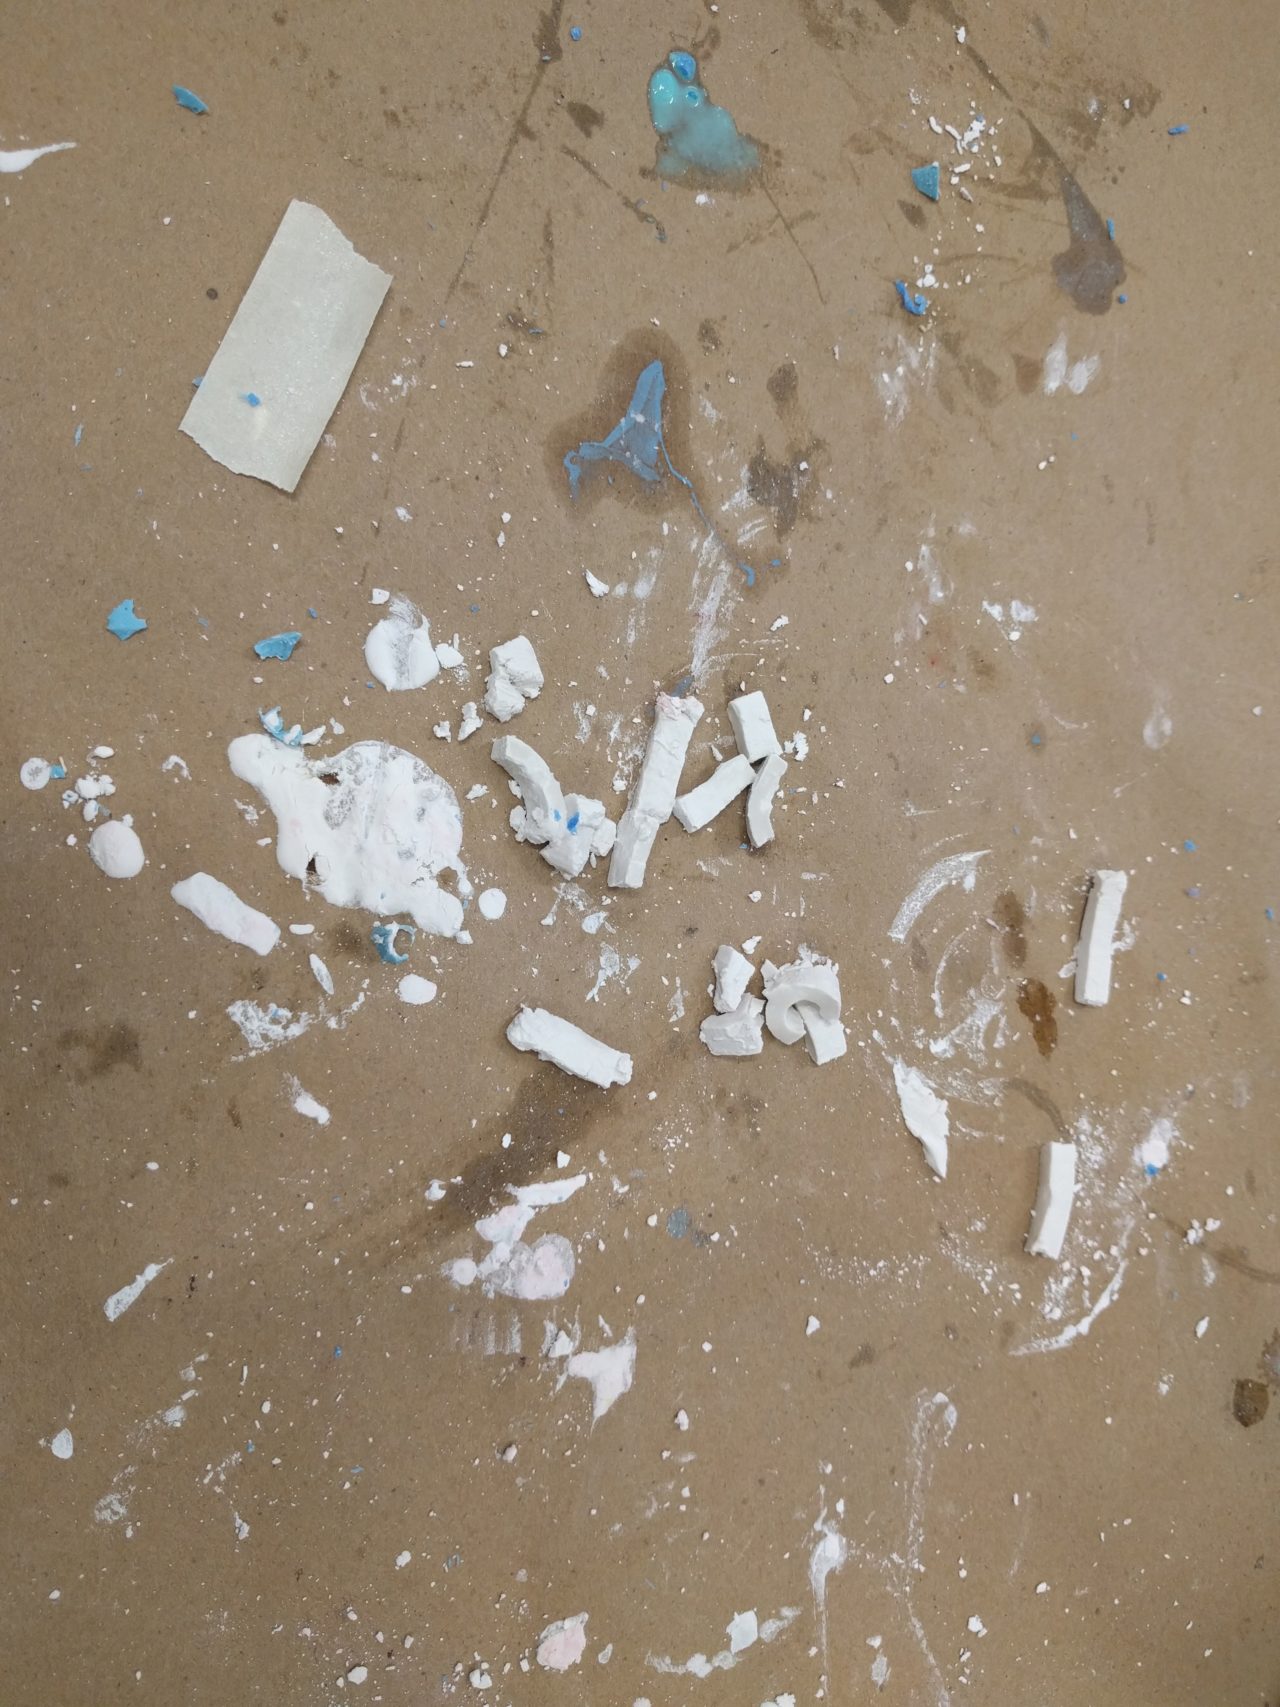
After 40mins, I removed the drystone from the mold, I noticed a couple of large bubbles in my cast due to my poor design of putting the sprues in the middle of the cast instead of on a side. Other than that, it looked pretty good. I sanded down the extra pieces from the sprue holes, which was still quite soft and left it to dry more.
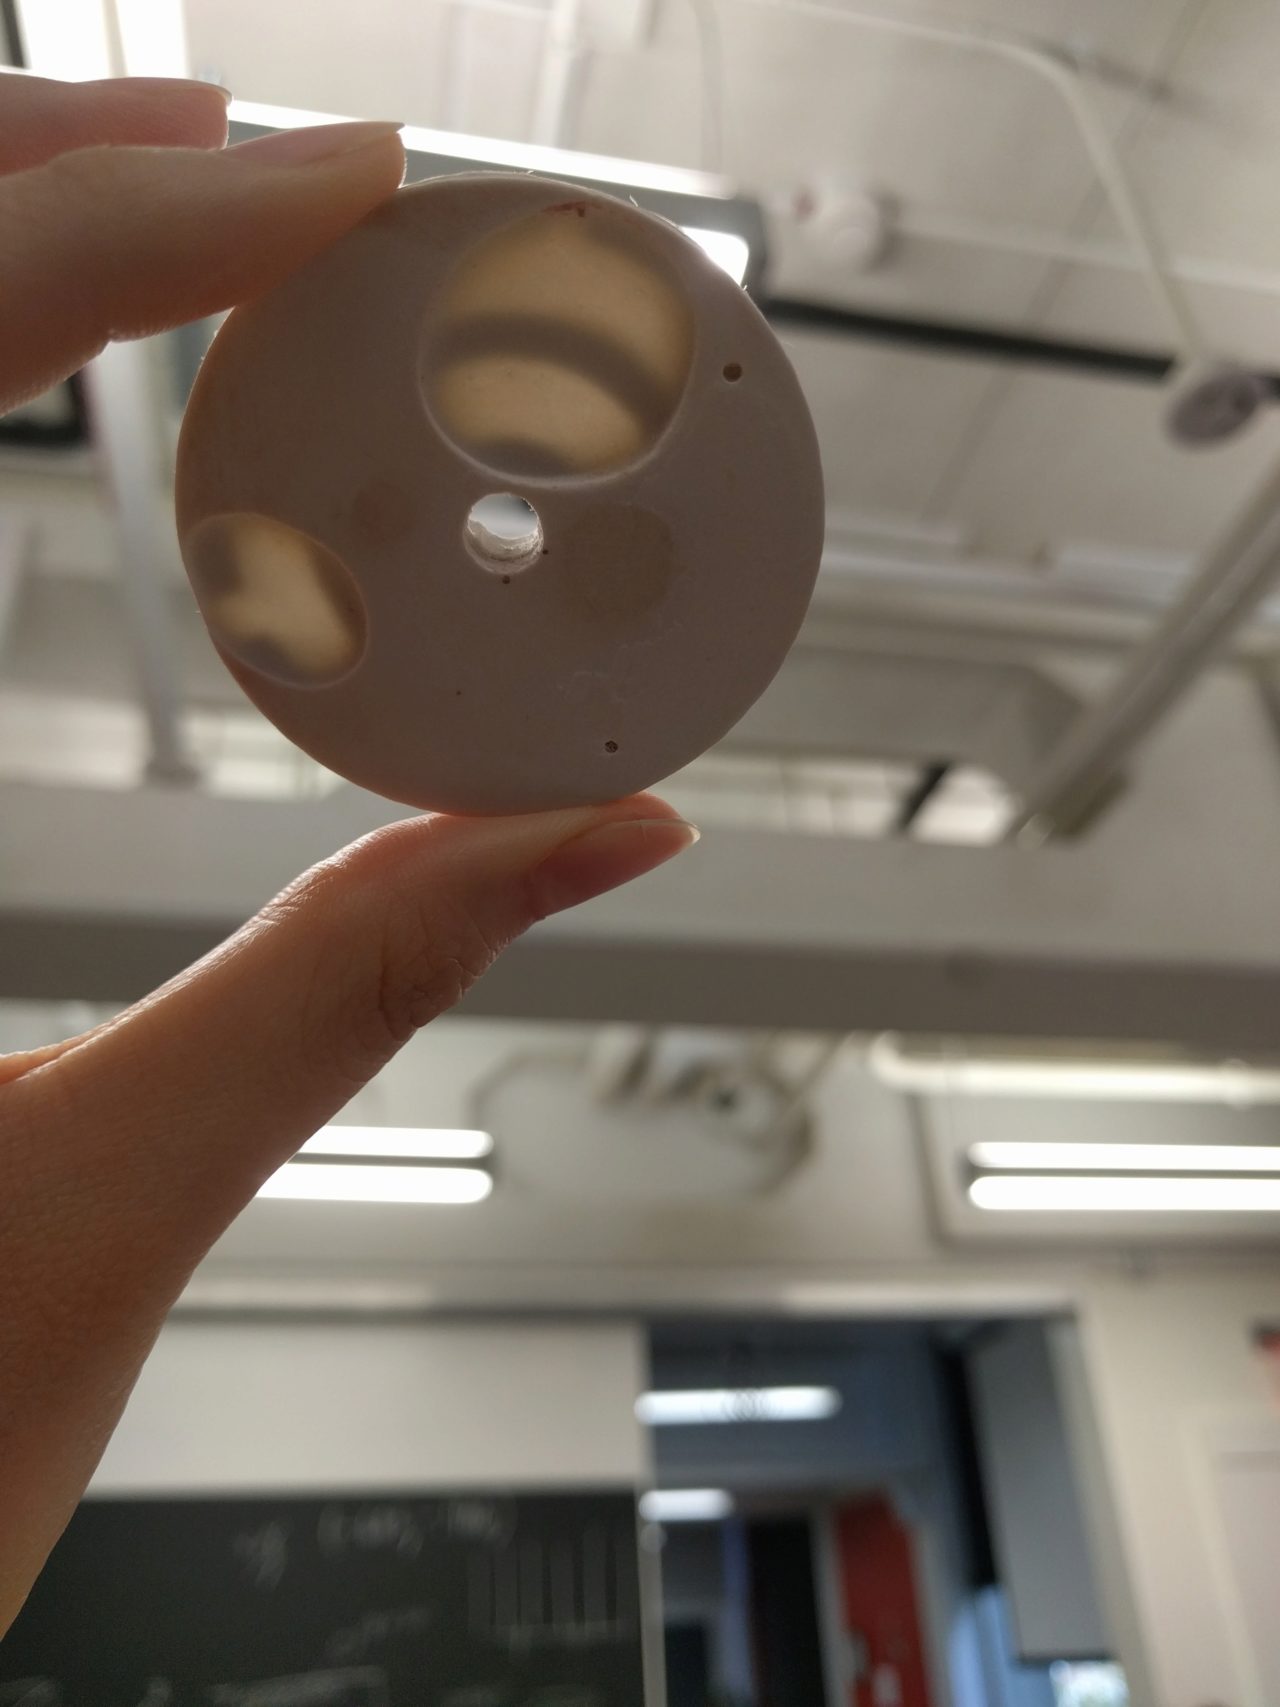
Here's the final result. Not too bad, I might consider doing this for the final project, but I'll have to tweak some things.

Special thanks to Rob, Diana, and Julia for their help this week!