c o m p u t e r C o n t r o l l e d M a c h i n i n g
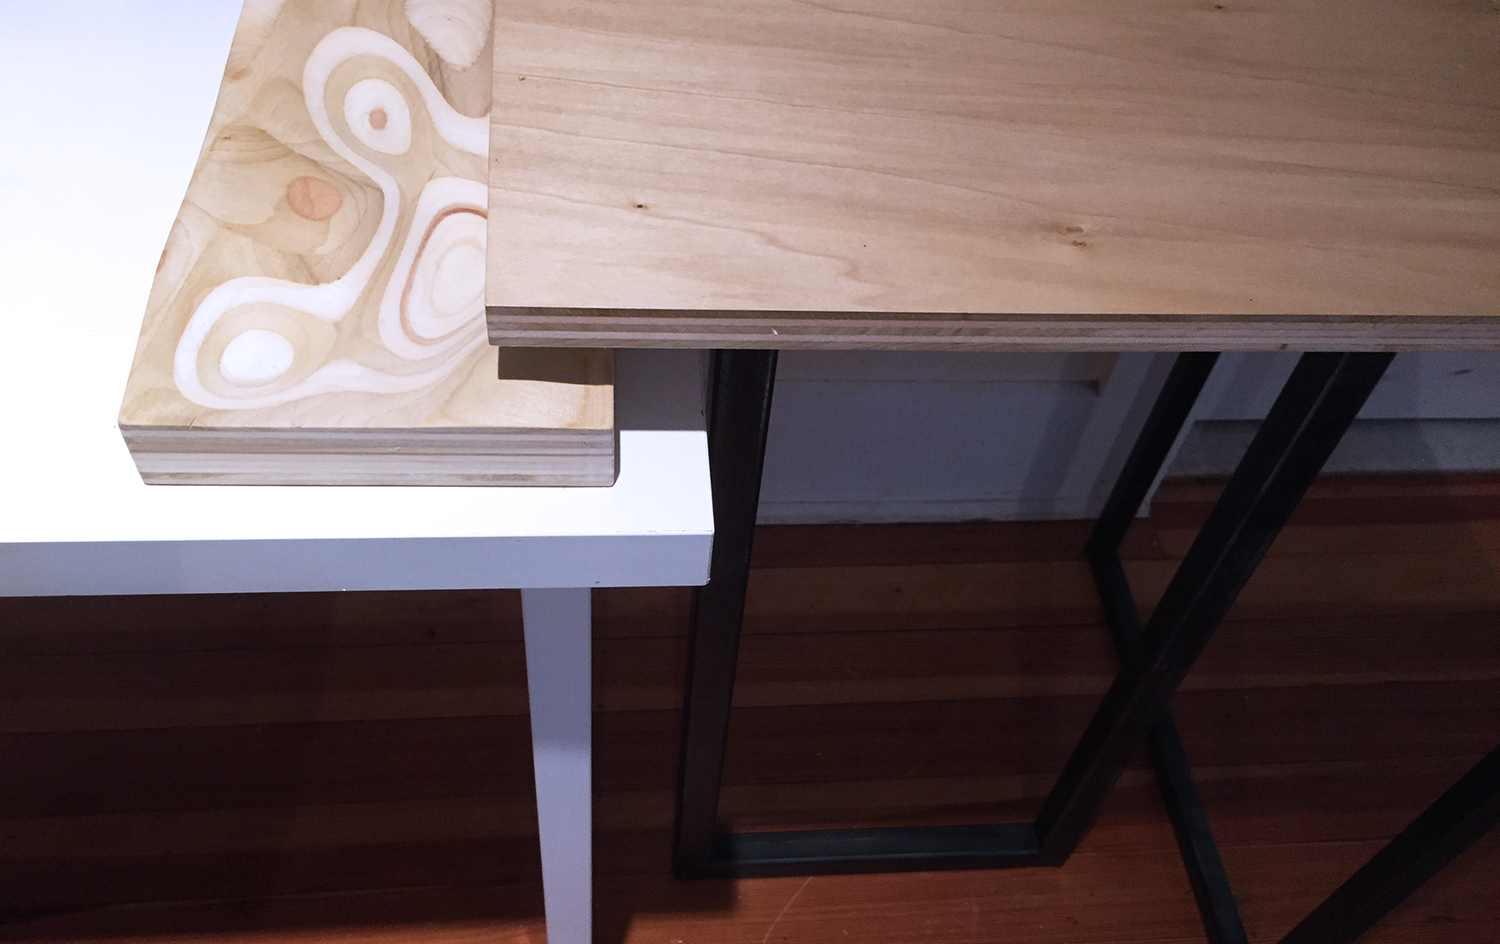
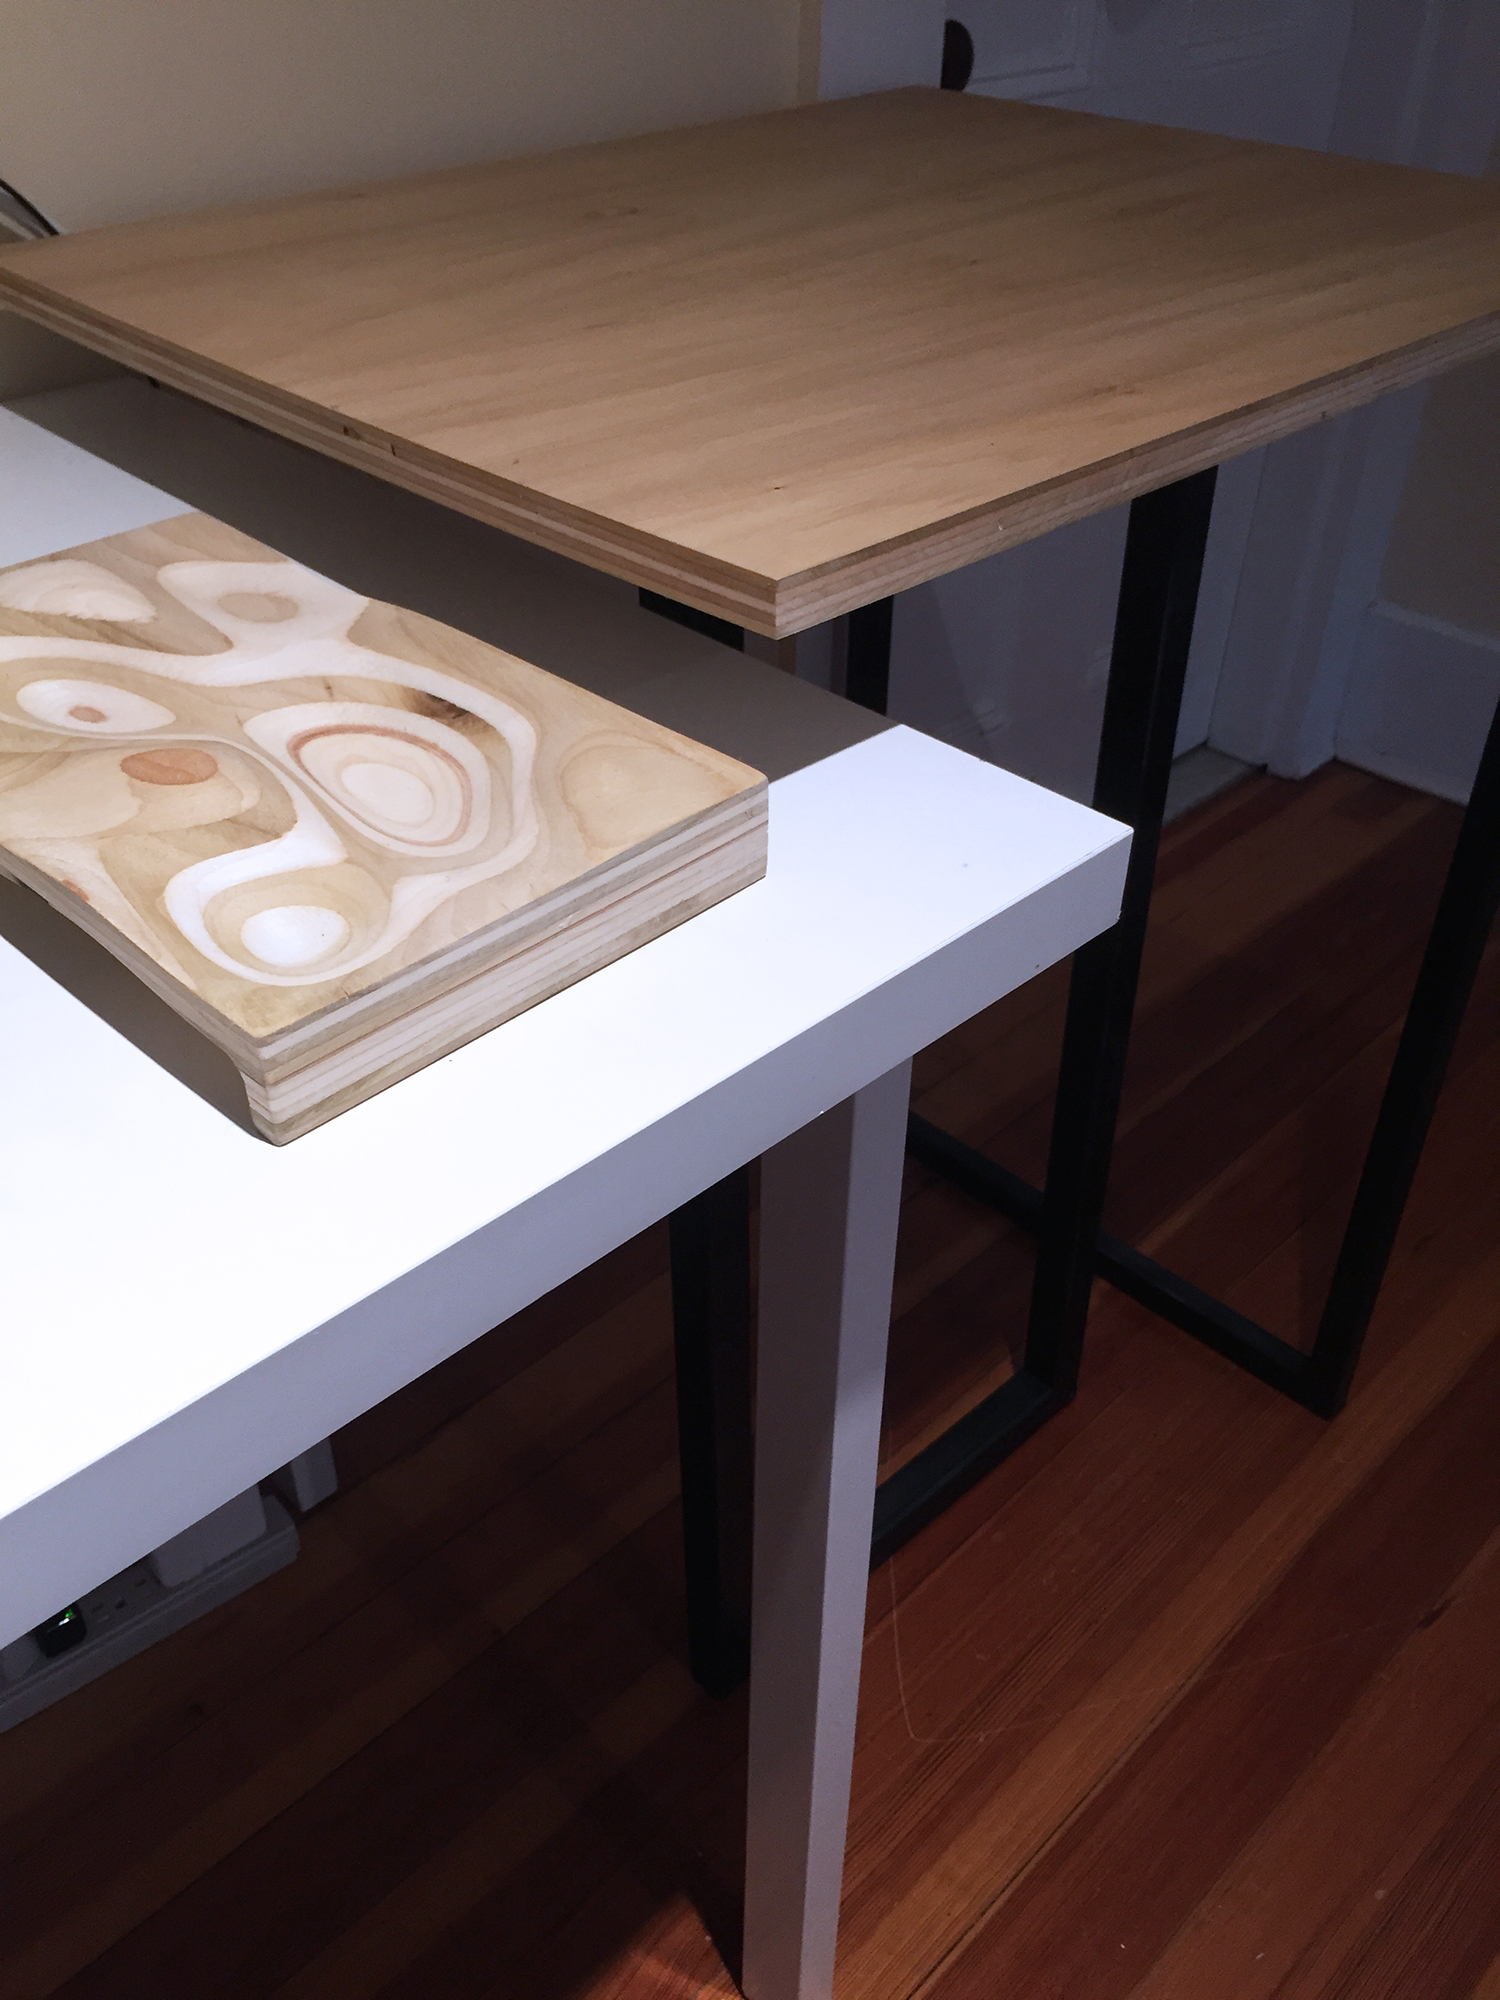
for 'Make something big' i made a desk extension and unorganized desk organizer to match. to Make the desk, i used a non-digital fabrication process. to Make the organizer, i used a flip milling process. using Both these workflows in the same assigment allowed for some interesting comparisons. First was the welding of the table legs.
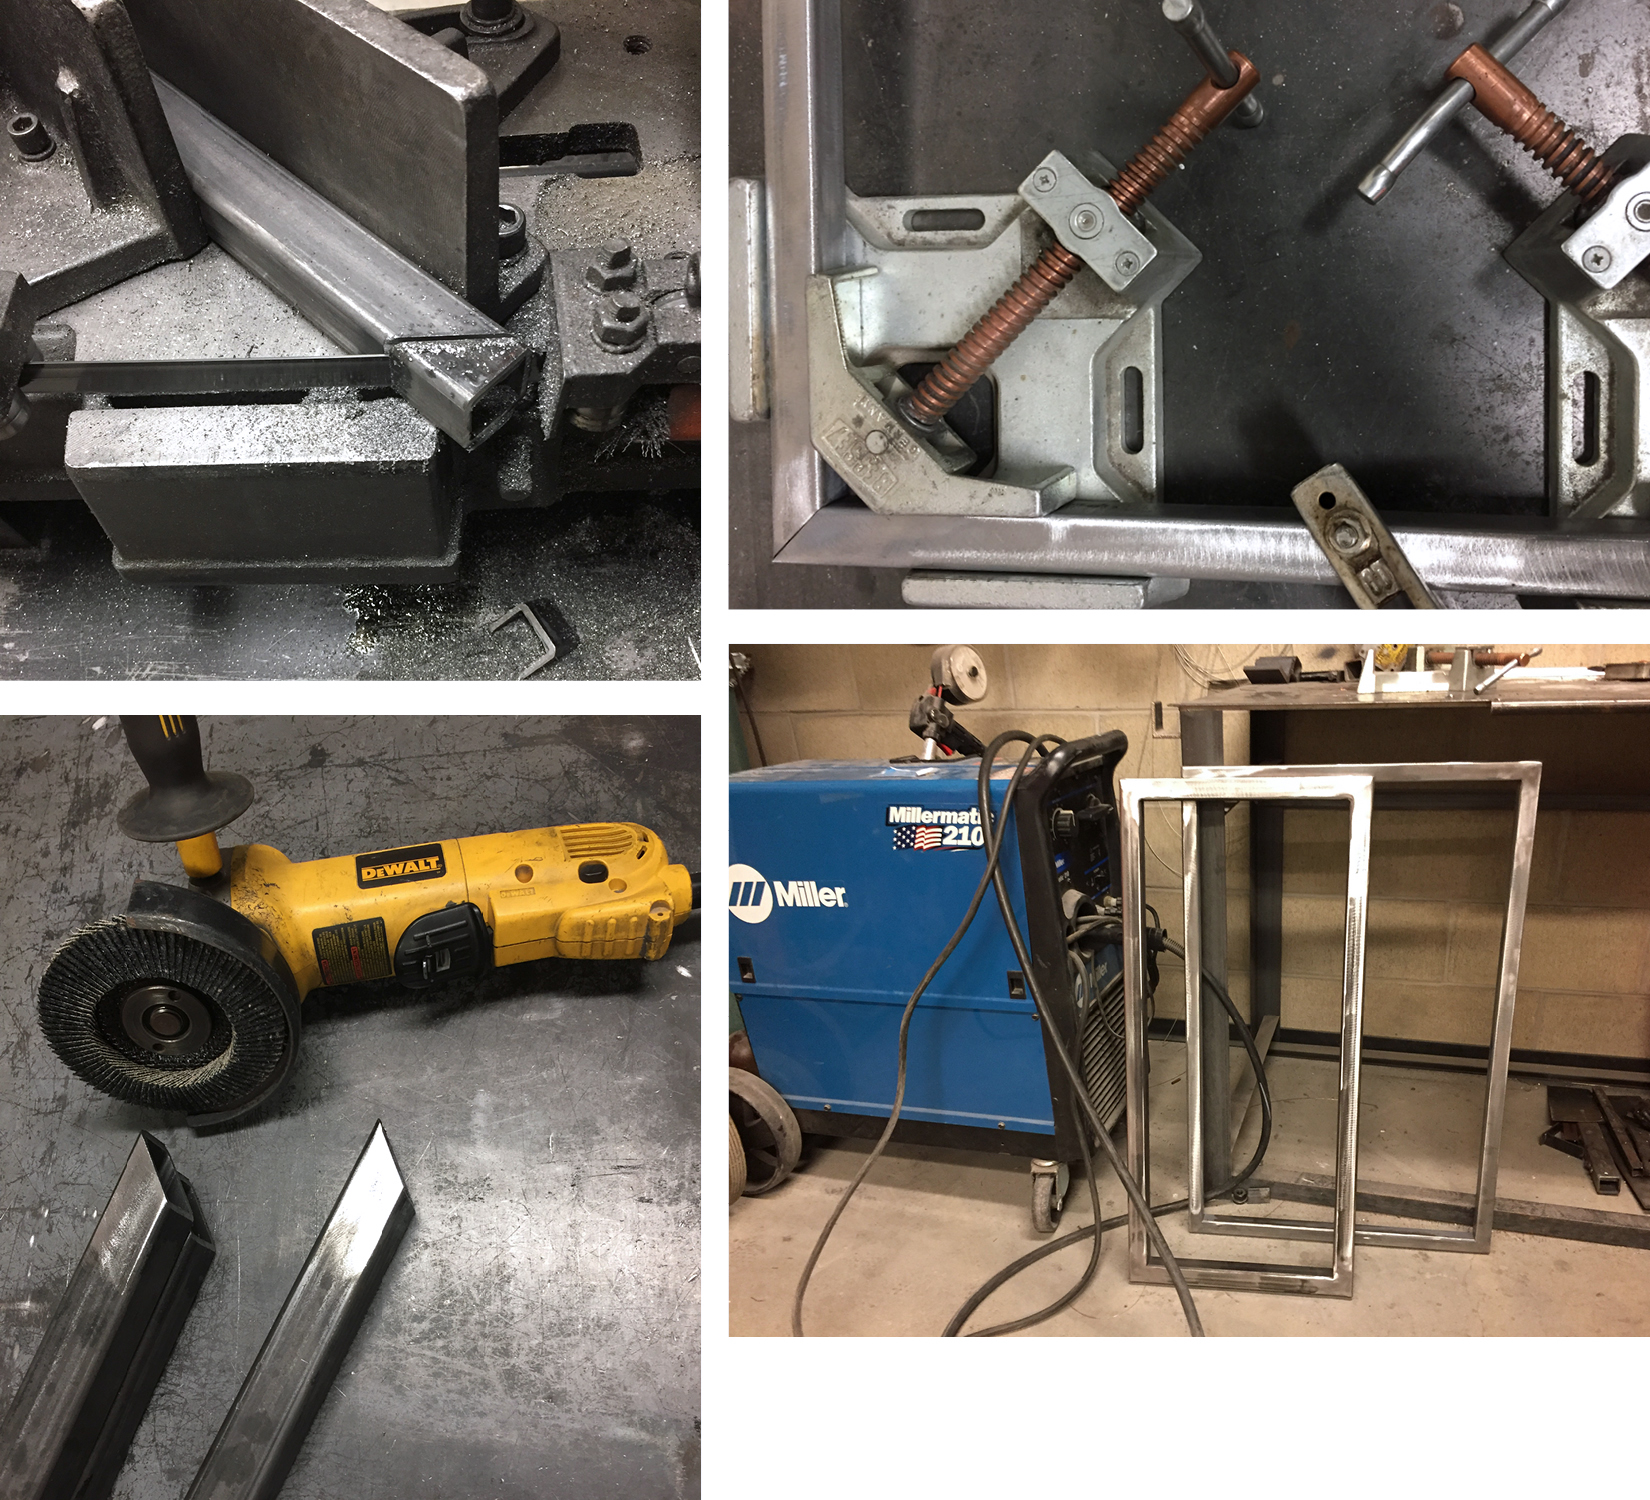
wanting To use only scap, i dug through the pile in the GSD's fabrication lab metal shop and sketched up a design using some square steel sections i found. the whole process included...1)cutting the pieces to length on a chop saw, 2)angeling the edges on a horizontal bandsaw, 3)griding down the areas to be welded, 4)fixturing the pieces, 5)welding, 6)griding down the welds, 7)drilling holes, 8)painting.
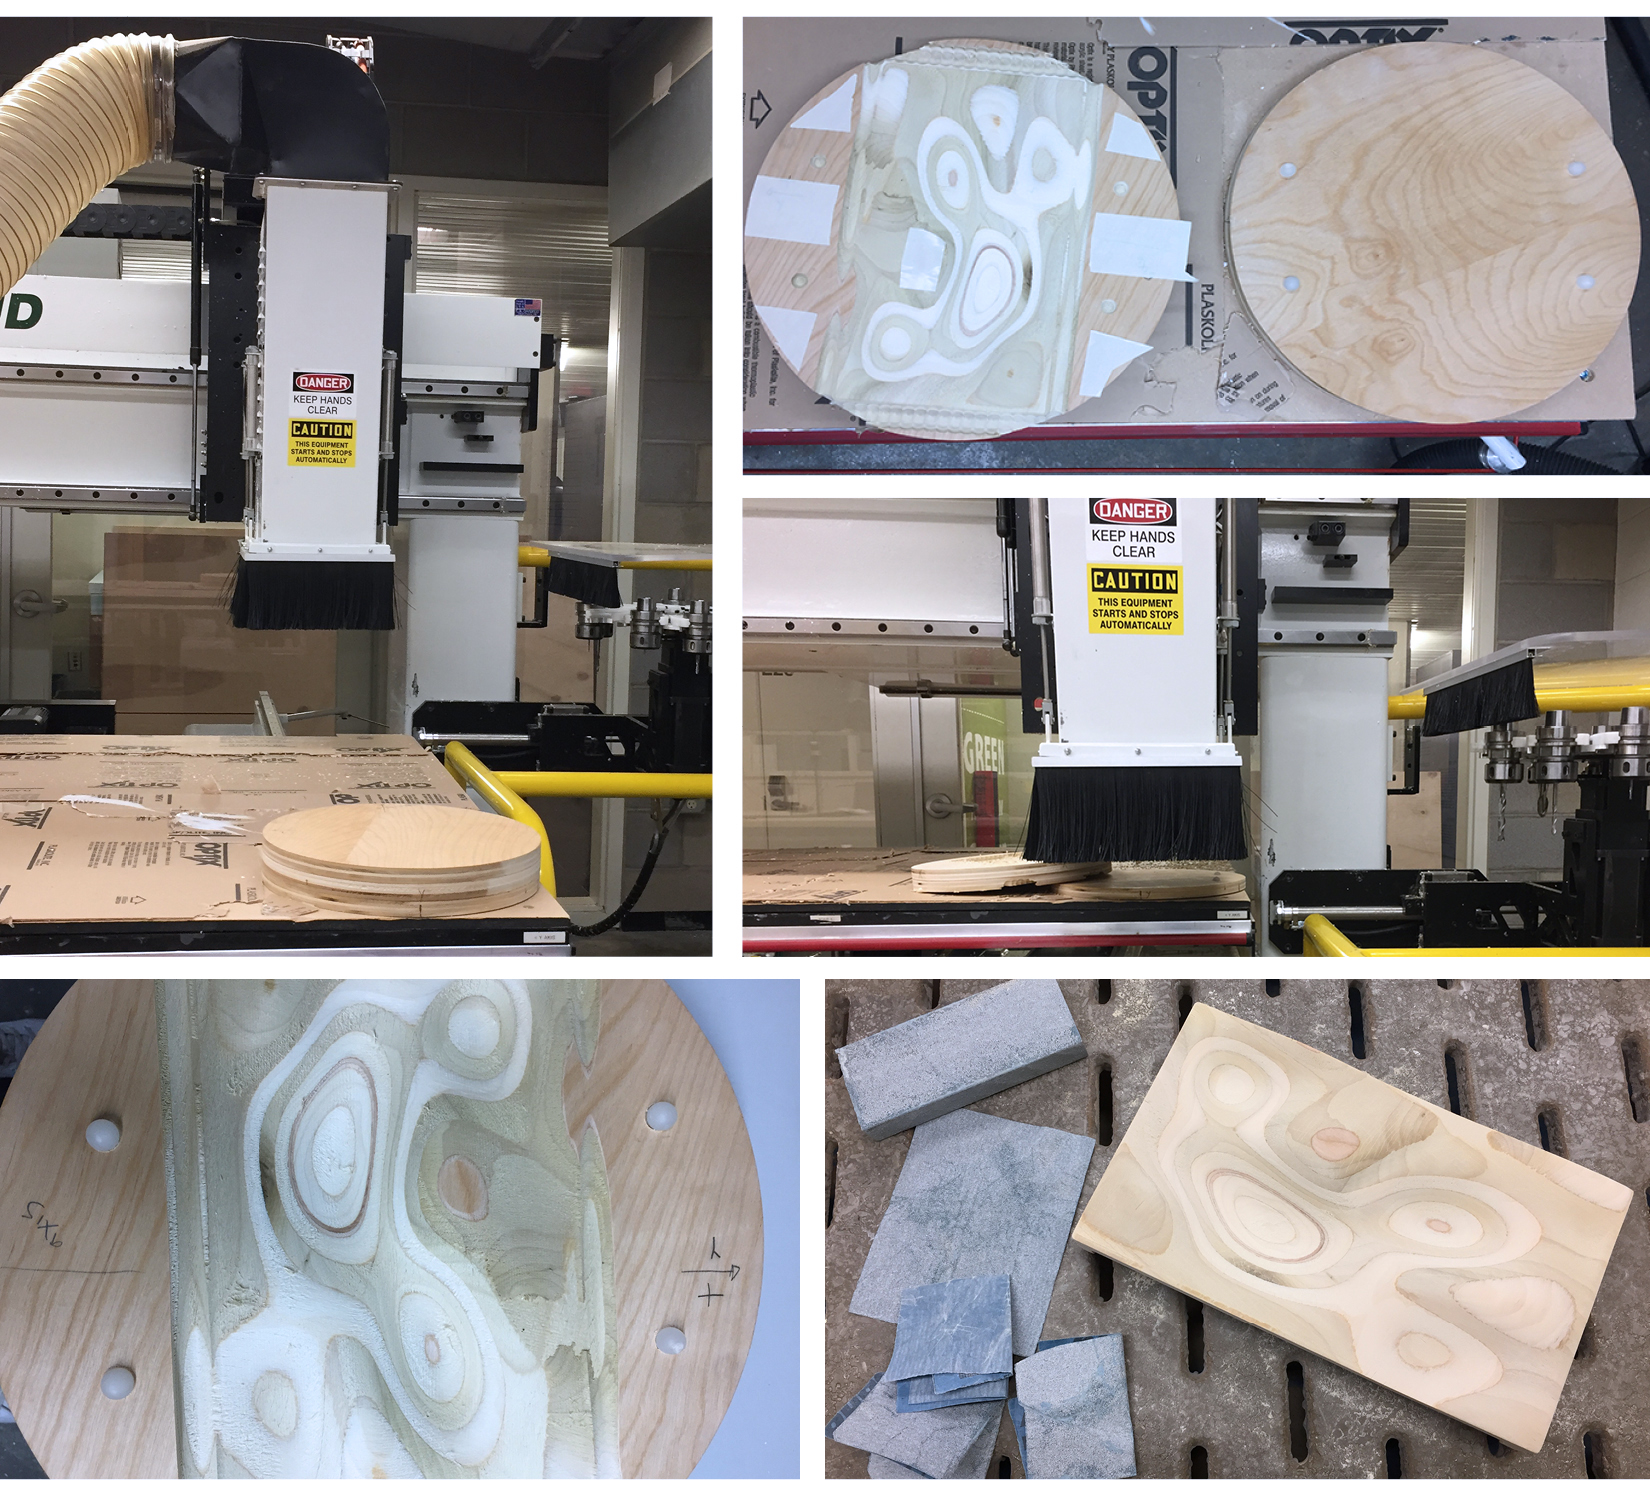
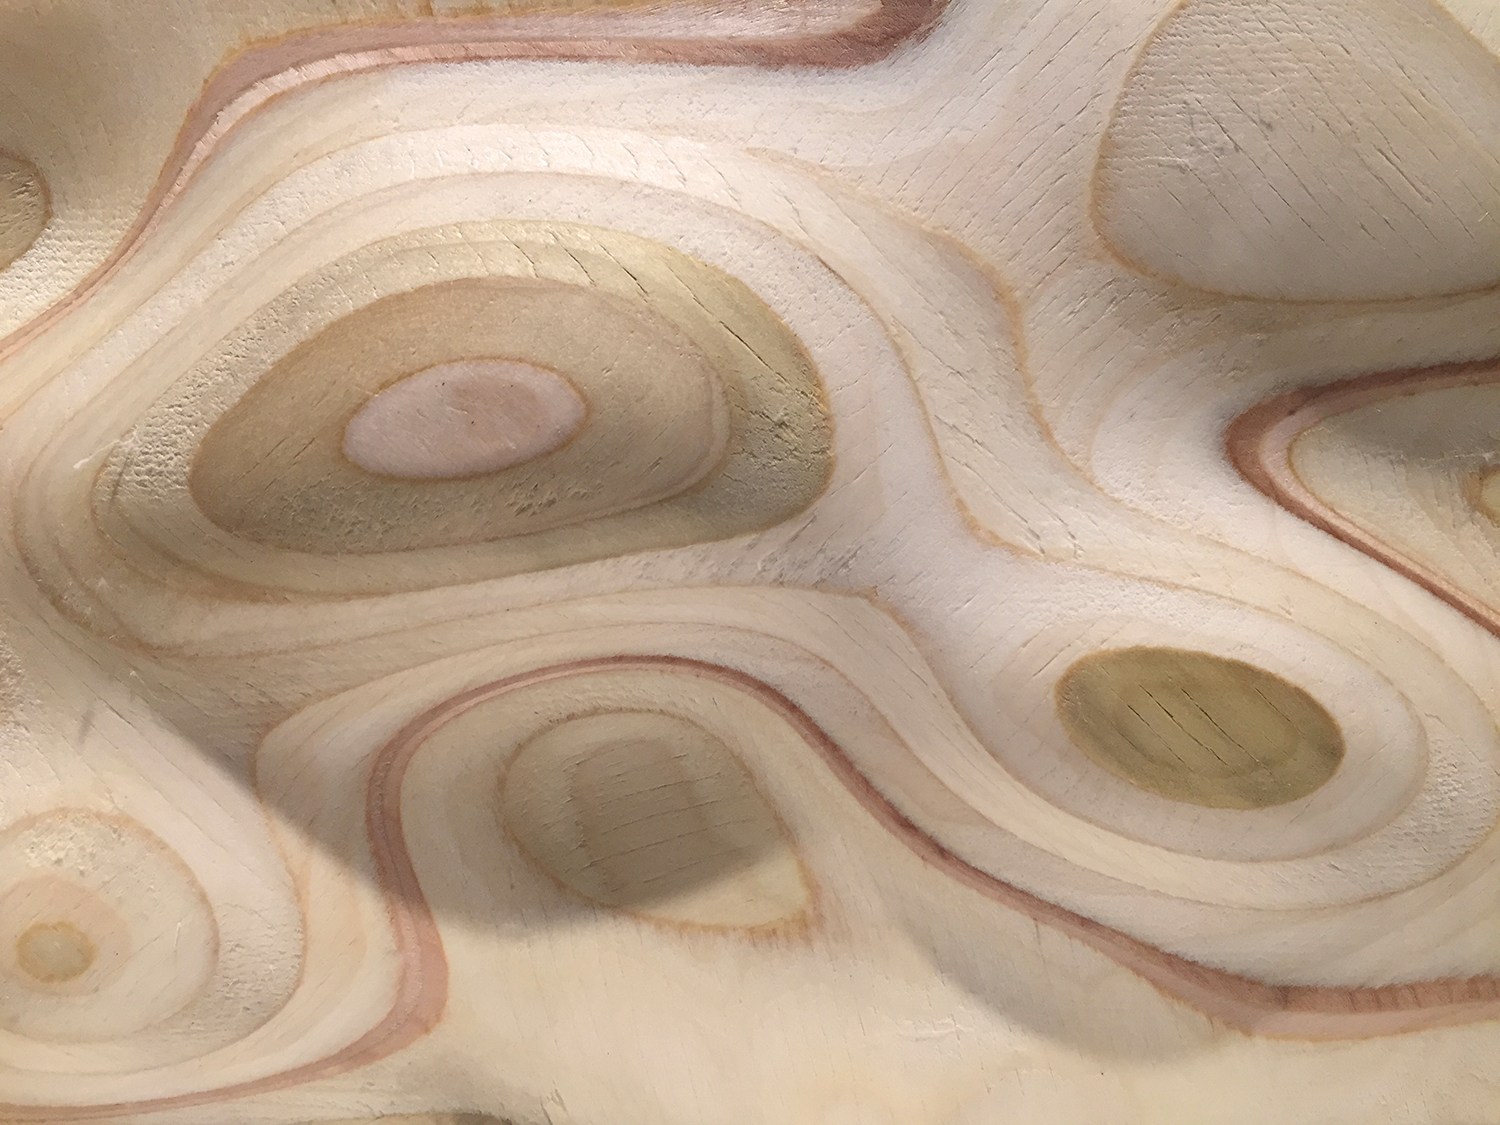
since I have cnc-ed a few things before I wanted to try flip milling. i Modeled a haptic surface in rhino to be used as a disorganized desk organizer. A place to throw all the odds and ends and let them fall into place. The flip mill process was equally as extensive if not more. it Begins with 1) importing the surfaces to Mastercam, 2)assigning tool paths to surfaces, paying special attention to the planes and origins in setting up the flip, 3) laminating the plywood to be milled, 4)positioning the stock to a sacrificial layer with double stick tape, 5)positioning the layers on the mill bed, then using the vacuum pump to fix it in place, 6)running the top level toolpath, 7)removing the stock but leaving the sacrifical layer, 8)running the reference hole tool path, 9)flipping the stock and adhering it back to the sacrifical layer** 10)milling the bottom surface 11)cutting out the mill from the stock**, 11)manually sand down the finish.
of Course everything did not go as planned. it Took the three CNC technical assistants on duty and i four hours to complete a job that had an estimated run time of 30 minutes. when We went to mill the bottom layer, we had to emergency stop because the stock came off. there Simply was not enought area to fix it down with double stick tape because the top layer toolpath had milled out alot of surface area. we Screwed it in the second pass making sure it was not in the way of any toolpaths. the Reference/sacrifical layer also got budged in the process so i had to do my best to reposition it, knowing i would loose some precision. luckily It was still on the rough pass so it could still be milled down. then On the final contour cut we sized up to a larger endmill. but The stock was so small that the force of the drilling beat out the suction from the vacuum. we Had to e-stop the machine again and decided it would be best if i just cut it out on the band saw. At this point we had lost too many reference points.
final Compositions below. the Plywood and steel table and legs took about 8 hours to make. the Small plywood tray also took about 8 hours to make. two Very different items and two very different processes but they do layer together quite well.