Week 06
embedded programming
Tools
- Eagle
- Roland SRM-20
- Arduino IDE
- FabTinyISP from Week 02
Programming 1 LED
This week we added some basic functionality to the boards we made in Week 4.
This is all new to me, so I started by using the Arduino IDE. I startedby running the blink sample file to confirm that I had identified the LED’s pin correctly in code.
The LED didn’t light up, although I could see the blinking pattern when I used the multimeter to try to diagnose, at which point I learned that my LED was backwards. It was a good excuse to try out the heat gun to remove the LED from the board, before resoldering in the correct orientation. When I plugged the board back in, it blinked.
Next, I tried programming functionality in the button, starting with this code (thanks, Jackie!):
const int buttonPin = 8;
const int ledPin = 2;
int buttonState = 0;

void setup() {
	pinMode(ledPin, OUTPUT);
	pinMode(buttonPin, INPUT);
}

void loop() {
	buttonState = digitalRead(buttonPin);

	if (buttonState == HIGH) {
		digitalWrite(ledPin, HIGH);
	} else {
		digitalWrite(ledPin, LOW);
	}
}
After spending too long trying to troubleshoot, I spoke with Axel who reminded me that since I hadn’t put a pullup resistor on the board itself, I needed to activate it in the ATTiny44. I did this by changing the pinMode in void setup(), as shown below:
void setup() {
	pinMode(ledPin, OUTPUT);
	pinMode(buttonPin, INPUT_PULLUP);
}
It worked!
Adding 2 LEDs
Next, I wanted to get some more practice milling, soldering, and programming, so I tried adding two more LEDs to the board.
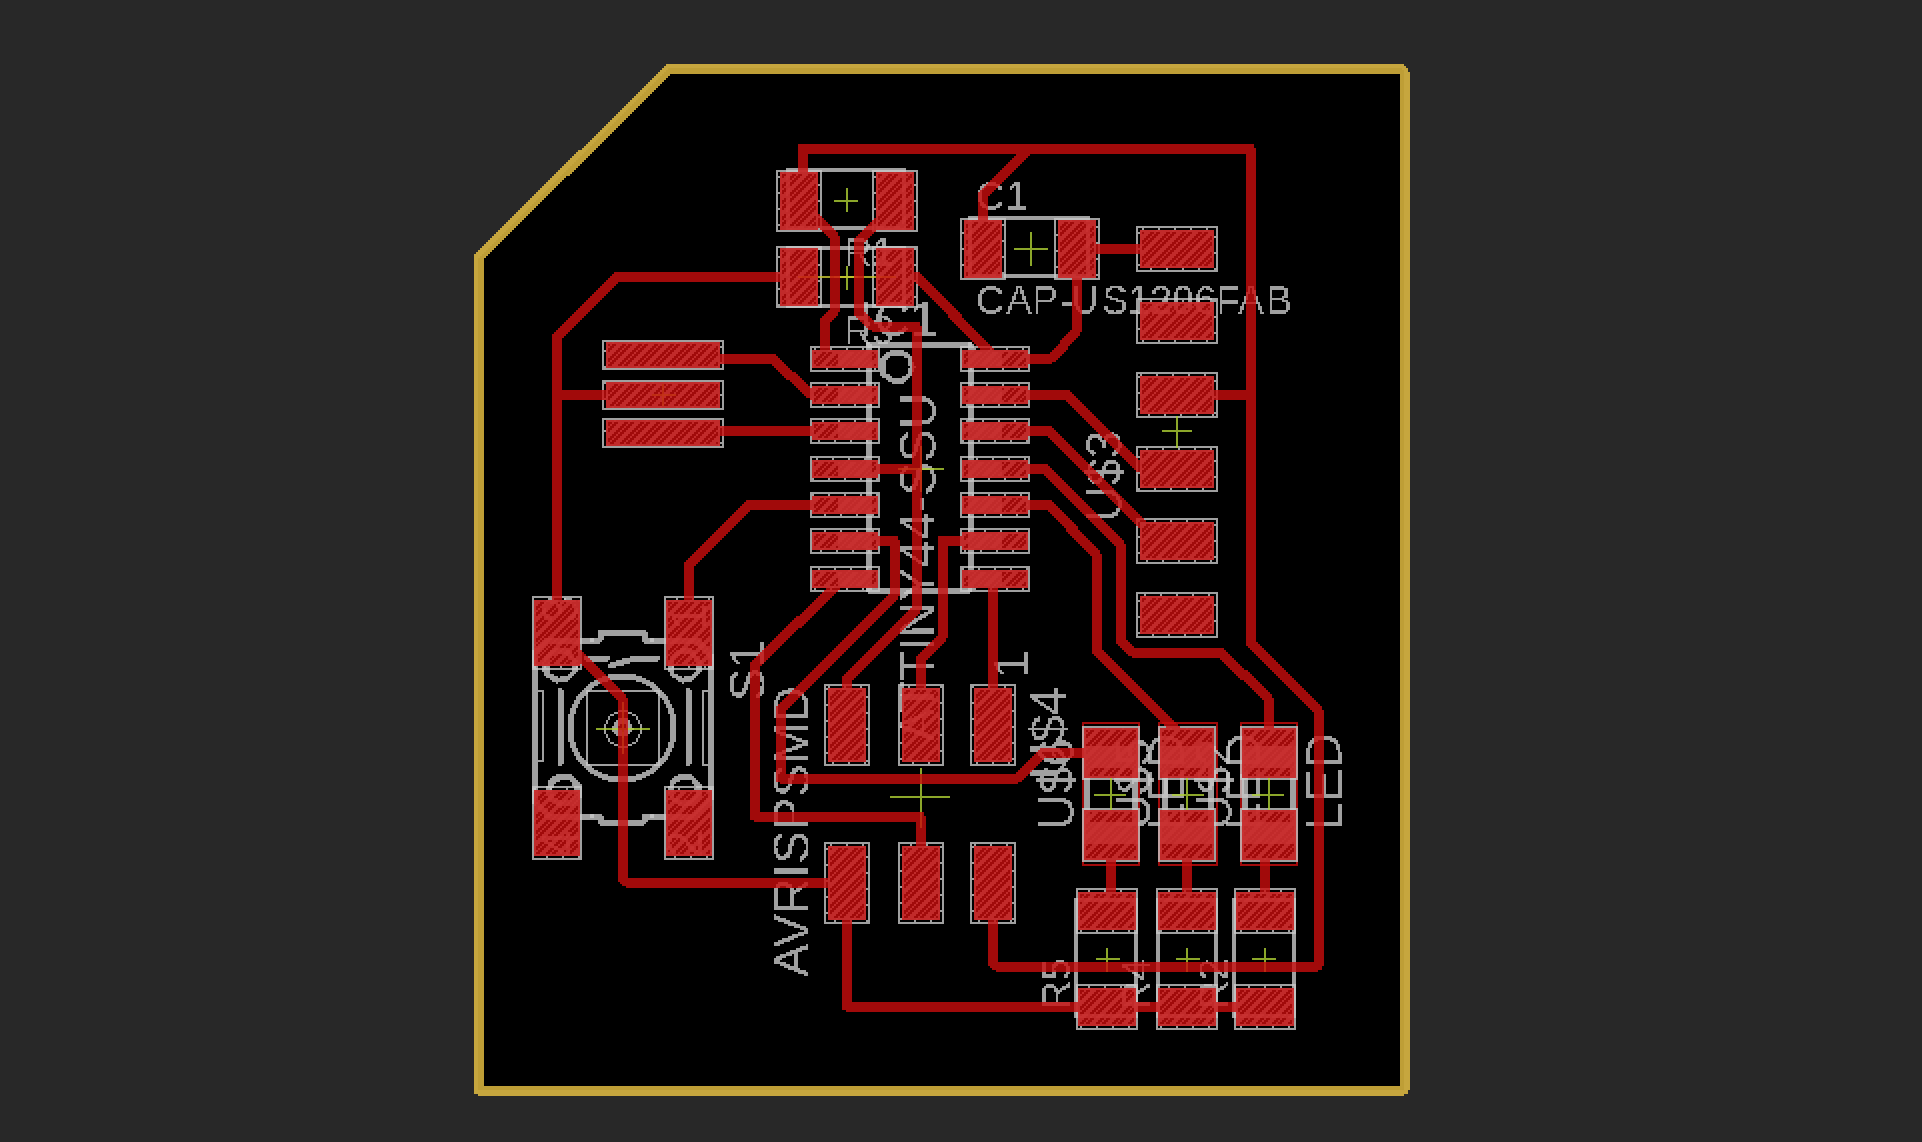
I updated the design in Eagle, adding two more LEDs and their respective resistors, each to their own pins on the ATTiny.
I used the Roland SRM-20 to mill and soldered on the components.
Programming 3 LEDs
Once everything was soldered, I did some quick tests, modifying the blink script to confirm each individual LED’s port and that everything was working as expected. Surprisingly, it was.
Next, I modified the loop to sequence through each of the LEDs in order, turning each one off before moving to the next.
const int ledPinA = 2;
const int ledPinB = 3;
const int ledPinC = 7;
const int timing = 100;

void setup() {
  // initialize digital pin LED_BUILTIN as an output.
  pinMode(ledPinA, OUTPUT);
  pinMode(ledPinB, OUTPUT);
  pinMode(ledPinC, OUTPUT);
}

void loop() {
  digitalWrite(ledPinA, HIGH);
  delay(timing);
  digitalWrite(ledPinA, LOW);
  delay(timing);

  digitalWrite(ledPinB, HIGH);
  delay(timing);
  digitalWrite(ledPinB, LOW);
  delay(timing);

  digitalWrite(ledPinC, HIGH);
  delay(timing);
  digitalWrite(ledPinC, LOW);
  delay(timing);
}
The results:
Then, I smoothed things out by updating the loop:
void loop(){
  fade();
}

void fade() {
  // Turn on the LEDs one by one, with a delay between each
  digitalWrite(ledPinA, HIGH);
  delay(timing);
  digitalWrite(ledPinB, HIGH);
  delay(timing);
  digitalWrite(ledPinC, HIGH);
  delay(timing);

  // Turn off the LEDs one by one, with a delay between each
  digitalWrite(ledPinA, LOW);
  delay(timing);
  digitalWrite(ledPinB, LOW);
  delay(timing);
  digitalWrite(ledPinC, LOW);
  delay(timing);
}
The results:
Finally, I set the button to toggle between different LED modes, remembering to set the internal pullup resistor.
// Assign pins
const int ledPinA = 2;
const int ledPinB = 3;
const int ledPinC = 7;
const int timing = 100;
const int buttonPin = 8;
int buttonState = 0;
int displayMode = 0;

void setup() {
  // initialize digital pins
  pinMode(ledPinA, OUTPUT);
  pinMode(ledPinB, OUTPUT);
  pinMode(ledPinC, OUTPUT);
  pinMode(buttonPin, INPUT_PULLUP); //Don't forget to set the pullup resistor!
}

void loop() {
  buttonState = digitalRead(buttonPin);

  // Only do something if the button is pressed
  if (buttonState == LOW) {
     if (displayMode == 0) {
      fade();
    } else if (displayMode == 1) {
      allOn();
    } else if (displayMode == 2) {
      allOff();
    } else {
    }
  }
}

void allOn() {
   // Turn on all the LEDs at the same time
   digitalWrite(ledPinA, HIGH);
   digitalWrite(ledPinB, HIGH);
   digitalWrite(ledPinC, HIGH);
   delay(500);

   updateDisplayMode();
}

void allOff() {
   // Turn off all the LEDs at the same time
   digitalWrite(ledPinA, LOW);
   digitalWrite(ledPinB, LOW);
   digitalWrite(ledPinC, LOW);
   delay(500);

   updateDisplayMode();
}


void fade() {
  // Turn on the LEDs one by one, with a delay between each
  digitalWrite(ledPinA, HIGH);
  delay(timing);
  digitalWrite(ledPinB, HIGH);
  delay(timing);
  digitalWrite(ledPinC, HIGH);
  delay(timing);

  // Turn off the LEDs one by one, with a delay between each
  digitalWrite(ledPinA, LOW);
  delay(timing);
  digitalWrite(ledPinB, LOW);
  delay(timing);
  digitalWrite(ledPinC, LOW);
  delay(timing);
}

void updateDisplayMode() {
  // Cycle through to the next display mode after each button push
  if (displayMode < 2) {
    displayMode += 1;
  } else {
    displayMode = 0;
  }
}
The results:
I need to learn a bit more about how to better handle listening for a button push in C, since this solution depends on a delay rather than only registering when the button is pushed down.
Files
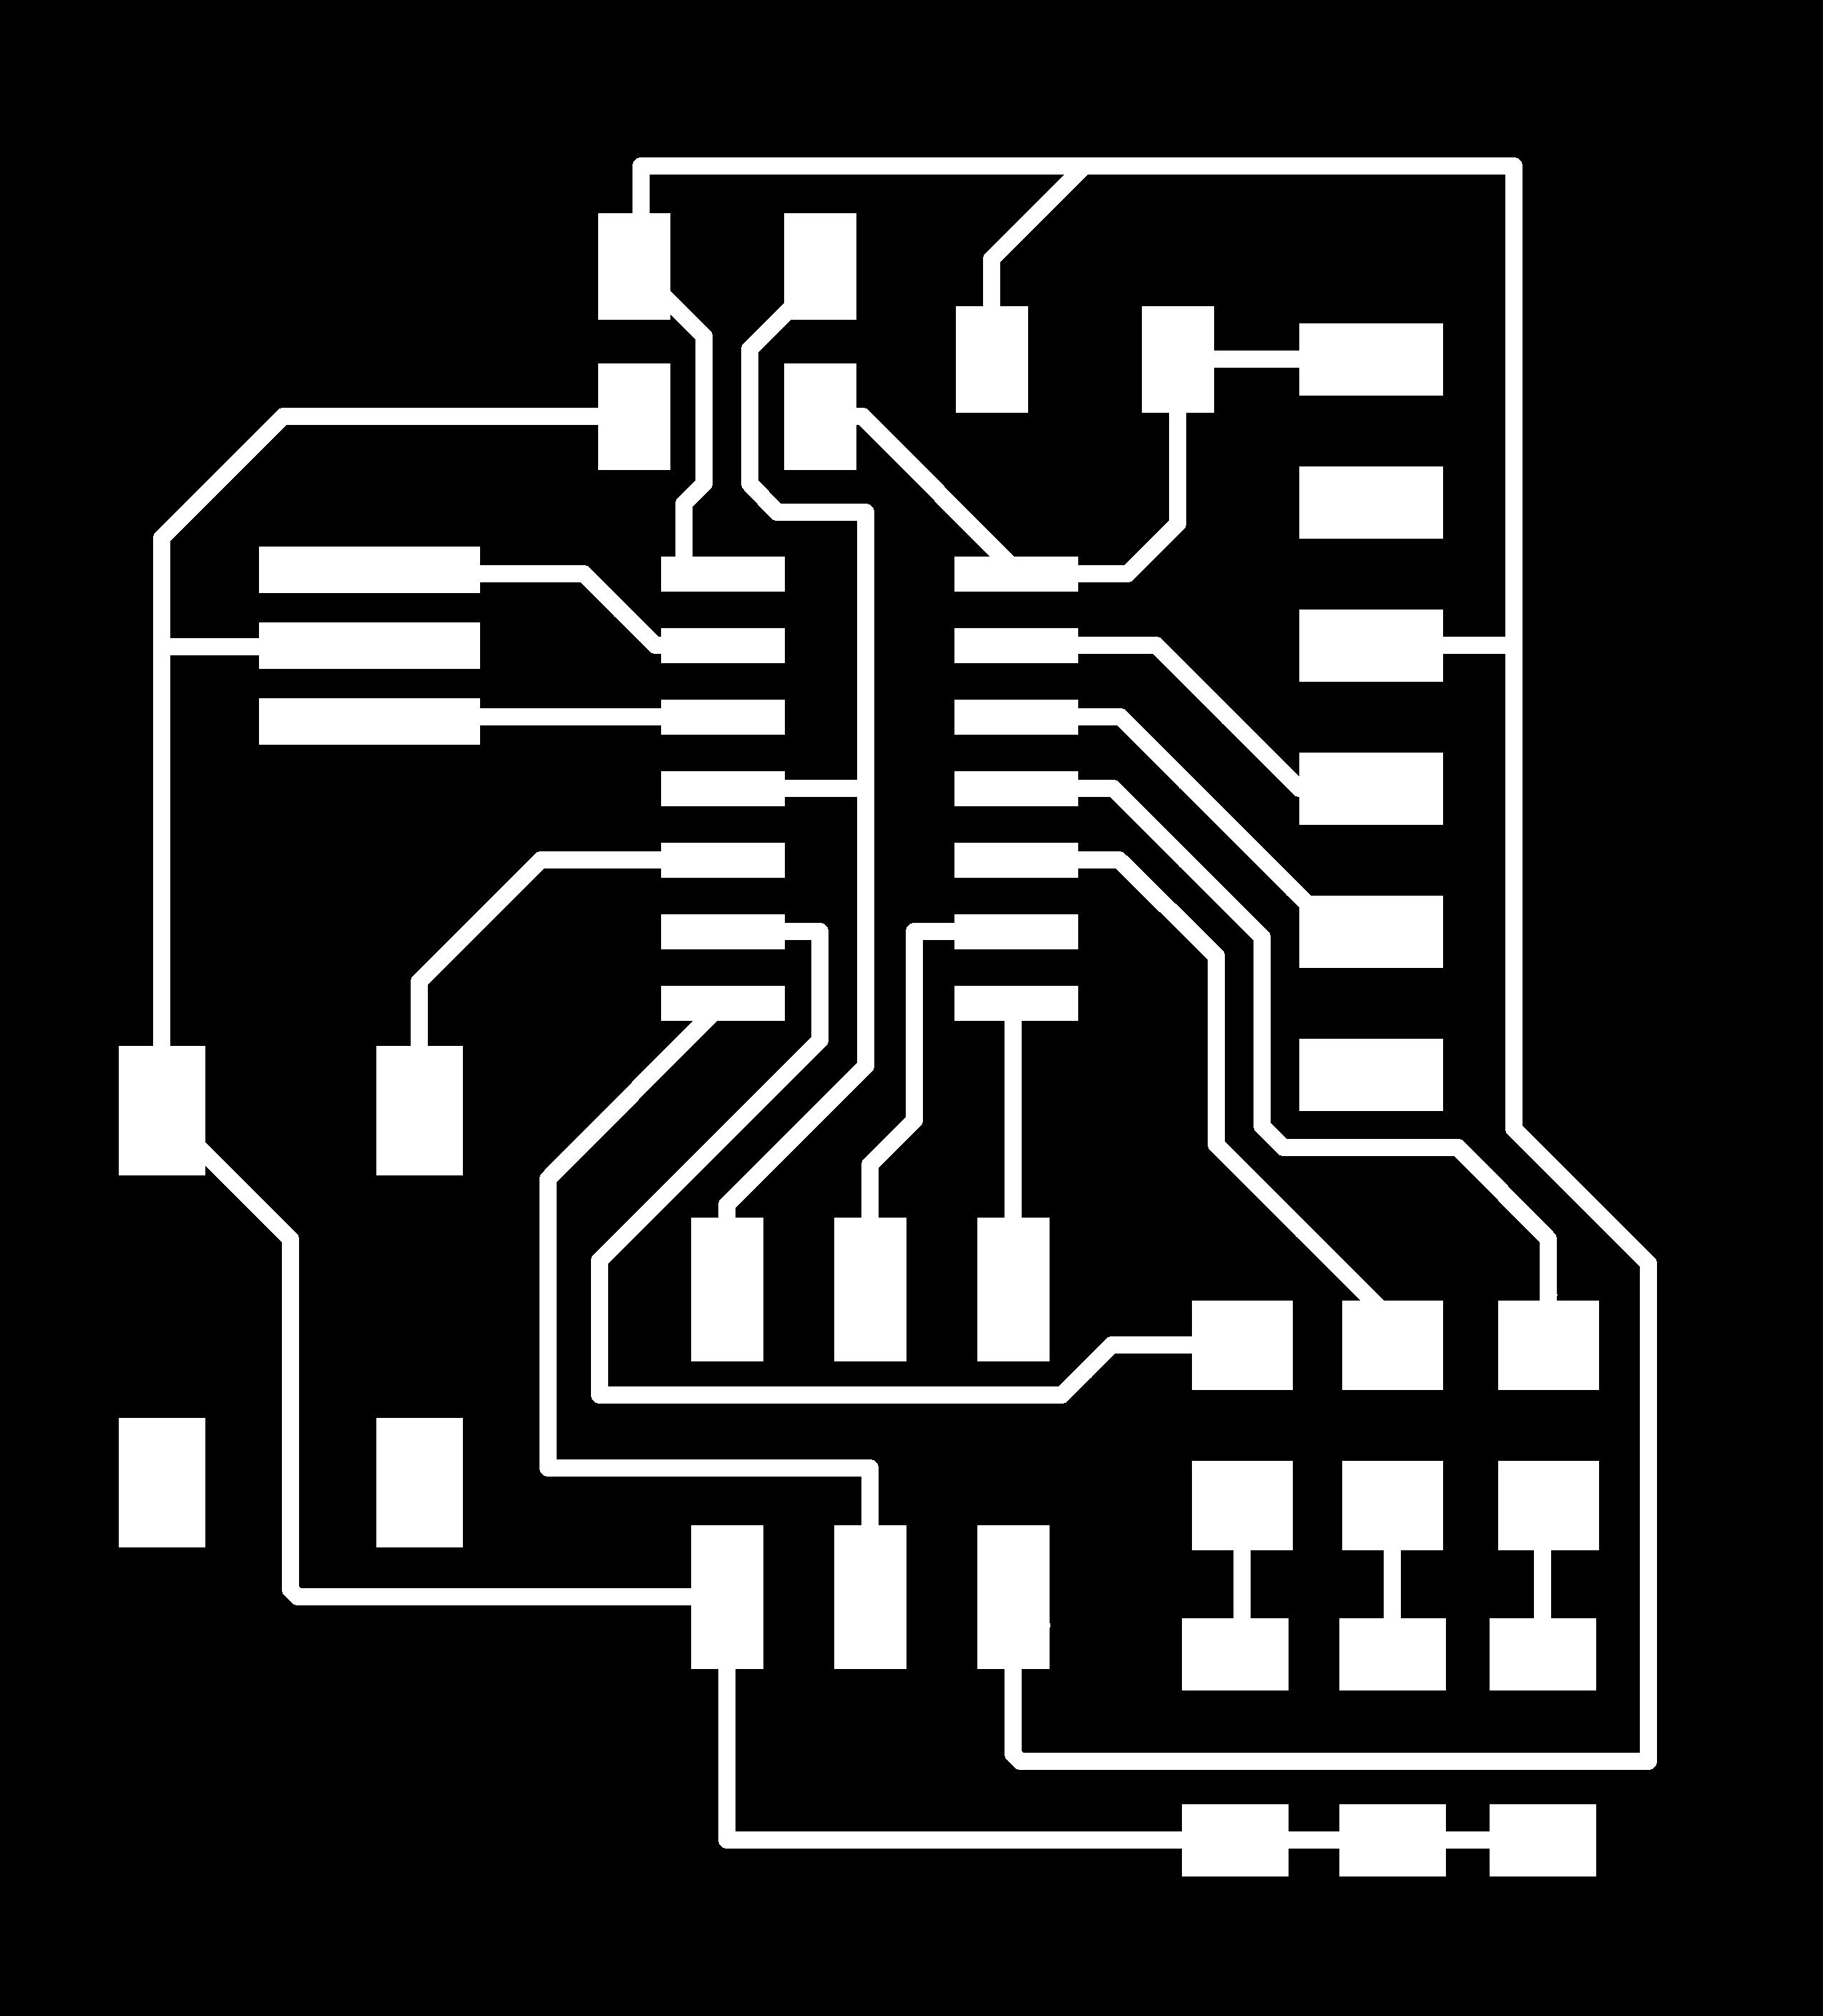
- PCB Traces, PCB Outline
- Eagle Files
- Arduino Files: blink, cycle, fade, button-fade, button-cycle