I really love Dada art movement (which in their definition should not be called an art movement), but I know the time era for Dada has past. What I was thinking is to create a contemporary Dada sculpture, on which I will apply the fabrication skills I will learn this semester. Thus, I made a contemporary version of the Dada sculpture.
3D Printed Geopolymers? and a Pyramid? : In one of my other classes, we were learning about making concrete and the possibility of building the pyramid using purely geopolymers they made on site, instead of moving around the stones. And as I need to produce a kind of geopolymer in that class, I started to look into the industrial use of the geopolymer. There were people who have done this, but I think it would be super cool if I can make a 3D printer of geopolymer (that I will make in the other class).
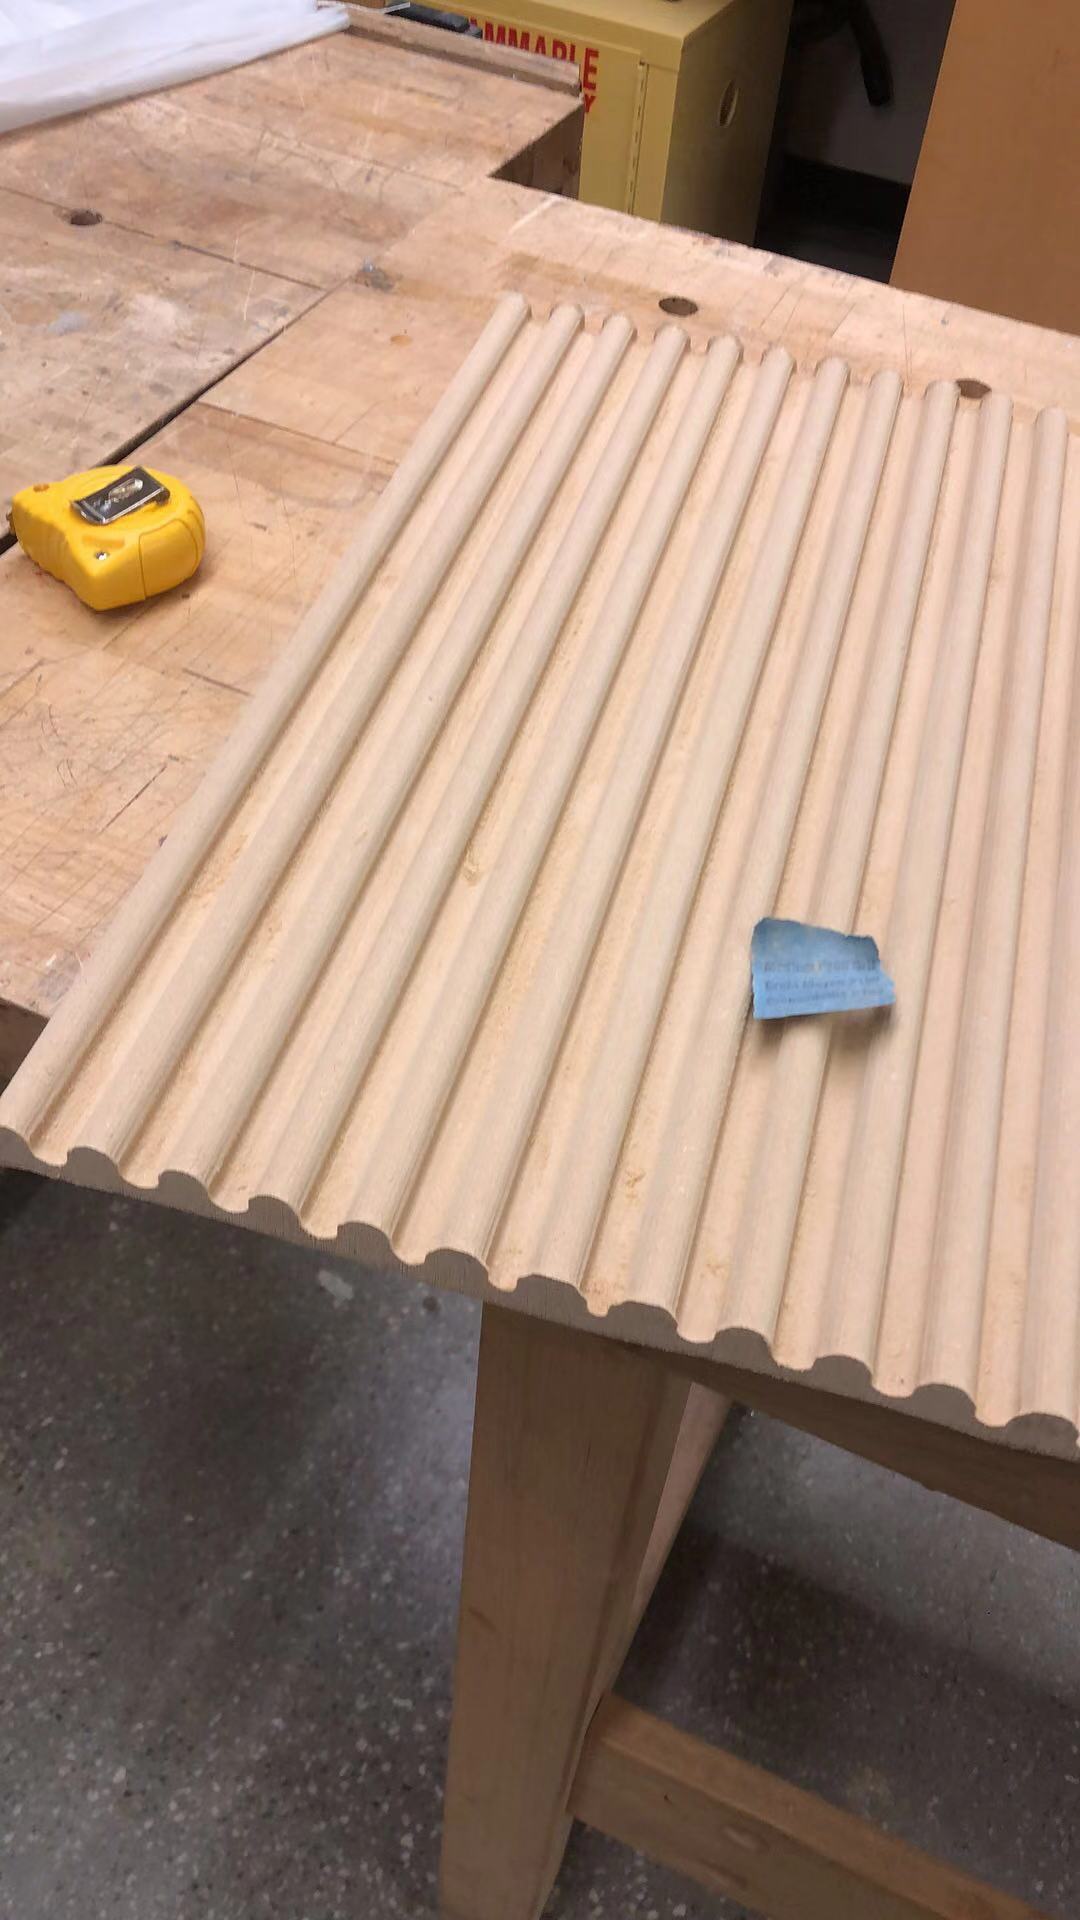
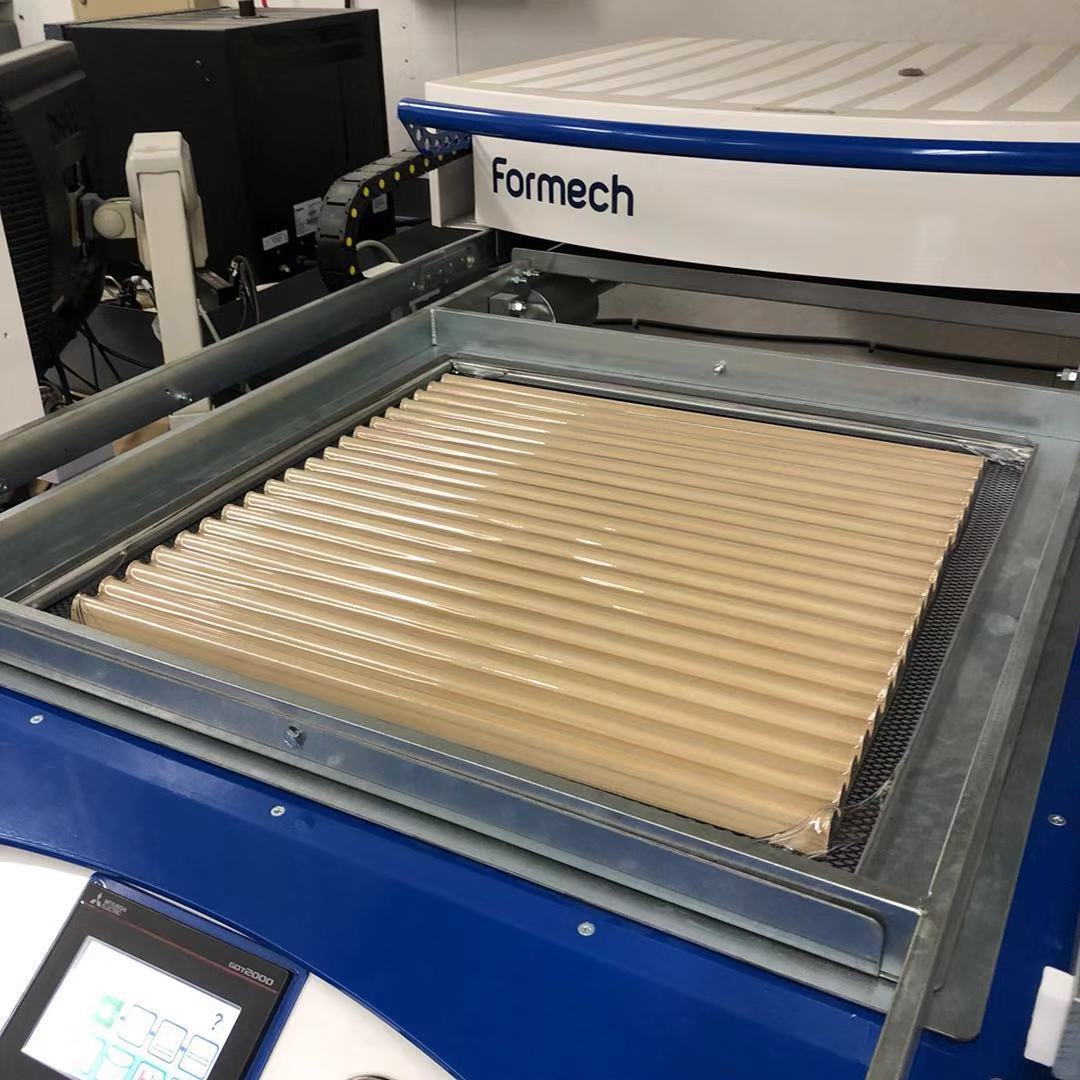
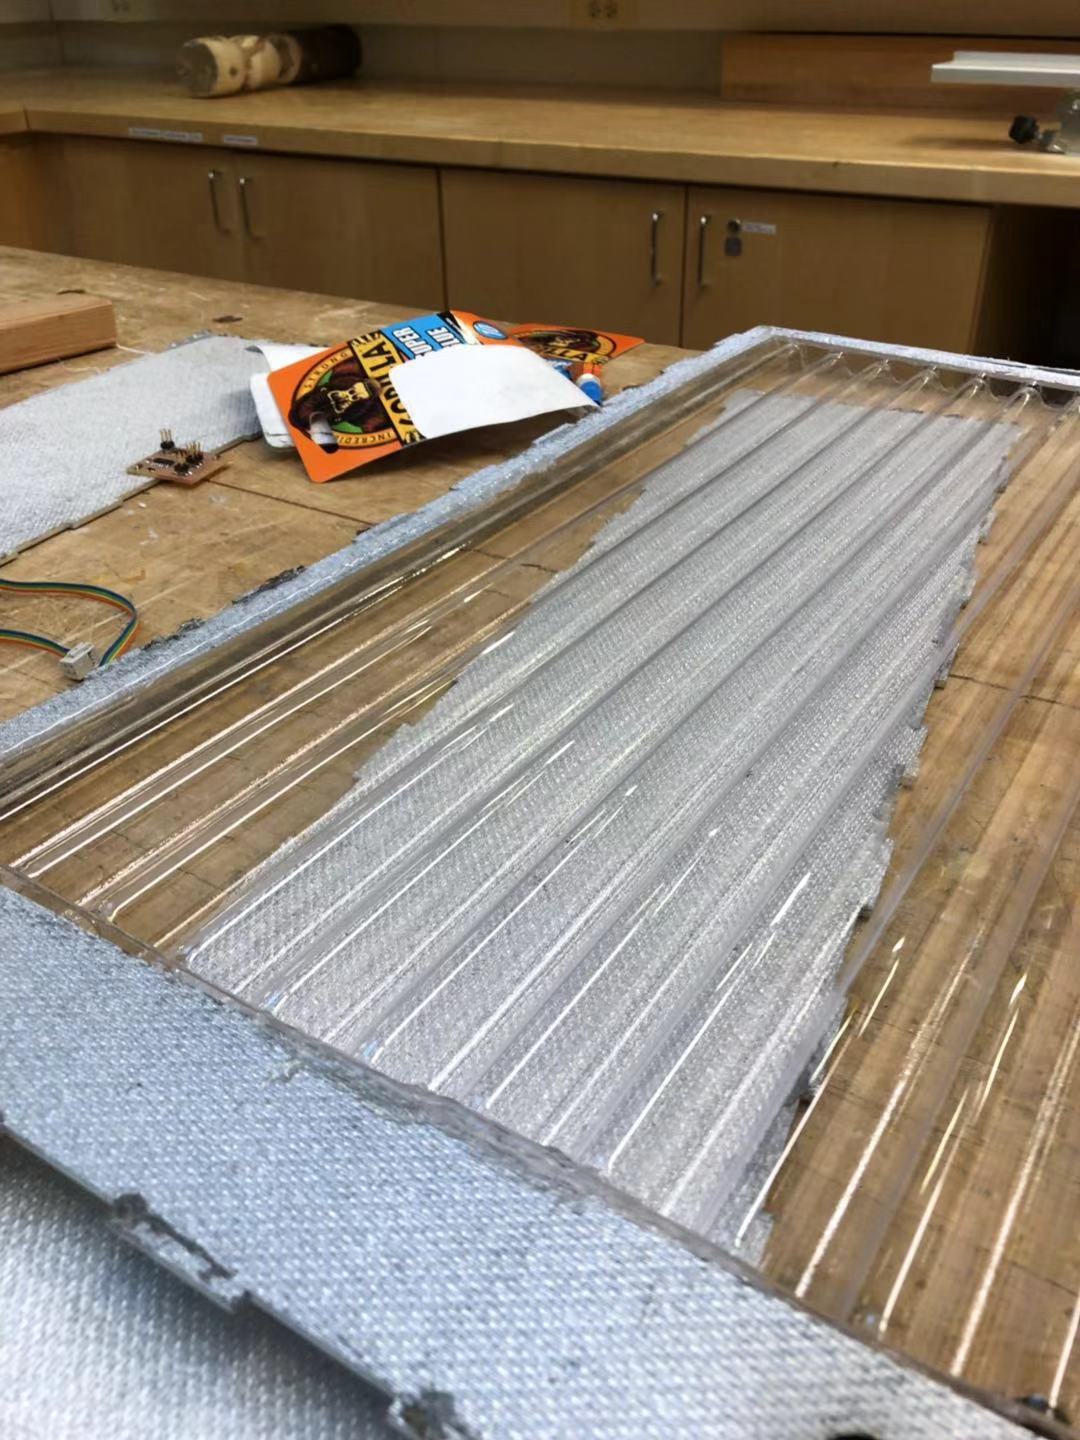
Continuing with last week, after making the mound for the vacuum forming, i was finally able to make use the vacuum forming machine to make the plastic screen in the shape of the undulating mould.
What I did wrong was that on the first time, I did not wait for enough time so that the plastic was not heated enough, and when I pushed the table up, the plastic did not followed the form of the mould. And maybe it was due to the uneven heating, The plastic sheet had multiple ‘hills’ that were uneven. With Axel’s suggestion, I flipped the deformed sheet upside down to re-heat the sheet. The sheet was then heated again, but looking back, I think I heated for too long that the plastic stretched too much.
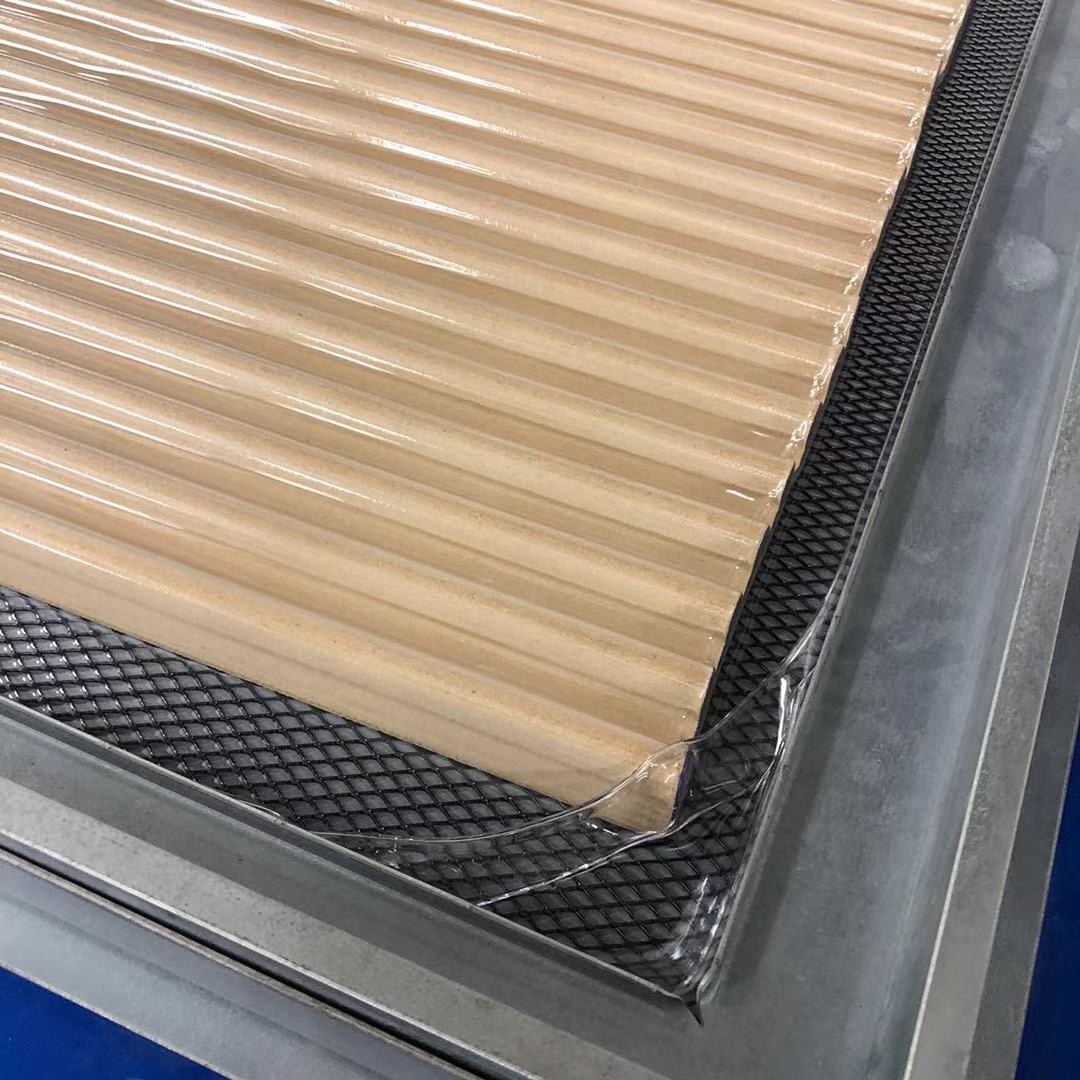
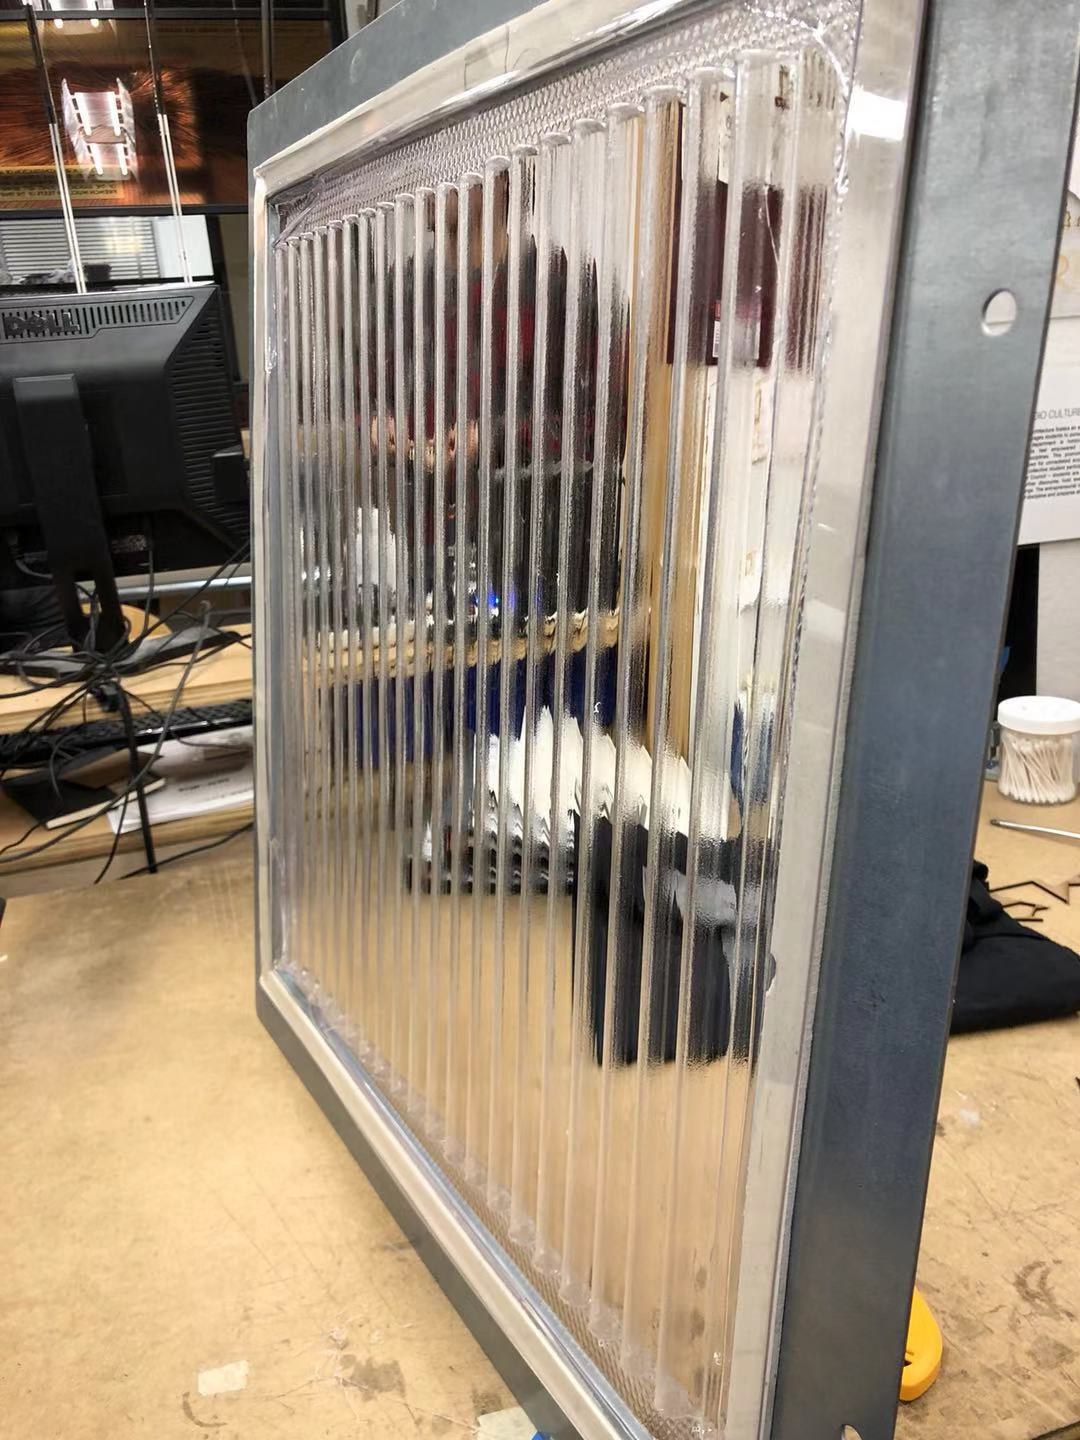
The result of over-stretching the plastic sheet that there would be too much plastic to wrap around my mould. In addition, because my mould desk not have that much height, the over-stretching has more severe impact onto the result. As we can see, the end result came out to be with most of the shape of the mould, but the plastic could not get further in between some of the crests of the mould, especially in the middle of the mould. Moreover, because of the over-stretching, the edges and corners of the plastic were covered with double-layered plastic sheet, and two of the corners had extra “corners” on them. Because the extra plastic wrapped around the metal frame, I was not able to get the plastics sheet out. Jen then helped me to get my plastic sheet out by bandsawing it from the metal frame. Finally, I got my plastic screen.
What I should improve for next time:
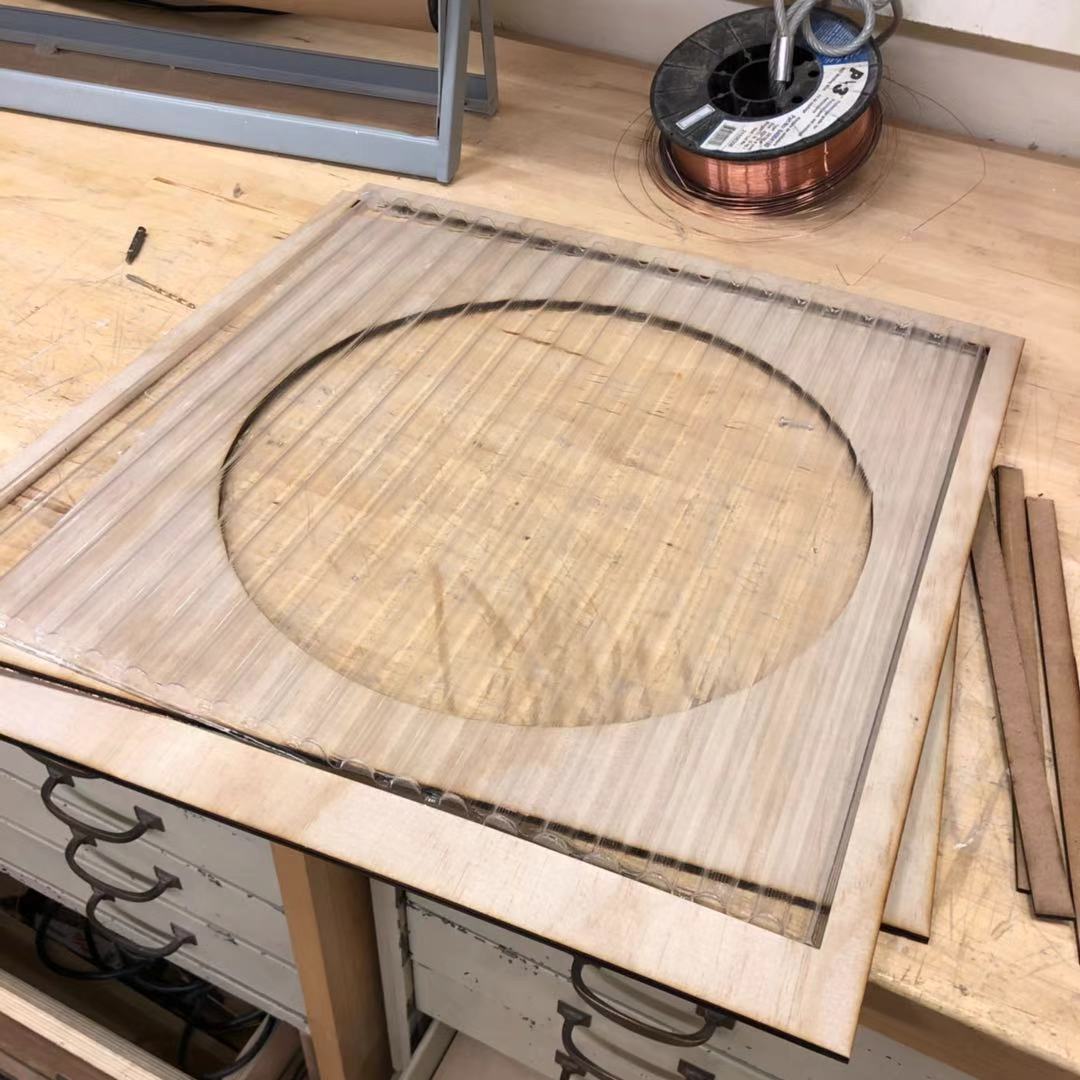
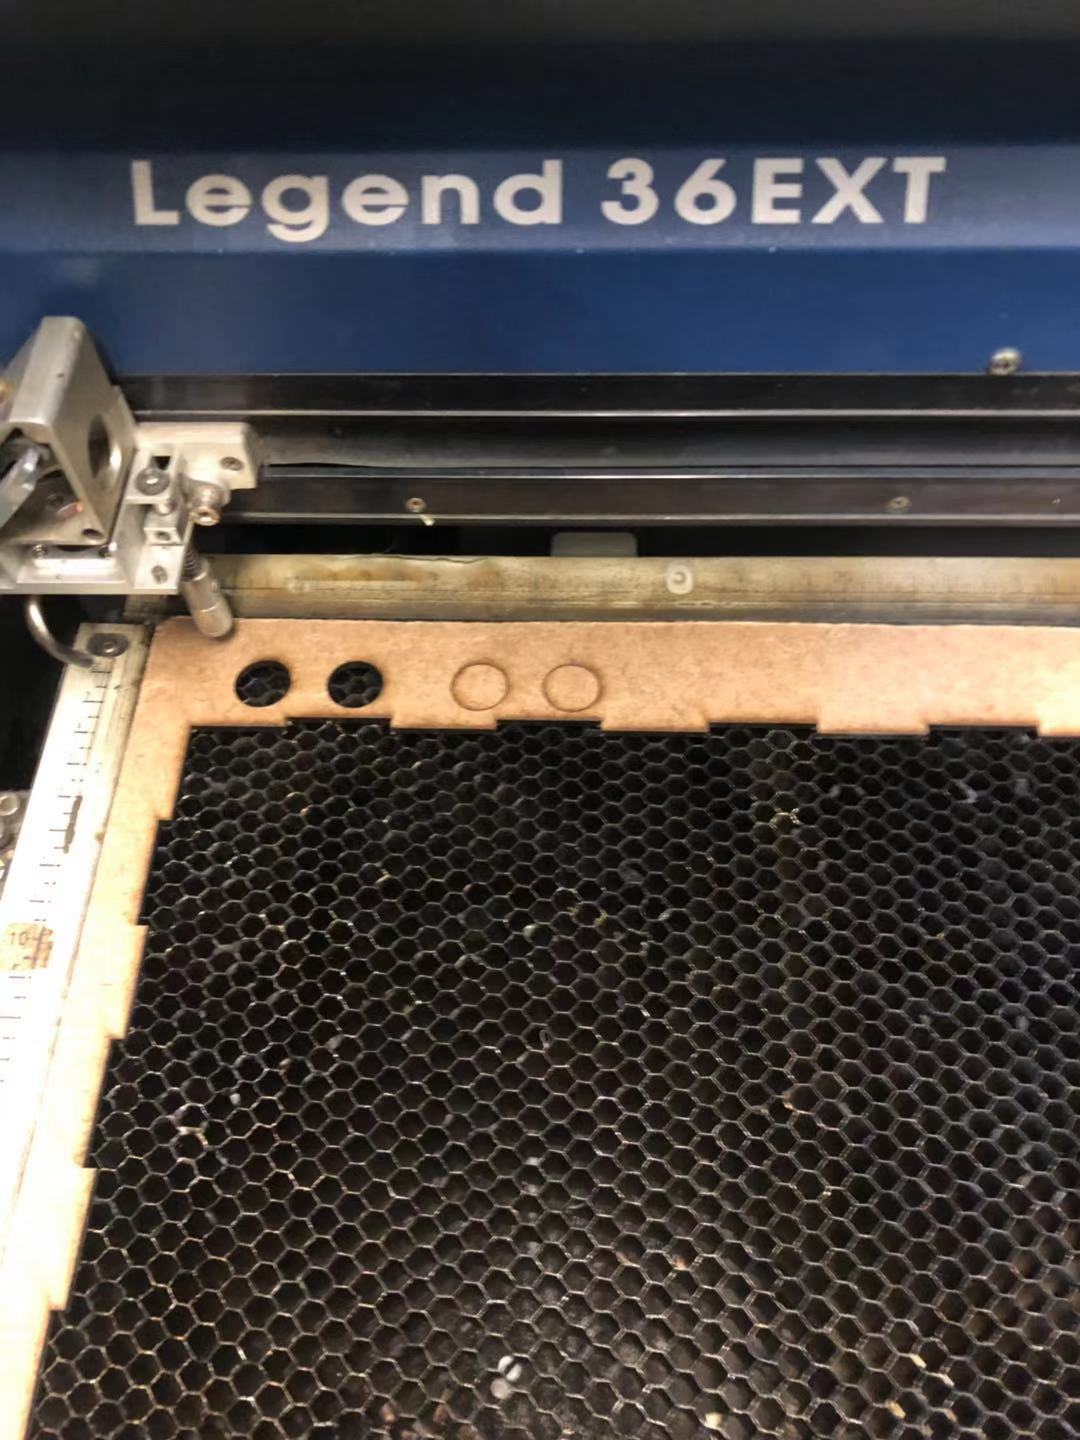
I designed the box in Rhino, creating a box that contains the plastic screen, and also holding the rotating disk in the machine, and then fitting in the sonar detector and its wiring in as well. At the beginning I only designed the box to try to contain the screen without other functions.
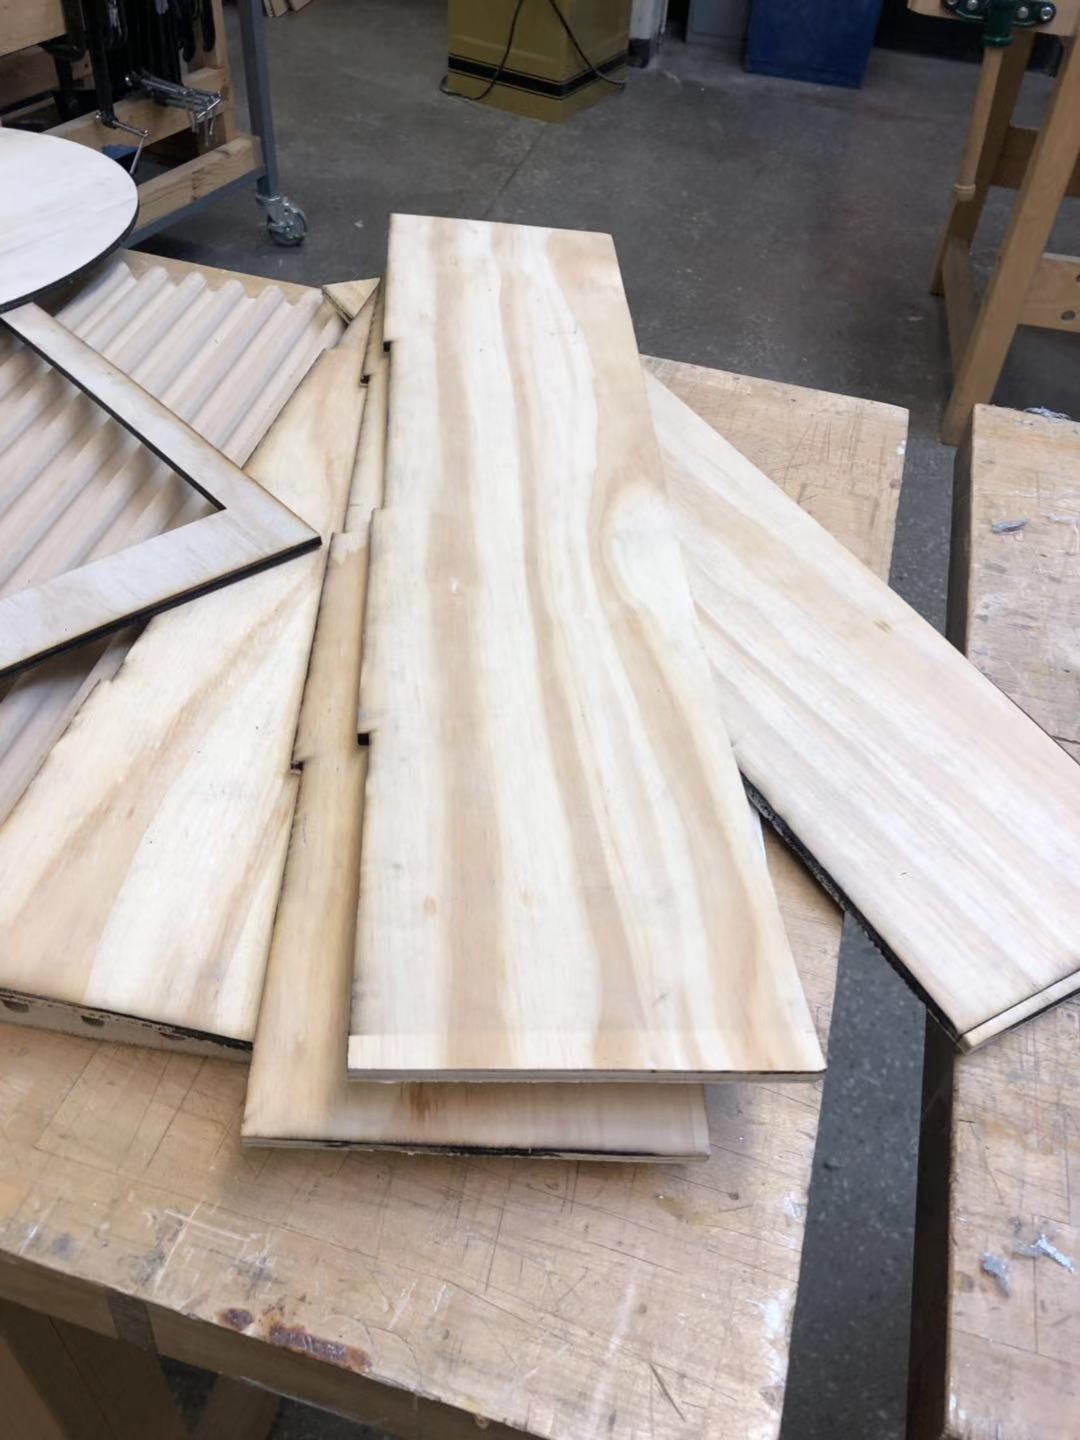
I first chose the material of 1/4 plywood sheet with the size of 2’ x 2’. After I designed the press-fit box of of such sizing, I then tried to made it. I first laser cut the wood sheet with the Epilog machine. What happened was that the wood was warped severely that I was not able to focus the laser at one specific point to have a uniform focus point. As the result, it was really hard to cut through wooden sheet evenly, even after around 4 repeated tracings.
I still laser cut all of the pieces onto the wooden sheets, and then I was hoping that I could first bandsaw the wooden board (following the laser cutting traces) and then file the edges with the polishing machine. But the resulting pieces were not what I expected. Moreover, because some boards are too warped that it was impossible to fit all of them to a box, even after I tried to bend them into their place.
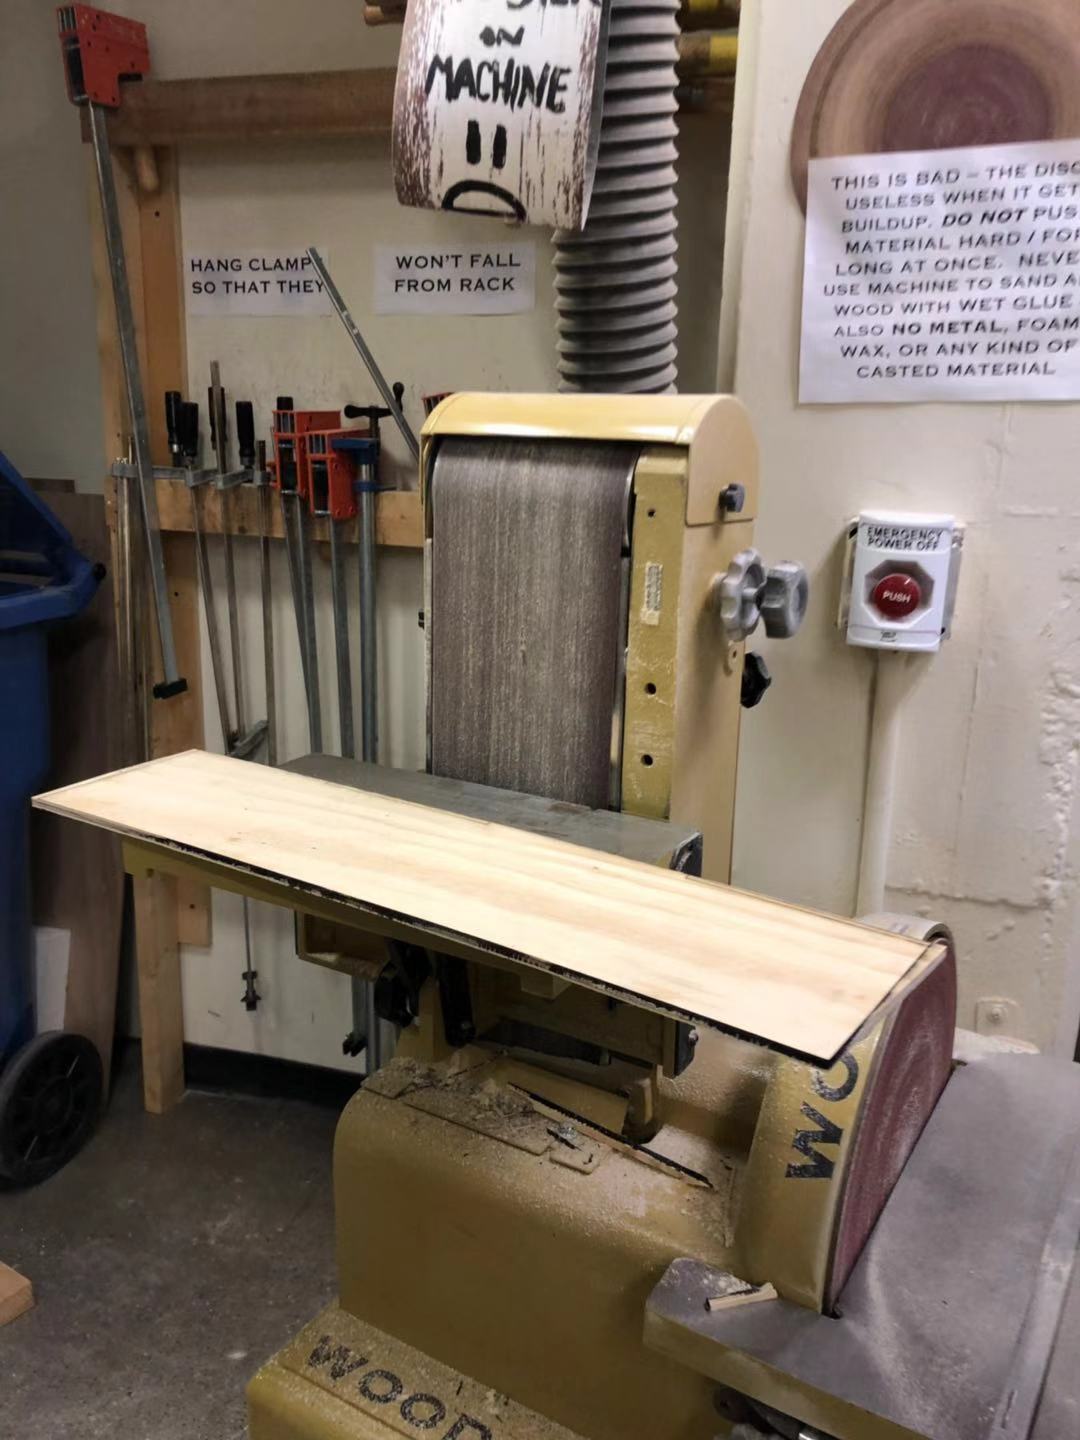
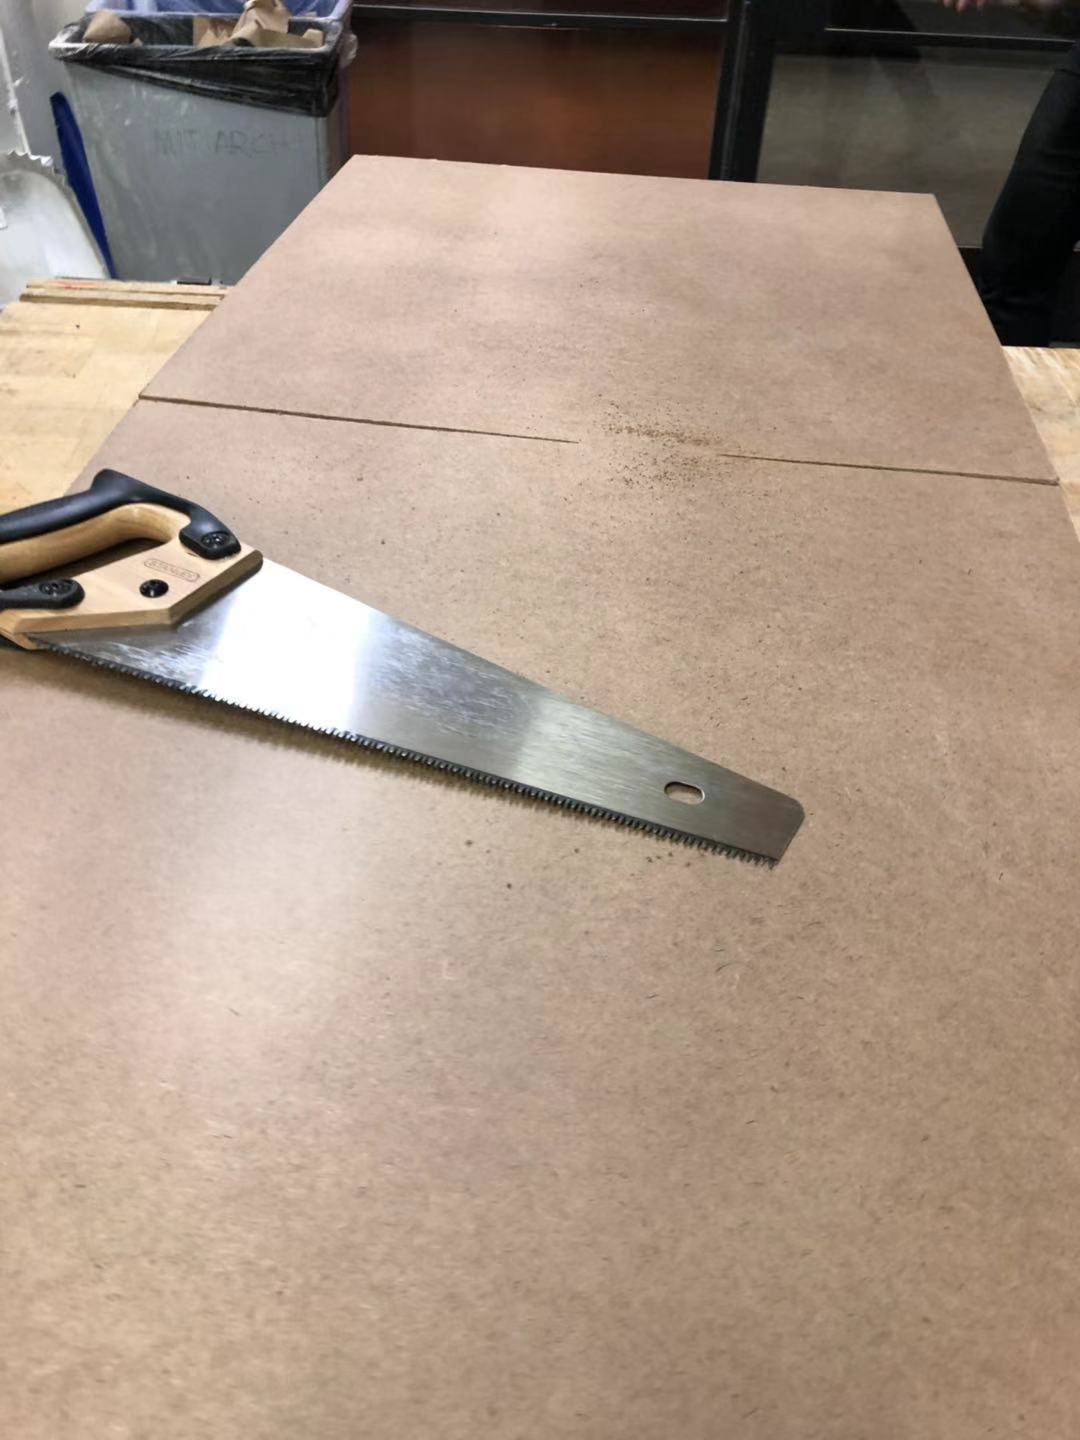
I eventually gave up trying on the plywood, and decided to change my material to masonite (hardwood), which I knew is less likely to be warped. So I revitsited Home Depot once again to get 2 sheets of 4 x 2 masonite. Because the sheets are too big to be fitted in the laser cutting machine, I first used the wood saw to cut both boards to halves and then fit them into the laser cutters. I then ran the laser cutting for two times on the Masonite with its setting.
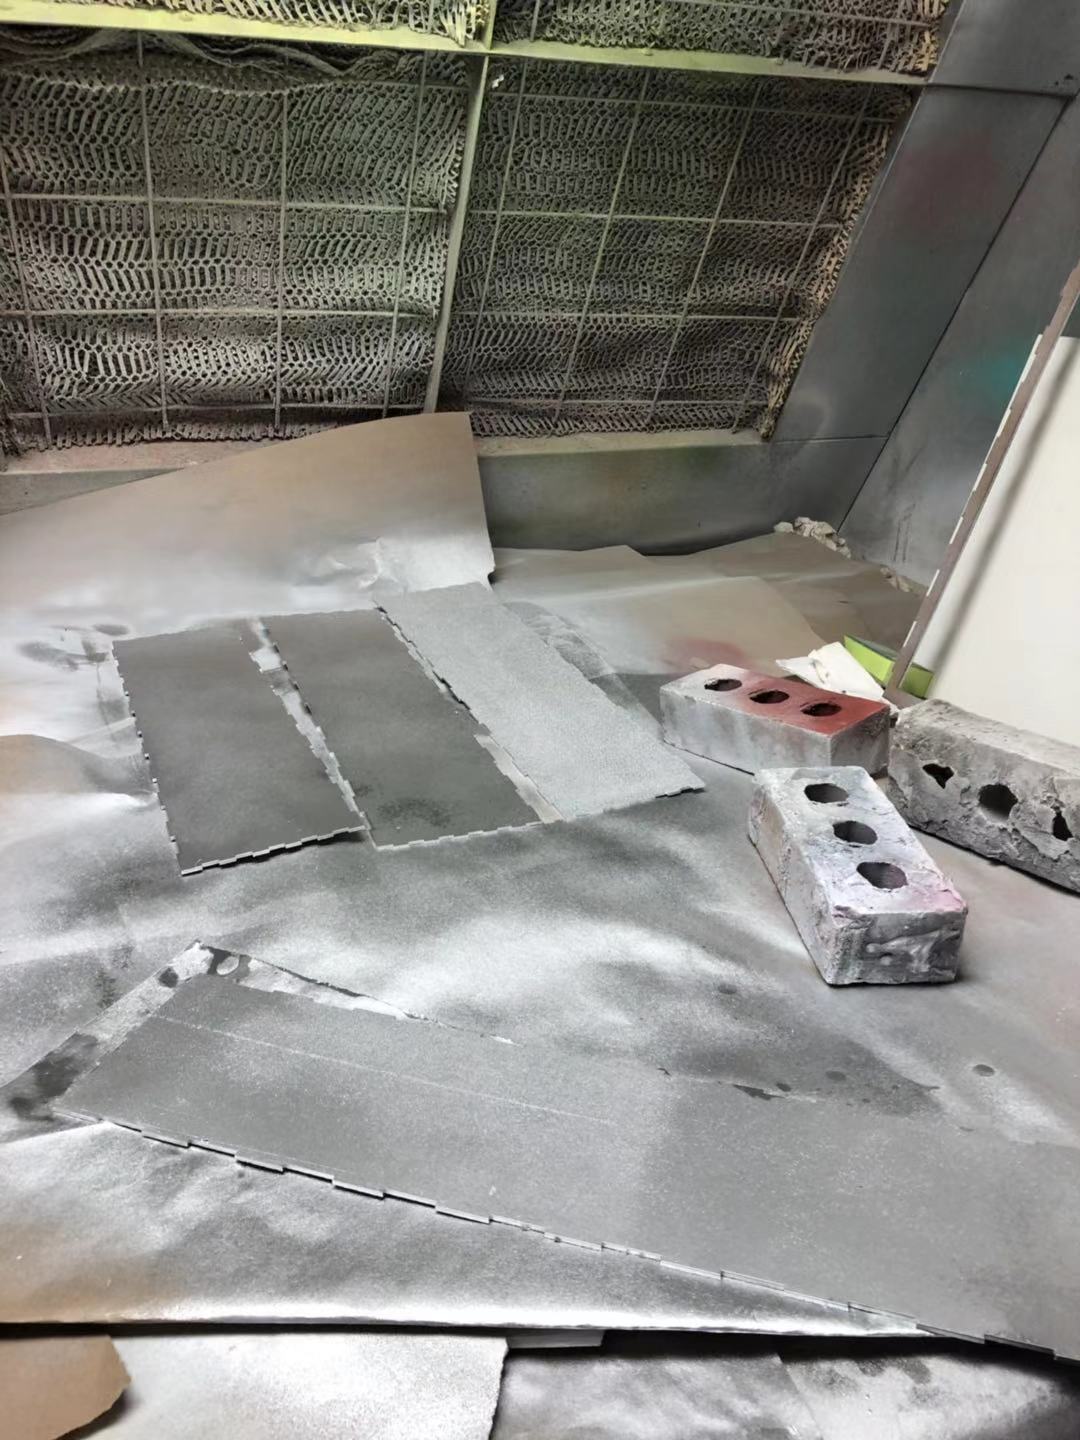
I then wanted to spray paint the boards before assembling them. As I wanted a metallic finish to my board, the surface needs to be as smooth as possible. One side of boards is coated and therefore really smooth, so I tried to sand the other side of the Masonite (the grainy side). I sanded some of the boards, but found out the sanded ones do not make that much difference, and sanding them also makes the boards thinner, so it was harder to preset fit them. I then decided to directly spray paint them to silver. As I learned, the paint will likely to compensate for the kerf width, so when I designed the box in rhino, I made the depth of the finger joints strictly as 1/8 inch.
The spray paint was different from the ones I used before, as it has high pressure, and is oil-based. These characteristic made it easier and faster to color the boards, the boards are also faster to dry. One drawback I discovered is that because it's oil based, after it was dried (at least seemed to be), it was still likely that my hands would rubbed the silver paint off.
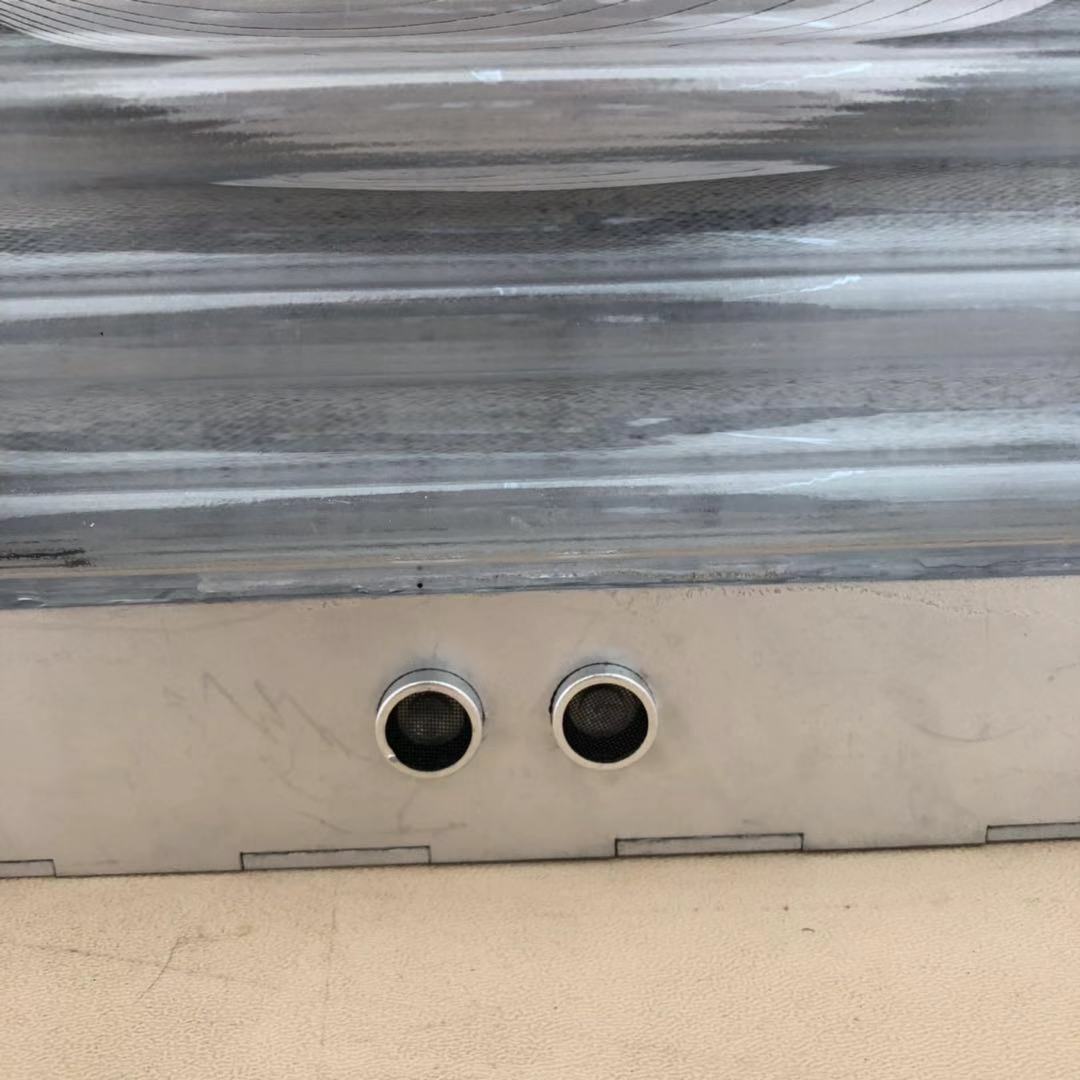
I then performed multiple testings on press-fitting the sonar on the scrap board, as shown in the image. Eventually, I found the right cutting size on the board to fit the sonar.
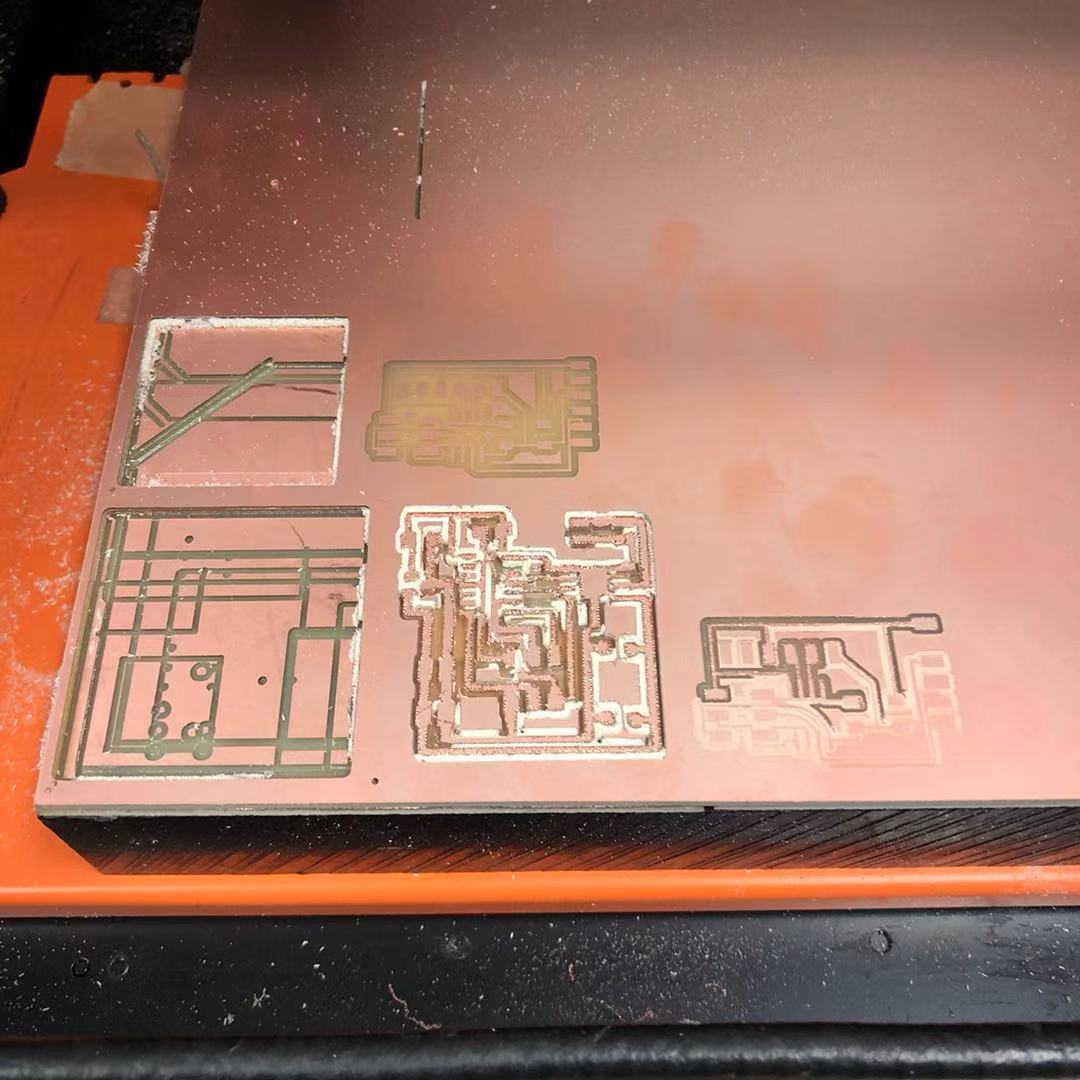
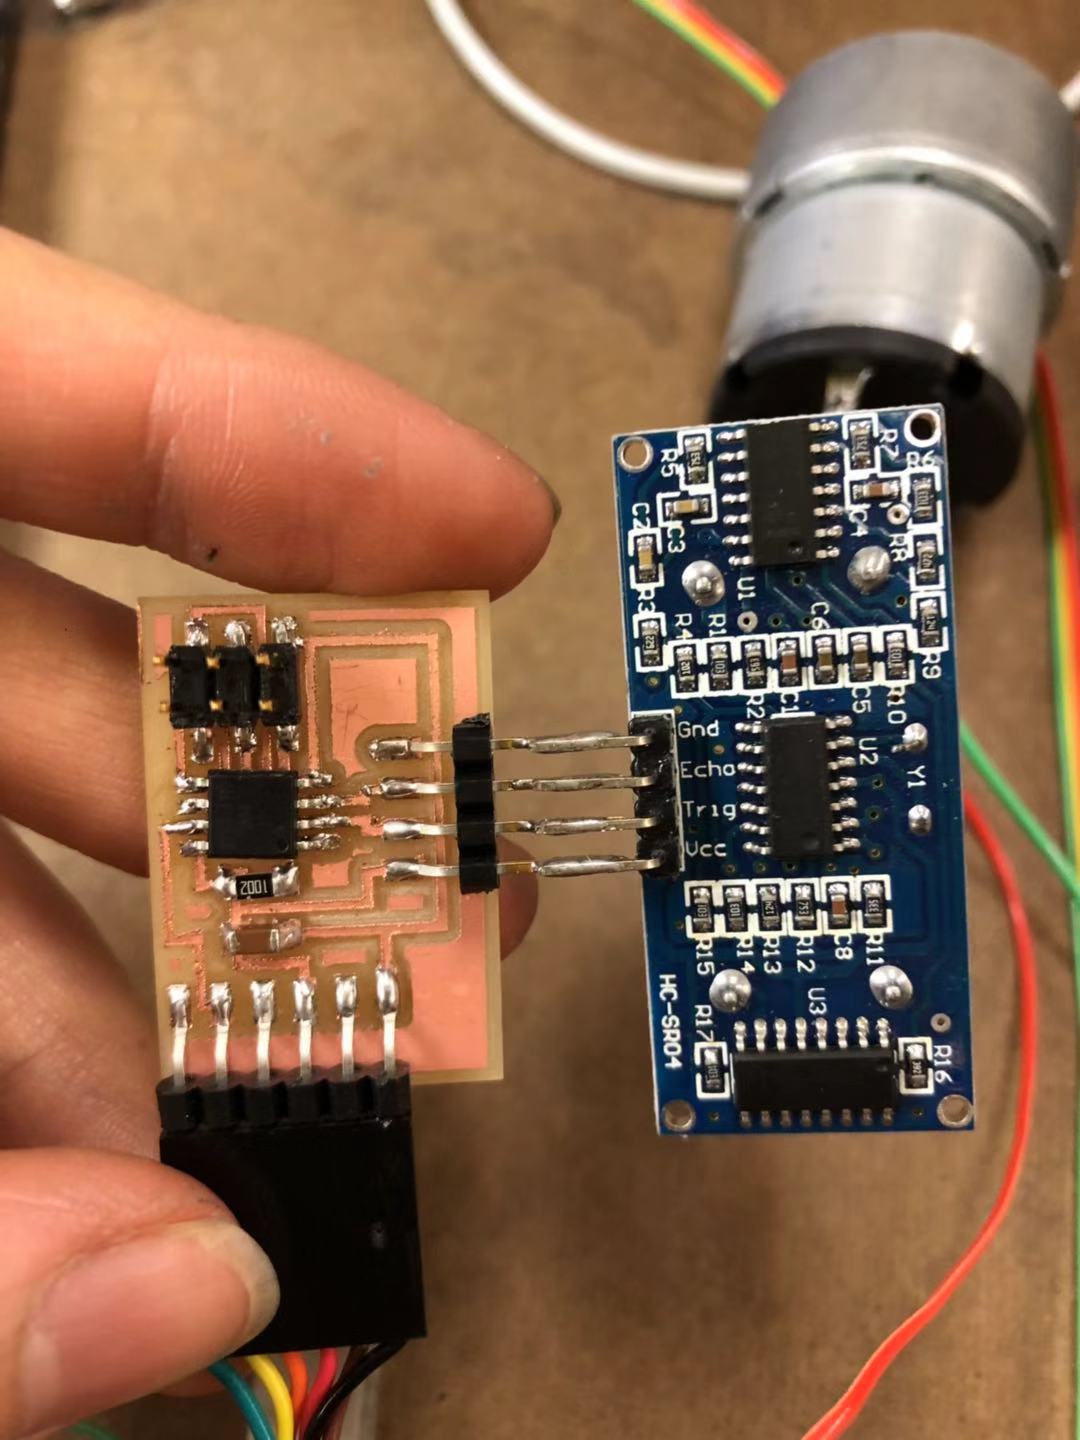
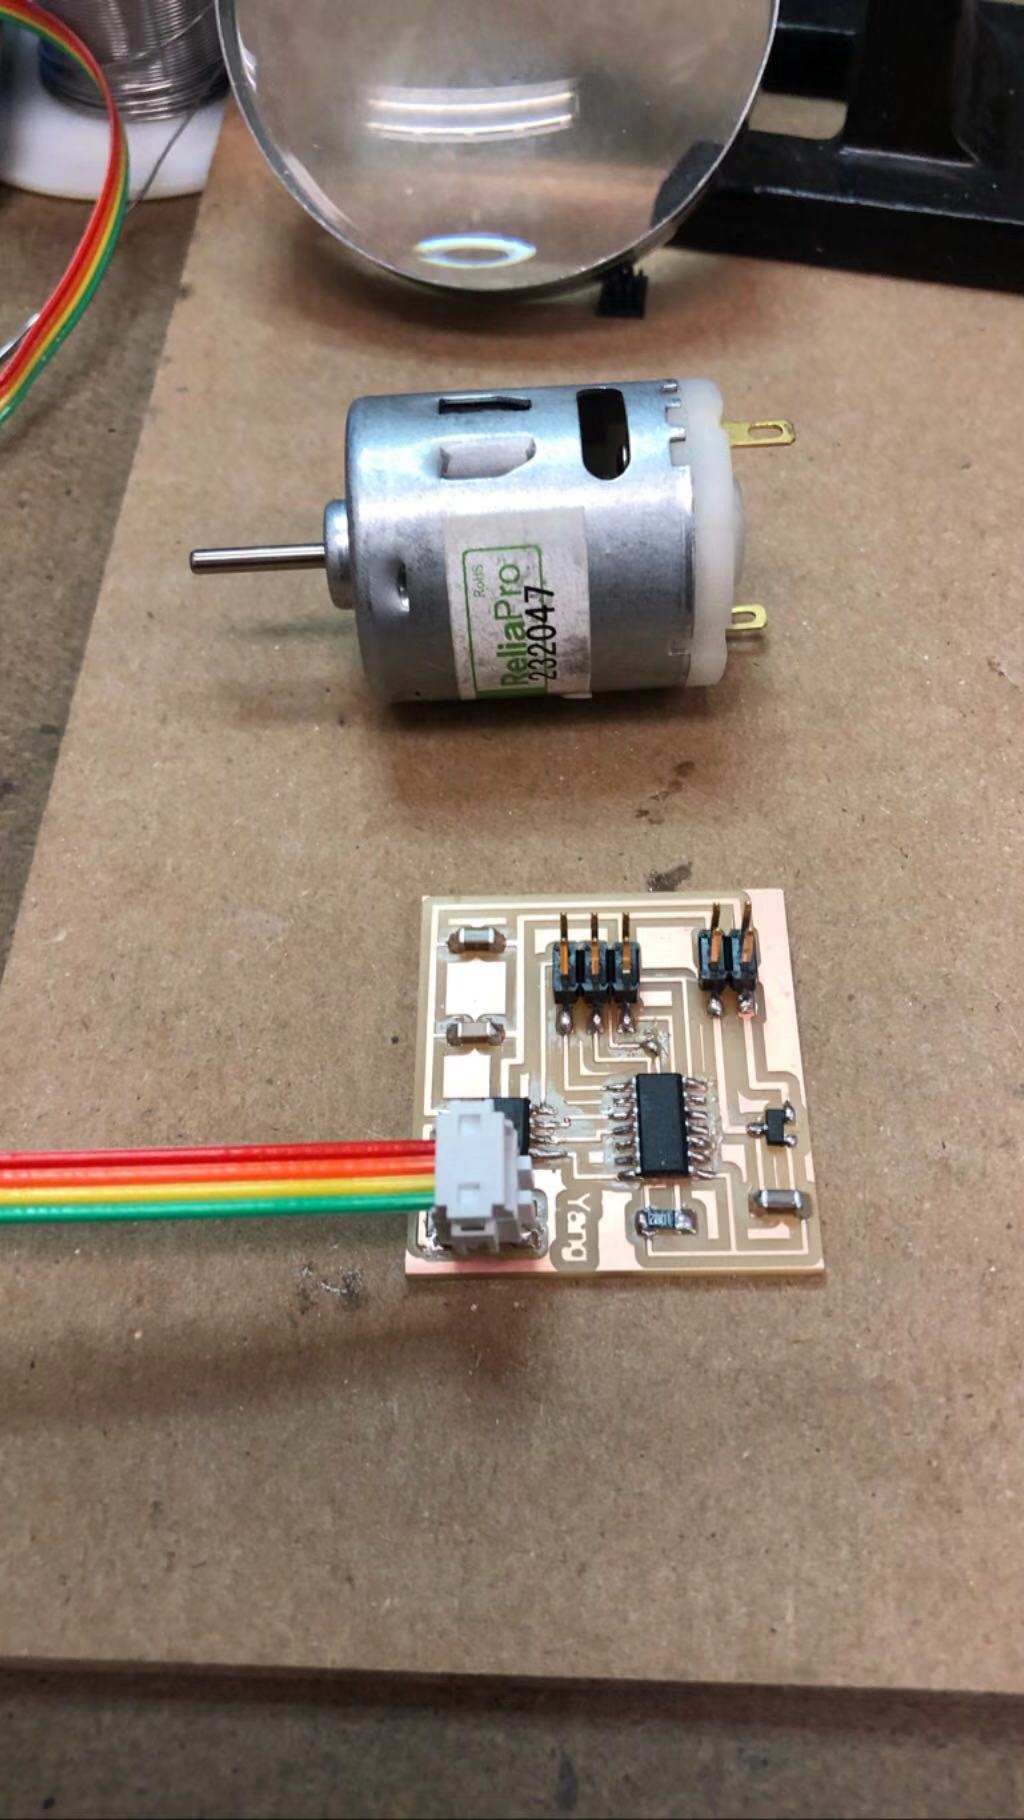
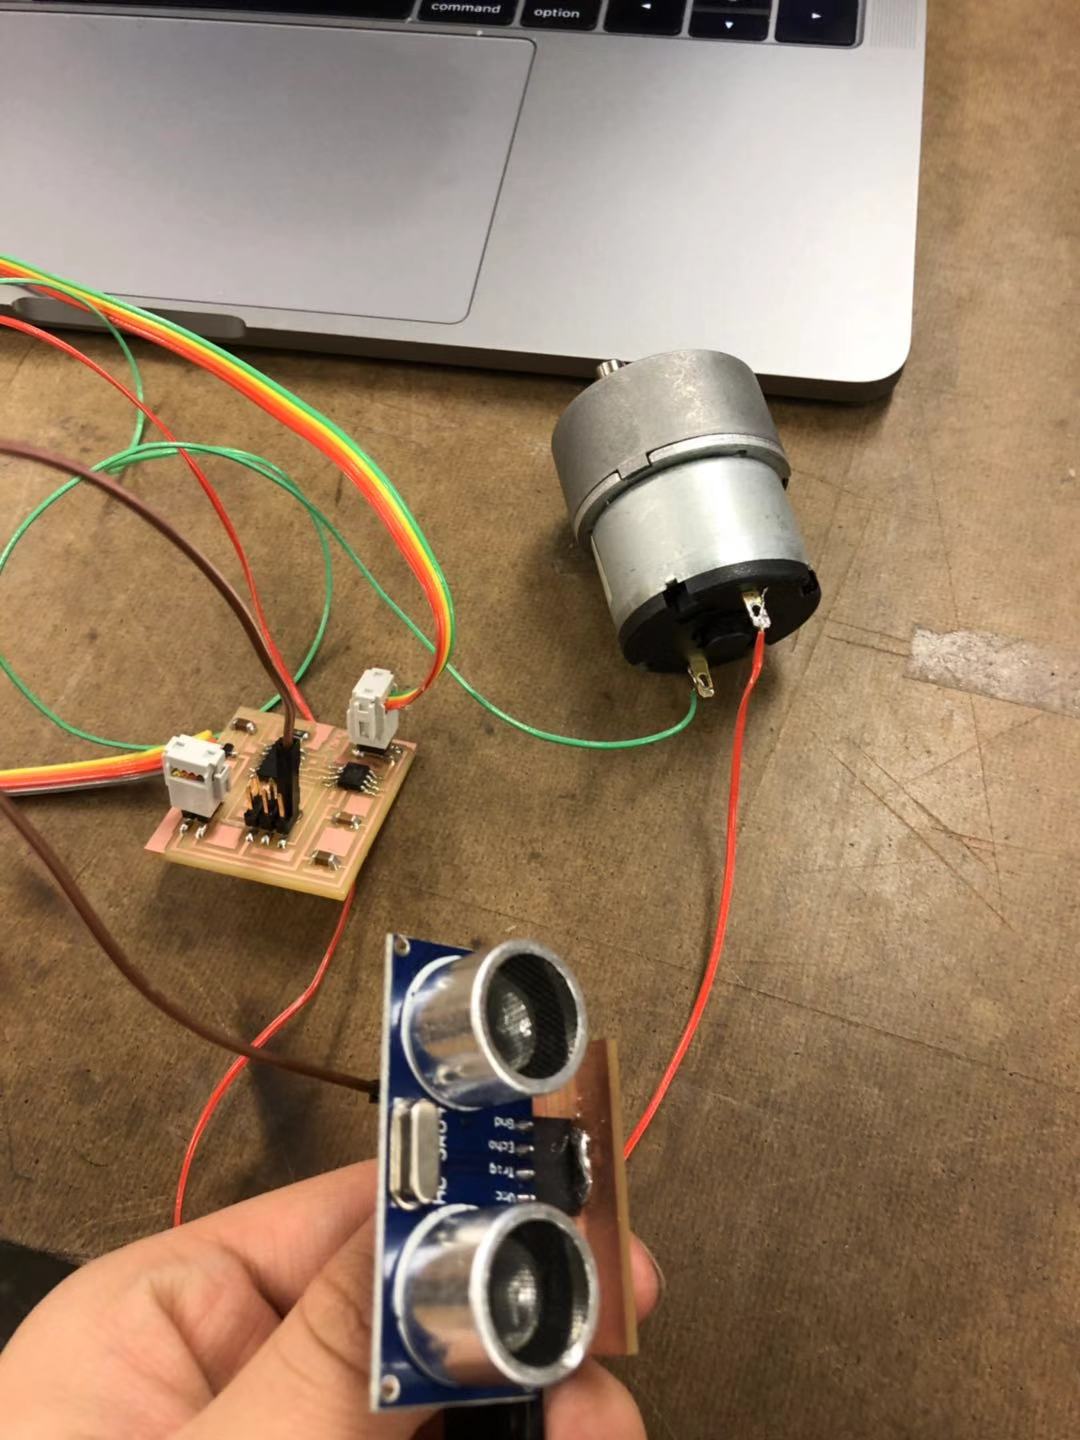
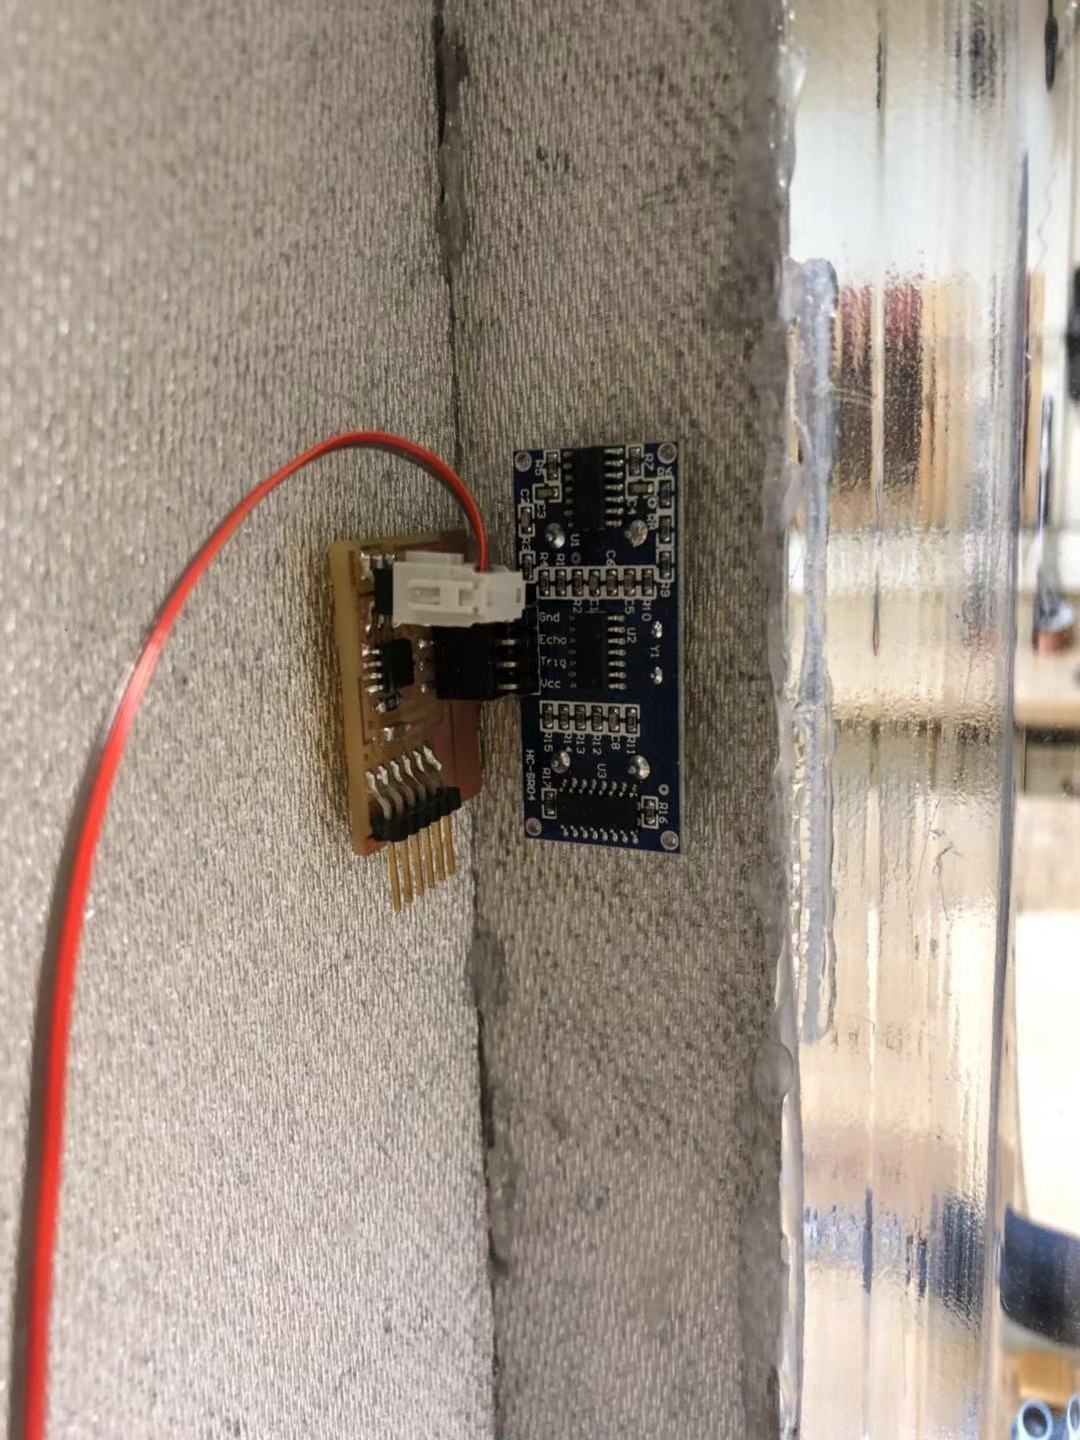
Because the sonar on the box will be far away from the motor, I decided to make two boards that have individual tasks of input and output and then make them communicate with the MOSI pin. I first designed the boards in EAGLE following Neil’s design. I couldn't find the right part of 4pin that connects the sonar, so I put a normal 6-pin pad and then only used the pins I needed.
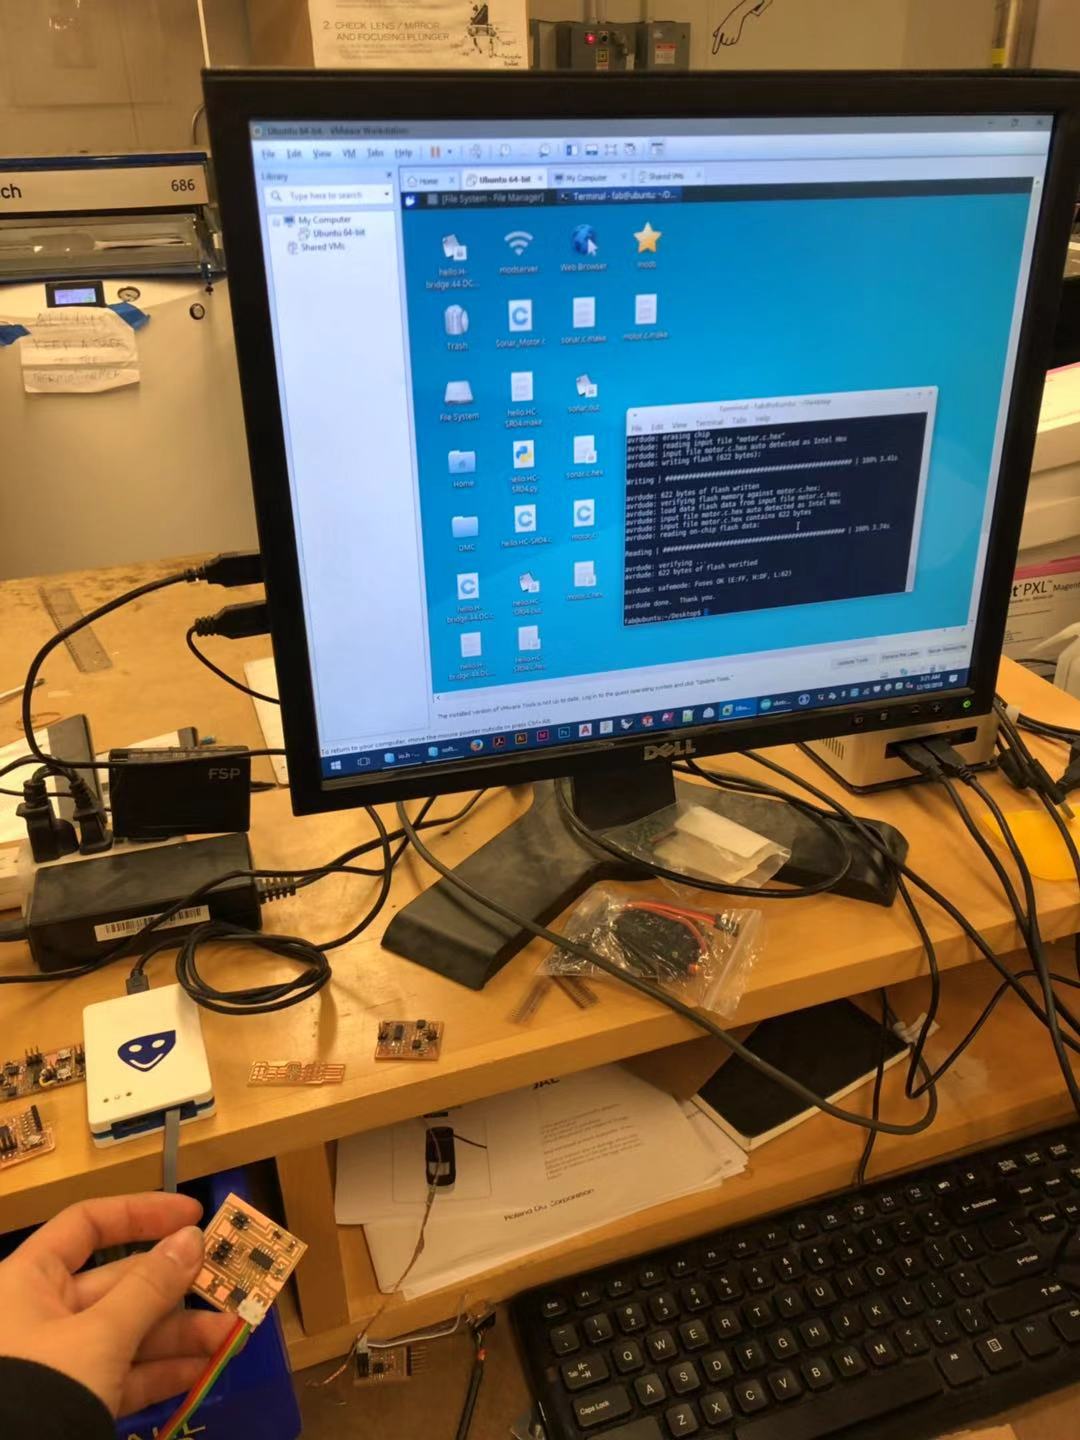
Then I milled the boards. As shown previously, there were several boards that has the wrong resolution. There were several times when I uploaded a new tracing image, the resolution would suddenly jump to 72dpi, and sometimes I forgot to check, and therefore used the setting of the wrong resolution.
The result: again, even though I always used the fab design rules, my milled board will almost always have some connected parts that were not what I wanted them to be. So I then used the exacto knife to separate the traces. I also made sure to use the multimeter to check if they are actually separated.
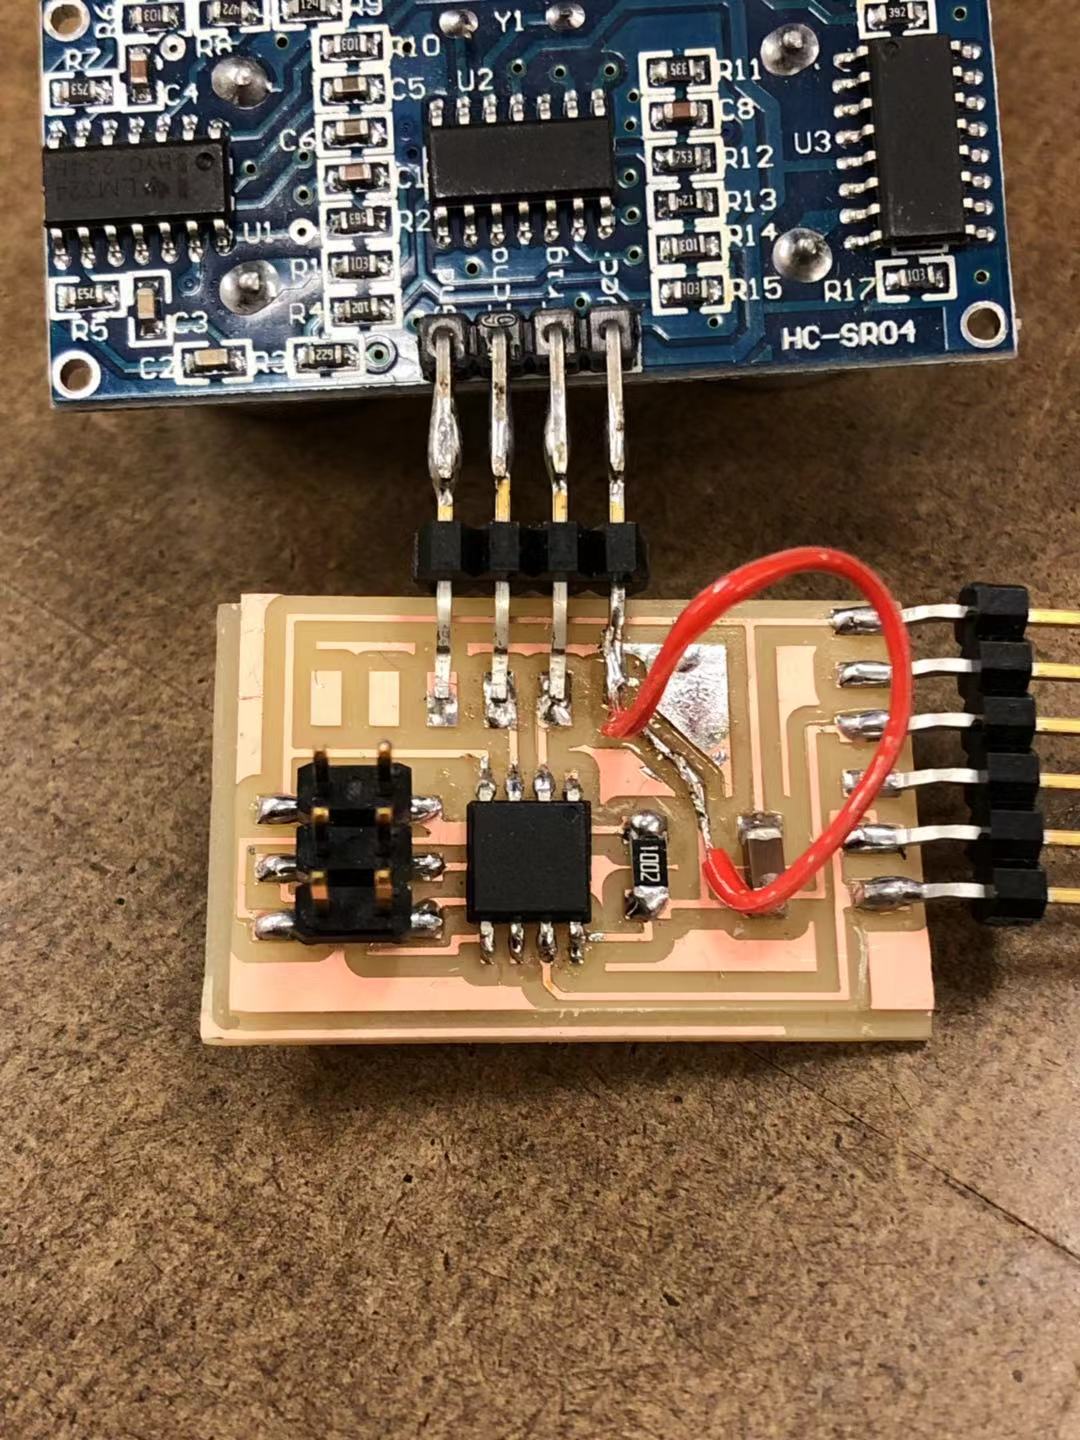
Then I soldered the DC motor boards and the Sonar boards, as I made. Most of the soldering went smoothly. I had some trouble when I was soldering the H bridge on to the DC board, as it was really small. Also, the Sonar I ordered myself from Amazon online has a different kind of pins than the ones on the HTM website. The ones I got has a row of flat pins that will be touching the other traces if they are soldered directly onto the board. So I connected the sonar to another four pins component. In addition, on one of the sonar boards, one pad has its copper layer fallen off the board, so I used a jumper wire to connect that Sonar pin with its net.
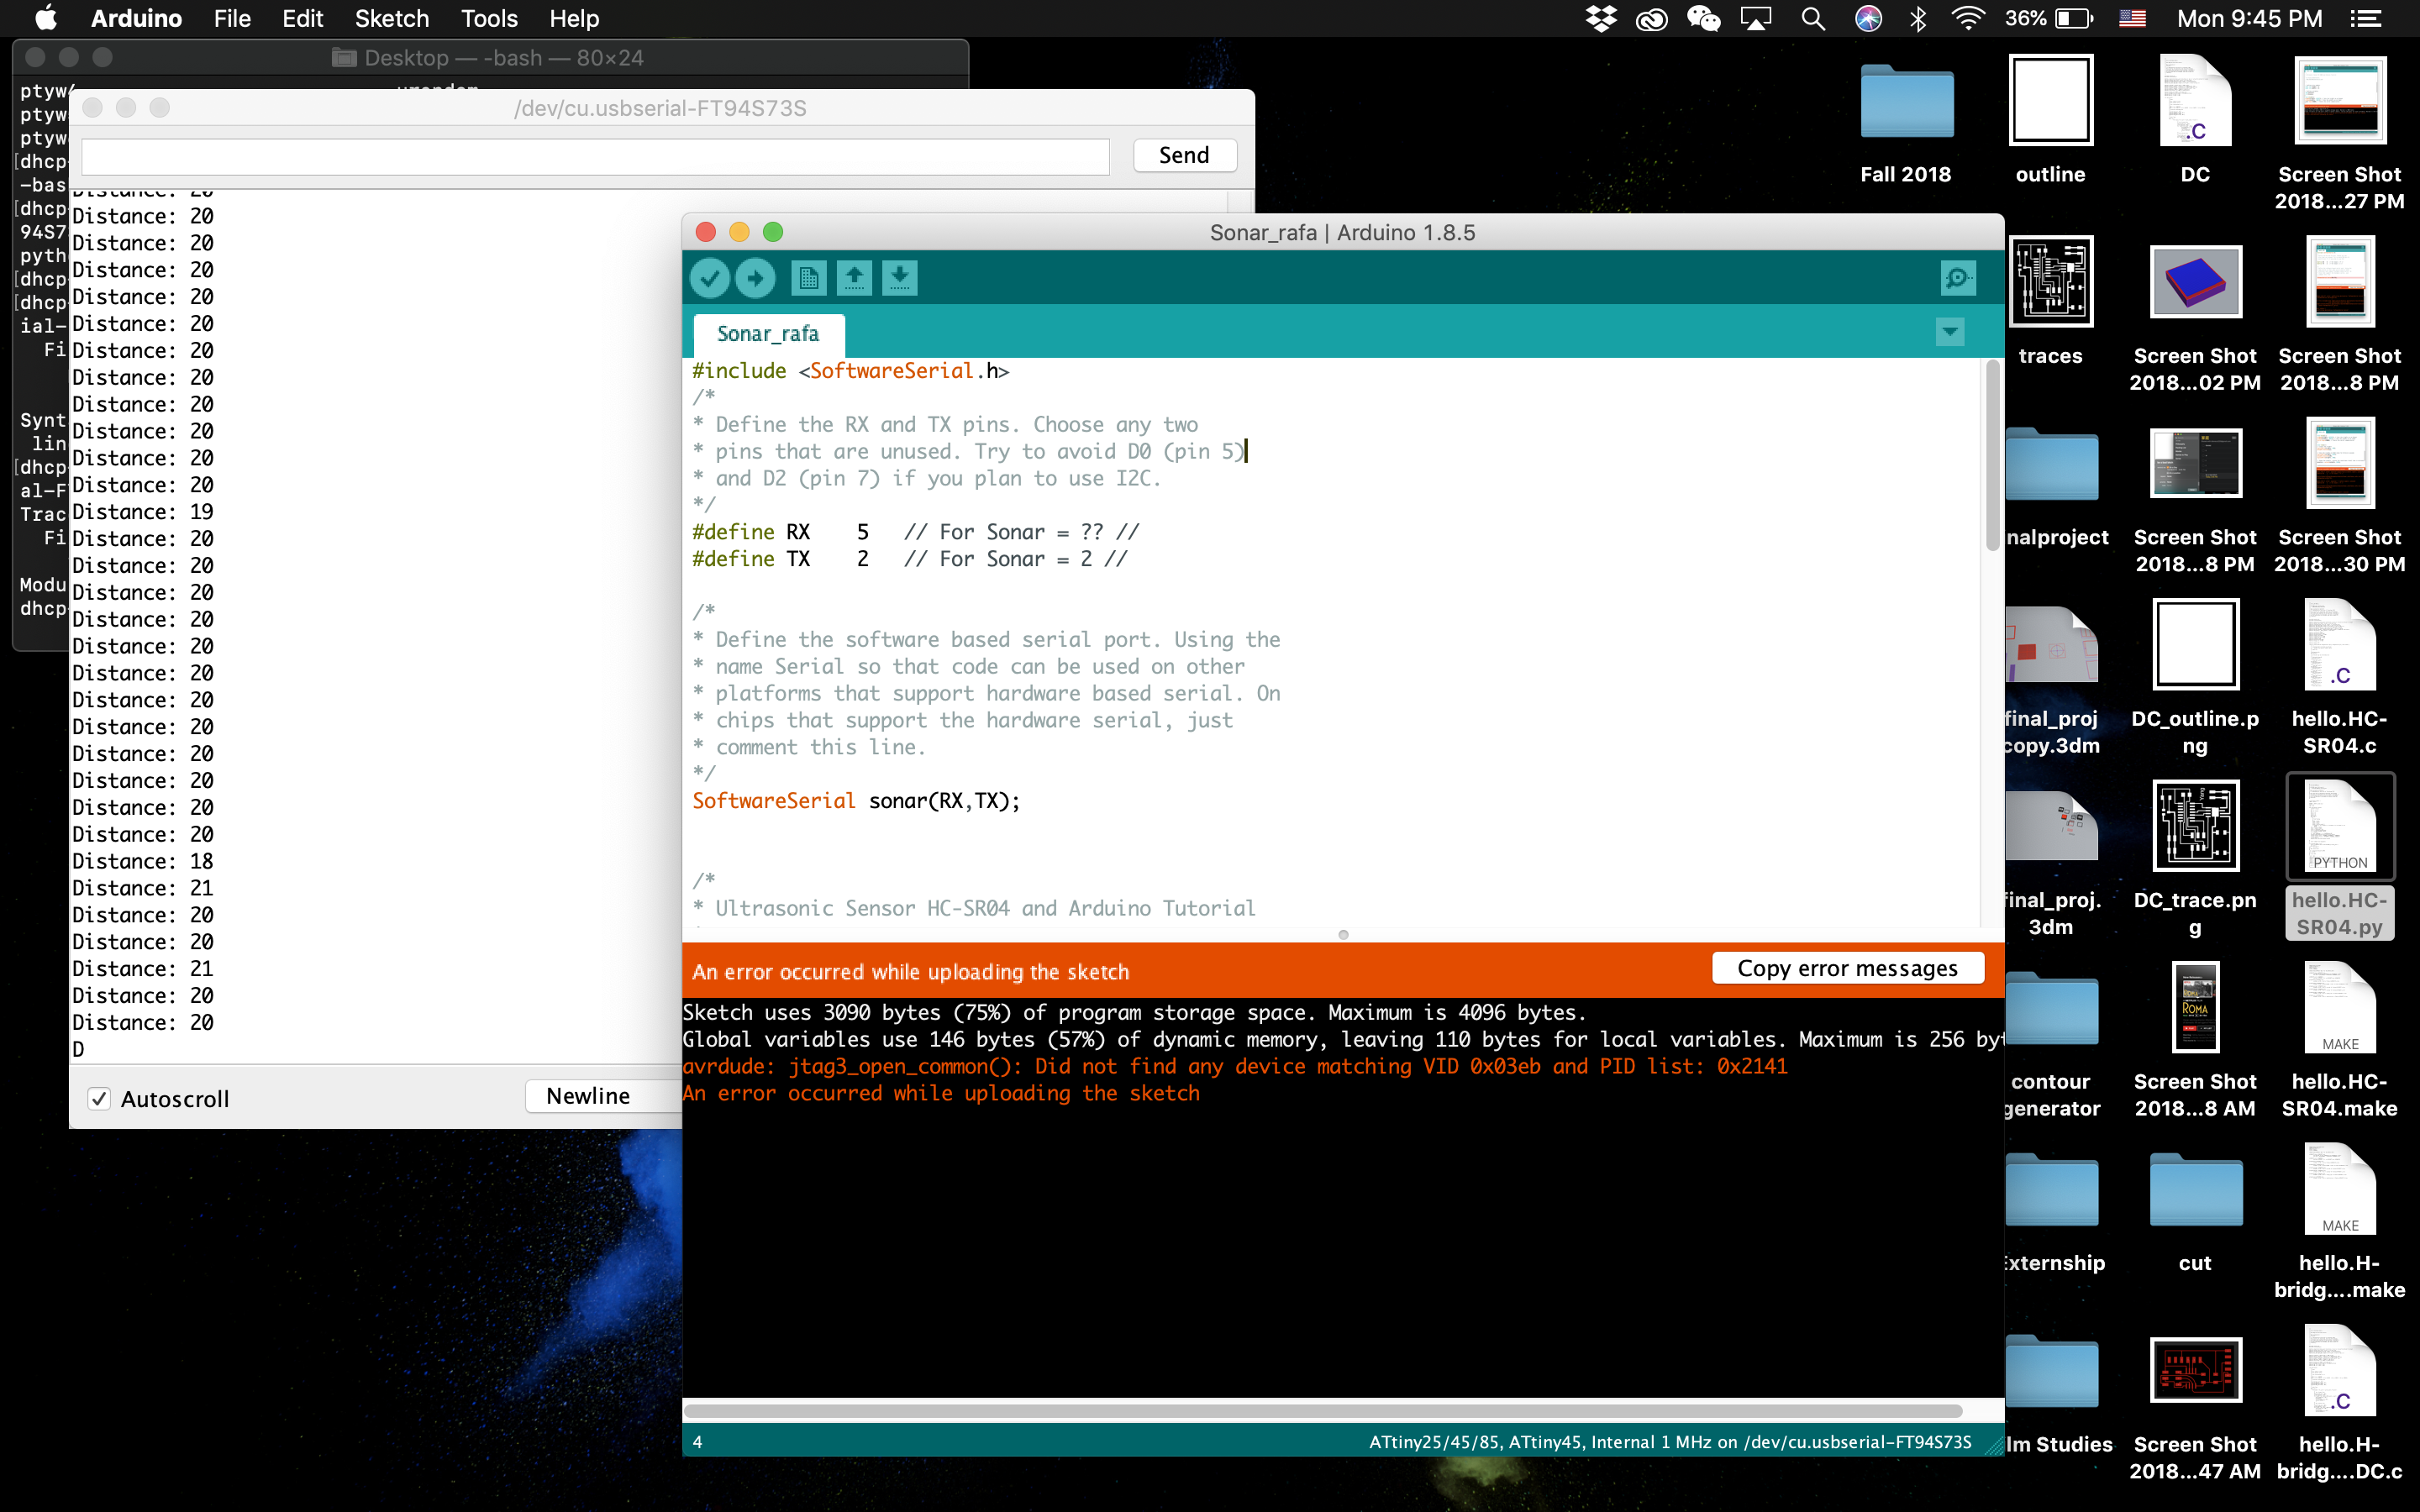
At the beginning, I tested the functionality of the sonar boards with the sample Arduino code. The code uses Serial monitor to display the distance it calculated with the formula. I also tested the slow, medium, and fast speeds of the DC motor with Neil’s code. Daniel gave me a really helpful reminder that the DC motor I had only works with voltage higher than 9V, and this also was the reason that I would not use Arduino for their communication later in the process.
I programmed the 2 boards so that the Sonar board will listen and calculate the distance from where the viewer is standing, and then send the signal to the DC motor board to adjust the speed of the motor, in terms of rotating slow, medium, and fast. Here are the final codes ( motor, sonar) for each of the boards, including how they communicate with each other. And at the bottom of the page I uploaded some working videos of each boards.
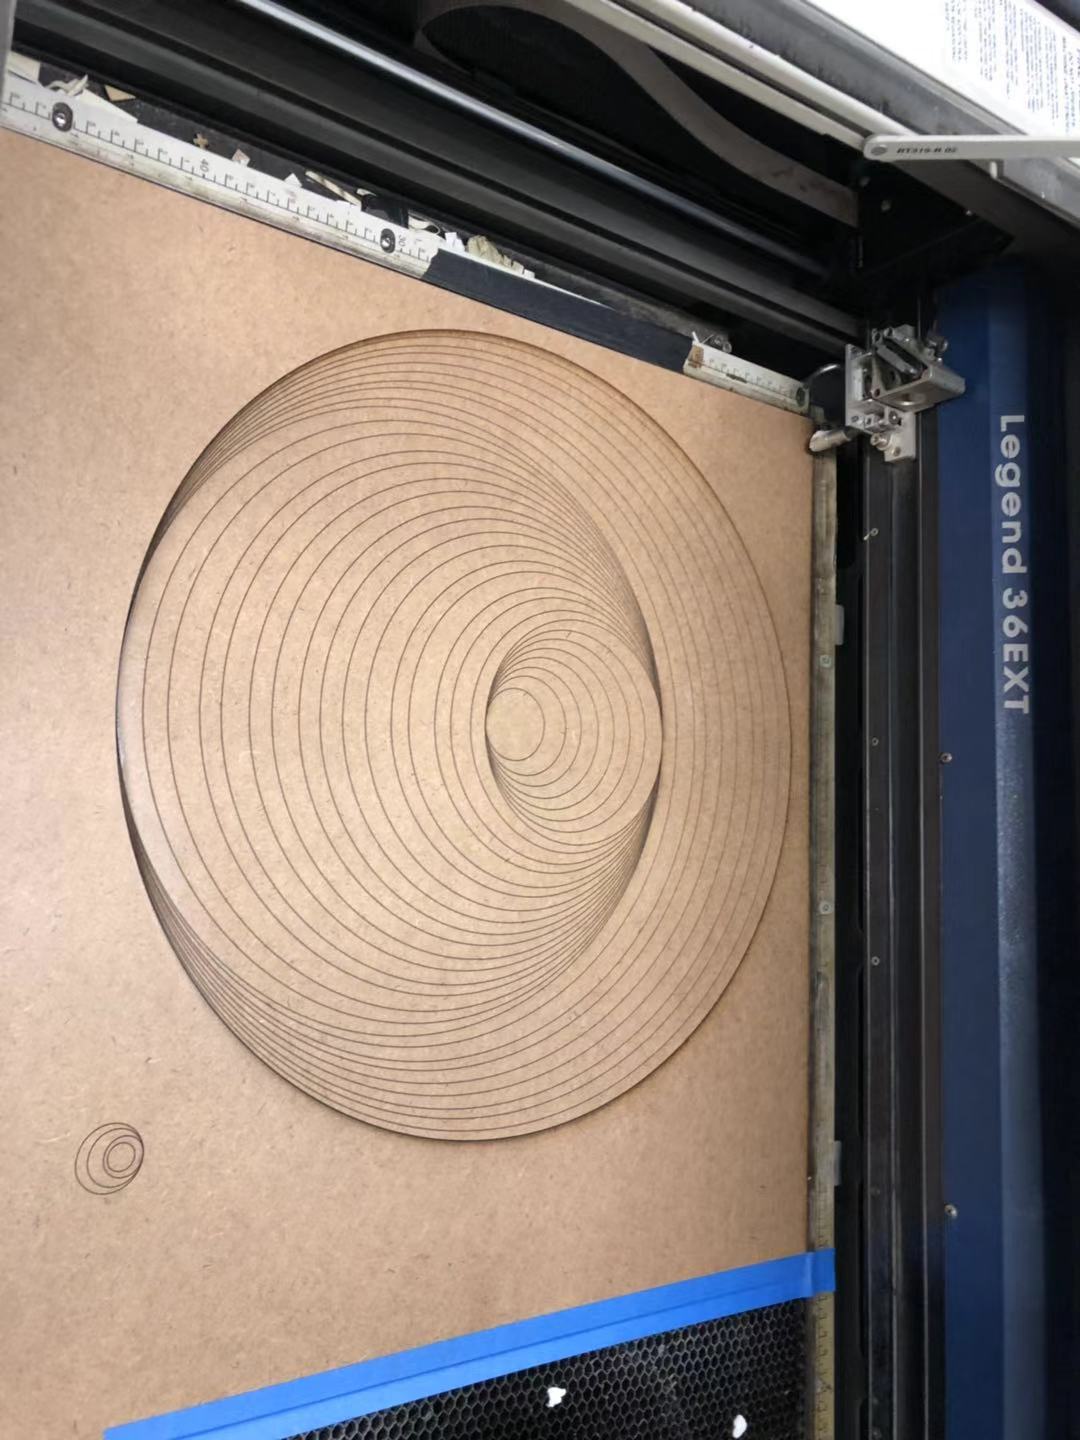
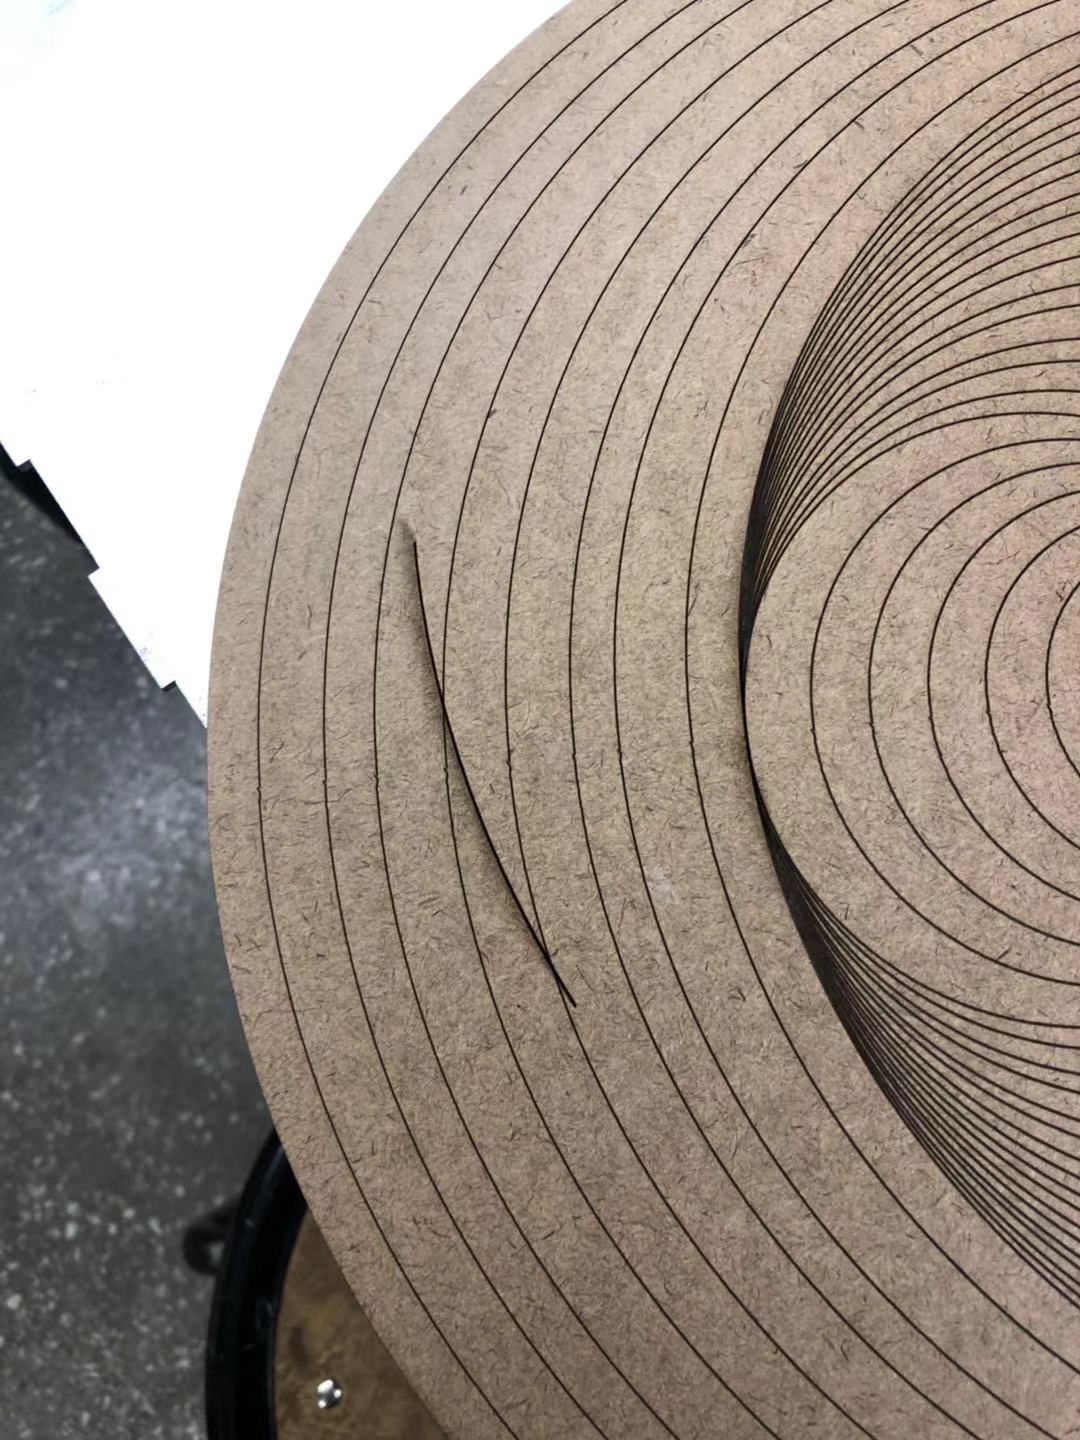
It was laser cut to have concentric circles on masonite, so that when it rotates with the DC motor, it will rotate like a vertigo.
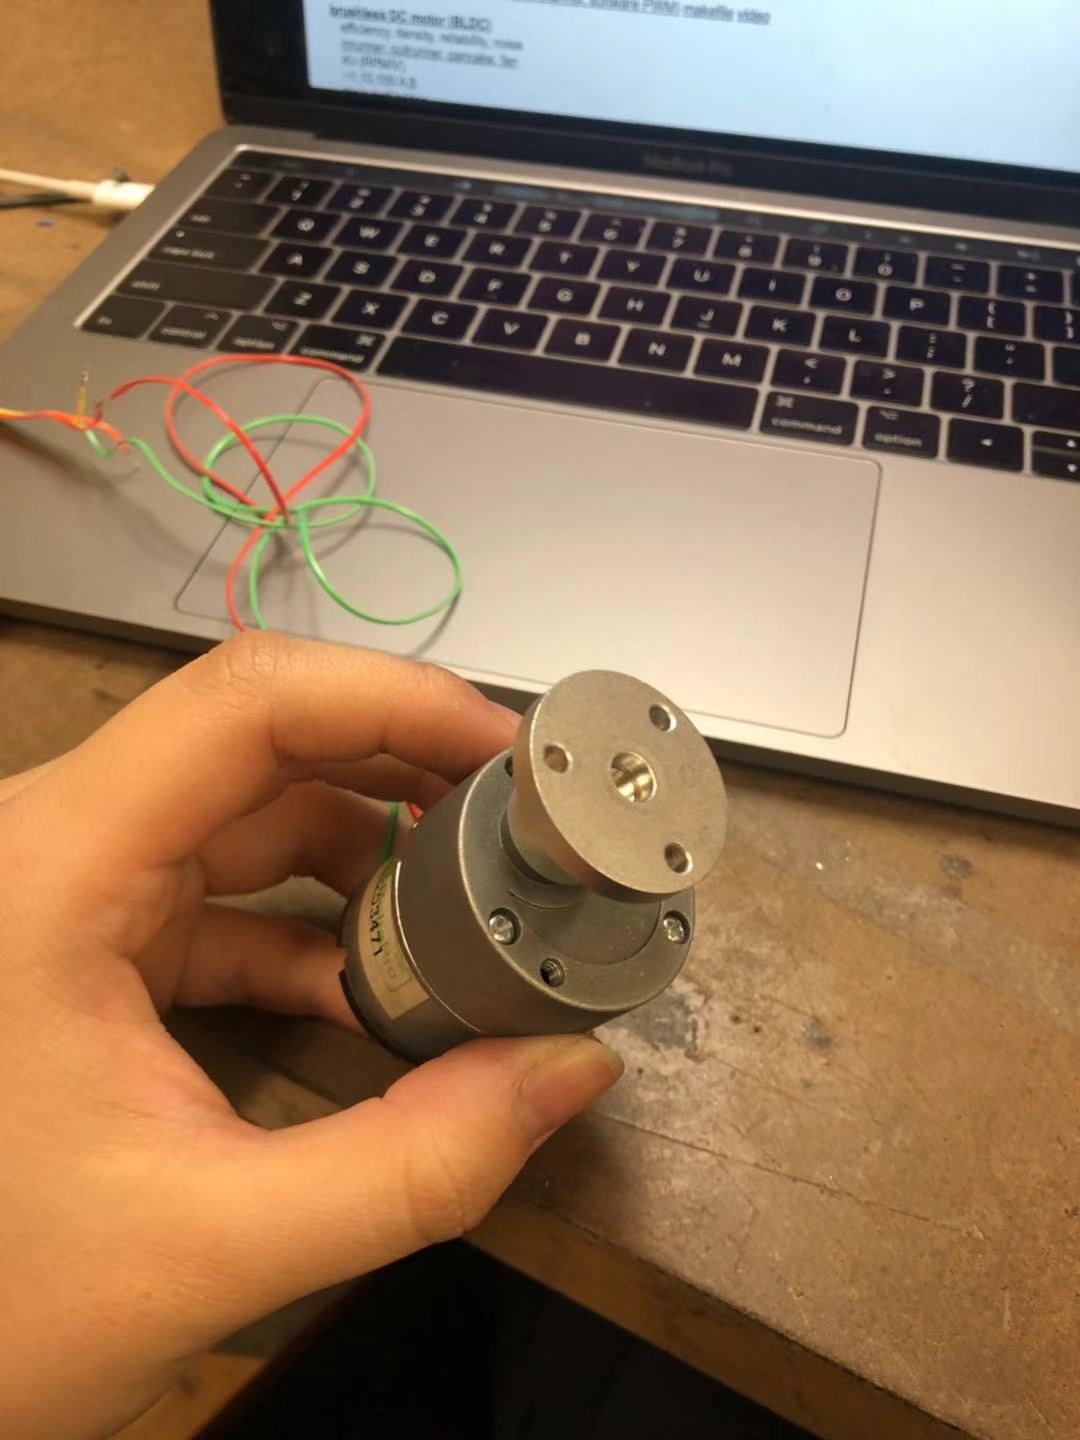
At the beginning, I only had the motor without any connection component. So I was going to 3D print a connection for the motor and the disk. But with others’ help, I obtained a metal connection piece that can be screwed onto the motor. As you see from the detailed picture, I had to drill through the disk to make sure it is stable.
Then I assembled the finger joint box and then fitted sonar onto the box, and then wired the box.
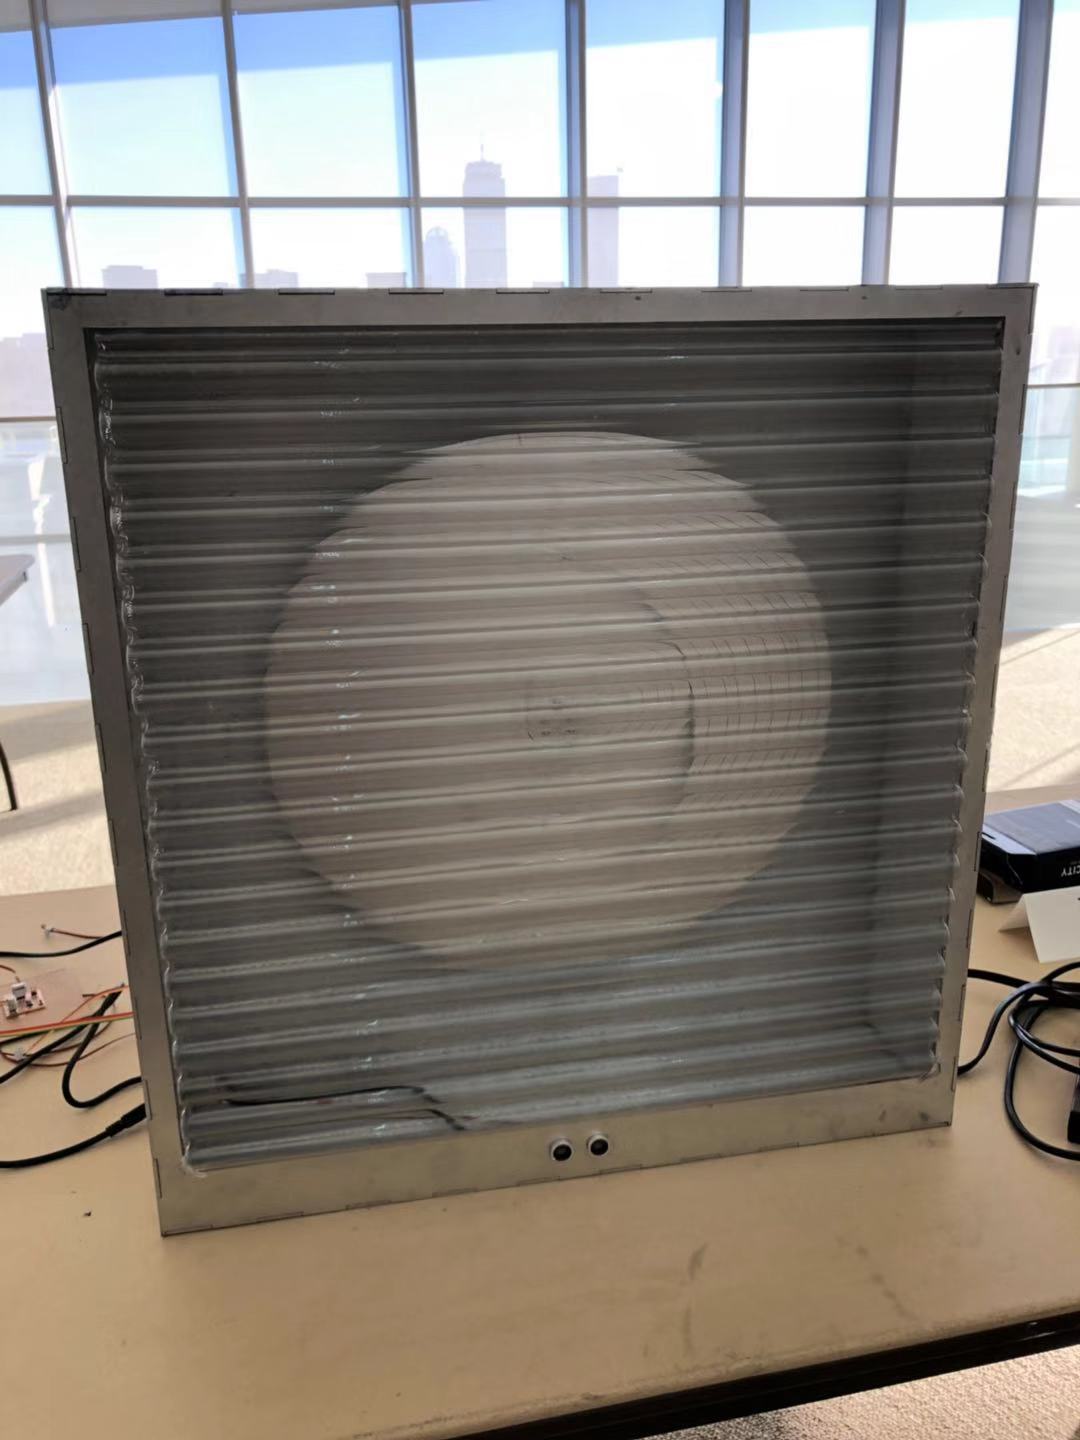
These are the working videos of the piece I shot in the arch shops before the presentation. The sonar on the art piece detects the viewer;s distance fromt the art and then set the rotational speed to slow, medium, and fast when the viewer is closest, farther, and farthest. The first video is the sonar detecting the increasing distance. The second video is the sonar detecting the decreasing distance. The third video is about the detail of the optical effect of the screen on the rotational disk.