This week, I learned the overall molding and casting process. More specifically, I learned setting the 3D tool path on shopbot and mastercam, and molding in Oomoo silicone and drystone.
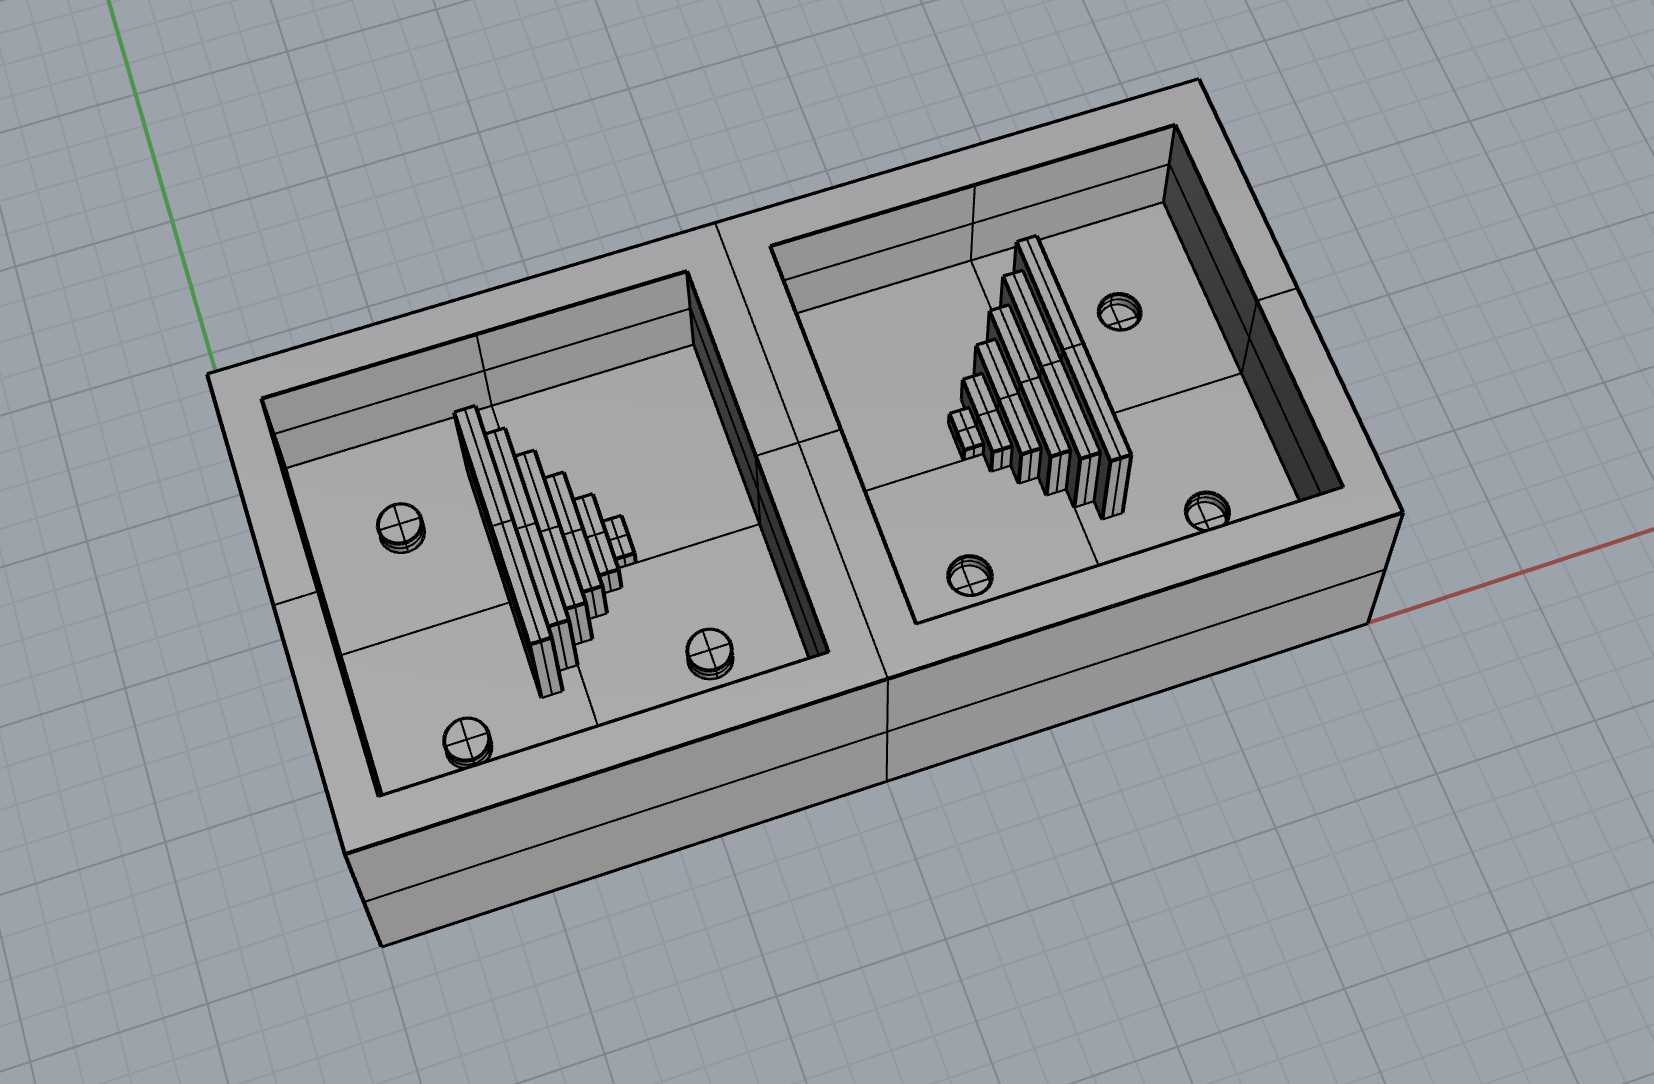
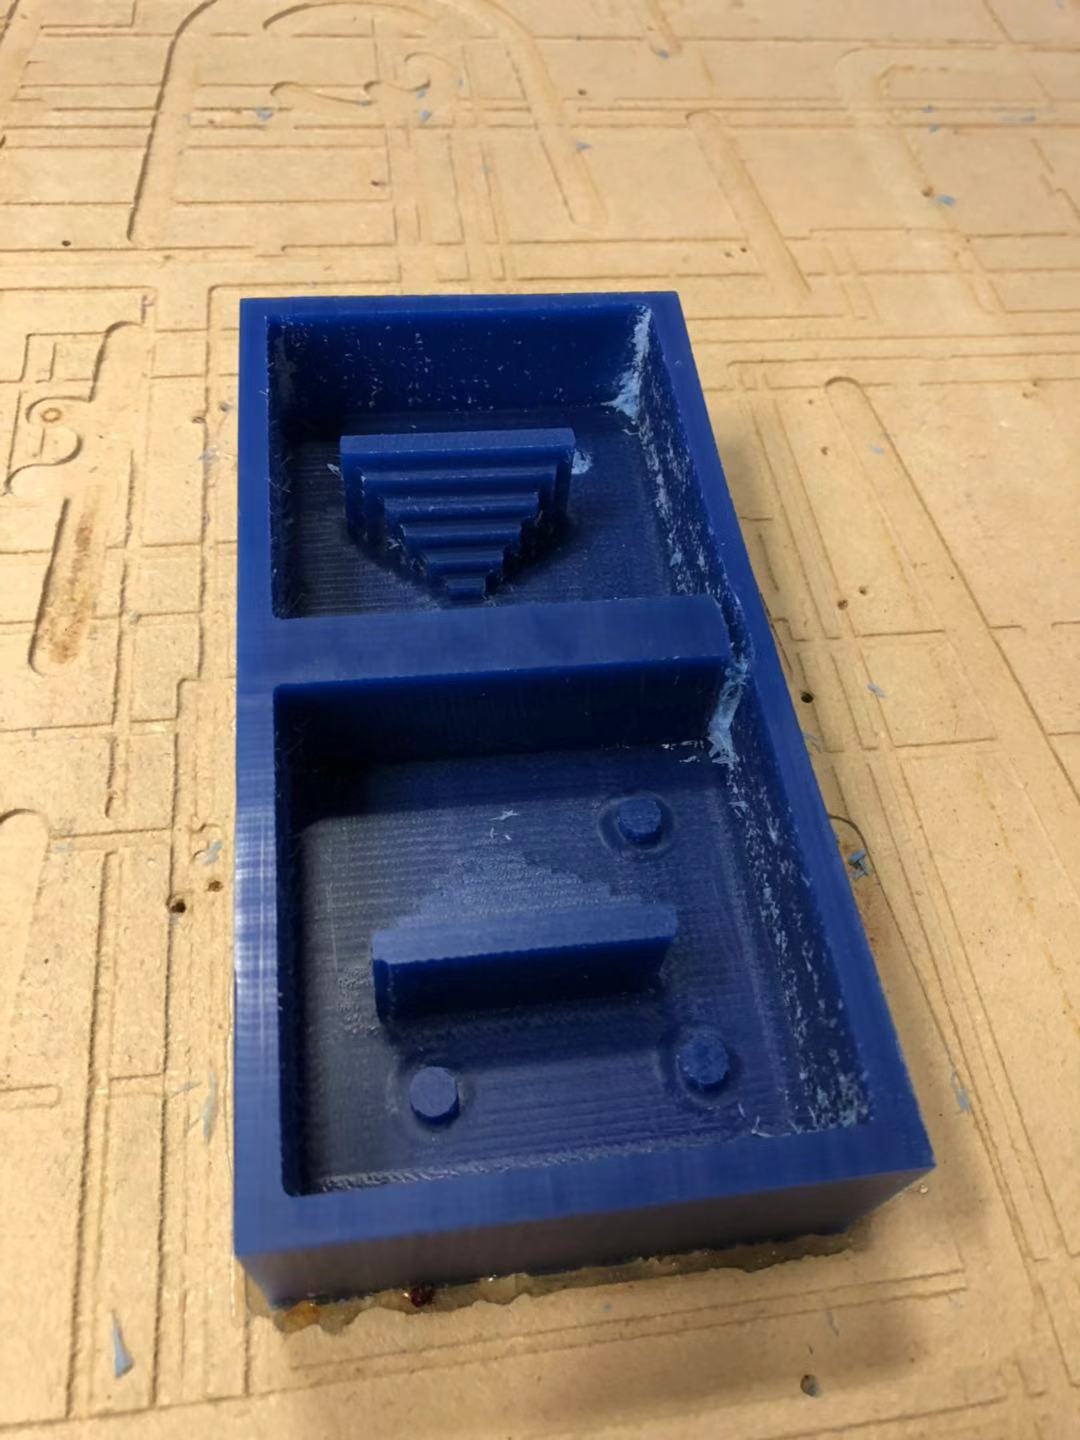
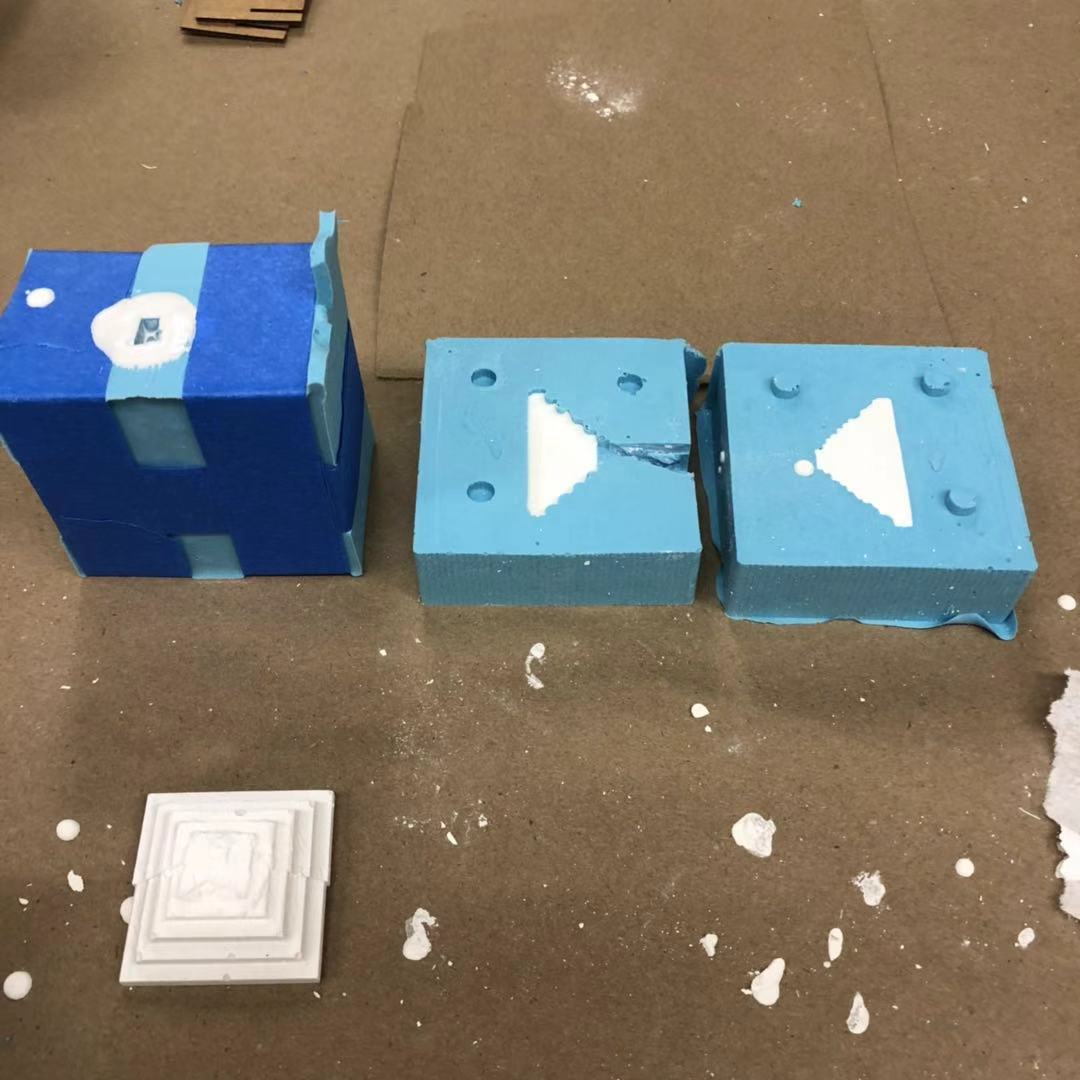
I am doing a project about the materials of the pyramid in another class I am taking, so I made a simplified version of the stepped pyramid in a two part mold. I designed a 6-layered stepped pyramid and then spilt it in half vertically. I then put 3 registration cylinders on each side of the mold.
Because Jen reminded us to design the wax mold around the available tools and their limitation, I then went from designing 8 layers to only 6, to ensure the lower point of the pocket is not too deep to reach.
Also, because we need to take into the consideration of the width of the tool, I put the registration marks as far as from the other vertical walls, so that the tools will not result in collision. I then BooleanUnion all of the geometry in the model to make a unified object.
For final product, I exported a 3d model of a wax block engraved with the half of the pyramid on each side.
I actually found the obj.txt file online, provided by Denmark National Museum. I then converted it to obj and then imported into Rhino. The mesh imported was extremely detailed, that it has the flaws on the original sculpture. I then scaled it to 40 inches tall and exported as a stl file
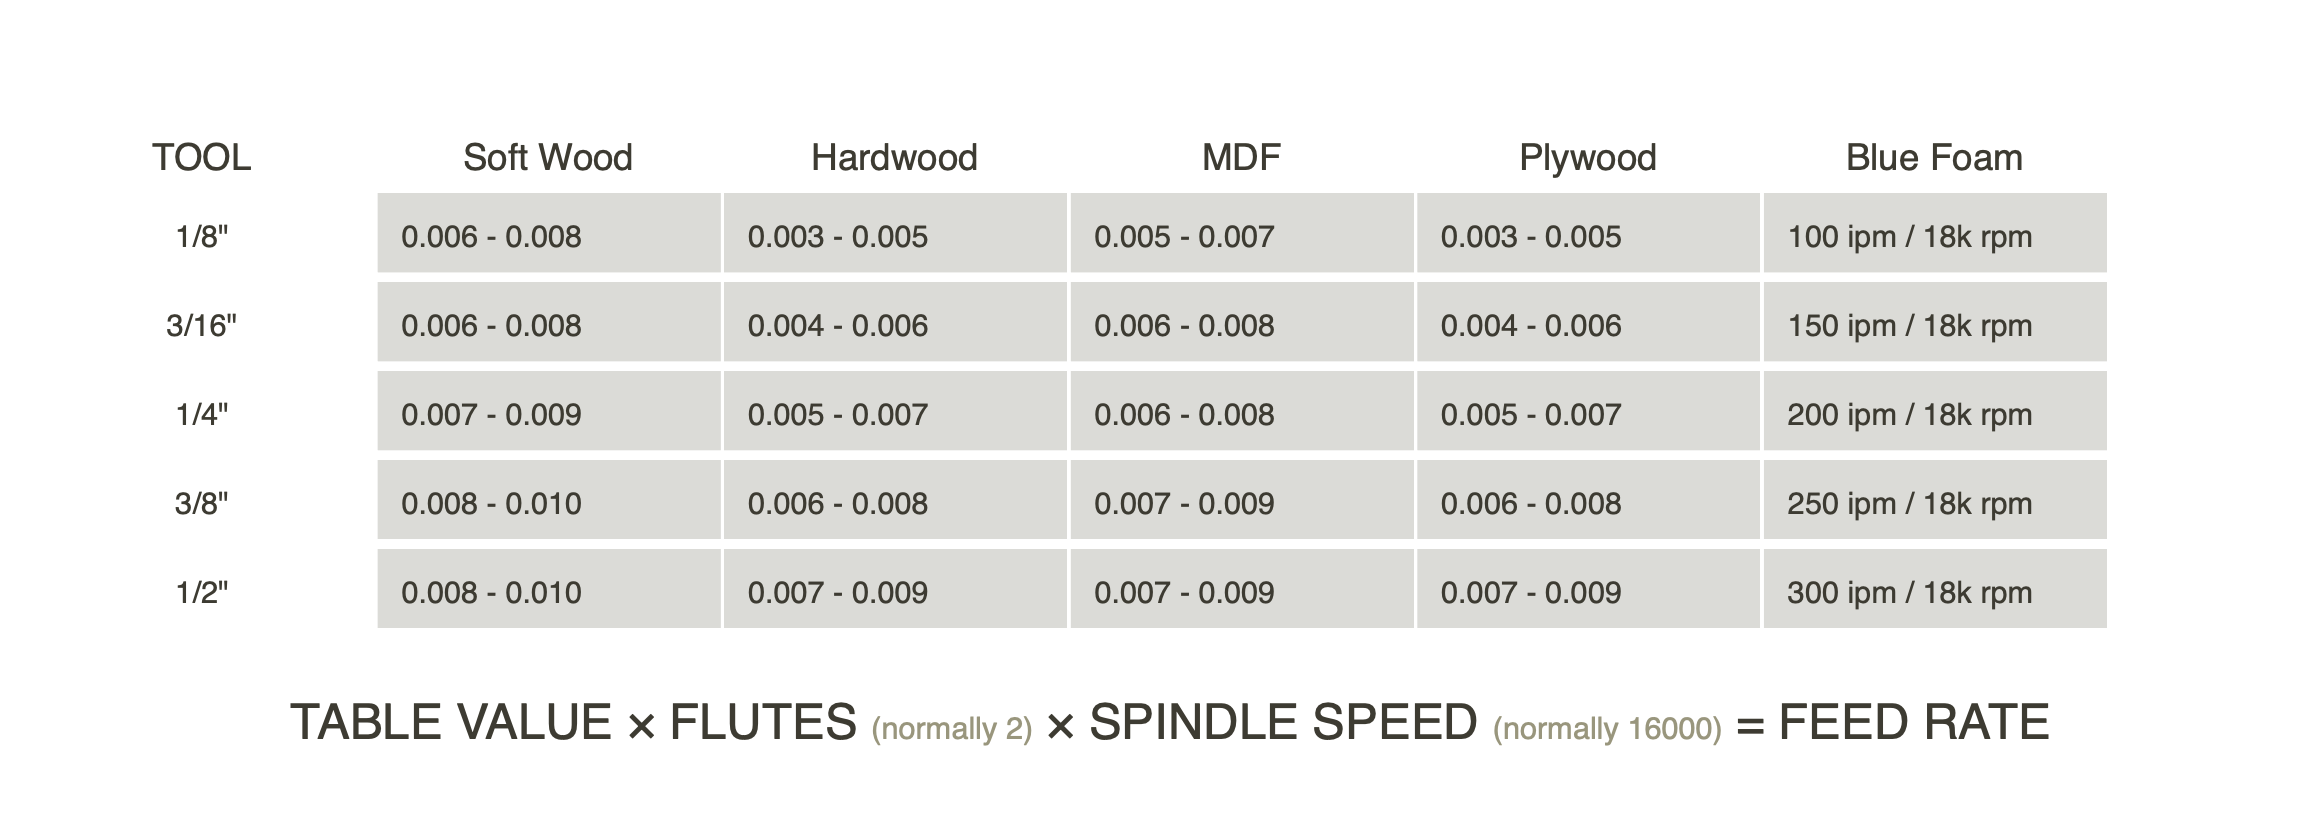
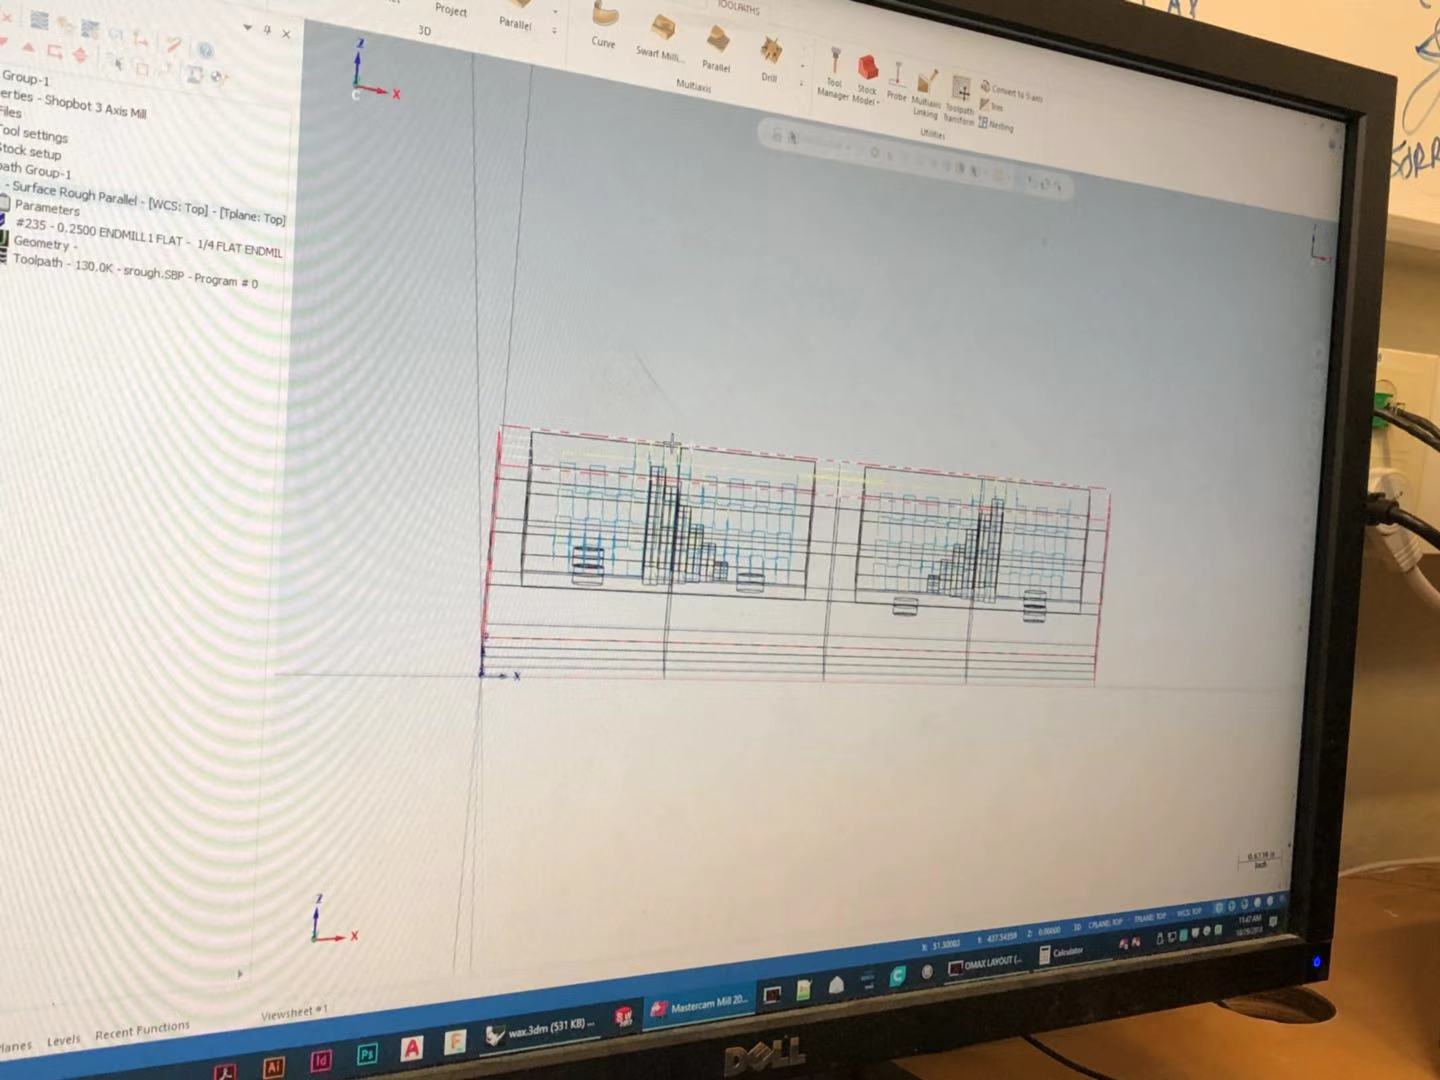
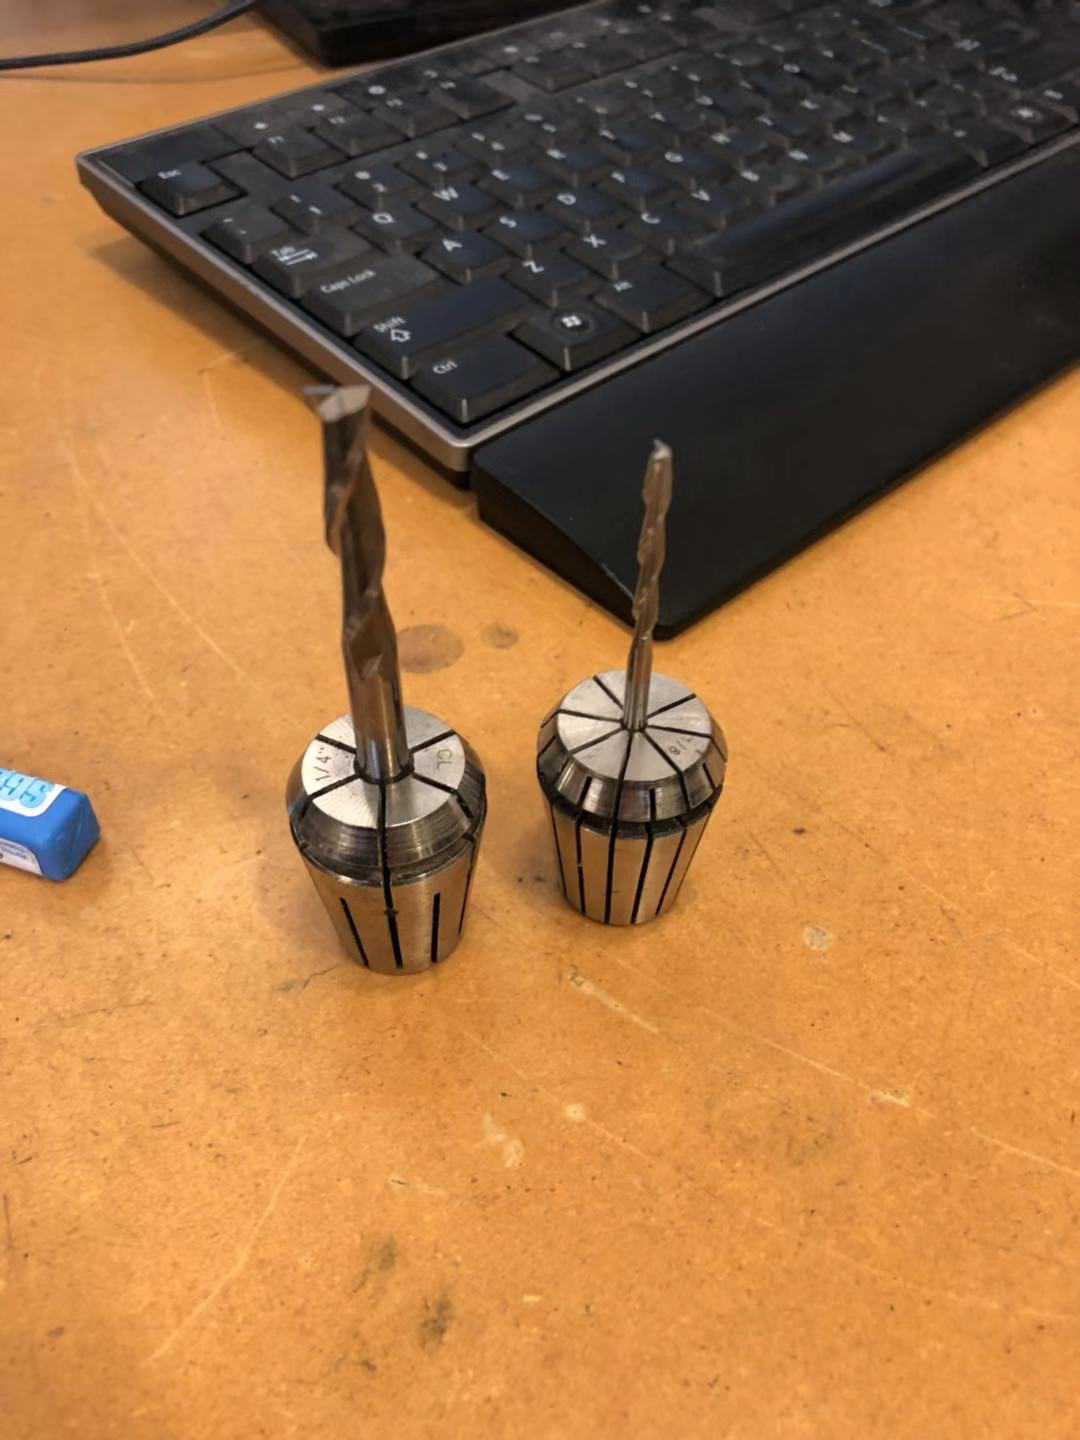
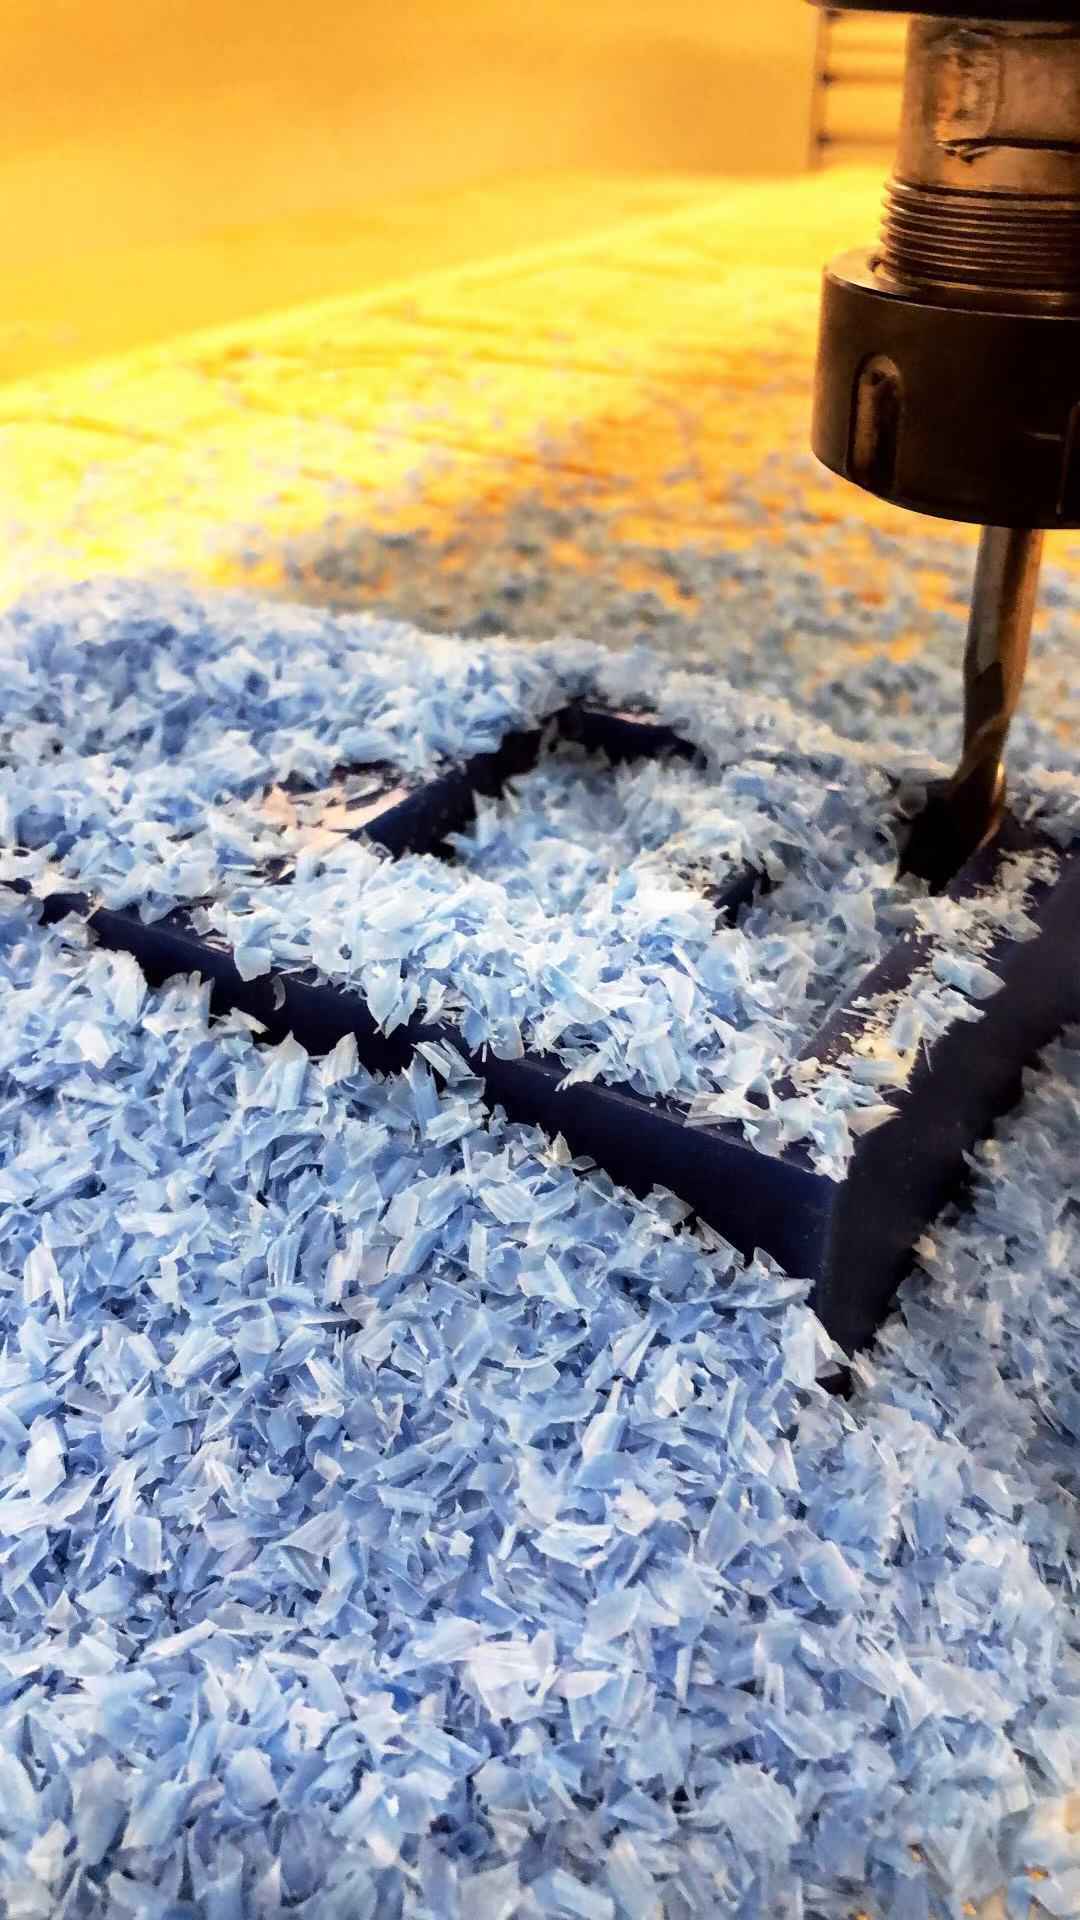
We first put up the right sacrifice table on to the shopbot, and then hot-glued the wax block onto the bed. The board was really heavy. Then we installed the drill bits using the torque helper tool, and then warm up. We first performed all of the 1/4 contours, and then 1/8 for the pockets and the cleaning up.
The process of the end mill going into the wax and get the wax bits out of the block was so satisfying. It was so real when I saw each line of the G code is executed.
During the process, an error was raised, saying that the end mill is not supposed to be used as a drill, but as we knew we were trying to make 3 small indentation, we continued the job.
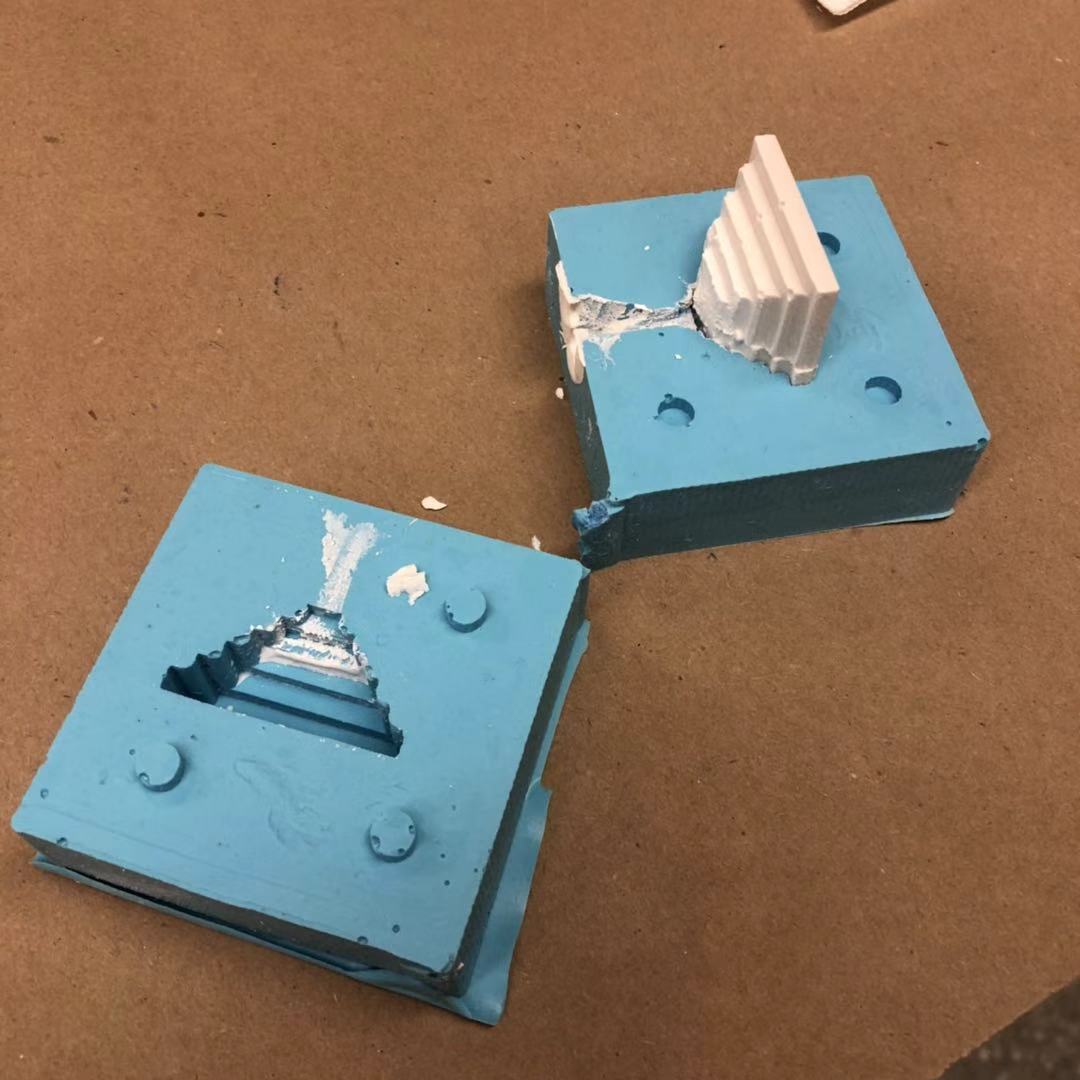
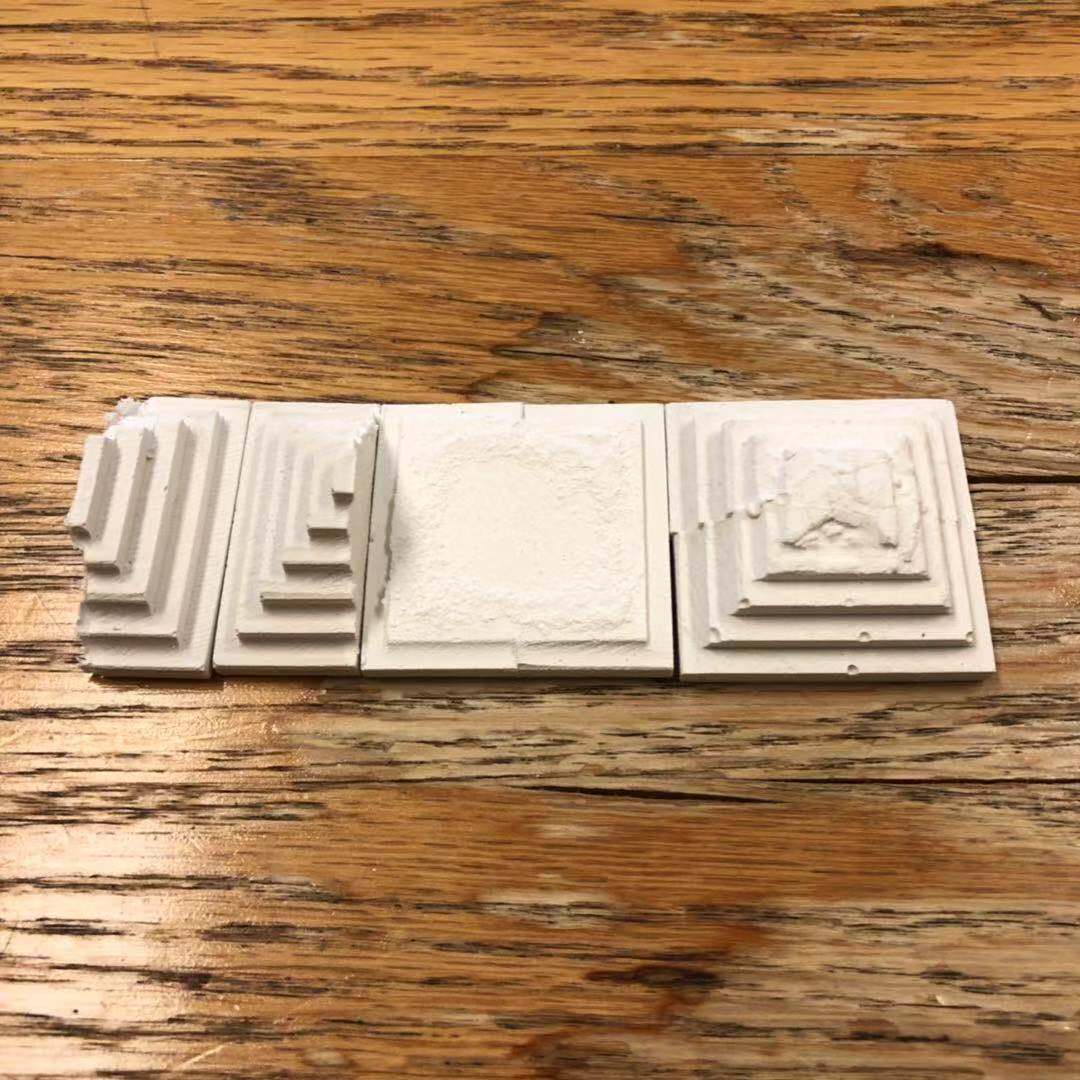
For the result , we found an accidental cut between the two pockets, which was the result when the drill was moving between 2 pockets during jobs. But this accident could be fixed easily, either by filling it with the hot glue gun, or just break the silicone formed by the mold.
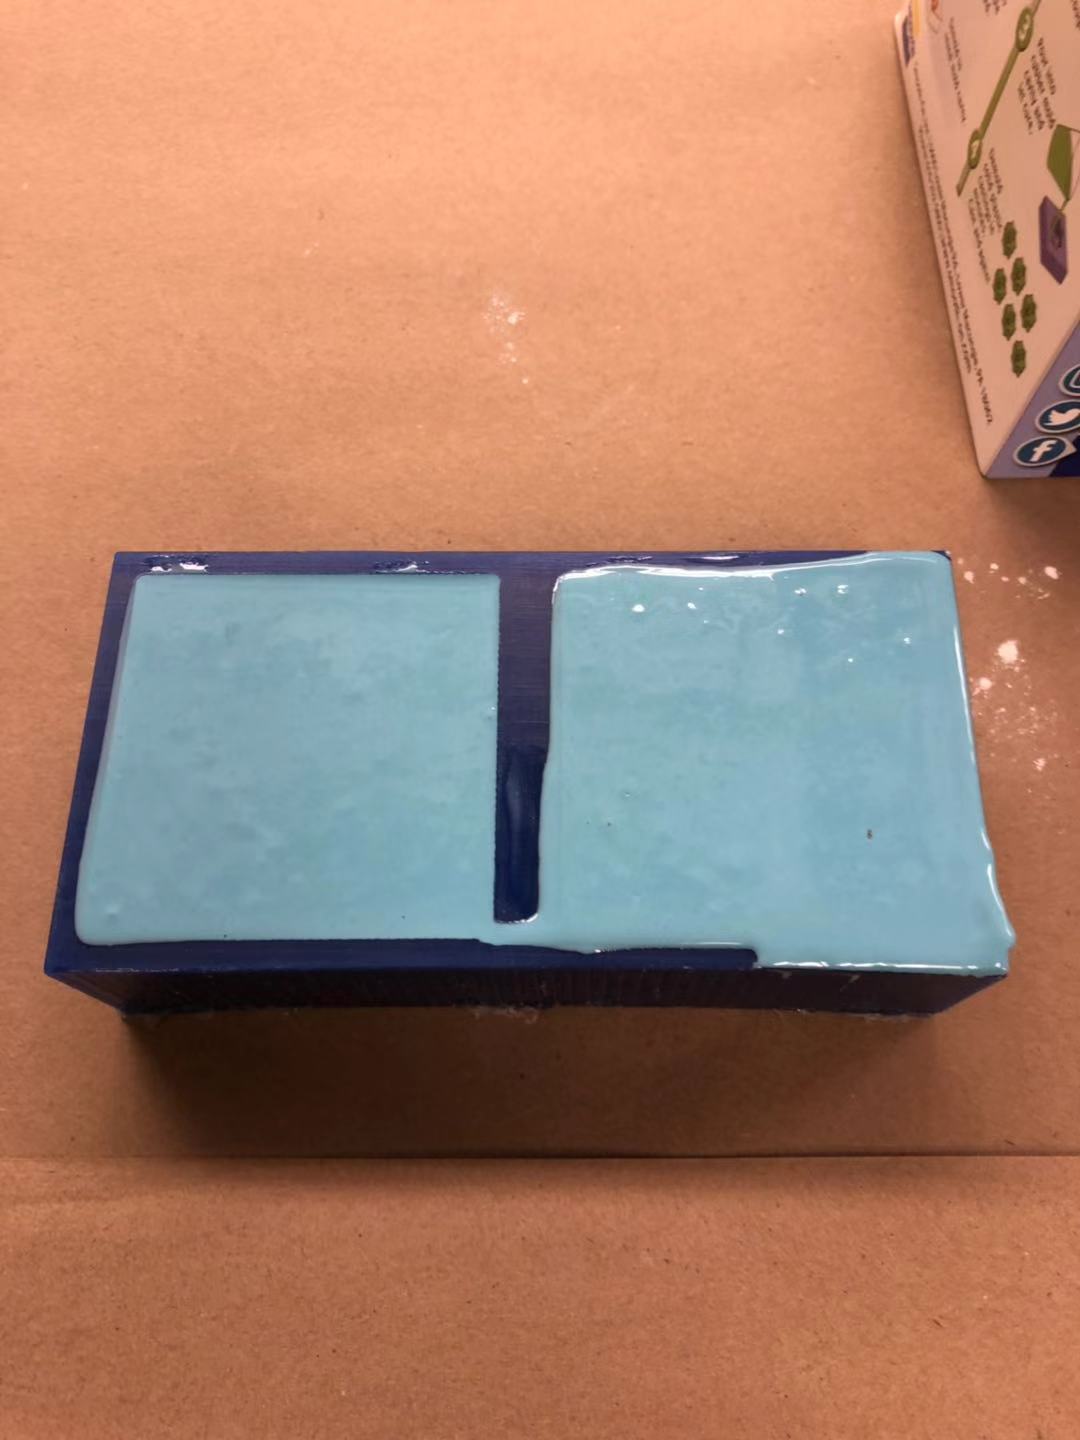
Because I did not cut a funnel to pour the casting material into the mold, I used a knife to cut a small opening on one side of the mold.
After the first casting of the silicone, I realized that even though I thought I forced all go the air in the silicone out, but there were more, probably because I stirred in too much air when I was mixing the A and B. Thus the first casting of the silicone was not that successful.
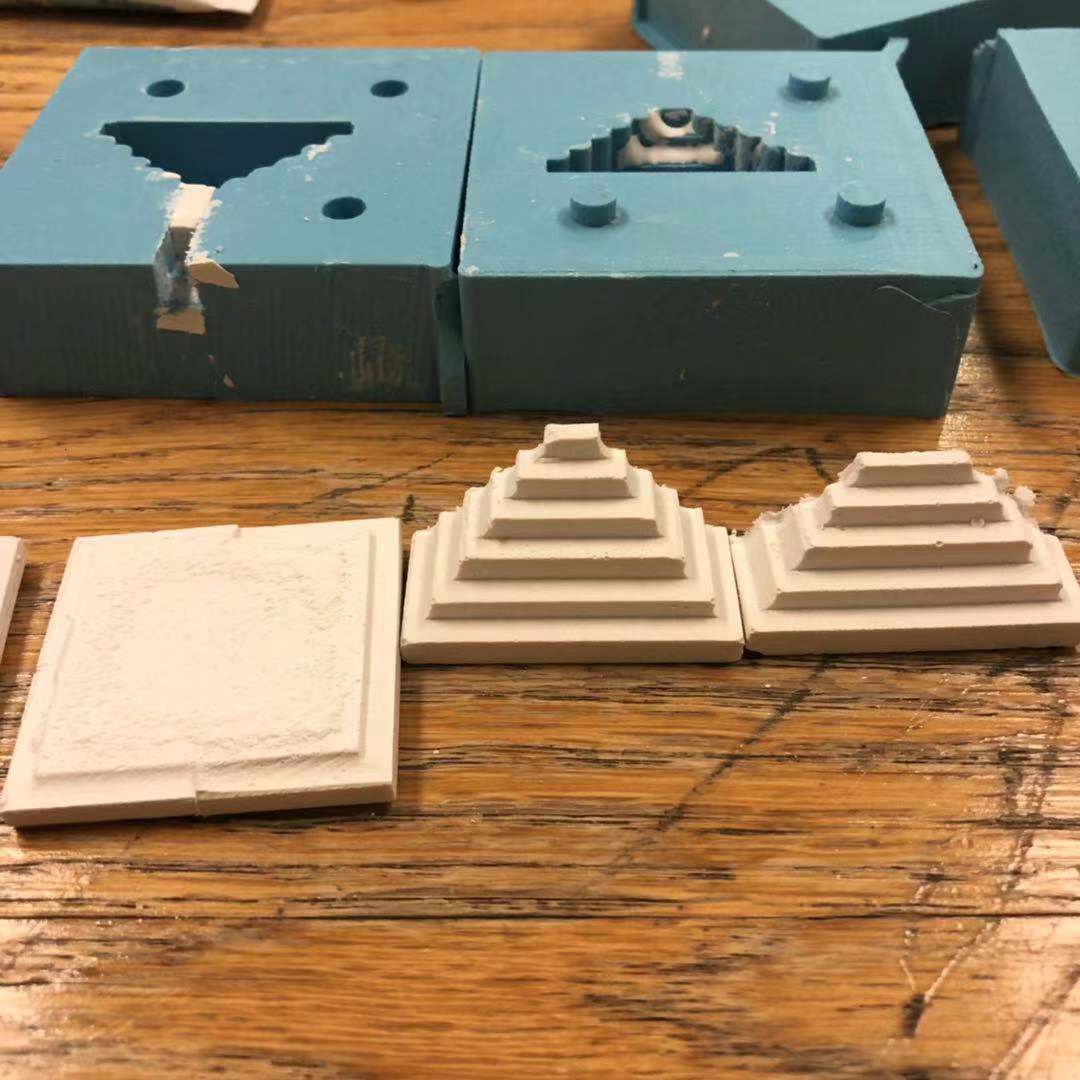
However, the second casting, with much longer shaking time, produced a much cleaner result, as shown in the image. This contrast really taught me the difference from shaking the mold.
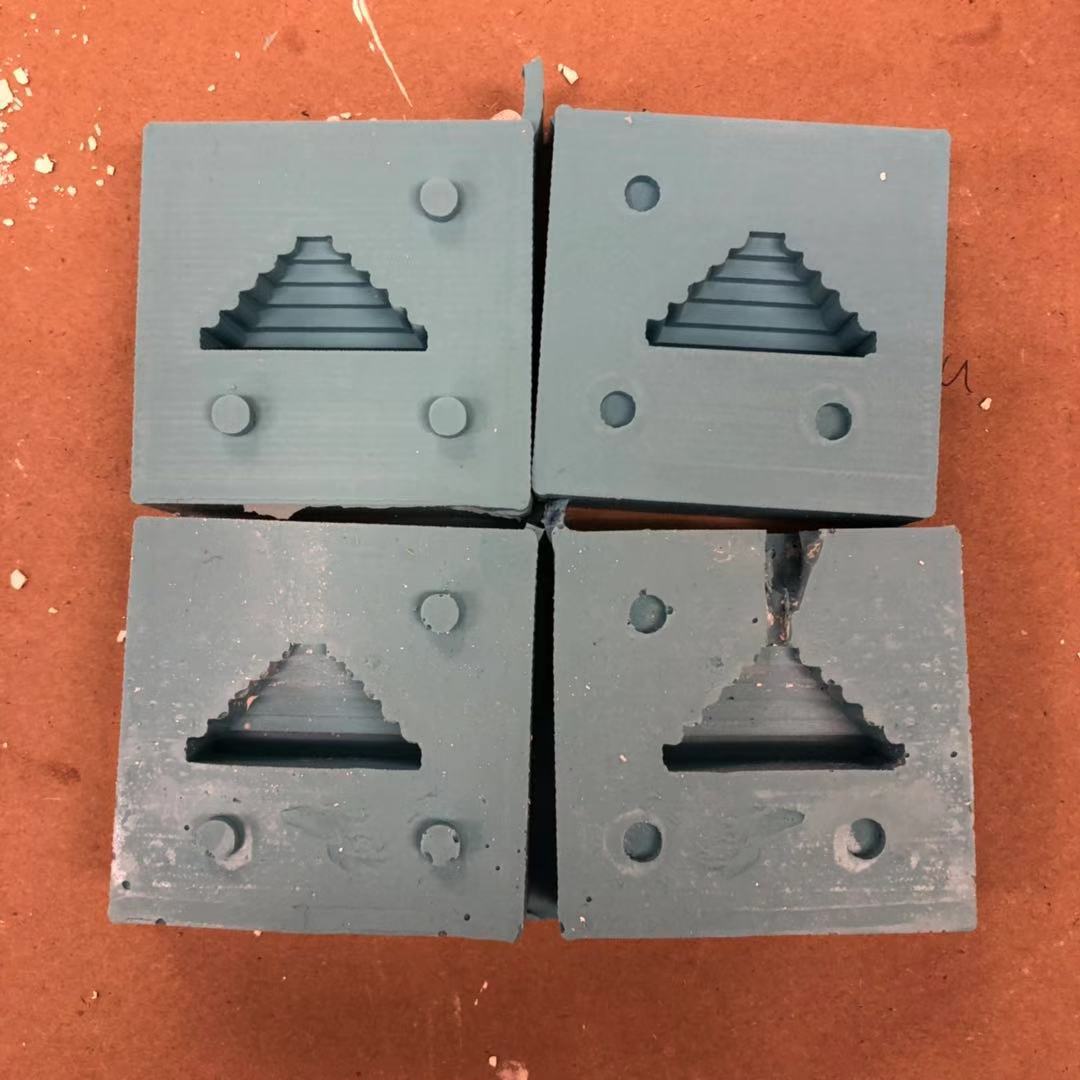
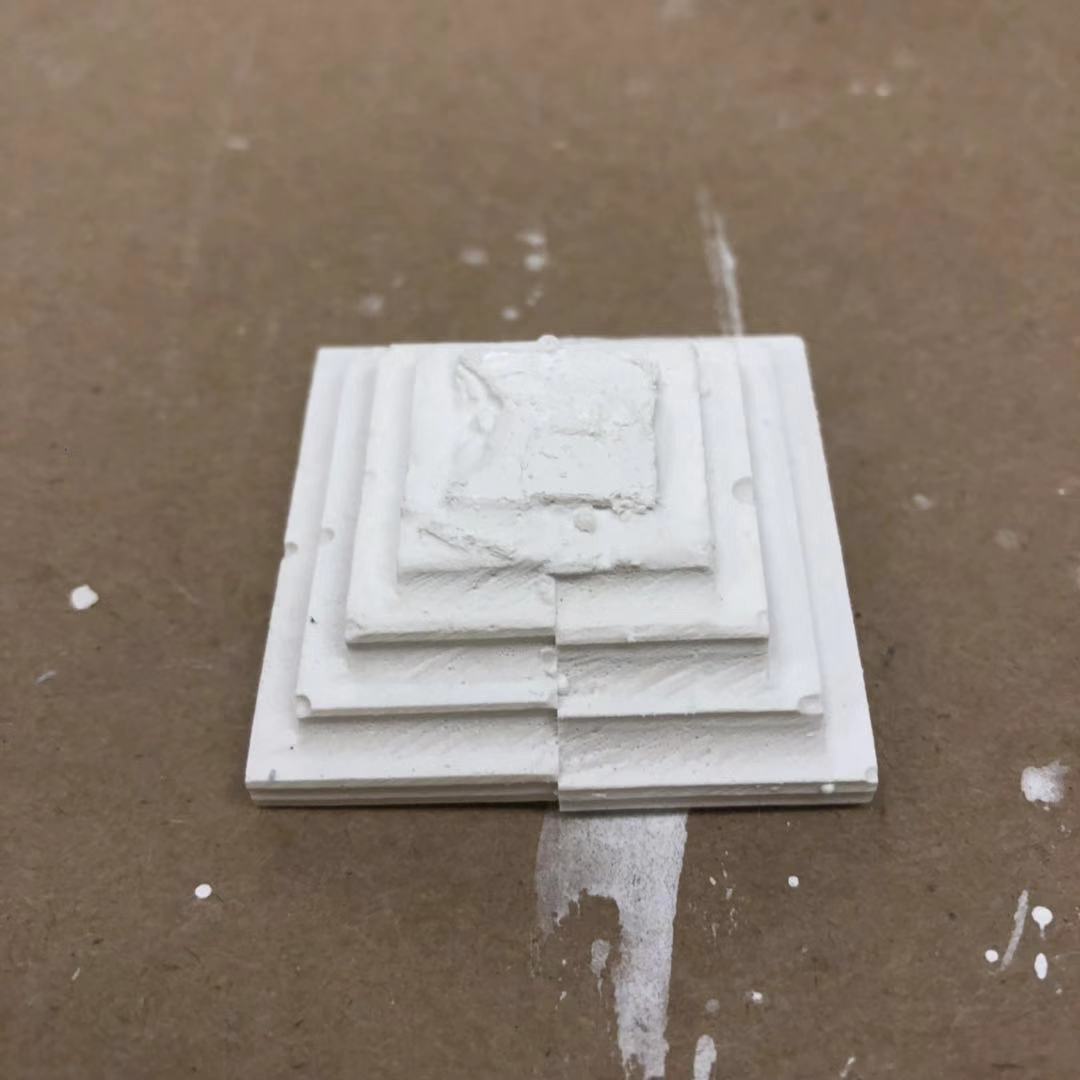
The first attempt was made from the bubbly silicone mold, and with the funnel that is bigger than I possibly needed. And because I was not sure how much should I pour and what would result in a clean top, the result ended up being incomplete at the top. Also, because the registration marks did not hold the two sides perfectly together. Thus we can see that the two halves of the pyramids don’t match.
After the first attempt, I used the bubbly mold to cast 2 single layered mold. Shown below.
For the second attempt, I then had a cleaner silicone mold, so that the side will be definitely smoother. However, I think the funnel I cut messed up the geometry of the top of the pyramid, so the top might not be finished again. But what I learned was to tape the two sides together to make sure the two sides will match up. The photos will be uploaded once demolded.
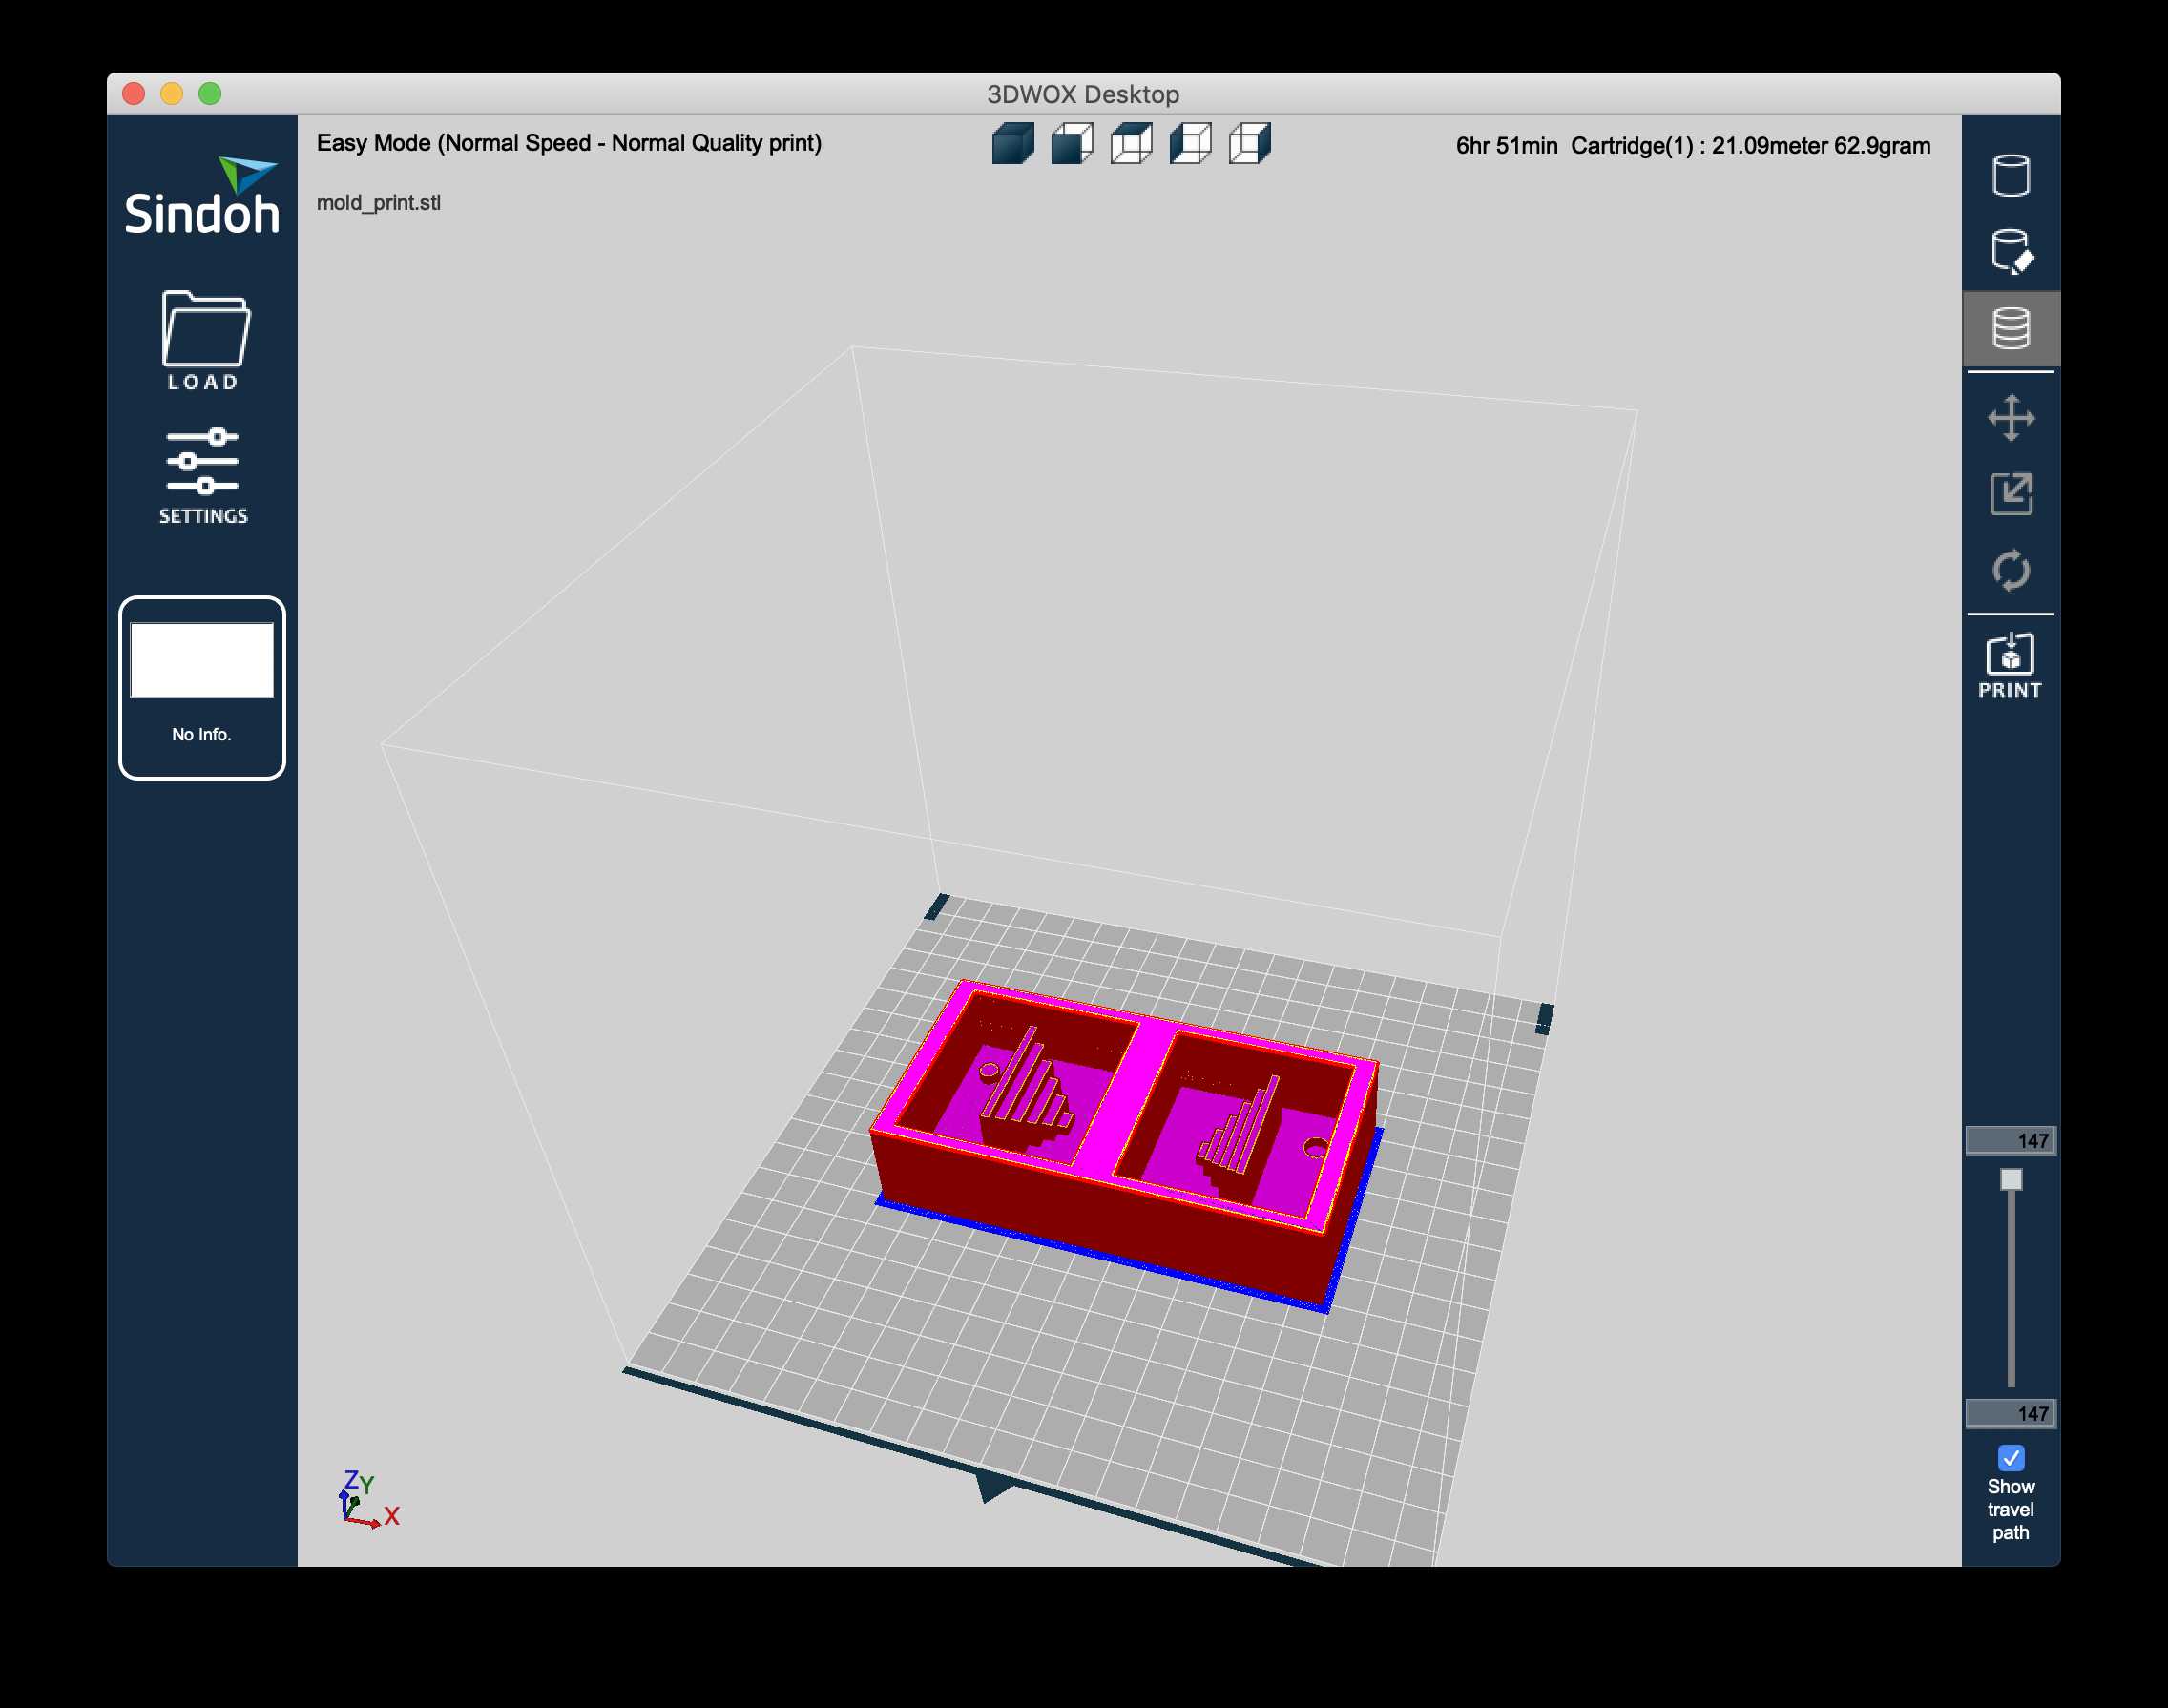
I also created a 3d modeling mesh to be printed out and also use as a mold. I would love to compare the smoothness of the surfaces of the milled wax and printed PLA.
For my final project, I want to make an optical art installation. And I think I can eventually use the molding and casting process to create a small prototype of a screen. I also want to look into the transparent plastic or epoxy casting.