How To Make (almost) Anything
7 - embedded programming
MORSE CODE: HELLO WORLD
helloworld.c | helloworld.c.make
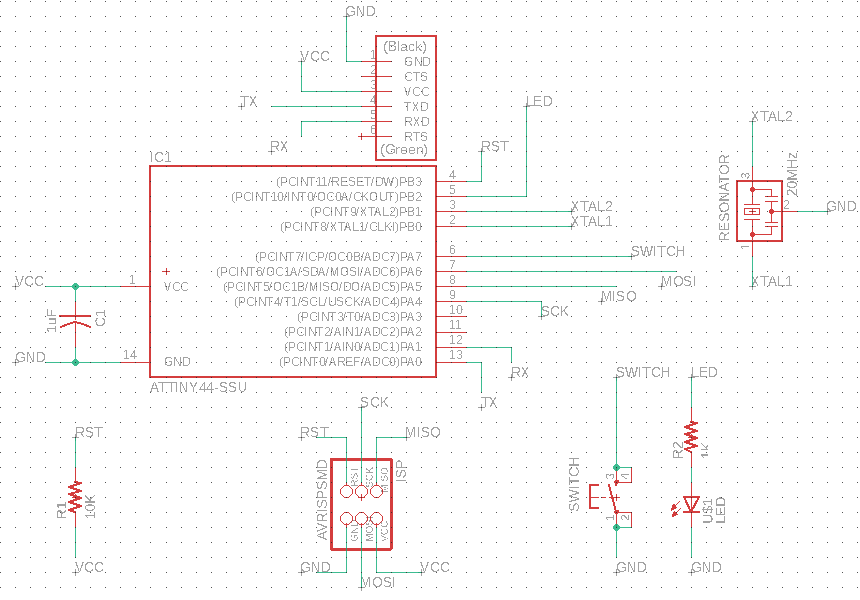
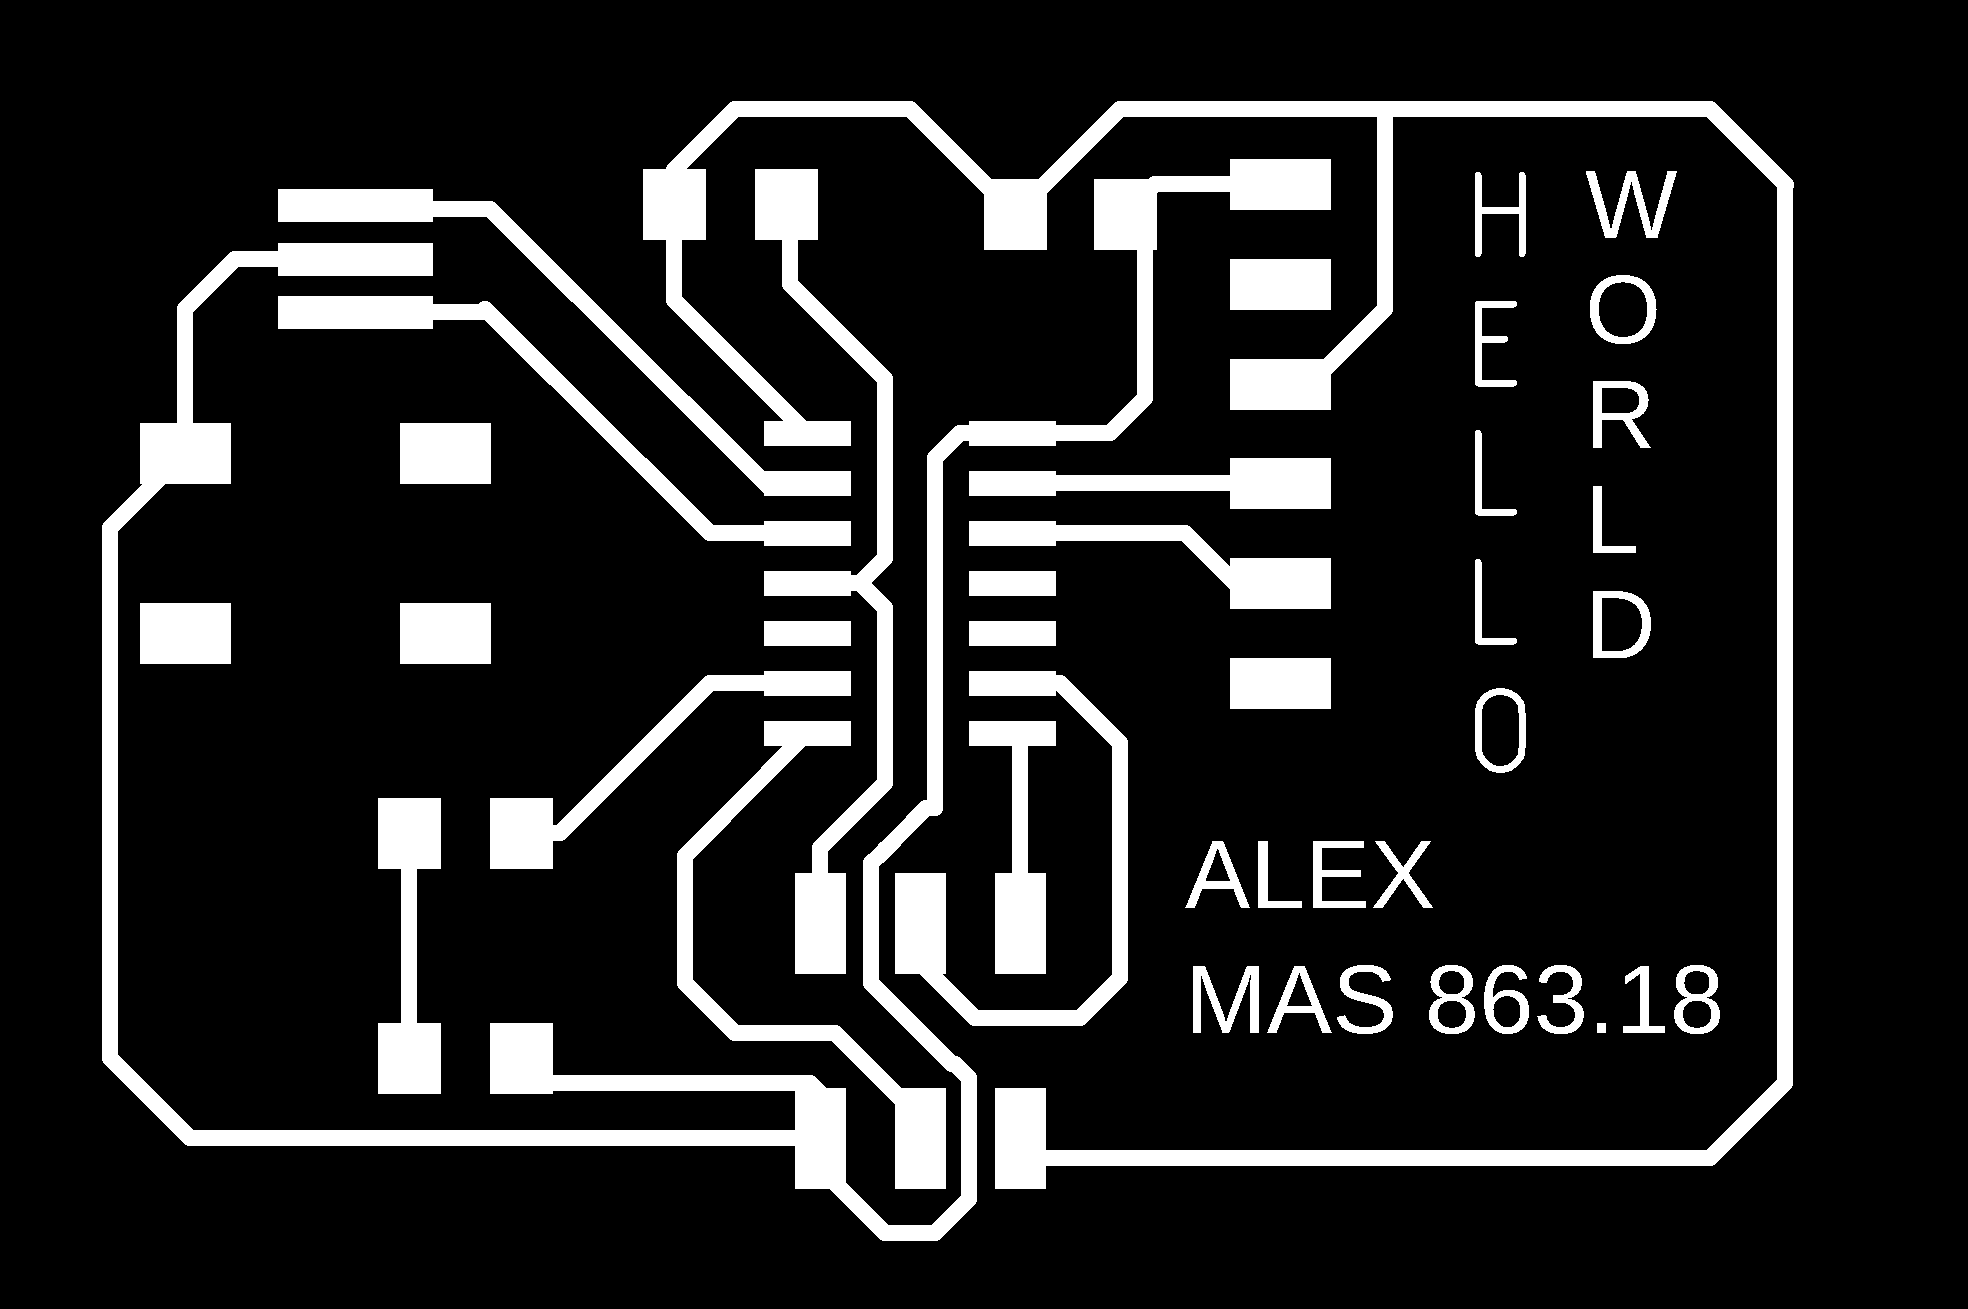
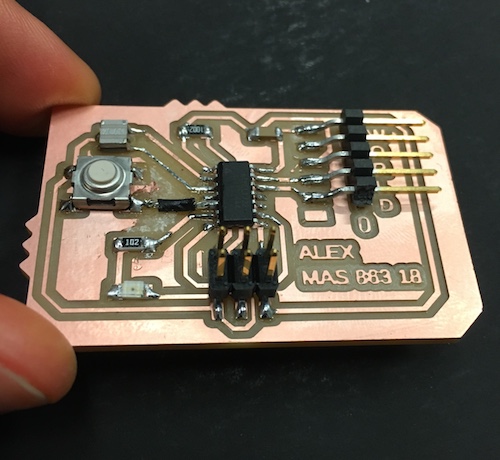
In a previous week, we designed and milled a PCB, and then stuffed it with an ATtiny44, a button, light, a capacitor, resistors, and other components.
This week’s task:
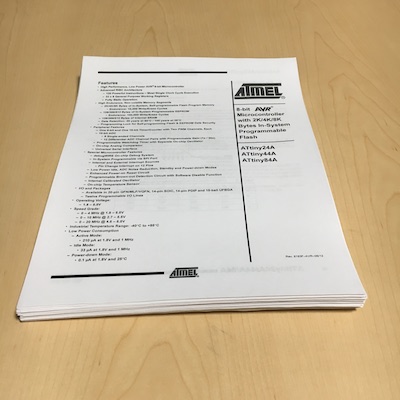
Read the datasheet for the ATtiny44 microcontroller & program the microcontroller to make the board do things.
READ THE (286 PAGE) DATASHEET
Reading the datasheet was helpful for understanding
- The location and purposes/capabilities of the microcontroller pins
- The internal architecture of the microcontroller and how it works
The datasheet described the architecture with many words, as well as diagrams. The diagrams start with high level overviews
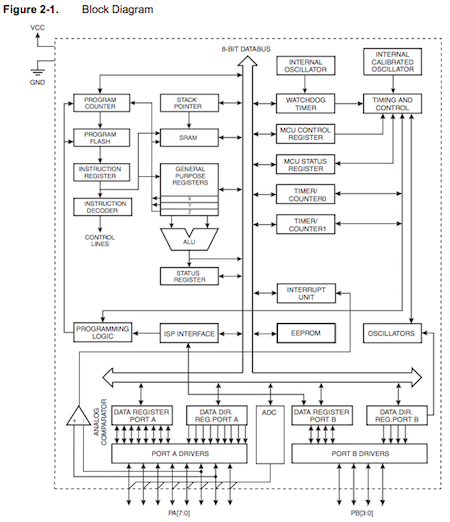
and then zoom into subsections of the architecture, such as the CPU Core.
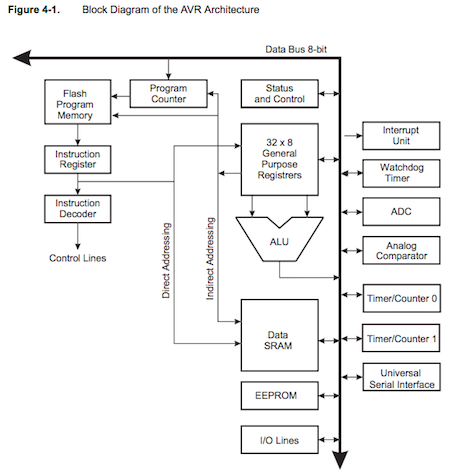
The ATtiny44 is in the “AVR” family of microcontrollers. AVRs use the Harvard architecture which has separate memories and buses for instructions versus data. The datasheet describes how this allows the microcontroller to maximize performance and parallelism. “While one instruction is being executed, the next instruction is pre-fetched from the Program memory. This concept enables instructions to be executed in every clock cycle.” (section 4.1)
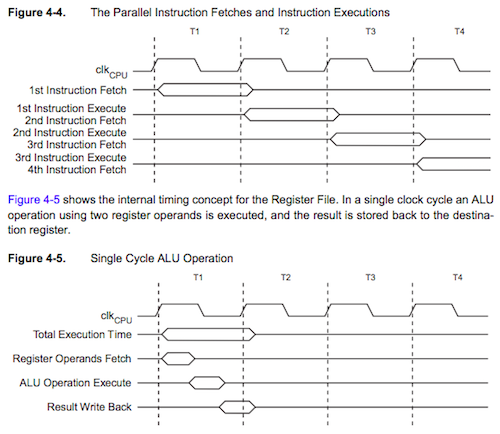
The timing of these parallel processes is later diagrammed in section 4.6.
Similarly, the other subsections of section 4 describe the details of the CPU’s other core parts. After reading each of these subsections, you can squint at the diagram of the CPU core and see how it fits with the most basic diagram of the Harvard architecture.

Favorite new word encountered (section 10.1.5): Schmitt-trigger
PROGRAMMING THE BOARD
This was my first time doing embedded programming, so I wanted to work my way up from arduino basics to a proper C program.
Steps:
- Arduino: Blink LED
- Arduino: Say HELLO WORLD in morse code
- C & makefile via command line: Say HELLO WORLD in morse code
ARDUINO
I downloaded Arduino on my mac.
To better understand AVRs and how to work with them, I read a helpful Arduino tutorial explanation. “Programming any AVR microcontroller six wires are needed. Three of these wires are referred to as the Serial Peripheral Interface (SPI) and are the Master In - Slave Out (MISO), Master Out - Slave In (MOSI), and Serial ClocK (SCK). The "Master" is the ISP or the device you are using to program the AVR chip. The "Slave" is the AVR chip being programmed. The other three wires are for the 5V power supply (VCC), Ground (GND), and Reset (RESET).” -- https://www.instructables.com/id/Program-an-ATtiny44458485-with-Arduino
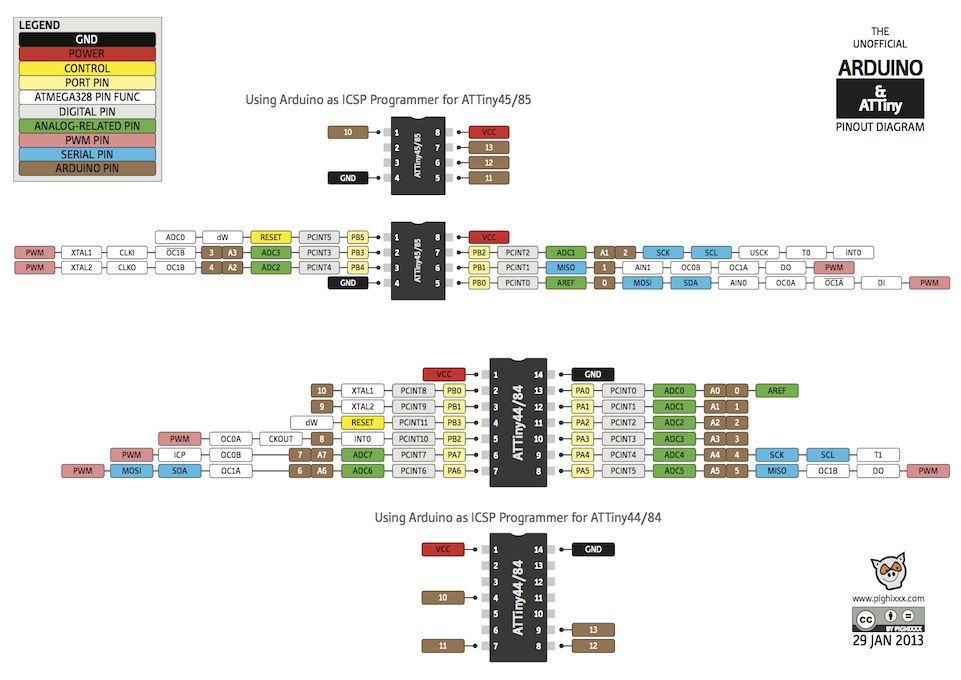
I then used the nice diagram mapping ATtiny44 pins to arduino virtual pins,
and followed along with Neil’s video to use the Arduino programming environment to make the LED on my board blink: http://academy.cba.mit.edu/classes/embedded_programming/Arduino.mp4
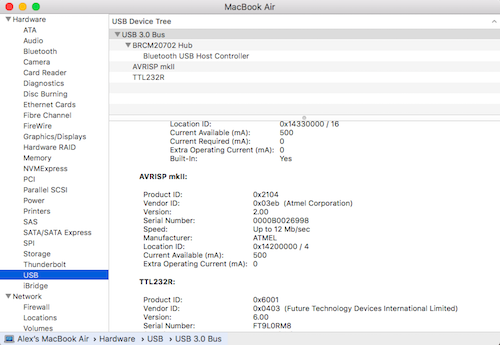
I connected my board to my computer with the AVRISP programmer I found in the FabLab, and a USB cable.
I confirmed that the programmer I was using is the AVRISP mkII by plugging the device into my computer and finding it in the hardware > USB section of my mac’s device tree.
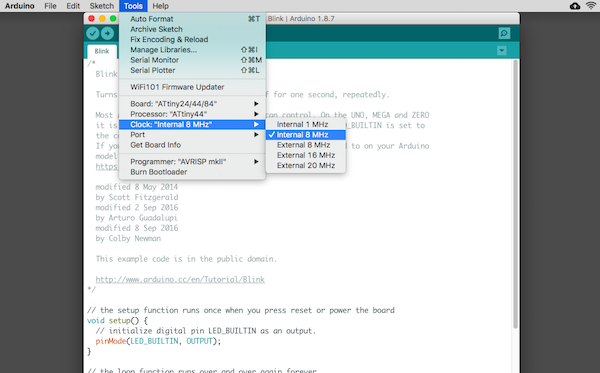
Even though I know I attached a 20mHz resonator to my board, I selected Clock: Internal 8 MHz.
I referred back to the schematic of my board to figure out which pins to set up.
I can see that I set up the pins as follows:
- LED: (PA7) pin 6
- SWITCH: (PB2) pin 5
I cross referenced the mapping of physical pins to Arduino pins (above) to get:
- LED: (PA7) pin 6 → Arduino 7
- SWITCH: (PB2) pin 5 → Arduino 8
I modified Neil’s supplied blink code for Arduino (http://academy.cba.mit.edu/classes/embedded_programming/Blink.pde) to use the right pin and then did Burn Bootloader to load the code.
When I then tried to run the program, I got the error message:
Please select a Port before Upload

Back to my list of connected devices I found what I assumed must be the USB: TTL232R with serial number FT9L0RM8

Which matched an option the Arduino IDE supplied me with:
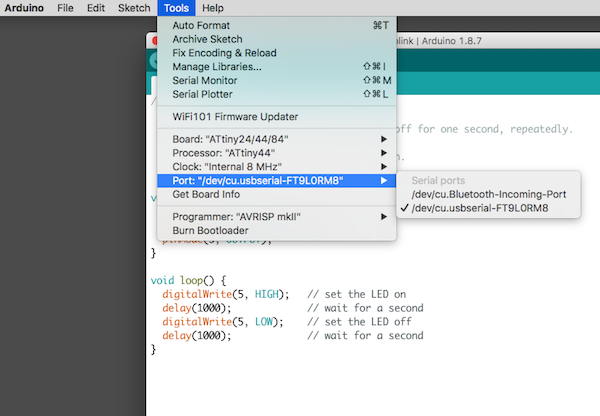
Running again worked.
That was too simple.
MORSE CODE: HELLO WORLD
The next step was to get my button to trigger the action of the LED. The action would be saying “HELLO WORLD” in morse code.
Morse code is composed of “dots” vs “dashes” or long vs short pulsations of a light.

Hello world is .... . .-.. .-.. --- .-- --- .-. .-.. -..
Arduino blink code: blink.arduino.ino
Arduino blink code: helloworld.arduino.ino
C & MAKEFILES
Now to return to the basic software I am most comfortable with: Text editors and terminals.
To ensure I had all of the necessary development tools, I downloaded CrossPack for AVR® Development on my mac. “CrossPack for AVR Development is a development environment for Atmel's AVR microcontrollers running on Apple's Mac OS X... It consists of the GNU compiler suite, a C library for the AVR, the AVRDUDE downloader and several other useful tools.” -- README for CrossPack
I started with Neil’s provided echo C code (hello.ftdi.44.echo.c), and modified it to use my LED and switch to say HELLO WORLD in morse code.
I also reused the makefile provided by Neil, modifying the project name. (Note: I am using the avrisp2 as my programmer).
MAKE commands (run in the terminal, in order):
make -f helloworld.c.make
make -f helloworld.c.make program-avrisp2-fuses
make -f helloworld.c.make program-avrisp2
Success. HELLO WORLD