MAS:863 HOW TO MAKE (ALMOST) ANYTHING 2018: Casey Tang
––––––
WEEK 6: Computer-Controlled Machining
Assigment: Make Something Big
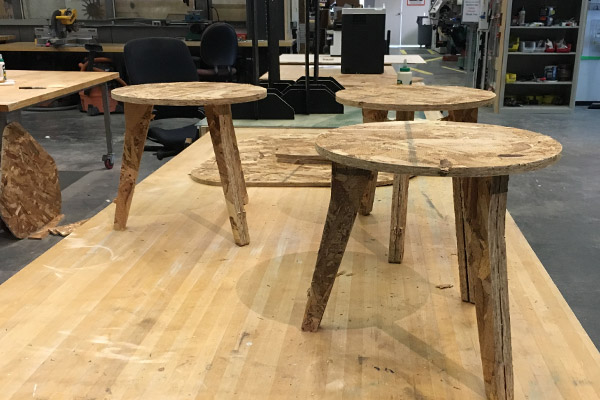
I decided to make the end tables that have been missing in my life.
-
Prep the file
- Import file into VCarve Pro-Shopbot edition. If paths get segmented you need to close the paths. To do thos go to Edit > Join vector. If your file does not have fillets you will need to create them by going to Edit Objects > Create Fillets and use the T-Bone option. Keep in mind if you are using a .25 tool fill you need to use a .25 fillet.
- In the tool path window set the pocket tool path: Start depth: 0. Cut depth: .15
- Profile Pockets: Open the Tool Database and select the appoporiate profile. The inputs should be Diameter: .25, Stepover: 95% ( The higher the stepover means theres less overlap which makes the cutting process faster), Tool: .2375.
- Tool number: 3, Click offset, Leave on convetional milling, select pocket cut and calculate
- Profile Toolpath: Open Tool Database and select "1/4" Down-cut
- Underneath Machine Vectors select outside/ right then calculate and it will show the doublelines.
- Click on the floppy disc icon to send file to shopbot
- Save your work as 2 file formats: CRV Vcard(editable) and SPP, the shopbot format
- Turn on the Shopbot: Press the blue button to reset this acts as a handshake btween the computer and the machine.
- Set Zero: open Active Process: set zero for X, Y to the left edge corner. Use the up and down keys to adjust. Go to Cut Menu > Zero for X & Y axis Now set Z zero by going to Cut Menu > C2-Zero Z axis, take metal plate from spindle and plate it down on the board, let the spindle touch metal plate twice and place the metal plate back into the holder.
- Put the key thats attached to the wrench in the machine this will power the spindle controller
- On the shopbot manually set RPM TO 10.0 (10K RPM).
- Load file in Shopbot. Start.
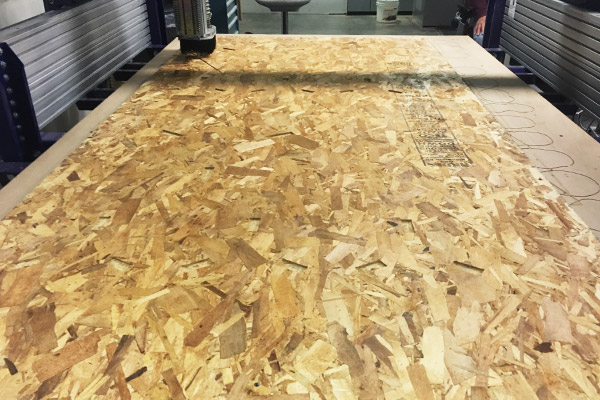
Using the Shopbot
Pockets are first. Followed by the trace.
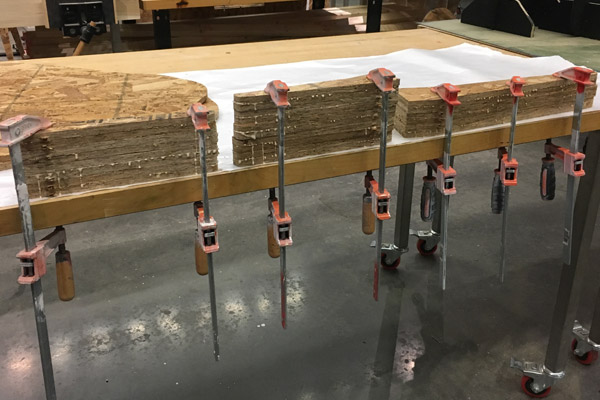
Wood glue and clamp the legs
End tables