Programming the ATtiny45
Programmers used/tested: ATMEL ICE ISP(white box with blue stripe), Arduino Uno, and my own FabTiny board.
References: Brian’s tutorial, Arduino as ISP tutorial, Ladyada’s tutorial on avrdude using Windows Command Prompt, Sparkfun’s tutorial on programming the ATtiny.
Operating System: Windows 10, and Ubuntu VM.
Next time, I should resize the code screen capture to 1000px to really appreciate them. Or I will just copy the output code and display them as code snippet.
Attempt #1: Linux Subsystem on Windows 10 - FAILED
I initially followed Brian’s tutorial using the Atmel-ICE AVR Programmer (White box with blue stripe - atmelice_isp), but realized that the linux subsystem on Windows 10 cannot recognize my hardware (usb), so I switched to the Arduino Uno as the programmer instead and used the Command Prompt.
Attempt #2: Windows 10 Command Prompt - CLOSE ENOUGH BUT FAILED AGAIN
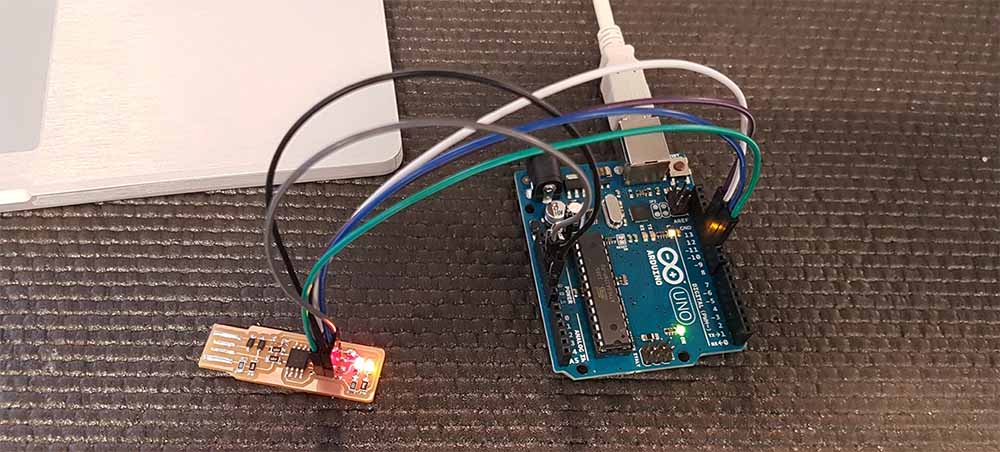
I followed the Arduino tutorial on how to setup an Arduino Uno as ISP to program my target board, the ATtiny45.
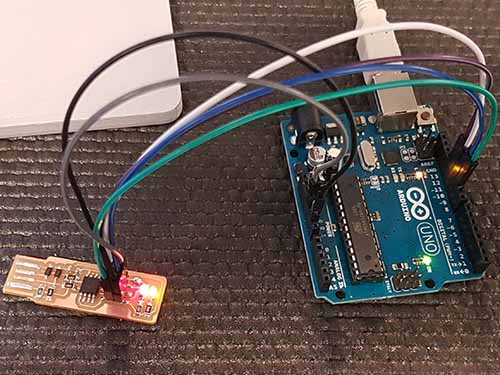
Then I followed Ladyada’s tutorial on how to use the Command Prompt on Windows to get the firmware listed on Brian’s tutorial onto the ATtiny45.
I first did
avrdude -c arduino -p t45 -P com4 -U flash:w:fts_firmware.hex
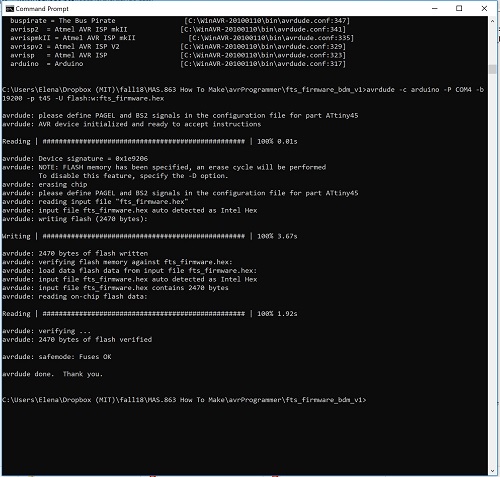
to program the code into the ATtiny45, but it failed to sync with the TSk500 error. I realized that it does not work with the default baudrate, I had to set the baudrate to 19200 by specifying -b 19200. Make sure you are in the .hex file’s directory (cd to directory) then run the line below.
avrdude -c arduino -p t45 -P com4 -b 19200 -U flash:w:fts_firmware.hex
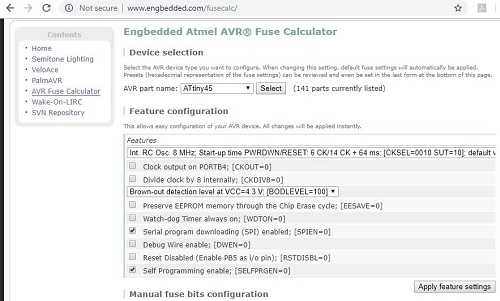
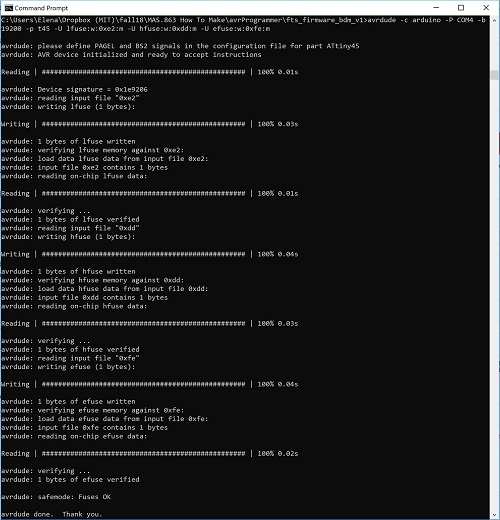
I used the fuse calculator to check out what the lfuse, hfuse, and efuse should be. I referred to Sparkfun’s tutorial for that. Basically: uncheck divide clock by 8, Brown-out detection level at VCC=2.7 V, Check Self-Programming enable. Mistake The Brown-out detection level should be 4.3V instead of 2.7V since the ATtiny45 is operating at 5V instead of 3.3V.
avrdude -c arduino -P COM4 -b 19200 -p t45 -U lfuse:w:0xe2:m -U hfuse:w:0xdd:m -U efuse:w:0xfe:m
I tried disconnecting the ATtiny45 from the programmer (arduino) to see if my computer could recognize the usbtiny, but nothing happened.
Attempt #3: Ubuntu Virtual Machine on Windows 10 - SUCCESS!!!
I gave up on Windows and installed VMWare (it is free for MIT affiliate) and got Ubuntu on it. I plugged in the FabTiny from my previous attempt and it still couldnt recognize it. I followed Brian’s tutorial again for Linux this time.
I used the ATMEL ICE ISP to program the ATtiny board again. This time I installed the firmware on my ubuntu download folder. I “cd” into that directory, then I installed everything that was needed.
sudo apt install avrdude gcc-avr avr-libc make
First thing I did was to run nano Makefile and changed the Programmer to “atmelice_isp” as instructed in Brian’s tutorial.
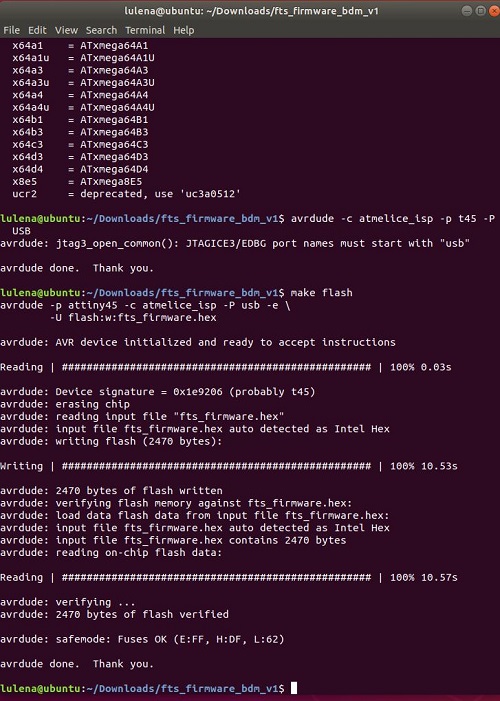
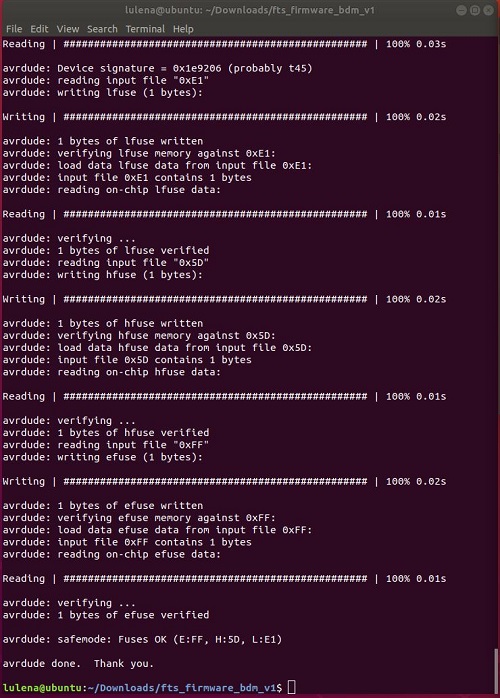
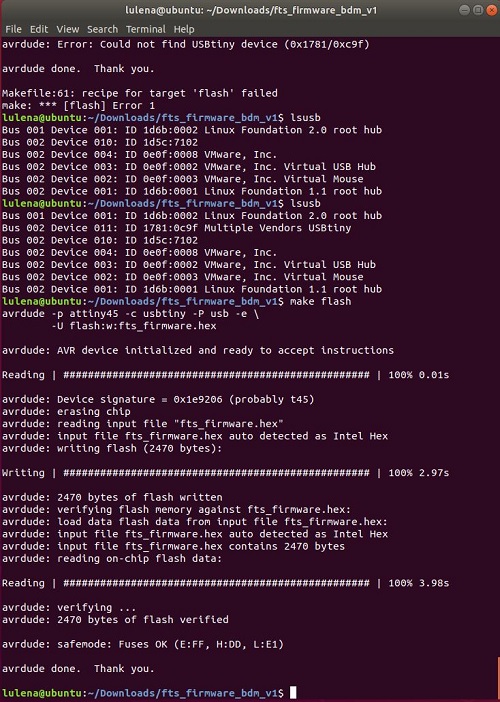
I then ran make flash. Notice in the picture below that it says avrdude -p attiny45 -c atmelice_isp -P usb -e -U flash:w:fts_firmware.hex, which is what make flash actually does. You will understand avrdude better if you read Ladyada’s tutorial. Ladyada (Limor Fried) is the CEO of Adafruit and a MIT alumnus.
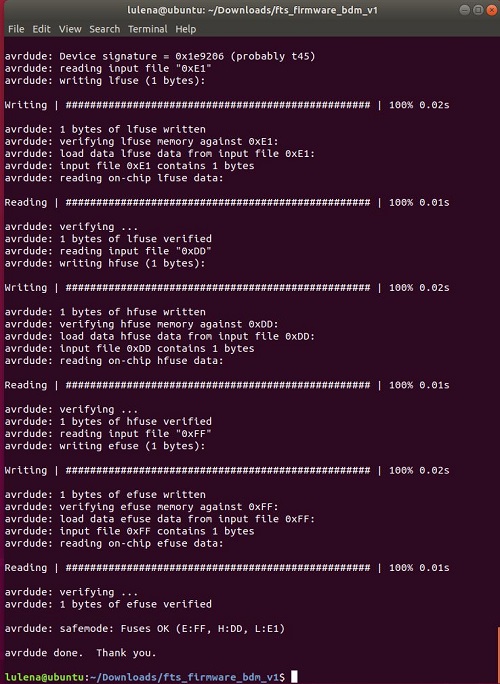
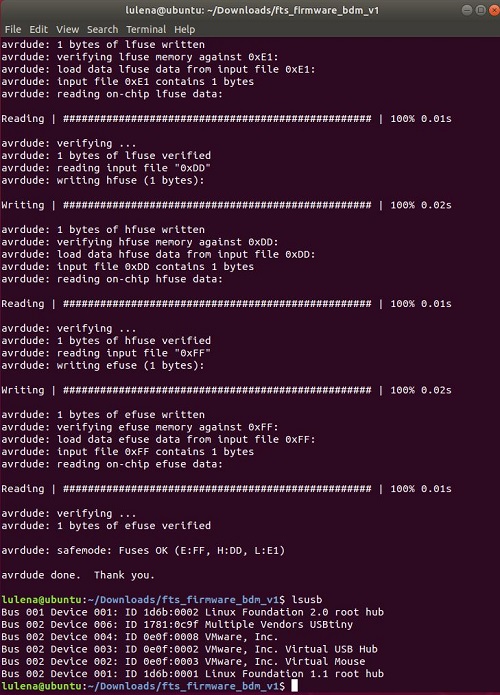
Then I ran make fuses.
I disconnected the programmer and connected my ATtiny board and it got recognized as Multiple Vendors USBtiny, YEAH! You can check it by running the command lsusb it should list all the usb on your computer.
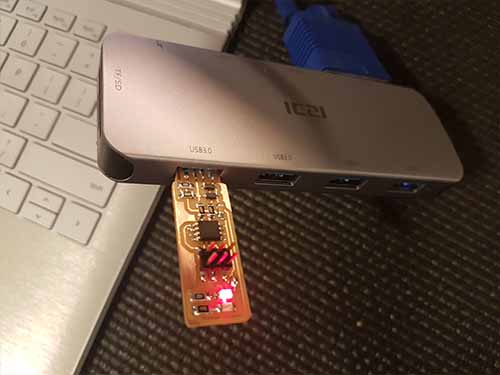
After verifying, I continued Brian’s tutorial by flowing the reset fuse with make rstdisbl.
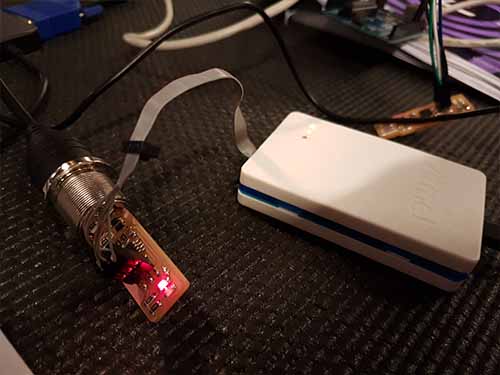
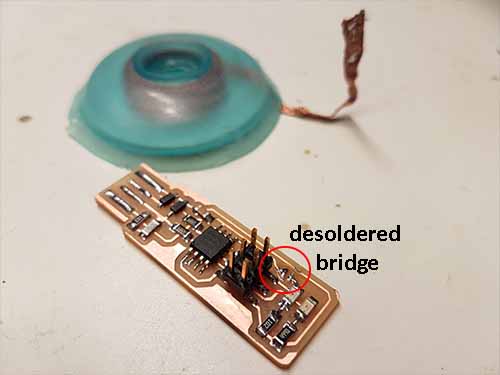
Then I removed the bridge on the solder jumper between the VCC and VProg. DONE! Now I just needed to verify that it actually works by using it to program another FabTiny (ATtiny45) board.
I made an additional board before in case I needed it. I used the newly programmed ATtiny45 as the programmer to program the second target ATtiny45 board.
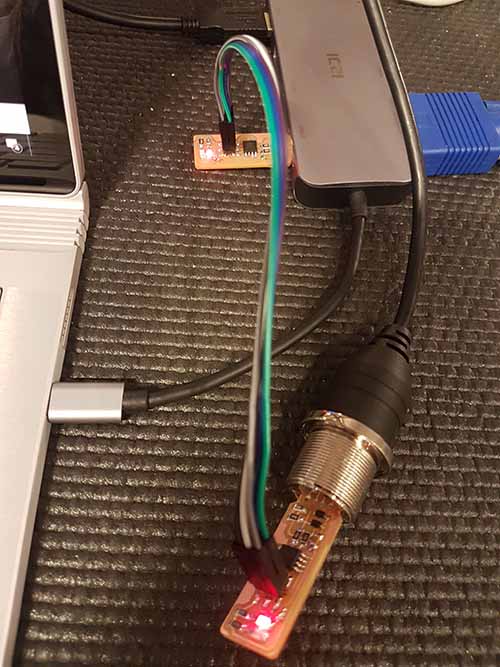
Just like before, I changed the “Makefile” to the corresponding programmer. In this case Programmer = usbtiny. Then, I just repeated the whole process again. In Summary:
- Run
nano Makefilein the Linux terminal and change the corresponding programmer. (refer to Brian’s tutorial or if you want more info refer to Ladyada’s one.) - Connect target board and programmer board together and then to the computer.
- Run
make flashto install firmware - Run
make fusesto blow fuses - Remove target board and programmer from computer. Disconnect ISP connection between the target board and the programmer board.
- Connect target board in the computer and verify if the computer can recognize the board or not by runnning
lsusb. If it is recognized by your computer, it should list Multiple Vendors USBtiny. - Reconnect the programmer back to the target board and connect back to the computer.
- Run
make rstdisblto blow reset fuse. MAKE IT OR BREAK IT… You wont be able to program the board through ISP again once the reset fuse is “blown”. - Desolder the joint between VCC and VPROG.
- Make your happy dance if everything worked.
make flash this time is avrdude -p attiny45 -c usbtiny -P usb -e -U flash:w:fts_firmware.hex.
DONE. Now I got two FabTiny boards programmed. It is so much easier on LINUX! Literally just a couple of lines. However, following Ladyada’s tutorial (adafruit), I was able to understand the “Makefile” much better. Now I know what “make flash”, “make fuses”, and “make rstdisbl” actually mean. I also programmed with atmelice_isp, arduino, usbtiny and they all worked. I think my Attempt #2 did not work because of the fuse code.
My failed board Fuse bit settings
EFUSE=0xFE
HFUSE=0xDD
LFUSE=0xE2
avrdude -c arduino -P COM4 -b 19200 -p t45 -U lfuse:w:0xe2:m -U hfuse:w:0xdd:m -U efuse:w:0xfe:m
Brian’s Fuse bit settings
EFUSE=0xFF
HFUSE=0xDD
LFUSE=0xE1
avrdude -c arduino -P COM4 -b 19200 -p t45 -U lfuse:w:0xe1:m -U hfuse:w:0xdd:m -U efuse:w:0xff:m
You can check what is inside the Makefile again with, cat Makefile
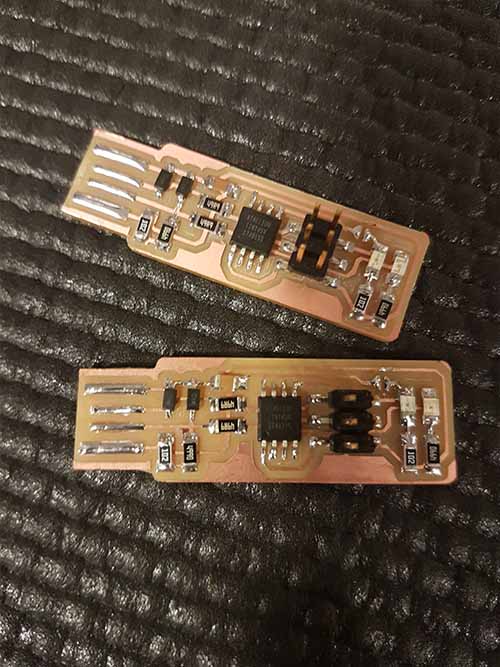
Resulting boards after desoldering the bridge.
This seems pretty trivial, but I spent three full days just playing around with the programmers and windows settings. It is pretty satisfying to see that at least one of the attempts works. It taught me to not give up until I find a way.