Week 6. Embedded Programming
Hardware: Arduino Uno, ATtiny44 board, Jumper wires, FTDI cable,
Software: Arduino IDE
References: High-Low’s documentation
Programming the ATtiny45 board: fabTiny Programming
Programming the ECHO.c file into ATtiny44: ATtiny44 Board ECHO Programming
Programming ATtiny44 board using Arduino IDE and Arduino UNO as programmer.
This week assignment is to program our ATtiny44 board to do something. Since it is Members’ Week at the Media Lab, things got a bit busy here. Thus, I programmed my target ATtiny44 board using the Arduino UNO as ISP with the Arduino IDE. This is the easiest way to program the board since it doesnt require complex C programming. I will eventually demonstrate how to do so in C and use my USBtiny with ATtiny45 (first fabricated board, FabTiny) as the programmer (requires me to switch to Linux OS.)
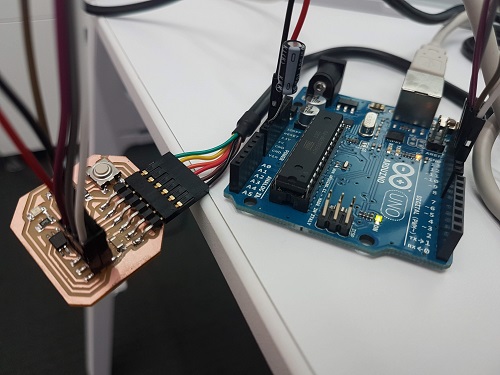
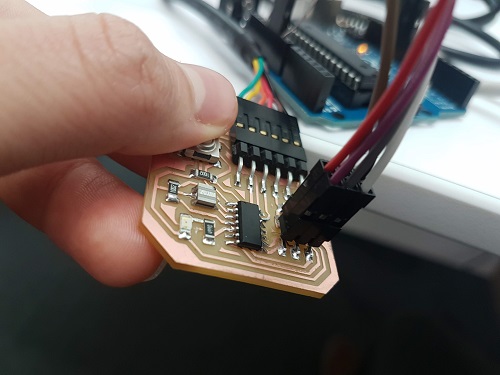
Here is the setup:
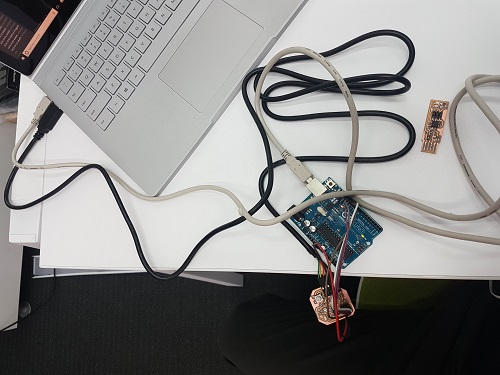
I connected the Arduino UNO together with my ATtiny44 board using the ISP header. I referred back to my schematic board layout from Week4 and the Arduino Uno ISP schematics using pin 10-14.
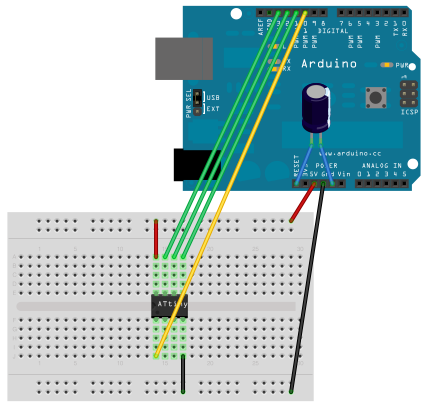

I referred to High-Low’s documentation for the Arduino Pin connection
- Arduino Pin 13 (or SCK of another programmer) to SCK of ATtiny44
- Arduino Pin 12 (or MISO of another programmer) to MISO of ATtiny44
- Arduino Pin 11 (or MOSI of another programmer) to MOSI of ATtiny44
- Arduino Pin 10 (or RESET of another programmer) to RST of ATtiny44
- GND to GND
- VCC to 5V in Arduino
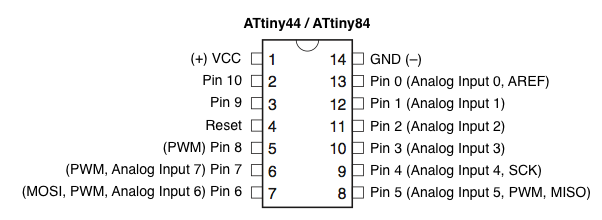
To figure out which pins I am programming, I used this image as reference.
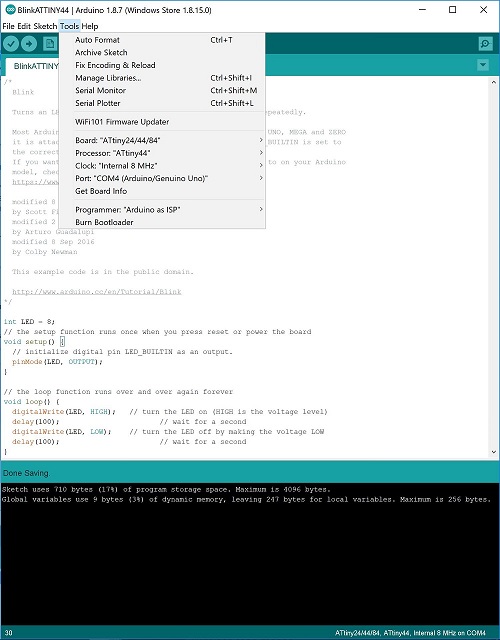
I configured my settings to the following: NOTE I selected the Arduino UNO COM PORT. The ATtiny44 board has an external 22MHz Resonator, but I didnt use it here. I picked the internal 8MHz one instead.
I know that I used the PIN 8 for the LED and PIN 3 for the BUTTON on my ATtiny44 by refering back to my schematic board layout or datasheet of the ATtiny44.
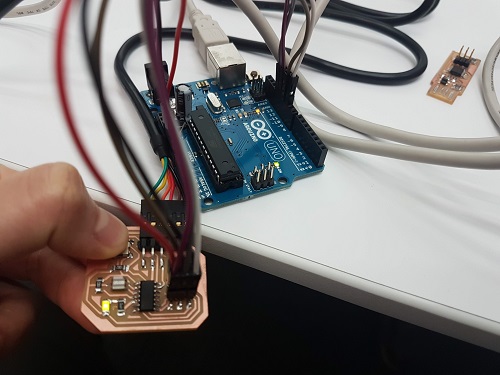
I used the Arduino Examples Sketch, first the BLINK, then the BUTTON, then the DEBOUNCE. All of them worked. Great! Press button and LED will light up.
Button not pressed.
Button Pressed and LED lit up.
 .
.
2x speed up video of led blink.
2x speed up video of button press without flagging or debouncing.