Make something big
For this week's assignment, I decided to make a bedside table, which would be pretty useful for me at the moment. I was inspired by designs that make use of joints and connections without the need for drews. I went for simplicity and functionality by thinking of the idea of press-fit.
I have done the design using fusion 360.
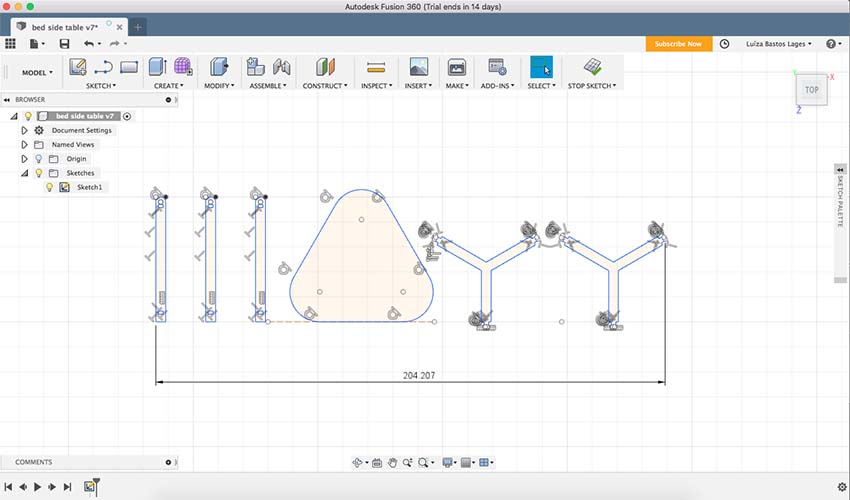
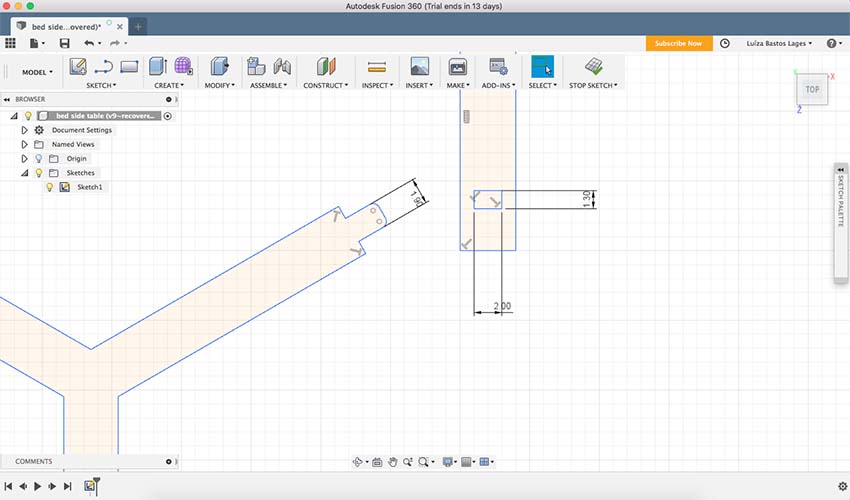
To make the connections, I have made the slots into which other pieces would come through 1mm bigger (in X and Y axes) than the dimension of the connection piece itself, as an attempt to be sure it would pass through and the connection would be possible.
Some notes on CNC routering:
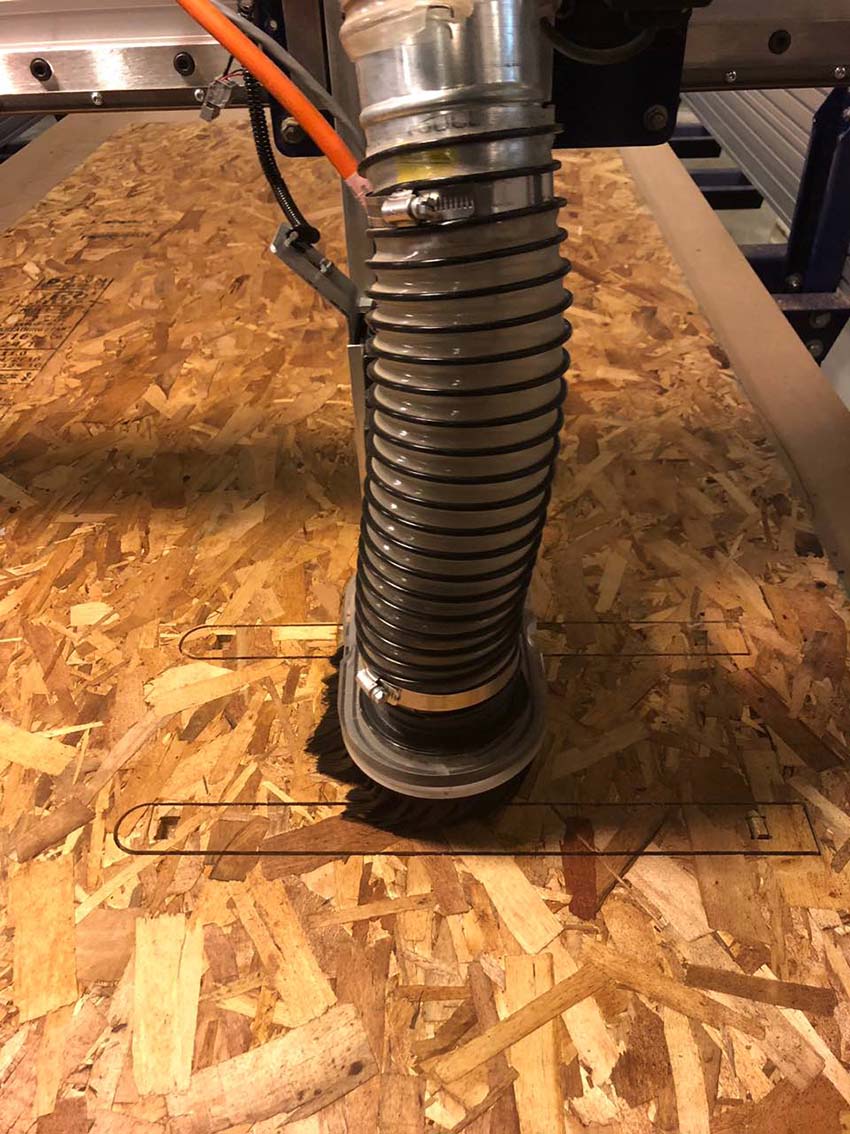
It is important to consider the size of the tool which will be used as well as the cutting path that will be set up. The cutting path can be set up inside, outside or right over the drawing line of the design, therefore, the thickness of the endmill matters.
The CNC endmill spins like a drill but it does not drill the woodboard. Instead, by its rotation, it removes material from the board. Differences in the shape of the far end of the endmill impact on how the tool removes material from the board. Some endmills pull the material down, while others push the material up while rotating. This difference has an impact on the finishing of the edge of the cut. In the first case, the bottom surface might have fibers of material pushed out, whereas in the last case, fibers of the upper surface of the board can be slightly raised.
Path Planning for machining
First of all, since I have designed in centimeters, which is the unit I am more familiar with, I had to open my drawing first in rhino to scale it for inches before opening it in Vcarve Pro, the software used to plan the cutting path. To set up the cutting path, with the support from TOM, I have first selected the tool which would be used which was the 1/8 tool - approximately 0.125 inches. Something to remember is that generally, the cut depth can be two times the diameter of the tool.
Some of the parameters used to set up the cutting path were:
- Tool >> select >> library >> select the tool which wil be used
- diameter: 0.25
- pass deepth: 0,26
- Sindle speed: 10.000 r.p.m
- Feed rate: 1200
- Plunge Rate: 60
After setting up the cutting path, for safety, a good tip is to run the job on the air, that is to say, at a certain Z height in which the endmill does not touch the board, so you can check it performing the cutting path into the right places. If everything is all right, you can hit stop and start again with the proper Z-height to cut the board.
Finalization
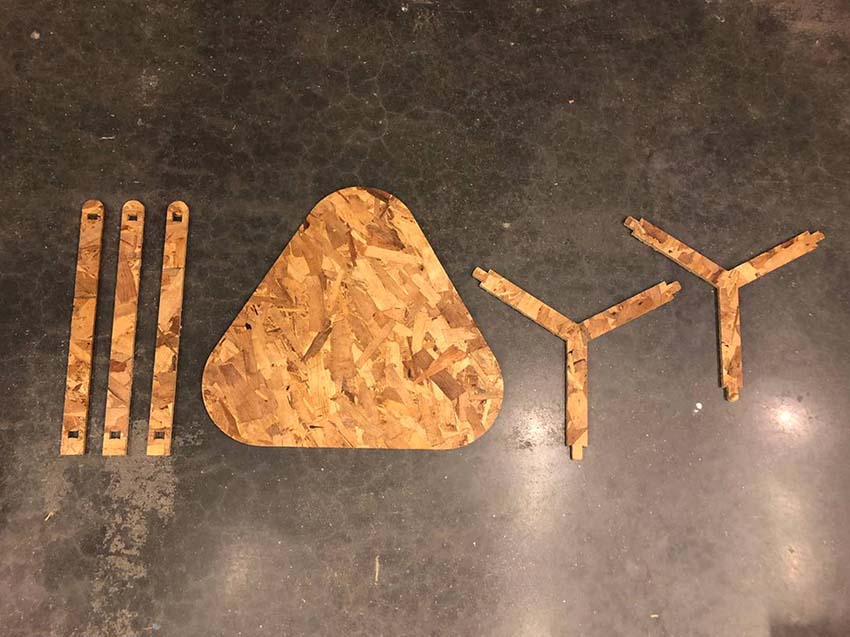
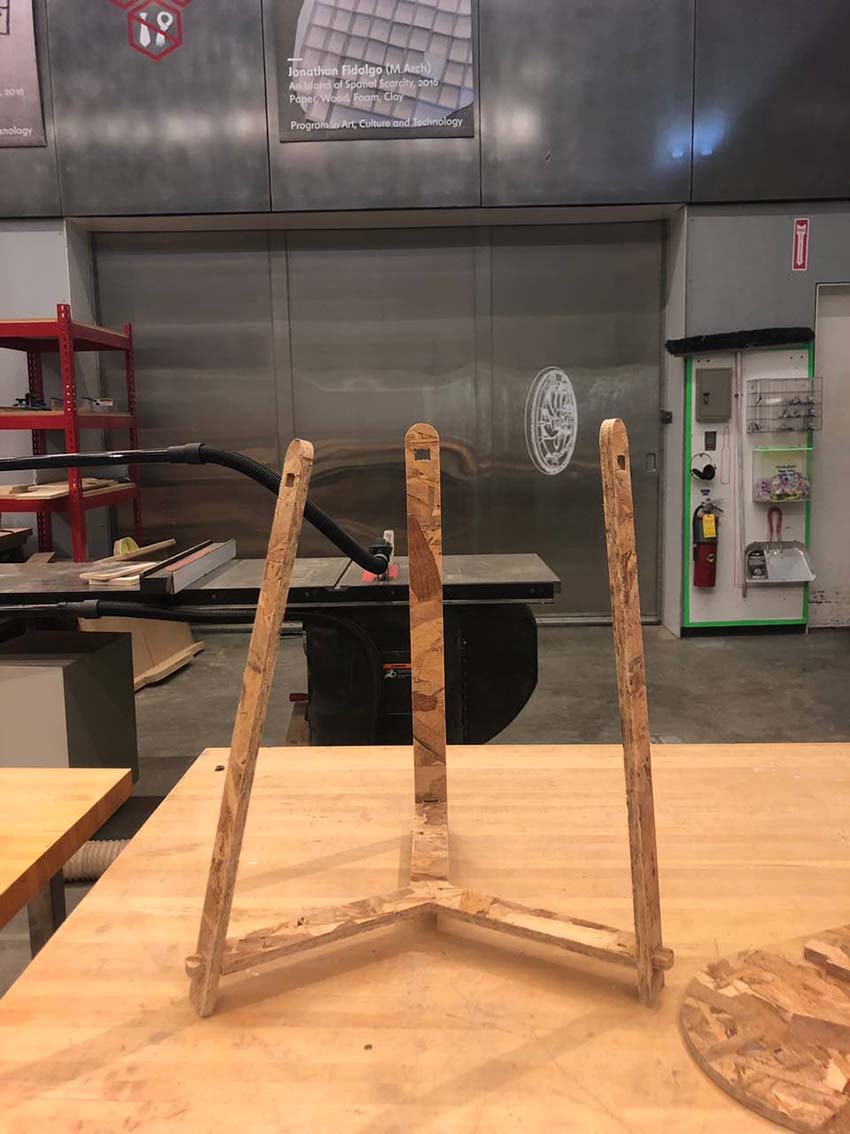
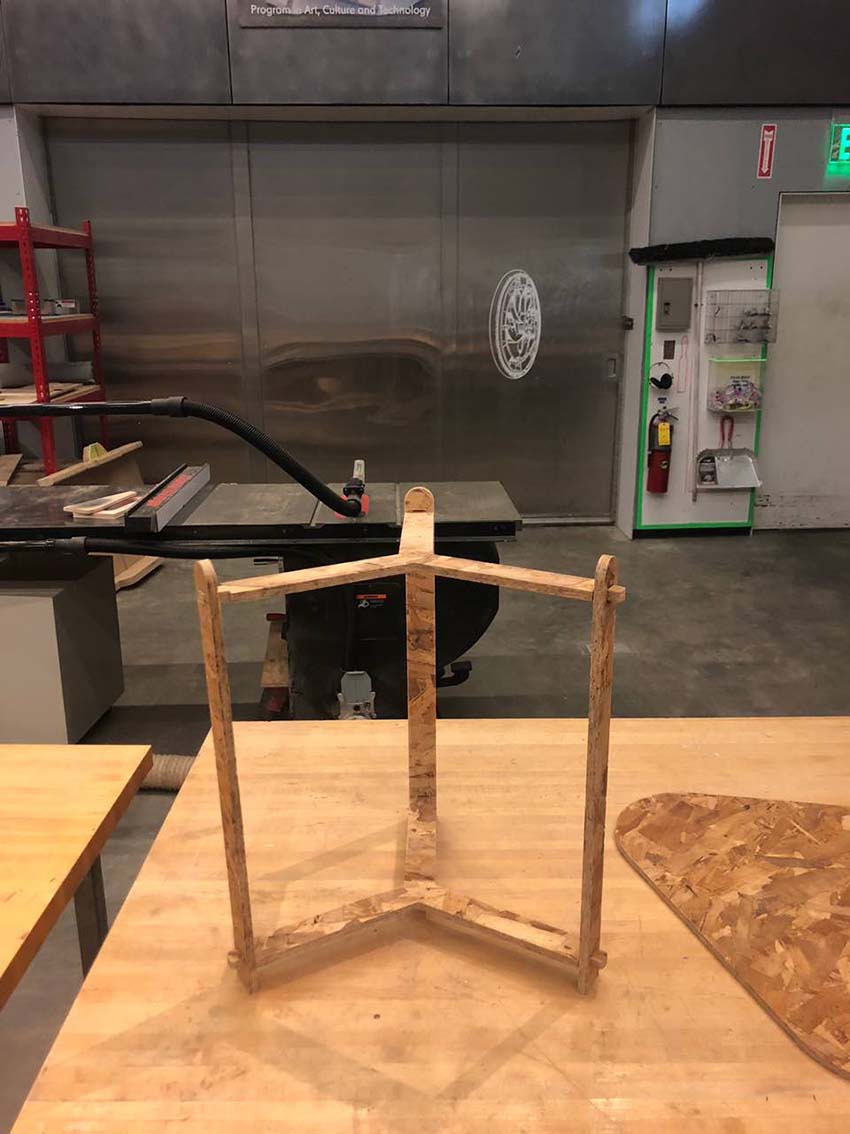
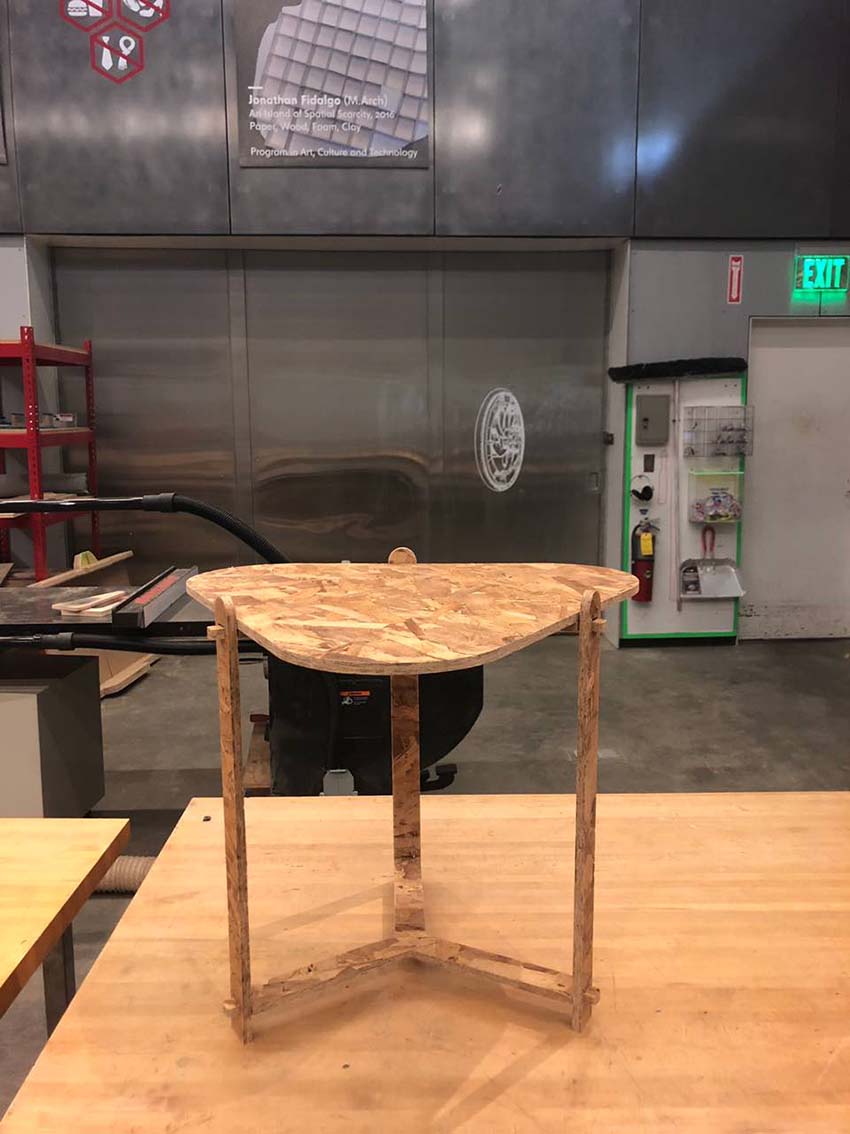
It was extremely simple and straight-forward to assemble the table. It seems however that the 1mm tolerance I have set up for the slots to have the connections fiting smoothly was actually a little too much, allowing the legs of the table to move slightly in relation to one another. This can be easily fixed with the usage of glue around the connection slots. However, since this was not my initial intention, this is something that could fixed for future attempts.
For this week's assignment, I decided to make a bedside table, which would be pretty useful for me at the moment. I was inspired by designs that make use of joints and connections without the need for drews. I went for simplicity and functionality by thinking of the idea of press-fit.
I have done the design using fusion 360.
To make the connections, I have made the slots into which other pieces would come through 1mm bigger (in X and Y axes) than the dimension of the connection piece itself, as an attempt to be sure it would pass through and the connection would be possible.
Some notes on CNC routering:
It is important to consider the size of the tool which will be used as well as the cutting path that will be set up. The cutting path can be set up inside, outside or right over the drawing line of the design, therefore, the thickness of the endmill matters.
The CNC endmill spins like a drill but it does not drill the woodboard. Instead, by its rotation, it removes material from the board. Differences in the shape of the far end of the endmill impact on how the tool removes material from the board. Some endmills pull the material down, while others push the material up while rotating. This difference has an impact on the finishing of the edge of the cut. In the first case, the bottom surface might have fibers of material pushed out, whereas in the last case, fibers of the upper surface of the board can be slightly raised.
Path Planning for machining
First of all, since I have designed in centimeters, which is the unit I am more familiar with, I had to open my drawing first in rhino to scale it for inches before opening it in Vcarve Pro, the software used to plan the cutting path. To set up the cutting path, with the support from TOM, I have first selected the tool which would be used which was the 1/8 tool - approximately 0.125 inches. Something to remember is that generally, the cut depth can be two times the diameter of the tool.
Some of the parameters used to set up the cutting path were:
- Tool >> select >> library >> select the tool which wil be used
- diameter: 0.25
- pass deepth: 0,26
- Sindle speed: 10.000 r.p.m
- Feed rate: 1200
- Plunge Rate: 60
After setting up the cutting path, for safety, a good tip is to run the job on the air, that is to say, at a certain Z height in which the endmill does not touch the board, so you can check it performing the cutting path into the right places. If everything is all right, you can hit stop and start again with the proper Z-height to cut the board.
Finalization
It was extremely simple and straight-forward to assemble the table. It seems however that the 1mm tolerance I have set up for the slots to have the connections fiting smoothly was actually a little too much, allowing the legs of the table to move slightly in relation to one another. This can be easily fixed with the usage of glue around the connection slots. However, since this was not my initial intention, this is something that could fixed for future attempts.