Week 2
Laser Cutting and Vinyl Cutting
Assignment:
1) Design something in CAD and laser-cut it in cardboard. It should have parts that can be reconfigured in multiple ways. The design should be parameterized, which means that it is designed in such a way that if a certain dimension is changed later, such as the width of the cardboard you'll be cutting into, you can input that change once and it will propagate throughout the design everywhere it appears.
2)Design a laptop sticker and cut it out using the vinyl cutter.
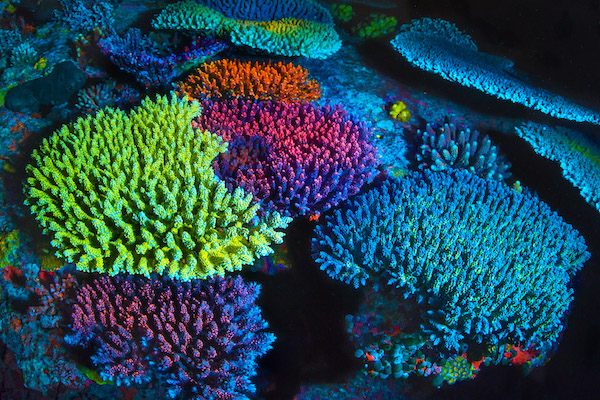
For this project, I decided to make a toy. I wanted to make something that people could enjoy taking apart and throwing together in different ways, which brought to mind legos, building blocks, and the like. I also took inspiration from nature, which is very good at building beauty and complexity from reconfigurable parts. I decided to make a branching coral.
The first step was a hand-drawn sketch of my concept.

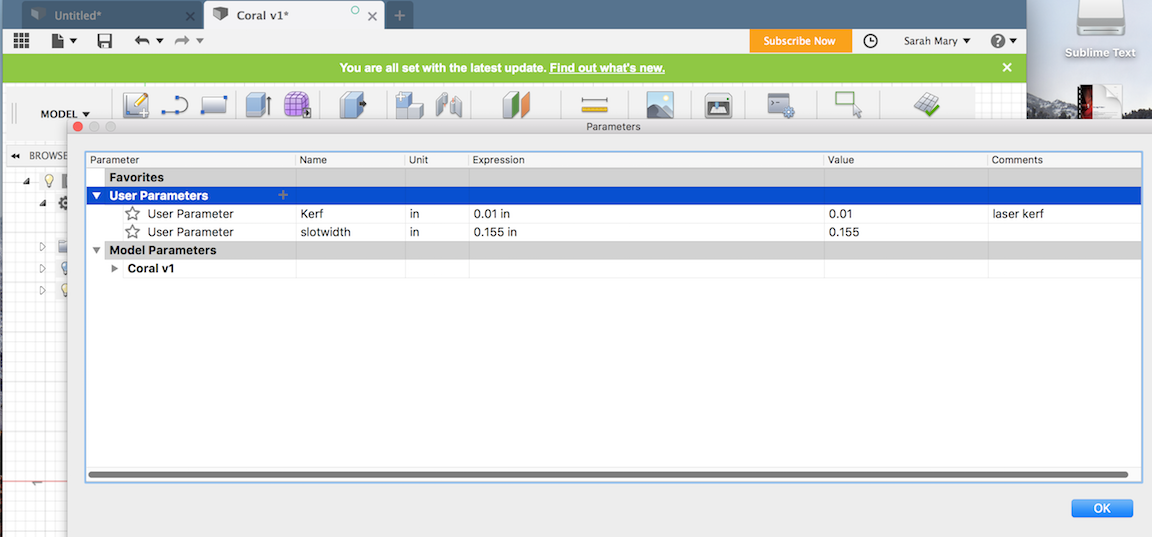
Before I do any serious designing, some of my classmates and I measure the width of the cardboard we will be using so we can integrate that into our CAD designs. We find it to be 0.17 inches wide. We also need to figure out how snug the slot size should be so that pieces fit snugly together. We design a test piece of sizes varying by 0.05 inches.

We find the best slot width is 0.155 inches, and that the laser kerf is 0.01 inches.

Next up, the CAD model. After last week's frustrations with FreeCAD, and asking around to find out the best software to use, I decided on Fusion360. I liked it better immediately. I also owe huge thanks to E.S. for answering my questions and teaching me the basics of Fusion360.
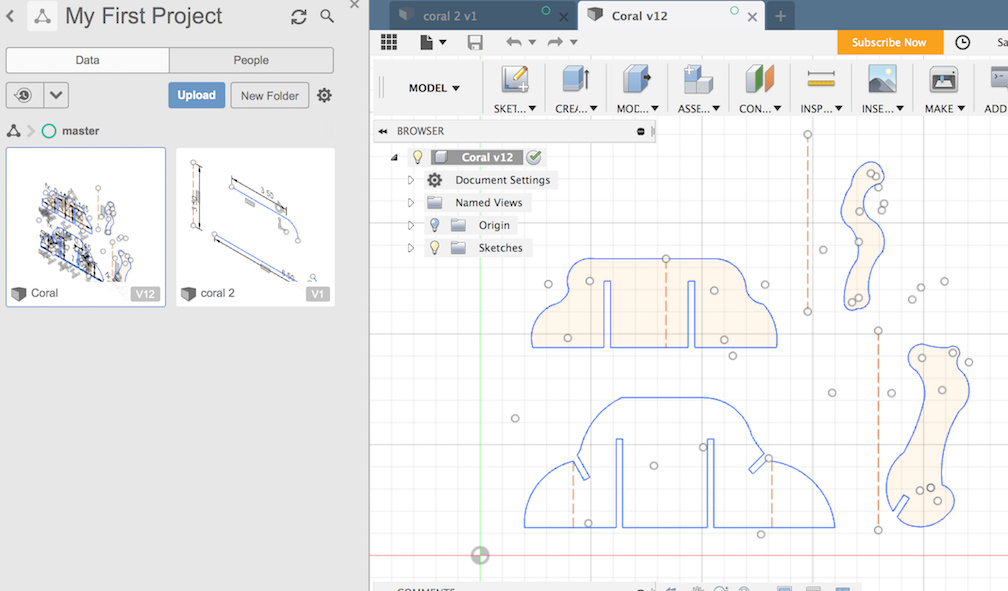
I parameterized my design, setting parameters for the width of the cardboard and the kerf of the laser, which is the amount of extra material that will be cut away due to the laser itself. Essentially, this accounts for the width of the laser.
I'm liking how this looks so far.

Now, off to the laser-cutter. It works in a way that feels magical. I've hand-cut a lot of projects with exacto-knives before, so being able to design something and have a laser do the work for me feels like some kind of wonderful magic.


It looks good, almost exactly what I envisioned. However, I notice a few things off and decide to go to some extra lengths to optimize.

First, one one of my larger pieces, a guideline that wasn't supposed to be cut out, got cut out. The laser interpreted the guide line as a "cut" line, due to an incompatability issue between Fusion360 and the laser cutter software (CorelDraw). I was warned about this in advance by E.S. and though I caught and removed all the other instances, I missed this one. I go back and remove the guideline from the CorelDraw file.

I also notice that I was a bit aggressive in designing the slots in which pieces of cardboard will connect to each other. They can be less deep and still hold strong, given how tightly everything is measured, and because the structure will not need to hold much weight. The slots can be removed entirely at the top branches of the coral, which I think will improve the overall aesthetics. I make these changes in Fusion360, import my file to CorelDraw, and re-send to the laser. The laser hasn't been cutting all the pieces all the way through, so I slow down the laser speed from 3 to 2.7. This helps but doesn't solve the problem. I try 2.5, but it's still not complete.
I finish cutting out the stuck pieces with an exacto-knife. Not ideal, but I don't want to play around with the laser settings too much since it's Saturday night at 11pm and a particularly bad time to accidentally start a fire.
Next up, spray painting the pieces and assembling.

But wait there's more!
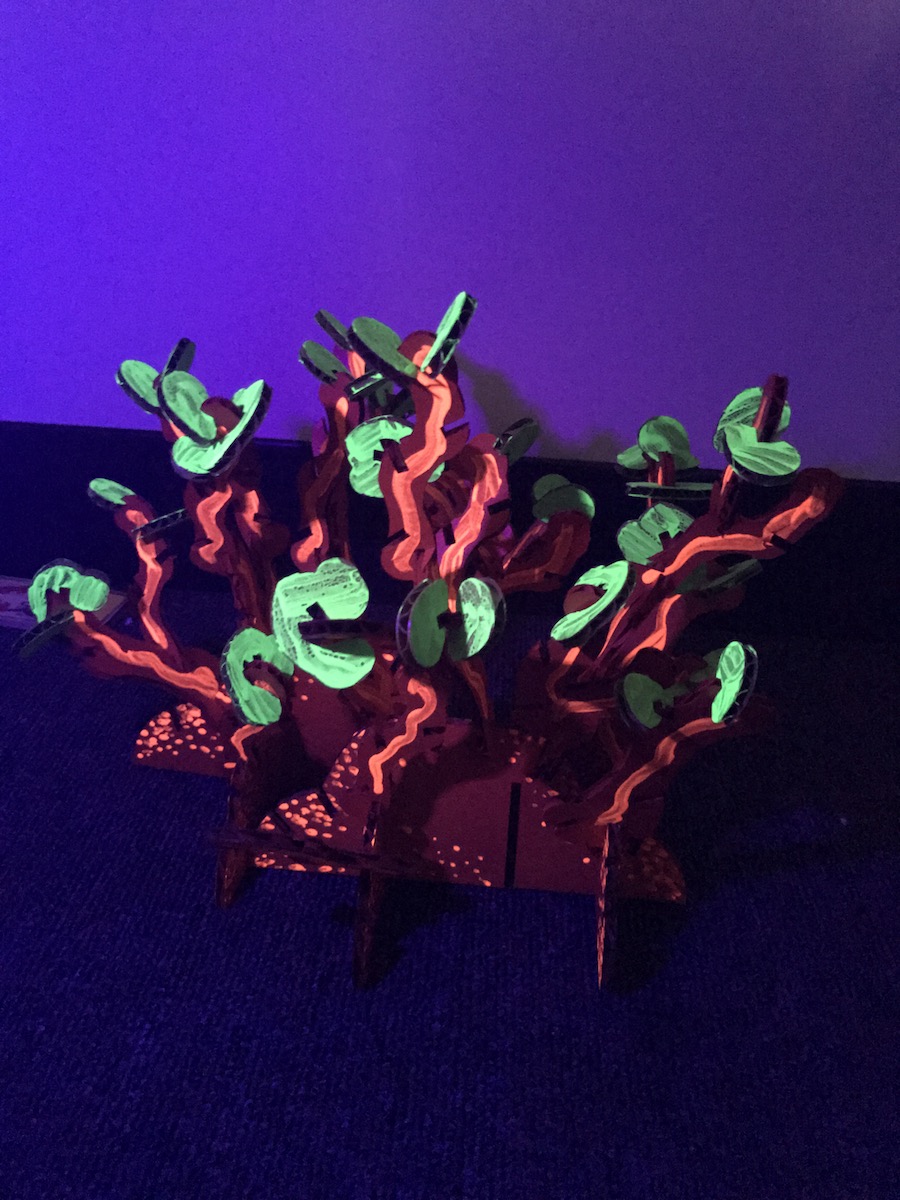
It glows in the dark
Let's not forget the vinyl cut
I decided to go with a classic, R2D2. I downloaded an image that looked like it could be a good stencil.
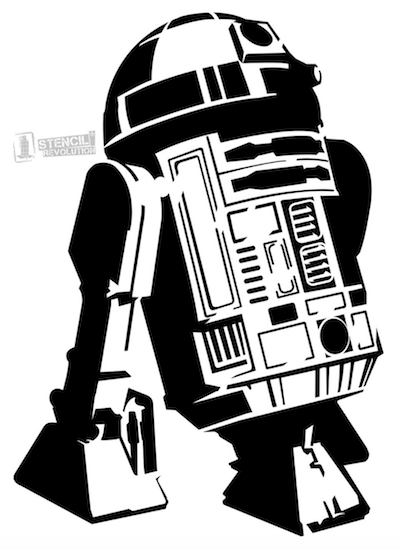
I converted it from a raster to a vector image, which means that instead of pixels of color defining the image, the image is now defined by lines, which a machine like a laser cutter or vinyl cutter can clearly follow. I converted from an image file (.png) to a vector file (.svg). I sent it to the vinyl cutter, which started cutting away. And away. And away ... For half an hour.
I suspected something might be wrong, as a relatively simple, small image shouldn't take that long to cut. A zoomed-in look at my vector file in CorelDraw revealed some hidden nastiness. The free online file converter I'd used was clearly worth its cost. My file, instead of having clean smooth vector lines, had the edge of each line shaved into a hundred jagged little lines, like shark teeth. The poor vinyl cutter had been digilently trying to cut all these impossibly small lines. With a borrowed copy of Inkscape, the original file was opened, saved as a .svg vector file, and sent to the printer. This time, it worked well. The image was perfectly cut in about a minute.

Getting the stencil weeded, however (picking off the negative parts of the image with tweezers) was a giant headache and I regret picking an image with such tiny details.

It's alive!