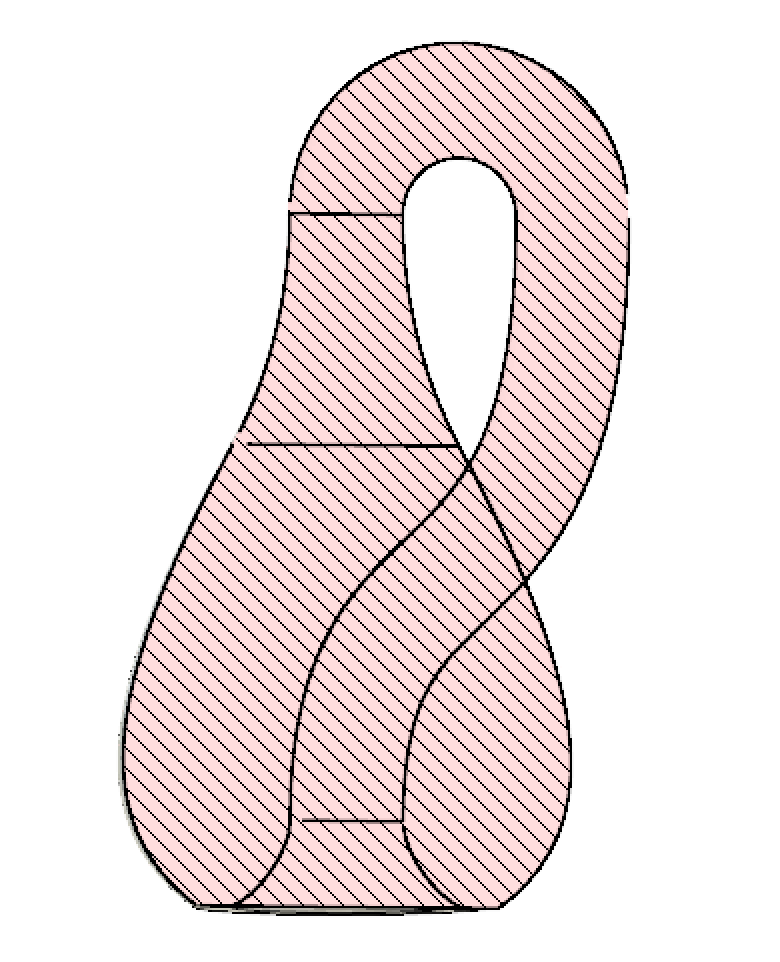
klein bottle + my hand
“design and 3D print an object (small, few cm) that could not be made subtractively”
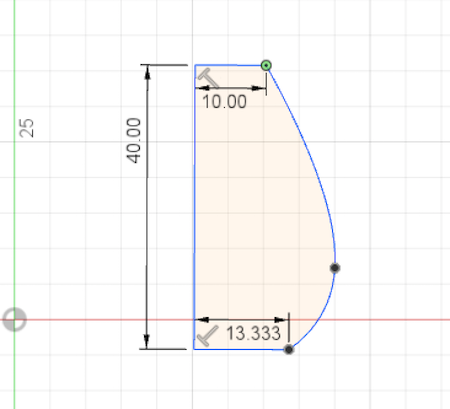
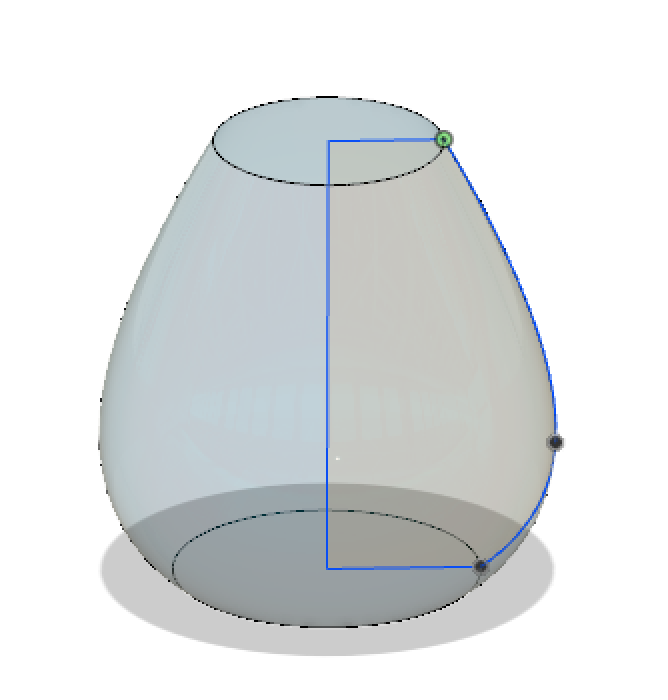
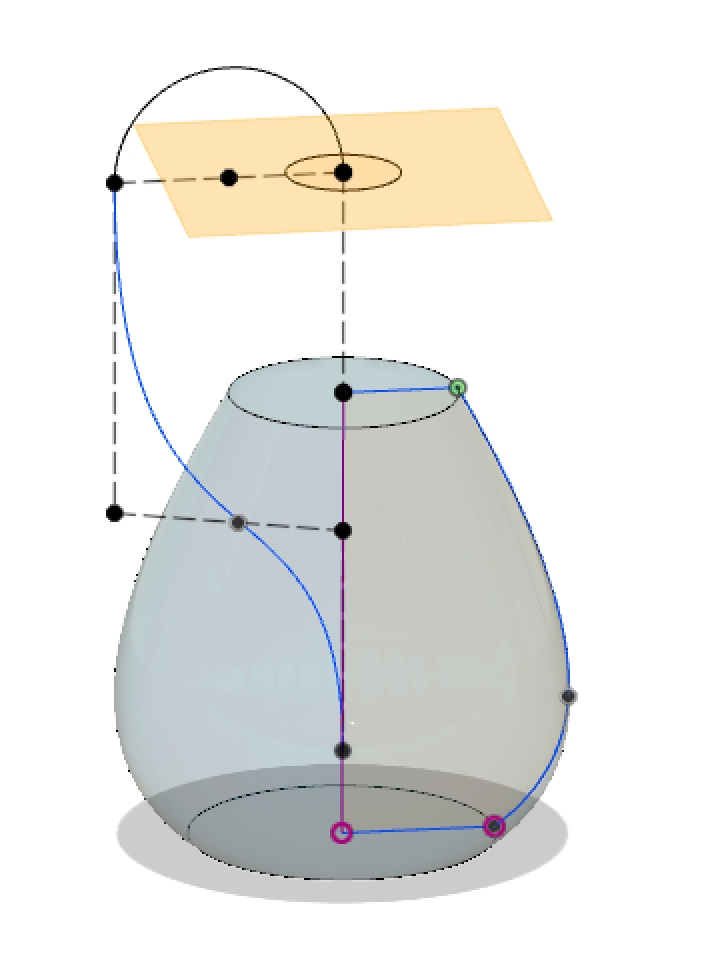
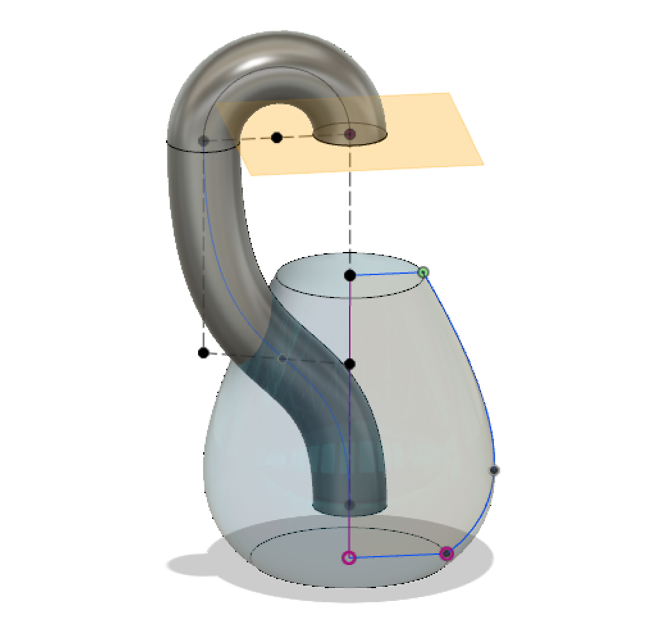
To design my Klein bottle, I used Autodesk Fusion 360 (which runs on MacOS unlike Solidworks…). I aimed to follow a ~5 min tutorial that used Solidworks to design the Klein bottle. It’s pretty crazy that this person was able to design the bottle in 5 minutes… It took me on the order of hours as I learned how to do certain operations in Fusion 360. ANYWAY! HUGE thanks to Ben Gray for taking his experience using Solidworks and translating it to Fusion 360 to help me!
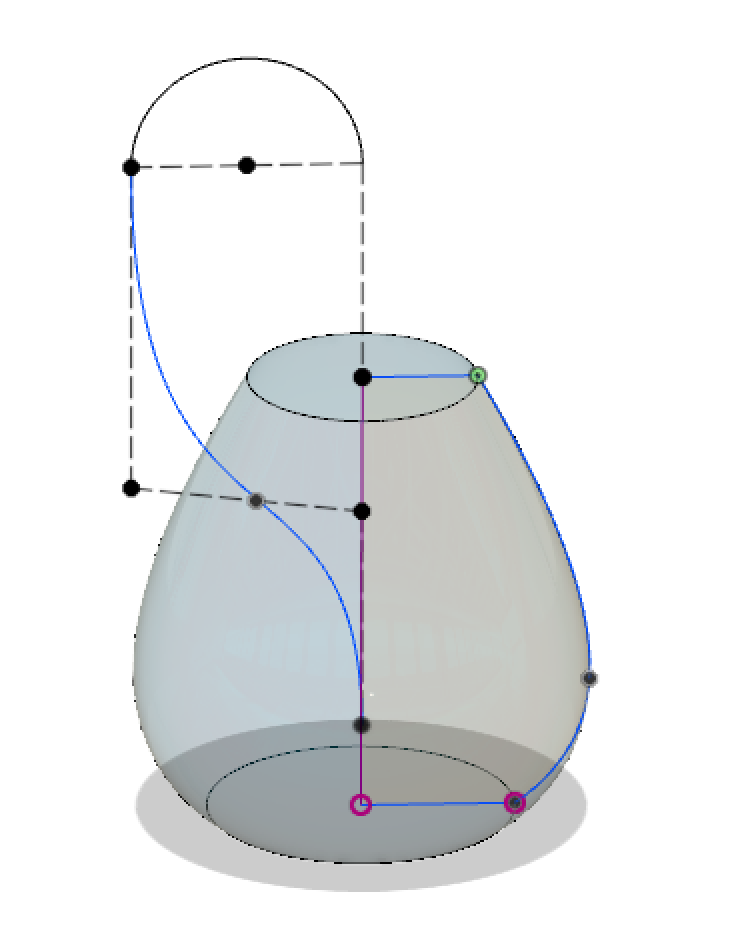
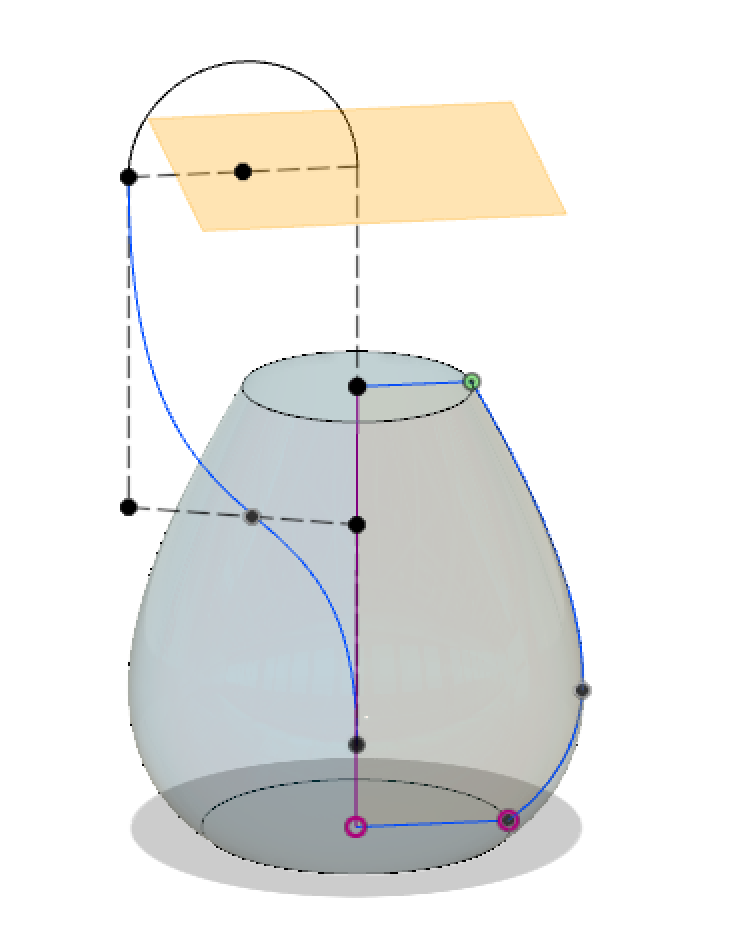
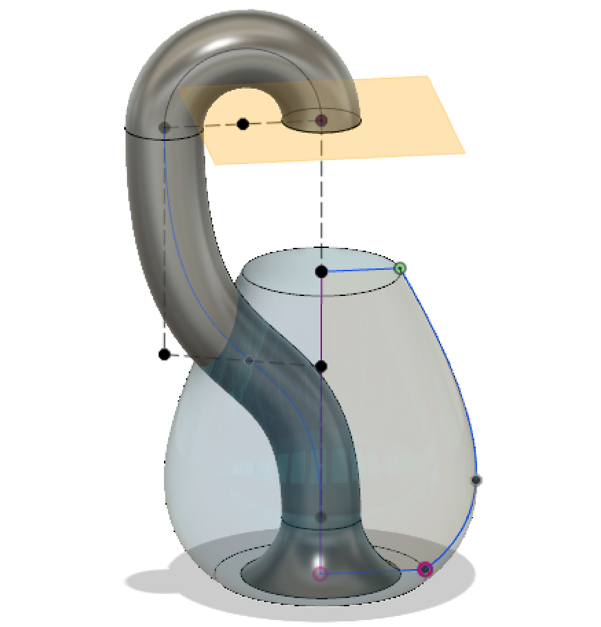
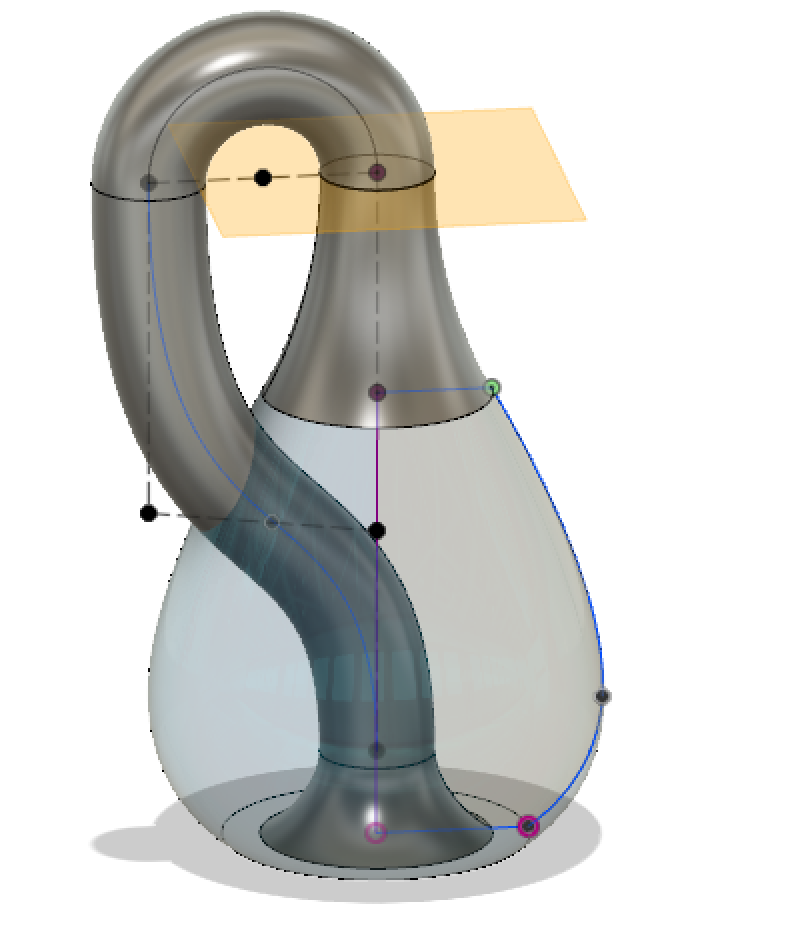
Process
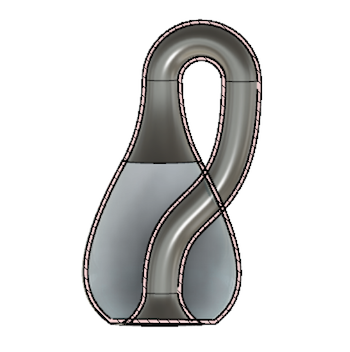
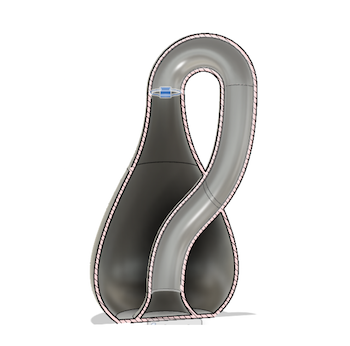


From Autodesk Fusion, you can export your model to an STL file via the File > 3D Print option. I didn’t realize that at first, so I exported a STEP file and an IGES. Tom ended up converting the STEP file to an STL in Rhino, and based on the 3D print, there might have been an artifact of the conversion resulting in a shape my friend Karishma calls “a 9 on a Hershey’s kiss” (See the first two prints below.)
These supports are made with a water soluble material that gets removed by letting the bottle sit in a heated bath containing water and lye (basically a really strong soap) that is ultrasonically agitated. Since there isn’t room for the supports to escape, they are stuck inside the bottle.
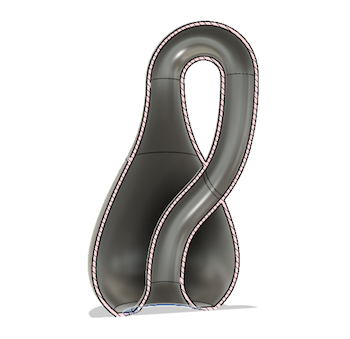
Since the prints didn’t come out as expected, Tom said I could try reprinting it with the Prusa (3rd image below).
Settings:
- Materials: Prusa PLA
- Quality: Detail 0.1mm
- Infill: Hollow/Shell - 0%
- Support: Only from build plate (Trying to print it without support resulted in it coming off the plate because there’s only a thin circle actually holding it to the plate.)


“3D scan an object (and optionally print it)”
Since I want to have a model of my hand for my final project, I tried using the Sense2 3D Scanner to scan my hand. I knew it was going to be hard to keep an even distance between the sensor and my hand on my own, so I asked John to help me out! It was pretty funny and involved teamwork as we took turns holding the scanner steady as John moved to my other side. We made two attempts (One in ‘Scan Object’ mode and one in ‘Scan Head’ mode) and got about the same results.


I tried to use the erase tool to clean up the hand, but when I went to solidify the hand after erasing, it undid my hard work so I decided to try scanning my head (again with Tom’s help). So that was kind of a fail.
Scanning my head was also pretty difficult, because as the scan is occuring, you often need to move the scanner very slowly and stay very still. It’s hard to do that and ensure that the scanner still knows how to combine the information in a way that makes sense. Once the scanner loses its tracking of the object its scanning (caused by quick movements, changes in proximity, or other objects getting in the way), it’s difficult to find again. Here’s the result.
