00
FINAL PROJECT
The idea of this project is to create a relaxing and automated table that resembles a Japanese zen garden. The design for this project is inspired by a Kickstarter project that came out a few years ago called the Sysiphus Table.
It works by moving around a magent beneath a table to control a ball bearing on the surface of the table. The ball bearing can then be used to create beautiful patterns in sand which are very relaxing to look at.
Parts
free = found in lab
- Slip ring: $10.99
- Magnetic ball: $0.99
- Linear Roller Bearing: $9.98
- 8mm Rod: $8.99
- 9/32" Stainless Steel Ball Bearings: $14.18
- Strong Disk Magnet: $4.44
- Stepper Motors: free
- Arcylic: free
- Sand: free
- Assorted screws, washers, and nuts: free
- Total: $45.13
| Tools: | Fusion 360, Eagle, Roland Mill, Othermill |
| Files: | Complete project |
| Date: | 09.12.2018 |
Next Steps
Right now the machine only knows one pattern. Ideally I'd be able to give it any picture and it would be able to draw it. This would require some path planning that I have not yet thought about. For now I'm going to leave it as is, but I look forward to working more on this during IAP!
The motors are also very shaky. I'm not quite sure how this can be fixed other than perhaps buying higher quality motors. Additionally, I'd want steppers with a lower step count so that I can get higher resolution on the images/patterns drawn in the sand.
12.15.18 - Finishing Touches
Mostly everything is working, but now I just need to finish the assembly of the table, put the sand on the top of the table, and add a homing feature so that the system knows where it is when it's first turned on.
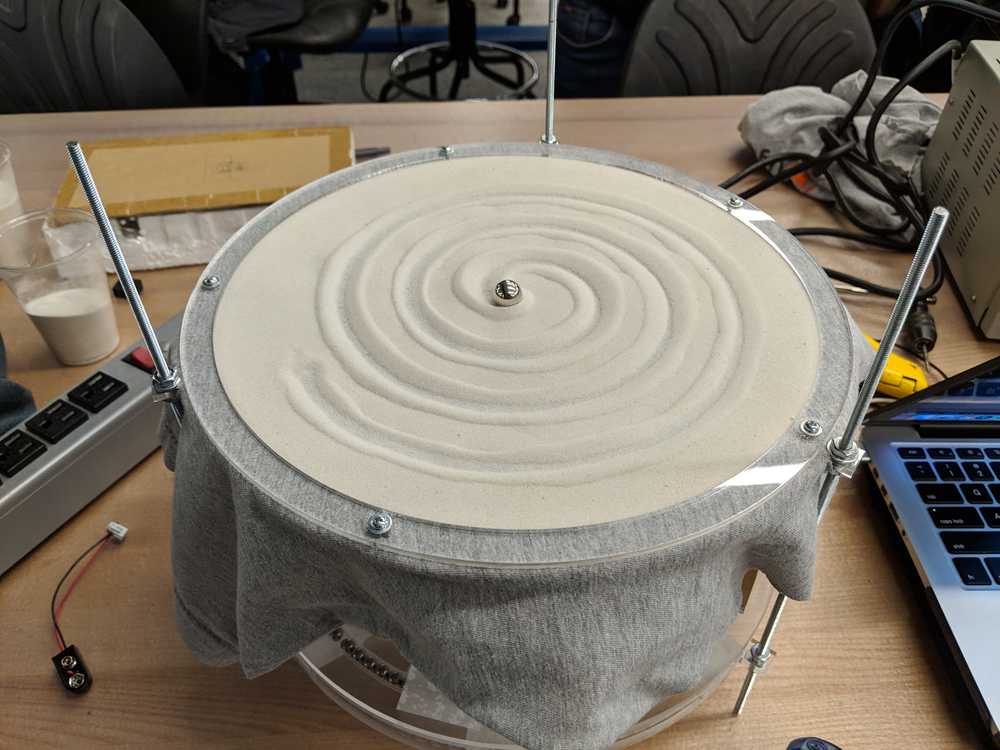
First, I supported the top of the table by getting some threaded rods I found in the back of our shop and cutting them to length. I then used nuts on each side of the table to keep everything in place. It turned out pretty well, here's how it looks.
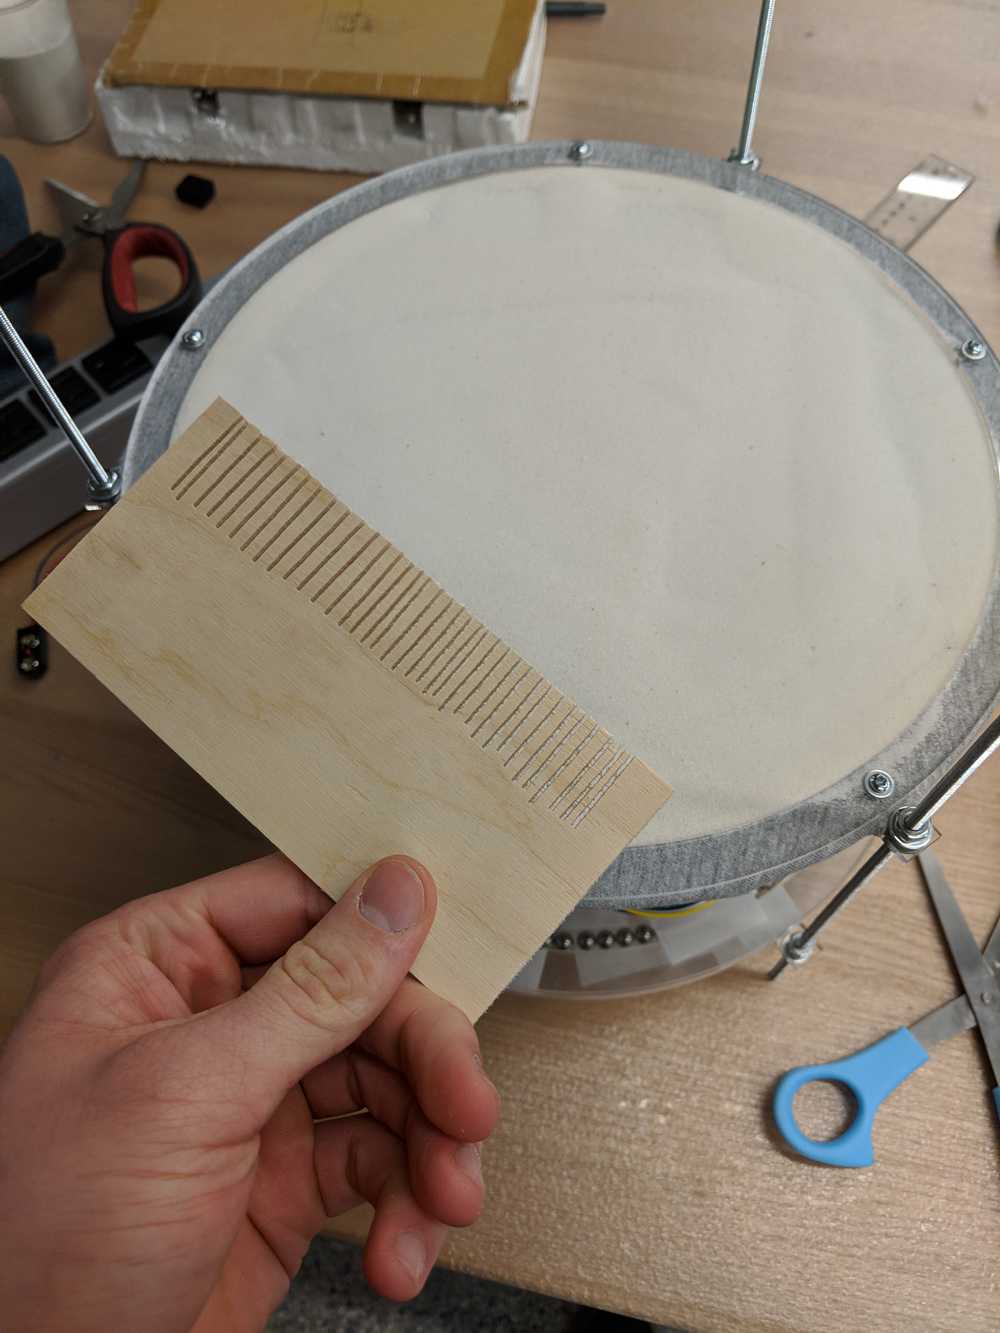
Next, I need to add sand. I went out the the architecture shop because I heard that they had some lying around. Unfortunately, they didn't but I did run into Rafa who works for the Rock Mechanics Group. Luckily, he was nice enough to take me to his lab and donated some sand to my project! And our TA Zach made a cute little rake to go with it!
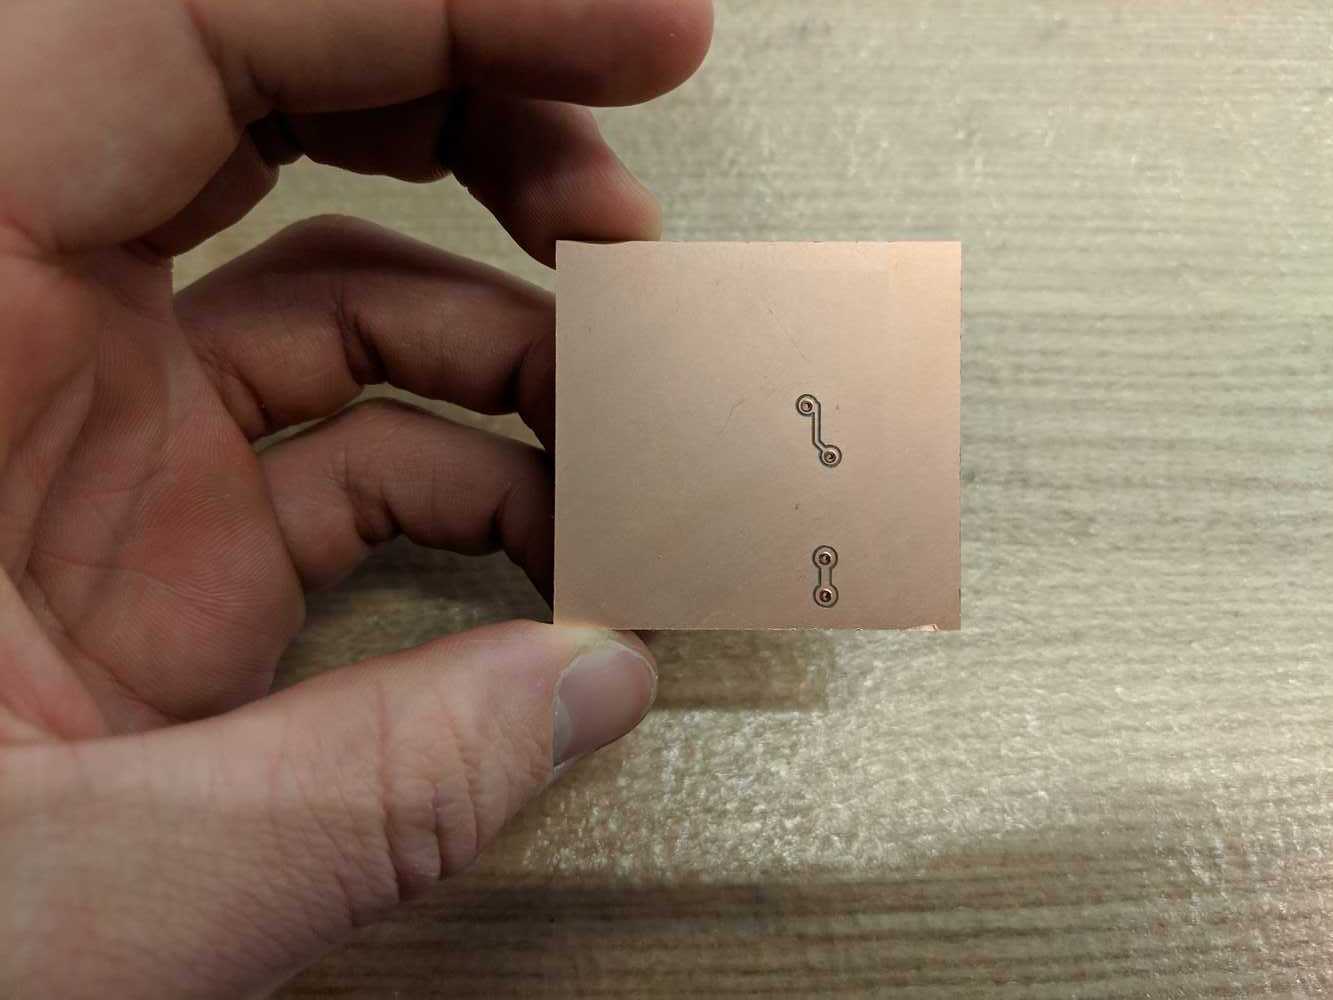
Finally I need a way to home the device so that when power is first connected, the motors can go to a "home" location from which to start every design. Orignally I was going to use a limit switch, but we didn't have any in the lab so I decided to use a button instead. I designed a very simple breakout board that has connections for a button and also and FTDI cable. However, I'm only going to use two of the FTDI pads. I used FTDI connections rather than a header because a header would have been extended too far from the surface and the button would never be hit. Here is an example of the homing system in action. As you can see the radial motor moves outward until it hits the button and then it knows to start doing what ever design it was programmed to do.
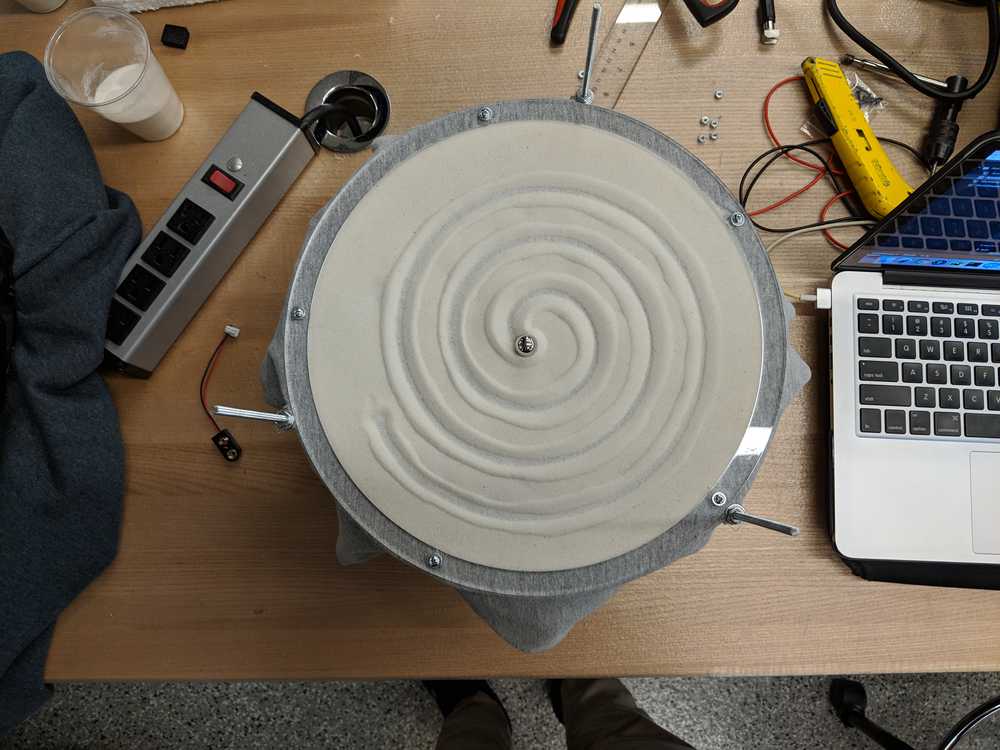
Now I'm finally ready to put everything together and do a final test! I programmed in a very simple spiral and turned on the power. It worked!! Take a look:
12.13.18 - Middle Assembly
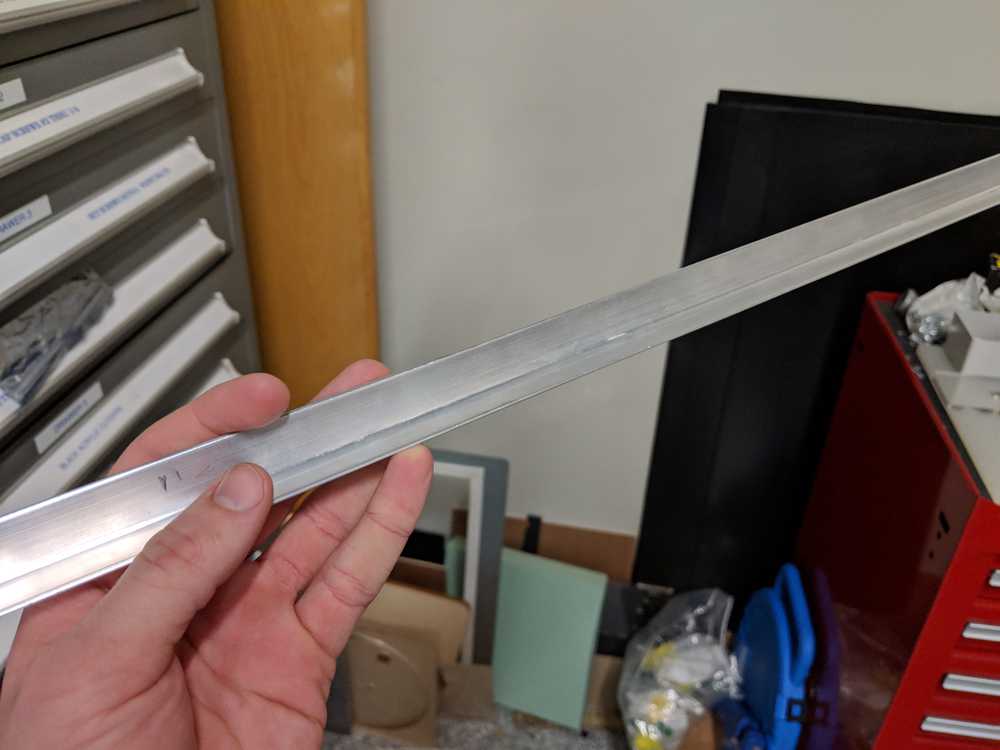
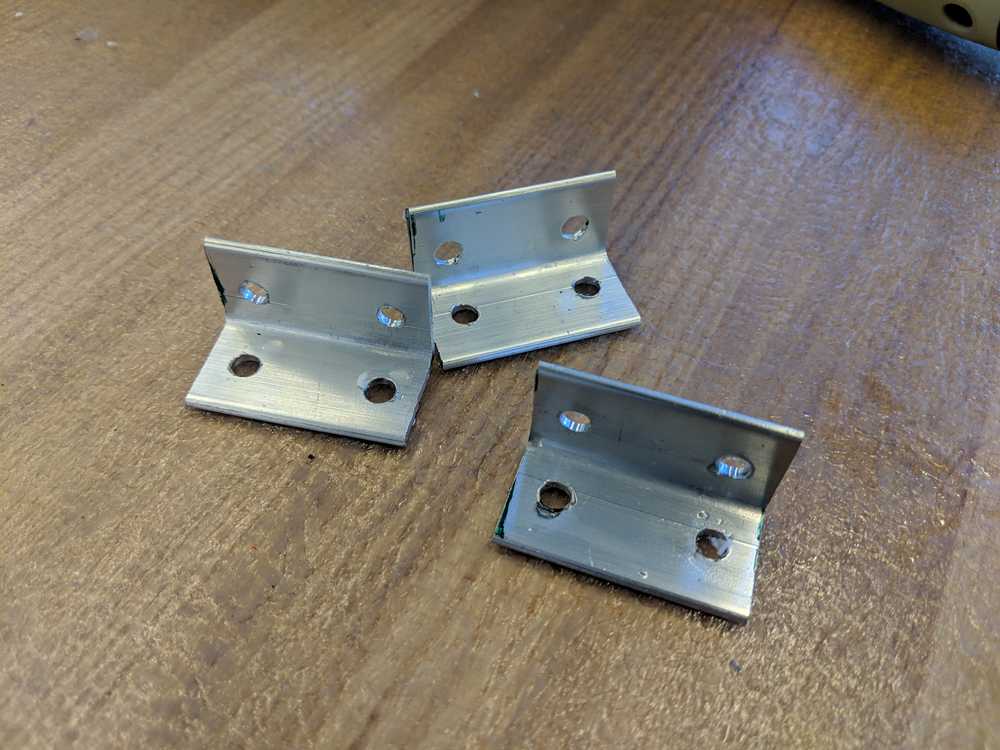
I have some laser cut pieces to support the rail that I need to be at a 90 degree angle to the base of the table. These supports should be sturdy so I couldn't use table like I did to secure some of the other laser cut pieces of acrylic. I found a long piece of L-shaped metal that I decided to cut into small pieces and use to hold down eveything.
Next, I fastened everything together by threading holes in the base acrylic layer and then using screws to connect the components. I still have yet to build the outside support system that will hold up the top of the table, but below is an image of how I hope it will look.

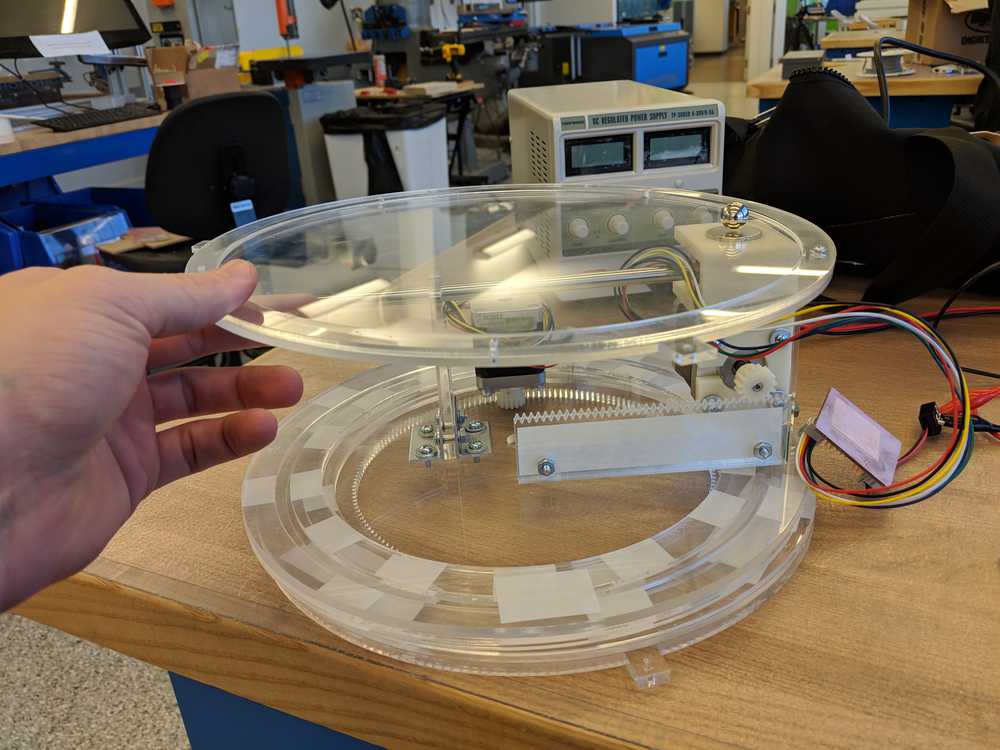
This is a test of the radial motion of the system. It works well but the motor needs to be held down or else it gets off the track. I'll build a support to prevent this from happening later on.
12.11.18 - Base Assembly
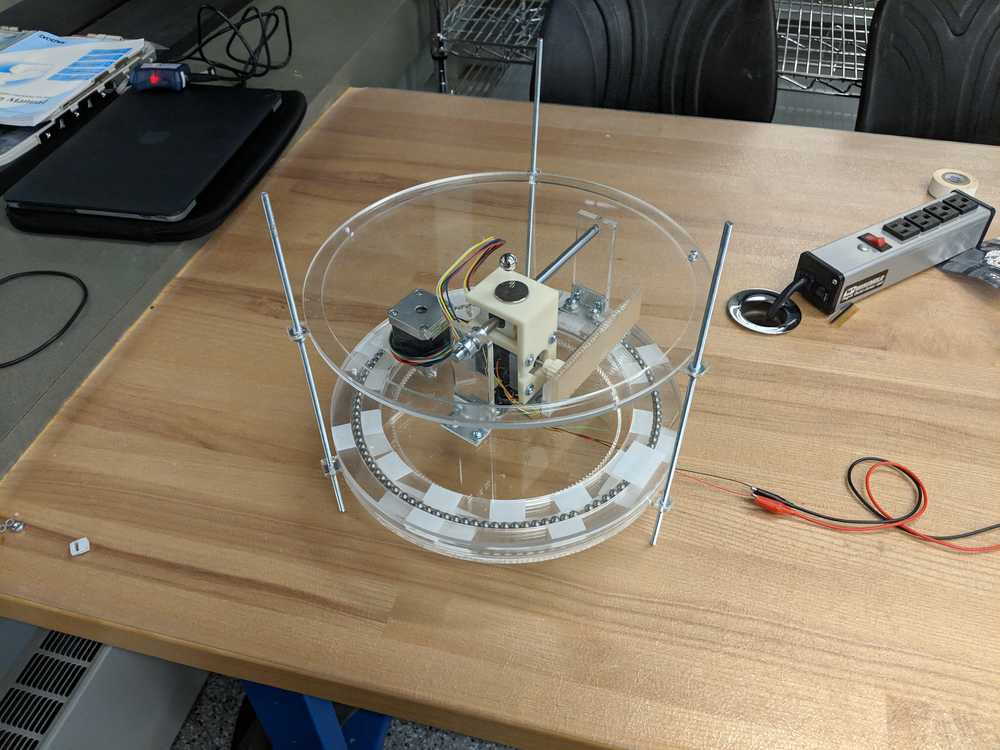
With the turntable now assembled, the board design finalized, and the stepper motors working, it is now time to start putting together the base of the table. First I had to laser cut a base for the table where I will mount the stepper motors, board, and various supports. Then I had to design an internal stationary gear that'll allow the table top to move. I made the gear using a site called Gear Generator, got the svg file, and then laser cut it.
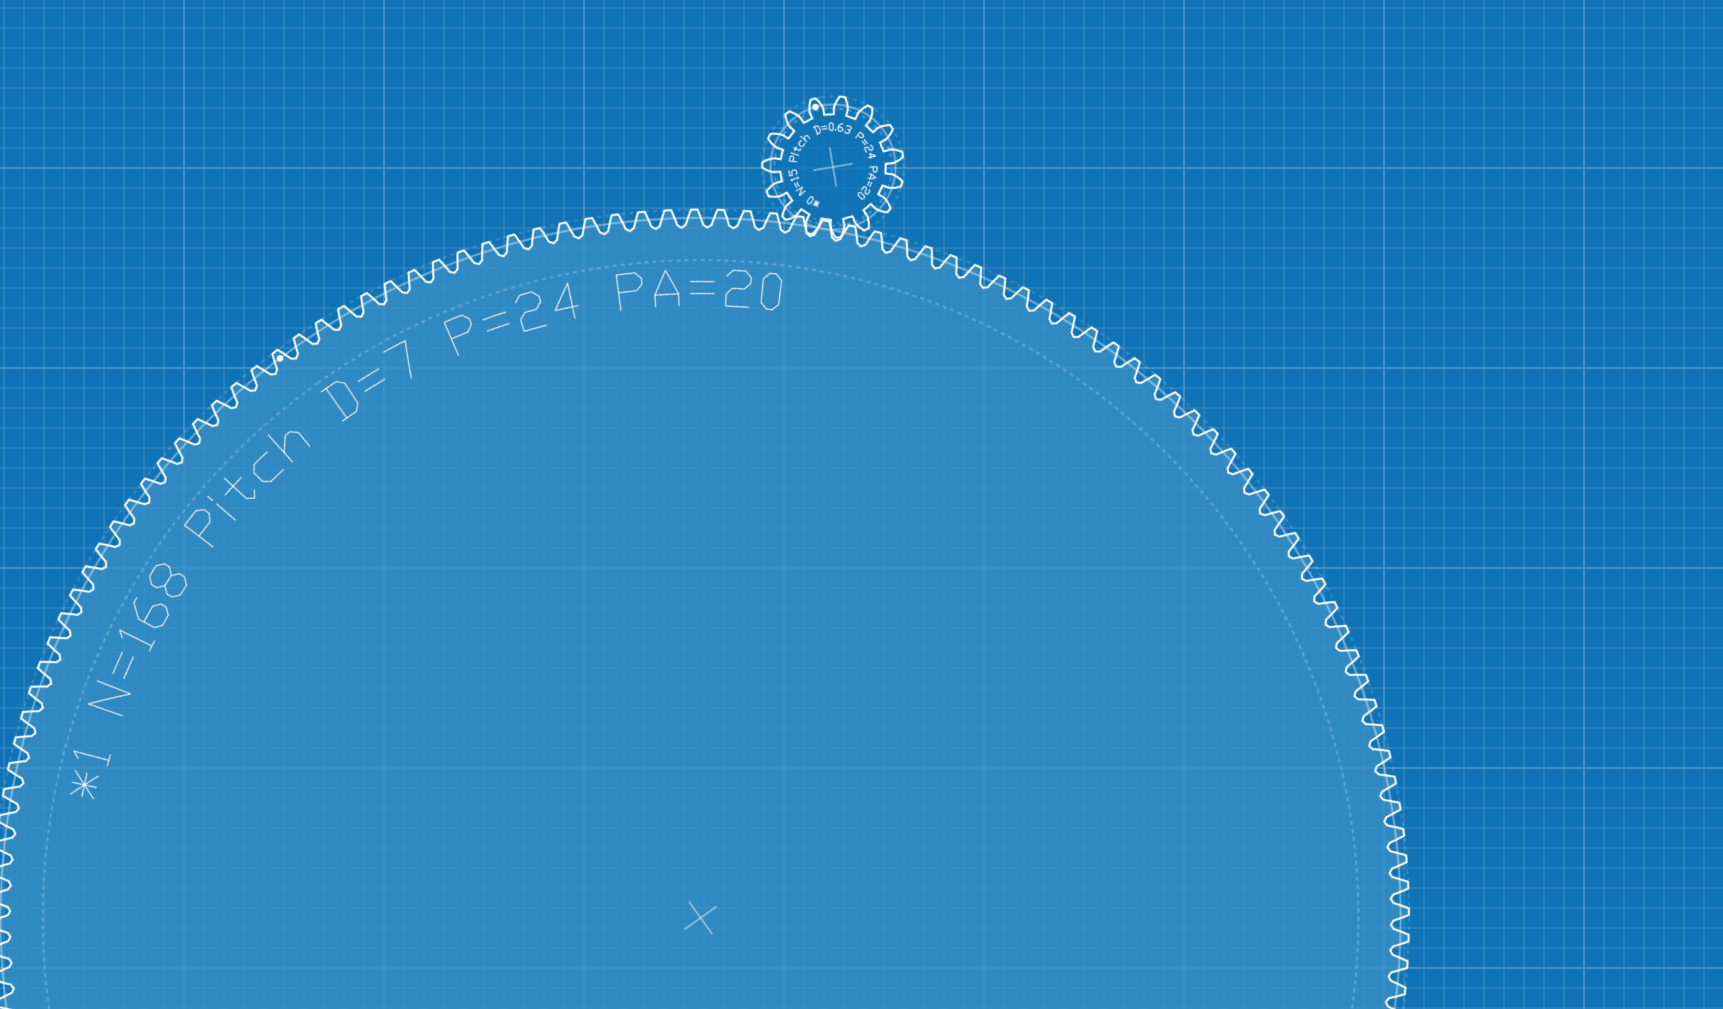
I laser cut this design and quickly realized that I didn't put enough clearance for the holes that would hold the stepper in place. Rather than waste another piece of acrylic, I got a scrap piece and made a small cut of the old holes. I then aligned the first piece of acrylic, enlarged the holes, and made the cut. This worked surpising well and saved me from having to ask for more acrylic.
Finally, I attached the first stepper and connected the whole system to power. It worked! I ran the motor at a slow speed to make sure everything worked but at this low speed there were issues with everything vibrating. This vibration is not only loud and annoying, but it also means the rotation is very choppy. I'll have to look into finding a solution to this. Anyway, here's a video of the rotation working.
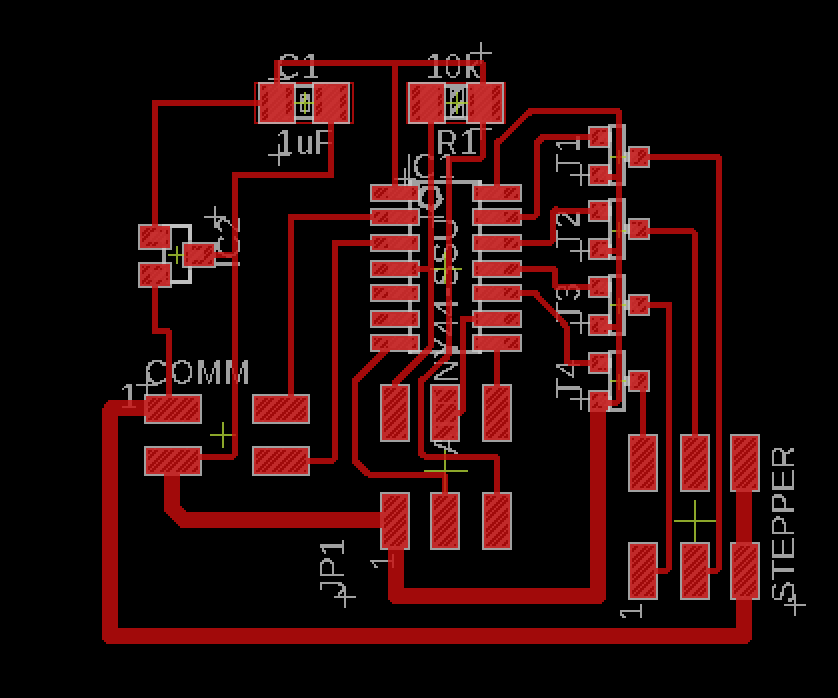
12.7.18 - Board design
For communication week I designed a system that allowed me to have a main board and two breakout boards. Originaly I did this because I thought one ATtiny44 didn't have enough pins to support my design. But after talking with the the EECS TAs I realized that I could reuse the programming pins and this would open up enough pins such that I would only need to use one board.
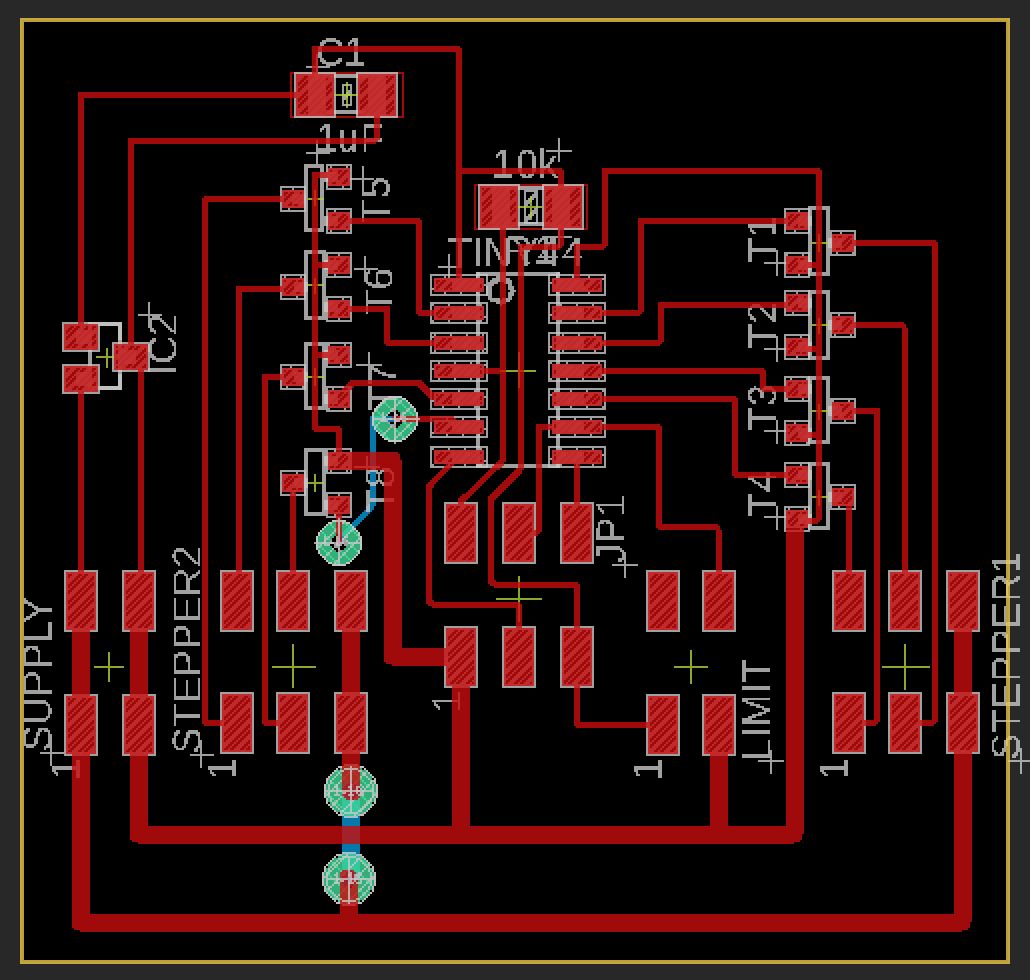
I had to add vias to properly route all of the traces. Instead of using the Roland mill like I normally do, I decided to use the Othermill because it's alignment bracket makes it easier to properly line up milling a double-sided board. I really love this machine and even though it's a little slower than the Roland, it's so much nicer to use.
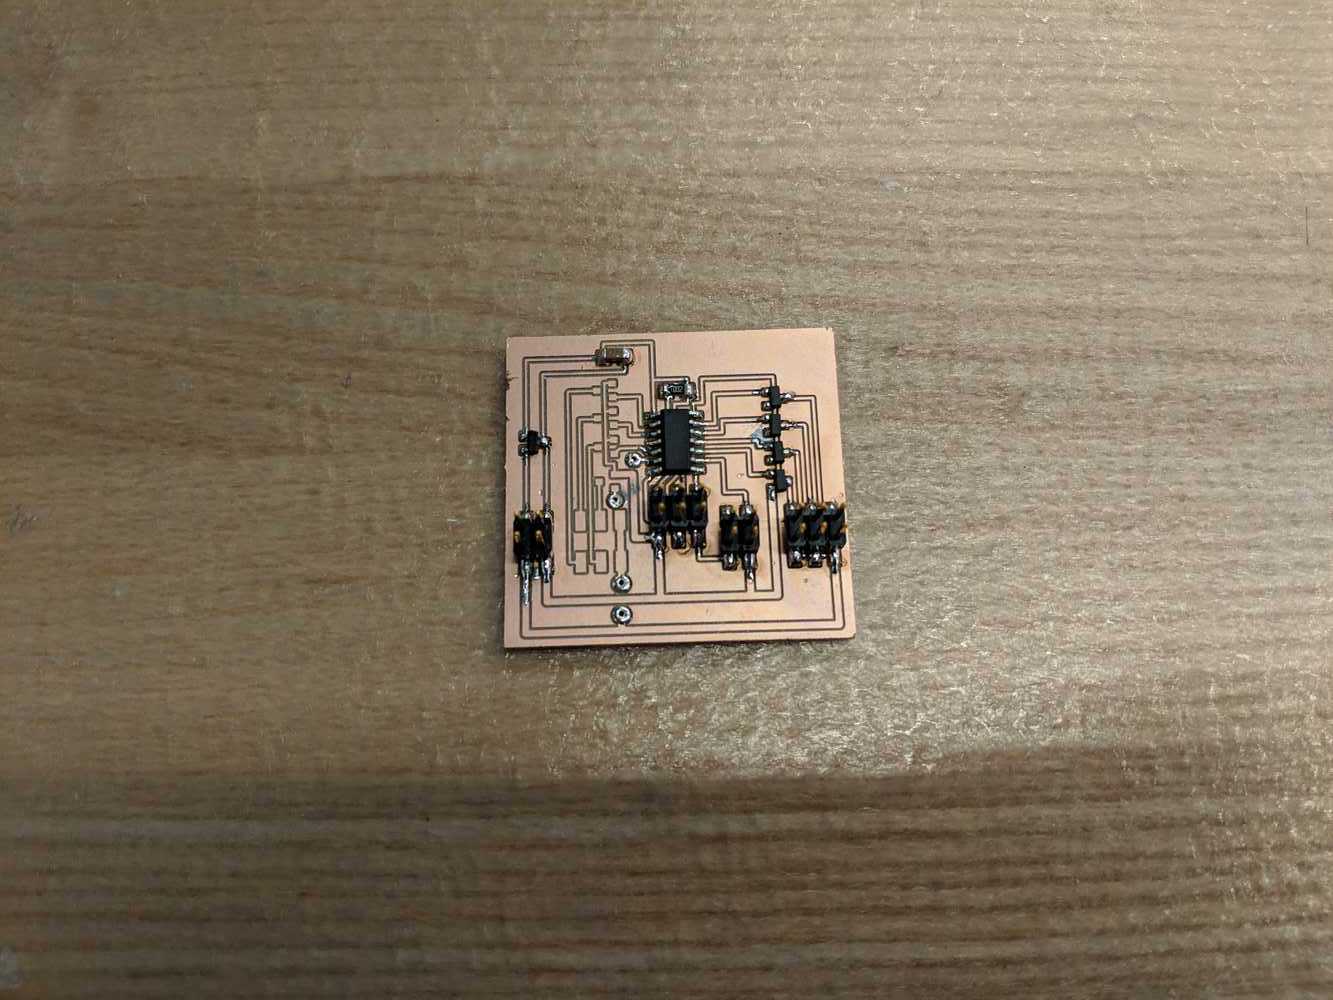
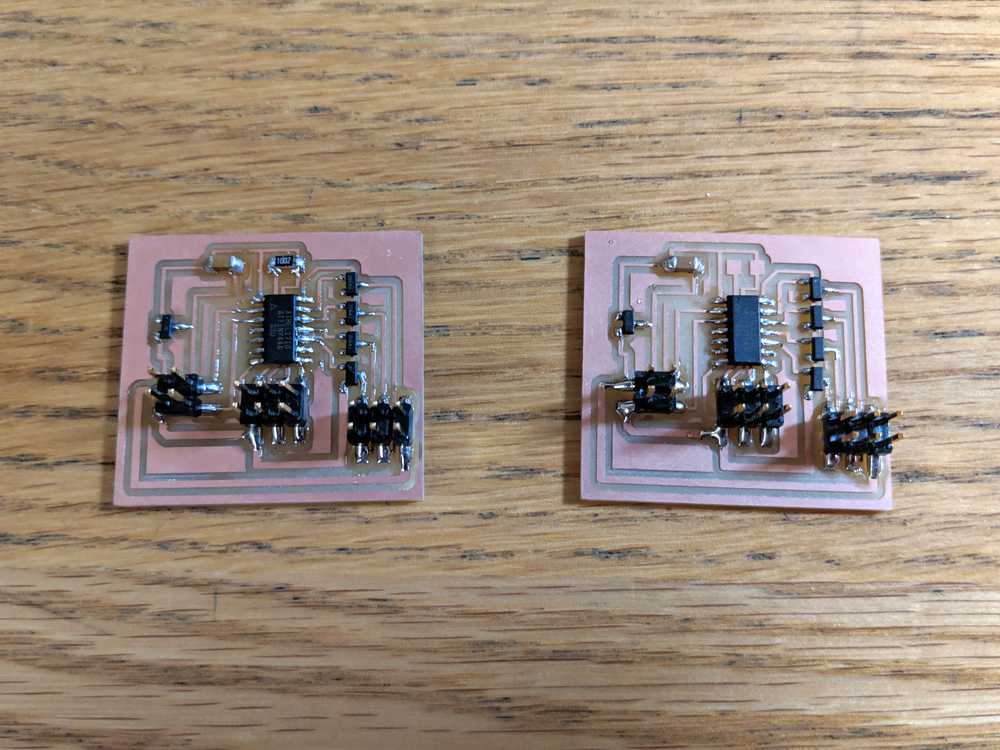
Here's how the board turned out. The pin headers are too close together and makes attachig things to the board really difficult. They still work so it's not worth milling a new board, but the distance of pins is certainly something I'll keep in mind when milling new boards.
12.5.18 - Stepper Motor
For output week I actually got the stepper motor to turn and milled the boards that I'll be using for the final project. See that week for more thourough documentation.
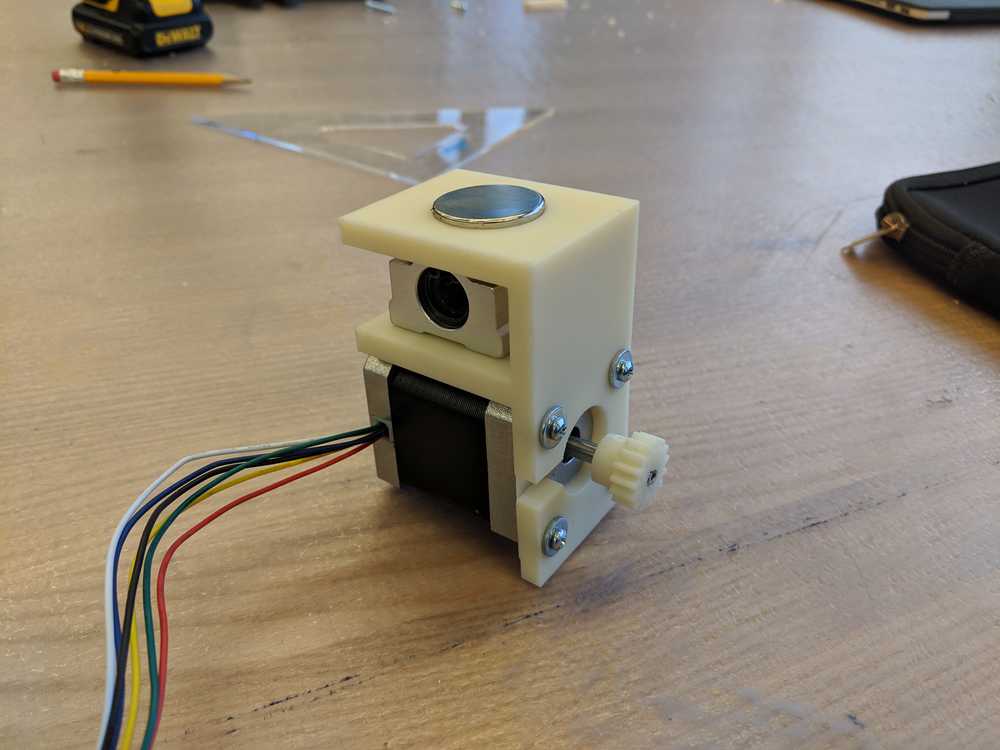
12.3.18 - Stepper Motor Holder
In order for the magnet tp move radially, it needs to be powered by a stepper motor on a rail and carriage. First I got all the measurements for the stepper motor and modeled a basic version of it in Fusion 360. Next, I built a frame around the motor that connects the stepper and magnet to the carriage.
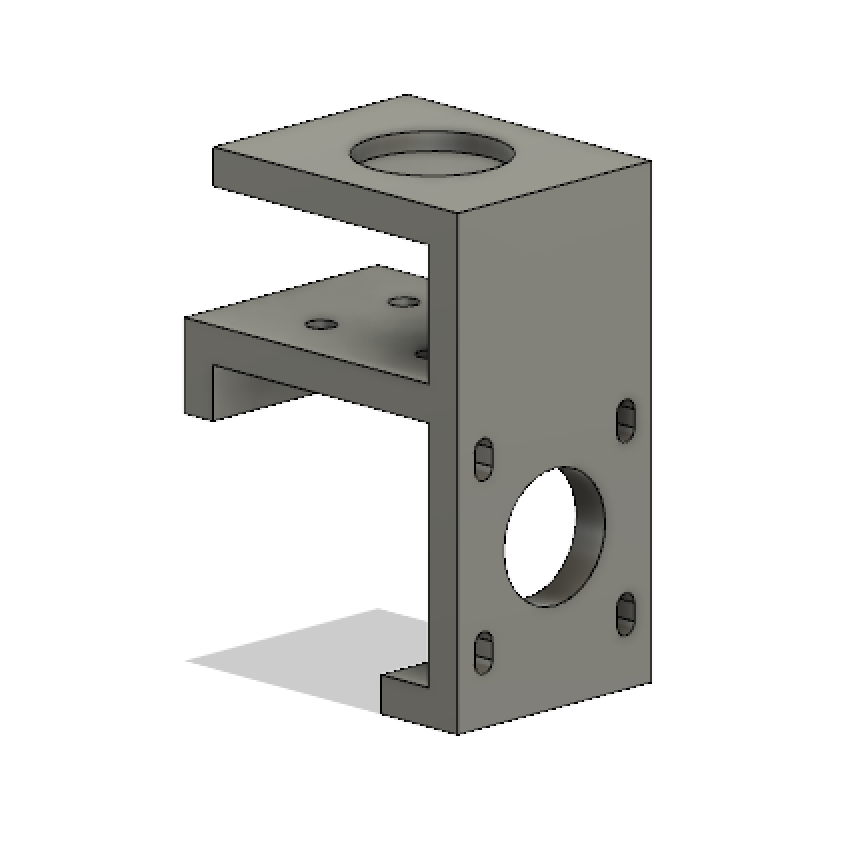
I 3D printed this part and after initially trying to assemble it I realized that I forgot to add a countersink for the screws above where the motor is mounted. This meant that the motor didn't fit into the printed part. Instead of 3D printing the part again and I just got a drill and used a larger bit to make a countersink. Thankfully, that woked and I was able to get everything assembled properly.

11.28.18 - Rack and Pinion Fabrication
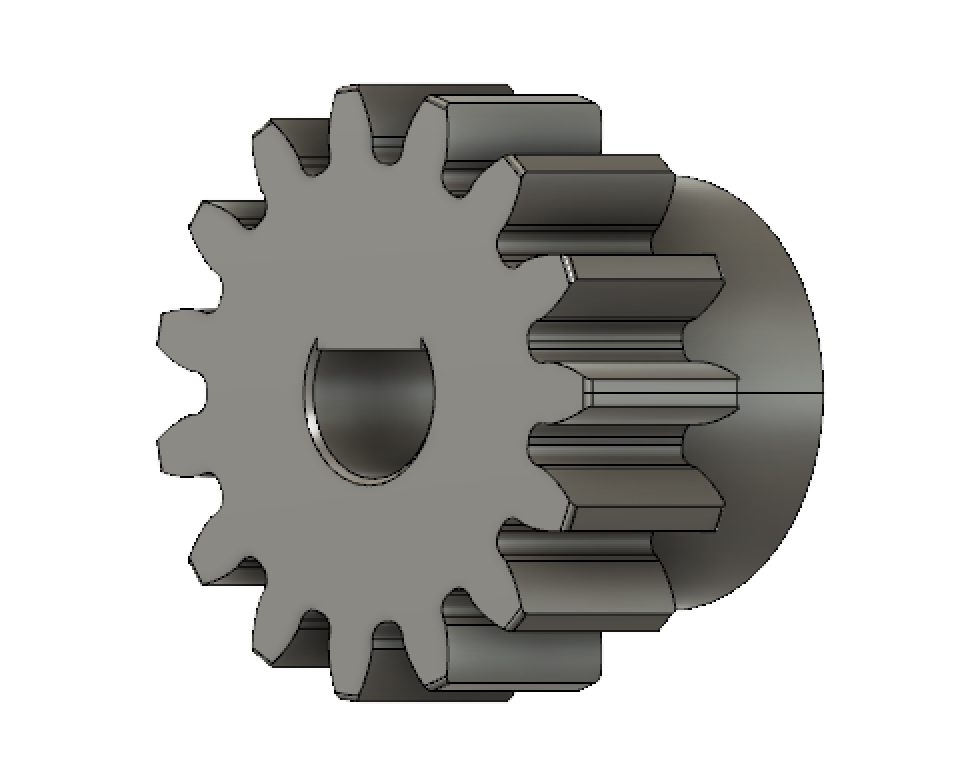
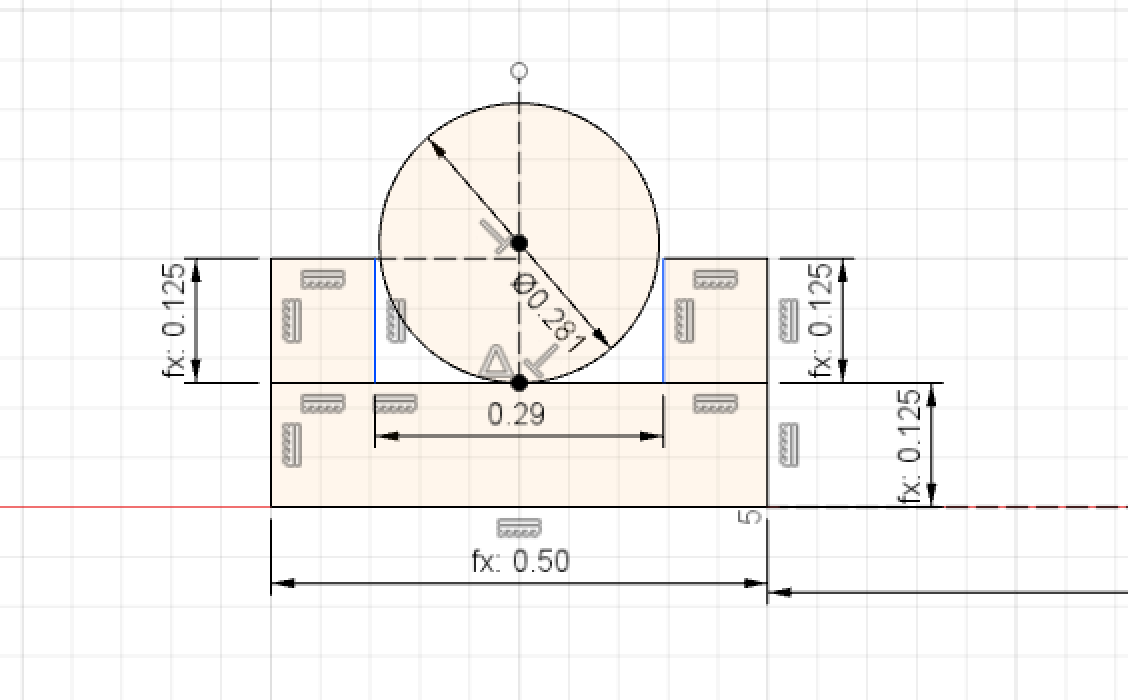
The next step was to get the gear attached to the stepper motor. Unfortunately, the stepper I have has a smooth shaft. Even if I added a set screw to my gear, I was worried that the gear would slip. To fix this I decided to add a flat to the stepper shaft and adjust my design for the gear accordingly. I got the gear design from McMaster Carr and then added the flat area and a set screw pilot hole.
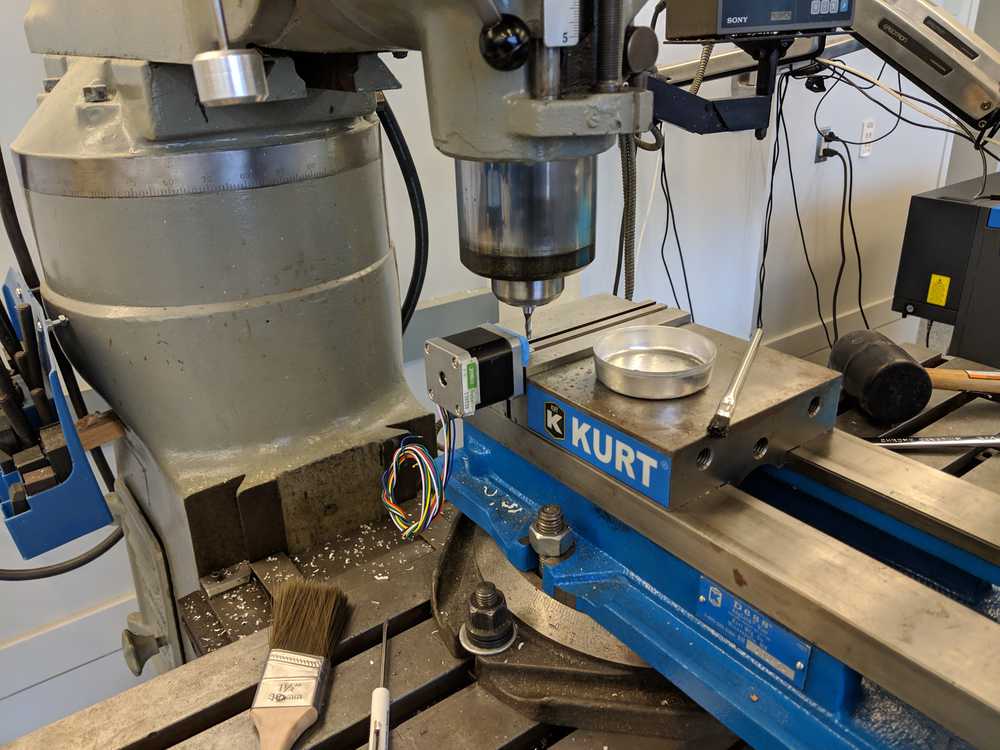
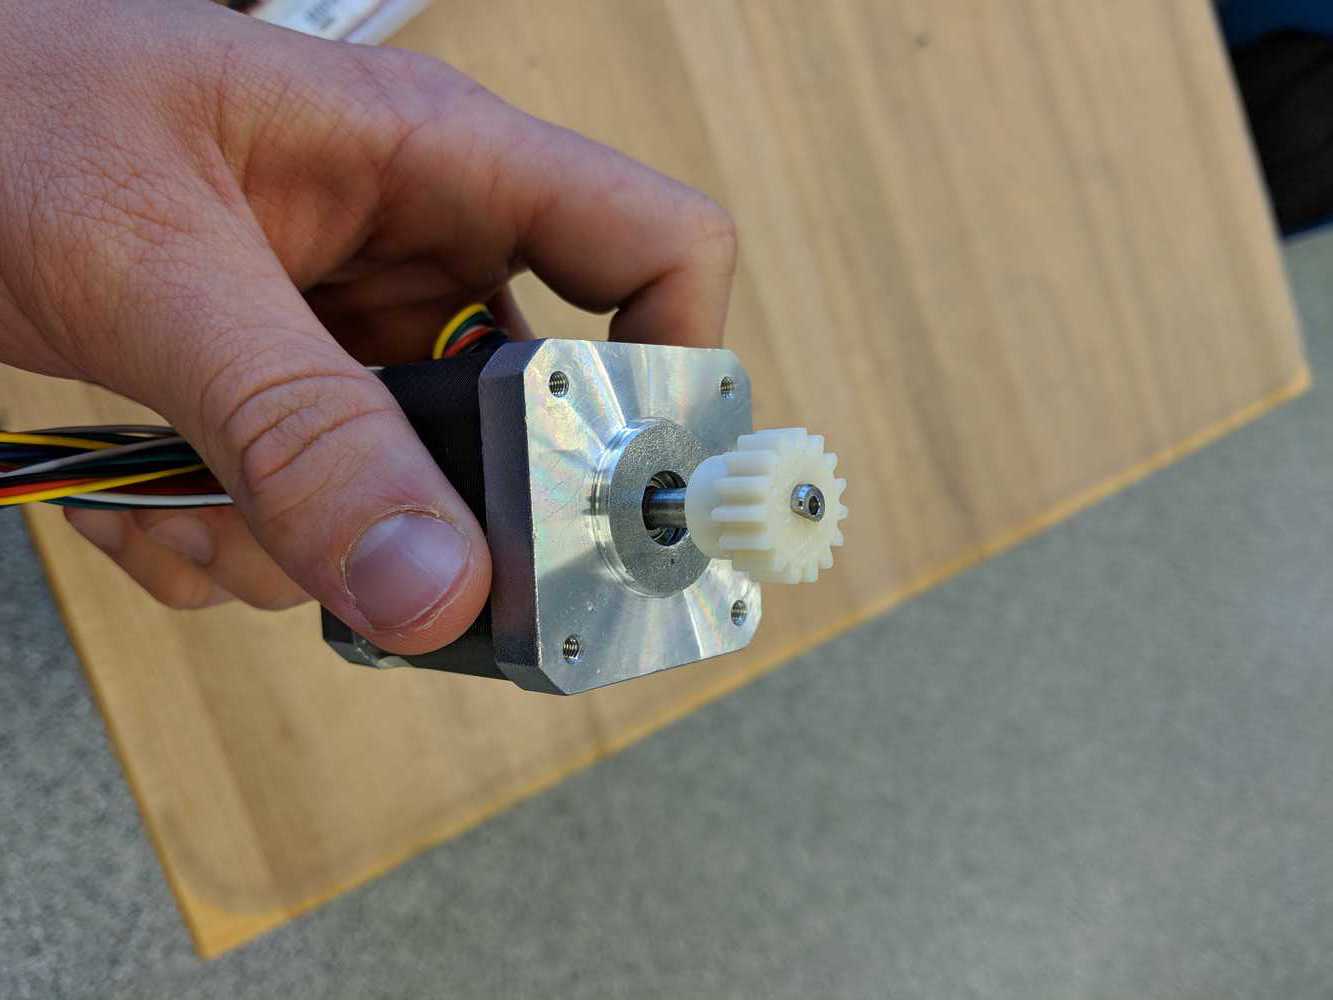
Once the gears had both been 3D printed, I had to fix the shaft on the stepper motor. With the help of Dave at E.D.S. I secured the shaft and shaved off the appropriate amount of the shaft to make it line up perfectly with my printed gear. In the end, it turned out perfectly! I likely won't even need the set screw.
11.26.18 - Cutting the Acrylic
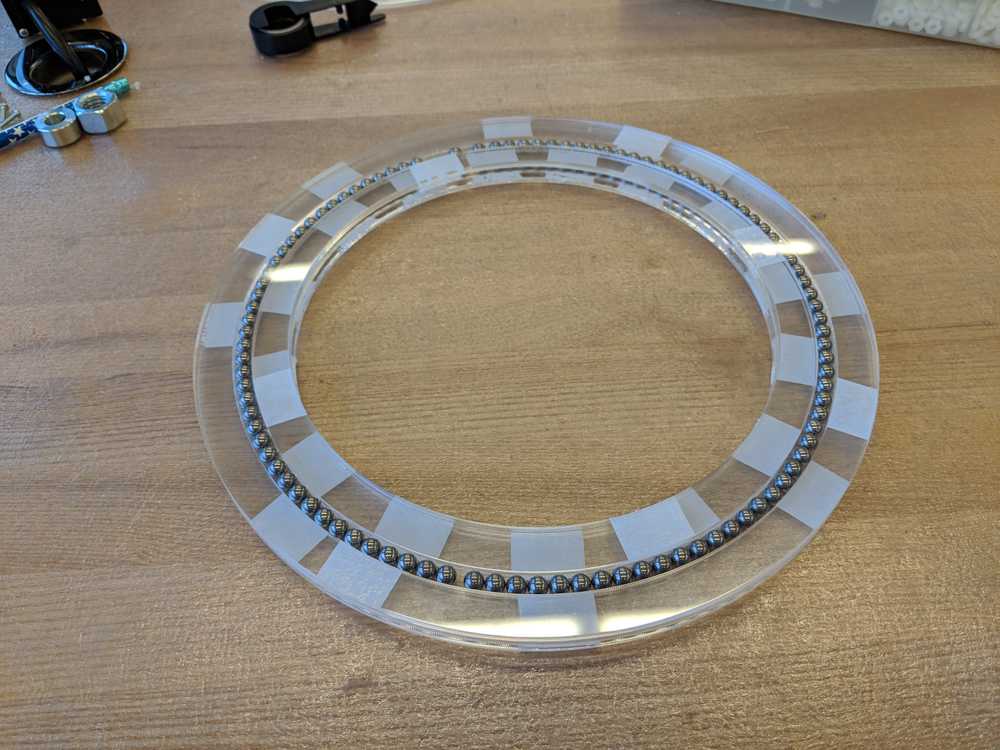
I started by working on making the turntable. I purchased the cheapest ball bearings I could find on McMaster Carr. Using the correct measurments for the ball and the thickness of the acryllic I would be using, I made this cutout from the side to check for correctness.
Then using those same dimensions, I made a top view of the turntable so that it could be laser cut. Here's how the cuts turned out. You can see the files in the "files" link above.
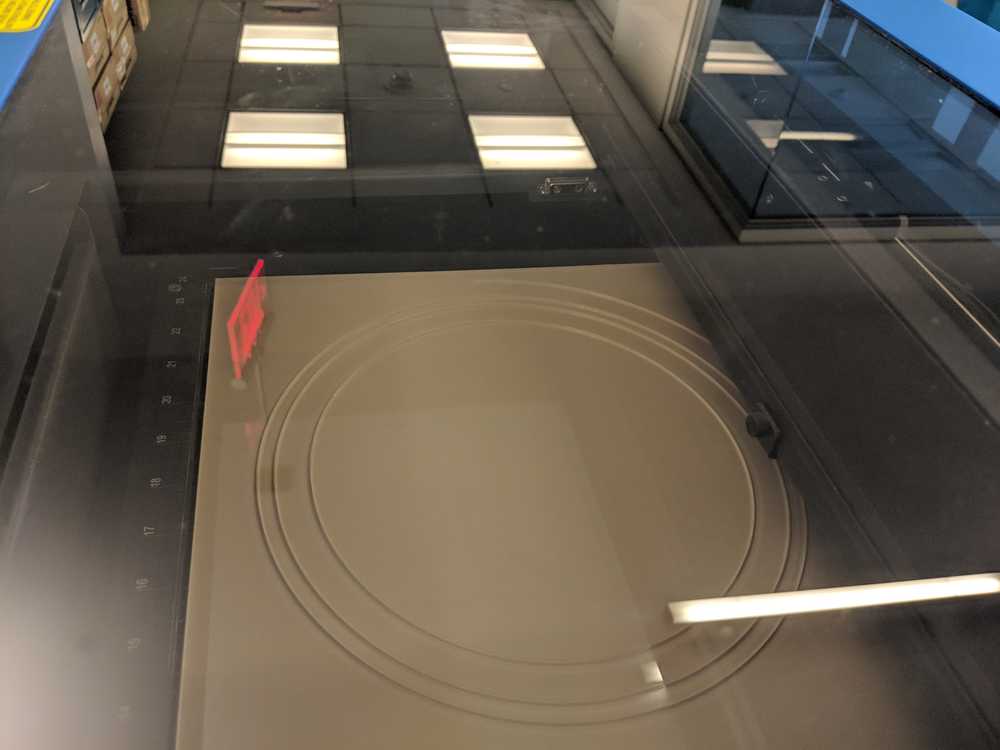
Now I started assembling. I quickly realized that I forgot to add pilot holes to certain parts of the acrylic. Rather than laser cutting again or drilling holes, I went with the simple approach of using double-sided tape to stick the pieces together. Much to my surprise, this method worked really well and was incredibly easy to set up.
Here's what the turntable looks like when it's all put together:
10.19.18 - Design Challenges
The biggest challenge for this product is going to be figuring out how to get a magnet to move around the on the table. In addition to having full coverage of the table, the movement of the magnet should be smooth. Currently, I plan on having the everything spin with a servo motor and then use a rack and pinion to move the magnet in the radial direction.
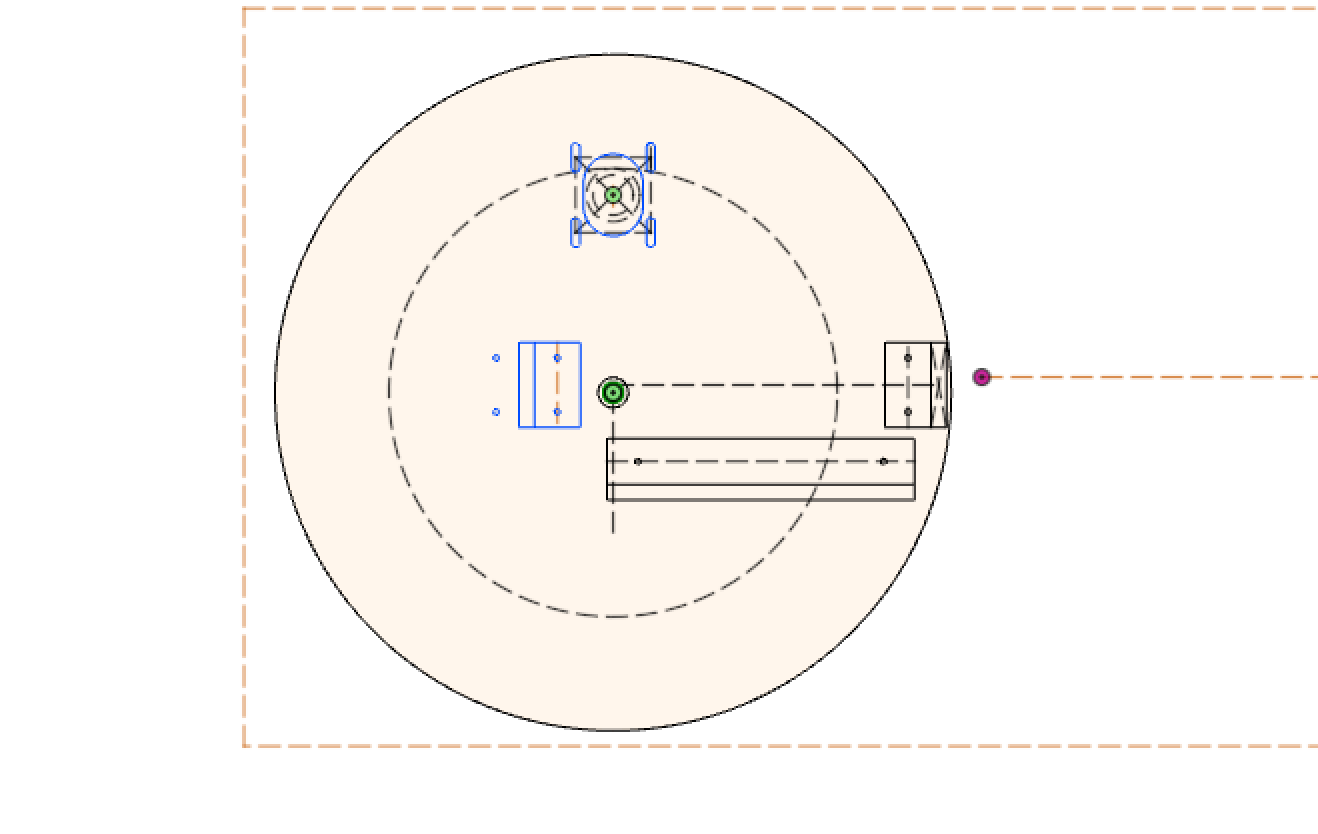
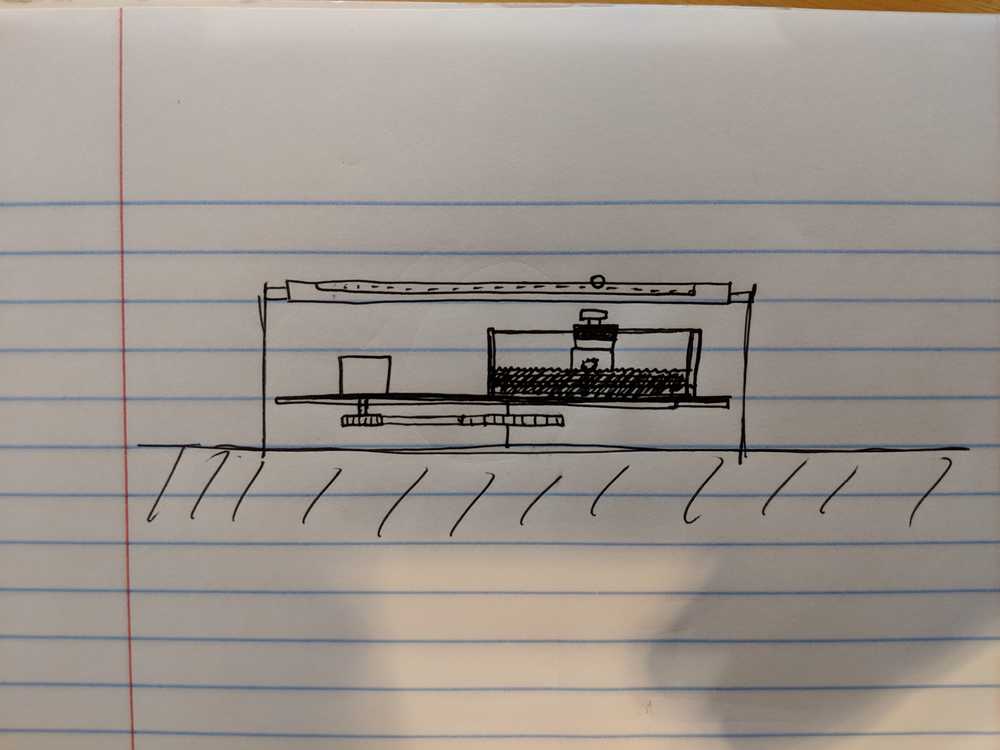
Below is an image of my initial design for the table. On the top you can see a table top with a small indent to hold the sand. This is where the ball bearing will move around. Beneath that there is a stepper motor on a rail system. This is moved with a rack and pinion. On the left of the image we see another stepper motor connected to a stationary center gear with a timing belt. This allows the table to rotate 360 degrees.
10.01.18 - Pivoting:
I've decided to pivot from my original idea of the wave pool table idea. I liked the idea of having water in the table, but after some initial research, I think the project was a little too out of the scope of this class. I still want to create a zen-like table so I did some research to find out what else was out there.
I found a really cool Kickstarter project from a few years ago that captured the exact look and feel that I want from my design. Here's a video of the table in action.
My final project will be to recreate this table and add a few more interactive elements. For example, I'd like to be able to place stones on the table (like in a real zen garden) and have the ball avoid those stones when making its designs.
09.19.18 - Initial Idea
The idea of this project is to create a zen-like table that resembles a Japanese zen garden. Except rather than being sand, this zen garden is a wave pool. The table is itself an infinity mirror, so the ripples will also be reflected along with the LED lights in the inifity mirror setup.
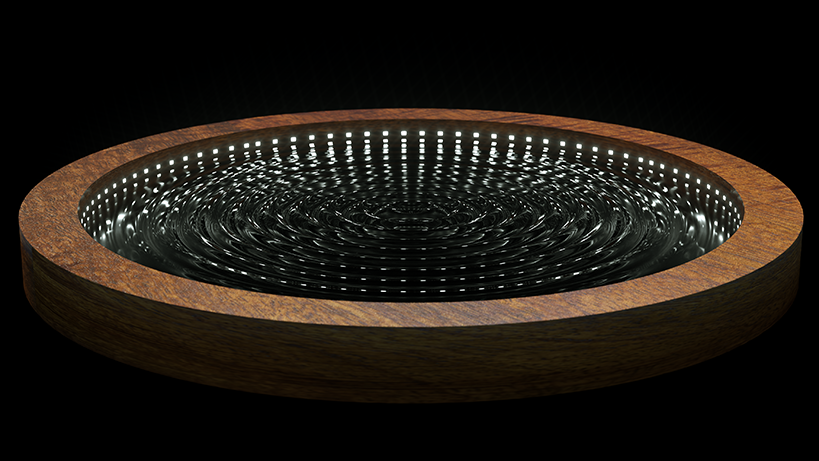
Here's a rendering (Cinema 4D) of how I'd like the table to look.