Printing and Scanning
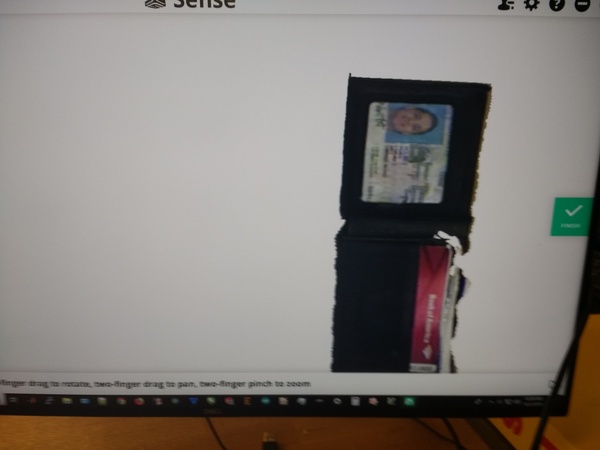
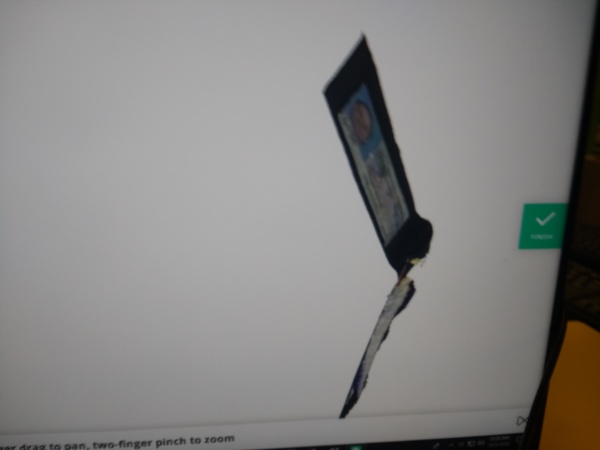
1 Scanning: A wallet
After some experimentation, I found that the (somewhat temperamental) scanner worked best on an object such as my wallet. Here's what I tried:
- My own ear
- I had initially wanted to scan my own ear to see about making my own holophonic recording unit (although presumably molding and casting would be a better fit for this project.) Mounting the scanner on a tripod helped me overcome the limitations of my arm length, but nonetheless the scanner couldn't get a good enough resolution read on my ear.
- My torso
- After the ear, I tried making a "bust" of myself from the waist up. This was only partially successful. Two tricks helped: removing my glasses to prevent confusing transparent/spindly/reflective surfaces, and also moving my body in all three angular directions (pitch, yaw, and roll) as if it were a rigid object.
- A book
- The book was too short — the scanner had trouble distinguishing it from the table beneath. Having a white paper background didn't help much.
- A thick paintbrush
- The brush was also too flat, surprisingly. Another problem was that the bristles and the handle were viewed as separate objects due to automatic color segmentation.
- A water bottle
- My own water bottle was too transparent, leading the visible/infrared sensors confused as to whether anything was there.
- A squirt bottle from the lab
- The slender nozzle on the lab's squirt bottles posed a huge problem. The scanner does not like objects with "critical points", i.e. objects that change appearance significantly when you move the camera just a little bit. This rules out objects with sharp protruding bits (such as the nozzle) or with surprisingly non-convex surfaces.
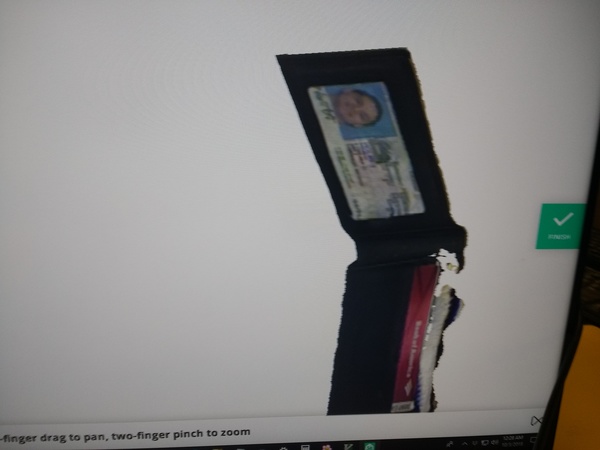
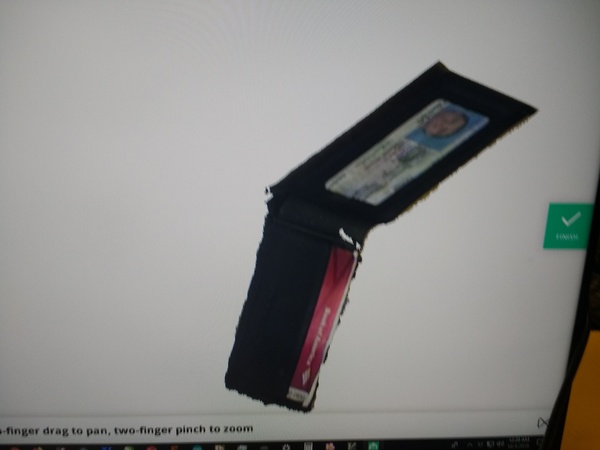
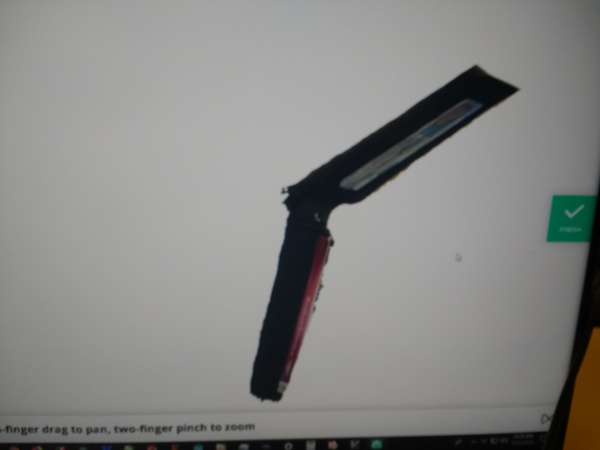
- A wallet
- The wallet turned out to be surprisingly successful. Apparently, it does not have many "critical points" where the view changes suddenly. It is also raised above the table when spread open, and relatively convex.

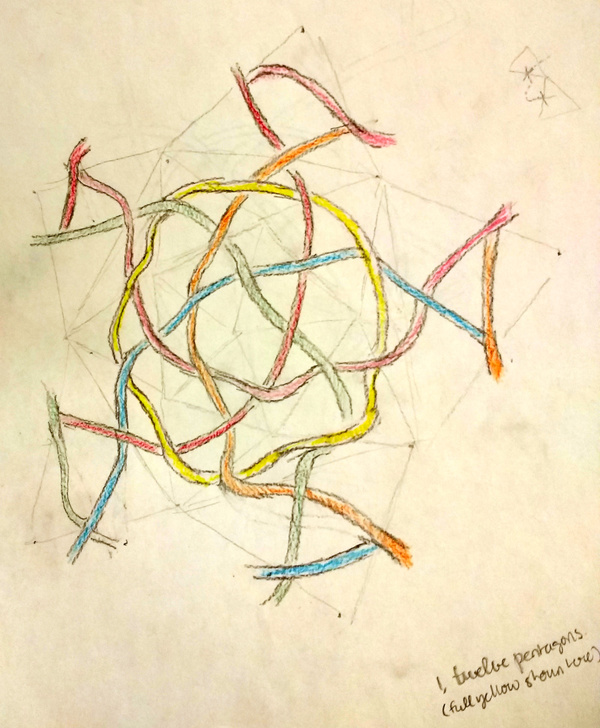
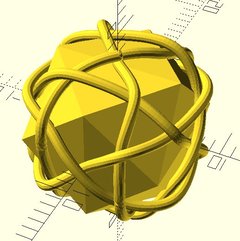
2 Printing: 3D Celtic Knot
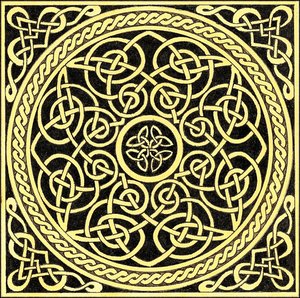
I was inspired by the theory of Celtic knot design, and wanted to bring those knots into three dimensions. In order to do so, I worked out how to form a Celtic knot around each of the Platonic solids. The most interesting of these was the icosahedron:
Once I had designed the figure on paper, I worked to model it in OpenScad. One interesting shortcut I used was to define the icosahedron as the convex hull of three golden rectangles. This saved a lot of work trying to name and define each of the triangular faces.
module icosahedron() {


    points = [
     for (c = [0,1,2])
	for (a = [-1,1])
	     for (b = [-phi, phi])

		    [[0,a,b][(c+0)%3],
		     [0,a,b][(c+1)%3],
		     [0,a,b][(c+2)%3]]


    ];

    hull() {
    polyhedron(points=points,
		faces = [[0,1,3,2],
			  [4,5,7,6],
		[8,9,11,10],


	     ]);
    }
}
In software, it turned out that the shape as written would be too unstable and would likely roll or slip during printing. To remedy this, I simply mounted the figure to a disc-shaped plinth.