8 Molding and Casting 🎃
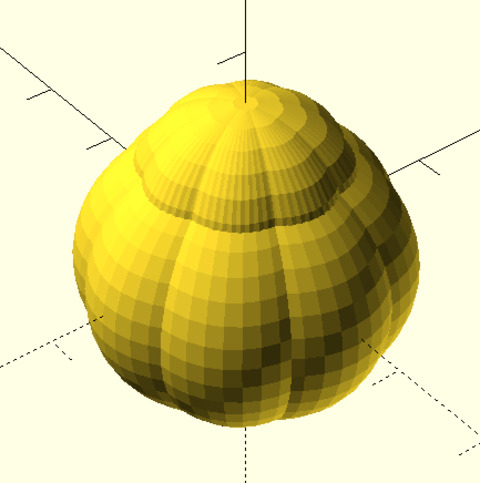
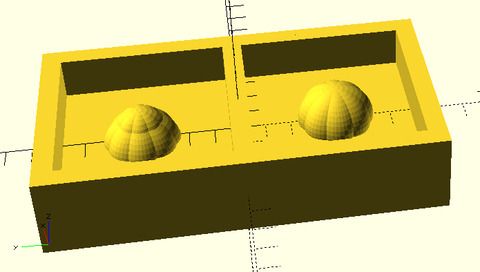
This week especially was a week for learning and documenting setbacks. Here are some of the things I learned or took note of. If you are reading this to get a sense of the process, I recommend reading through and/or skimming the entire thing first to get a sense of common suprises, pitfalls, and expectations. I started off with a round "pumpkinoid" model in honor of halloween, then switched to a flatter "stamp" design when I ran into prohibitive difficulties.
1 General process
- Our process for molding and casting is as follows: first, we make a positive mold of the shape we want out of wax (this involves two passes: a rough pass to remove most of the wax, then a finer finish pass to create precise details). We fill the wax cavity with a compound that becomes a squishy silicone rubber (called Ooomoo). The result is a squishy negative. By filling the negative with one of a few choices of material such as hydrostone, we can mass-produce many positive versions of our shape.
- Every stage of this process takes a long time (hours), because milling a 3D shape takes hours (Conceptually, imagine the amount of time it takes to mill a circuit board, then multiply it by the height of your figure!), because curing with each substance takes hours (waiting for the materials to harden). Also if your design has flaws (which mine had many of; see below), iterative redesign takes a while.
2 The wax mold
You create a wax mold by designing it in CAD software such as OpenScad or SolidWorks. A milling machine will cut it precisely out of a special kind of machineable wax, which is wax with polymer added for rigidity.
The process takes two passes: in one pass, a large (1/8") end mill excavates as much wax as possible and adds large-scale featuers. In the second pass, another (potentially smaller) end mill creates fine details and a smooth finish. Each of these milling jobs can take hours to perform, and must always be supervised.
Pro tip: Use the buddy system. Because the milling machine must always be supervised, make sure that another person will be with you or will check in on you periodically in case you need to leave (for a "bio break"). This can be a recprocal process. You might also, within the limits imposed by keeping an eye on the machine, bring other things to do.
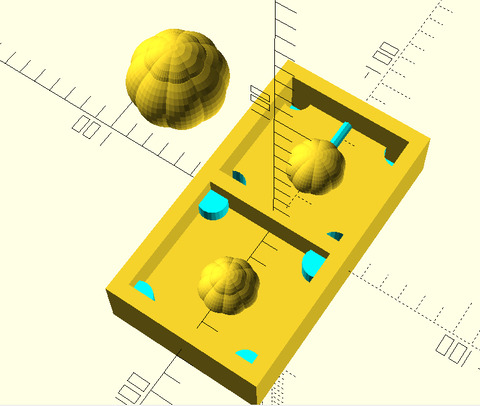
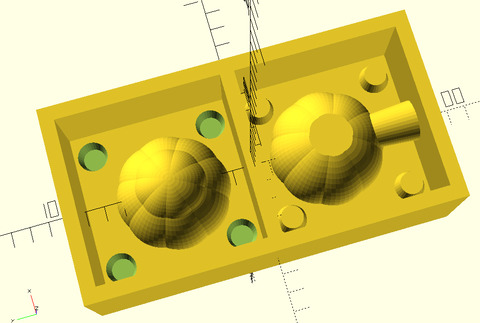
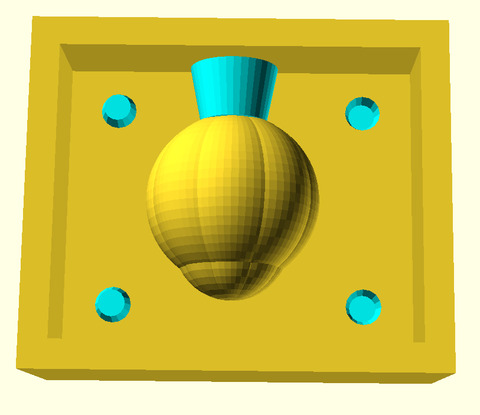
Once you have designed your shape, you prepare it for being a mold by (a) cutting it into two halves ("boolean intersection" is the appropriate operation.) then (b) by adding keys and (c) a sprue.
Keys are matched pairs of protruding/recessed shapes on each half of your mold such that in the silicone rubber stage, the keys slot together perfectly and hold your mold in the proper registration. You can, for example, have protruding keys on one half and recessed keys of the same shape on the other half. Or you could have a mix of both as long as they will fit together properly.
A sprue is a spout such that in the silicone rubber stage, you can pour a material into your negative mold. Without a spout, there's no way to fill the cavity with material when the two halves are clamped together. You can cut the sprue in half along with your object such that the top half of the sprue is on one shape and the bottom is on the other (make sure the halves are appropriate.
Because the sprue must be a spout in the silicone rubber stage, it must actually be a solid (filled) shape in your wax mold.
It might be useful for keys to be tapered, though make sure that they're tapered in mirrored ways (protruding keys should get narrower toward the top; recessed keys should get narrower toward the bottom. The general rule is that keys should be inverses of each other.)
It is probably useful for the sprue to be tapered so that it flares on the outside. This aids in pourability. Also if the sprue is too narrow, then the silicone rubber (which is quite viscous) will not be able to fill the cavity properly.
Keys should be at minimum 4mm tall.
You must be sure to include space at the top of your mold so that it can be submerged completely in a layer of silicone rubber. If your shape is flush with the top of the stock (the wax you're cutting out), then there will be no room for a layer at the top and the mold won't work properly.
You probably ought to include space such as a quarter inch wall around the entire perimeter of each of your wax shapes. You will need at least some wall to hold the silicone rubber goo, and the bigger the walls, the less precise the origin of your mill needs to be.
Pro tip: The software will assume that the top of your actual model, wherever it is, corresponds to the origin and the top surface of your stock (wax). This can lead to the unintended effect of deleting the space you've reserved at the top of your mold in the previous step.
To fix the problem, explicitly model the walls as part of your model—don't just leave them out. The top of the walls will correspond with the top of your stock as expected.
(!!) The mill has a finite length, and above the mill is the wide collet. This can cause danger around the perimeter of your figure—if there is a height drop anywhere in your wax mold that is greater than the length of the end mill (to whatever final depth you've shoved it into the collet), the collet will collide with your stock when the end mill tries to cut there, and the machine will become very unhappy and noisy.
You can fix steepness problems with your model by either making it shallow, and/or by, for example, adding steps or slopes so that there's never to steep of a drop.
If the slope is more gradual than the critical angle formed between the collet and the mill, you can make your model as deep as you like.
There is surprisingly little space within the mold volume. I would recommend picking a shape with very small volume, or a flat shape. I would recommend doing more of a wide flat shape than a small rotund shape.
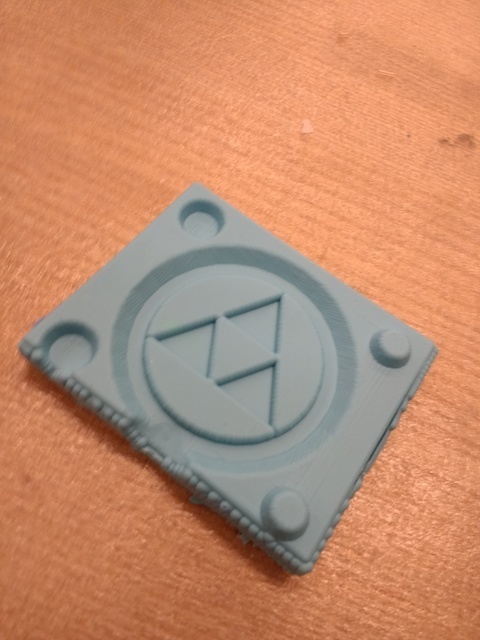
Very pro tip: If the shape of your object has bilateral symmetry (like capital letter A and unlike capital letter R) you can make a symmetric version of your mold which only has one "half". This makes the milling process take half as long at the cost of making the silicone process take twice as long (because you have to make two casts of your wax mold). Because milling takes so long, I consider it to be well worth it.
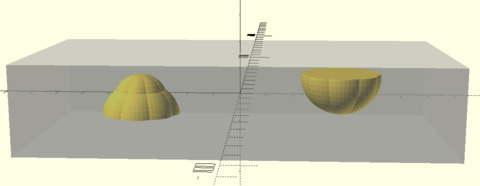
Here's a before-and-after shot:
If you are making a symmetric mold, the changes you have to make are that the sprue must lie along the line of symmetry (where previously you could put the sprue anywhere). The keys should also be inset on one side of the line of symmetry and raised on the other side.
I recommend measuring the stock (wax block) exactly using calipers. I measured it with a ruler and I was too imprecise, leading to problems later on.
3 Wax-milling software
Once the model is designed, some process must convert it into a print job for the milling machine. Much CAM software produces very good print jobs—in particular, some can specify jobs very precisely, such as "only do detailed work in this region of the model", which can save a lot of time. Theoretically, you could also generate gcode (printing commands) through your own process.
Typically, as of this iteration of the process, we have fab modules (fabmodules.org) as a way of generating the print job. (Fab modules is not to be confused with the newer "fab mods".)
Pro tip: Fabmodules serves two functions: it generates the print job if you haven't already, and it sends a print job to the computer. Although you must be on-site to set up the machine and actually execute the print job, you can generate the job — which can itself be a time consuming process—from anywhere. Just log onto fabmodules.org from home (or use your own software to generate a job). You can export the job as a file and import it on the milling machine's computer when you're ready to begin.
If you're using openmods to generate the print job, the first part of the procedure is to log into the software, select the STL mesh format.
For fabmodules, the mesh must be formatted as binary-format STL. Turns out that, as of this writing, the CAD software OpenScad only produces the larger ASCII-format STL — however, there are online programs (and other software on the milling machine's computer) for opening and converting STL files.
When you import your mesh, it will appear on the screen in a way where you can pan, rotate, and zoom it. I discovered that, apparently, however you transform the mesh's appearance, that's how the eventual shape will be transformed (so if you zoom in, you'll get a larger finished shape.) Be careful of this!
Also, the origin is a bit tricky. It is apparently controlled by: where your model (in particular, each "corner") is located in absolute coordinates in your CAD system, where the mesh has been translated, and where the end mill is located. Be careful of all of these.
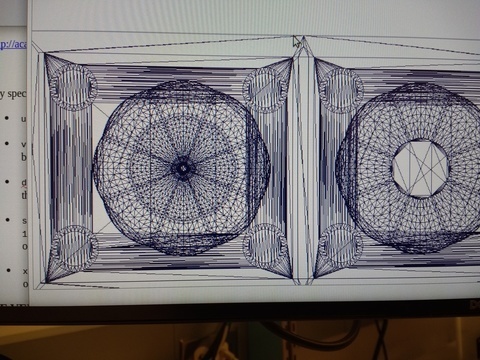
Offset mesh in software, height map, select job then machine (!), cutting map.
4 Silicone rubber
- Oomoo has two components, A and B, which should be mixed 1A:1B by volume or 100A : 170 B by mass. (Electric balances were provided.)
- As with most mixtures of this type, the moment you mix them, they begin to cure (harden). The "pot life" is the term for how long a compound continues to be pourable after being mixed; it's on the order of ten minutes for Ooomoo — so you should wait to mix it.
- Precision is a little bit important, because an improper ratio will make the final mold indefinitely gooey and not quite set.
- Measuring and mixing take about fifteen minutes the first time.
- Oomoo is viscous and bubbles are a defect in the final mold. Use a stir stick in a vertical back-forth swishing motion (as opposed to a circular stirring motion, which traps additional bubbles) to eliminate some bubbles prior to mixing.
- Rattling the wax mold causes bubbles to rise to the surface. You can pop them by blowing on them. Doing that a lot will benefit your model.