E Wildcard—Embroidery report
Table of Contents
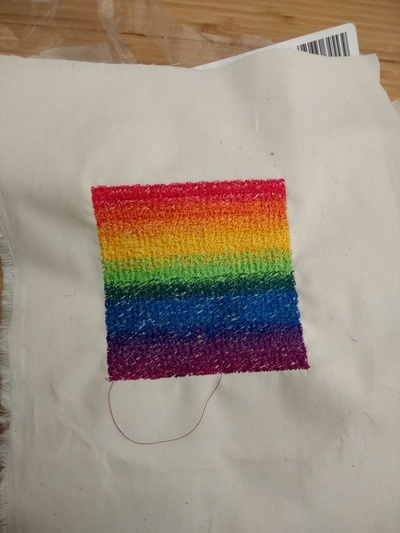
For wildcard week, I designed and produced an embroidered color gradient using a computer-controlled sewing machine (Brother SE-1800). The gradient was an interesting area of exploration because smooth gradations are difficult to achieve by hand — they're one of the new possibilities afforded by computer-controlled embroidery.
1 Computer-controlled embroidery
I worked with the built-in Brother software, which was a rather "mittens-on" experience: the software accepts various image formats, and uses a blackbox image processing algorithm to convert it into either a solid-color image with large regions of similar flat color, or a photo-like image with a large variety of colors.
Settings control the segmentation sensitivity (i.e. how many different colors of thread are employed) and offer image adjustment such as brightness and contrast. Generated regions constist of fill only, but lines can be generated for selected fill regions.
Once segmentation is complete, the segments are arranged in time in preparation for the stitching process. Segments by default are ordered by putting regions of the same color together to avoid an unnecessary number of thread-color changes (every time a new color is embroidered, the thread in the machine must be changed by hand), but you can reorder them. Other settings include the color, type of stitch, stitch orientation, etc.
One of the most useful features of PE design is auto-converting images and high-level requests like stitch direction into low-level programming commands in an automated region.
We discovered that the context (right-click) menu can be used to "ungroup" the auto-segmented image so as to have finer control over the individual regions and stitches. Separation of dots so as to delete regions
I briefly experimented with an alternative program, embroidermodder, to modify threads at fine level of detail.
I had initially intended to test the design limits of the machine with various images, such as lines of increasingly narrow spacing and programmatically generated code. Unfortunately, I couldn't figure out how to get fine-grained control over stitches through PE Design, and generating dst files will take a little more time.

2 Loading the sewing machine
- You cut an appropriately sized piece of backing material.
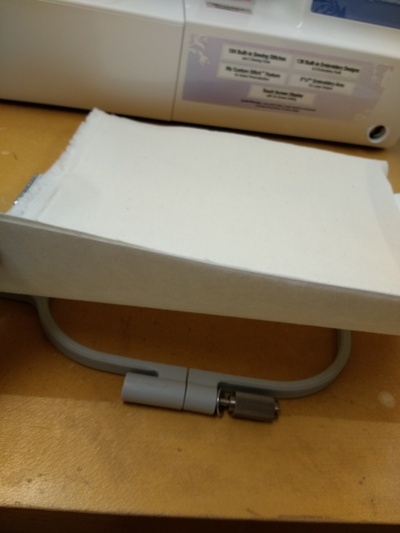
- Some material is iron-on, some is water-soluble, etc.
- You stretch the material taut within an embroidery hoop.
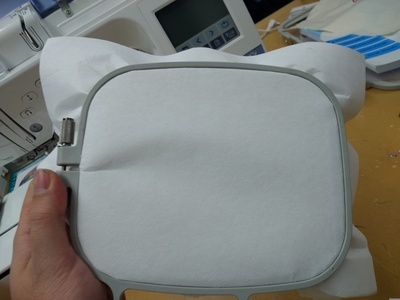
- You affix the hoop to the movable bed (the needle goes up and down in a fixed range of motion, while the bed precisely moves beneath it.)
- Spools of thread are pierced onto a spindle; the orientation of the
roll must be so that the thread comes under the bottom of the spool
toward you, not over the top.
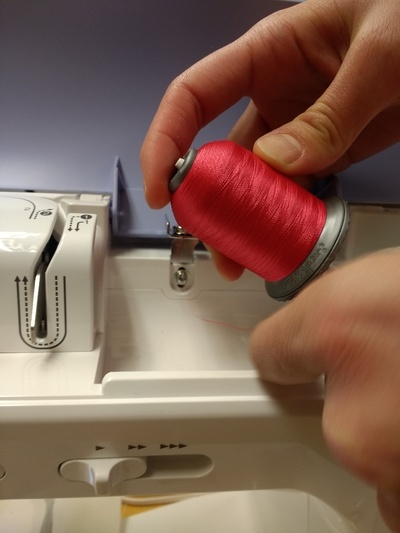
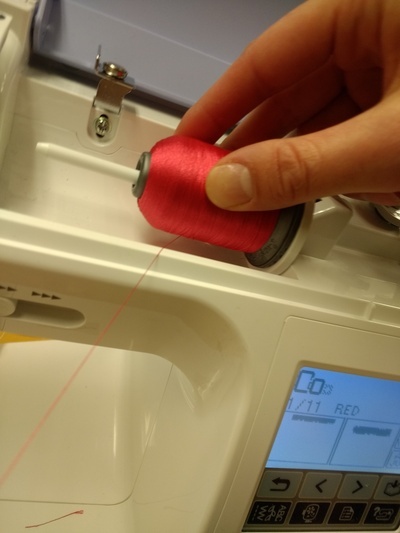
- The spool tends to move, creating tangles that break the needle. Instead, you can fixture the spool to the enclosure using, e.g., putty.
- Threading is straightforward, as there are numbered directions positioned around the machine.
3 Code
I explored, but did not finish, generating embroidery patterns in code. I looked into a variety of alternative programs and file formats.
I found that these proprietary formats (PES, DST, etc.) are fairly well understood, and that the gcode-like DST file format is accepted by most machines including, I believe, the Brother SE 1800.
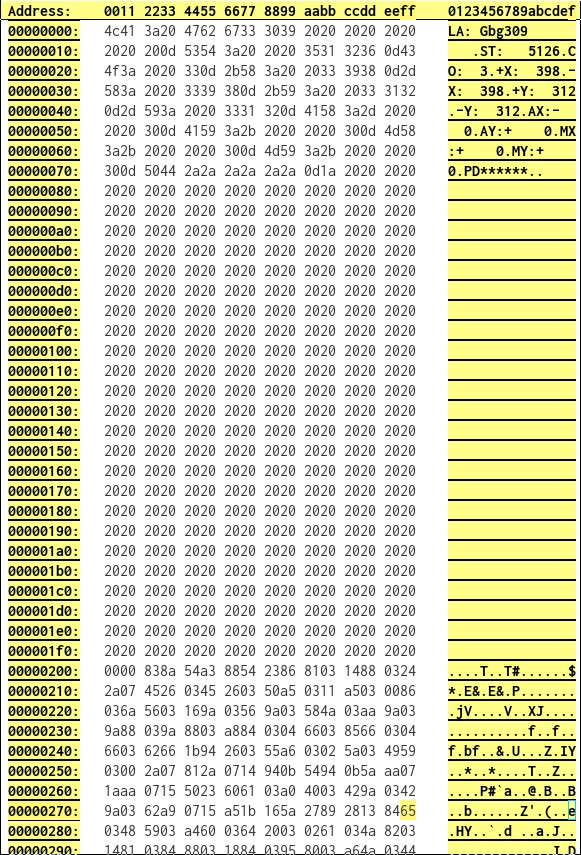
Using a hex editor, you can read a DST file ( ./img/gbg309.dst). The beginning consists of human-readable fixed length fields describing the name of the design, its physical extent, whether it is connected to other files (I think in case the design was so large it exceeded a single set of punch cards), and the total number of stitches (useful for creating a progress bar.)
- File formats PES, DST
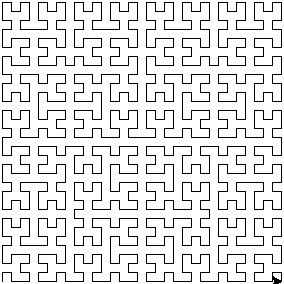
// File stitch.py by Dylan Holmes

// Create dst files from simple commands
// viz pyembroidery at code.google.com

// distance units of 0.1mm unless otherwise specified

const increment_exponents = 1
const MAX_STITCH_DISTANCE = 81 + 27 + 9 + 3 + 1

// const TRIM_LIMIT = 3 // after this many jumps, the embroiderer automatically trims. To send a trim command, execute a jump sequence consisting of this many jumps which ends in zero movement.

const position_code_x = {},
      position_code_y = {}

position_code_y[0+increment_exponents]    = 0x800000
position_code_y[-(0+increment_exponents)] = 0x400000
position_code_y[2+increment_exponents]    = 0x200000
position_code_y[-(2+increment_exponents)] = 0x100000
position_code_x[-(2+increment_exponents)] = 0x080000
position_code_x[(2+increment_exponents)]  = 0x040000
position_code_x[-(0+increment_exponents)] = 0x020000
position_code_x[(0+increment_exponents)]  = 0x010000
position_code_y[1+increment_exponents]    = 0x008000
position_code_y[-(1+increment_exponents)] = 0x004000
position_code_y[3+increment_exponents]    = 0x002000
position_code_y[-(3+increment_exponents)] = 0x001000
position_code_x[-(3+increment_exponents)] = 0x000800
position_code_x[(3+increment_exponents)]  = 0x000400
position_code_x[-(1+increment_exponents)] = 0x000200
position_code_x[(1+increment_exponents)]  = 0x000100
// control code                             0x000080
// control code                             0x000040
position_code_y[4+increment_exponents]    = 0x000020
position_code_y[-(4+increment_exponents)] = 0x000010
position_code_x[-(4+increment_exponents)] = 0x000008
position_code_x[(4+increment_exponents)] =  0x000004
// set                                      0x000002
// set                                      0x000001


function parse_signed_ternary(exponents) {
    var ret = 0
    for(var i=0; i<exponents.length; i++) {
        if (exponents[i] >= 0) {
            ret += Math.pow(3, Math.abs(exponents[i])-increment_exponents)
        }
        else {
            ret -= Math.pow(3, Math.abs(exponents[i])-increment_exponents)

        }
    }
    return ret
}

function signed_ternary(n) {
    var ret = []
    var sign = 1
    while( n != 0 ) {
        sign *= (n > 0) ? 1 : -1
        n = Math.abs(n)
        var exponent = 0
        var partial_sum = (-1+Math.pow(3, exponent+1))/2
        while(n > partial_sum) {
            exponent += 1
            partial_sum = (-1+Math.pow(3, exponent+1))/2
        }
        ret.push( (exponent+increment_exponents)*sign )
        n -= Math.pow(3, exponent)
    }
    return ret
}


function stitch_byte_move(dx=0, dy=0) {
// Yield three bytes of DST code corresponding to the indicated
// move. Vars dx and dy are integer distances, specified in units of 0.1mm

    if( Math.abs(dx) > MAX_STITCH_DISTANCE
        || Math.abs(dy) > MAX_STITCH_DISTANCE ) {
        // problem
    }

    var ternary_x = signed_ternary(dx)
    var ternary_y = signed_ternary(dy)

    var ret = 0b11
    for(var i=0; i< ternary_x.length; i += 1) {
        ret |= position_code_x[ternary_x[i]];
    }
    for(var i=0; i< ternary_y.length; i += 1) {
        ret |= position_code_y[ternary_y[i]];
    }
    return ret
}

function stitch_byte_stitch(dx=0, dy=0)         {return stitch_byte_move(dx, dy) | 0b00000000}
function stitch_byte_jump(dx=0, dy=0)           {return stitch_byte_move(dx, dy) | 0b10000000}
function stitch_byte_halt(dx=0, dy=0)           {return stitch_byte_move(dx, dy) | 0b11000000}
function stitch_byte_sequinmode(dx=0, dy=0)     {return stitch_byte_move(dx, dy) | 0b01000000}
var stitch_byte_color_change = stitch_byte_halt

console.log(stitch_byte_color_change(0,0).toString(2))


// for(var i=0; i<30; i+=1) {
//     console.log(i, signed_ternary(i), parse_signed_ternary(signed_ternary(i)) )
// }


// HILBERT

function hilbert_curve(n, up="U", left="L", right="R", down="D") {

    var ret = []
    // make a left-rotated shape: recur(up=left, left=down, down=right, right=up)
    // make a right-rotated shape: recur(up=right, left=up, down=left, right=down)

    if( n <= 0 ) {
        return ret
    }
    else {
        ret = ret.concat(hilbert_curve(n-1, right, down, up, left))
        ret.push(up)
        ret = ret.concat(hilbert_curve(n-1, up, left, right, down))
        ret.push(right)
        ret = ret.concat(hilbert_curve(n-1, up, left, right, down))
        ret.push(down)
        ret = ret.concat(hilbert_curve(n-1, left, up, down, right))
        return ret
    }

}

function hilbert_curve_pattern(n, scale) {
    // unit dimension is 0.1mm
    // scale multiplies this dimension

    const size = Math.pow(2,n) - 1

    const header = new Array(512)
    for(var i=0; i<512; i+= 1) {
        header[i] = 0x20 // spaces
    }

    var pattern = []
    var direction_commands = hilbert_curve(n, [0,1], [-1, 0], [1, 0], [0, -1])
    var stitch_byte
    var num_stitches = 0

    for(var i=0; i< direction_commands.length; i++) {
        stitch_byte = stitch_byte_stitch(direction_commands[i][0]*scale,
                                         direction_commands[i][1]*scale)
        pattern.push(stitch_byte)
        num_stitches += 1


        console.log(stitch_byte.toString(2))
    }
    console.log(num_stitches)
}


console.log(hilbert_curve(3))

hilbert_curve_pattern(3, 15)