assignment
The name says it all: this week, we were given a 4'x8' sheet of oriented strand board plywood to try out our cutting skills, and our only task was to create something big.
Most people cut their project using a ShopBot, the more "traditional" large-format CNC machine; you load your large stock on this large machine and an automated drill drives around and cuts out your design.
We were also given the option of cutting out our project using a Shaper Origin, the much less traditional machine. Instead of an automated, two-axis machine moving around the board, you do the moving! It also costs much less, and works fairly well. I'll detail the process below!
the shaper | |
|
How does the Shaper work? I was pretty confused at first too. It's actually very cool and an awesome mix of mechanical engineering and computer science. |

|
|
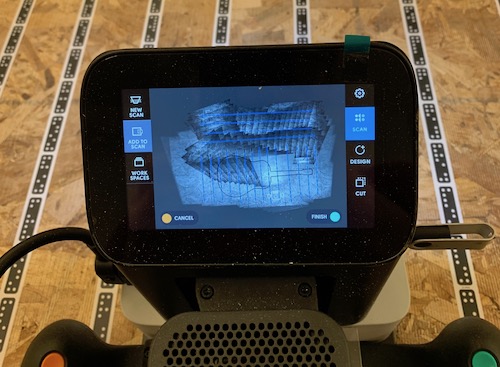
To start, you first lay down Shaper-provided tape all over the surface you're about to cut. With the Shaper, you take a scan of your surface, allowing it to use the unique domino patterns on the tape to orient itself and create an accurate virtual representation of your cutting surface. It has a camera on its back that allows it to constantly orient itself based on which unique domino patterns it can see. We ran into a small hickup: oriented strand board (OSB) is the "hot dog" of plywood as it's composed of scrap wood smushed together into a sheet of plywood. It has some kind of coating on the surface that caused the adhesive on the tape to not work at all. The easy solution was to simply sand off the coating |


|
|
The Shaper allows you to create a "workspace" for each project you cut out. A workspace includes your scan of the surface you're cutting and your design. This makes it easy to pause and continue a cut later or, in my case, to add more scans to your workspace. I traced out the outline of my own acoustic guitar in Rhino and exported this first to a DXF (composed of small segments of the path) and then converted to an SVG. When uploading the design to the Shaper, I realized that this DXF -> SVG conversion created an SVG file that the Shaper couldn't understand; since the path was disjoint by a fraction of a millimeter, the Shaper couldn't figure out how to create a cut path from this. So I manually stitched together the parts of the SVG. design |


|
|
Before I started cutting, I realized a problem: since the Shaper only uses cameras on the back to detect where it is on the cutting surface, it's not simply enough to have tape laid out where you're going to cut. At the edge of the design, there was no tape for the Shaper to see and it would get disoriented. So I laid down more tape and easily added it to the workspace. |
|
|
We then configured the cut depth, bit size, etc. And now, I was ready to cut.
|

|
|
The Shaper has two handles that feel almost like a game controller. Each has a button on it: one for starting and one for stopping. I positioned the Shaper so the screen showed that I was over the cut path. I hit the green button and the spindle plunged into the material. |
The first pass on the Shaper. |
|
While cutting, the screen shows you a white circle larger than the diameter of the cut - this is the coarse grained target that you move along the perimeter of your design. The Shaper then does the fine grained movement within the white circle, cutting precisely along your design's path. This allows you to "drive" the machine without a large, 4'x8' two-axis tool. If you stray from the design's path, the spindle raises so as to not cut outside your design, and you can reposition the Shaper over your design and deploy the spindle again. While cutting, I encountered one problem: As the piece was cut out from the sheet of plywood, the piece and the plywood were no longer level with each other, and thus the tape on the piece and plywood no longer appeared to be connected to the Shaper. It got slightly confused and disoriented, and the simple fix was to push down on the surface of the plywood to make it level with the cut-out piece. |

The Shaper shows where the spindle is relative to the cut path of your design. In real time, it guides you through your design. |
|
I did two cut passes to cut entirely through the plywood. |
More cutting sped up. |
|
The shaper was surprisingly accurate during each pass, and I only found a handful of edges where the top cut and bottom cut weren't perfectly aligned - but these could all be fixed with a little sandpaper. |


|
|
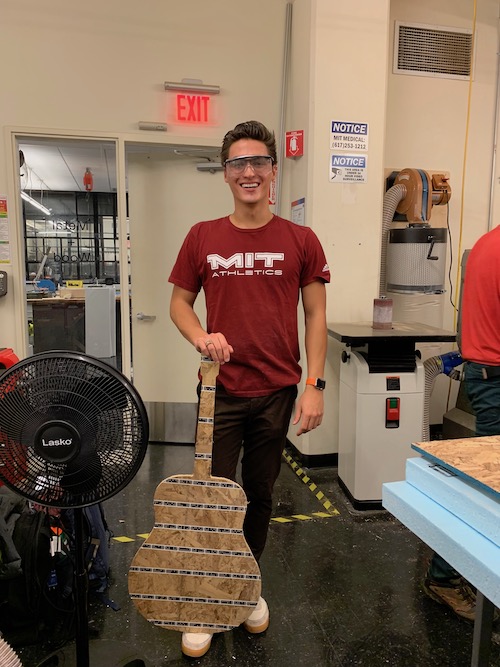
All in all, from setup to cutting out the design, the process was extremely smooth. It's really nice to not need a huge CNC mill that takes up a large portion of a room. I will surely use these skills for my final project - though hopefully I will be using some nicer, less-splintery wood! For now, I made myself a nice looking guitar shape that will function as some nice wall art. |
|