Week 11 - Machine Week
This week was a lot. With Thanksgiving on the border and many people traveling, there were two main challenges: building the machine and working together effectively.
At out initial meeting, we decided to make a three-axis mill, in hopes that if it works well, we can use it for pcb production, since there always seems to be a queue for our other two mills. For lack of any idea of what specific tasks lie in front of us, we split into two generic groups: CAD & Hardware and Electronics & Software. Since the rest of my life revolves around software, I decided to join the CAD & Hardware group to make things a little more interesting.
Friday 11/16: Design Day
- 10am: Prash and I meet to start designing the mill. We go through Jake’s files and realize he’s designed all the rails and gantries already, we just need to adjust the size parameters and put them all together. Throughout the day, we were joined by Vivian, Cowboy, Miana, and Ivan.
- 11am: We start discussing possible designs. We considered having the bed move in the x and y-axis, but that would take up twice the base area per axis. We ultitemately decided to move the spindle in the x and y-axis, and the bed in the z-axis. We didn’t want a third axis on the spindle because we feared it might be too heavy. In hindsight, this was not the best plan, but we wanted to make a decision quickly since we didn’t have much time.
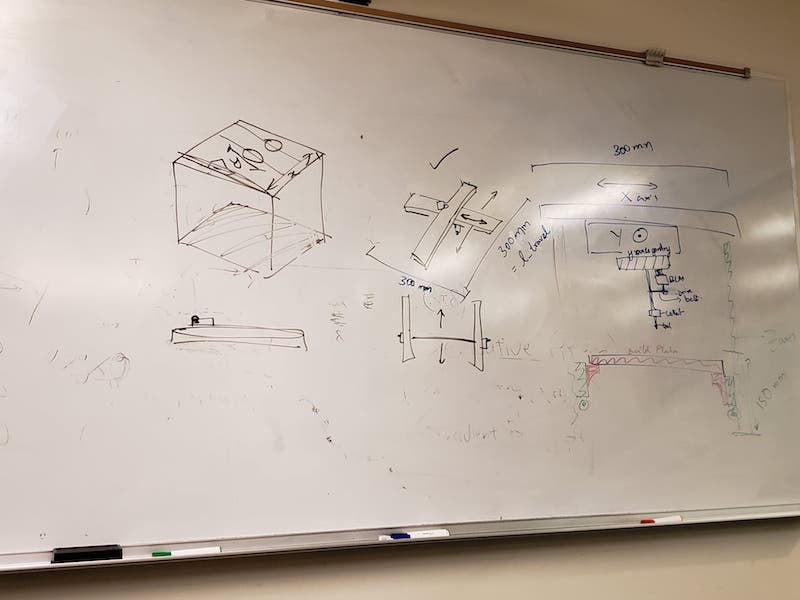
- 12pm: We break into groups. Cowboy and Prash are designing the bed and z-axis, along with supports, and Vivian^2 power duo is working on the joining the x and y-rails.
- 5pm: We start putting our designs together. We hoist the x nad y-axis up into the air with lots of supports, and set the bed underneath it. It’s pretty hideous. We send the design off to Zach and Ben to be reviewed.
- 7pm: We get feedback. The bed may be unstable even with two rails and may flex/tilt. Only one motor along the y-axis might cause torque. The supports and cluncky. The xy-axis are too high up and that may be unstable.
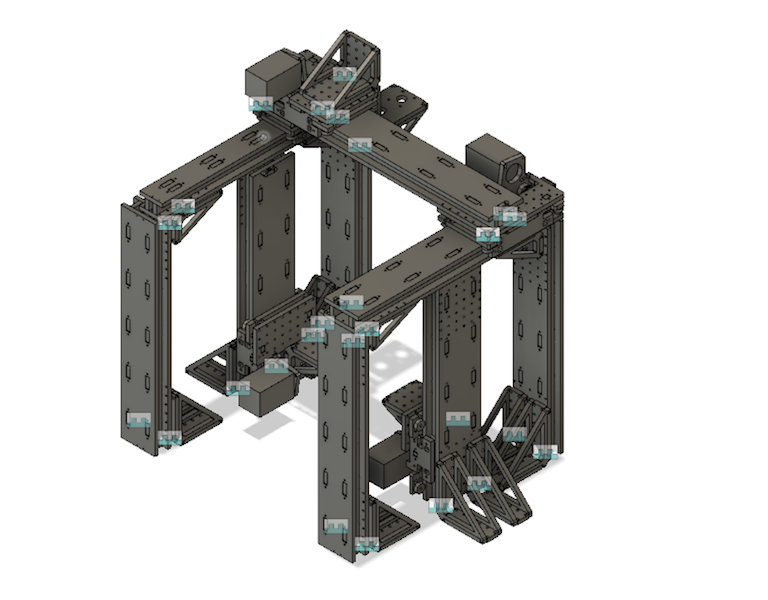
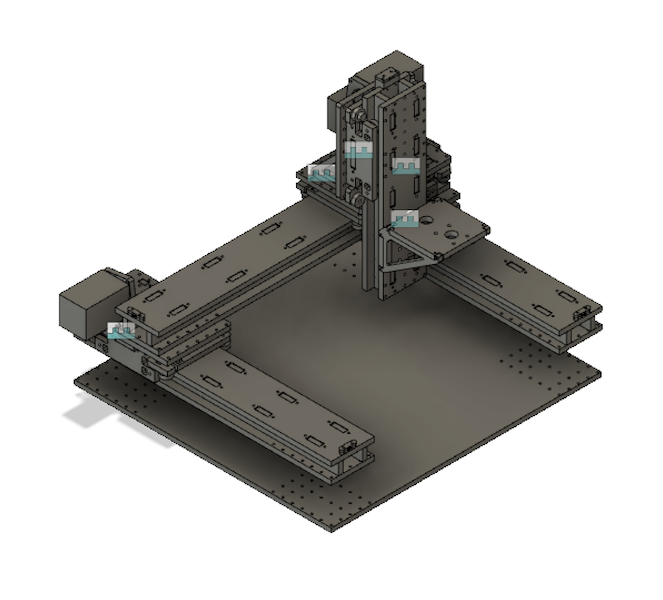
- 8pm: We scrap this design and add the z-axis to the xy-axis. The z-gantry is fixed against the x-gantry, and the z-rail would hold the spindle and move up and down. This brings the xyz-axis down closer to the ground, getting rid of all the supports we needed before. We’re also able to use only one stepper motor for the z-axis, so we’re able to use that motor to drive the second y-rail. We put in a base plate, connecting the two y-rails, for extra stability.
Saturday 11/17: Fabrication Day
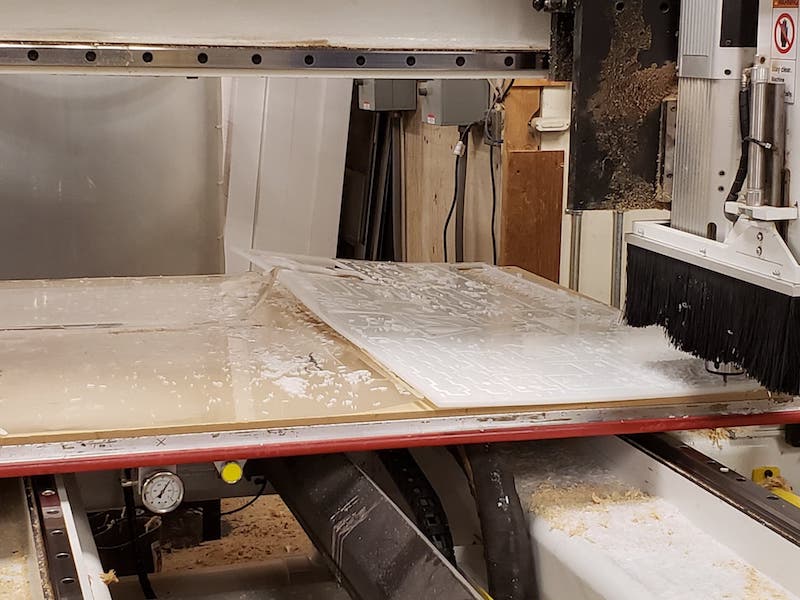
- 2pm: We meet Zach at the N51 basement architecture shop to use their fancy machine, which has a vacuum bed and automatically switches bits for you. There are three sheets to cut. We spend a few hours moving holes to a separate layer for a drilling pass, but turns out we didn’t have the right size bit so it was mostly for naught.
- 3pm: We run into problems with the CAM software not calculating the right toolpaths.
- 4pm: We attempt to cut the first sheet. It goes mostly okay, but the bed is a bit uneven and the material cut all the way through on the far end and some parts came completely detached (we’re supposed to have tavs and a thin layer at the bottom for the vacuum bed). We also break a bit because the feeds and speeds were set too fast.
Sunday 11/18: Fabrication Day 2
- 2pm: Most sheet 1 pieces were missing dogbones, so they had to manually add them in via filing or bandsaw. Vivian and Ivan start this; I join them at 4pm.
- 5pm: Zach milled the remaining two sheets, which went pretty smoothly. He added a drilling pass for the dogbones and redid the pieces that needed redoing – cut on the worng side, missing holes, etc. We broke three bits in total.
- 6pm: We start cleaning up the pieces: removing the “skirt” and poke through hole with a ultility knife.

Monday 11/19: Assembly Day
- 3pm: I finishing cleaning up the pieces are start messing around with screws.
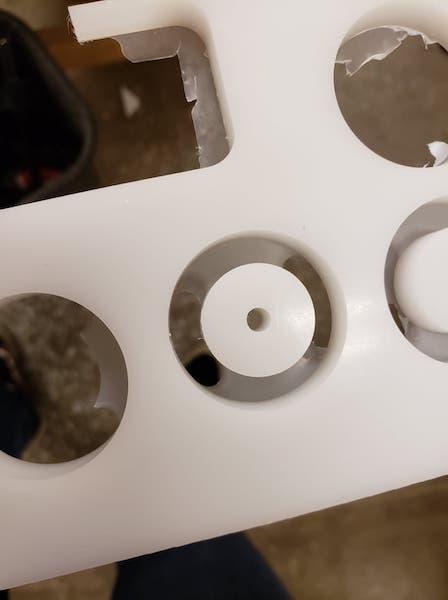
- 5pm: We find our actual metal bearings, and not just the bunch of plaster circles we cut (yay!). Two of the y-rails were cut smaller (inside cut instead of outside cut) so we had to put them on the bottom and align very carefully. We also had to drill the holes that we didn’t have. The rest of the assembly took lots of screwing and countersinking.
Tuesday 11/20: Assembly Day 2
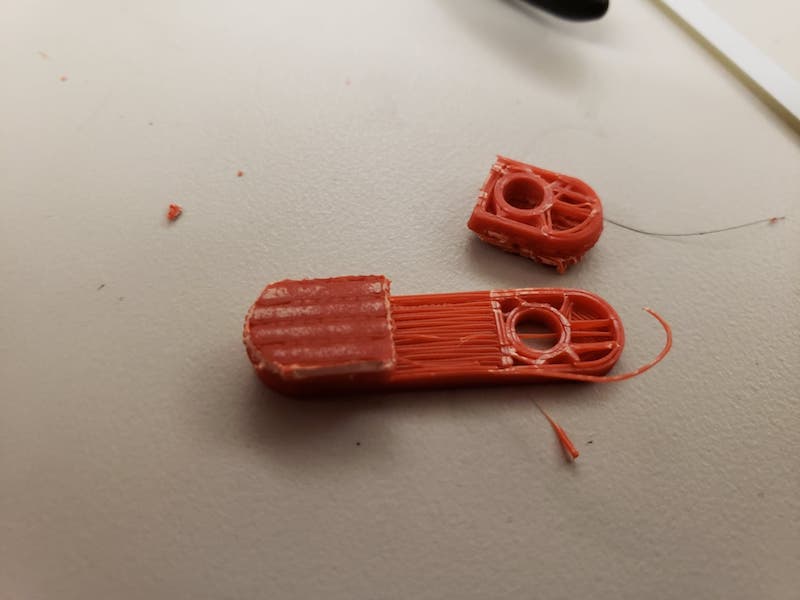
- 5pm: We work on the post-processing of the new 3D printed parts. The rafts didn’t just snap off; we had to use pliers to pry the skirts off instead. Once that was done, we pressed bearings into each of the bearing cups, but the cups seemed to be just a tad bit too small. Each piece plit a little bit at the edge, but we didn’t have enough time to print new parts so we used them anyways.
- 7pm: We realized we missed a bearing yesterday so we add that in. We assemble the rails and add belts, motors, and tensioners. It all seems to work alright.
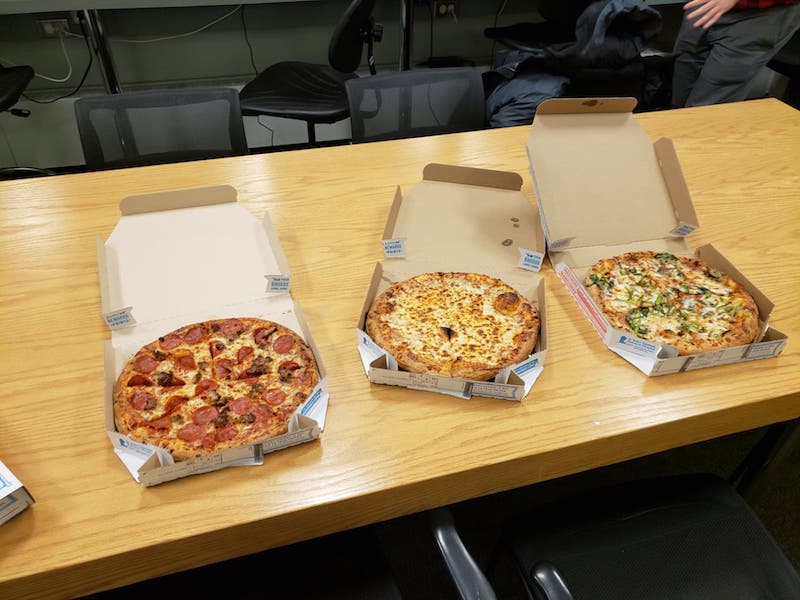
- 9pm: Pizza break. Carlos came through.
- 10pm: We attach the spindle mount to the z-rail. We first attached it one direction, but then decided the other direction was better. We also assembed one of the y-gantries backwards, but to fix it would involve too much diassembly so we left it. This cut down on the amount of space we had to cut and we had to attach mechanical stops (extra nails sticking up) in order to stop the z-rail from running into the y-motors.
- 11pm: We wire everything up and software team does its thing.
- 2am: We finally get the machine to run some gcode, and everyone goes home.