First thickness measurement
Group assignment: Characterize your laser cutter, making test part(s) that vary cutting settings and dimensions
Individual assignment: Design, laser-cut, and document a parametric press-fit construction kit, accounting for the laser cutter kerf, which can be assembled in multiple ways
Goal: Identify ideal settings for cutting cardboard on the office laser cutter, and create a parametric, modular, press-fit, geodesic lamp

Onshape
Adobe Illustrator
IKEA HEMMA Pendant Lamp Base
Geodesic Kits for Sale
Prior Work by Montserrat Ciges Lopez
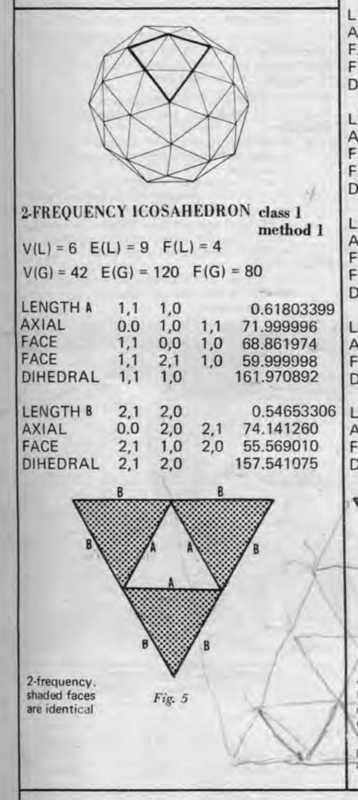
Geodesic Dome Frequency Explained
2V Geodesic Dome Diagrams
Scanned Copy of Domebook 2 from 1971
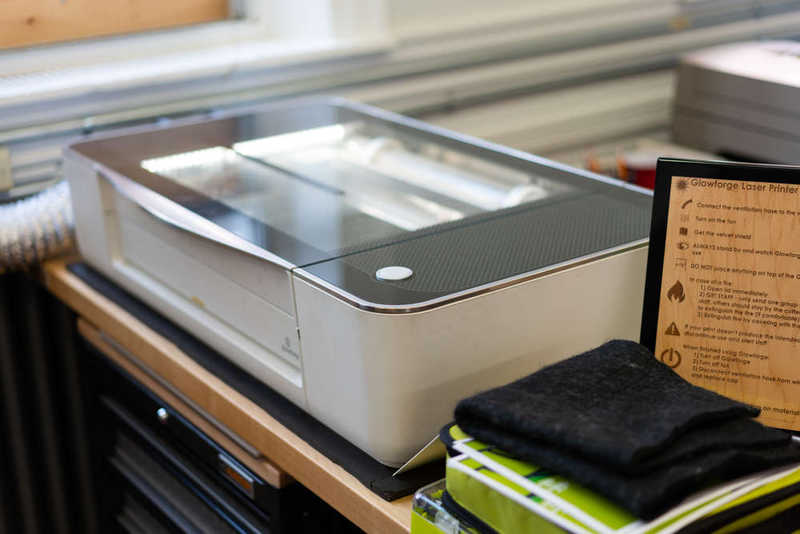
My organization has a Glowforge Pro desktop laser cutter at our program headquarters in Cambrdige. In addition to completing my assignment, I thought it would be helpful for our staff and students to have documentation of settings for cutting cardboard. In the spirit of the assignment my colleague Wes joined me in characterizing our laser cutter.

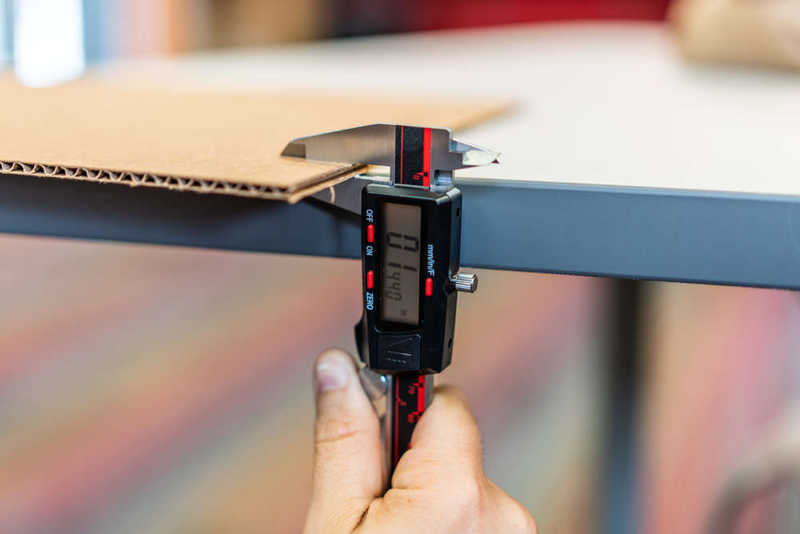
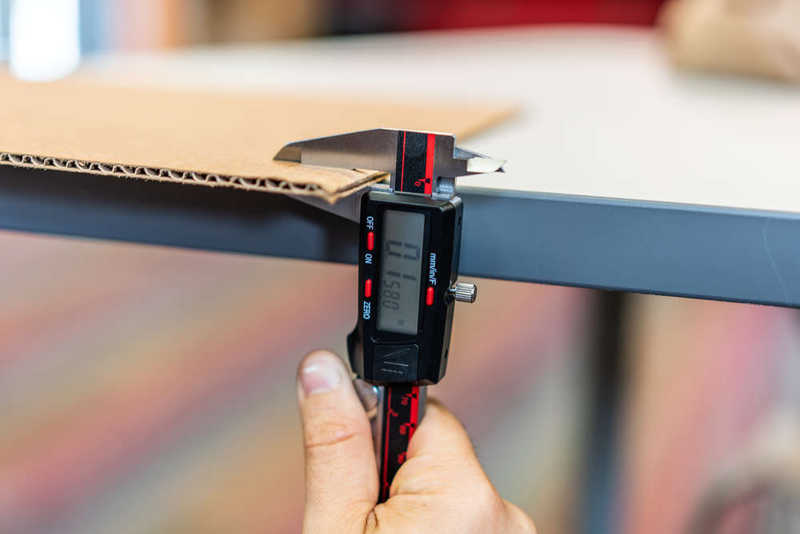
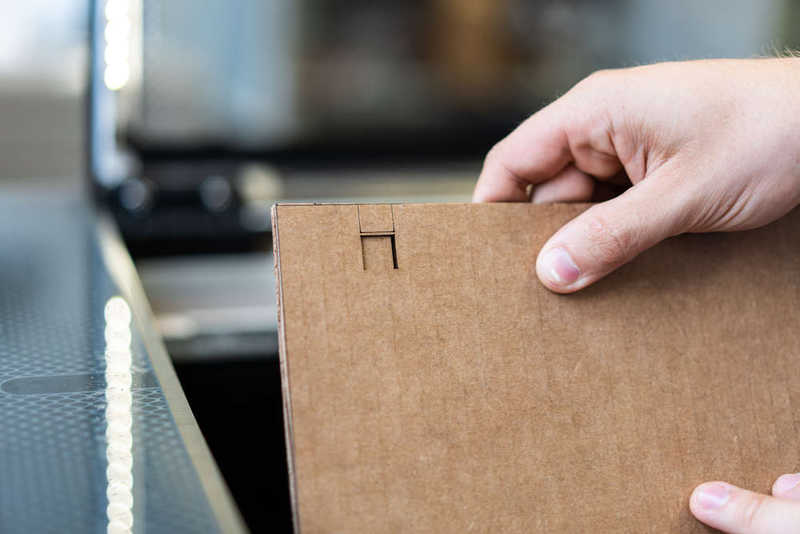
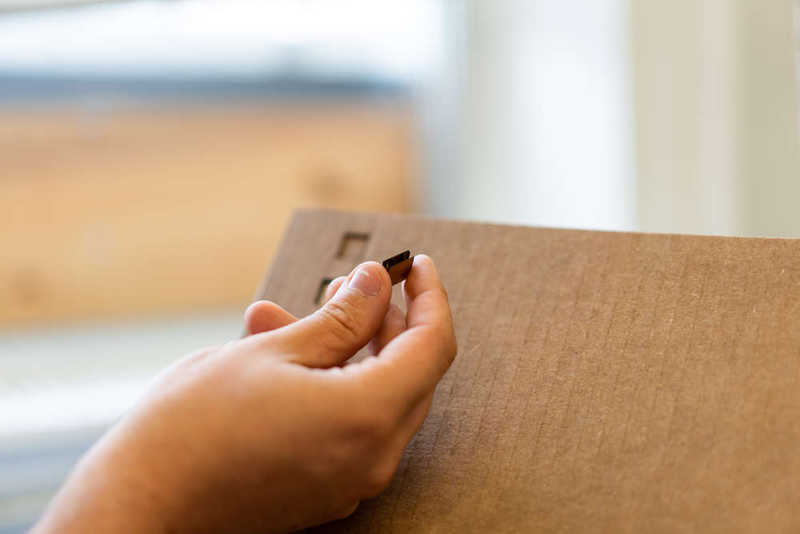
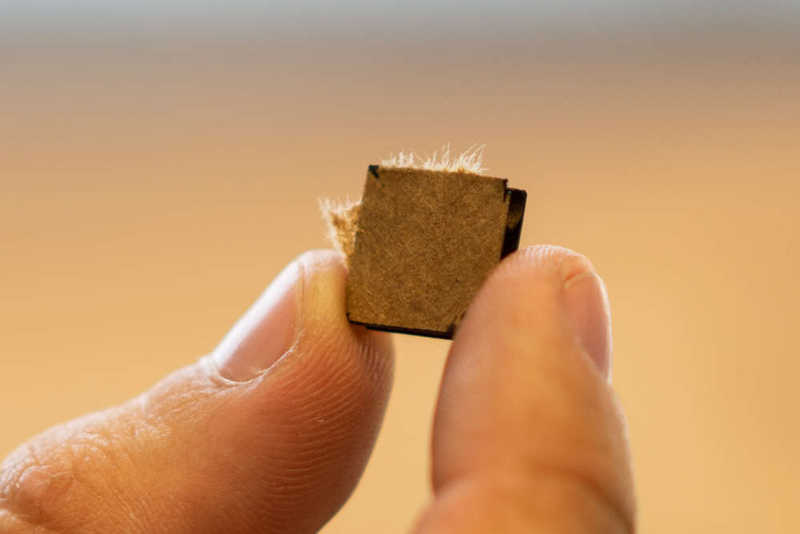
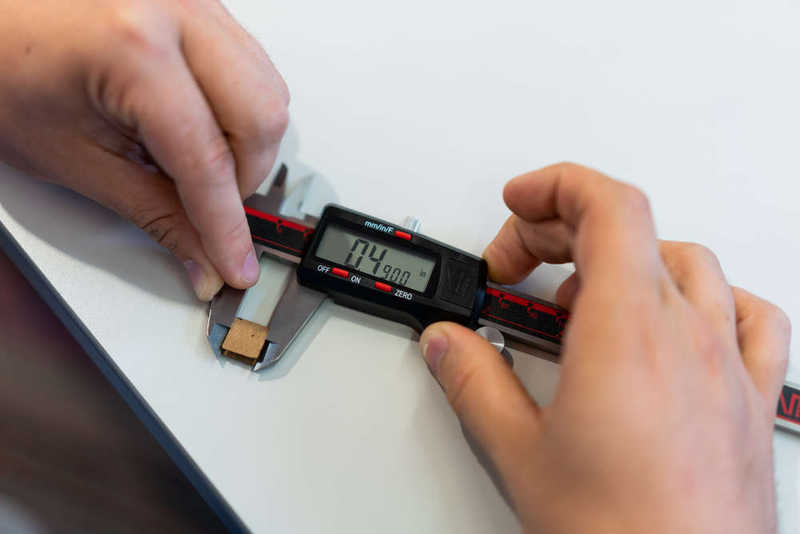
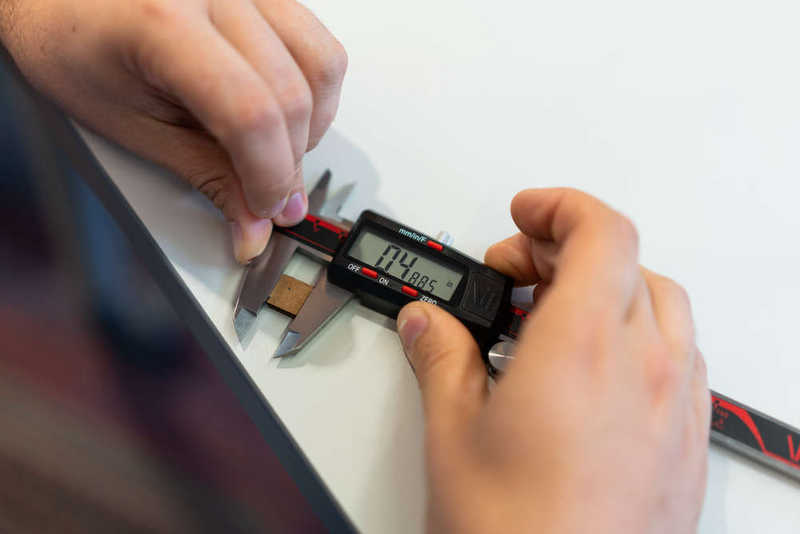
We began by measuring our cardboard thickness. While measurements varied slightly depending on the piece of cardboard, all hovered around 0.151" +/- ~0.007". We created a comb cut file with slot sizes of 0.145", 0.148", 0.151", and 0.154". We also tested the laser kerf by cutting a small square; while measurements were consistent, it appears that the kerf is slightly different in each direction: more material is removed when cutting vertically than when cutting horizontally - roughly 0.010" when measured across the vertical axis, and 0.012" when measured across the horizontal axis.
That said, cardboard is rather forgiving at these tolerances, and while joining the two 0.154" slots felt smoother than we liked for press-fit, all of the other slot dimensions were easy to join and held their place reasonably well. I settled on a slot width of 0.148" for my project, which worked well.
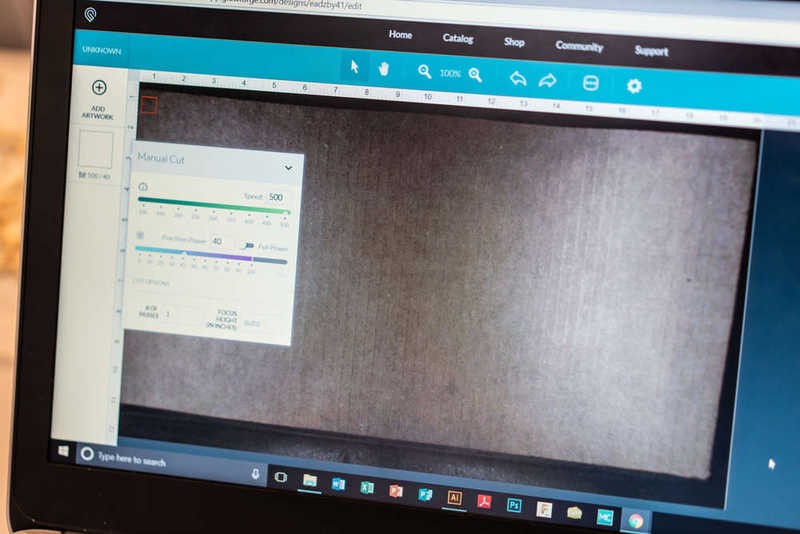
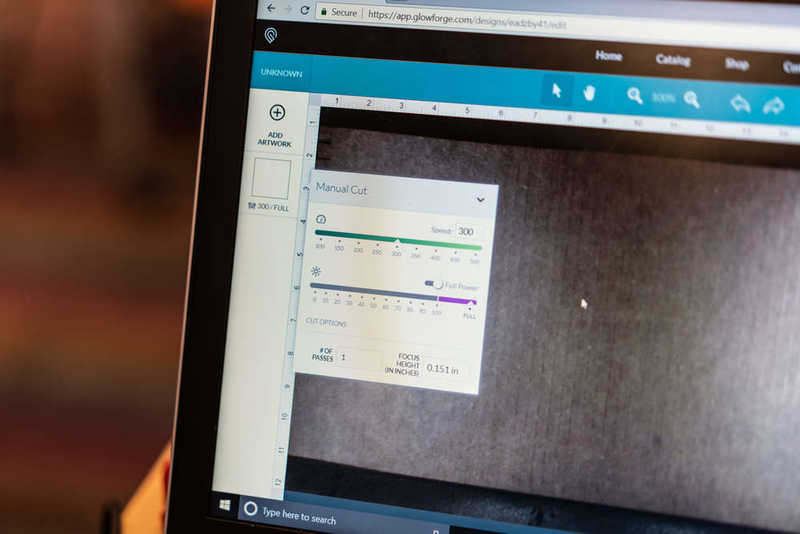
As for laser settings, we settled on a speed of 300 (out of 500) and a power of Full Power. Evidently, Full Power is in fact different from 100% power on our machine - while Full Power at 300 speed cut through nicely, 100% power at 300 speed did not (see images below).
First thickness measurement
Second thickness measurement
Third thickness measurement
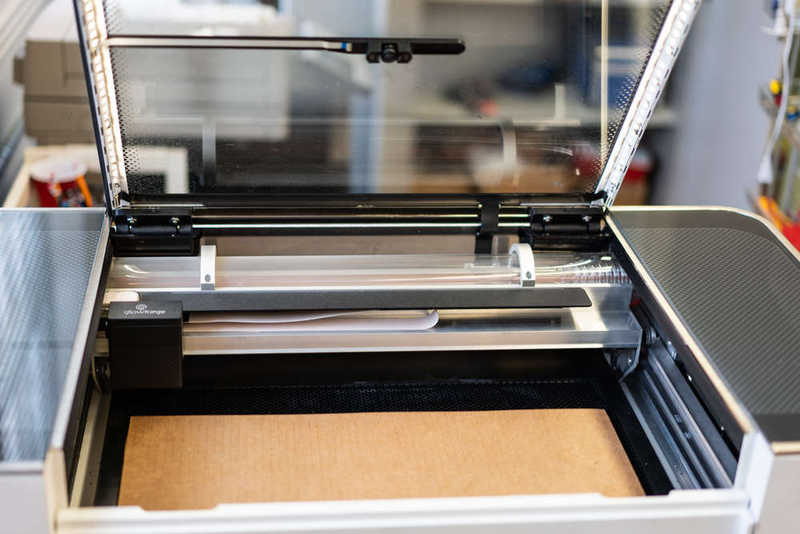
Loading the laser cutter
One of our initial settings
Close but not quite
The winning settings
Clean cut with our winning settings
Clean cuts are highly satisfying
Oddly, 100% power didn't cut cleanly while Full Power did
Measuring for kerf size
Checking the orthogonal direction
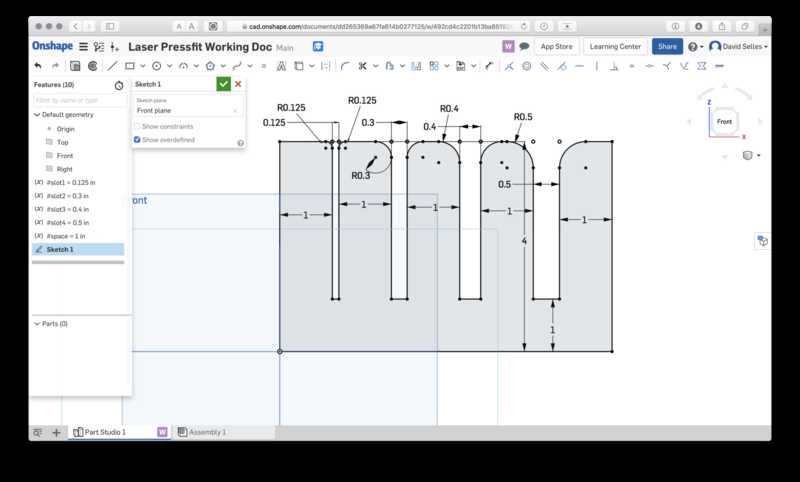
Creating a slotted comb in Onshape (note that slot widths were not yet set, though variables were in place for easy adjustments)
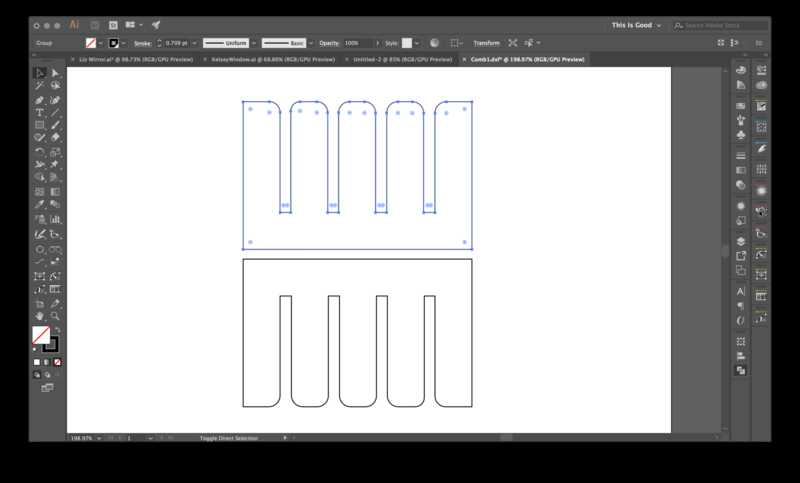
Importing Onshape's exported DXF into Illustrator, joining paths and saving out as SVG for Glowforge
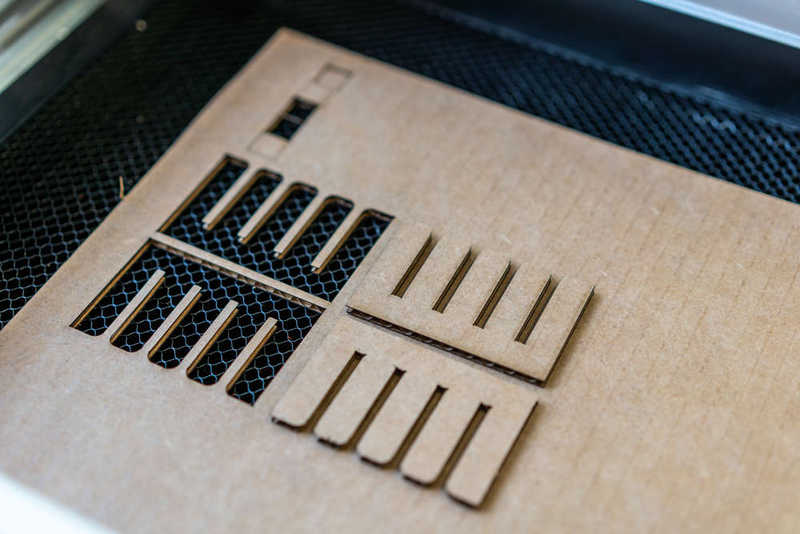
Cutting the combs
Testing fit and feel with the different comb slots
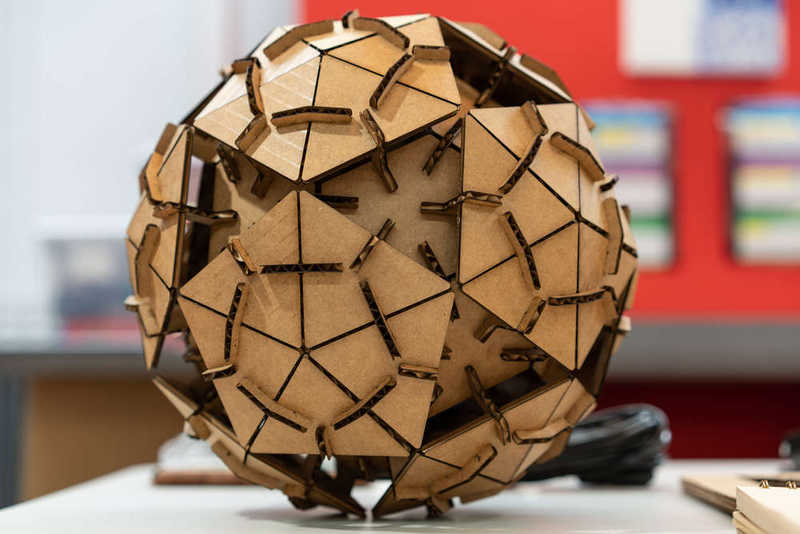
I was curious to explore a non-orthogonal construction system for this project, which led me to look into geodesic domes. During my research, however, I found that someone already has such a construction kit for sale on Etsy, and our very own Montserrat attempted the same project when she took this course. Halfway through my work I decided to turn the project into a lamp using an IKEA fixture we had around the office.
The mathematics behind geodesic domes and spheres turns out to be more involved than I expected. Most geodesic domes have edges of varying lengths and varying dihedrals (the angles between faces of a geodesic dome or sphere... another vocab word learned through this project). Luckily, there's a whole community of geodesic dome fanatics who have written extensive documentation regarding this peculiar geometry. Up top I've linked to some of the most helpful resources I found online, including a scanned copy of Domebook 2, which contains 130 pages of geodesic done goodness (hosted by the Washington State Department of Archaeology and Historic Preservation).
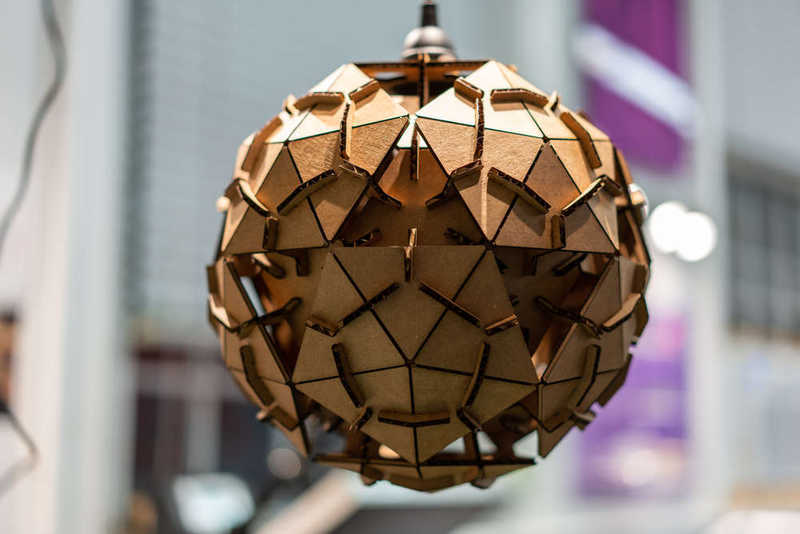
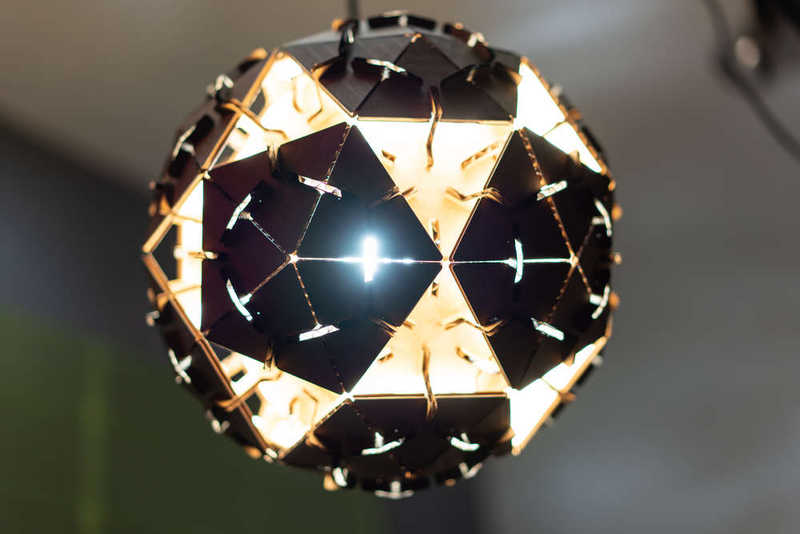
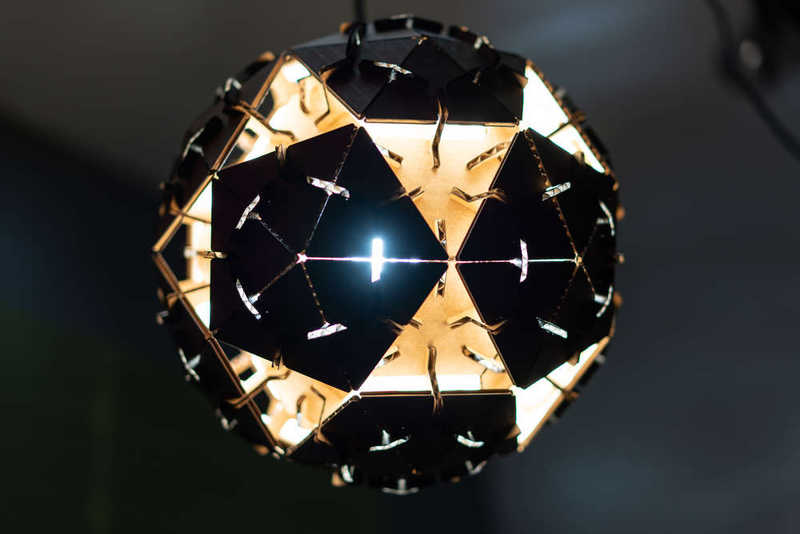
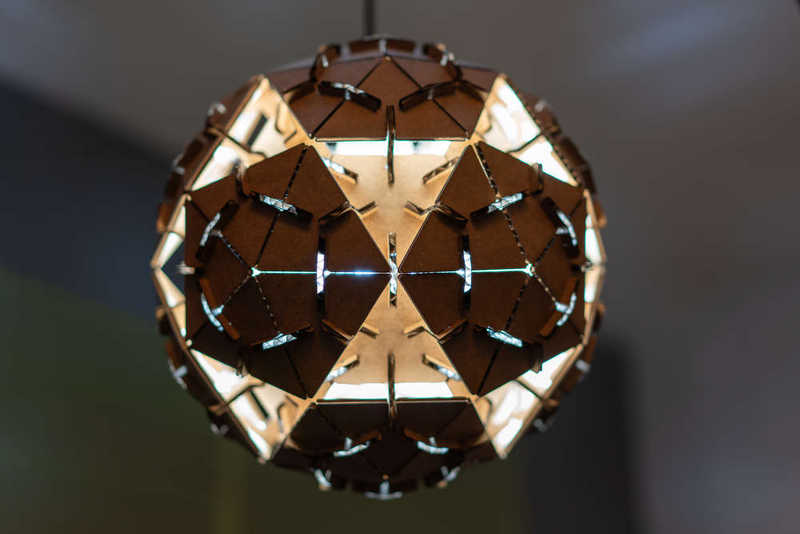
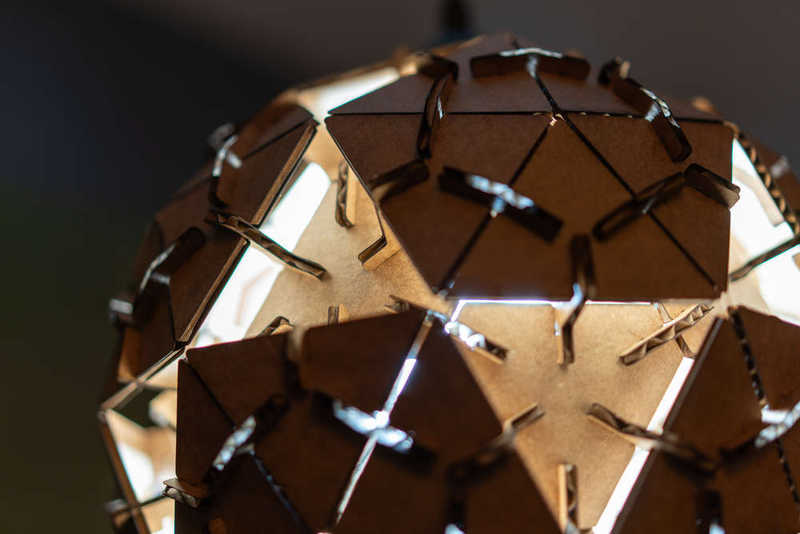
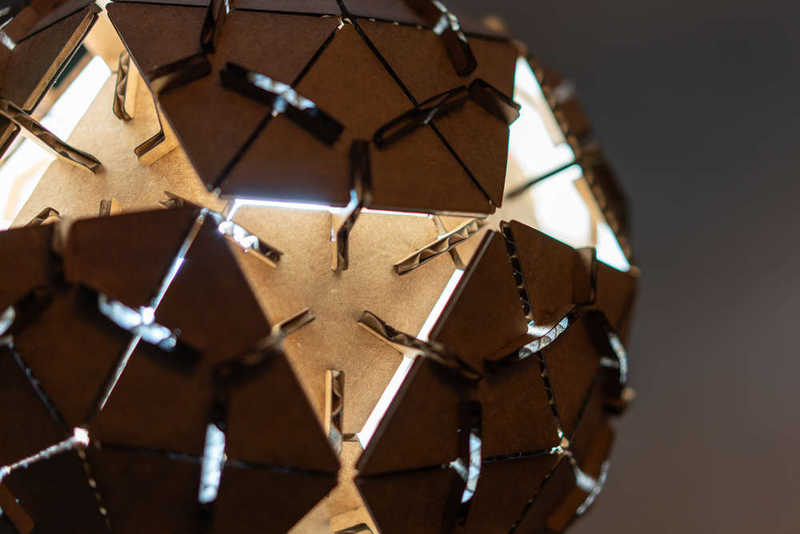
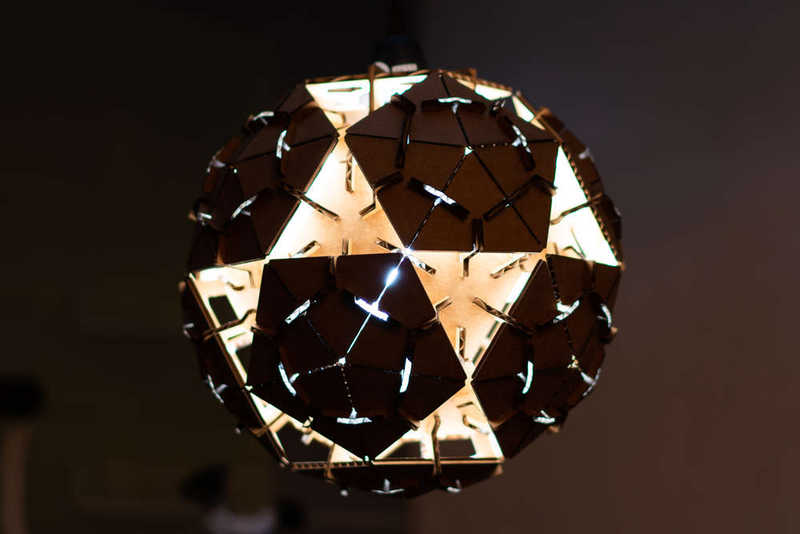
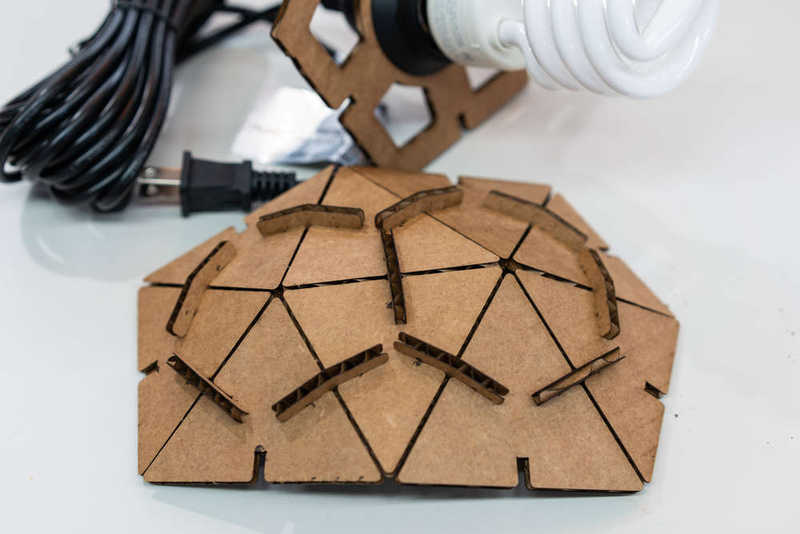
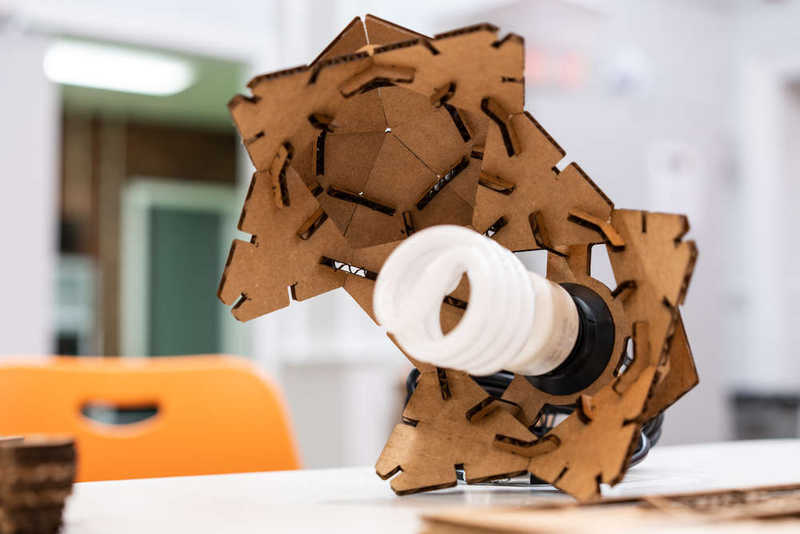
When I started thinking about the lamp design, I wanted to create inset panels which would allow diffuse light to escape from inside, without the light bulb shining directly in anyone's eyes. At the office we have some wooden chandeliers designed by a former volunteer of our program, and I wanted to emulate that diffuse glow.

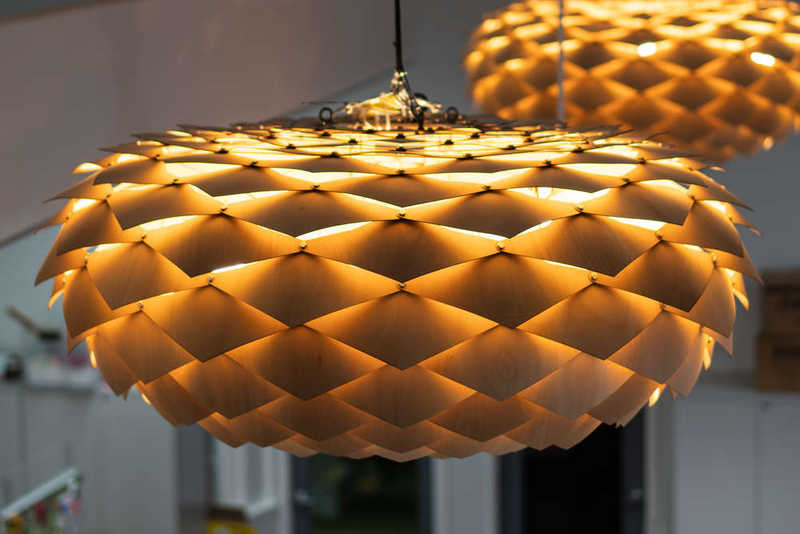
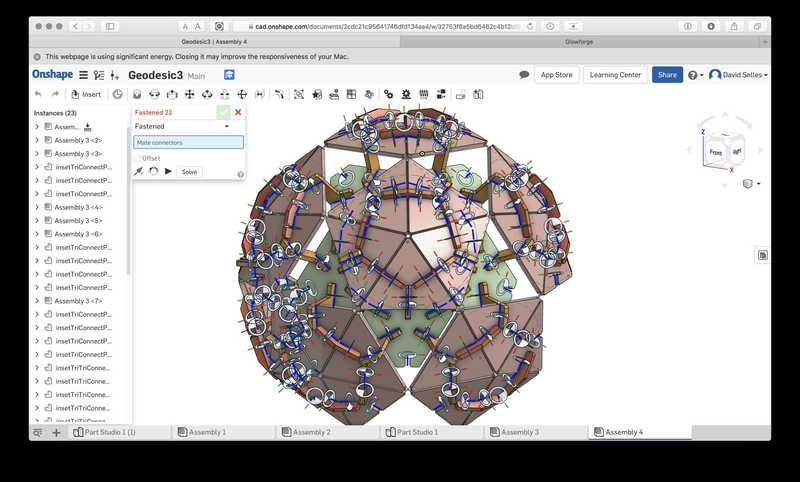
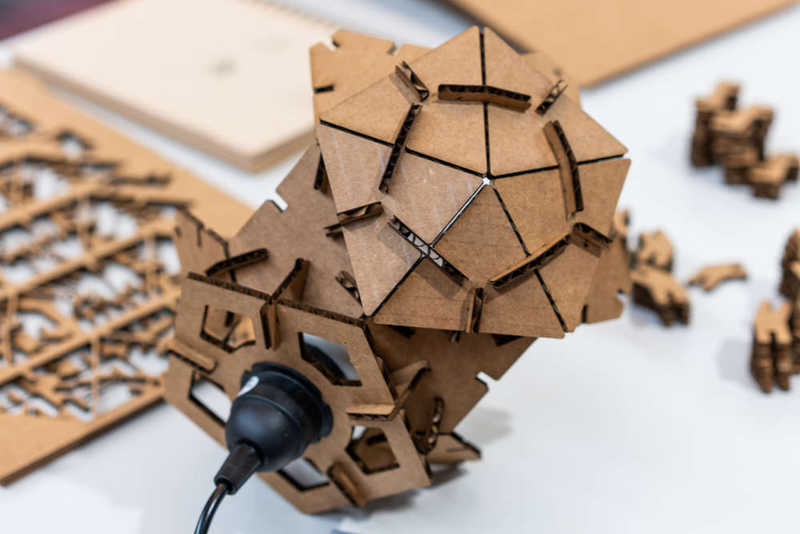
I settled on a 2V geodesic sphere as the base for my project, which would have 80 panels when fully-assembled. I used Onshape for the design of the geodesic, press-fit construction kit. Nearly everything about the design is parametric - the thickness of the material and slots can easily be adjusted, as well as an overall scaling factor for the lengths of the edges of each panel. I used variables to hold the data from the Domebook (relative edge lengths and dihedral angles), as well as the slot thickness, slot length, a global scaling factor, and a depth measurement for the inset panels. I would periodically add new variables as I found it useful to do so. I've linked to my design file in the resources section up top.
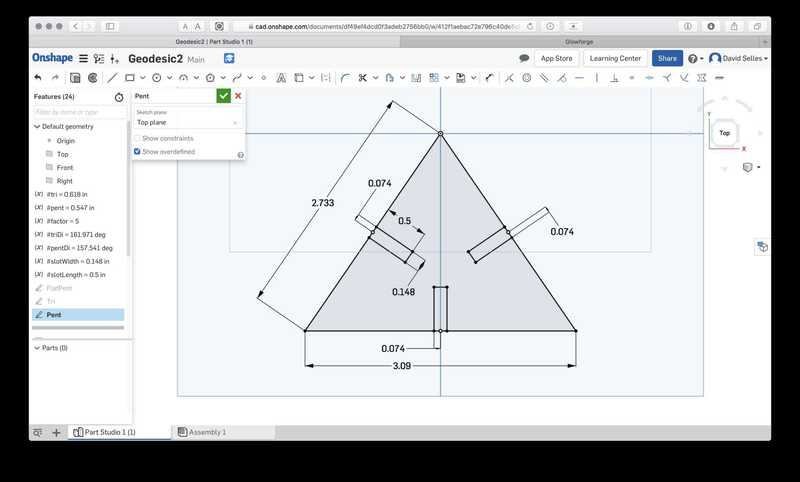
Sketching the triangular panels for the pentagonal sections
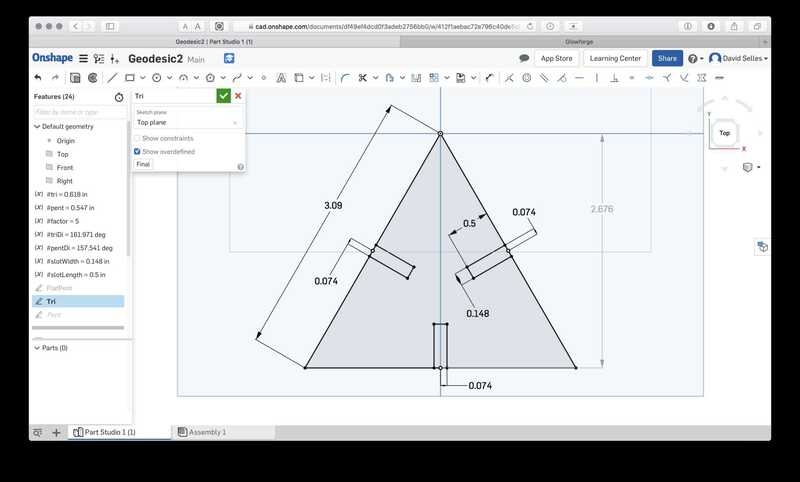
Sketching the triangular panels that go between the pentagonal sections
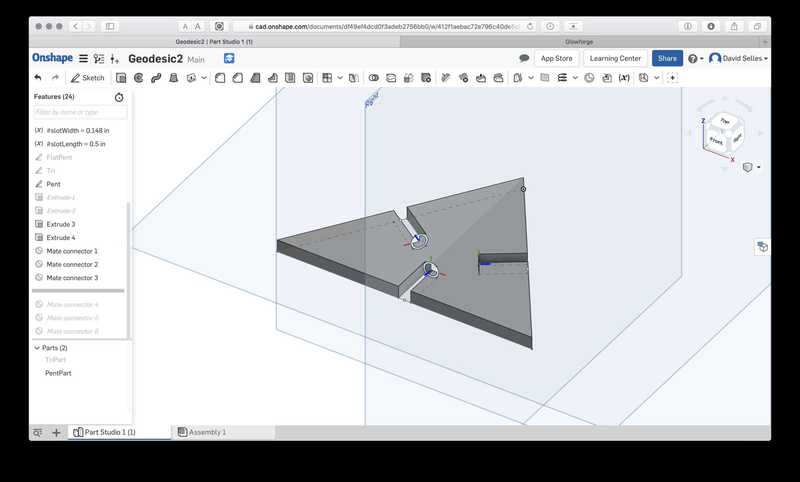
Bringing the 2D sketches into 3D parts using the #slotWidth variable
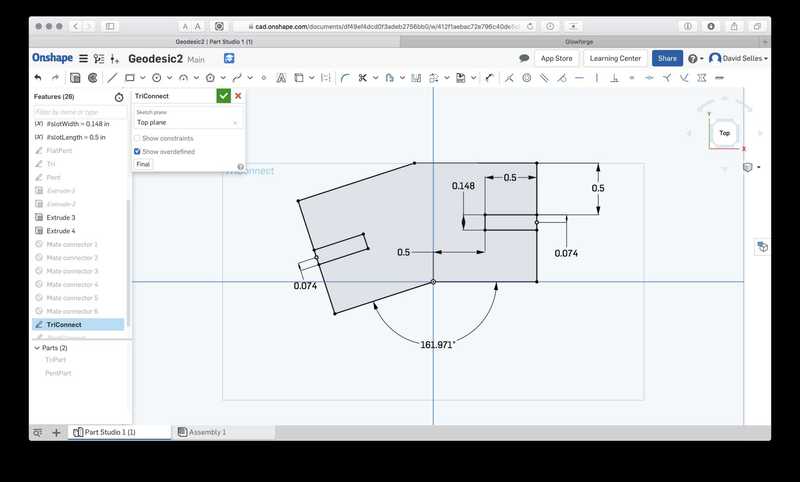
Working on the connector pieces
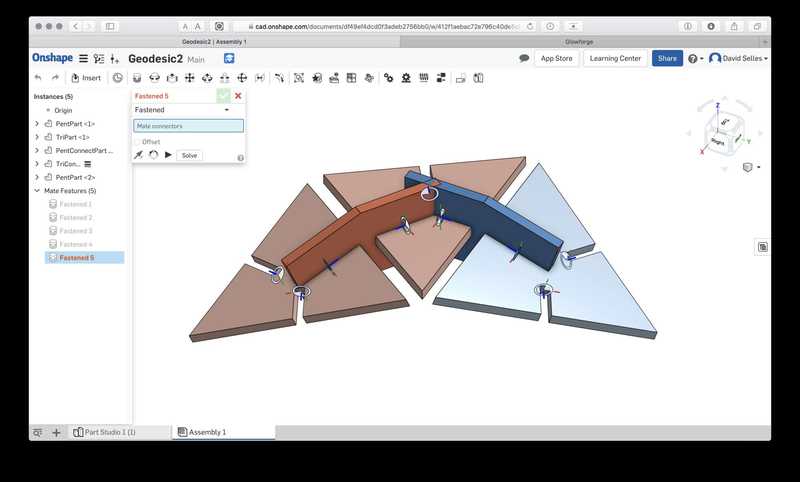
First try at an assembly didn't quite fit right
Turned out my math was wrong in the connector pieces, but it was an easy fix
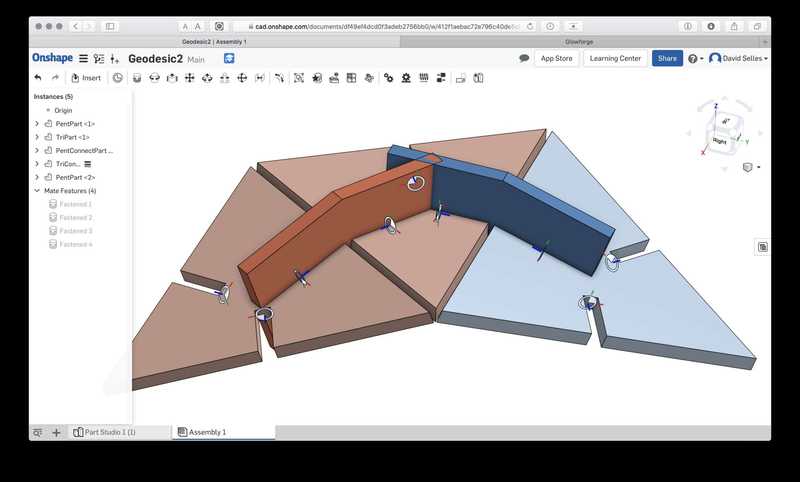
Building out a structure
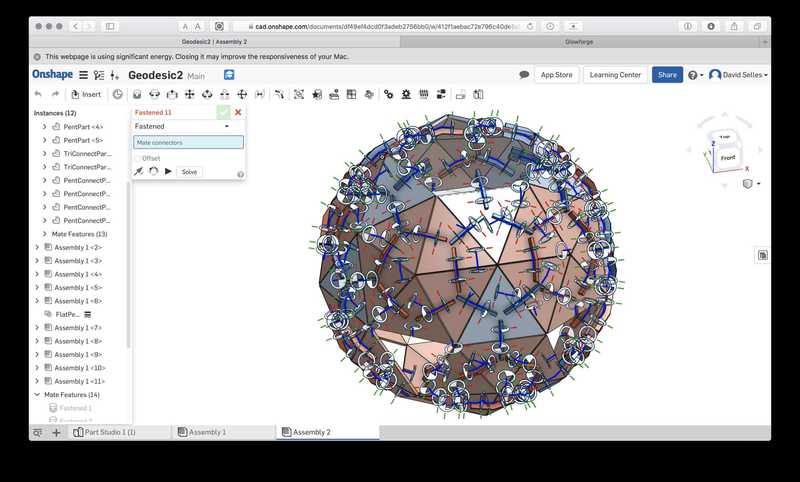
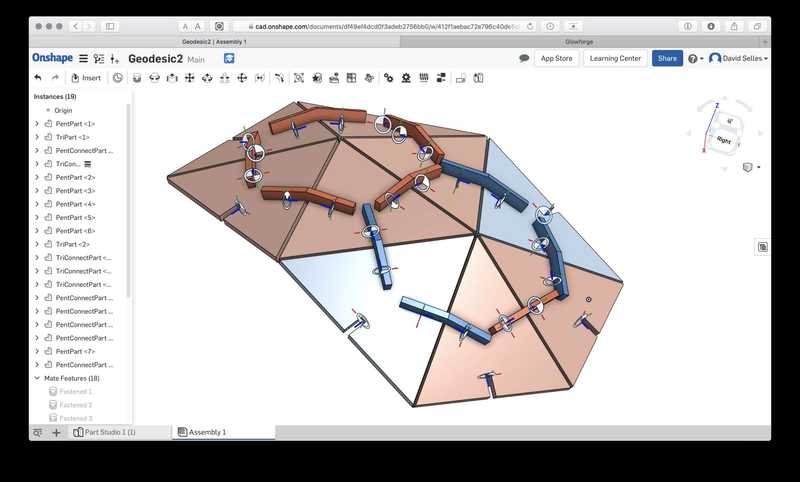
Building out some more - the mate visuals are starting to clutter the view
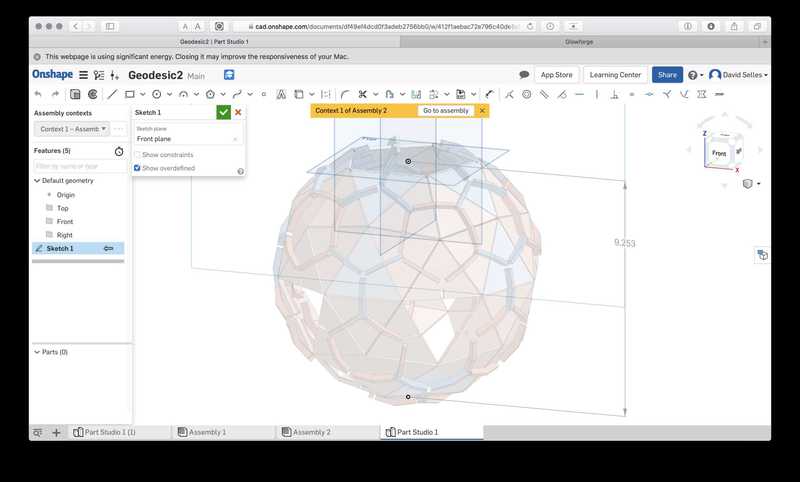
Now that most of it is build out, I can check how big it will be based on the current scaling factor. and adjust as needed.
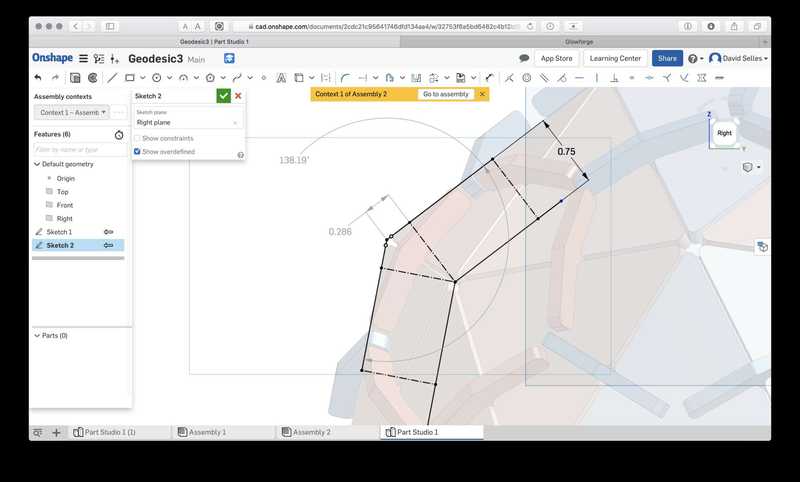
Reverse engineering the geometry for the inset panels and their connectors
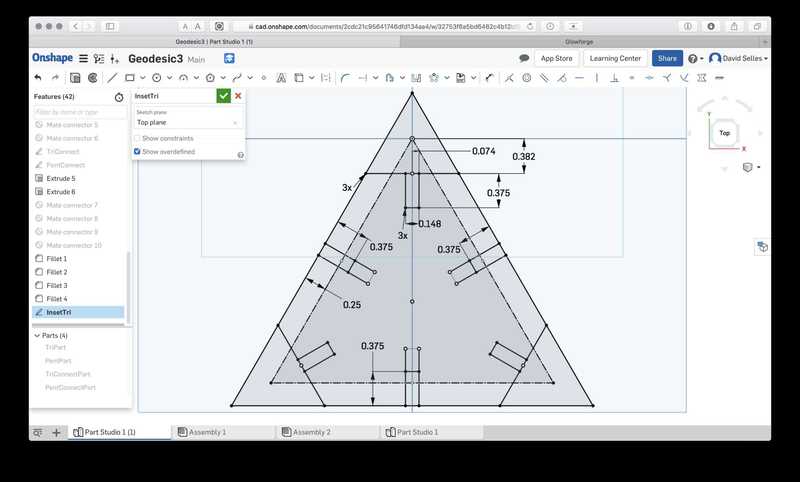
Creating the sketch for the inset panels. They'll be slightly wider than the non-inset panels.
Building out another assembly with the inset geometry
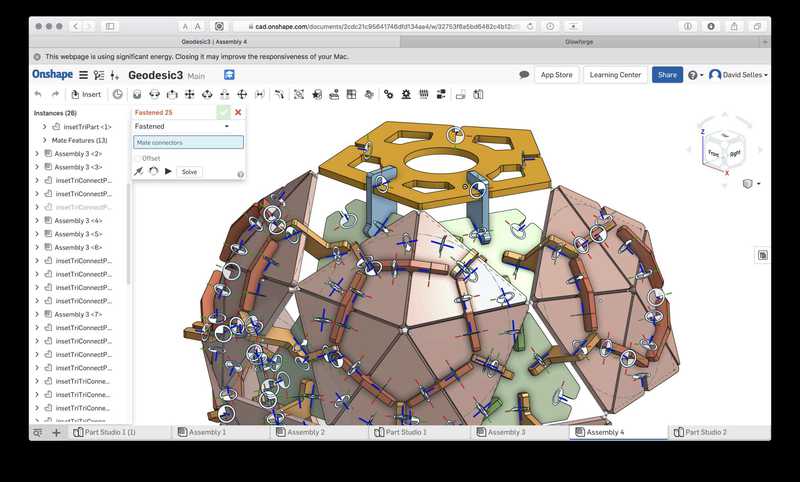
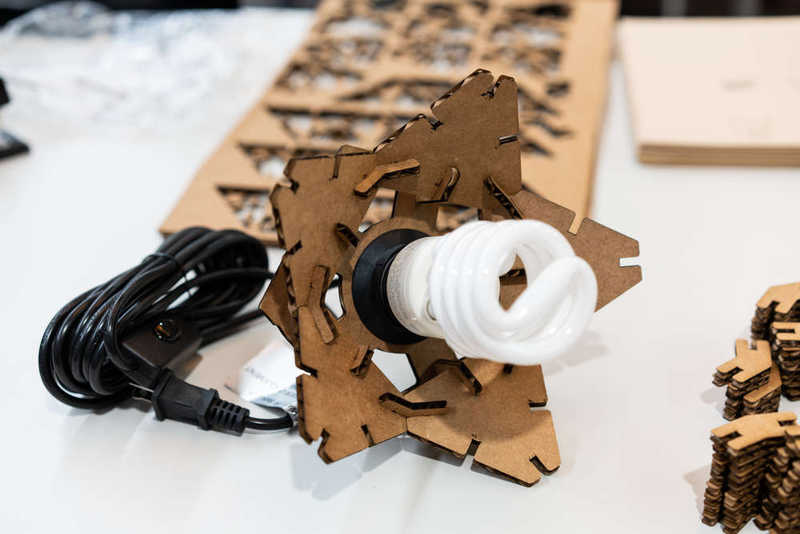
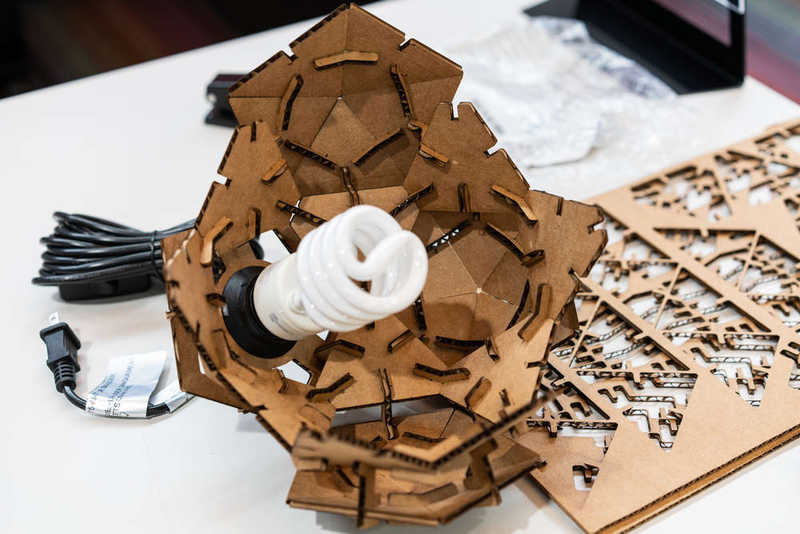
Adding a top made for the pendant lamp
With the geometry ready, it was time to start cutting. There were very few snags, aside from not cutting enough parts to start. I had just enough cardboard on hand to complete the project.
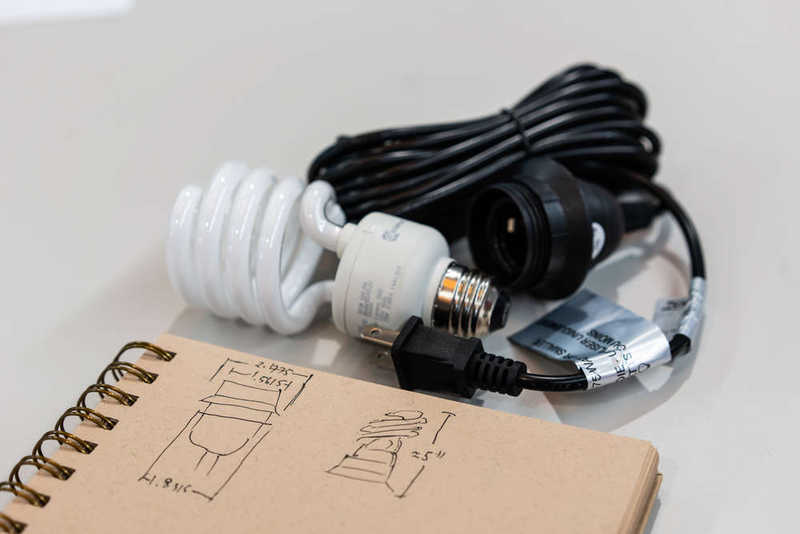
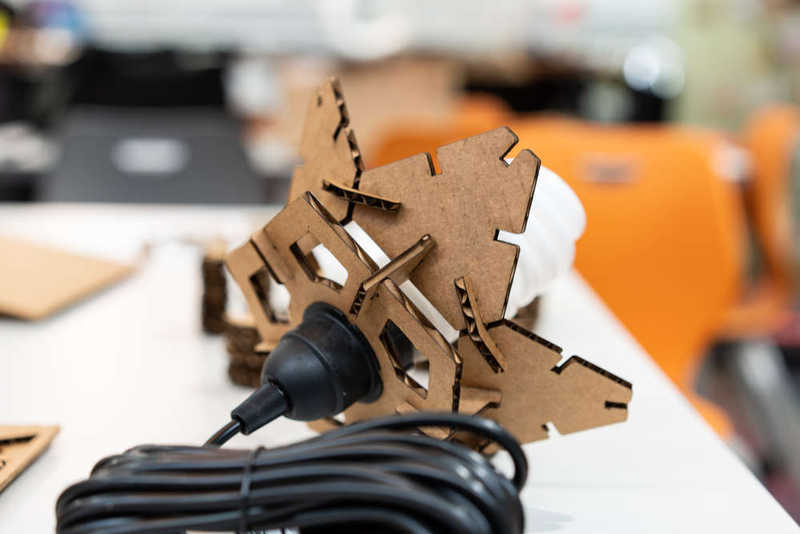
The lamp fixture
Some initial cuts to test in the real world
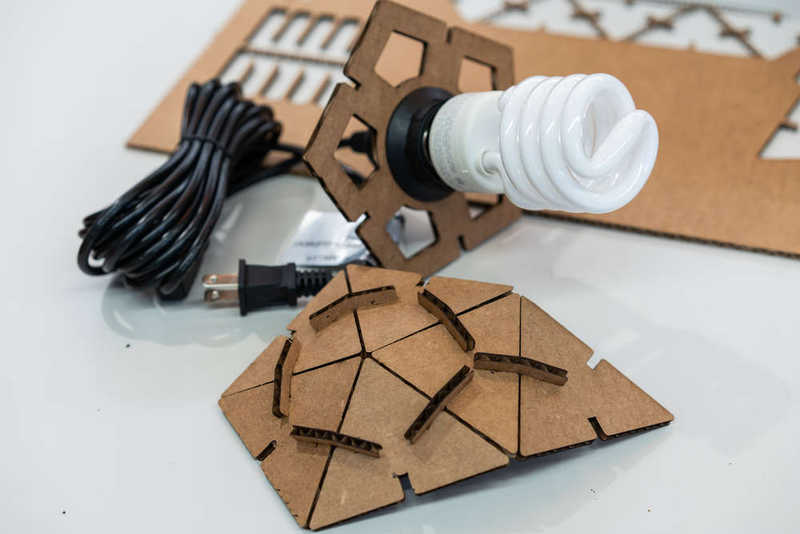
They fit!
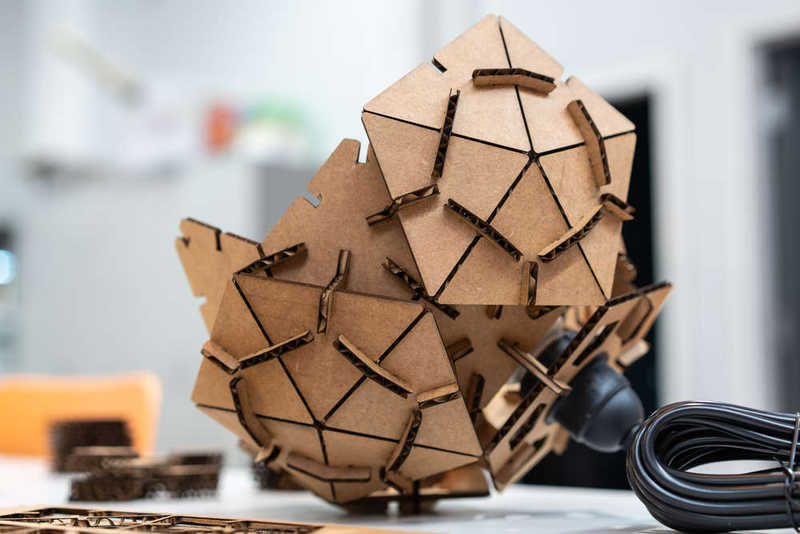
Building out a bit more just to make sure
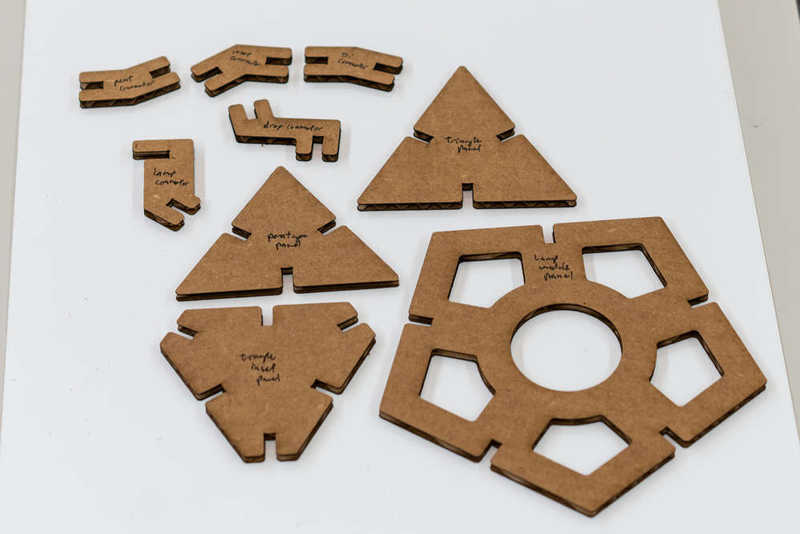
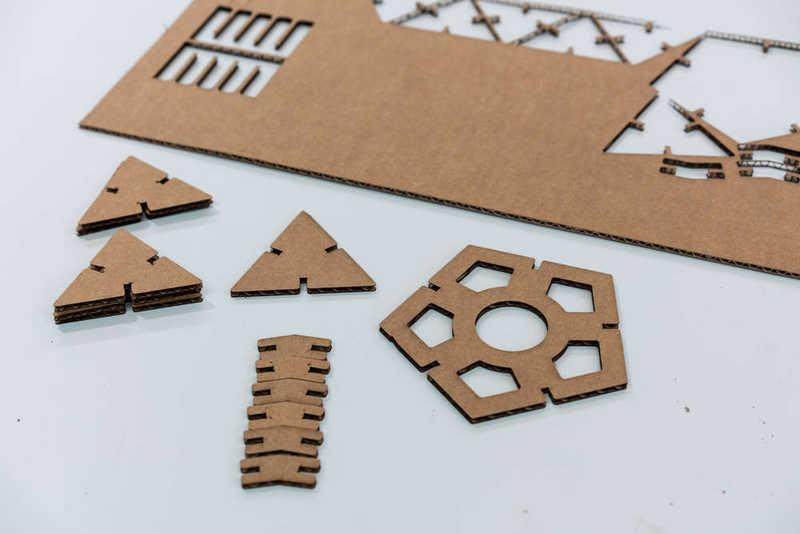
Each of the different component parts
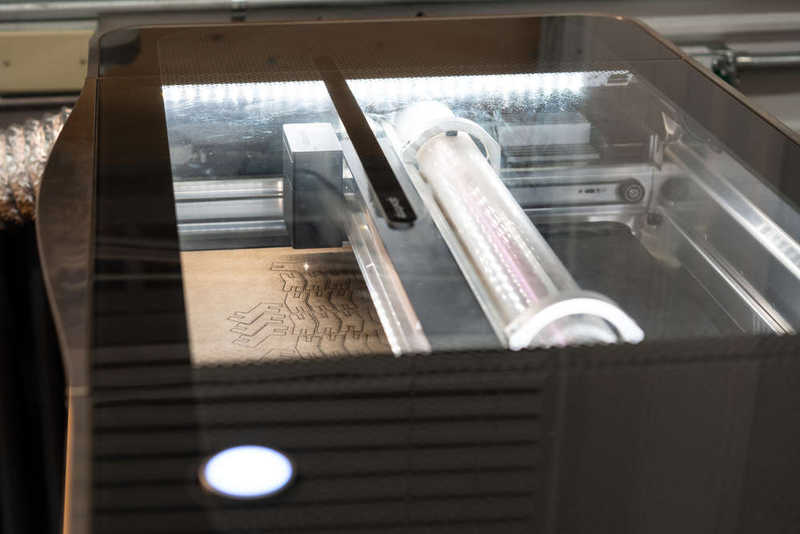
Laser cutting more parts
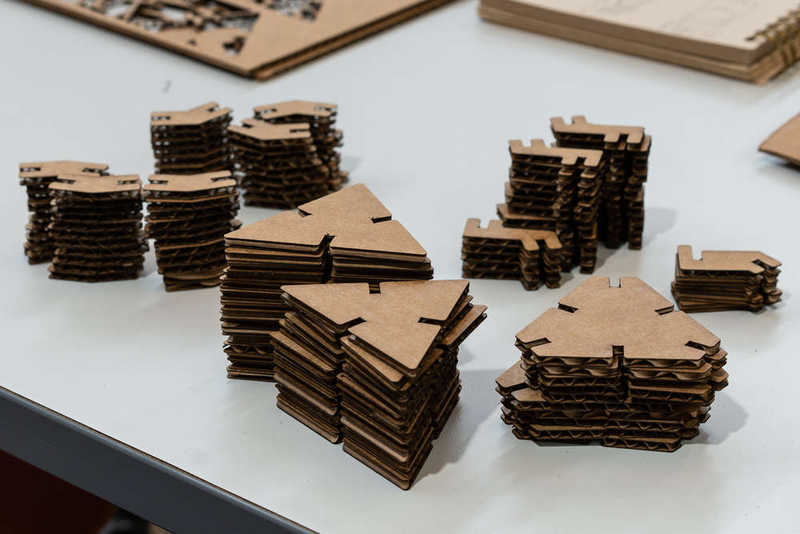
Lots of parts (this was about half of what I needed)
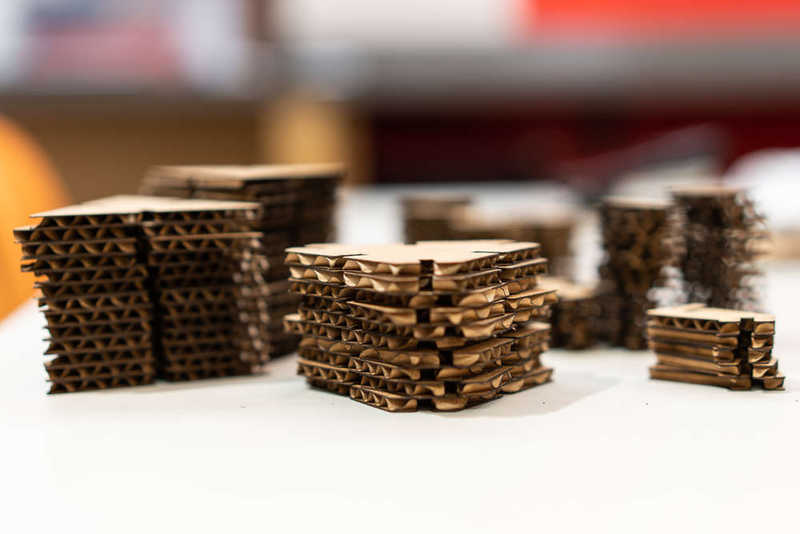
Cardboard can be rather beautiful
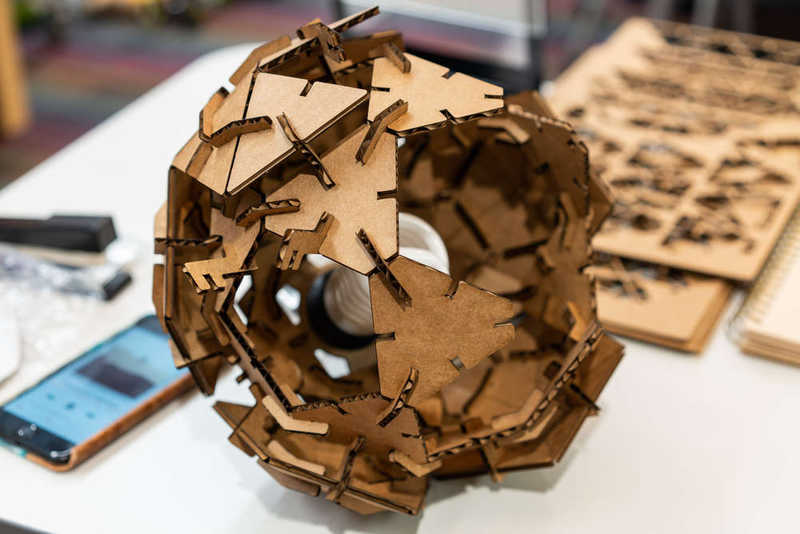
Stage 1
Stage 1
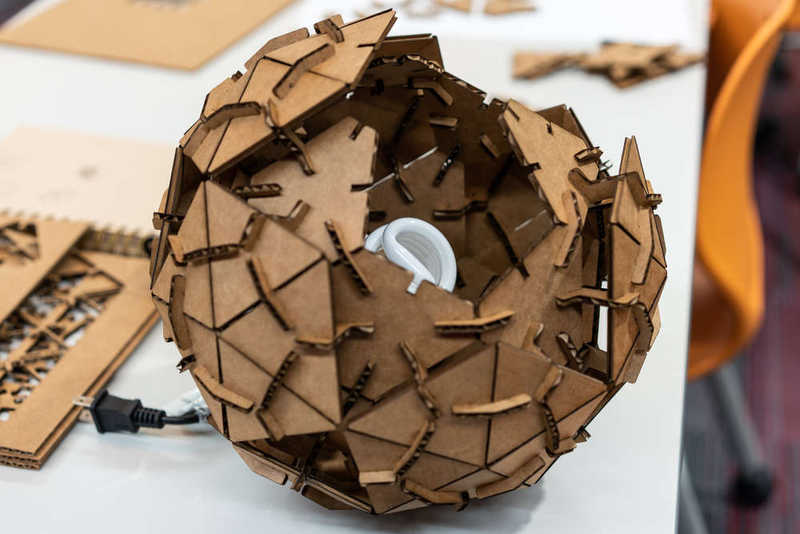
Stage 2
Stage 2
Stage 3
Stage 3
Stage 4
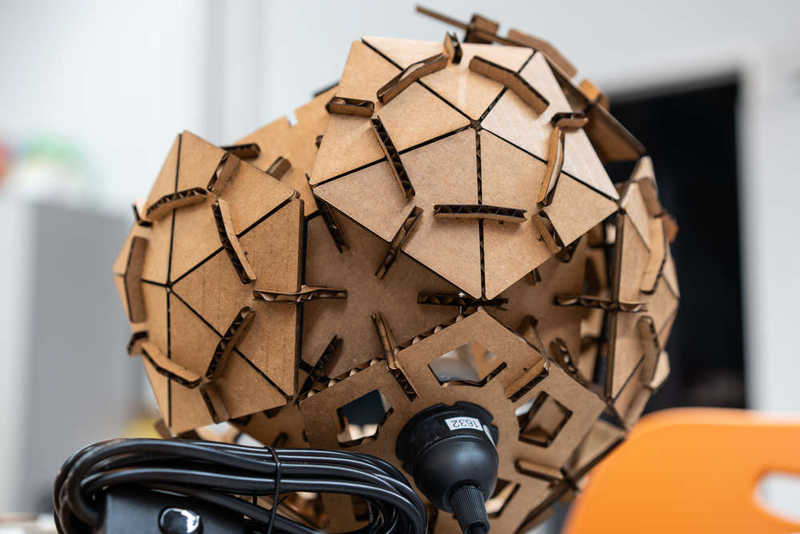
Stage 4
Stage 5
Stage 5
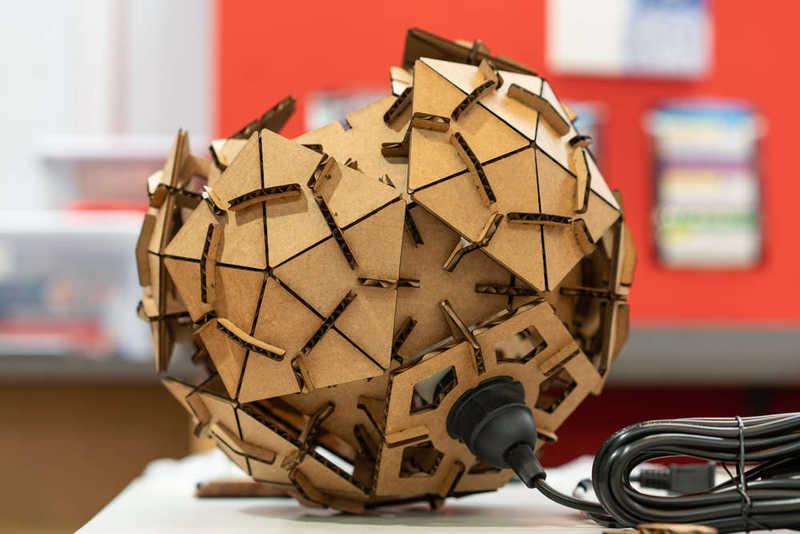
Completed
Completing the geodesic lamp was highly satisfying. As I was building I felt the form was aesthetically more floral than I expected, which I appreciated. However, it really doesn't produce much light at all, which was disappointing. The pentagonal sections reflect too much light back inside the lamp instead of deflecting it outward; if I make a version 2 of the lamp, I'll flip the pentagonal sections to be concave instead of convex.