Week 1: Computer-Controlled Cutting
Vinyl Cutting and Laser Cutting
Vinyl Cutting: Parrot Sticker
1. Introduction
One of the things we were assigned to do this week was to use the vinylcutter. I decided to cut a sticker of the company where I did my internship last summer, Parrot. To do this I got a PNG image of the company logo and proceeded to use Professor Neil's mod to organize the flow of the cutting better. The process was pretty straightforward since I just needed to import the image, then I needed to change the force and speed of the Roland GX-24 (the vinylcutter we were using). I set the force to 100g and the speed to 2 cm/s since those worked really well after testing.

Figure 1. Using Neil's mod for the Roland GX-24 Vinylcutter on my Parrot sticker.
For the first version of the sticker I cut it with the letters as the positive part and the background as the negative part, or the part that gets cut out by the vinylcutter. For a second version, I inverted the part to cut so that the letters would be cut out from the rectangle.
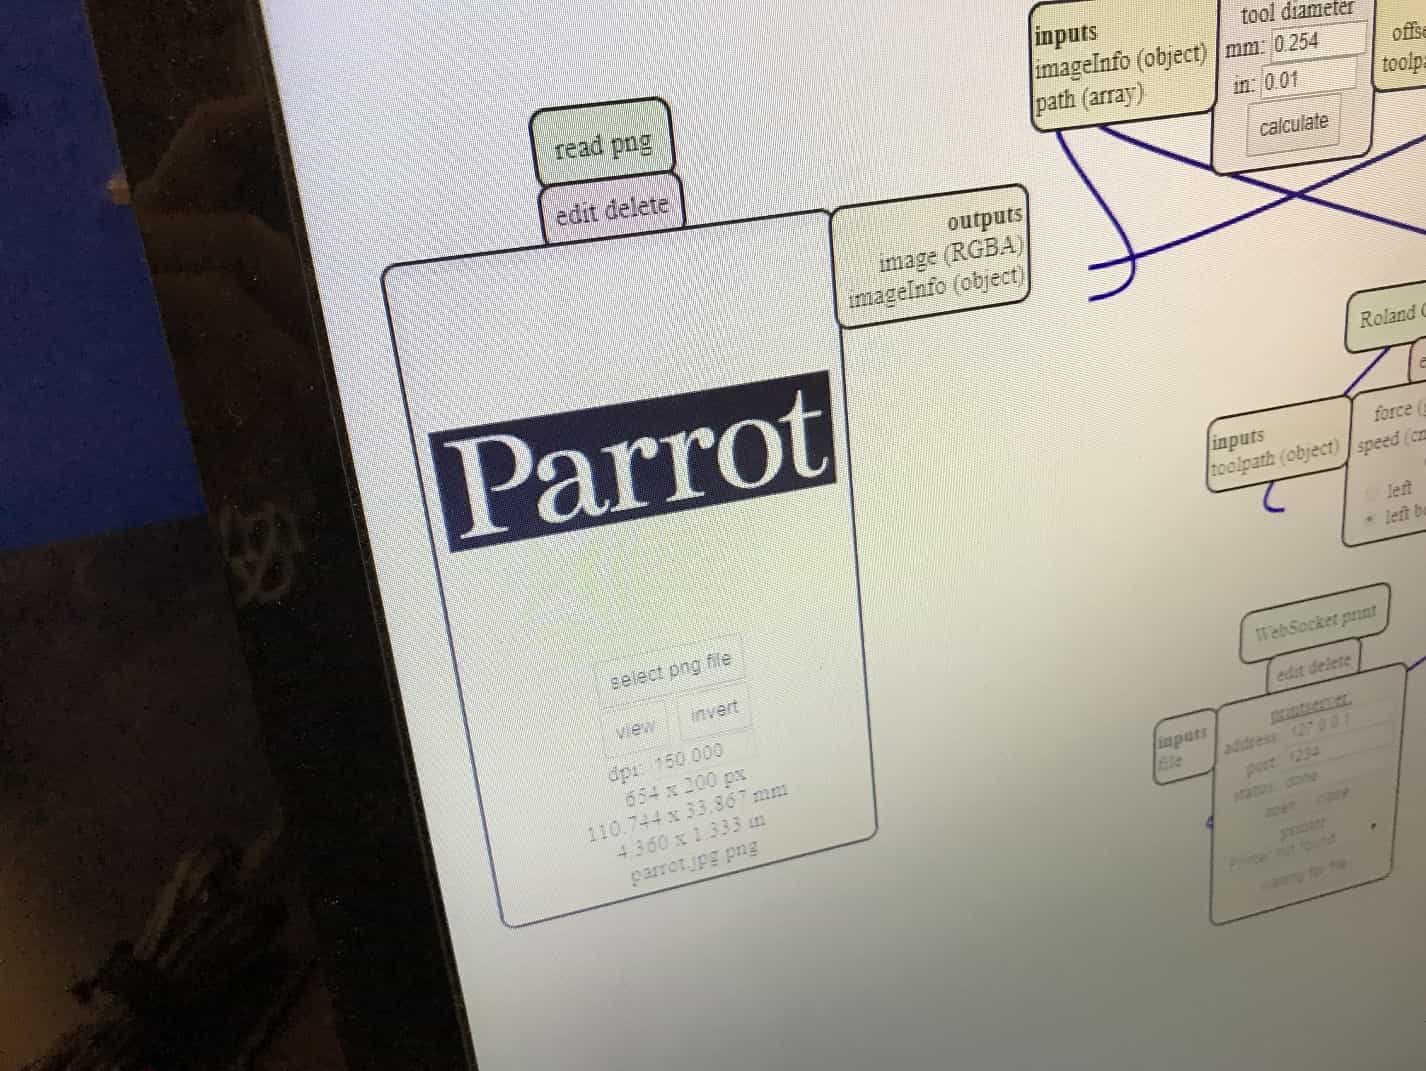
Figure 2. Negative cut out version of Parrot sticker.
2. Final Product
After I vinylcutted the sticker I transfered the vinyl onto the transfer paper and then I laid it over my laptop. The cut turned out really well as the sticker turned out perfectly and looks great on my laptop!
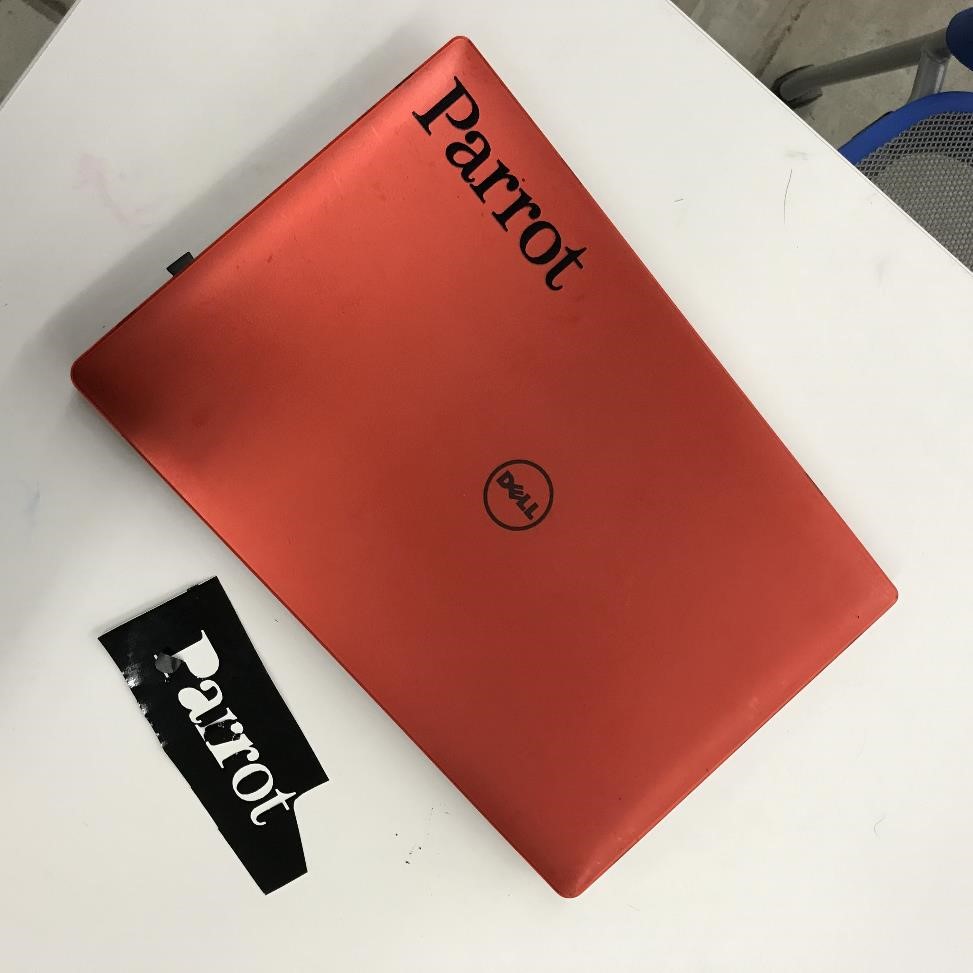
Figure 3. Final version of Parrot sticker!
Laser Cutting: Honeycomb-Inspired Containers
1. Introduction
For the laser cutter project we were supposed to make a modular press-fit kit. We were given cardboard for this project and I decided to do all the design and modeling of the press-fit kit by using Solidworks. The reason why I used Solidworks was because I previously had experience using Solidworks through my experiences in Mechanical Engineering.
2. Ideation
For this project I wanted to make something that I could use to put my things in since I had a bunch of pens and other utensils lying around but didn't have any containers to put them in. As I was thinking, I contemplating using an octagonal design but then I realized that if I wanted to put them together the octagon shape would leave a square gap in between them.
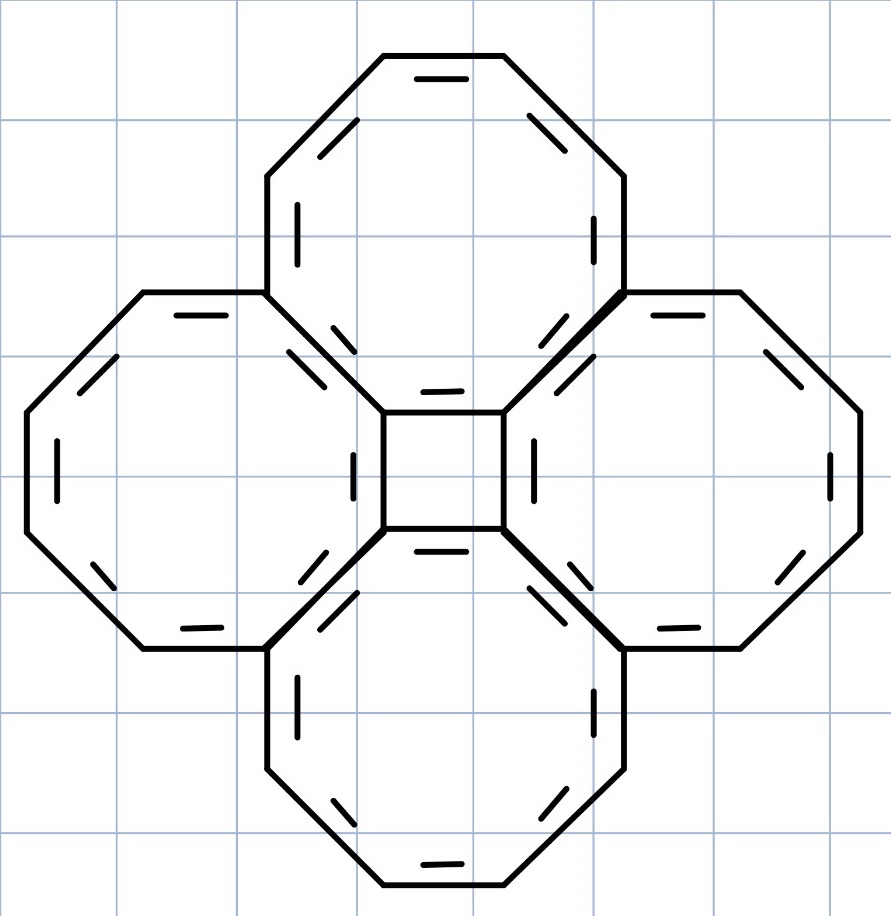
Figure 4. Sketch with the octagon shape containers.
Because of this, I decided to do a hexagonal shape container based on honeycombs that would be able to fit together and also stack vertically.
3. Solidworks
I started making the design on Solidworks and decided to create a 3D structure of what I wanted my final product to look like and then export the sketches of the contours that I needed to lasercut. I decided to go with the idea of making a hexagonal base and have 6 "column" like pieces on each side of the hexagon. To be able to stack up more layers, I decided to alternate the notches so that 3 notches would go into the base hexagon and the other 3 notches would fit into the hexagon on top of it, and so on.
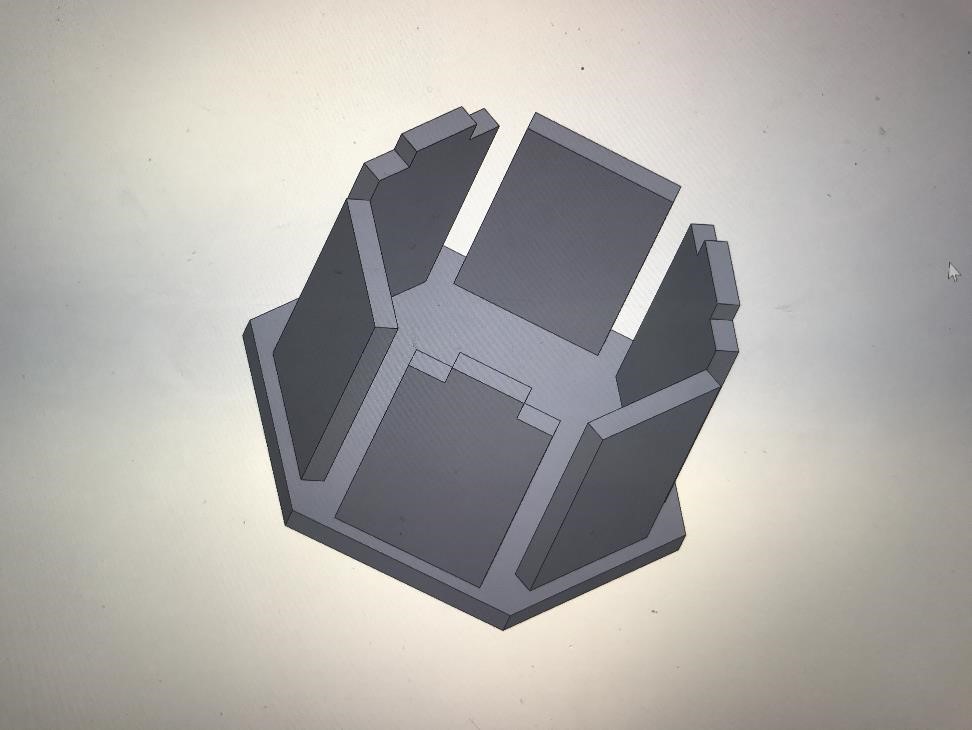
Figure 5. Here you can see the Solidworks design of the honeycomb container with 3 alternating notches pointing up for the next hexagonal layer to fit into.
Then I proceeded to make the upper layer with the notches connecting the columns so that they fit together in place. Here I worked with chamfering the edges of the interlocking joints so that they could fit better. Then, I made another layer on top of that similar to the base hexagon but empty in the middle so that I can put my stuff in it.
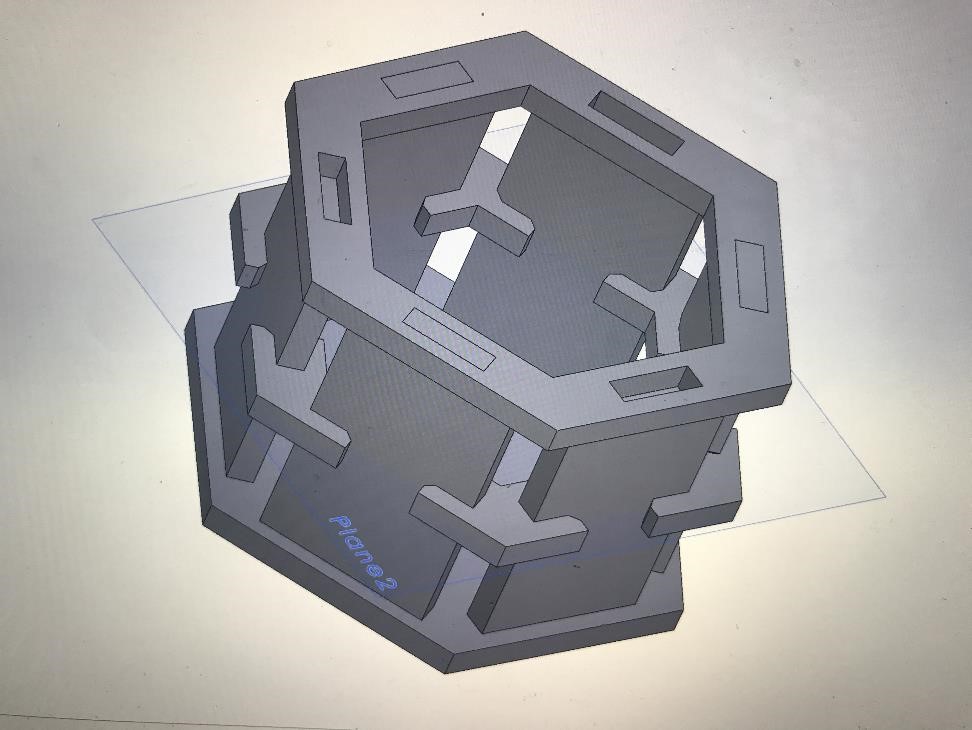
Figure 6. Updated Solidworks design with joints and an upper layer.
While I was doing this I realized that I didn't know the width of the carboard so I made a global variable on Solidworks named "cbwidth" and I defined it as 0.3 in for the time being (which would end up messing me up later yikes)
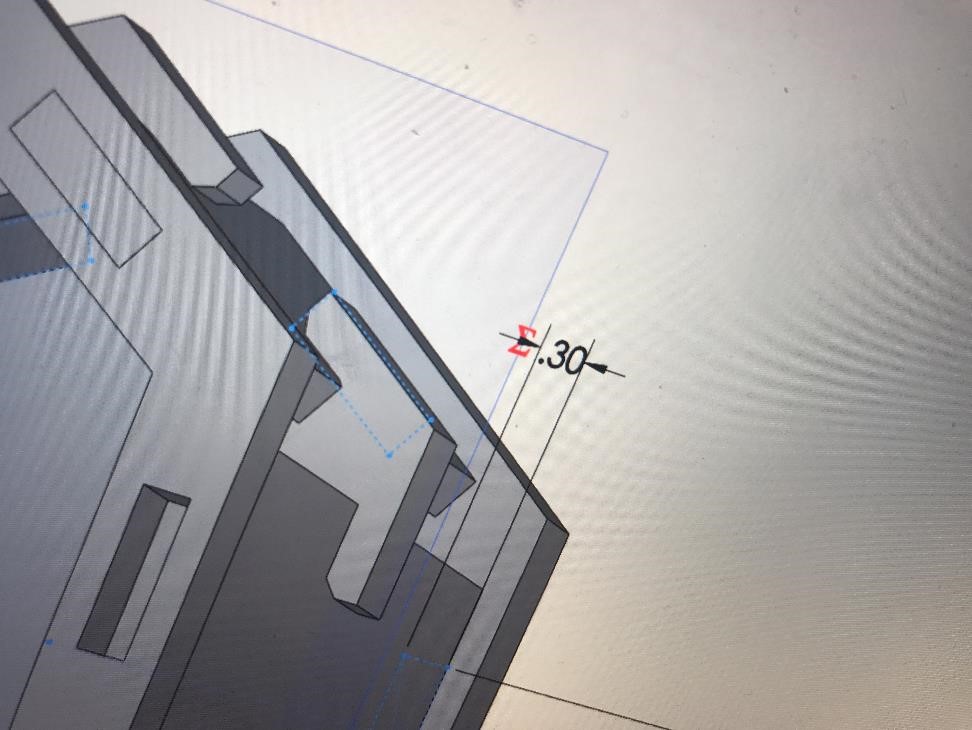
Figure 7. Assigning a global variable to cardboard width of 0.30 in.
4. Laser Cut Prep
To prepare for laser cutting, I grabbed the cardboard and headed to the Active Learning Labs in SEAS since I knew the staff there and used the laser cutter before. Before I started I realized that the cardboard was too large to fit into the laser cutter so I discovered this handy new tool that was basically an oversized papercutter. I used these to slice up my cardboard pieces into smaller 20 in x 15 in sheets.
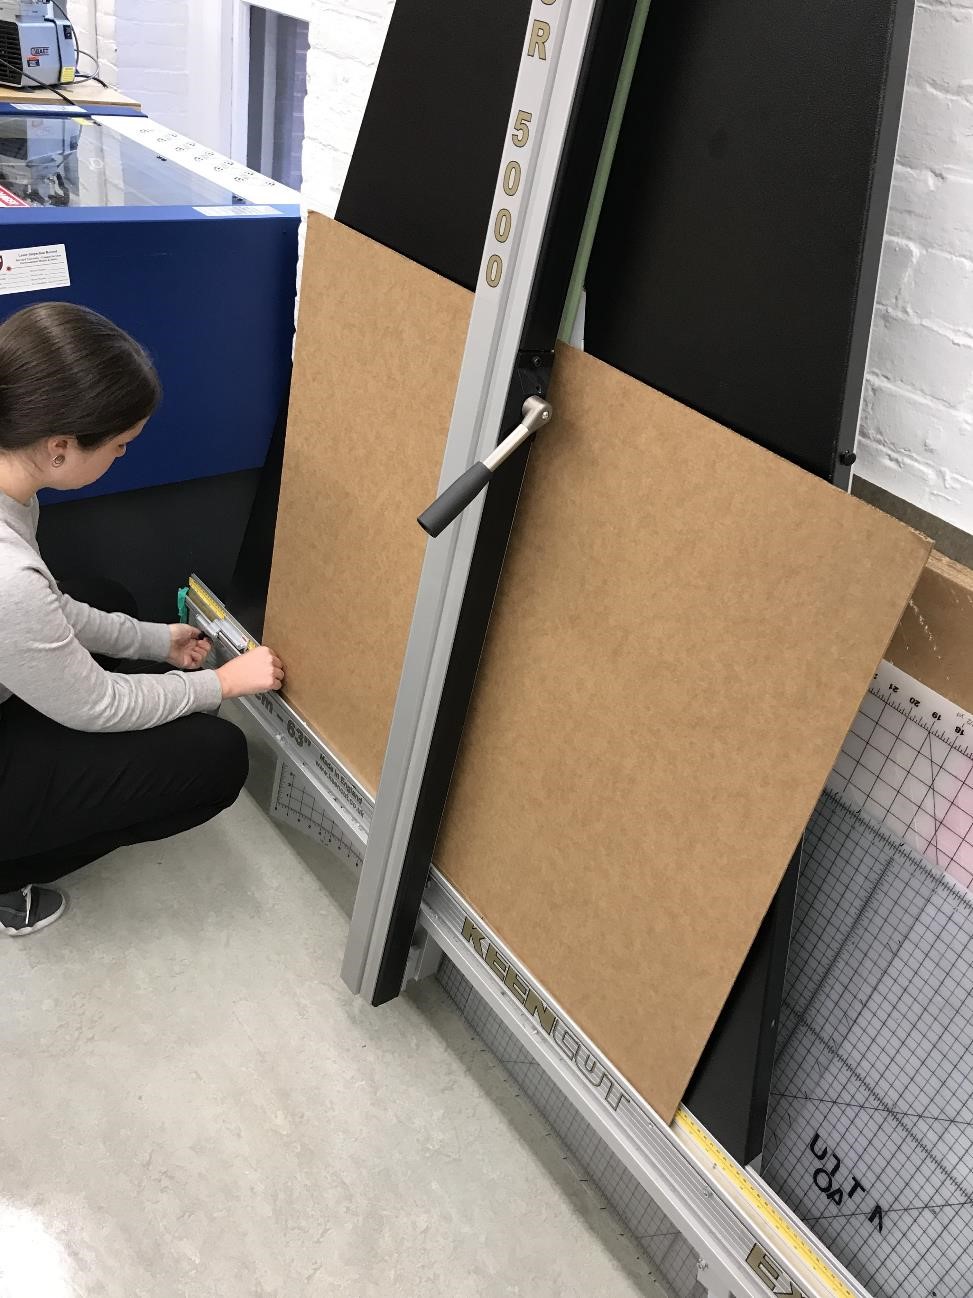
Figure 8. Using the oversized paper cutter to cut my oversized cardboard!
I then proceeded to do my kerf testing to see how much extra material the laser cutter burnt up on the process of laser cutting my parts. I did this by cutting up a rectangular part with the laser cutter and then proceeding to cut multiple slots with varying widths of 0.05 in to see which slot would the cardboard piece fit better in. After doing this and inserting the rectangular piece into each slot I found that even though the width of cardboard was 0.146 in it fit the best into the slot that was supposedly 0.131 in. This is how I calculated that the kerf was about 0.0075 in.
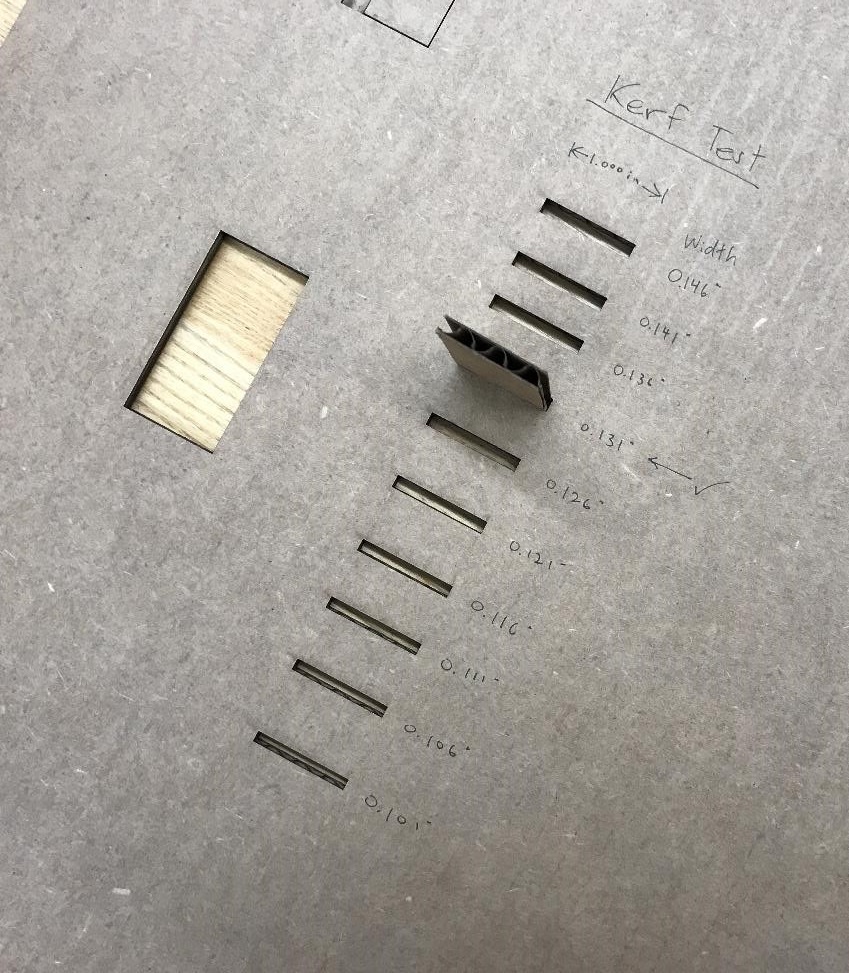
Figure 9. Testing to see which slot fits better to see how much kerf there is.
5. Actually Laser Cutting
Now that I was done testing for kerf I modified my dimensions in Solidworks and proceeded to laser cut the actual pieces! I first exported the Solidwork sketches as .dxf files and then I put multiple pieces on one sheet on CorelDraw and laser cut them.
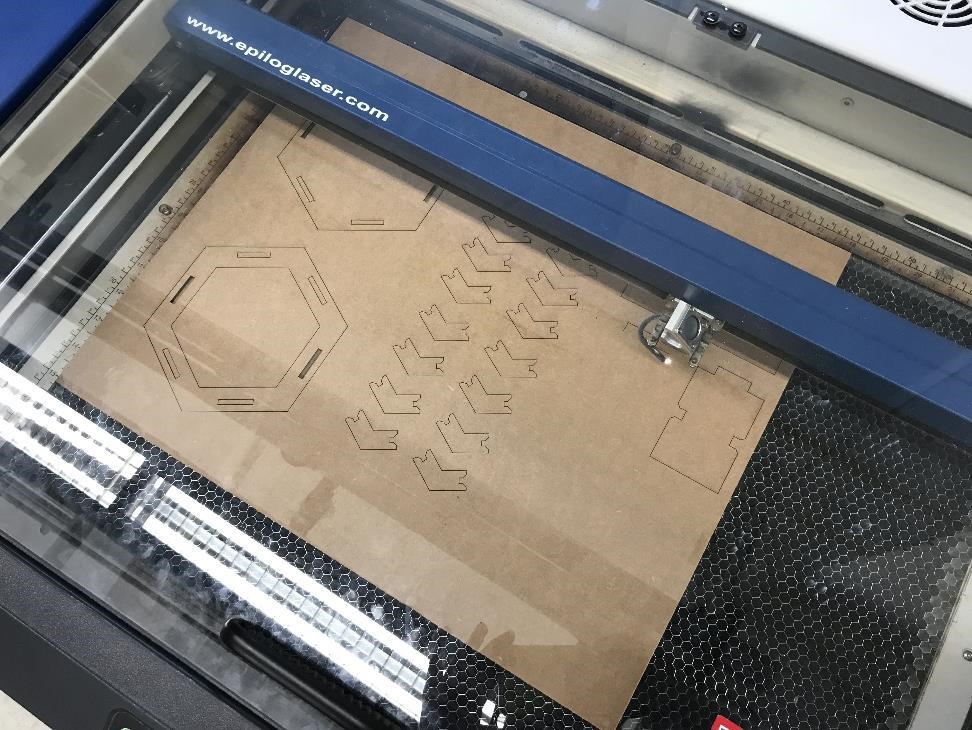
Figure 10. Laser cutting the different pieces onto one sheet of cardboard.
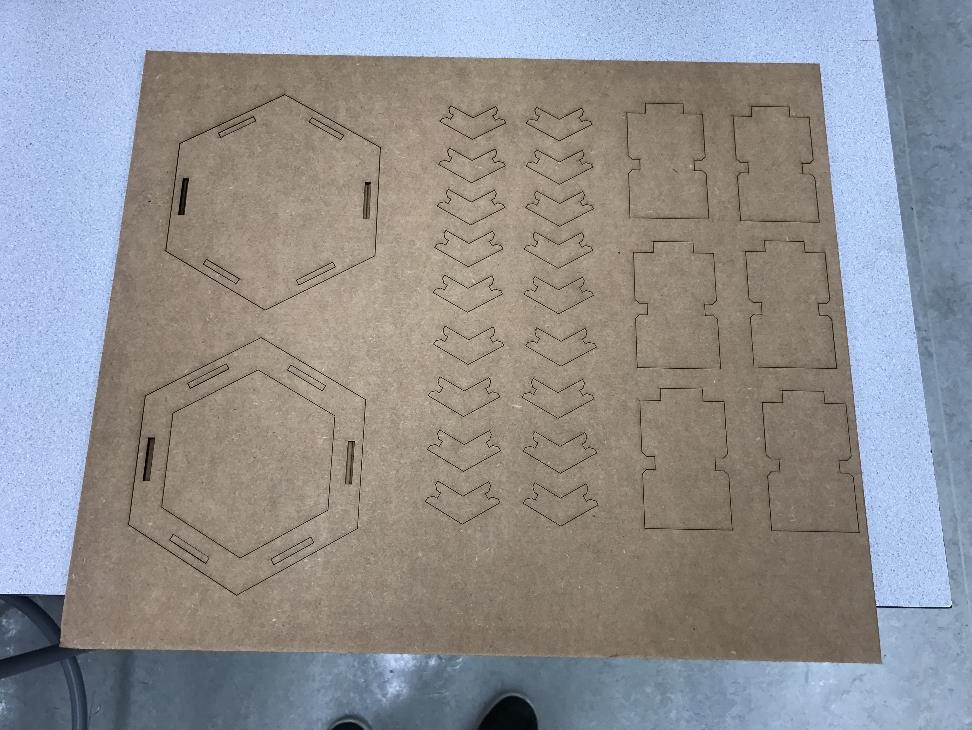
Figure 11. Cardboard sheet after the laser cutter cut out the pieces.
The whole process of laser cutting went really smoothly and I was able to assemble it relatively easy, however as I put the parts together I realized one critical error (not really but just to make it slightly dramatic).
I realized that there was a little gap vertically between the joints and the columns. I quickly checked Solidworks and saw that for the joints in the columns I had used the formula cbwidth/2, but Solidworks hadn't saved the formula. It had only saved the resulting value which was 0.15 in, so the width didn't convert correctly when I changed the value of cbwidth afterwards to the length of cardboard. Lesson learned: Make sure to get all your measurements beforehand if possible before designing your parts. But other than that the whole container turned out well and all the joints fit together which was a huge success!
6. Final Product!
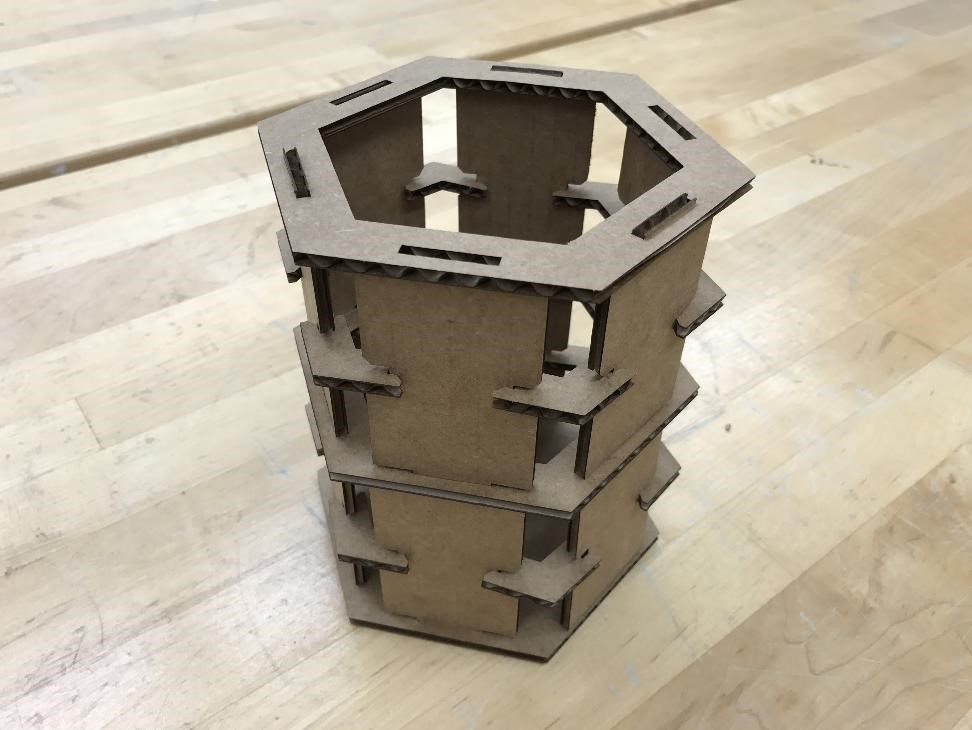
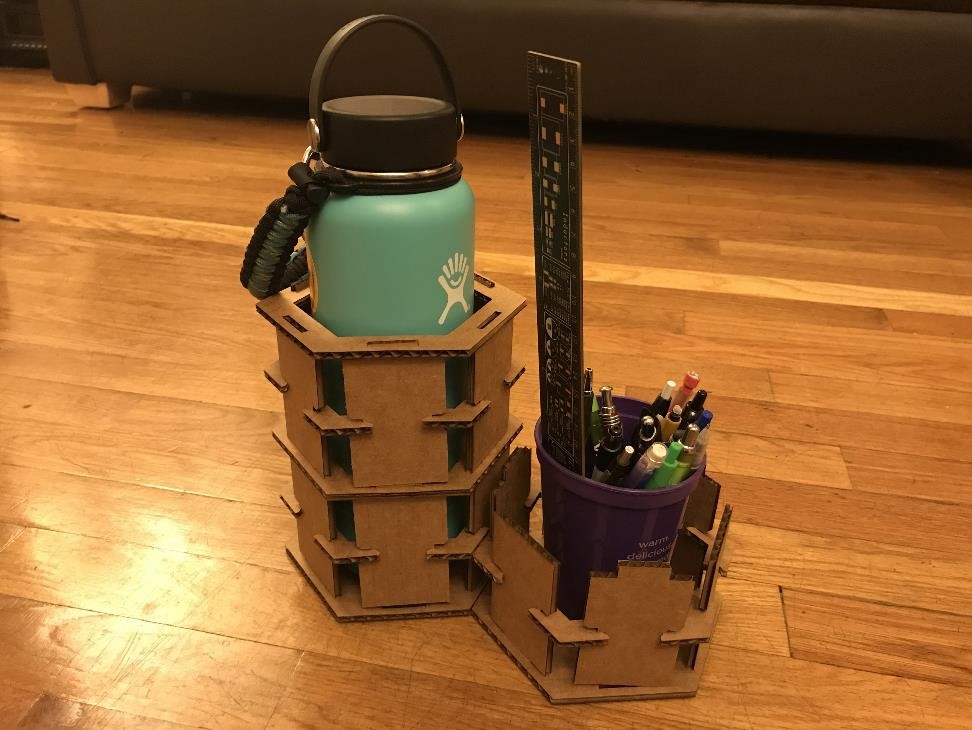
Figure 12. The final product! Honeycomb-inspired containers! So cool!
After I finished this final product, I had 15 minutes to get to class in MIT so I ran to the T and made it to the Media Lab just in time with this finished product! It turned out better than I expected since I realized that I could use it in different ways such as by putting it over a desk lamp to make cool light effects.
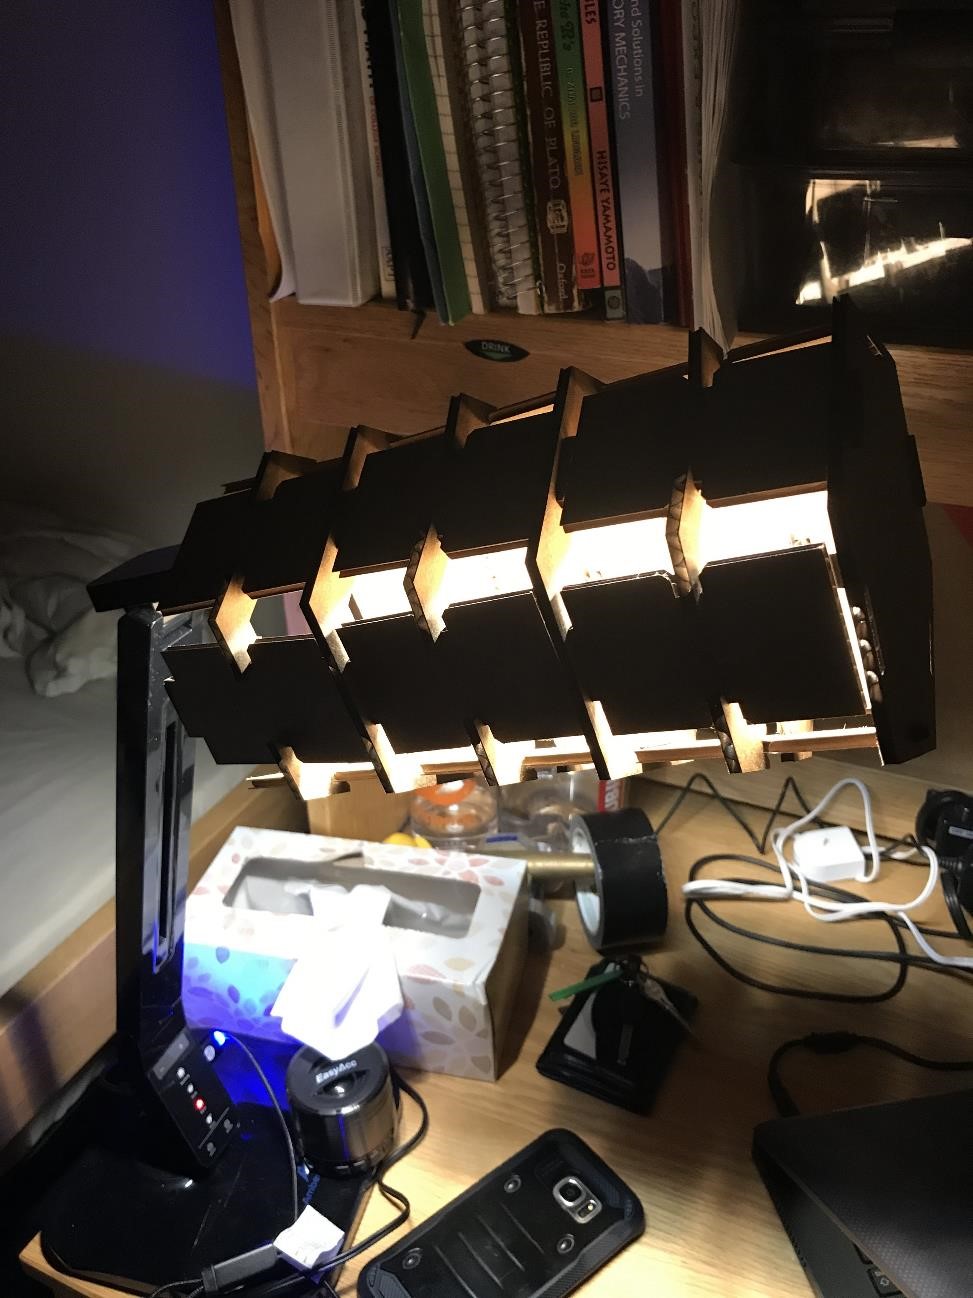
Figure 13. Putting the honeycomb container over a lamp to make any party lit! (hopefully not in the fire kind of way since the cardboard could actually be set on fire).
And I found a way to better organize my things, so if you ever come to my room you'll see a lot more of these! Overall, it was a little stressing to make the final product since there were many complications with the joints and visualizing the final product, but it turned out quite well!