How To Make Almost Anything Neil Gershenfeld

MIT Center For Bits And Atoms
3D PRINTING
Fab labs share an evolving inventory of core capabilities to make (almost) anything, allowing people and projects to be shared. These are my projects.
3D Design
& Printing -
Chain links
09.26.18
Our assigment was to "design and 3D print an object (small, few cm3, limited by printer time) that could not be made subtractively". Due to my lack of experience in Rhino or equivalent 3D modeling software, I was tempted to print one of the beuatiful designs available on Thingiverse.com, but that seemed too easy. I want to become more comfortable in Rhino, and this was a perfect opportunity. That said, I knew even a simple design would take me quite some time so I was humble in my ideation.
A linked chain seemed about the simplest thing that could not be made subtractively, yet could still be rendered on my own in Rhino. Plus I like the dark, heavy metal aesthetic of the chain. After my first (failed) attempt, using purple filament, I realized that a black plastic would exaggerate said aesthetic.
My first attemp, in purple filament, failed due to lack of support for the horizontally oriented links. Of course, it also would have failed due to lack of support for the top portions of the vertiacally oriented links as well but I stopped the print before it could go any further. Perhaps supports would not have been necessary if I had altered the orientation of the chanin, which I did in the following attempt, but with supports regardless. These supports were incredibly difficult to remove and only came off with a lot of xacto carving and some sanding. For the third and final print, I adjusted the support settings, increasing the Z distance by one millimeter, thereby increasing the distance between the support and the object.

Fig.1 3D Rnedering of chain from Rhino

Fig.2 3D Rnedering of chain from Rhino, alternate orientation

Fig.3 Plan view of chain from Rhino

Fig.4 Plan view of chain from Rhino, alternate orientation

Fig.5 Section view of chain from Rhino, alternate orientation
Fig.6 Characterizing 3D Printer
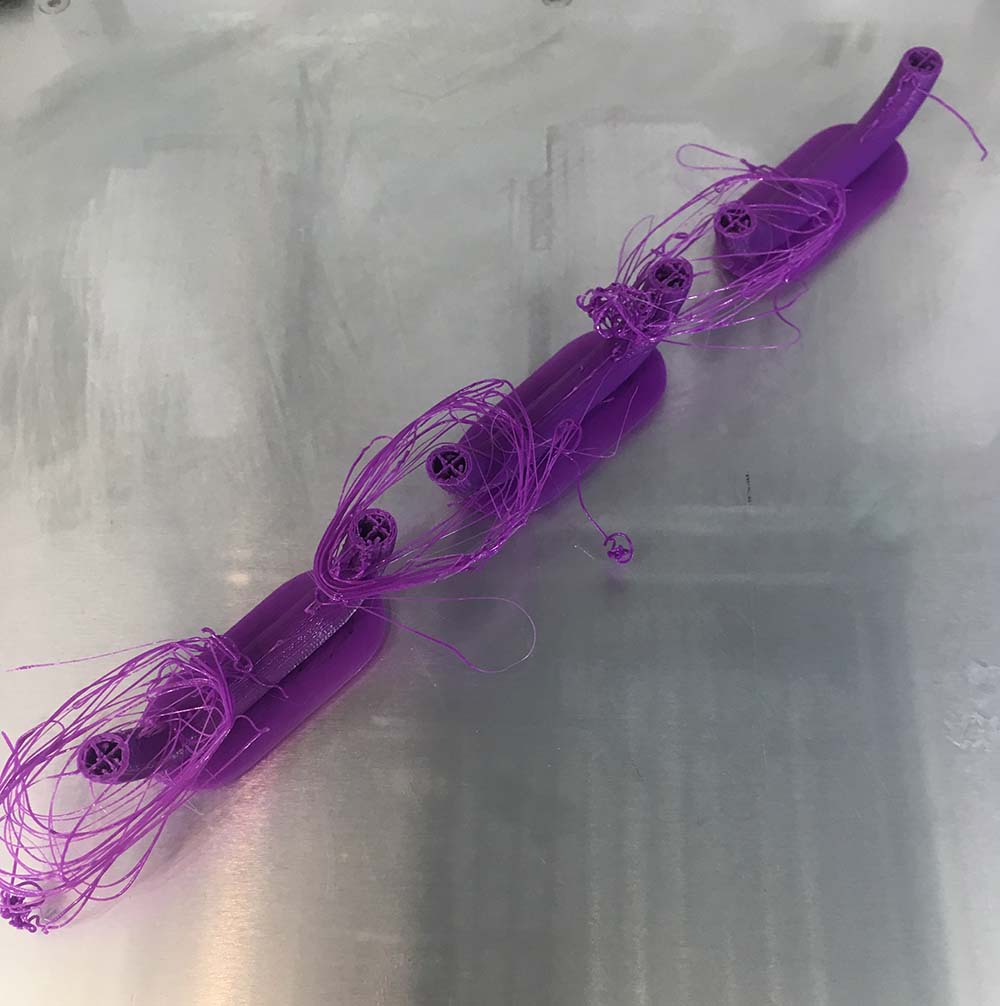
Fig.7 Failed attempt at perpendicular, "+" orientation without support
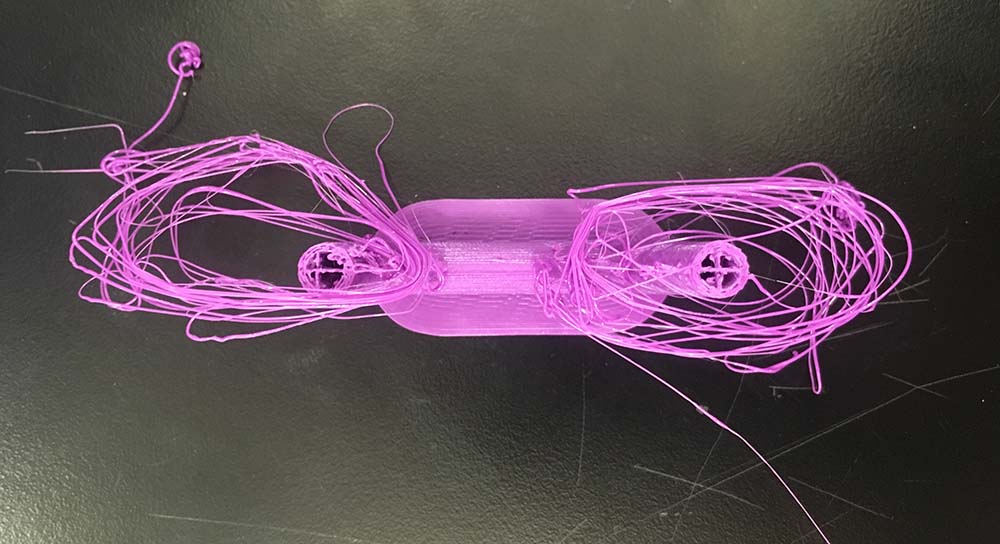
Fig.8 Close up of above
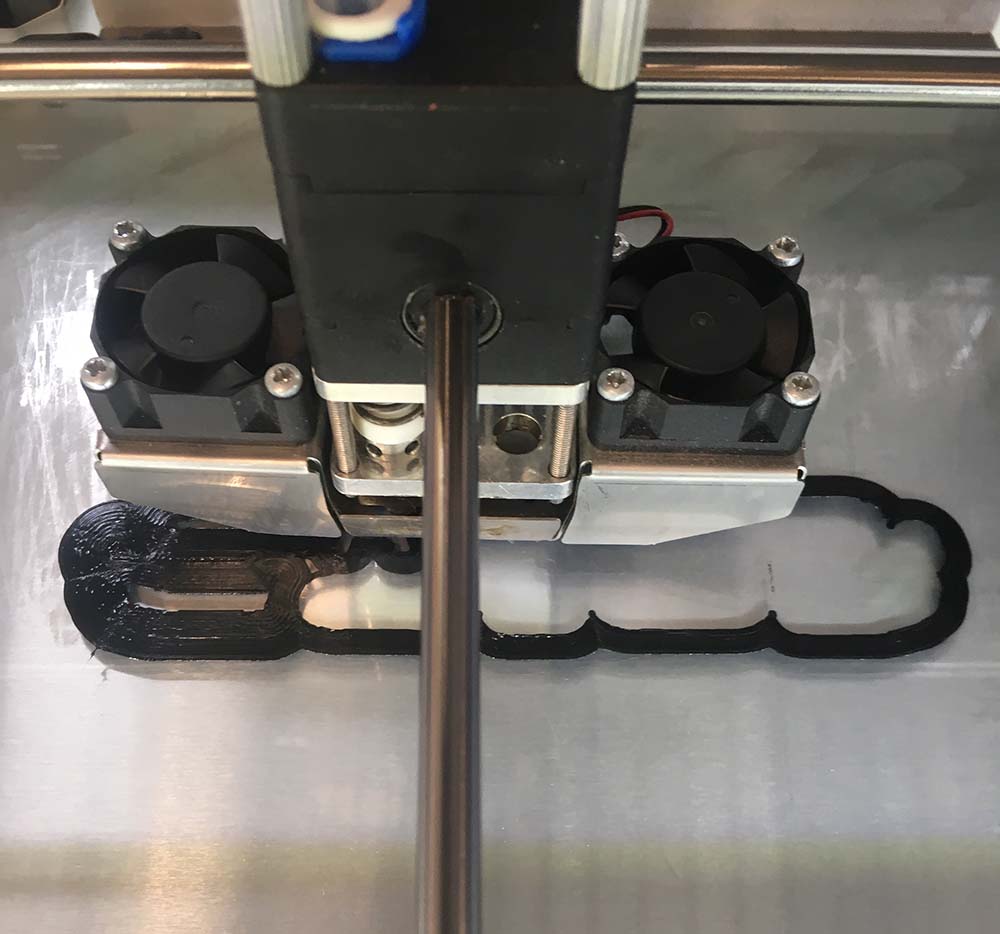
Fig.9 Raft for new print at an "X" orientation with support
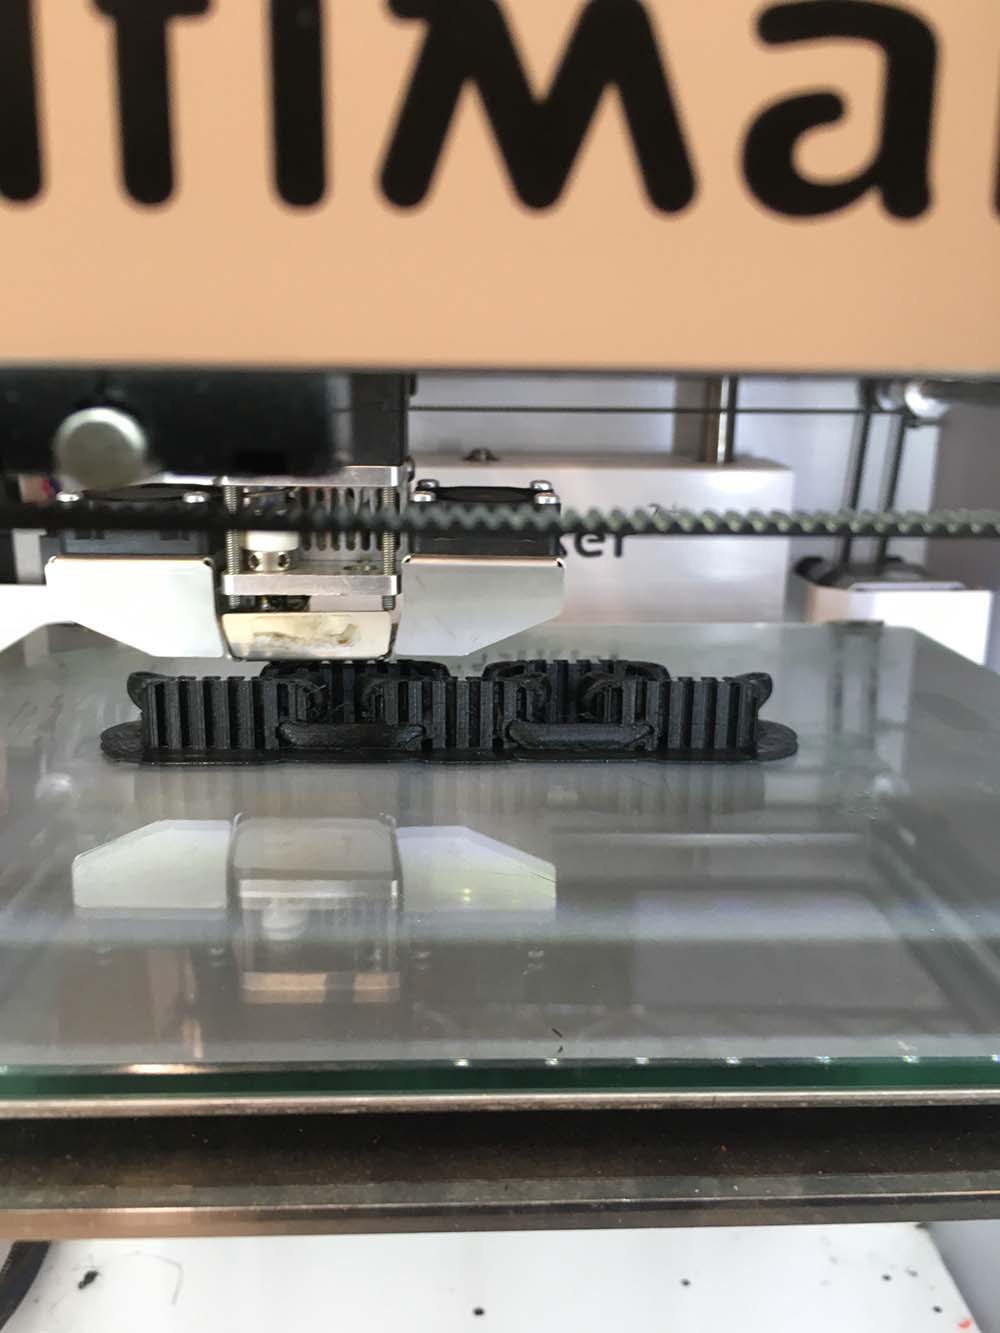
Fig.10 Print in progress at an "X" orientation with support
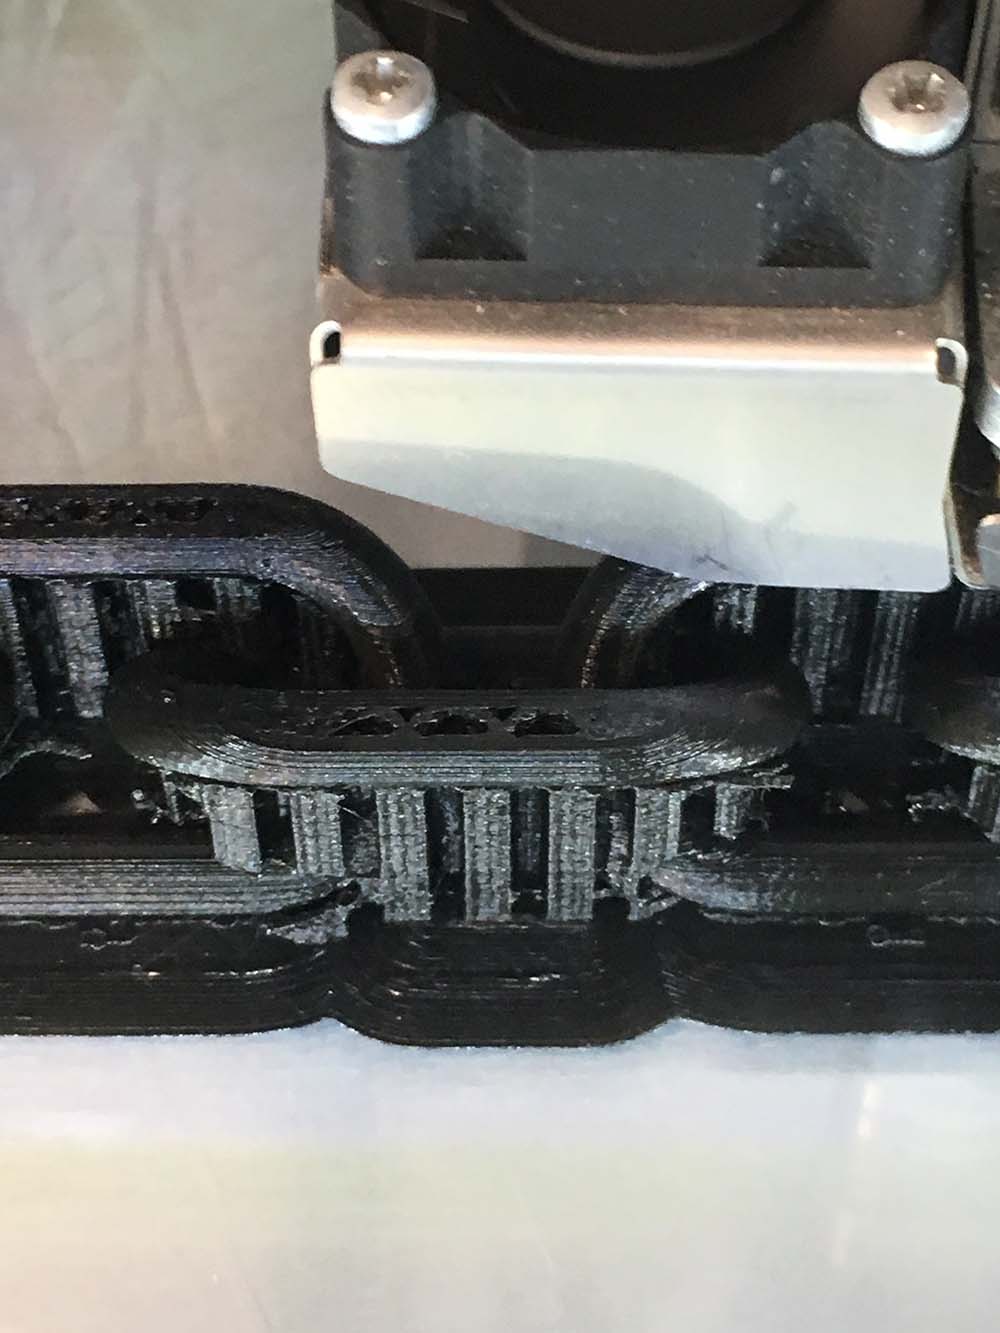
Fig.11 Close up of above
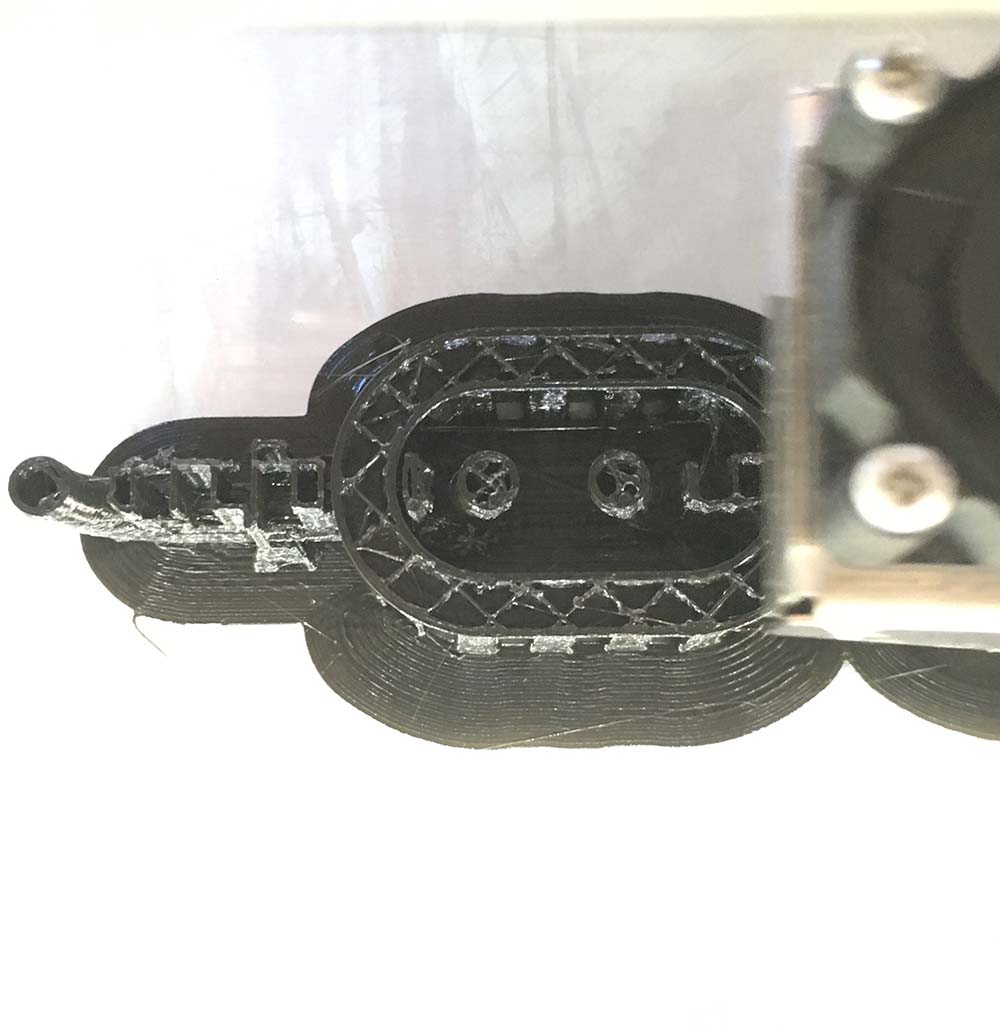
Fig.12 Third print at perpendicular orientation with updated support settings
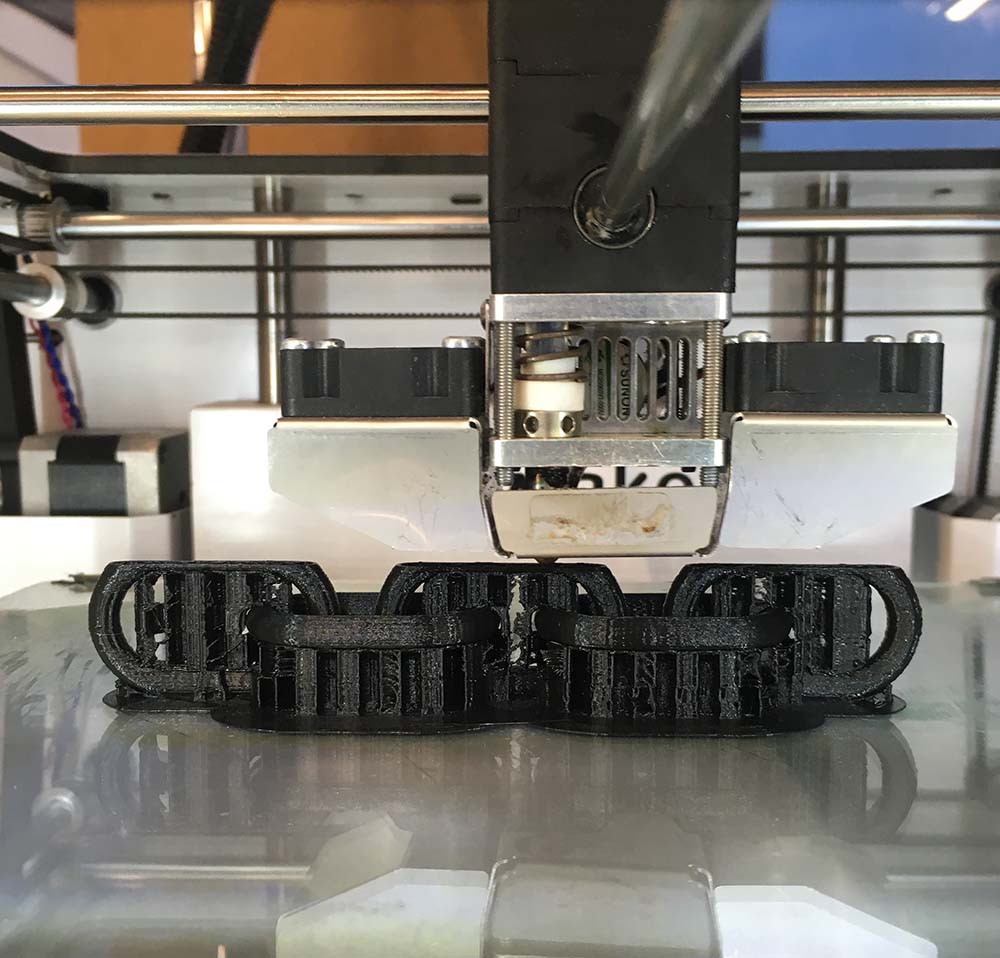
Fig.13 Third print at perpendicular orientation with updated support settings
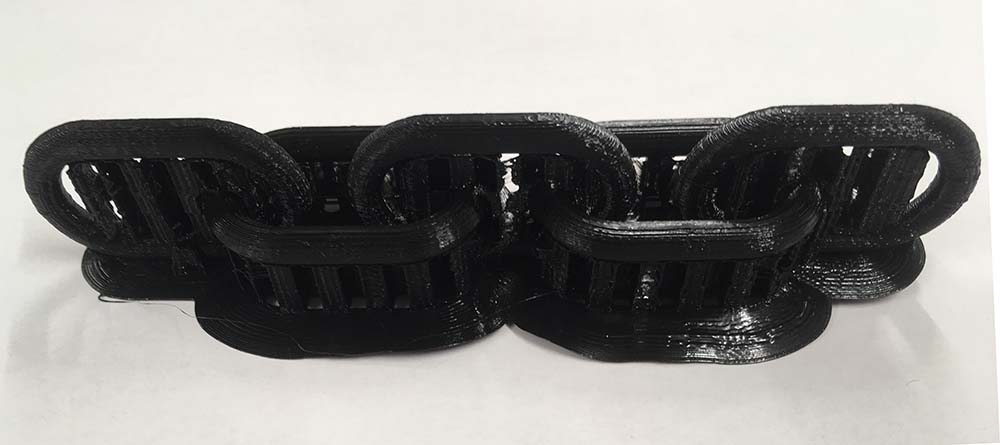
Fig.14 Third print at perpendicular orientation with updated support settings
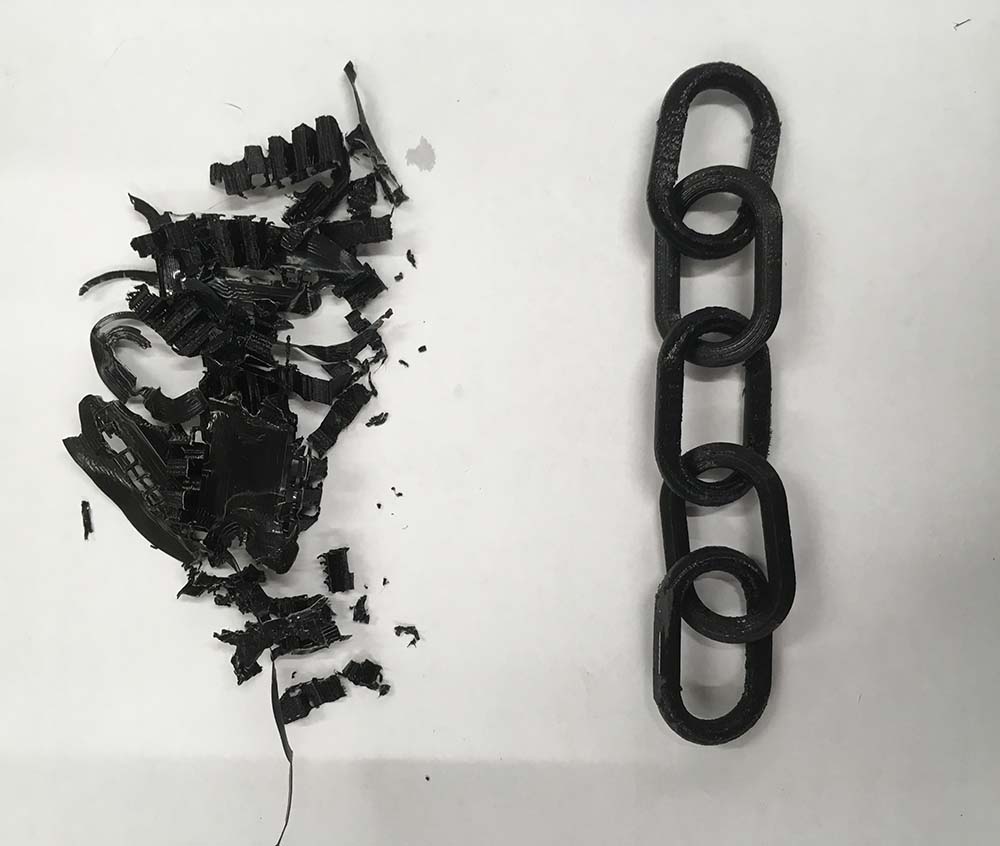
Fig.15 Removing support from chain
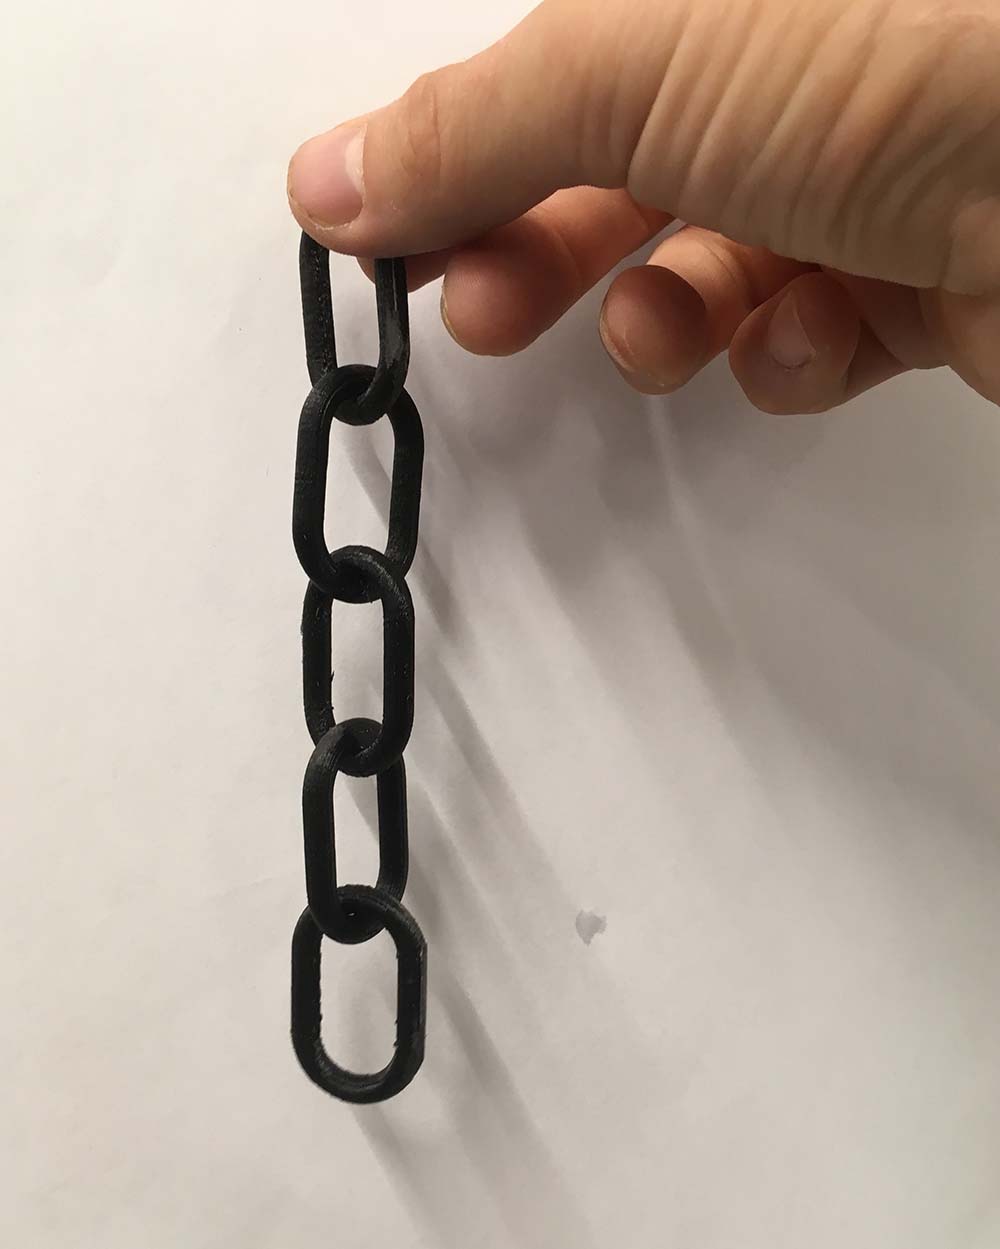
Fig.16 Completed print with supoprt removed and light sanding
3D Scanning
& Printing -
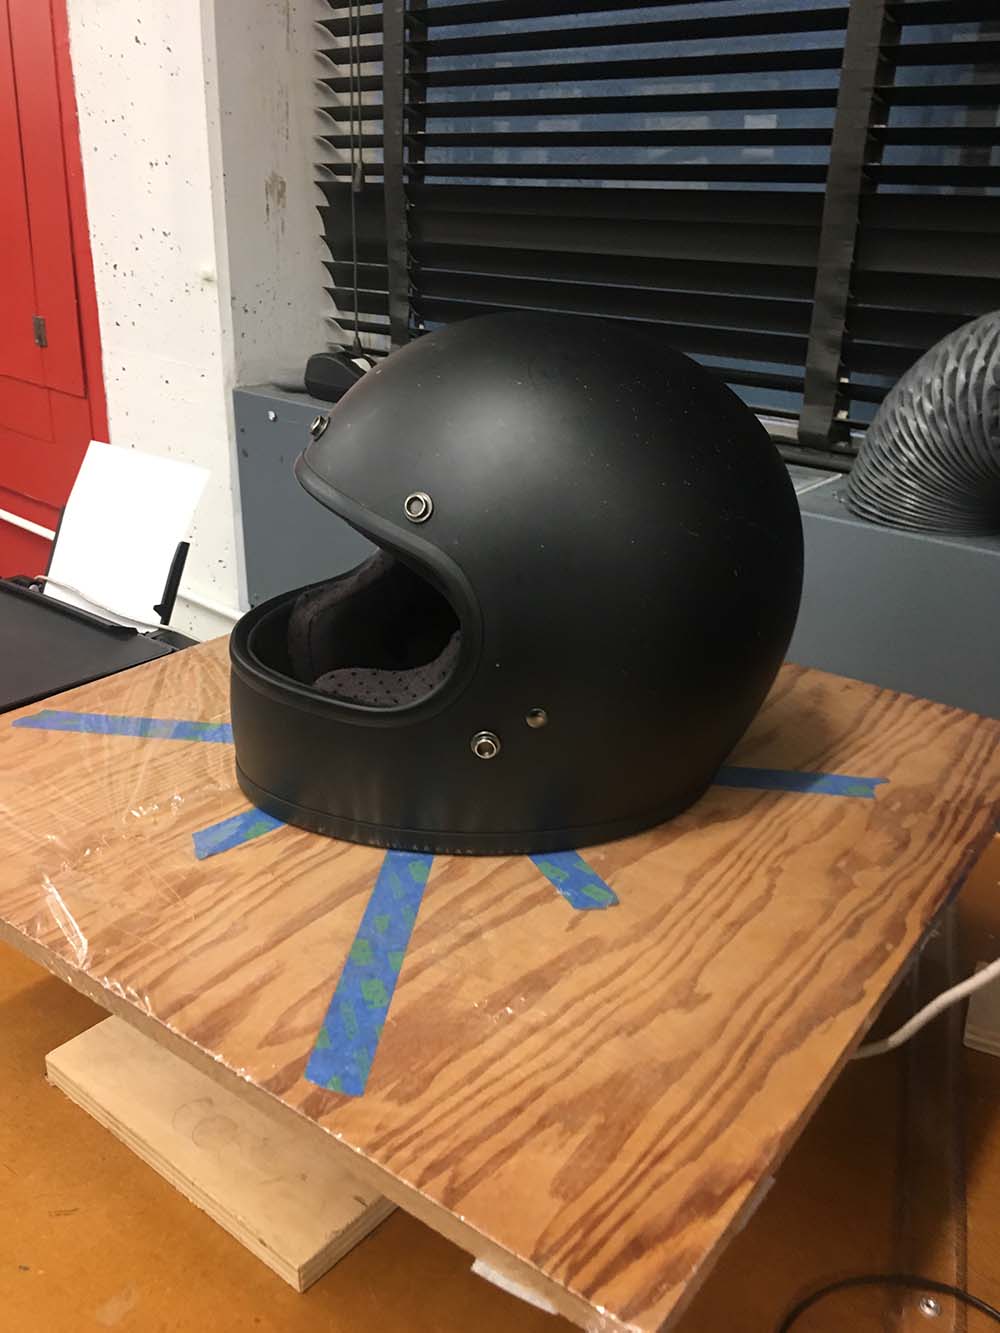
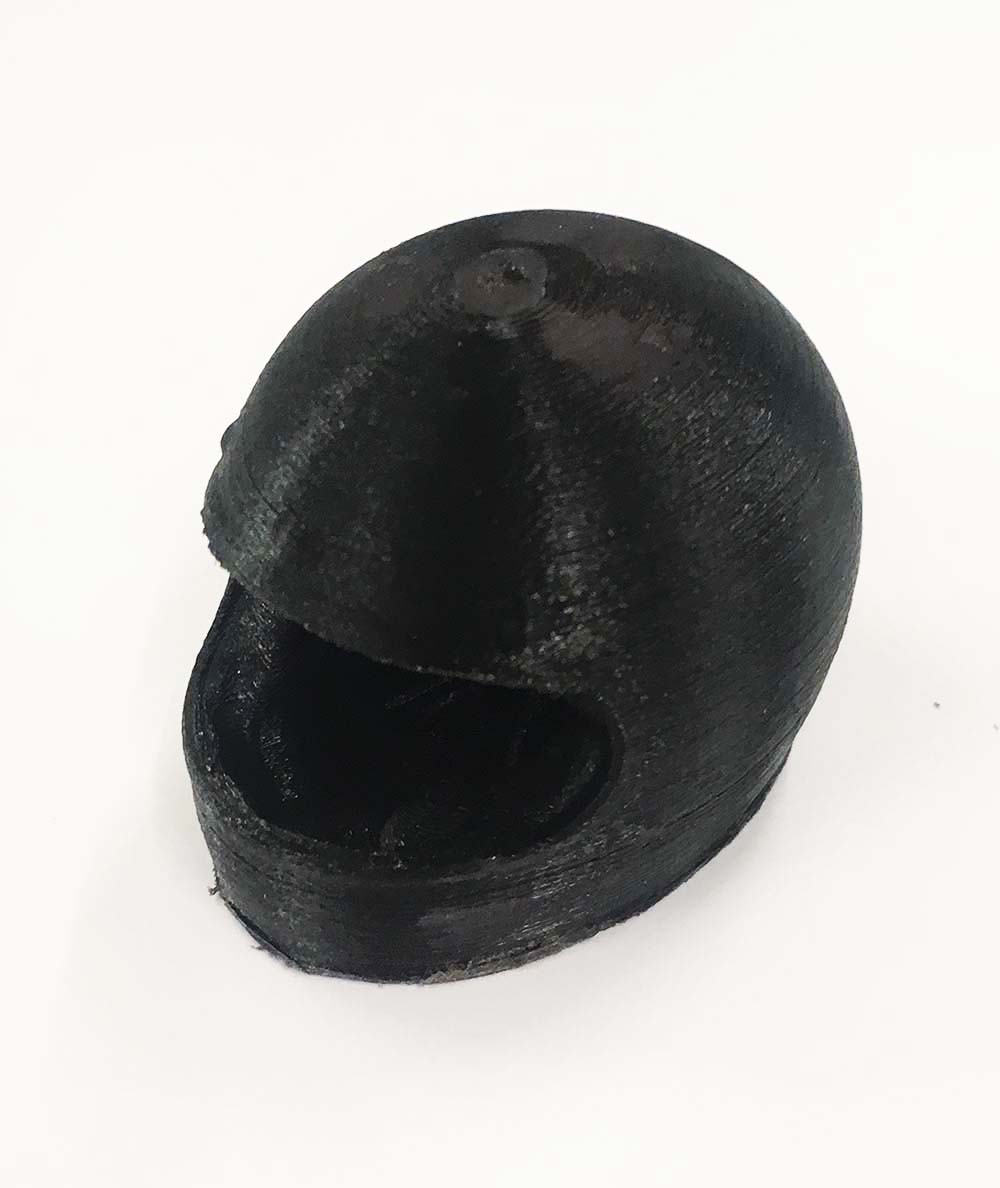
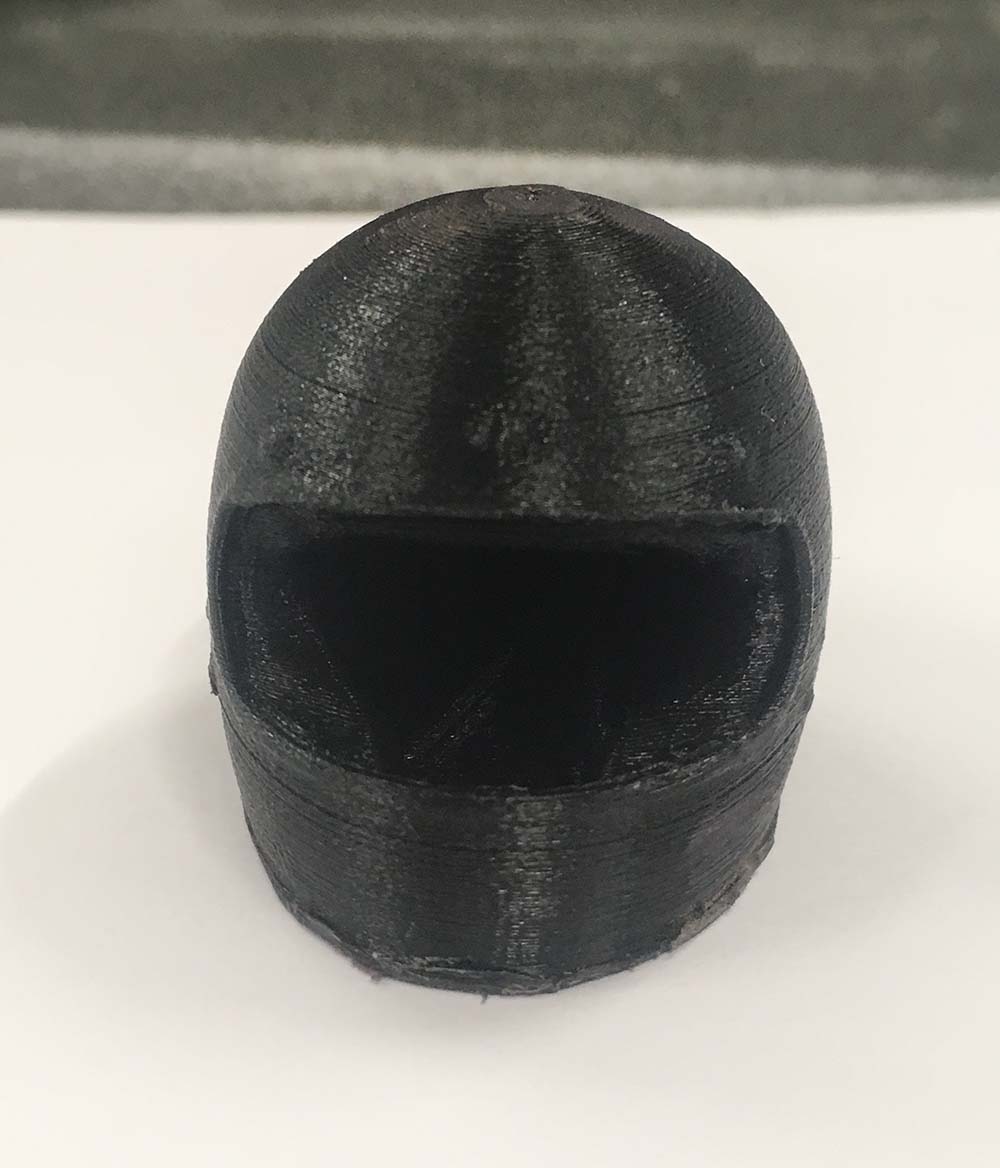
Motorcycle helmet
09.26.18
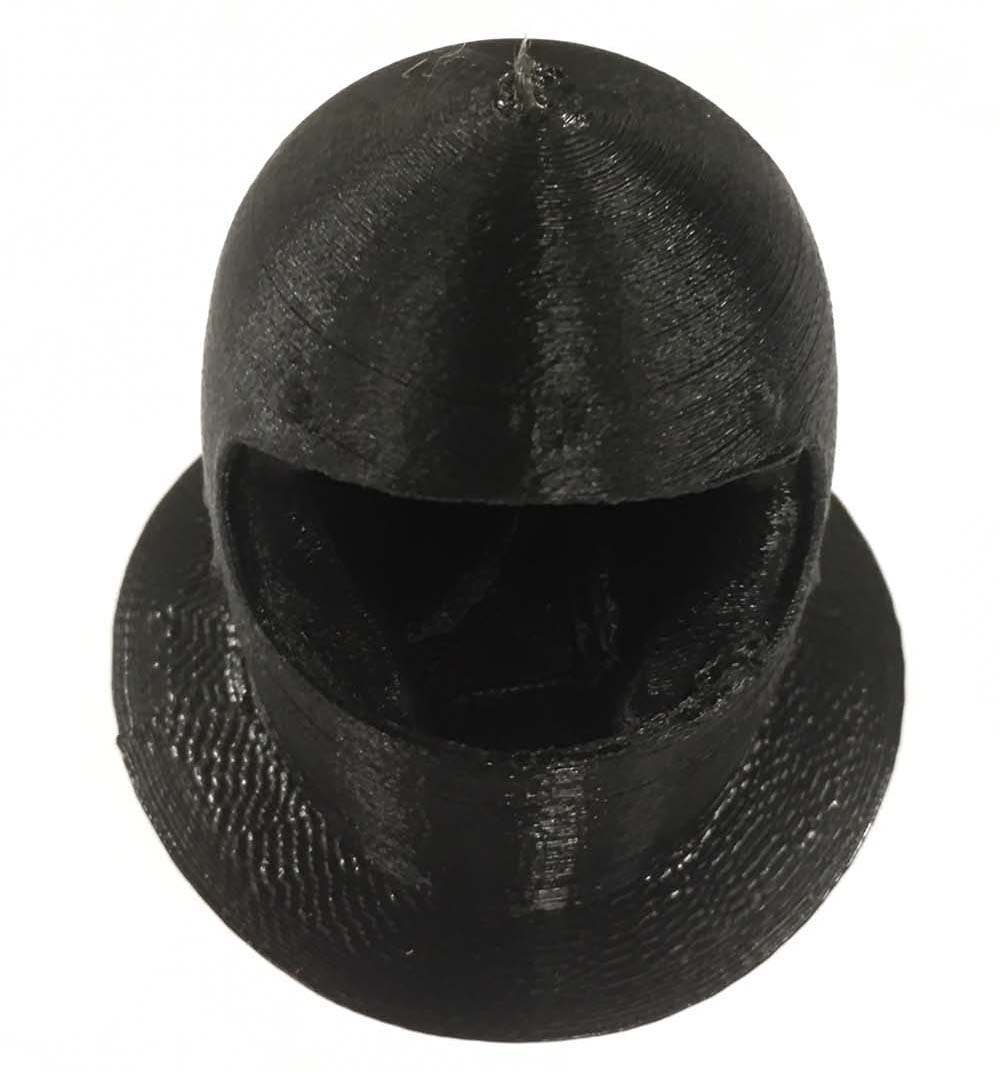
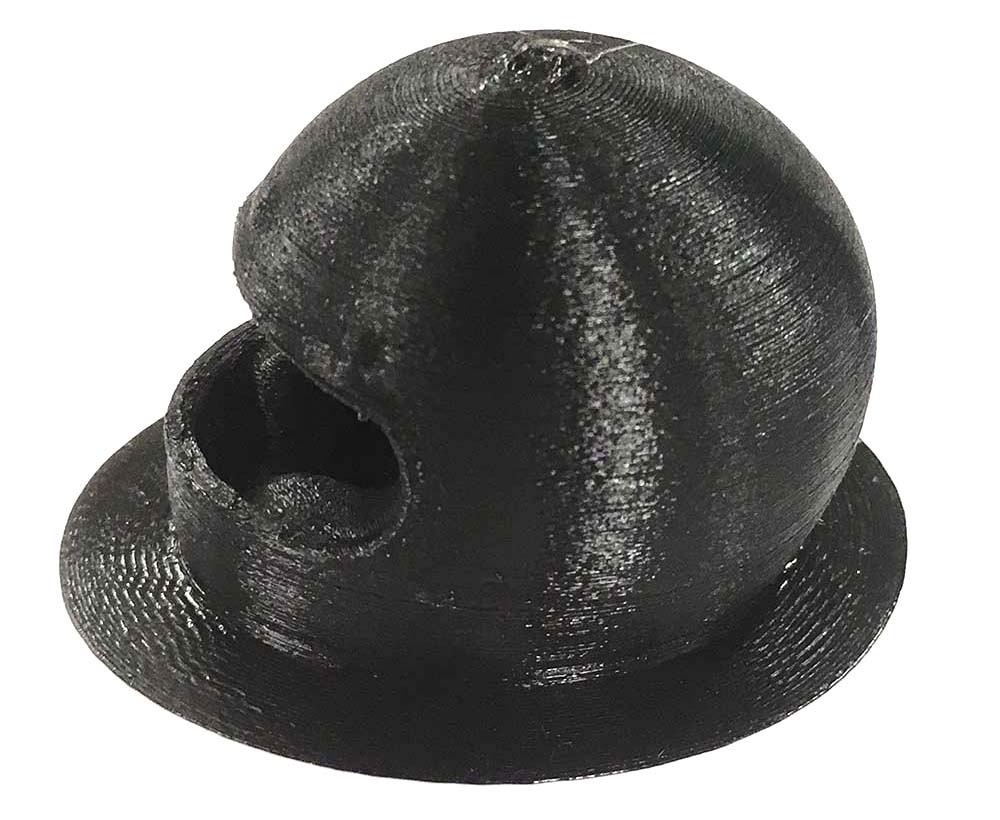
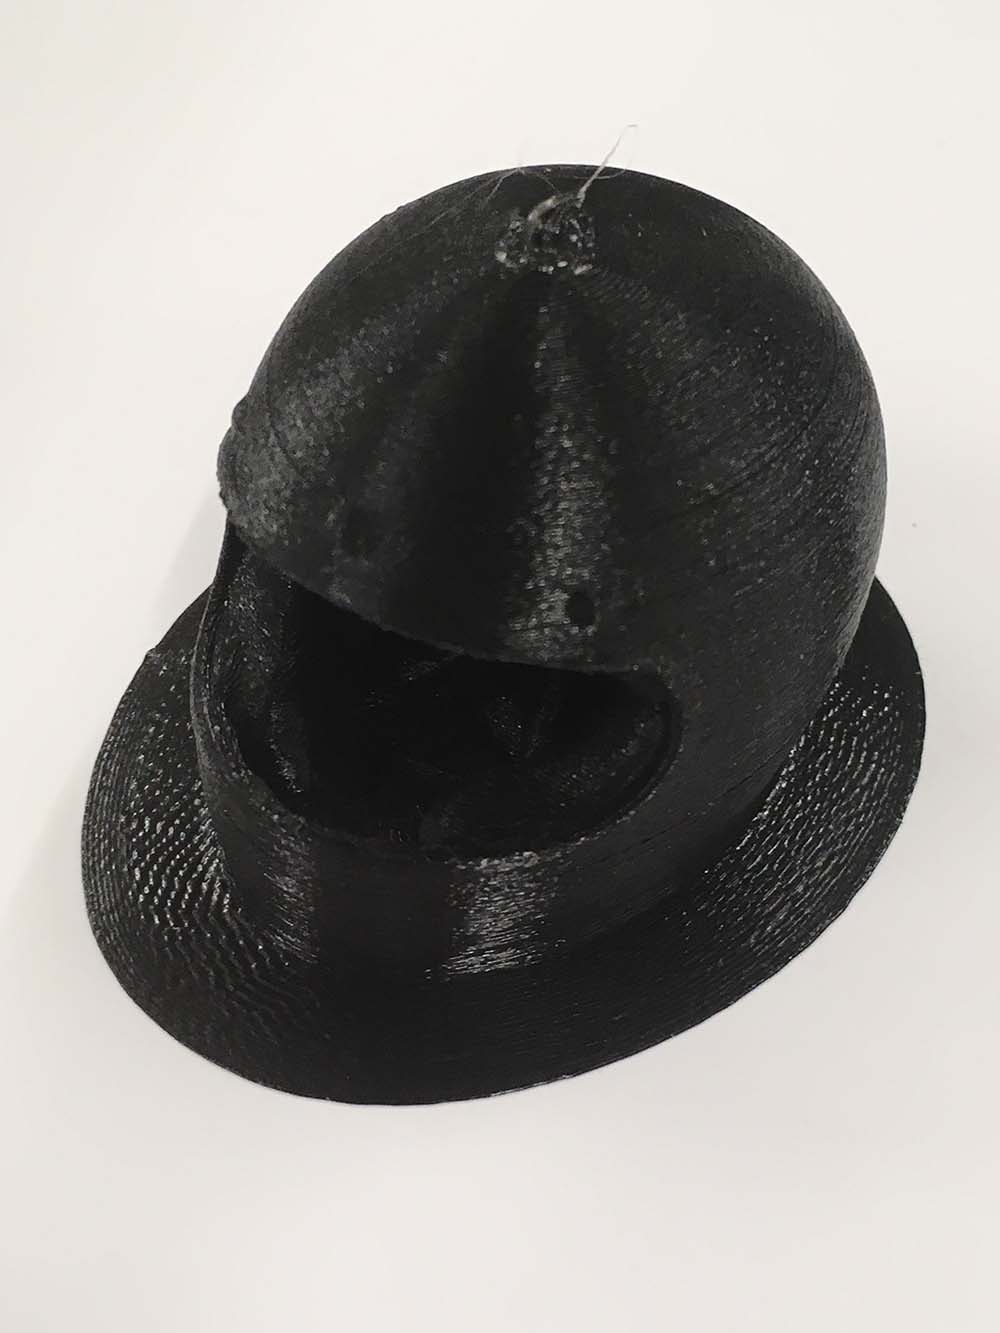
For the 3D scanning portion of the assigment, I thought it would be a good idea to scan my motorcycle helmet since it may inform my final project. I knew that I wouldn't have time to print a life-size helment (it would probably take a week and wouldn't even fit inside the Multimake 2+ anyway), but I could print a smaller vesion and having the 3D scan may come in handy at some point down the road. Now that I think of it, I should add it to project 00 as an additional rendering for the ideation process.
The scan came out relatively well, although I ran into one problem... I couldn't save my file, for some reason the software kept throwing an error when I tried to save. After a lot of frustration, I realized that it was a simple permissions issue that was occuring because I was not using an administrator account on the Windows computer. Once I switched to the admin account everything saved without a hitch.
The print had to be quite small in order to keep the duration under 4 hours, my target since the lab requires longer prints to be completed overnight so as to allow everyone the opportunity to use the machines. Perhaps I could have reduced the print duration by ensuring that my scan was hollow. During the scanning process, I made some operations to ensure that there were gaps in the scan, but in retrospect I believe these solidified the object. I used no supports for this print.