Assignment 7
Molding and Casting
The assignment this week is to mold or cast an object. I decided to make a stamp for a wax seal so that I can be fancy when I send my letters. I decided that I would make a two part mold, where one half was for a shaft (that could later be threaded to fit in a handle) and the other for the detailed stamp face. I decided to mold Oomoo (Smooth-On brand) in wax, then use the resulting mold to cast the final metal piece.
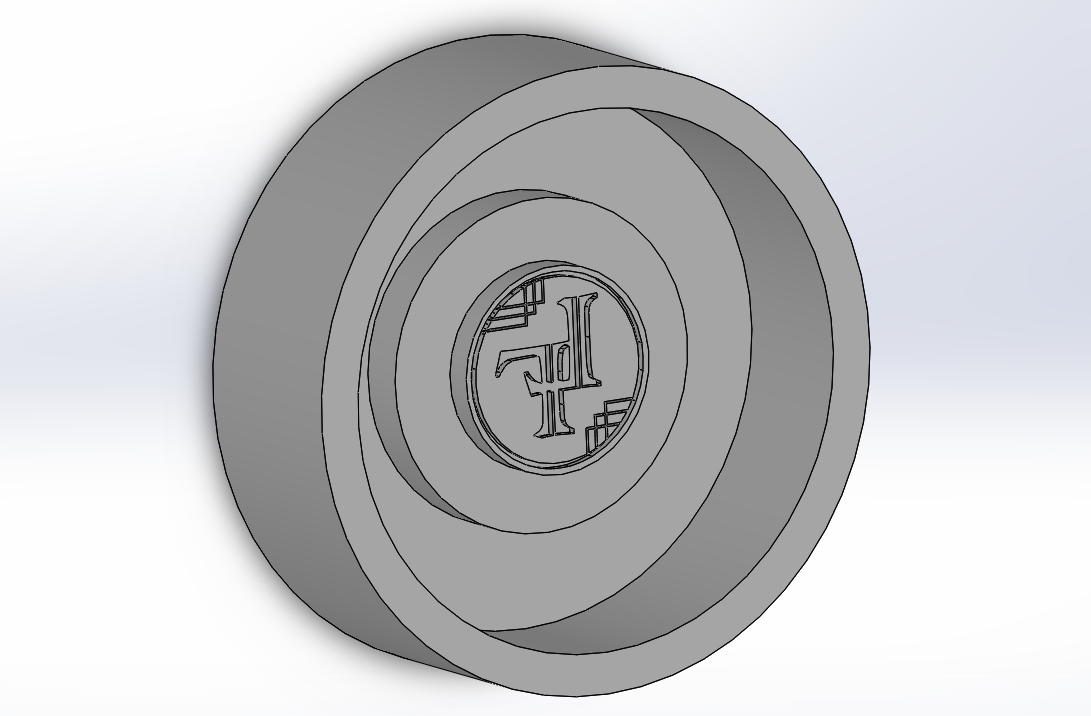
I made a design in powerpoint (of all places), and did some slight altering in classic Microsoft Paint.

I then brought this .png file to InkScape (free vector image editing software) where I vectorized it, exported it as a .dxf, then brought it onto my model in SolidWorks. Thinking about the inversions in this process was tricky (which, as you'll see, I messed up the first time), as I essentially had to make a mold for a mold for a mold. Once I THOUGHT I had this figured out, I went ahed and designed a two-part mold that fit concentrically together to hold itself in place. After importing it into the VCarve software to make toolpaths, it was simply a matter of waiting for the machine to cut the wax blocks for the initial mold.
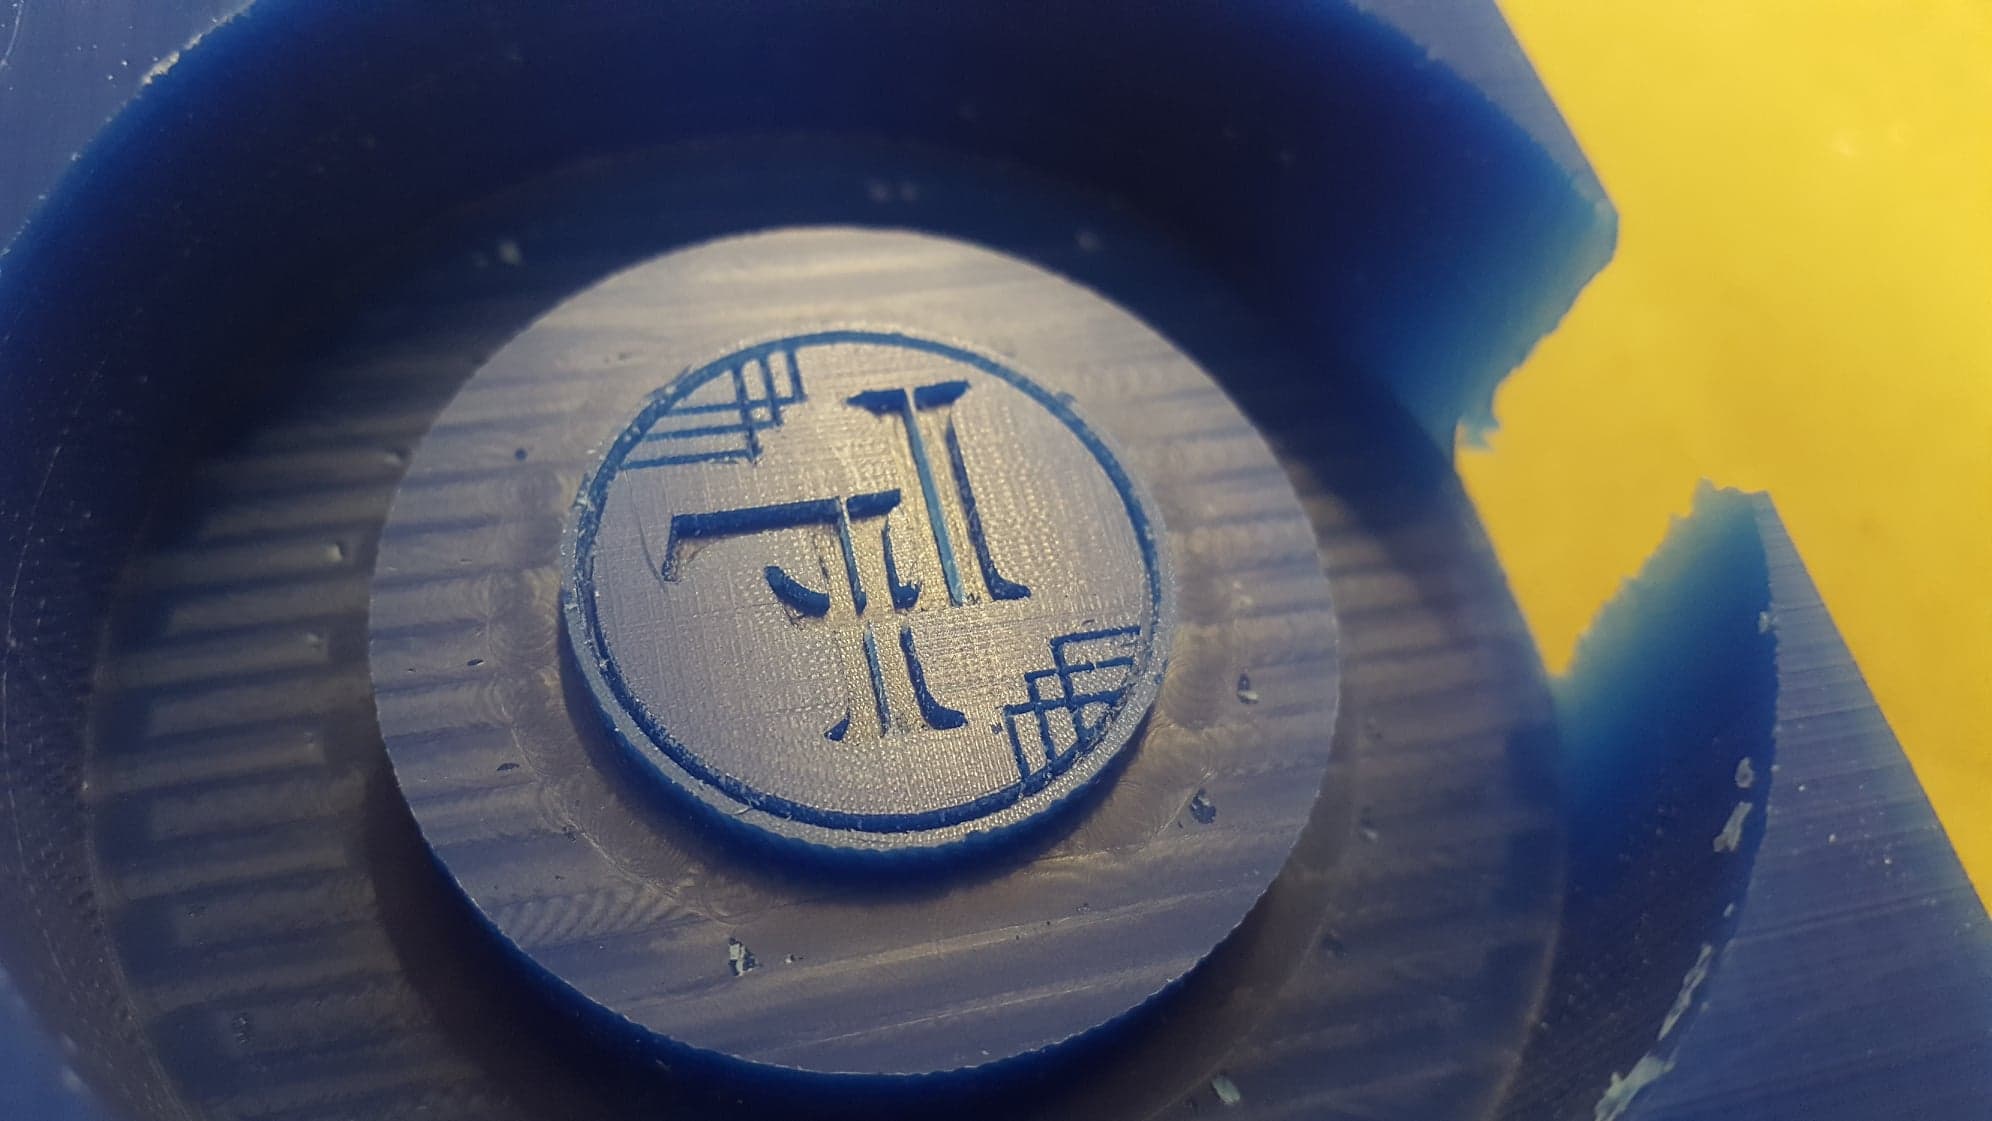
As you can see above, the MakerBot mill didn't like my small features, and refused to cut out the lines within the letters. I continued on with the project and made the Oomoo molds, hoping that this missing feature could be accepted as an artistic choice in the end.
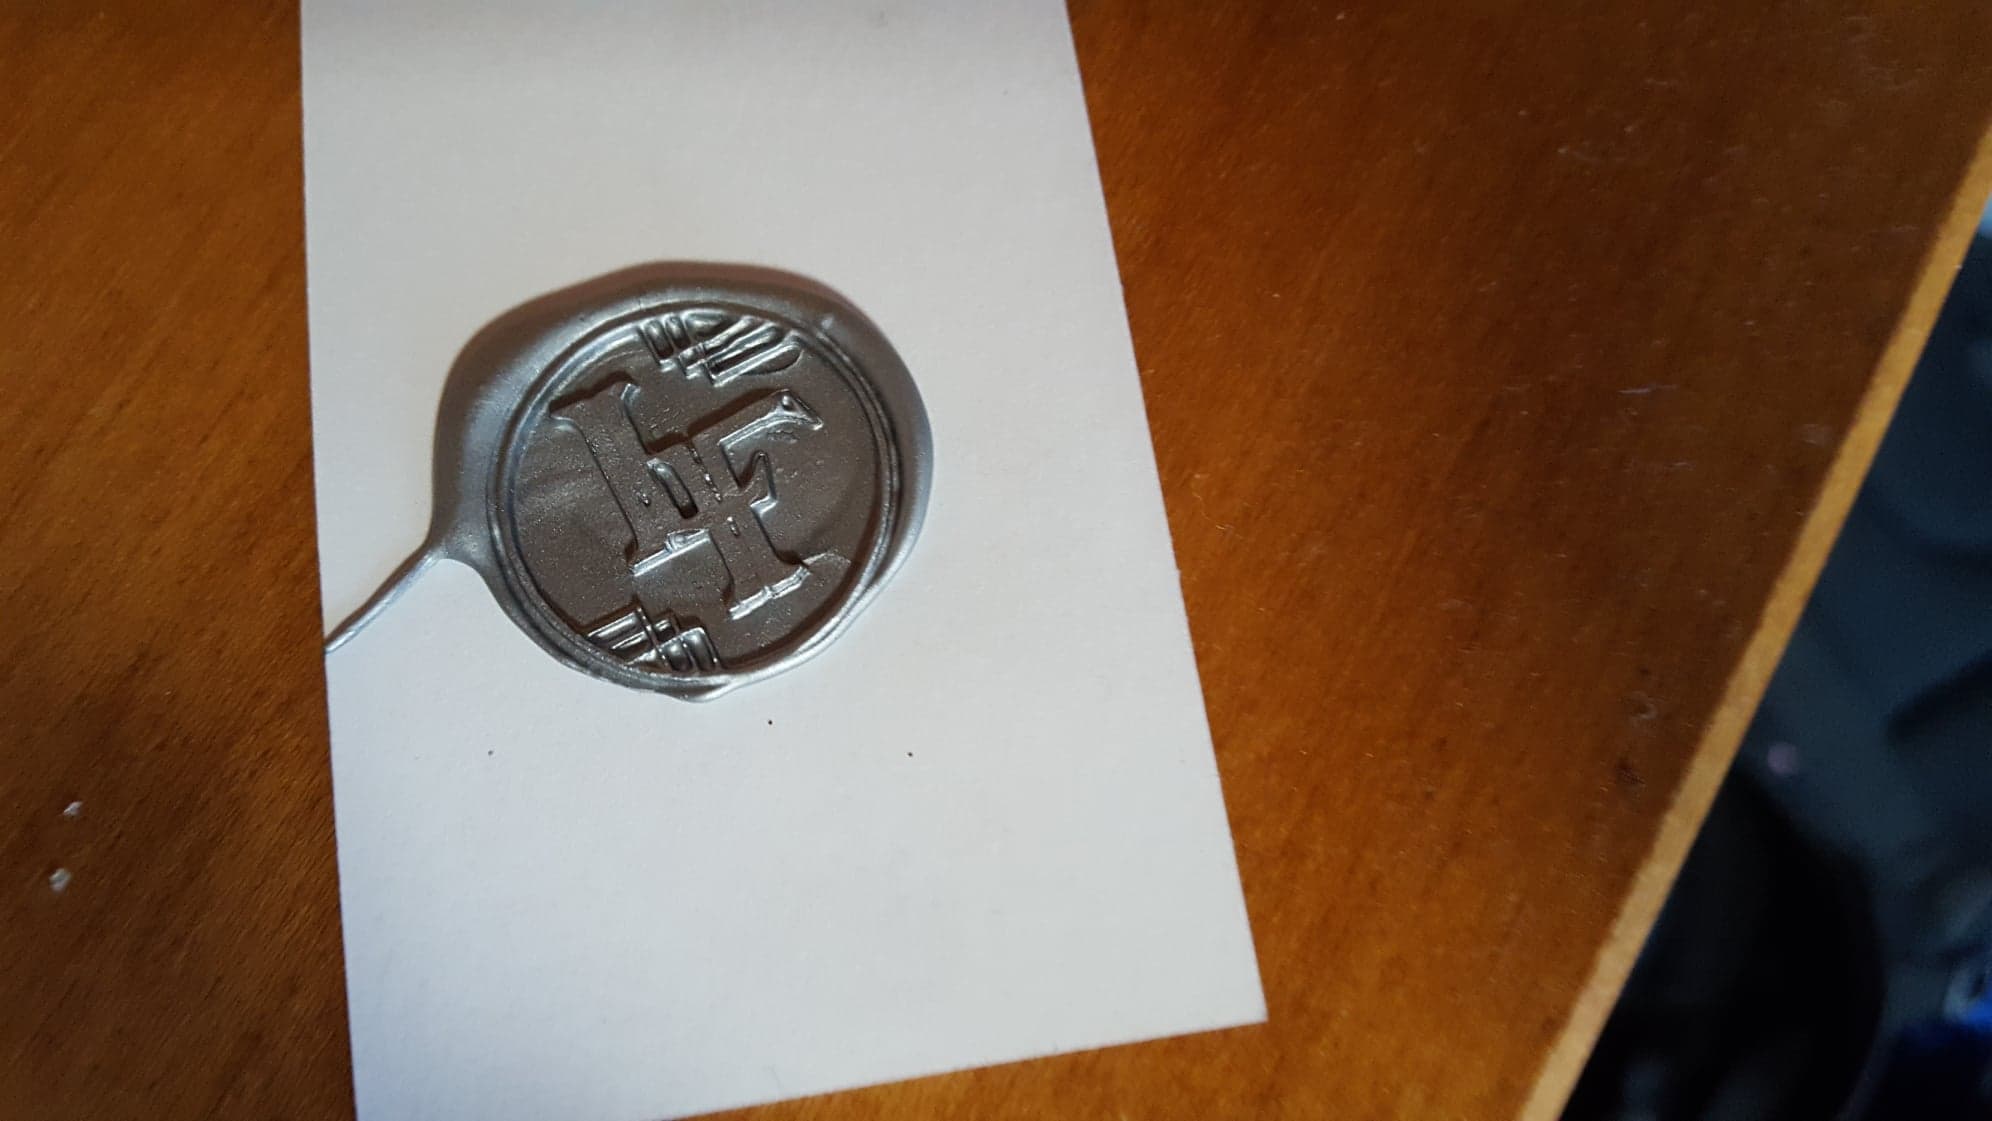
After the Oomoo molds came out nice, I then poured the low-melting point Tin-Bismuth mixture into them for the final product (making sure to add talc (baby powder) for a good surface on the final product.
\
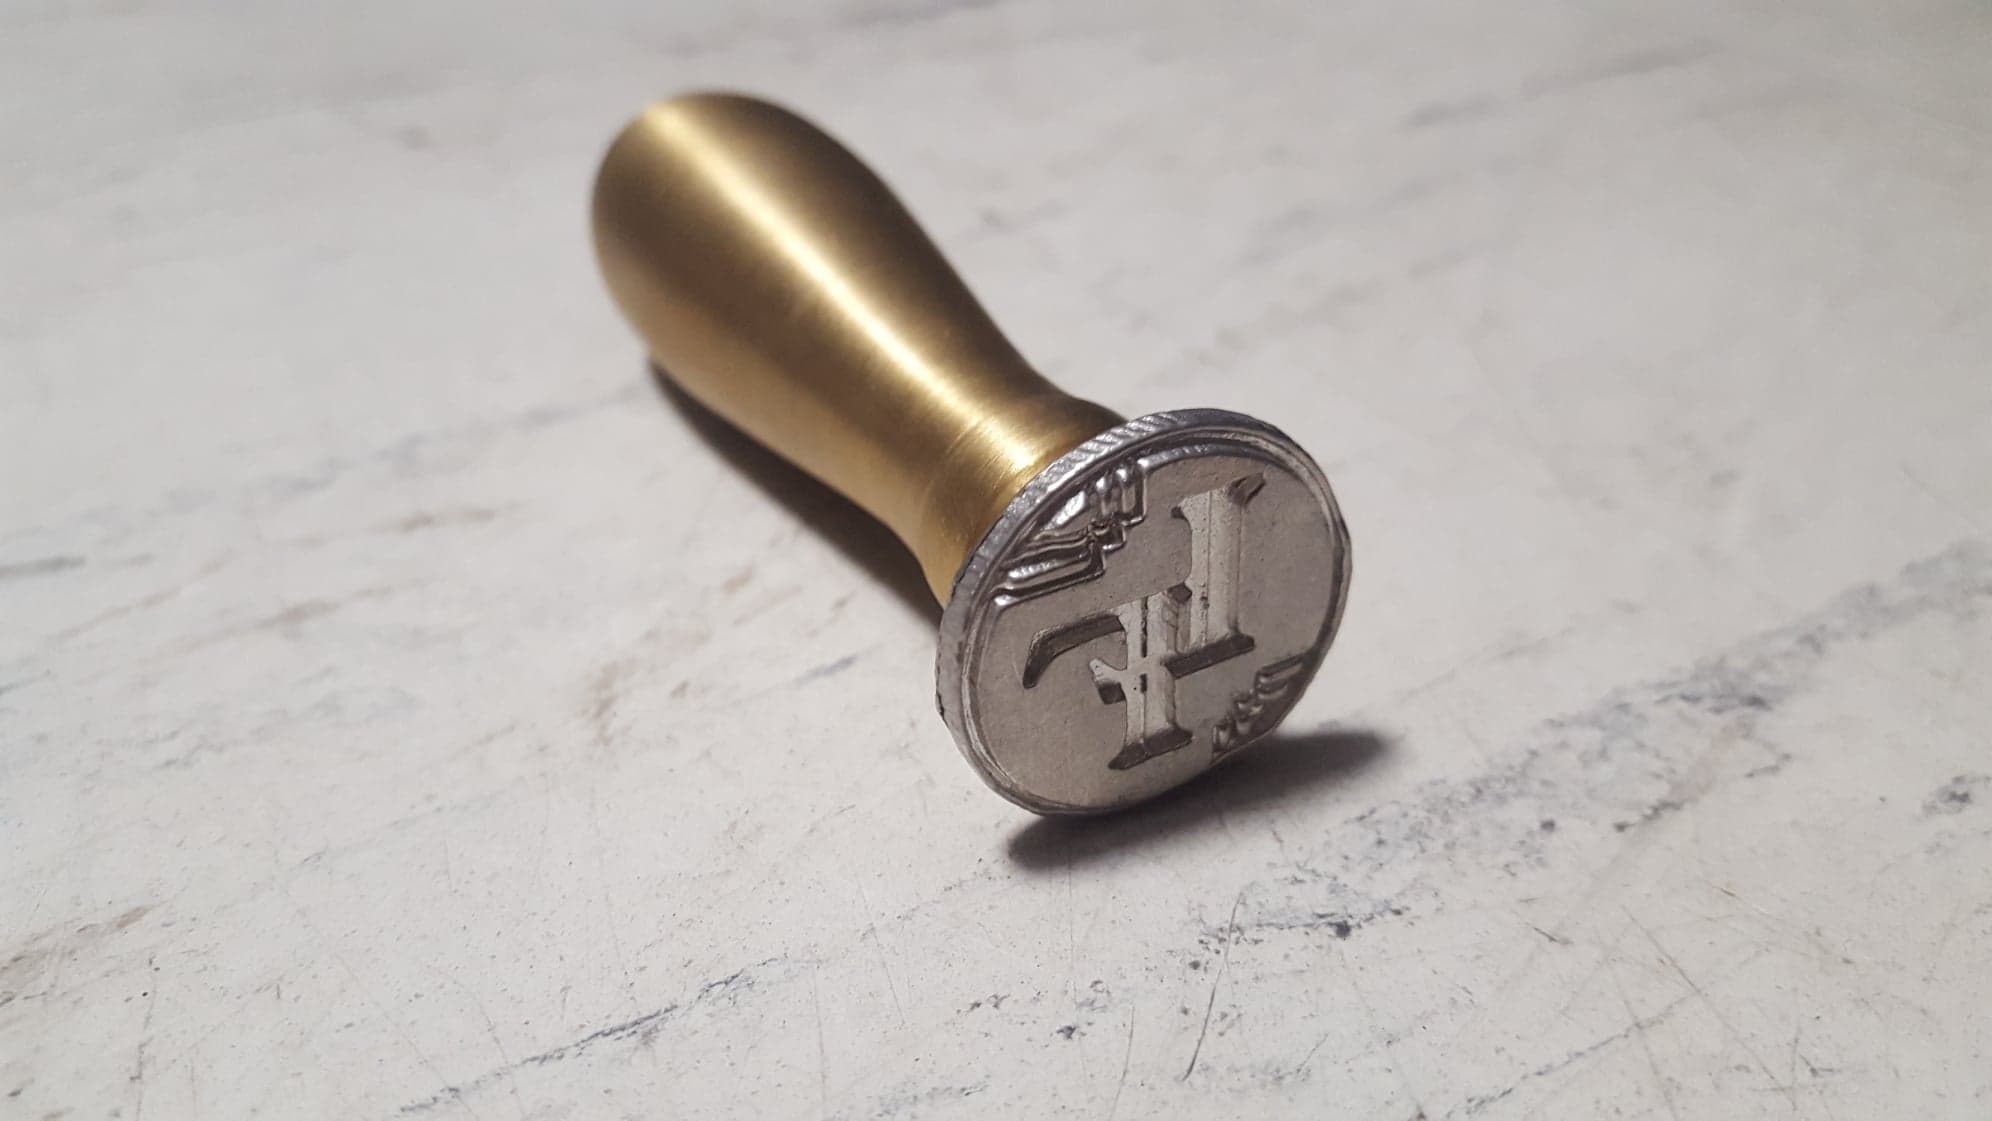
While the stamper looked nice, it would very clearly make a mirror image of what I actually wanted in the final stamp--I had been thinking of the metal stamper as my final desired product, where in reality it was the wax stamp it would make. In other words, I was missing one inversion when I designed this. Oh, well. If at first you don't succeed, try try again...
Update
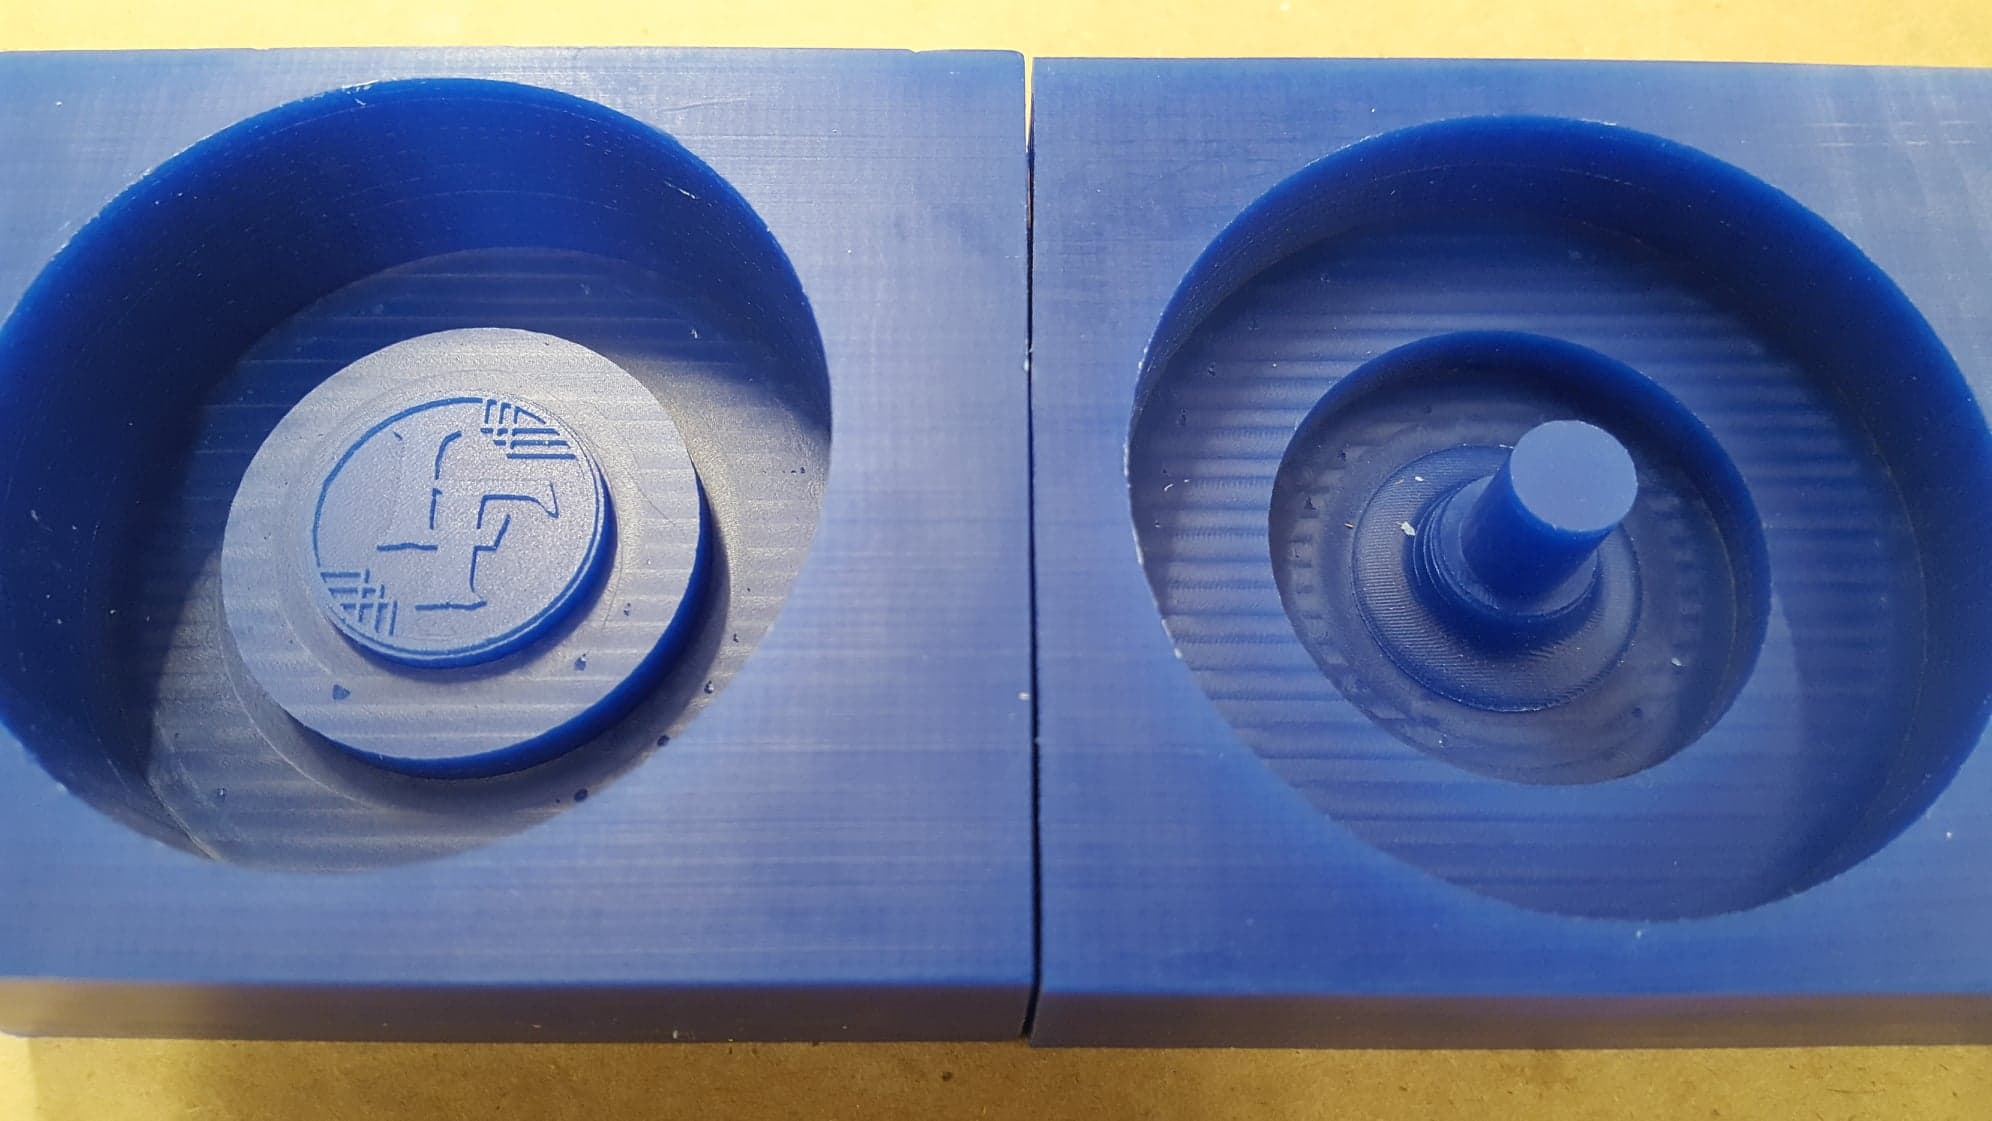
I clearly wasn't super satisfied at how this week had turned out, so I came back to set things right! I re-made the wax molds in Solidworks with the correct inversion, and made the extrusions a little deeper (0.005).
This time, I decided to trick the Makerbot software. I knew from measuring my features in SolidWorks that non of my features were smaller than the smallest drill bit I would use (1/64"), yet VCarve Pro refused to make those tool paths. So, I made the virtual tool about half the size within the program. Because the step size and other aspects of the tool path decreased with my change of diameter, there was no worries of the tool breaking. This allowed me to cheat and get the toolpaths I wanted for those fine features.
The paths were so fine, I had to weed out the little wax chips from the fine features. One of the features ended up being so fine, it broke as I pulled out the Oomoo mold, but the detail was in the mold nonetheless.

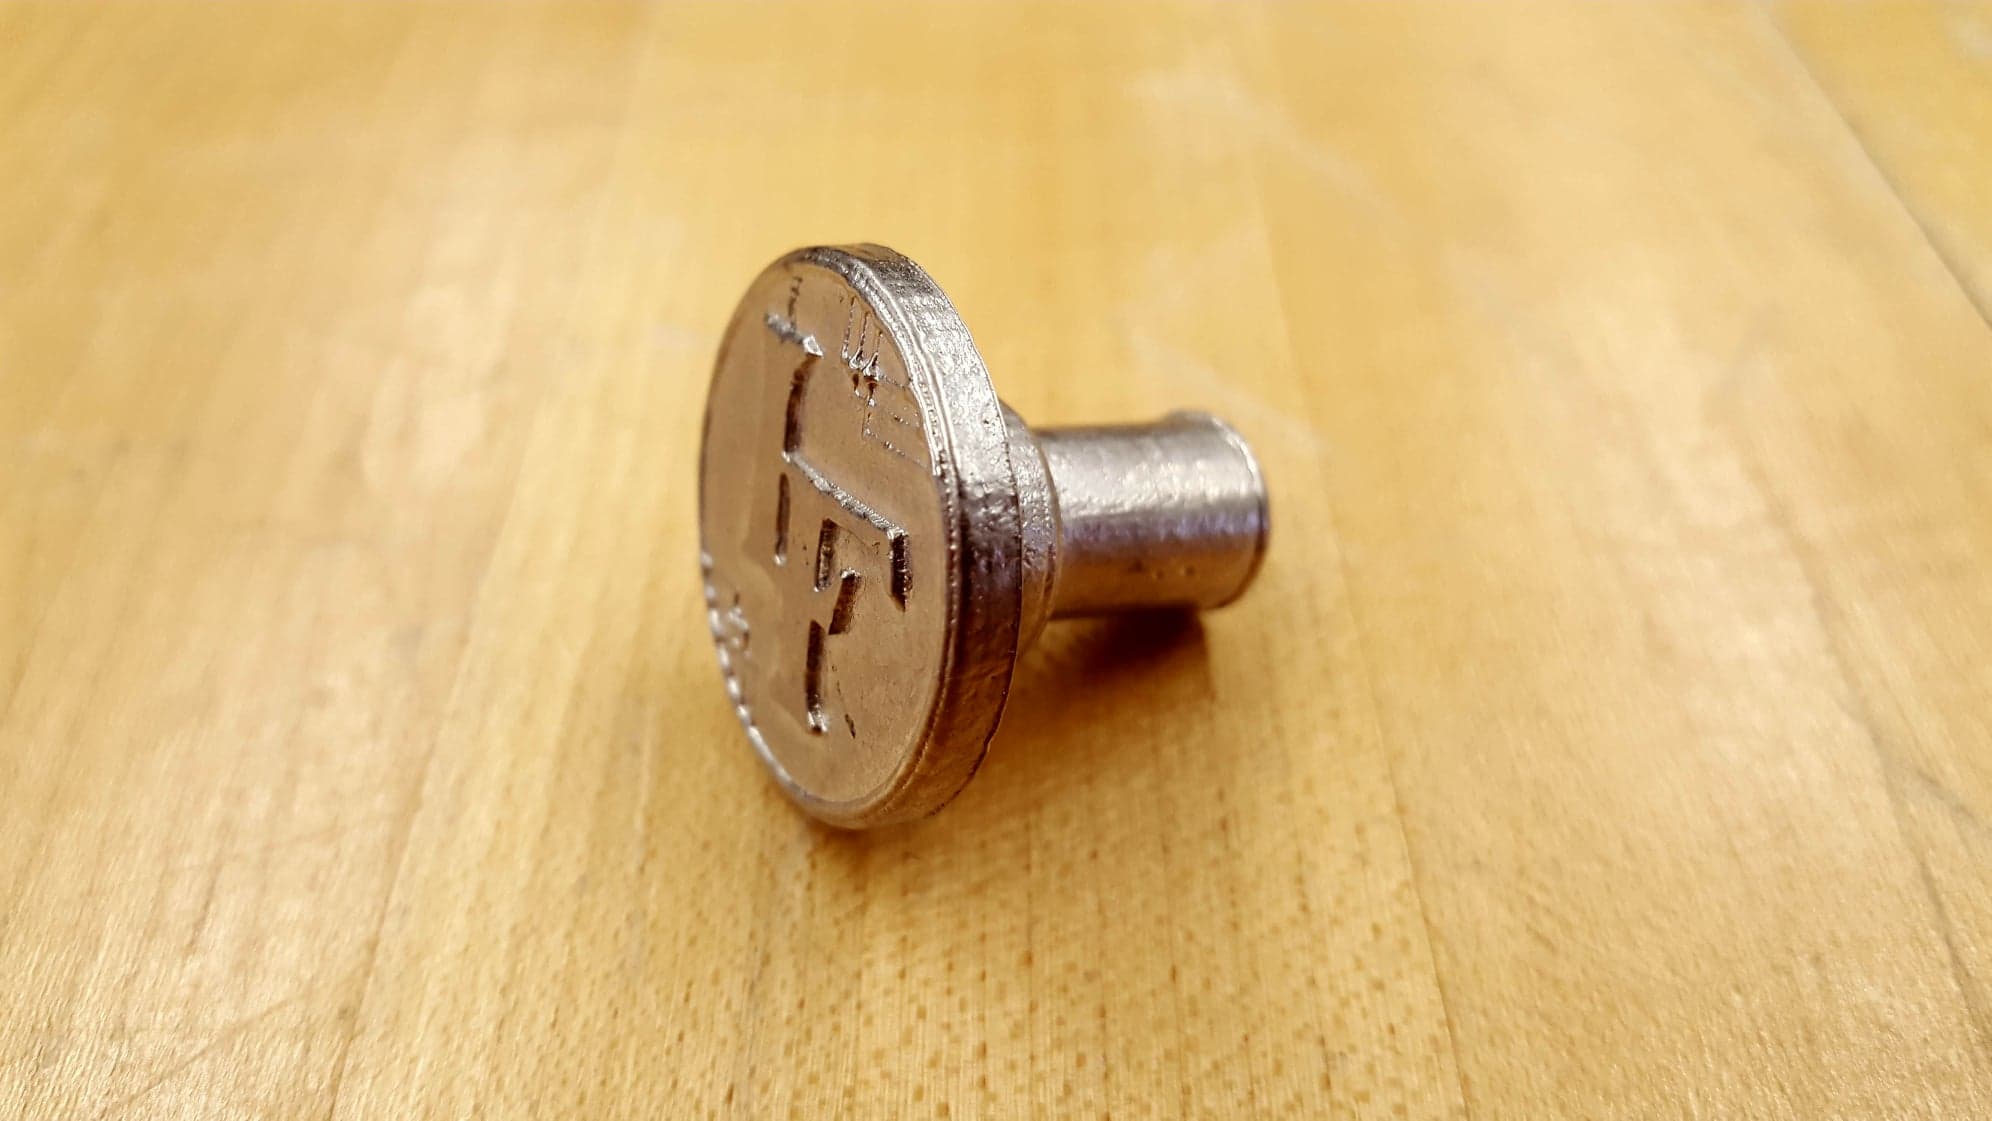
From here, I proceded as I did before, and ended up with this beautiful piece which I threaded in preparation for a handle I would soon make:

After threading the shank with a die tool, I made a nice brass handle on a metal lathe and tapped it to match. The resulting wax stamp in the end was much more satisfying this time. :)