vinyl cutting
I started out a bit overly ambitious with the vinyl cutter --> I visited a friend of mine over the weekend and wanted to make her a vinyl sticker of her dog as a thank you gift for hosting me! this is her pup, Douglas :)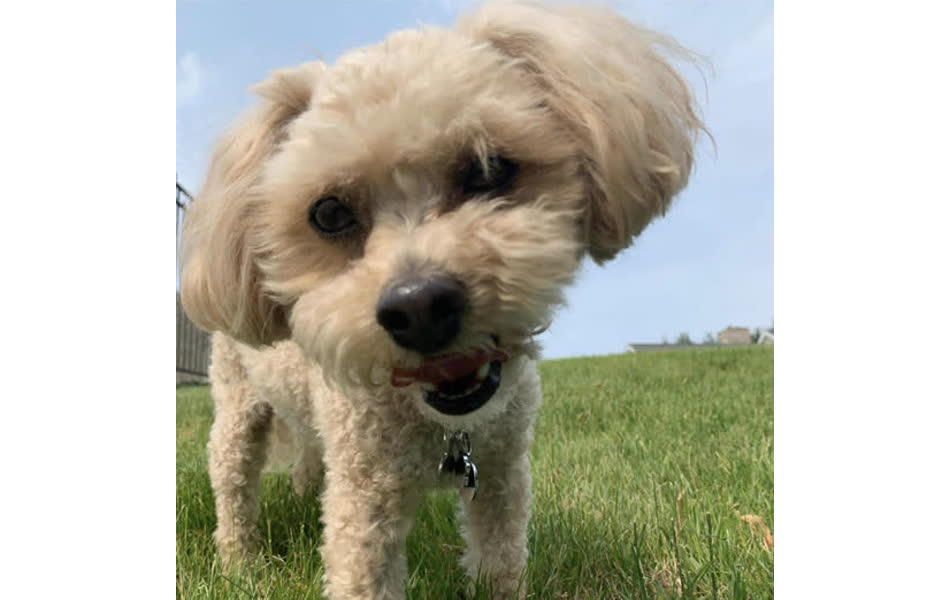
In order to posterize the image of douglas, I needed to download GIMP and Inkscape - which ended up being an unexpectedly longer process than I anticipated.
software installation debugging
GIMP was a seamless installation, but I ran into a problem with Inkscape on macOS Mojave 10.14. For the most part, Inkscape devs don't appear to be mac users, so the latest version of the software is not yet pacakged for macOS. I found a `brew cask` install for the penultimate release. Since Inkscape is not native to mac, you also need to download Xquartz, which is Apple's version of the X server for Windows. When first opening the app there was a popup window that asked Inkscape to have persmission to access and edit my Finder app. I selected no, but then the program imediately closed.Tried to open the app again, it looks like it's about to start loading, but then automatically quits. I thought it might be the `brew cask` install so I uninstalled that and tried to redownload an older version with a .dmg from the official Inkscape website. The installation was successful, but when trying to open the app, it still automatically quits.
I searched online for a while but couldn't find anything specific about Inkscape needing access to Finder and all macOS installation issues just focus on the XQuartz dependency. Finally, I gave up and decided to just do all if the Inkscape work on my CBA machine because it runs linux and can reliably load Inkscape.
... still unsolved so if anyone has a solution or ran into similar issues with Inkscape + OS X let me know . . .
Once I finally got Inkscape running, I started adjusting the contrast and brightness filters to get a clear outline of Douglas that could be passed to the posterize filter.
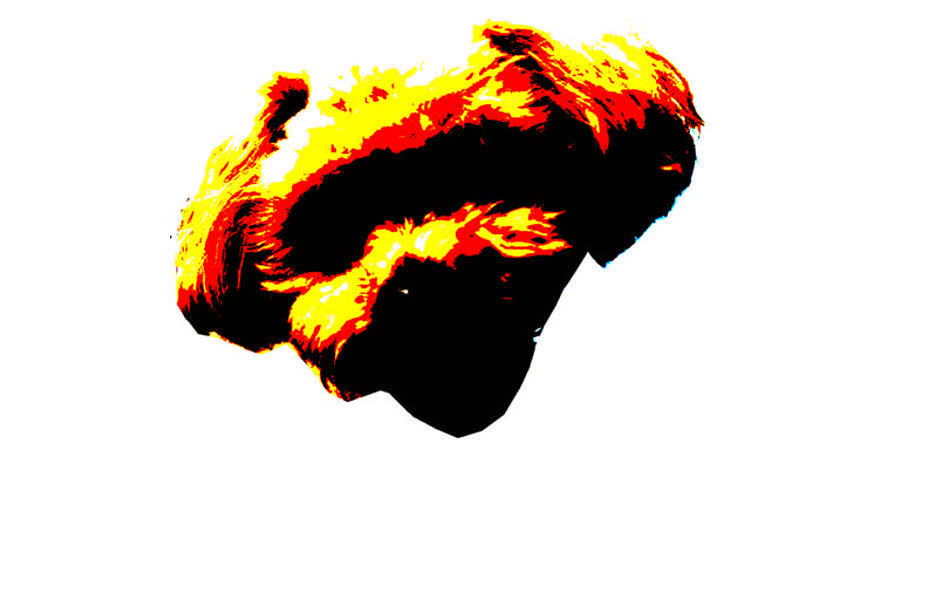
As you can see, the difference between the top of Doug's head and the backgorund was large enough to get a clear outline. I was running out of time given the Inkscape installation rabbit hole and my photoshop skills aren't strong enough to throw together a solution on the fly so I abandoned the Douglas vinyl for the time being .. . maybe I'll get back to it one day . . .
Mondrian's boradway boogie
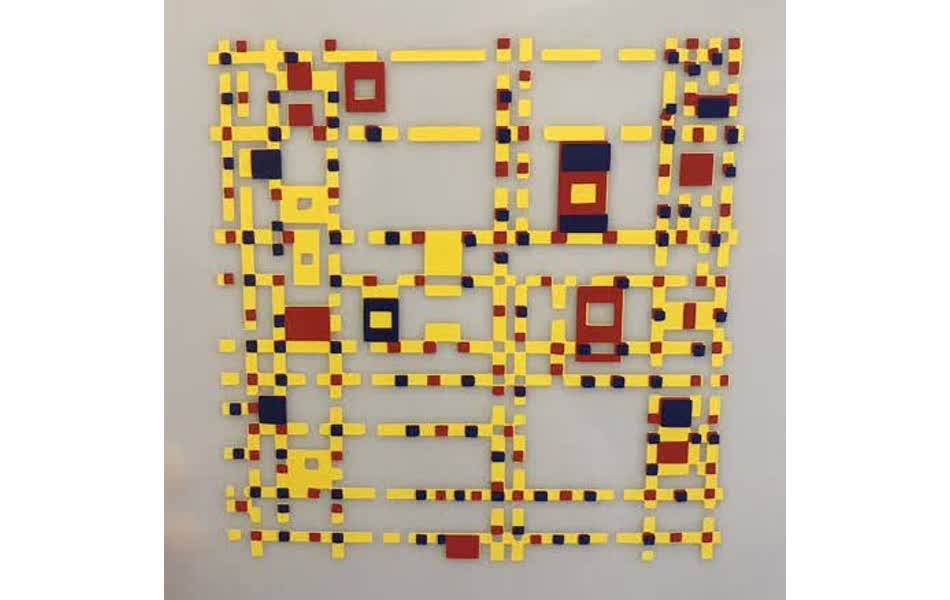
With a fresh start, I decided to print Piet Mondrian's Broadway Boogie Woogie painting. It would be easier to extract bitmap color layers from and would give me a change to play with mulitcolor vinyl patterns.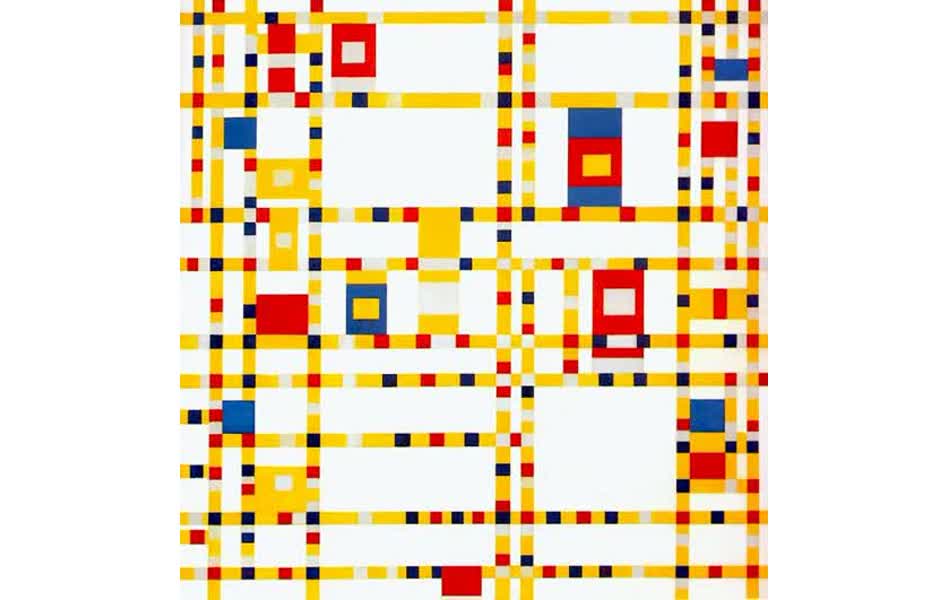
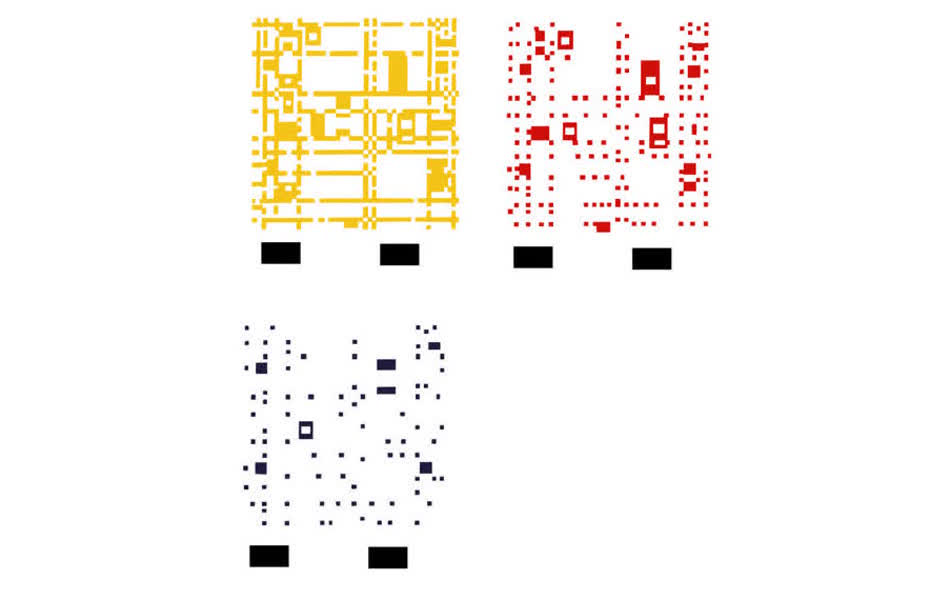
Following this Inkscape Tutorial rather closely, I imported the image into Inkscape, did a multicolor bitmap of it, and separated the color layers. I added space markers to the bottom of the image to keep track of where to stick each one.
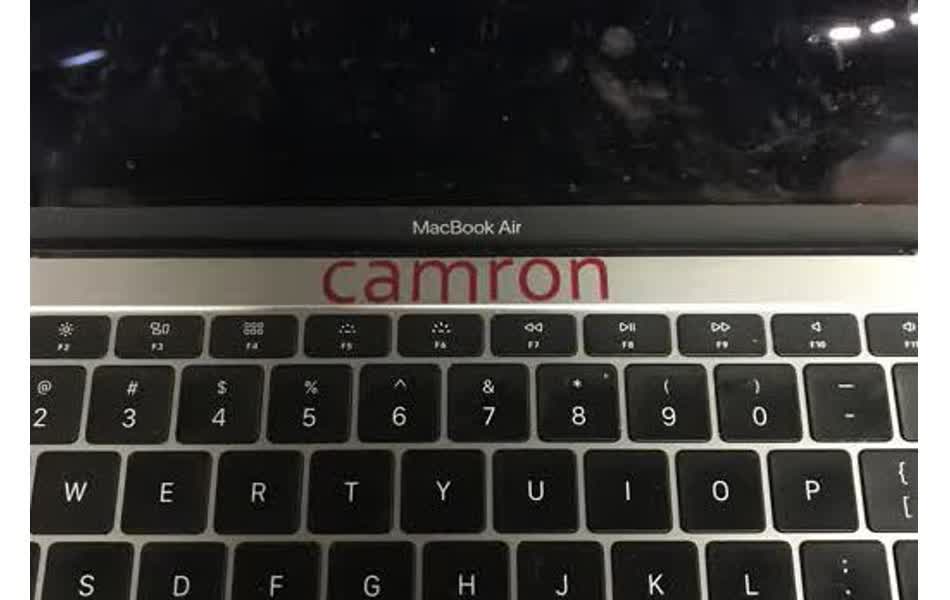
Once down in the shop, I decided to print a test run for the first time since my pattern came out rather complicated with tiny squares and mulitple layers. I printed my name and put it accross the top of my laptop.
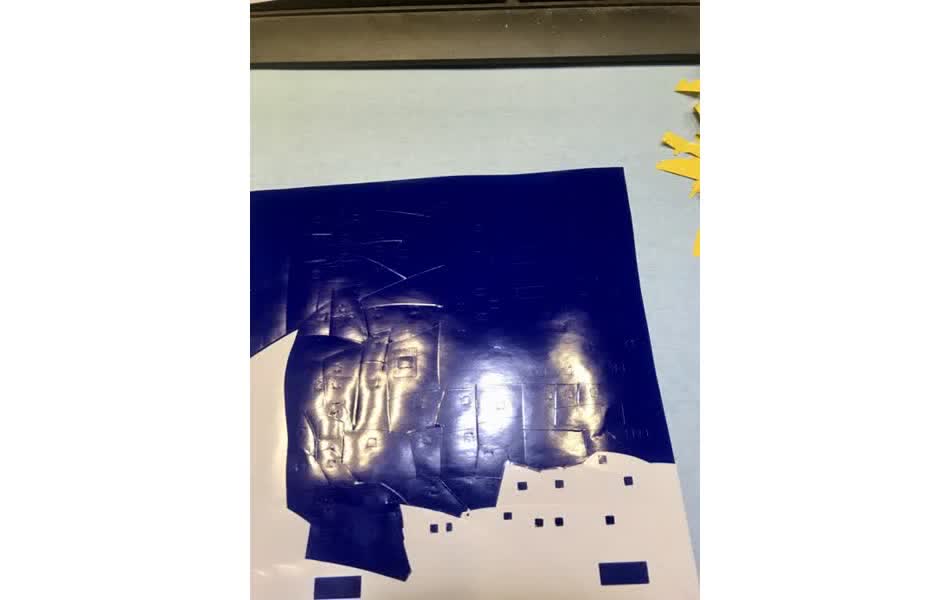
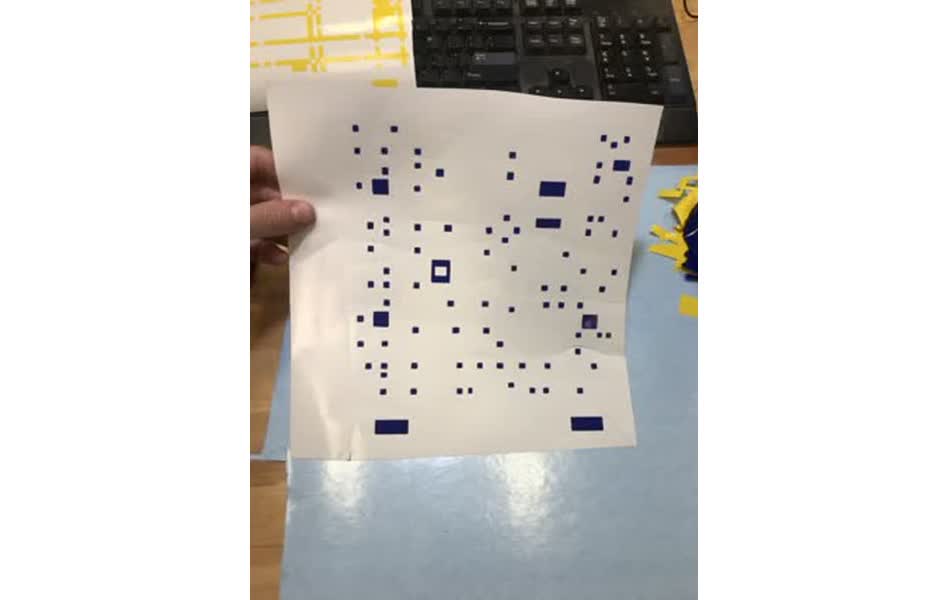
Then, I was ready to start on the broadway boogie. I printed them in the order that they will be transfered: yellow, then red, then blue. The little squares were very hard to weed because lifting the large parts of vinyl around it would just pull away the whole thing. Some of the traces were not cut all the way through so if I were to do it again, I would slightly increase the force when printing. I found that it was easiest to keep the small squares down if I was weeding with smaller parts of vinyl so I used an exacto knife to segment the vinyl waste.
Finally, using the alignment tabs, I transfered each layer to a peice of white acrylic.
Laser cutting
cut characterization
In order to understand how to use the laser cutter optimally, Alfonso, Jack, and Daniel and I ran some experiments characterizing the beam width. The general idea of our testing is to cut many 50mm by 50mm (as defined by CorelDRAW) squares into a sheet of cardboard, while varying different printing parameters. Then measure the physical dimensions of each square, comparing that value to 50 to find the width of the beam.From shop tribal knowledge, we knew that the optimal parameters to set for laser cutting cardboard are: velocity at 2.5%, power at 100%, Pulses Per Inch (PPI) at 200, and the beam in focus. Therefore, we individually varried each of these values while printing boxes that are identical according to the software to measure the effect each have on laser kerf.
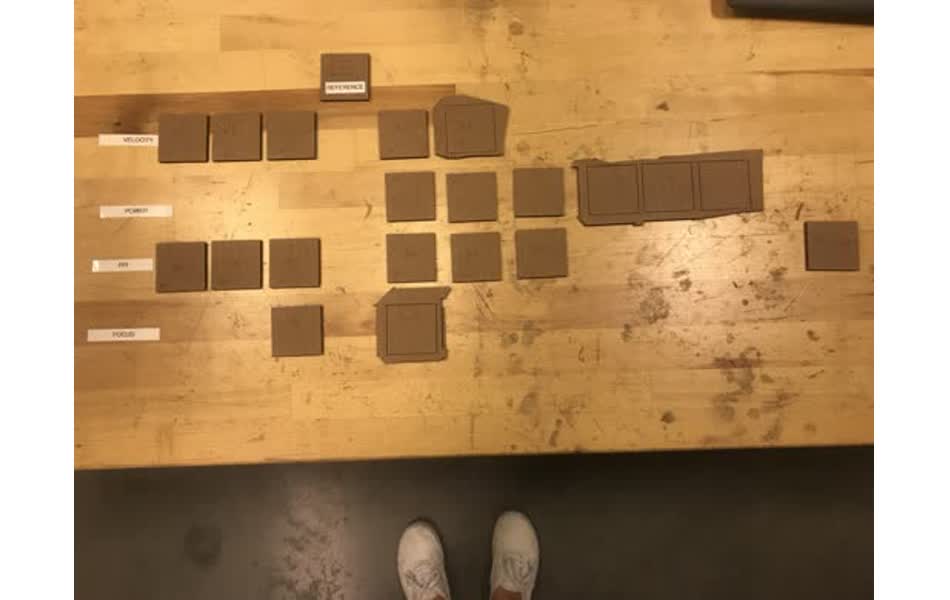
velocity
        | box # | velocity (%) | cut thorugh? | box width (mm) | laser width (mm) |
        |-------+--------------+--------------+----------------+------------------|
        |     1 |            1 | Y            |          49.68 |             0.32 |
        |     2 |          1.5 | Y            |          49.75 |             0.25 |
        |     3 |            2 | Y            |          49.75 |             0.25 |
        |     4 |          2.5 | Y            |          49.79 |             0.21 |
        |     5 |            3 | N            |              - |                - |
        |     6 |          3.5 | N            |              - |                - |
power
        | box # | power (%) | cut thorugh? | box width (mm) | laser width (mm) |
        |-------+-----------+--------------+----------------+------------------|
        |     1 |        95 | Y            |          49.82 |             0.18 |
        |     2 |        90 | Y            |          49.84 |             0.16 |
        |     3 |        80 | Y            |          49.92 |             0.08 |
        |     4 |        70 | N            |              - |                - |
        |     5 |        60 | N            |              - |                - |
PPI
        | box # |  PPI | cut thorugh? | box width (mm) | laser width (mm) |
        |-------+------+--------------+----------------+------------------|
        |     1 |   50 | Y            |          49.75 |             0.25 |
        |     2 |  100 | Y            |          49.81 |             0.19 |
        |     3 |  150 | Y            |          49.78 |             0.22 |
        |     4 |  200 | Y            |          49.79 |             0.22 |
        |     5 |  300 | Y            |          49.78 |             0.22 |
        |     5 | 1200 | Y            |          49.64 |             0.36 |
Results show that to get the smaller laser width, while still cutting all the way through, it's best to reduce the power to ~90. Although, the 80% power still cut and has a smaller width, it didn't cut thorugh very well and the corner of the box was slightly torn out instead of cleanly cut
However, what is important isn't so much the smallest laser width, but rather just knowing what the laser width is given your print settings because you can correct for whatever it may be when building with parametric design.
Laptop Stand
I'm a Fusion 360 newbie, so I decided to start off simple by following along with this tutorial on how to make a laptop stand!I followed the design from the tutorial pretty closely, but modified the height, latop dimensions, and bulked up the support stands since I'll be printing on cardboard instead of plywood as in the video.
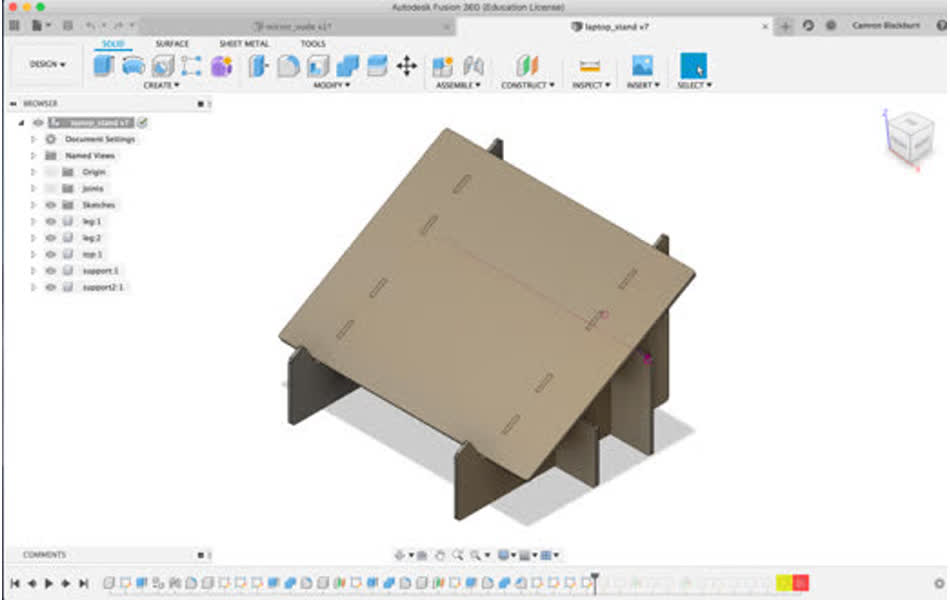
One of the key points here is to define a user parameter for the cardboard thickness and width of the stand's legs so that the design can be parametric, i.e. thickness and width can be iterated without starting from scratch each time.
I found it important to ocassionally stress the user parameters while building to see if any additional measurements need to be defined as a funciton of the parameters. For example, when I increased the material thickness from 4mm to 15mm, I found that the laptop supports interfered with the top of the stand, so I added a constraint to the distance between the supports and top.
Finally, I'm ready to test it out. Given the in depth laser characterization that we did earlier, I set the material thickness to 3.8 because I want the joints to be rather tight and sturdy to hold the laptop. I exported each component as a .dxf file and sent the designs to CorelDRAW to print on the GCC laser cutter. ... and it worked!
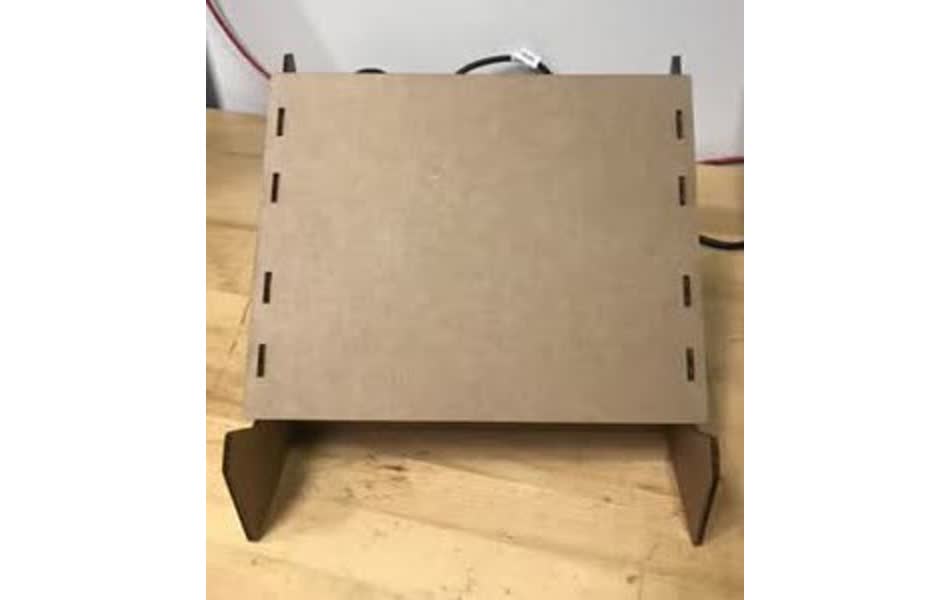
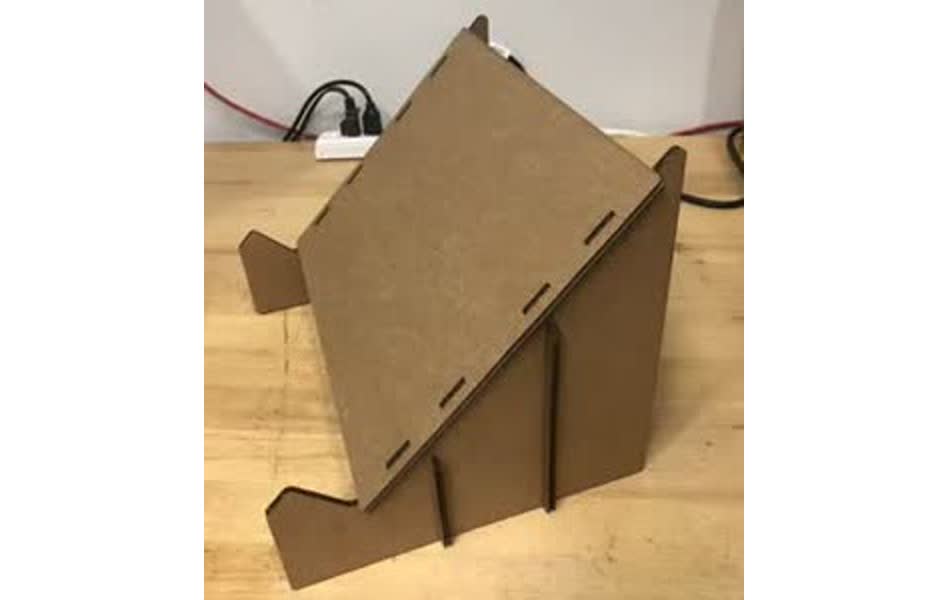
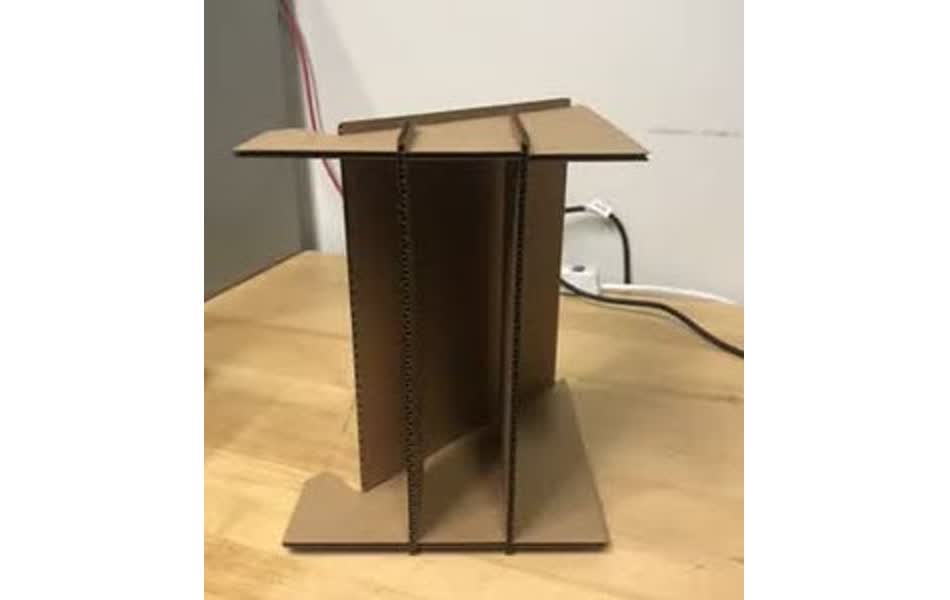
BUT, the laptop is at far too steep of an incline, the legs are too wide to comfortable support my laptop, and the outside edge of the supports are too thin.
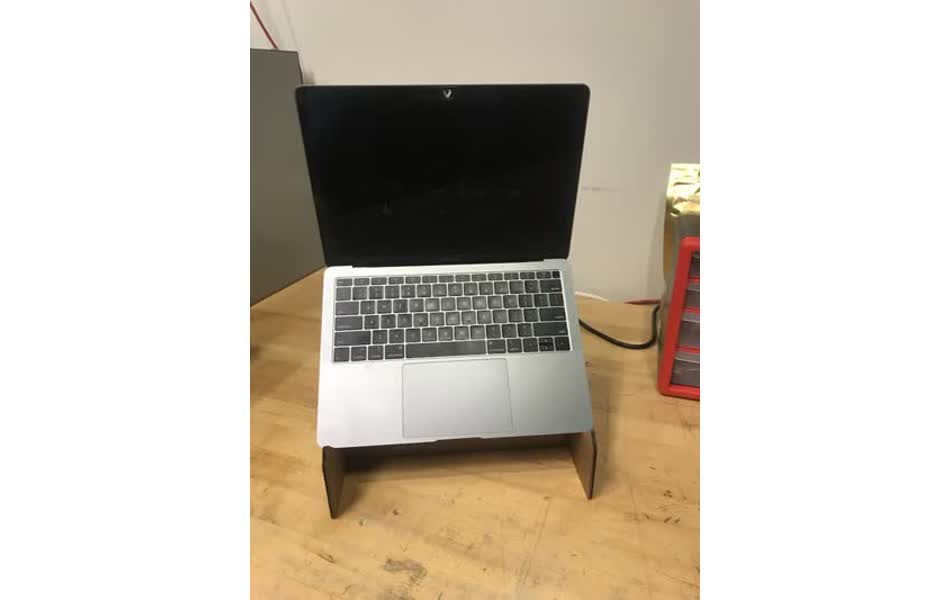

So, I modified the design to make the incline shallower (something I should/could have designed parametricly) and adjusted the distance between the legs (which I did create a parameter for (: ). Resulting in the final results *for now* ..
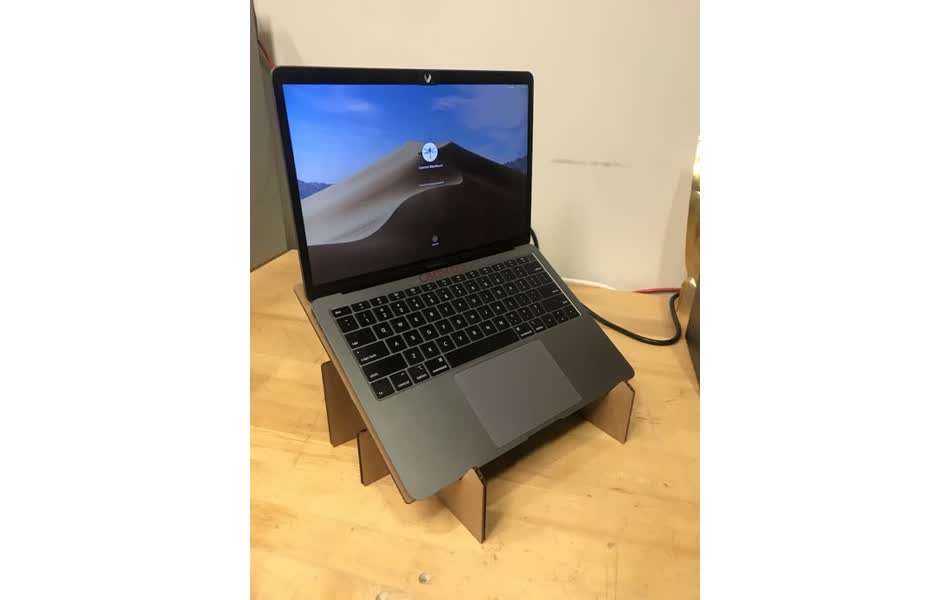
After using it for a couple days, there are a couple things I'd like to change. The ledge supporting the bottom of the laptop at the end of the incline is a bit too tall. I'd like to make it shorter so that my hands can more comfortably rest at the base of the stand.