Week 1: Computer Aided Design
It is the first week of How to Make Anything! I am excited and ready to get my hands dirty.The first thing on the agenda this week is to make something on the laser cutter. We've got a huge stash of cardboard ready, and the rest is up to imagination -- the only constraint is that the final piece can hold itself togethere without anything like glue or tape.
Let's begin by running some test cuts on the laser cutter!
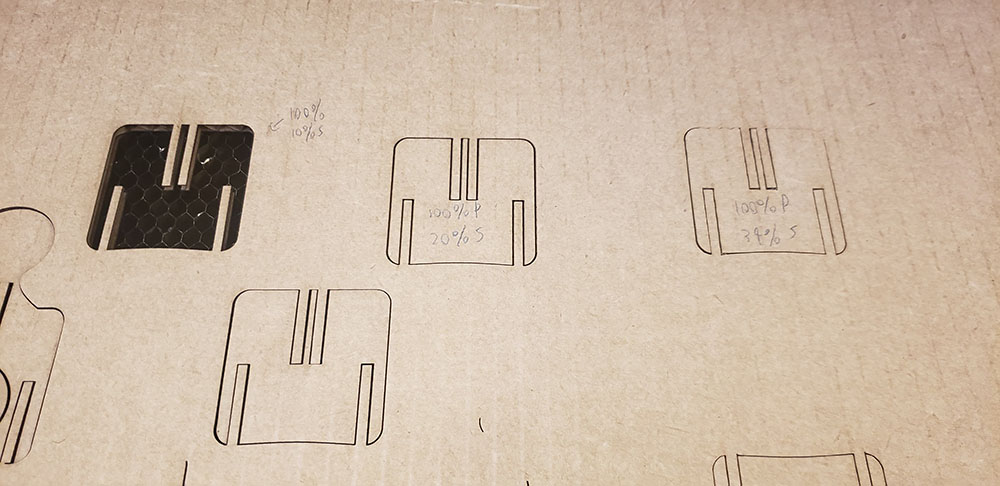
First, my group and I and had to figure out the power settings to cut cleanly through the cardboard without burning it. The conclusion was to operate at 100% power and 10% speed. Higher speeds would leave a dark line, but the cardboard would not be completely cut.
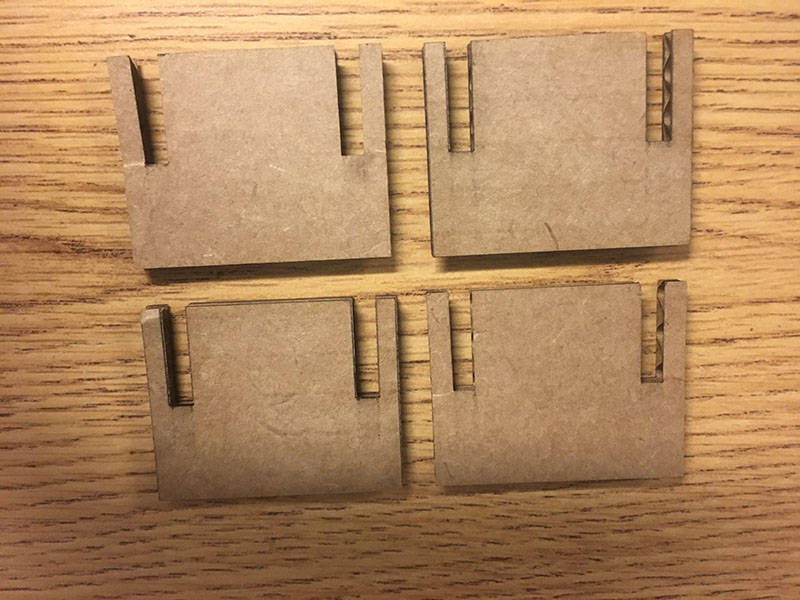
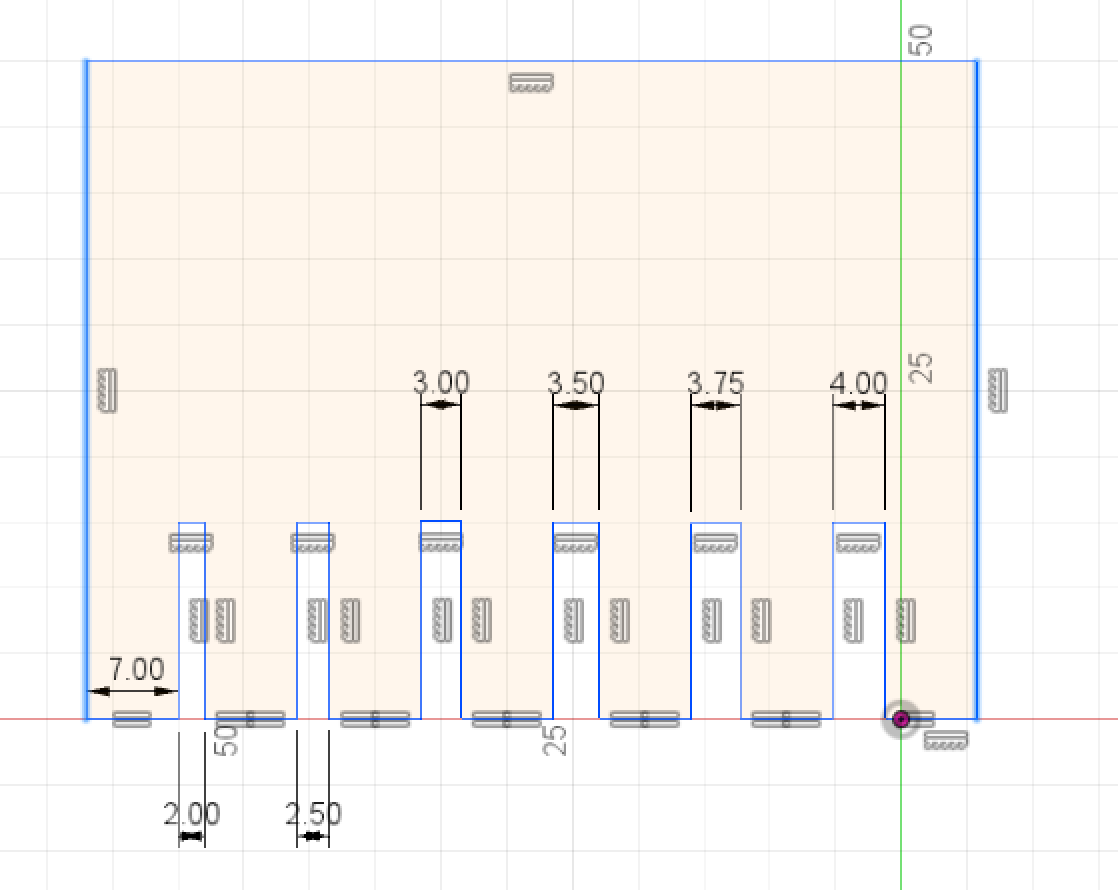 Afterward, the basic joint I aimed for was to stick two pieces of cardboard at 90 degree angles, each with a slit with the same thickness as the cardboard itself. That way the two pieces could interlock and form a 3D structure. The design above was a super simple test cut to figure out what kinds of gap thickness is nessessary for the interlocking behavior.
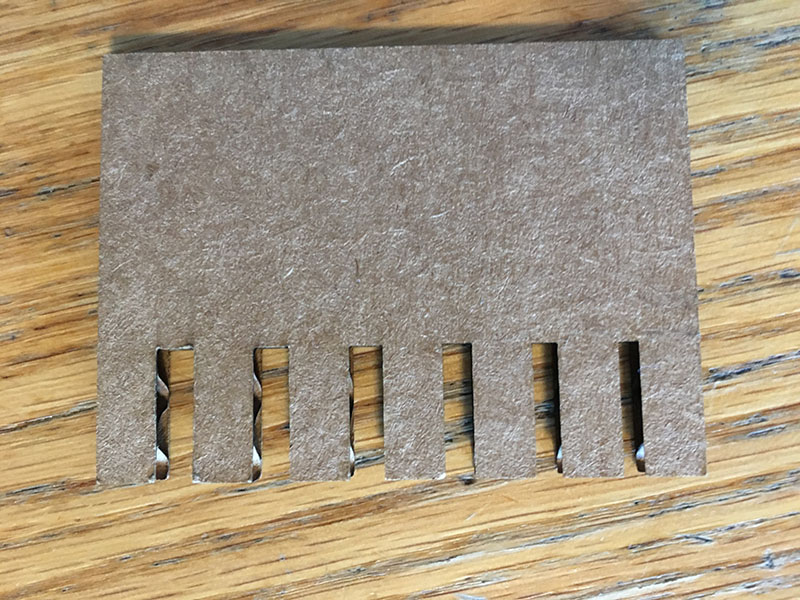
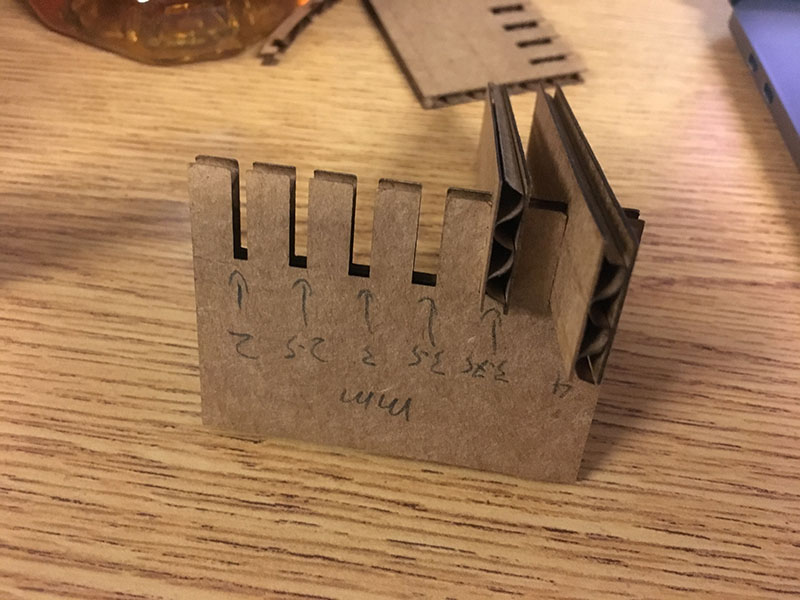
As it turned out, while the estimated 4mm gap did work, the 3.75 gap ended up being the most stable place to hold the second piece of cardboard in. Anything thinner and the second piece could not fit in.
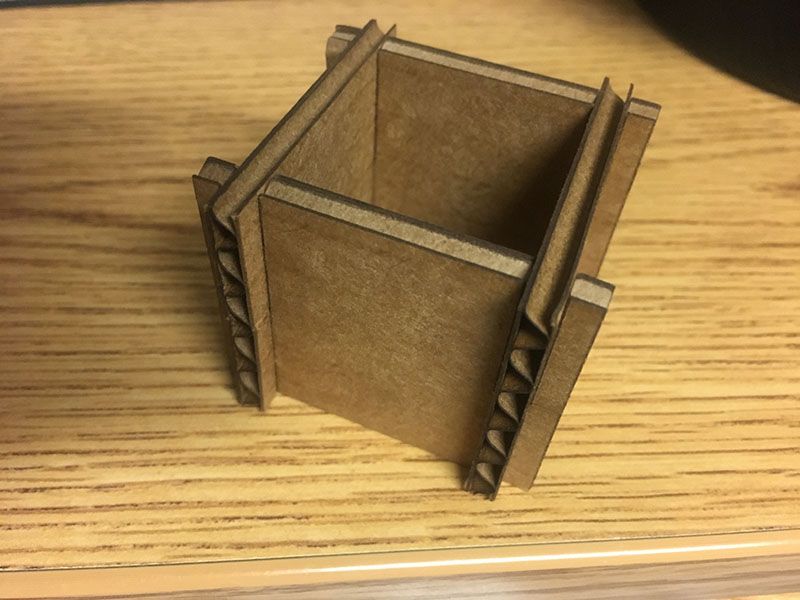
After figuring out how to make a joint, it was time to test out a box design! This four-sided container uses four of the same pieces, each with two slits that go halfway through the length of material. When two of the pieces are flipped upside-down, they all slide together to form a surprisingly strong box.

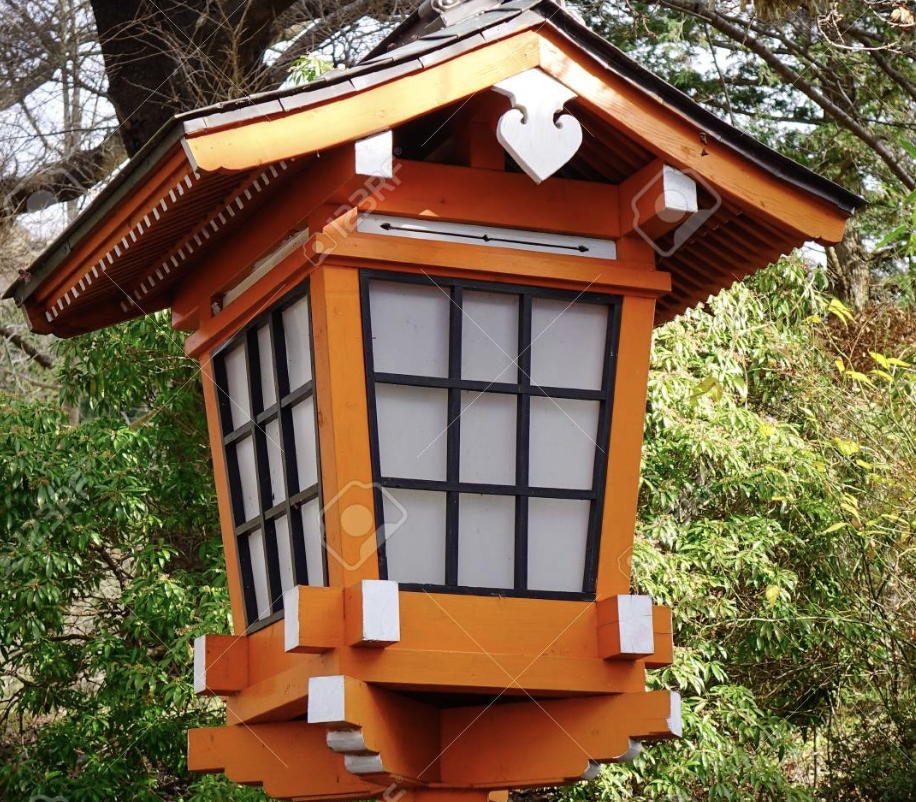
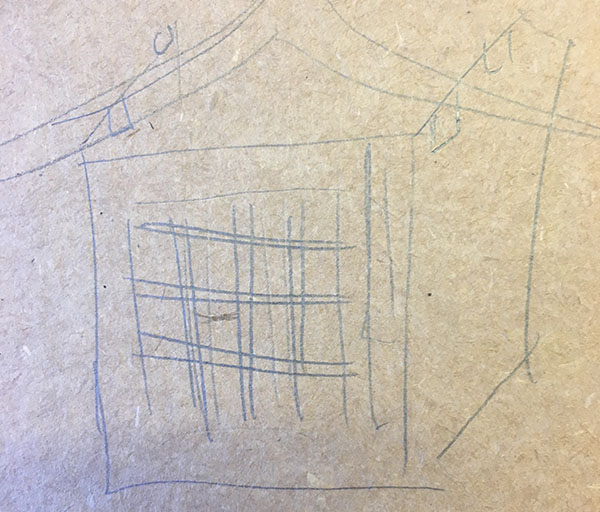
Now that I was a bit more accustommted to how to put together pieces to make box-like objects, I started thinking about designs for what to actually build. I am a big fan of Japanese style architecture and design, and one of the things I had often seen were these stylized lamp-posts commonly seen around shrines and temples. The sketch on the right was my very rough idea of what I wanted to make -- a little hollow box that a small LED light could be stuck in.
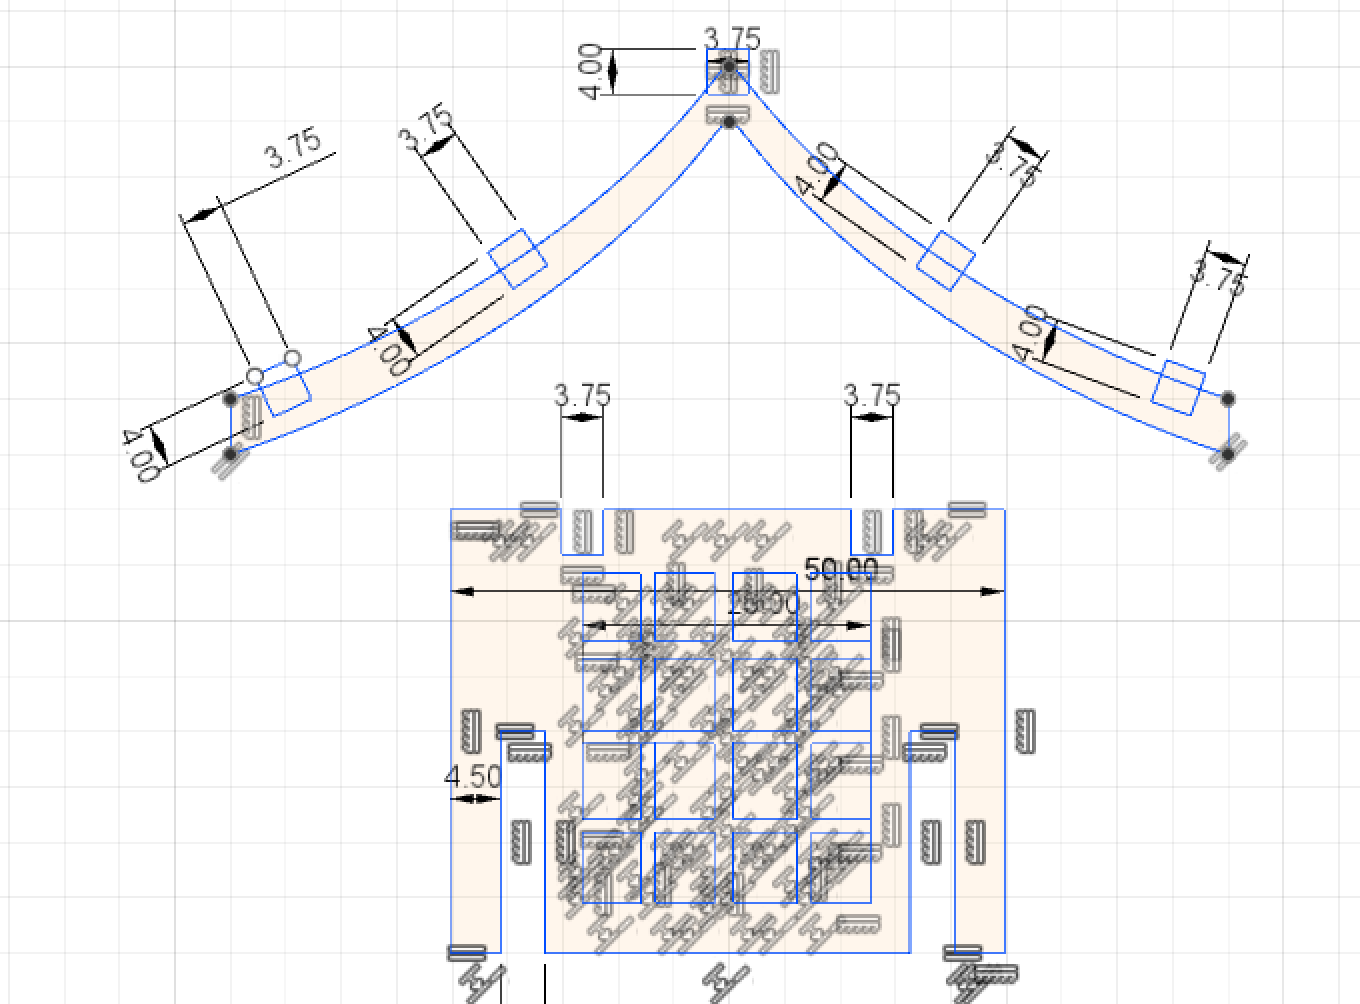
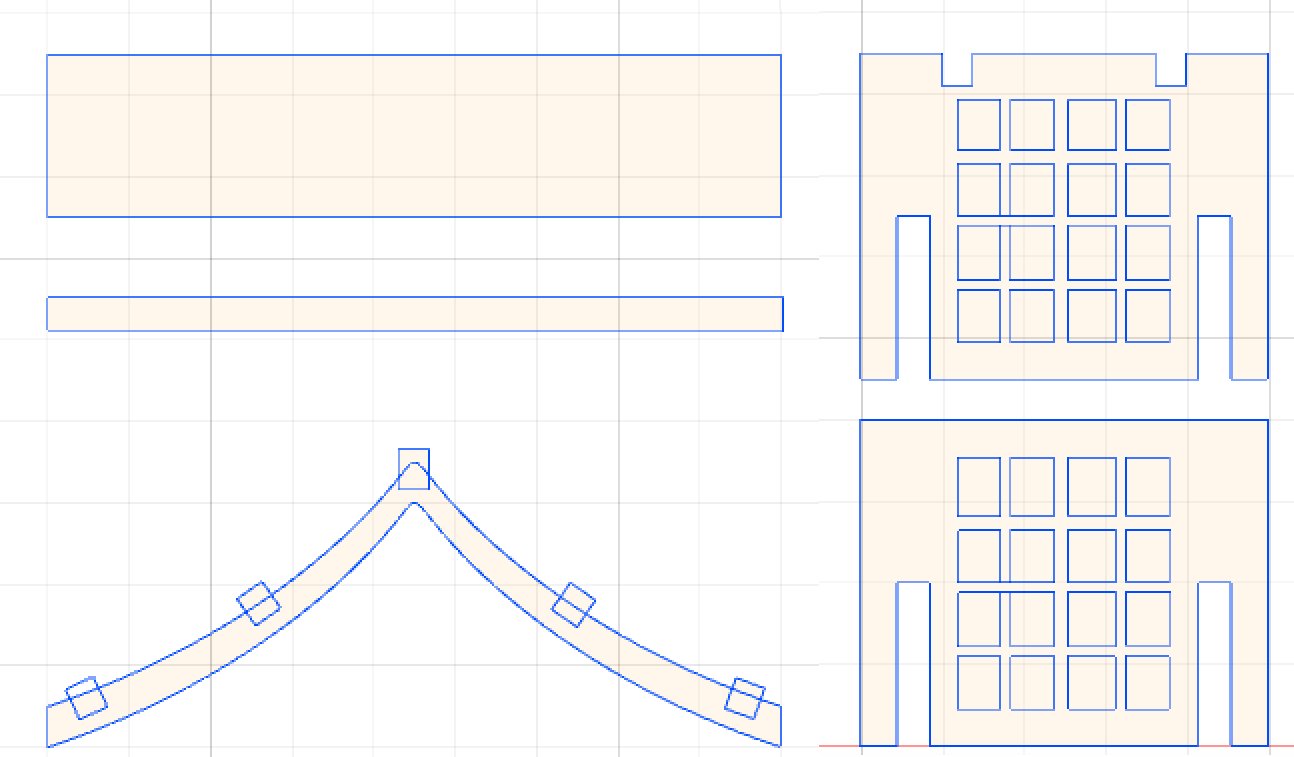
The ideas were ready in my head, but I still had to convey them to the computer somehow. After a bunch of scouring on youtube and the like, I (somewhat) figured out the constraint system on Fusion 360, and was able to create a parametric model for the lamp's outward faces and roof tiles.
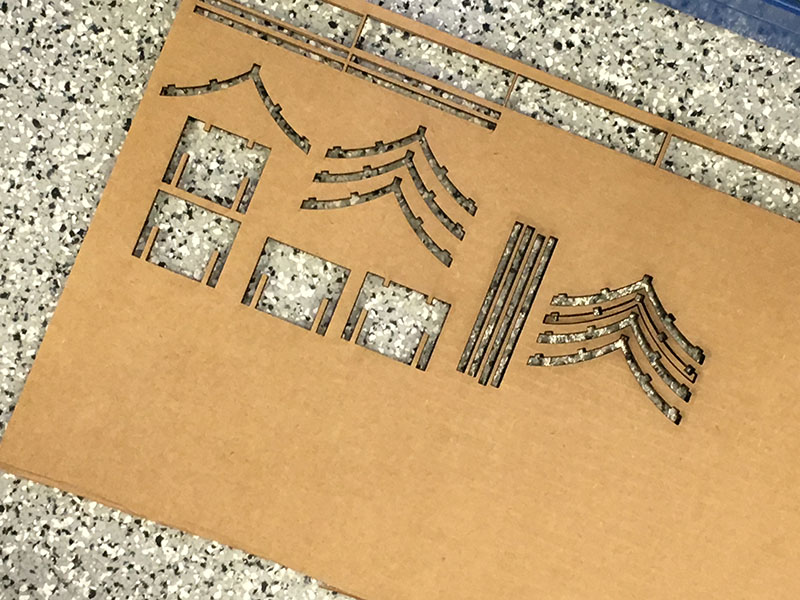
Popping out all the cardboard pieces was very satisfying.
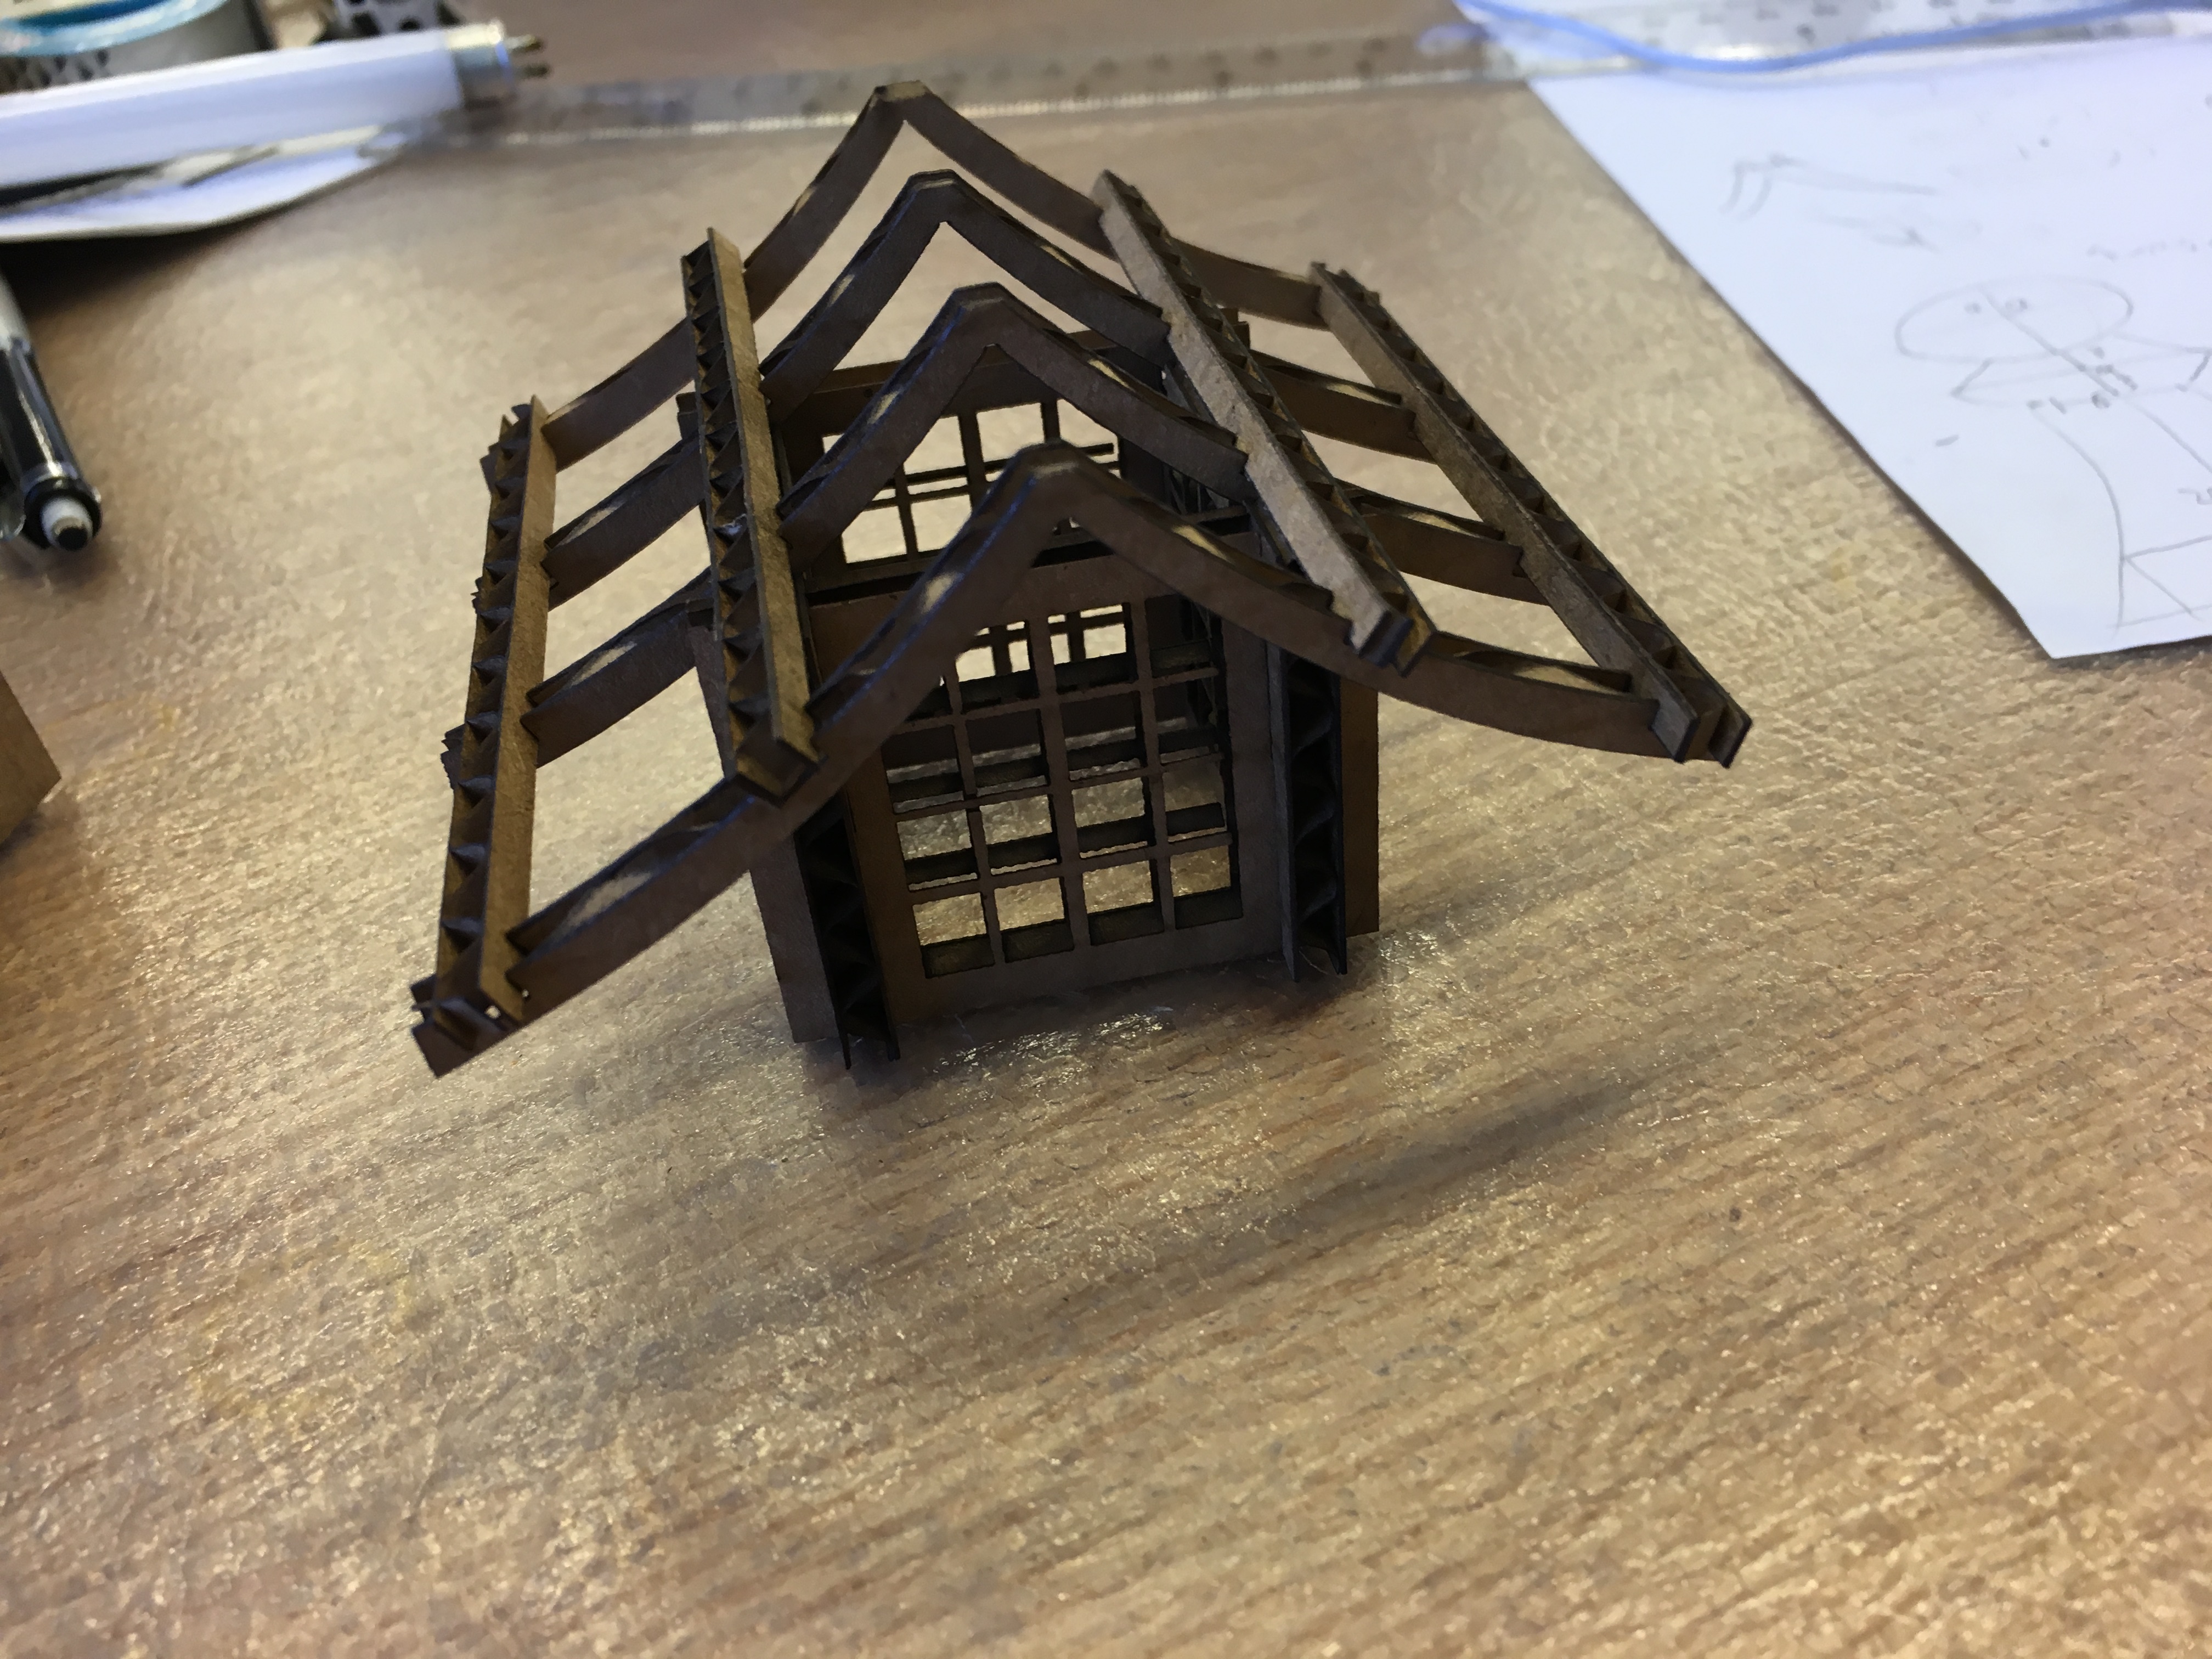
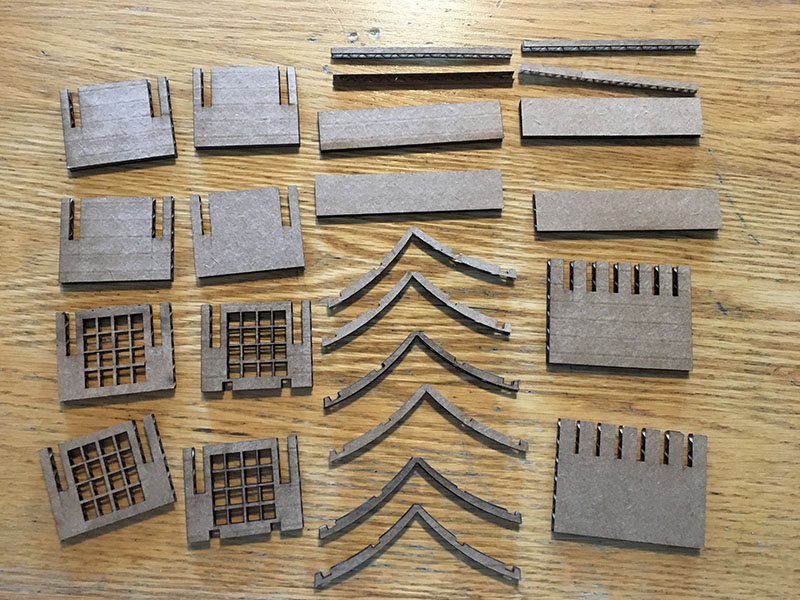
Finally, the shrine lamp is press-fit together and structurally stable! In the end, I had to end up ditching the roof tiles because the slot for the final horizontal beam (at the very top of the roof) did not cut properly, so I couldn't place a support there. The lamp ended up being completely hollow, even on the top -- but really, that just lets more light out, so I'm happy with it in the end.
Vinyl Cutting
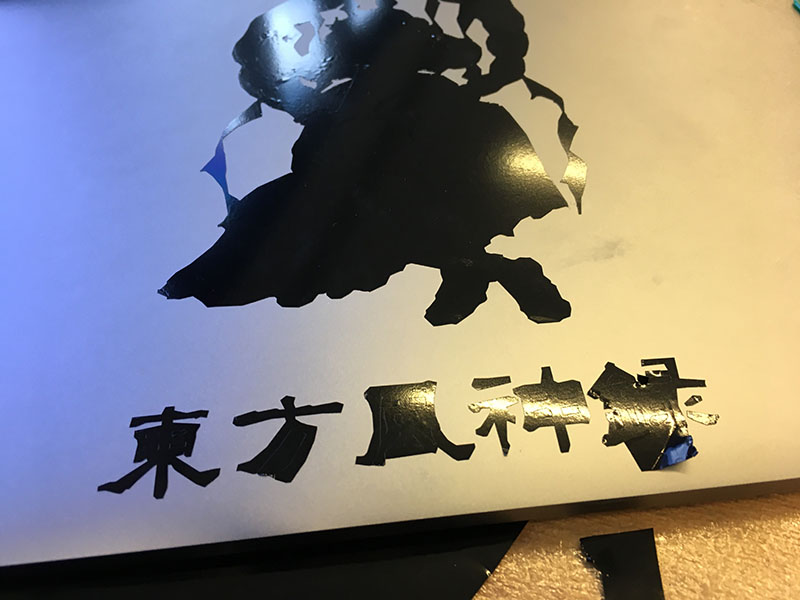
The other bonus assignment this week was to mess around with the vinyl cutter. This machine can cut out stickers, but only an outline will show up. While I tried a bunch of images, none of them ended up looking that well with just an outline -- until I remembered a memory from long, long ago...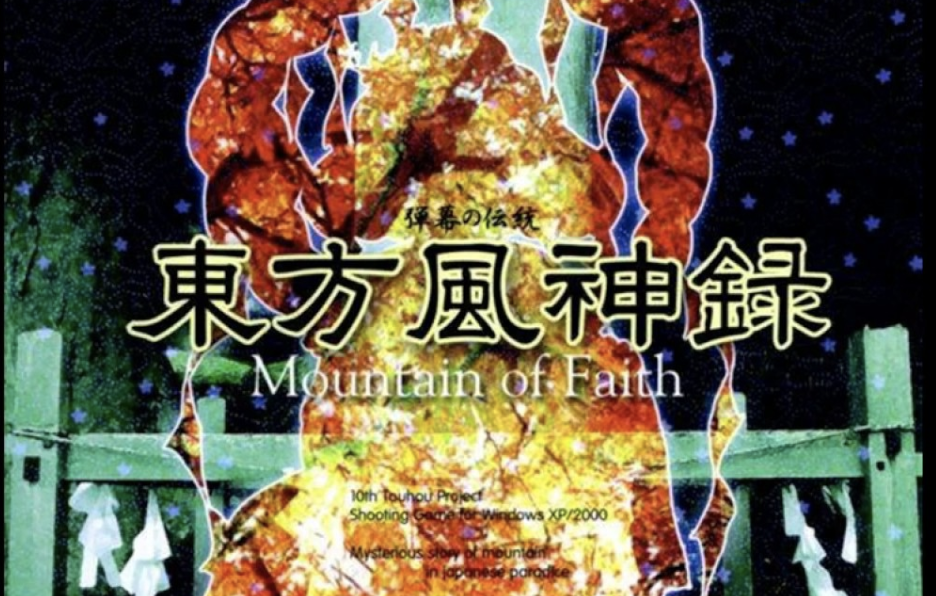
Ok, so that last statement was a bit of an exaggerration. Actually, what came to mind was the title screen to one my favorite games (Touhou 10), where an outline of the final boss appears menacingly to mock the player as they start. I set out to recreate this shadowy figure in sticker form.
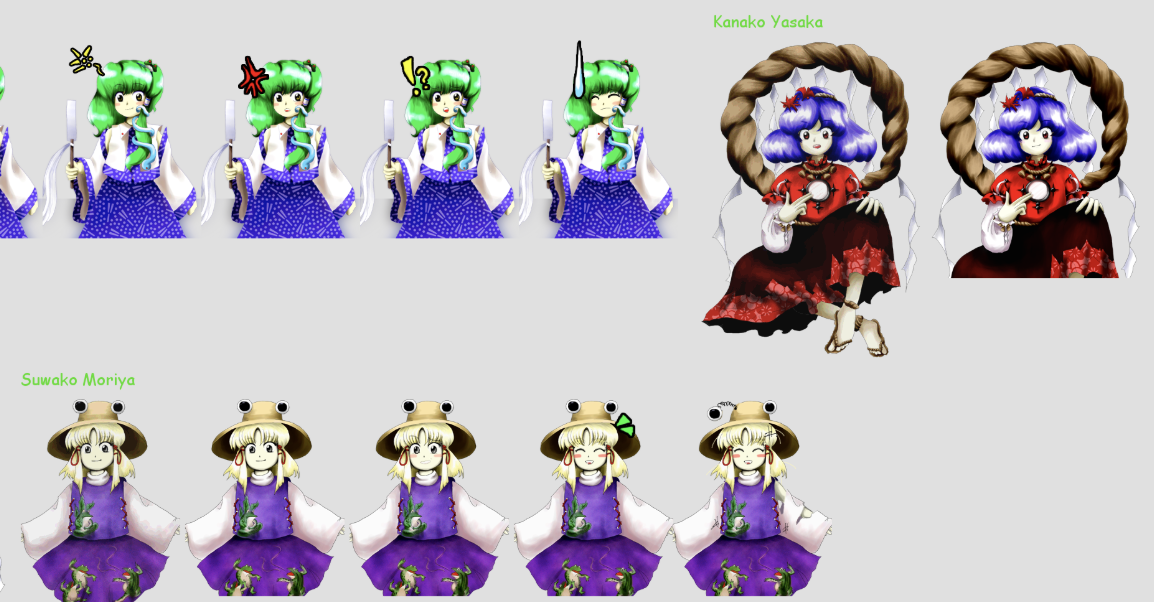
Immediately, there was a slight problem: the only reference I had to this scene was a single title screen, but all the assets were overlapping with each other and basically impossible to extract. My savior came in the form of a website from the early 2000's -- Spriter's Resource, a database of extracted sprites from a whole bunch of retro video games. With this, I was able to get the graphics in a clean format and prep for the cut.


With a bit of Photoshop, I processed the images into outline form, ready to be loaded into the fab mods site.
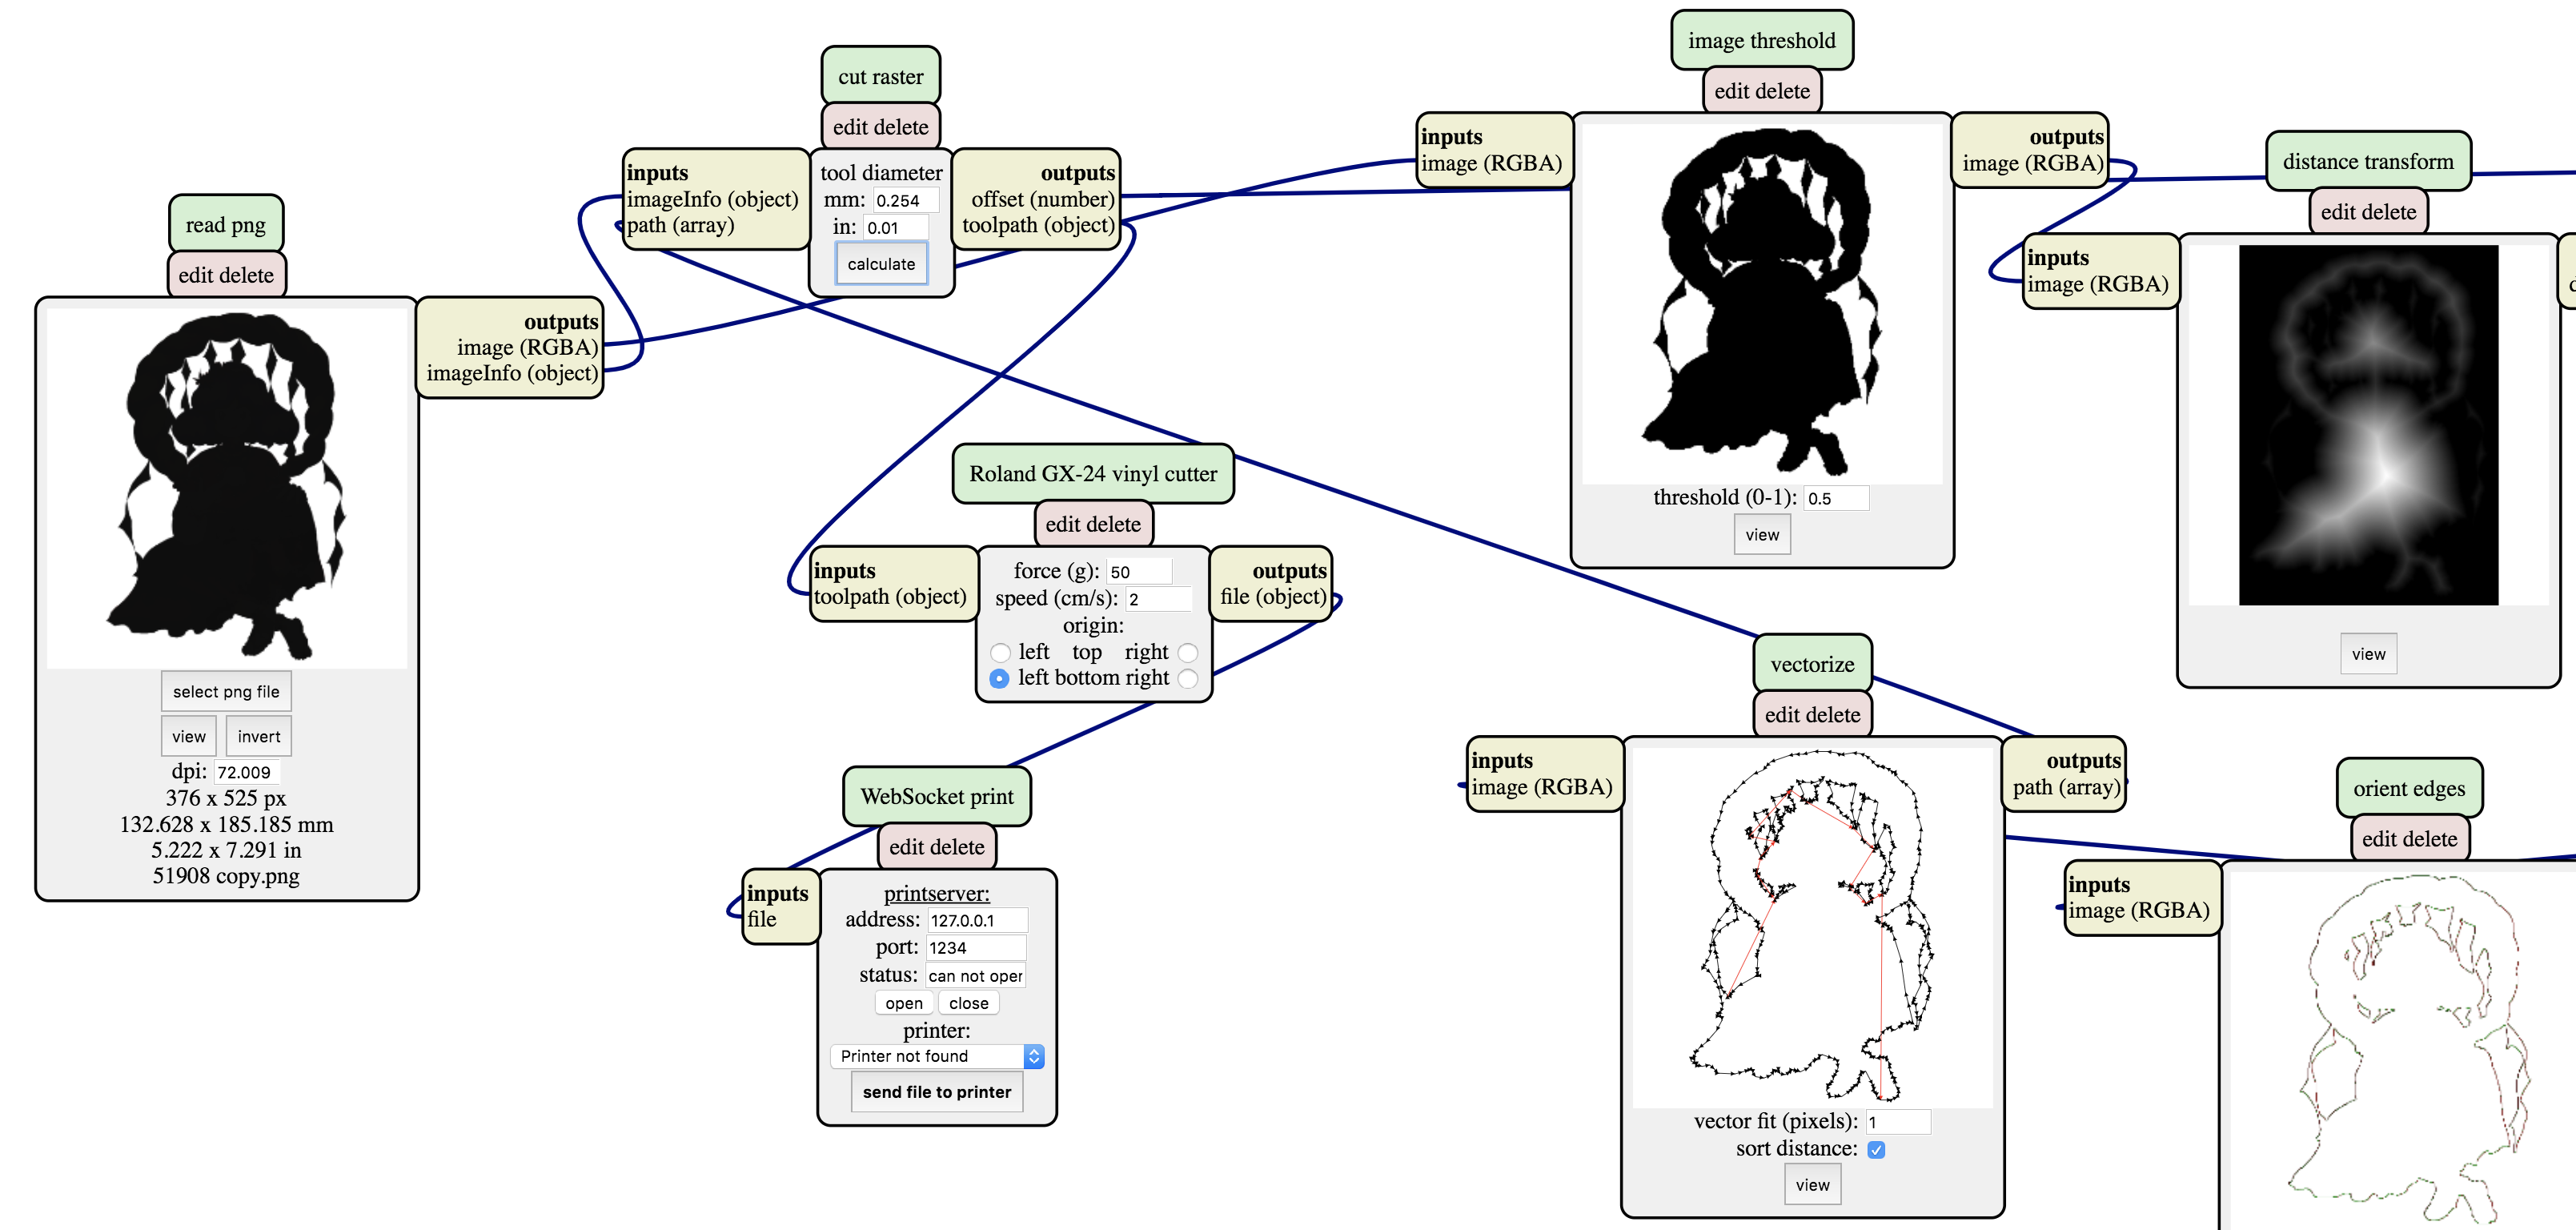
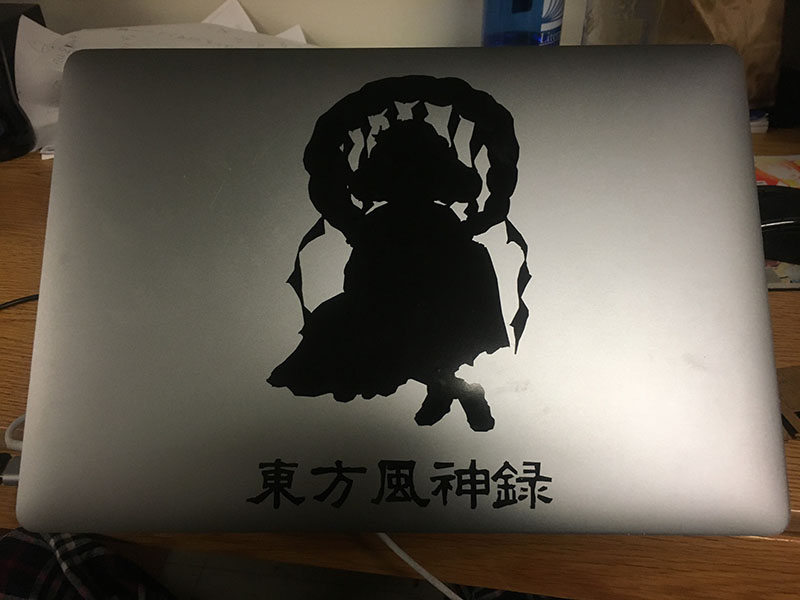
And finally it's time to cut and peel! It is said that peeling can either be the best or the worst -- for me, it was a very painful process since I had so many tiny little holes in the text characters, but finally getting the sticker on the laptop was a satisfaction like no other.
And that's it for week one of How to Make! Stay tuned for more from the kvfrans factory.