tooling paths
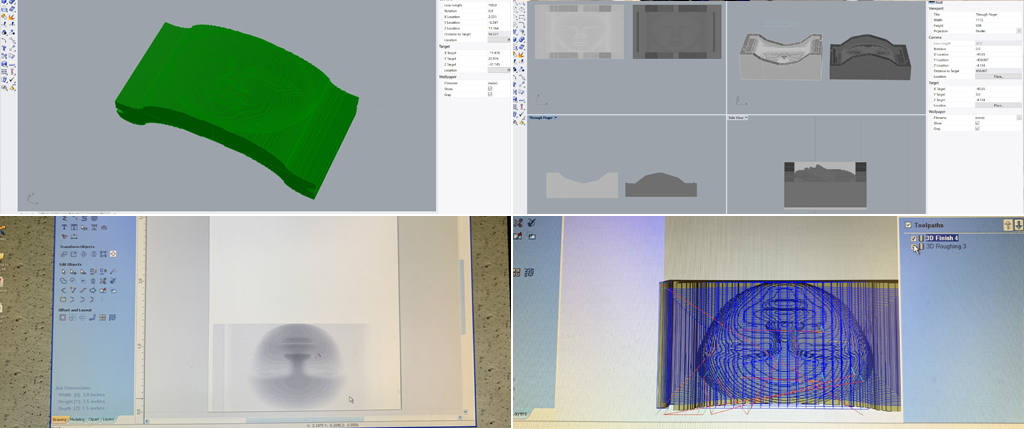
I then moved to Aspire to create the tool paths. The first step was to measure my wax bloc, to open a new file entering the dimensions and then importing my STL 3d model, I then arrange the model to sit on the right direction, in my case, laying flat near the edge of the block to avid wasting material. A black line on the 3d model visualize the zero plane or the diving/splitting line, which I moved up and down to set the right cutting area of the two part mold. Clicked on OK. On the screen appeared the part of the model to be tooled. Then I set the material to make sure that there is a gap of a few millimeters above the model in order to allow silicone pouring. Then I created a the tool paths, starting with a roughing tool path, I edited the tool mill to make sure the right dimensions of the end mill are selected as well as the step over rough proportions. I then calculated the path and preview to visualize what the mold look like. Then I proceeded to create a finishing cut, edit the tool setting and indicated an offset of 10% for better finishes, selected model boundaries and calculated the path. I then reset preview to visualize boundaries and path. Both the rough and finishing cut appear listed, and then saved them individually and was ready to move to the ShopBot.

cutting
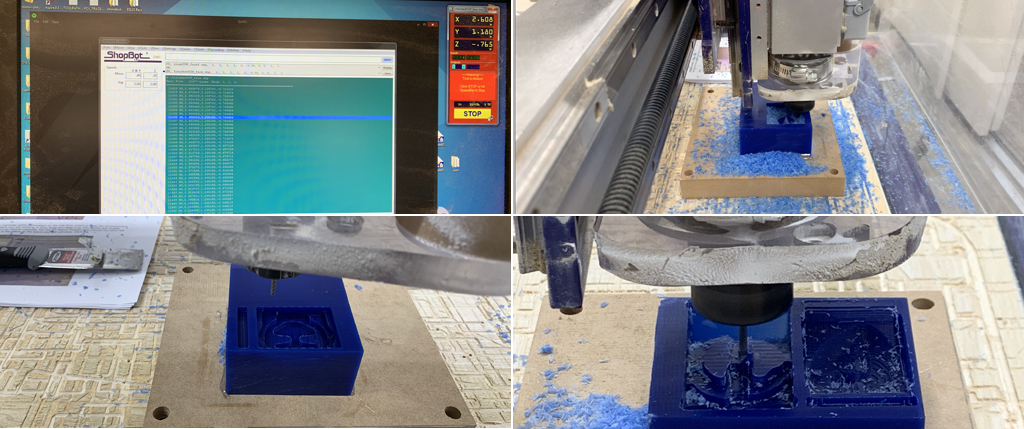
I then used the glue gun to glue gown the block of wax on the ShopBot. I opened the ShopBox software, zero x and y axis, imported my rough cutting file, did an air cut to make sure that everything is ok. After, I zeroed the Z axis and launched the rough cutting process. This took approximately 5 minutes. Once the rough cut was finished, I followed the same process with the finished cut, the cutting time was approximately 7 minutes. At this point, since my design included a positive and negative of the same silhouette, the concept of making a mold of my mold became a bit confusing, and the potential of making a mistake became evident. I went back to Aspire to create the tool paths of the other half of the mold and repeated. Calculating and previewing the paths of the positive and negative mold of my mold became even more confusing. My only option was to try.

Molding
Once both sides of the mold were finished, I was ready to take care of making a silicone mold. I went over the product data sheet to understand hazards and how the product should be used. I mixed both materials and carefully mixed, doing my best to avoid bubble air formation. I then slowly dripped silicone on both sides of the mold and placed the mold in a secure place to dry for at least 75 minutes. The next day I went to demold and I realized that the fatal mistake I had foreseen was in fact a reality. The mold of my mold did not allow thickness for the brick sculpture. To solve the issue without having the go through the entire process, I made a containing box out of carton and lined it with adhesive tape inside and out, and then processed to slowly pour plaster. The next day I came back, removed the mold and cleaned the brick sculpture, which did not come out as bad as I thought it would.
