W4 - Molding & Casting
Assignments:
- Design Mold
- Cast Objects
The Mold
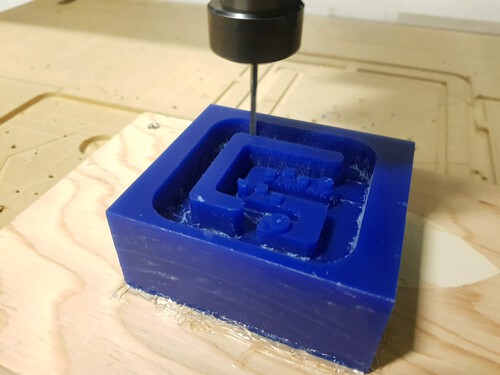
I used Fusion to desigh a mold for my part. My design is a desktop ornament with the City Science logo. The design includes references to the Bpston and Cambridge areas, like the Great Dome (MIT), the Charles River, the Prudential, 111 Huntington Avenue and a layout grid that mimics the grids use by the CS research group for urban development. The process that we use requires to desig our part in positive. I made sure to parametize my design according to the size of my material en the tool diameter that I was going to use (.125 in).
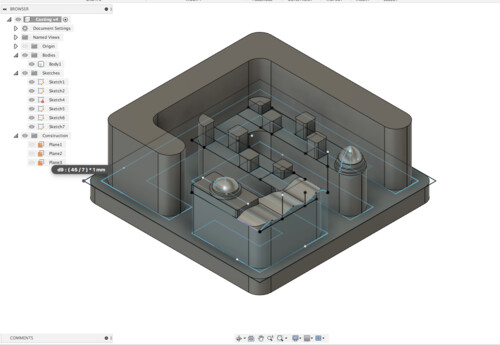
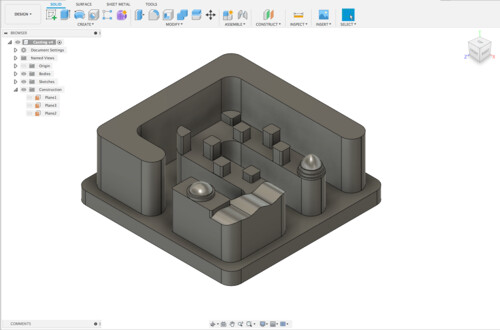
Curves and spacing for details are guided by the fact that corners are best cut when rounded to the same diameter as the one the tool has. For this design I wanted to experiment with different shapes and splines in order to test how the milling tool managed to cut them with it's three axis capabilities. This is the final design:
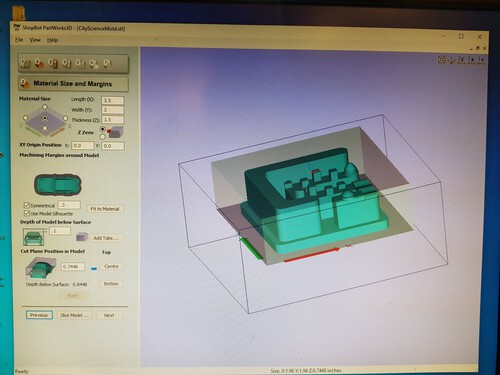
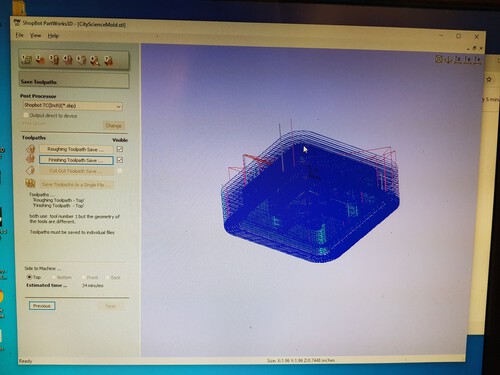
I took this design down to the Shop Bot Desktop machine and milled it onto was to create a positive mold. In order to do so, I made sure to set the right parameters on VCad. Some relevant parameters are the tool size, the cut depth (this is very important because it allows for your mold to have enough space on the bottom), spindle RPM, and the size of the material you will be cutting on. After inputting parameters Vcad allows you to calculate roughing as well as finishing paths.
After checking that everything looked right, I went on to set up the Shop Bot, I fixed my material and zeroed all of mi axis. I ran the process and everyhting went well!

Casting
After having a succesful mold creation, I went on to prepare a mix of OOMOO, the setup is very easy due to the fact that Part A and Part B of the mix are calculated by volume, calculating by volume is less of a hassle than calculating by weight sometimes. I mixed very carefully to avoid creating undesired bubbles. My design contains many details and cavities, this is not optimal for molding because surface forces make it easy for air to get stuck on them. For this reason, I was extra careful about how I was mixing and pouring the OOMOO into the mold.
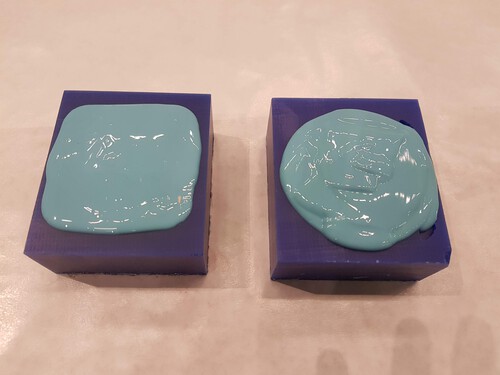
After letting the mix cure for 75 minutes, I extracted my mold and felt quite good with the results. I did have some minor bubbbles on some of the sides, but considering the tight geometries that I included in the design, the result was satisfactory.

I then decided to cast with the mold using different materials, the first test I made was using metal, I had to go to a class and realy wanted to see the result so when it hardened, I put it into a bucket of cold water to speed up the process. This did not help at all with the finish. My pieze came out very pourus. I then casted it patiently and the piece came out much better. My final tests used hydro stone. I mixed it by using the island method becuas I saw that this gives you a much better surface. I made too much hydro stone mixture so I took molds that were lying around and used them to create many shapes. Here are some images...
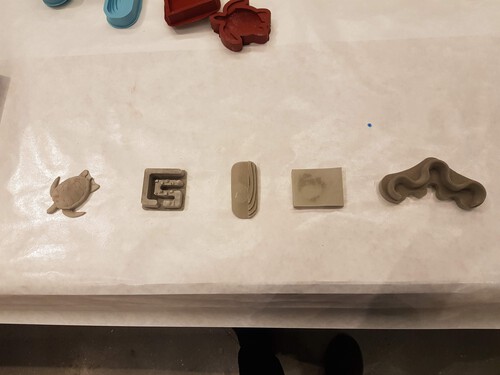
And here are the final three pieces! I will probably use the mold to give out souveniers to lab visitors in post pandemic times...
