Home PCB Milling Machine

Week 5

I am completely new this all. When i brought in the clank at home, i had no idea it would take the time it took to put it together. For over two weeks, i kept going over the videos put together by Jake, watching, pausing, doing - it was endless. Especially because I have had no interaction with any of these materials before, at the beginning, i coudl not tell you the different between a nut and a screw. I swear i know the difference now. The clank wasn’t the easiest to build, to be honest. I had no idea how tight is tight enough, how to get to the really tight spots and how to really know if what i was doing was even right, in terms of putting it all together. The next step, i didn’t get to it till much later. The learning was that a lot of different parts come together to make a machine that i have no idea would even switch on.

Tools: Jake's videos ftw
Date: 9.13.2020


I think it was a very gruelling experience.


The step after this was to flatten the bed so that I can start to mill a board just to get comfortable with milling boards. To do this, there’s a bunch of steps to take: Going on to the Fab academy website and playing around with the keys and functions showed me that there’s zeroing of the mill. The x, y, z keys help to position the end mill. When i was trying to do this, to position and start milling to flatten the bed, i realized my z keys - up and down were not working.


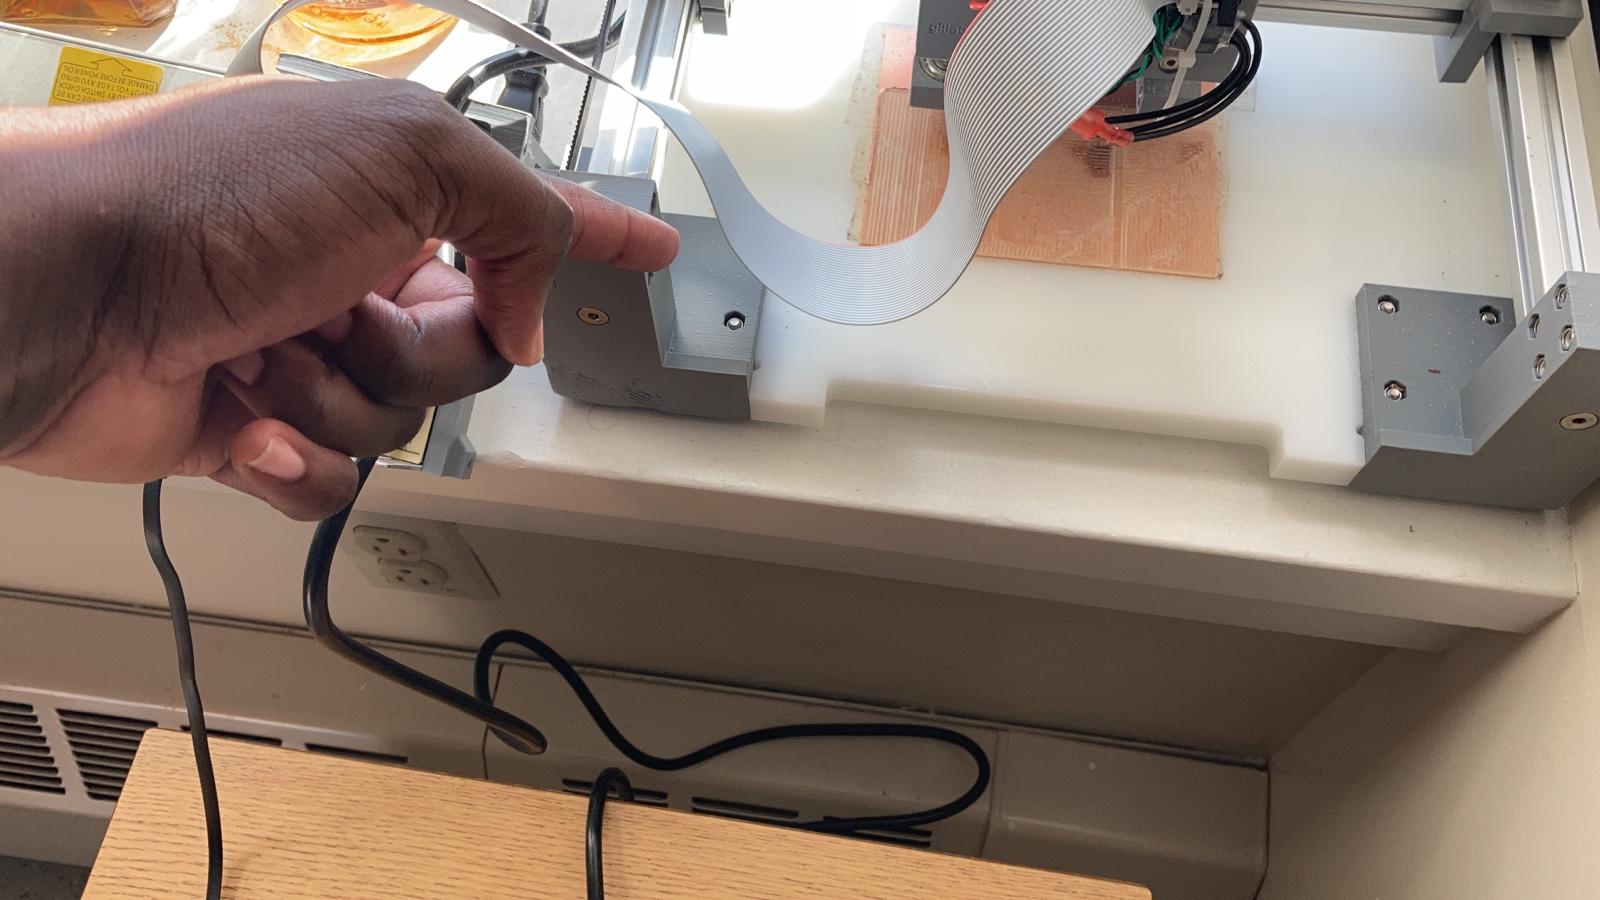
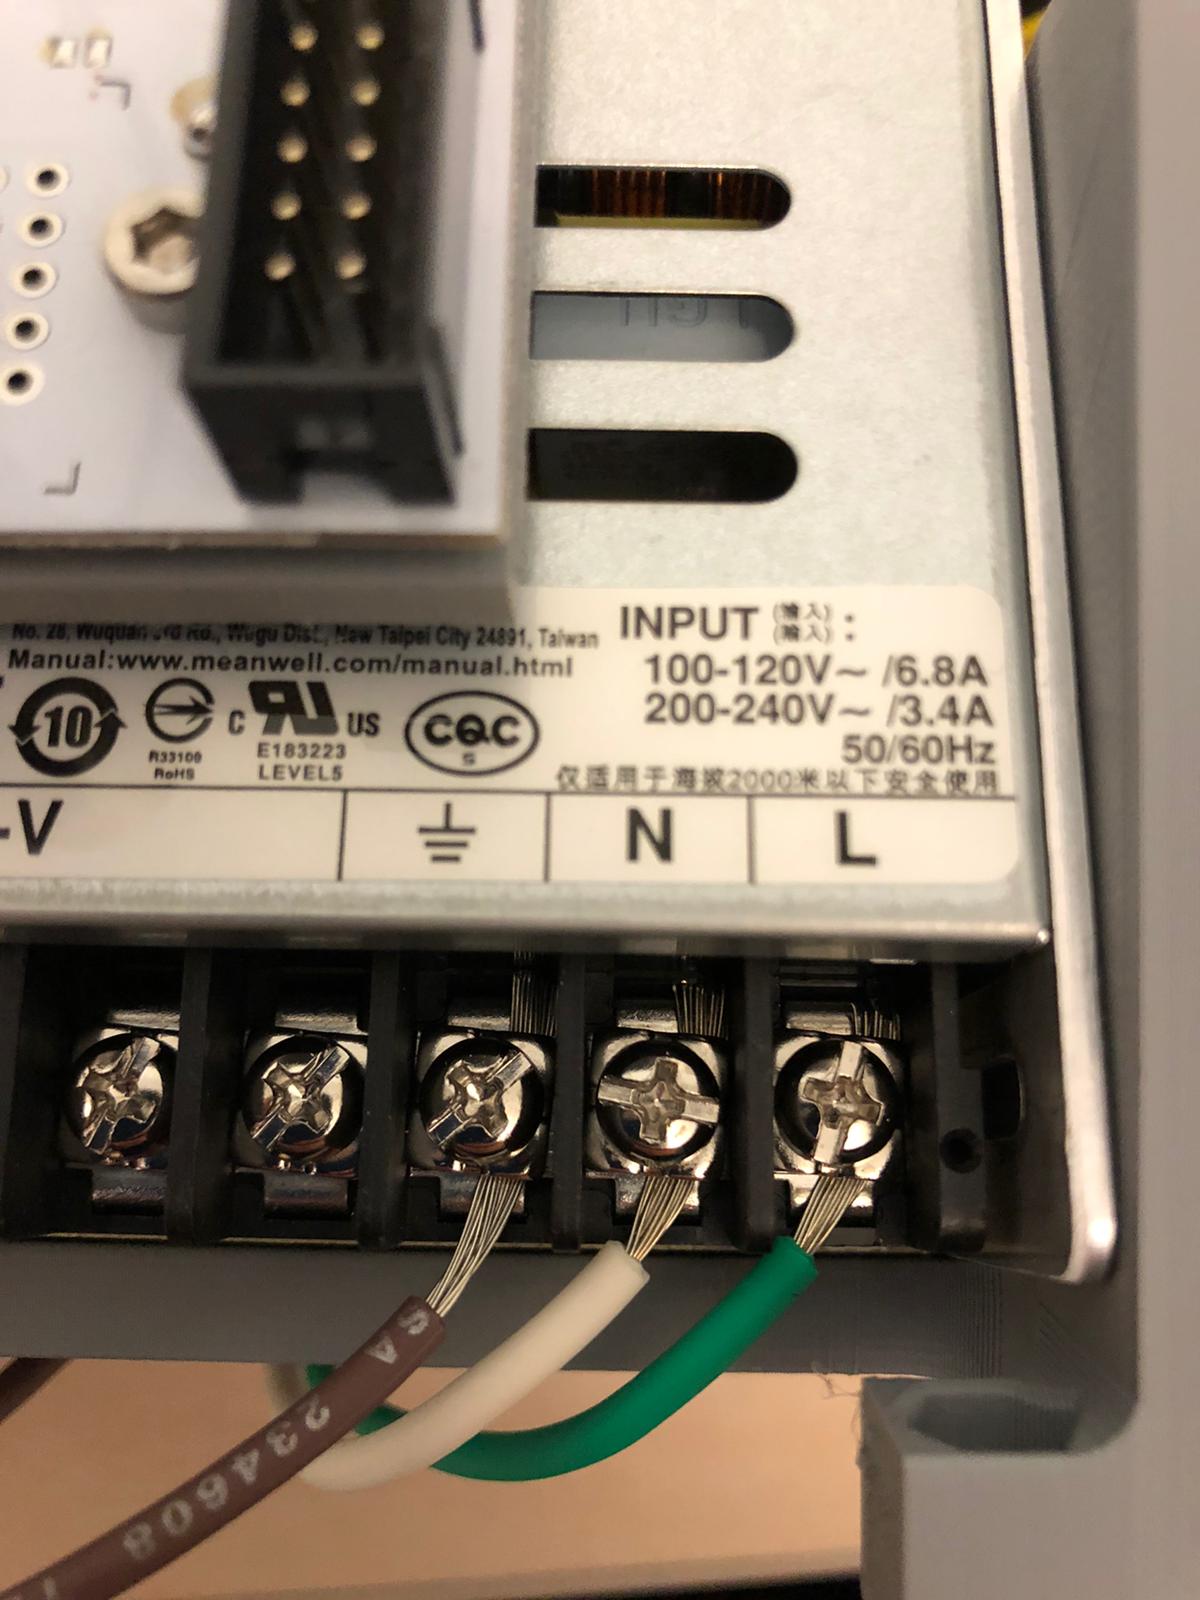
I tried a bunch of times to figure this out by myself but unfortunately, i no longer could see the leds on the power supply board lighting up. I knew then that the code is not talking to the board and that this means the machine is no longer going to work and run.
Trying to troubleshoot with premila over zoom at home, only made me more acutely aware that the machine is off. I brought the machine into the Lab where Premila and I spent hours trying to figure out what might be the issue. A week after, I tried to run the clank again. The first thing I did was flatten the bed. This came with its own sets of learnings for me. I let the laptop go to sleep and because of that, the bed flattening stopped midway and I had to dig slightly deeper - 1.5 mm and reflatten.

Tools: Clank
Date: 9.13.2020

Once i was done with flattening the bed, we need to try the machine to mill a board. I tried to mill a trace - the circuit that i had designed. The steps to get to that - Place your circuit and stick it tightly to the flatbed. Then, adjust the x,y,z coordinates such that they are roughly in the middle of your board. Adjust the speed of the mill, the depth for thickness of engraving and then hit go.


I had to use an image - a png of my board and upload it on the fab modules, then calculate the path and then hit run. Unfortunately, i did something wrong here since the endmill - 1/64th scratched across the board, broke the mill edge and stopped working. This was weird since this happened midway through the milling. This taught me the importance of placing your board correctly, the importance if bringing your end mill down to the board slowly down when you do the test for the z axis.


This is when i decided i better use the other mill at the lab to mill my final boards.

Here's a video of the clank assembly at home. Obviously it took a lot lot longer than evident here.