Getting Set Up For Electronics Design & Embedded Programming
Hi everyone! This week I embarked on setting up the samd11c programmer and using it to program an attiny412 to control the blinking rate of an LED. The boards and code were provided in class and I thought it might be helpful to go through some of the steps in more detail and cover some issues I ran into. I'm hoping you'll find this useful as you work on the designs of your board this week. I tried this on windows and mac systems. There is still one unresolved error on the mac side of things, but we can work around it for now. I'll make a note of it below when we get to it.High level, I'll be working with two different microcontrollers - the samd11c (ARM based MCU) which will act as our programmer and the attiny412 (AVR based MCU) which I'll load a program onto to blink an LED! To accomplish this I mainly followed THIS page by Quentin. You'll find most of the information you need there. I'll just be adding a few notes here and there.
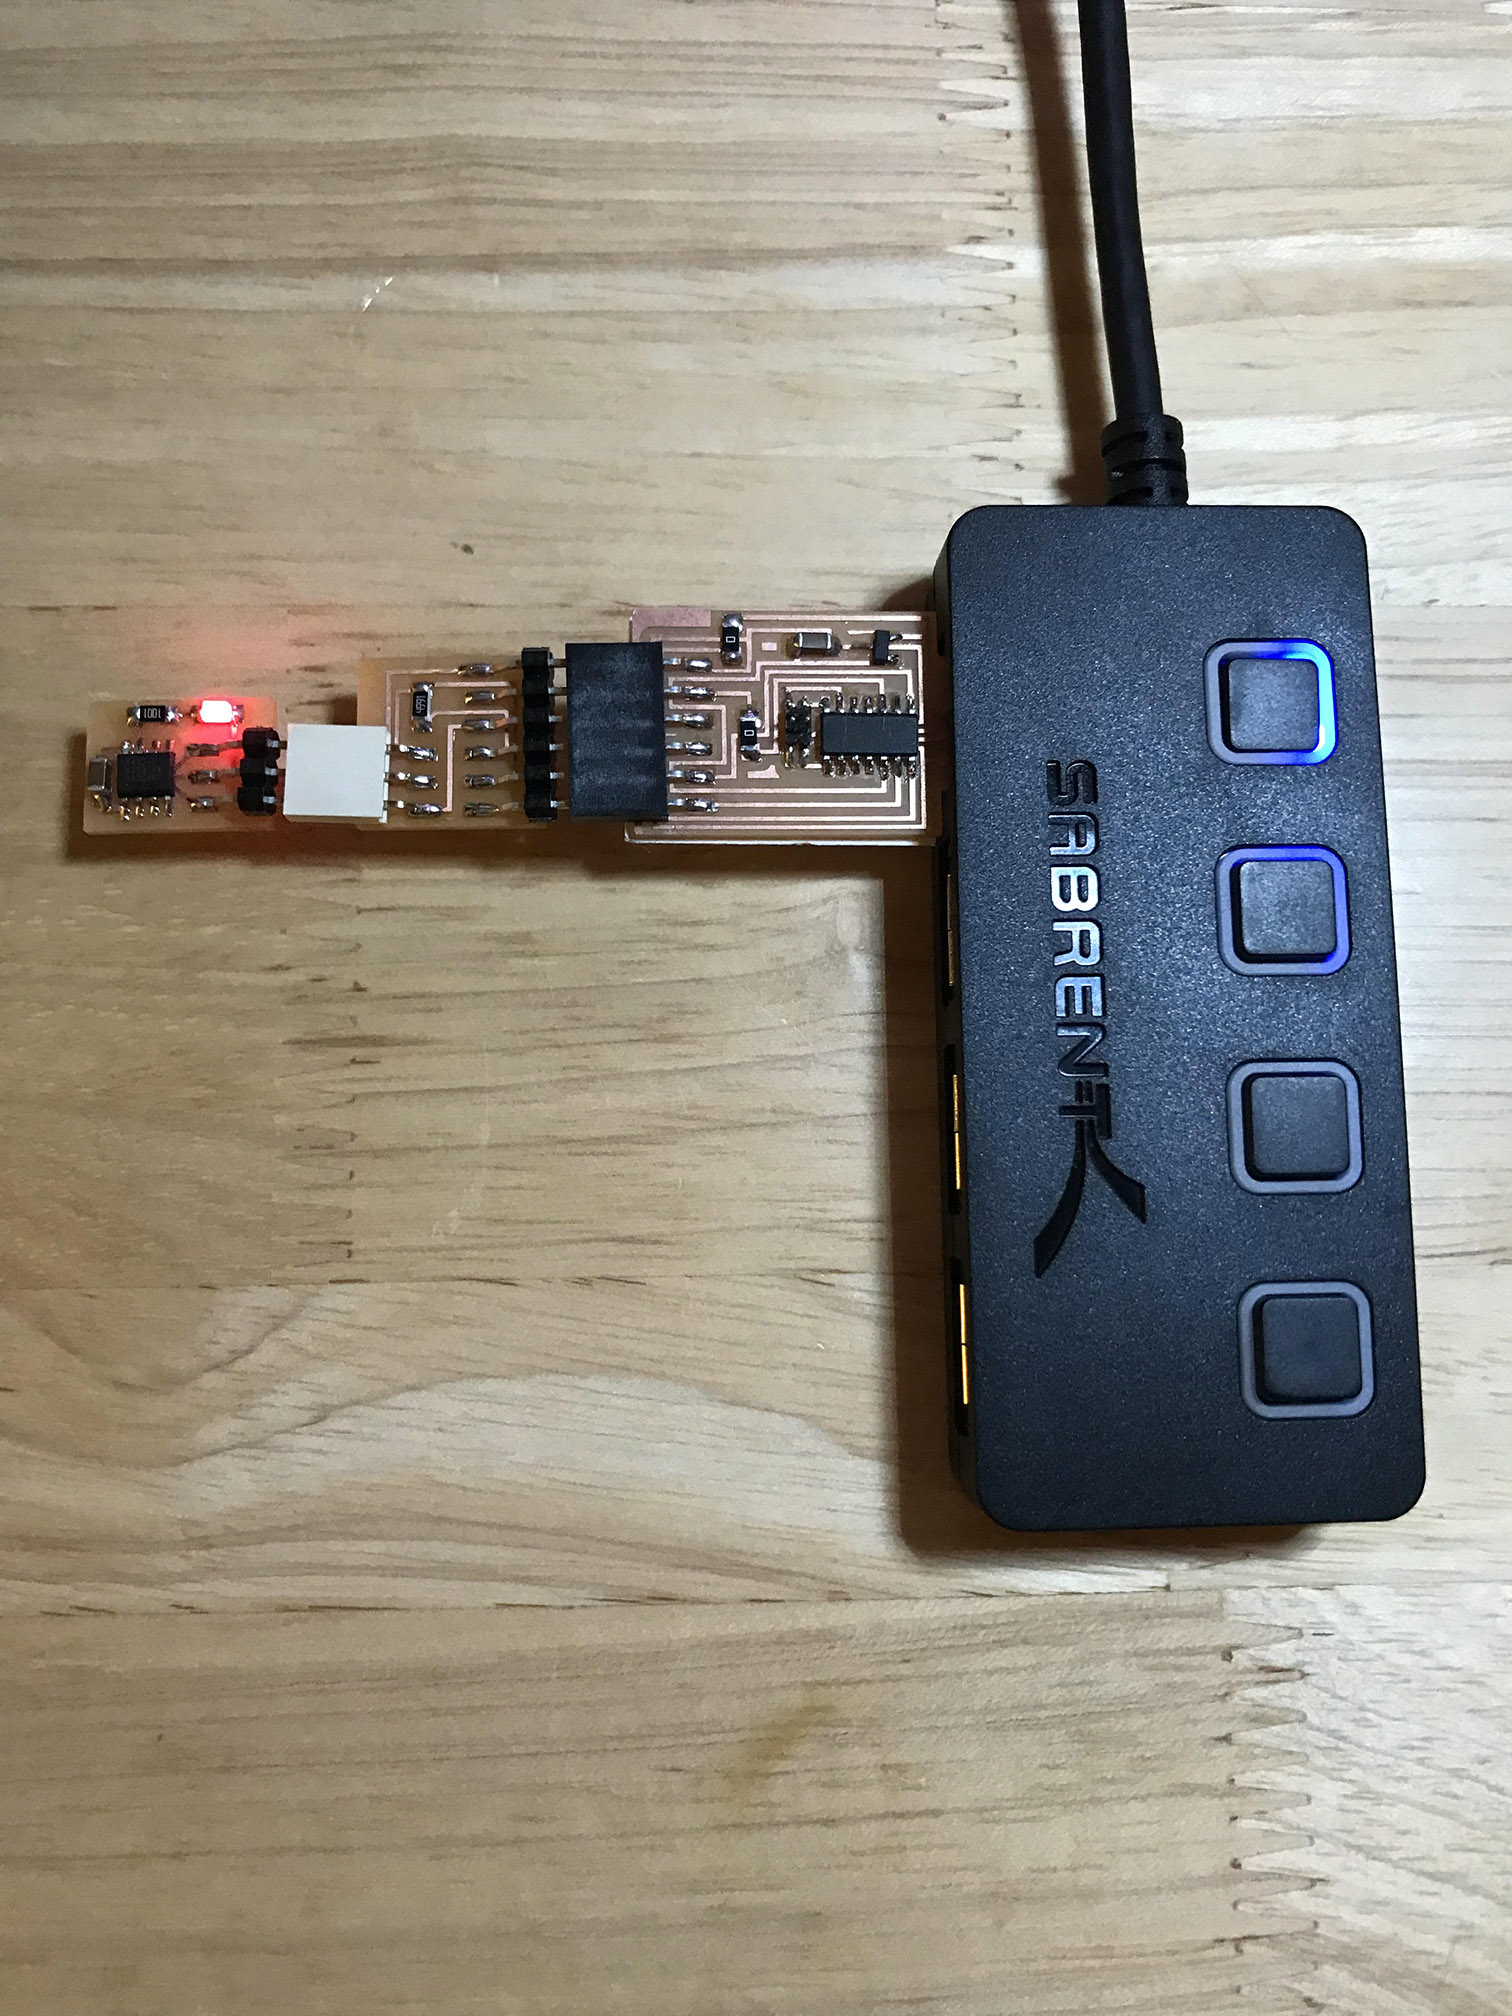
Here is the goal of our mission:
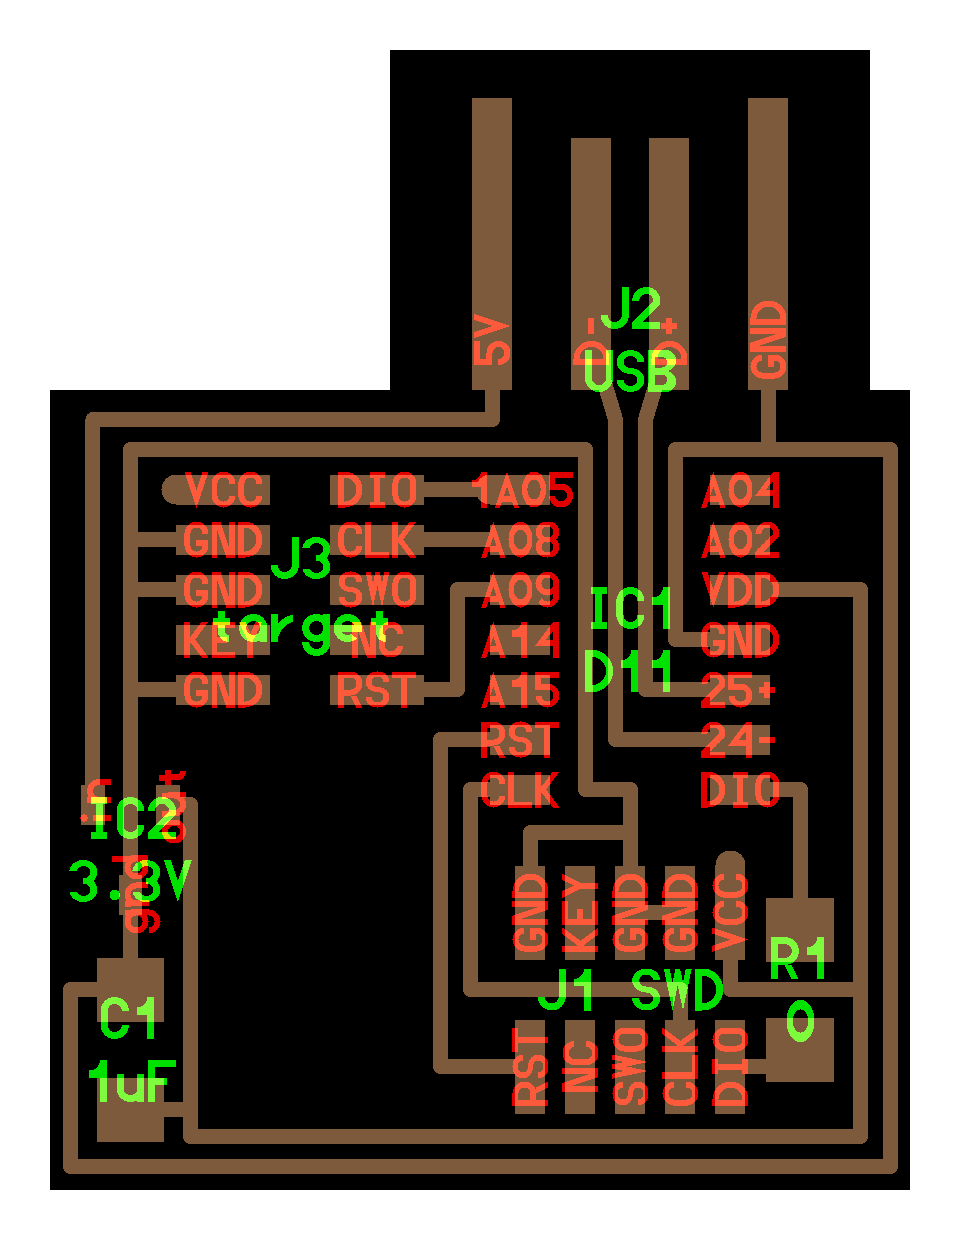
To get here we first need to mill and stuff the following boards:
- The 10 pin d11c
- The hello serial d11c
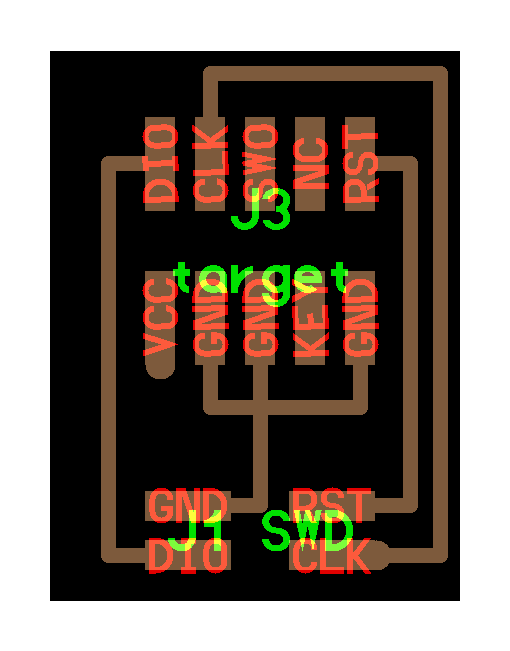
- The hello SWD 10 to 4 pin
- The serial to UPDI
- The hello blink attiny412


We also need to install the following
Windows:- edbg
- arduino ide
- edbg
- brew (to install edbg dependencies)
- arduino ide
And download some binary files
Now that you know the pieces we can started!With Windows
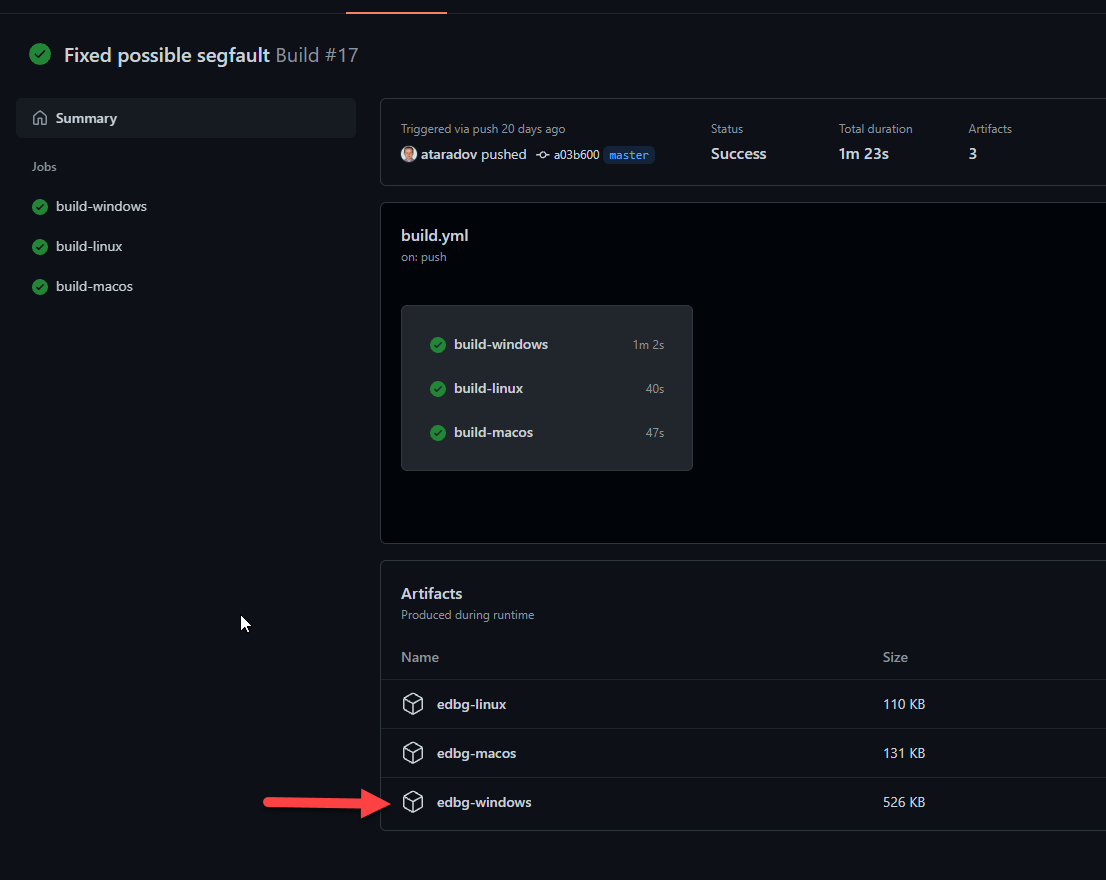
To install EDBG I found that it was easier to download the edbg.exe file from the git repository and adding the PATH vs installing make, minGW, and cygwin64. Shout out to Anthony for the advice - using the edbg.exe is much much simpler. To do that go to the edbg git repository, click on the action builds under installation, go to the latest build (for me it was #17) and download the edbg-windows file. You can download only if you are signed in to git.


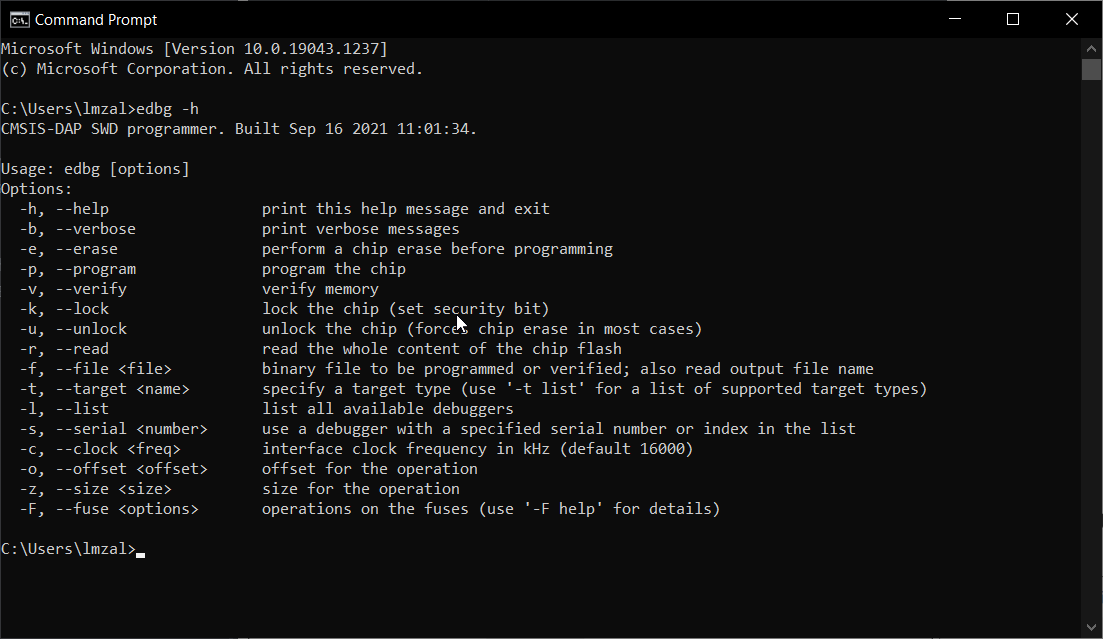
If all is done properly you should be able to type "edbg -h" in the command prompt and get the following:
Also install the arduino ide. This should be straightforward so I won't go into it here.
With Mac
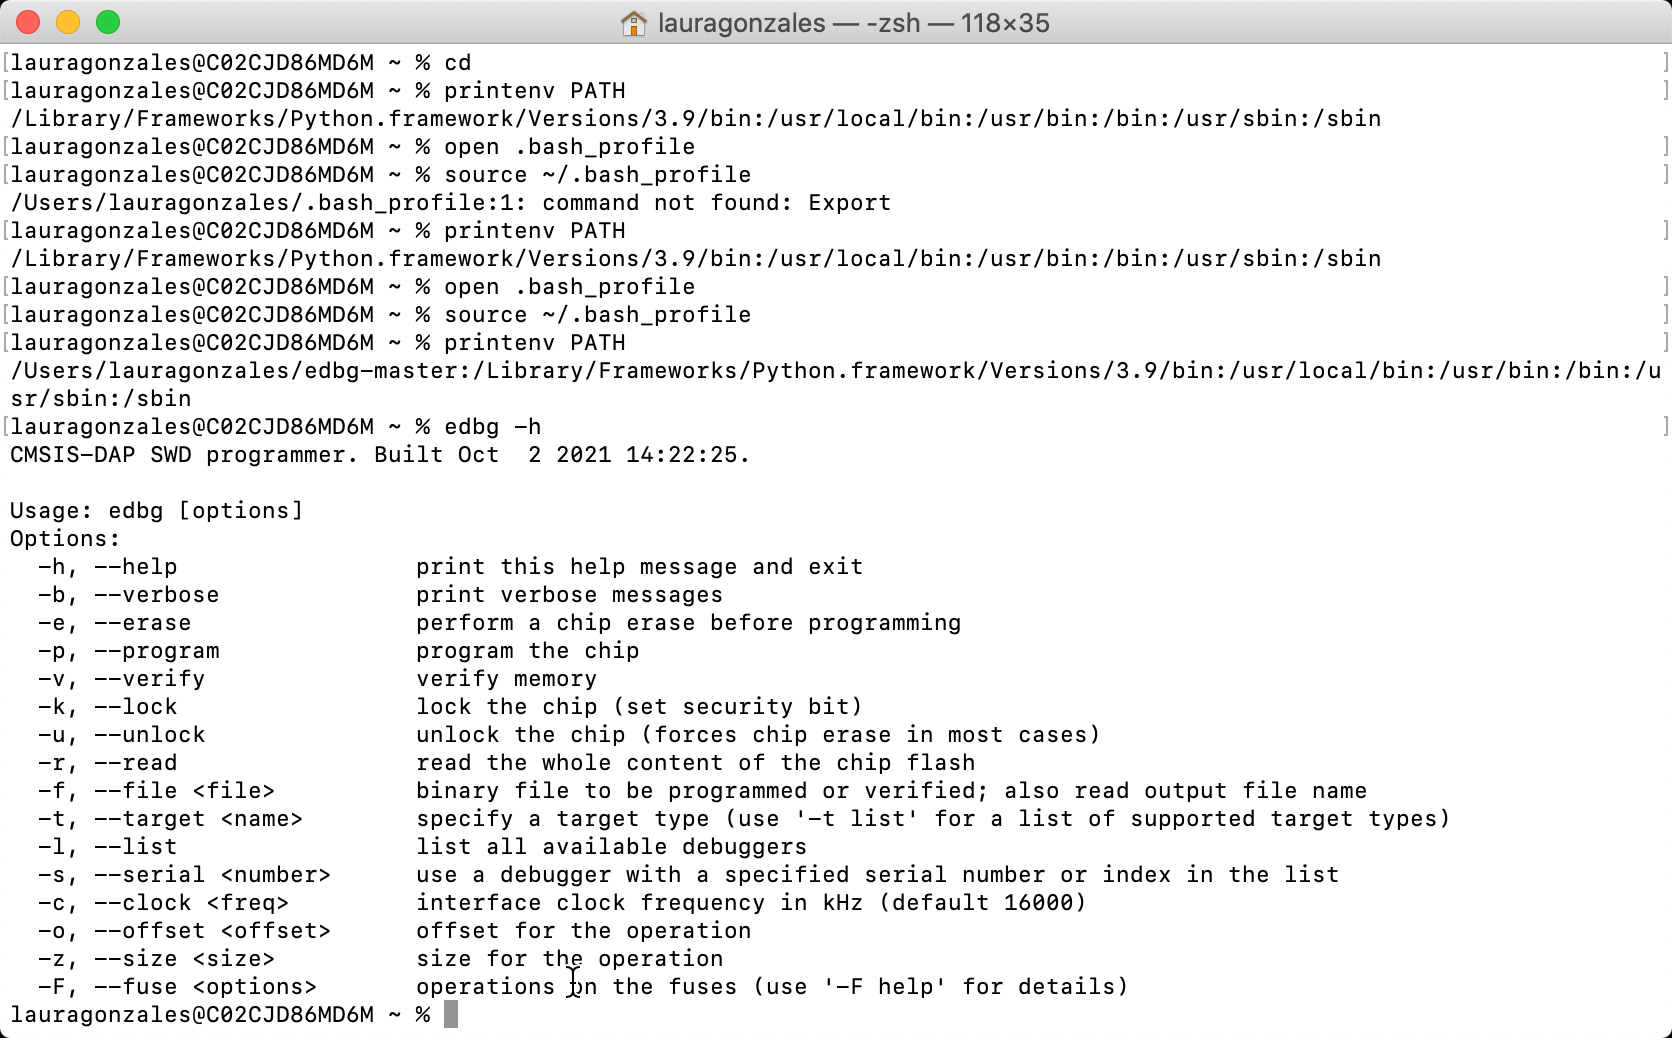
I followed this documentation HERE to set up edbg on Mac. On mac you can use "make all" to install edbg after you clone the repo or download the zip file. You then need to install libhidapi with brew and make sure you are in the same directory as your binary file when you go to flash it to your board.Same as windows - you can use "edbg -h" to check if the install was successful. Will look like this:
On to the boards!
"edbg -bpv -e -t samd11 -f free_dap_d11c_mini.bin"
to flash the device. Note that we are using a different binary file than the one used by Quentin because we are hoping to use this device to load a binary file onto another d11c. If all goes well we will see something like this (except with a different binary, forgot to screenshot in that moment):

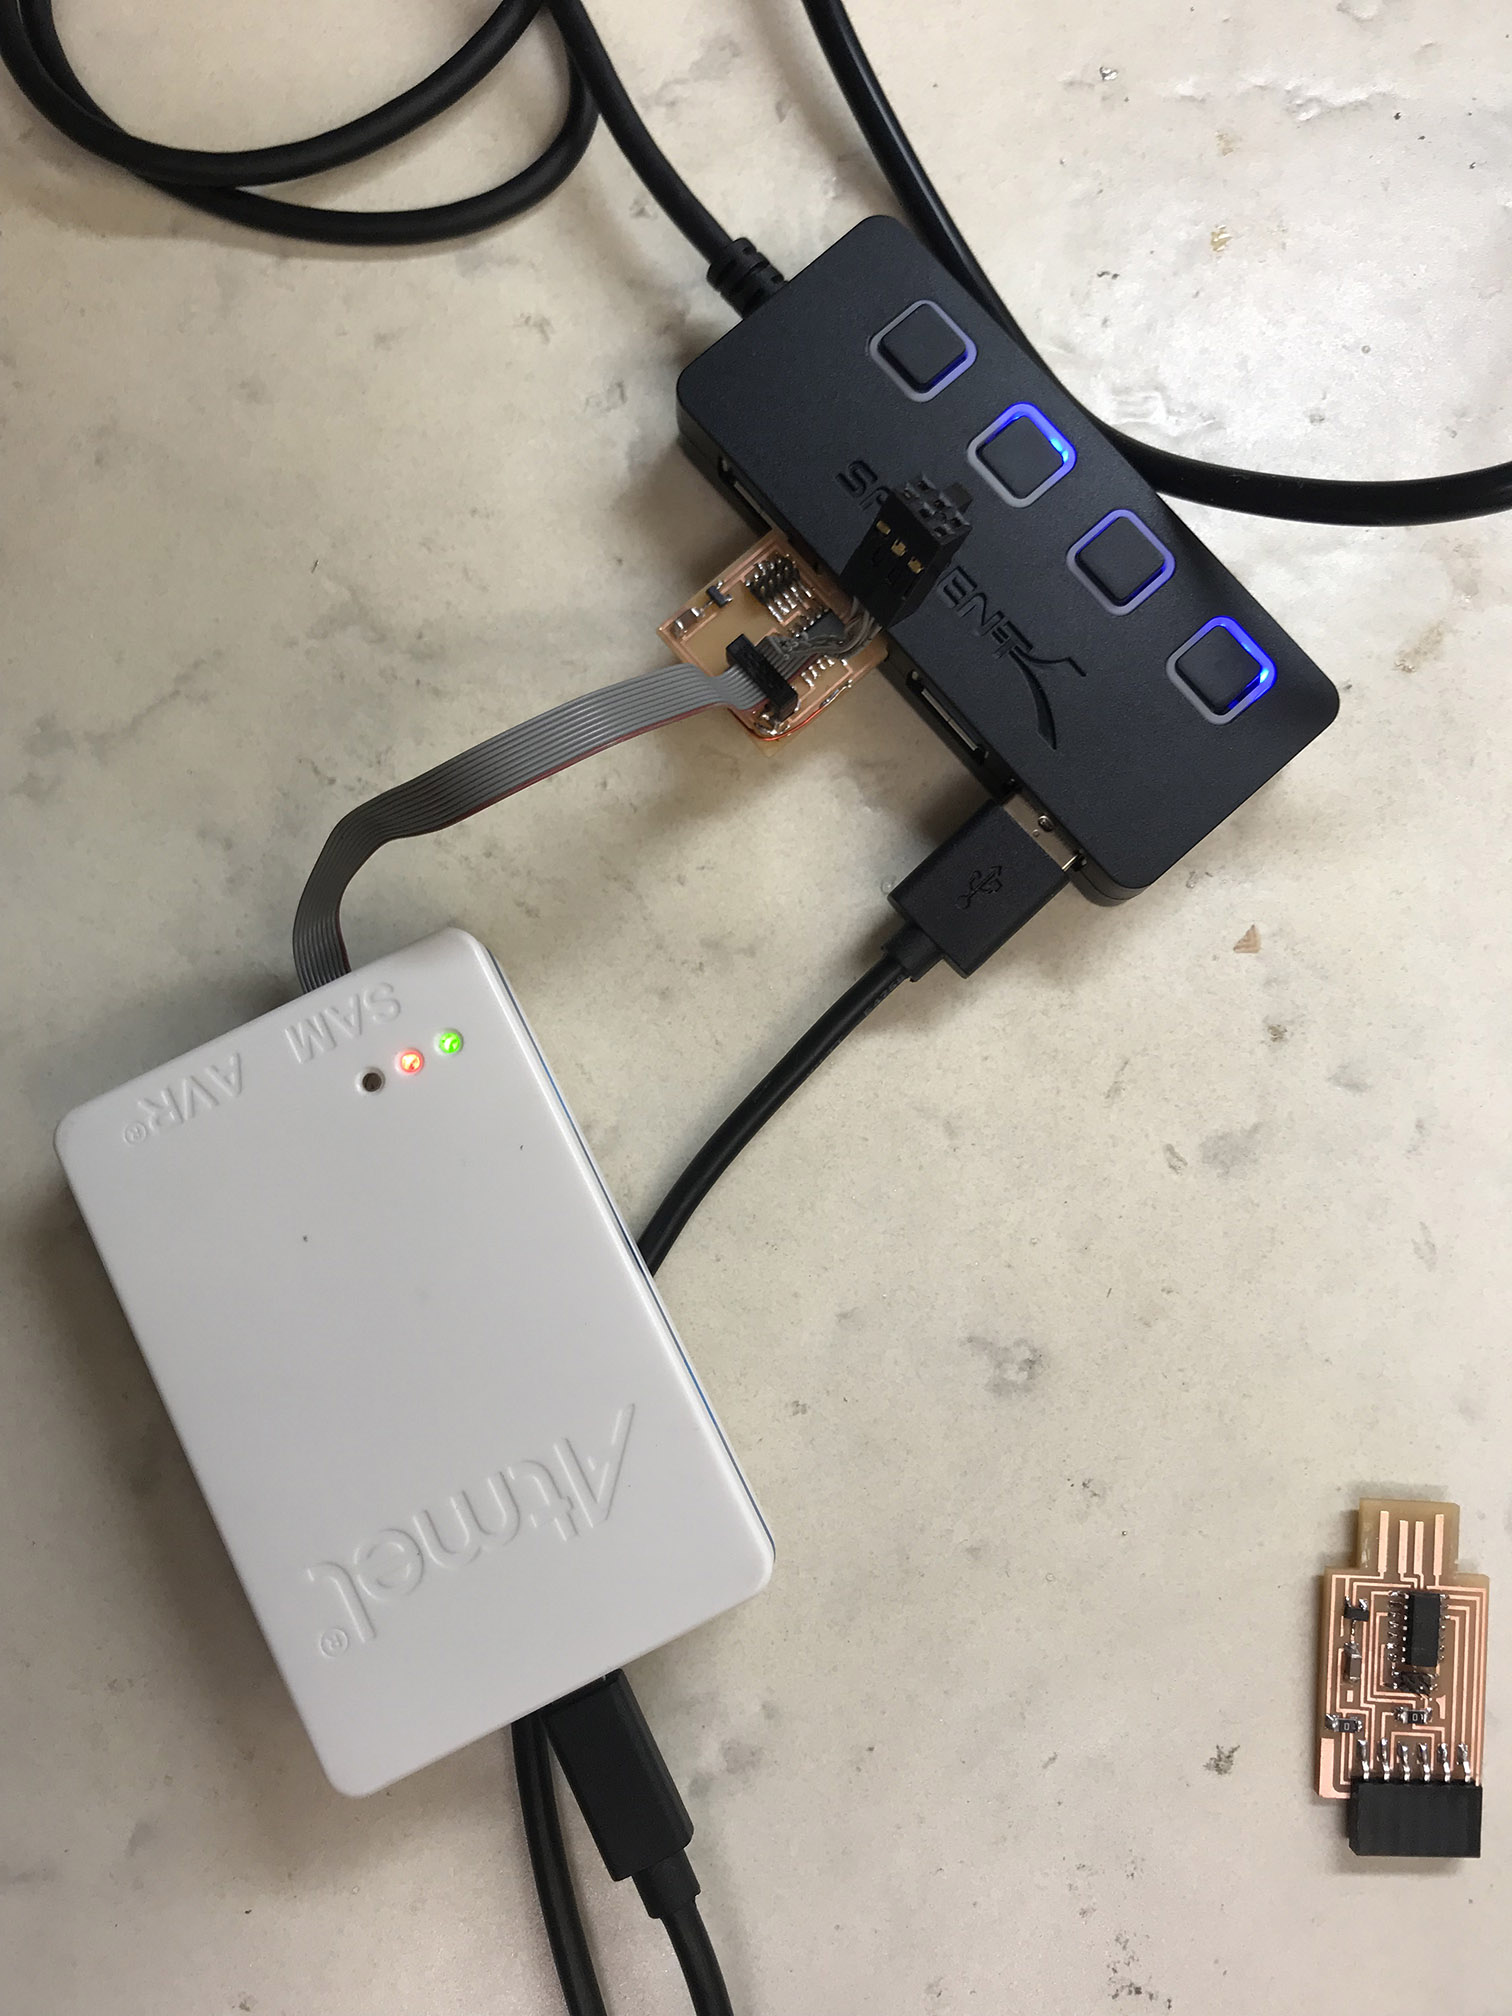
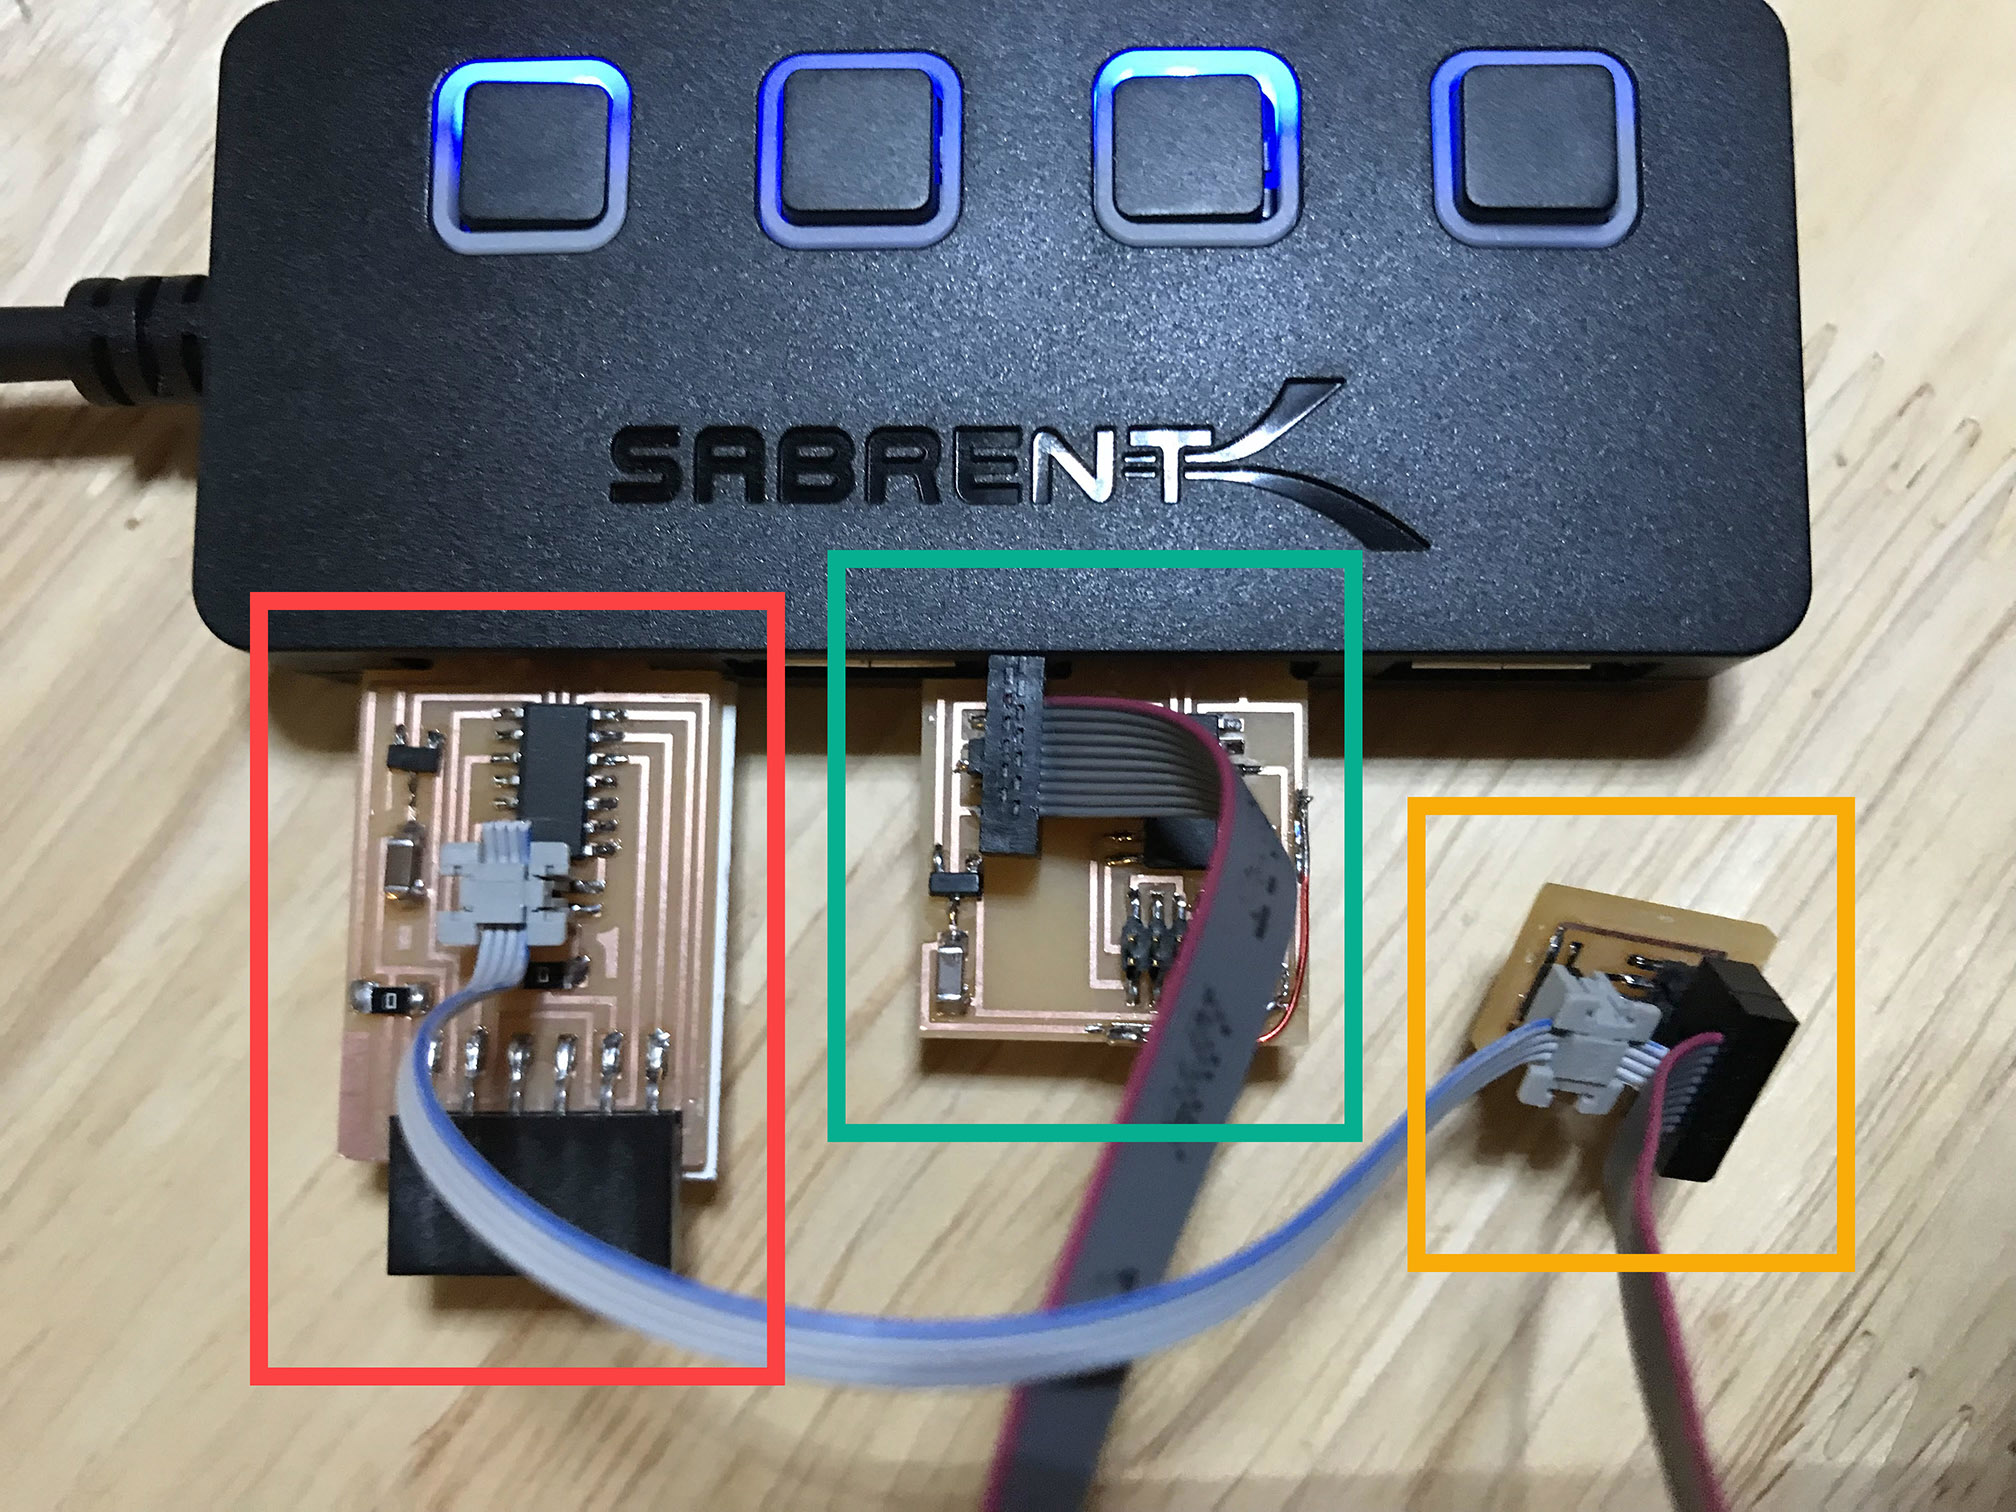
Now that the bootloader is on the board we can disconnect the atmel ice and insert the hello serial d11c board (red) using the 10 to 4 pin adapter(yellow) to connect the two. Note the cable orientation!
Use the terminal again - this time to flash the other binary file.
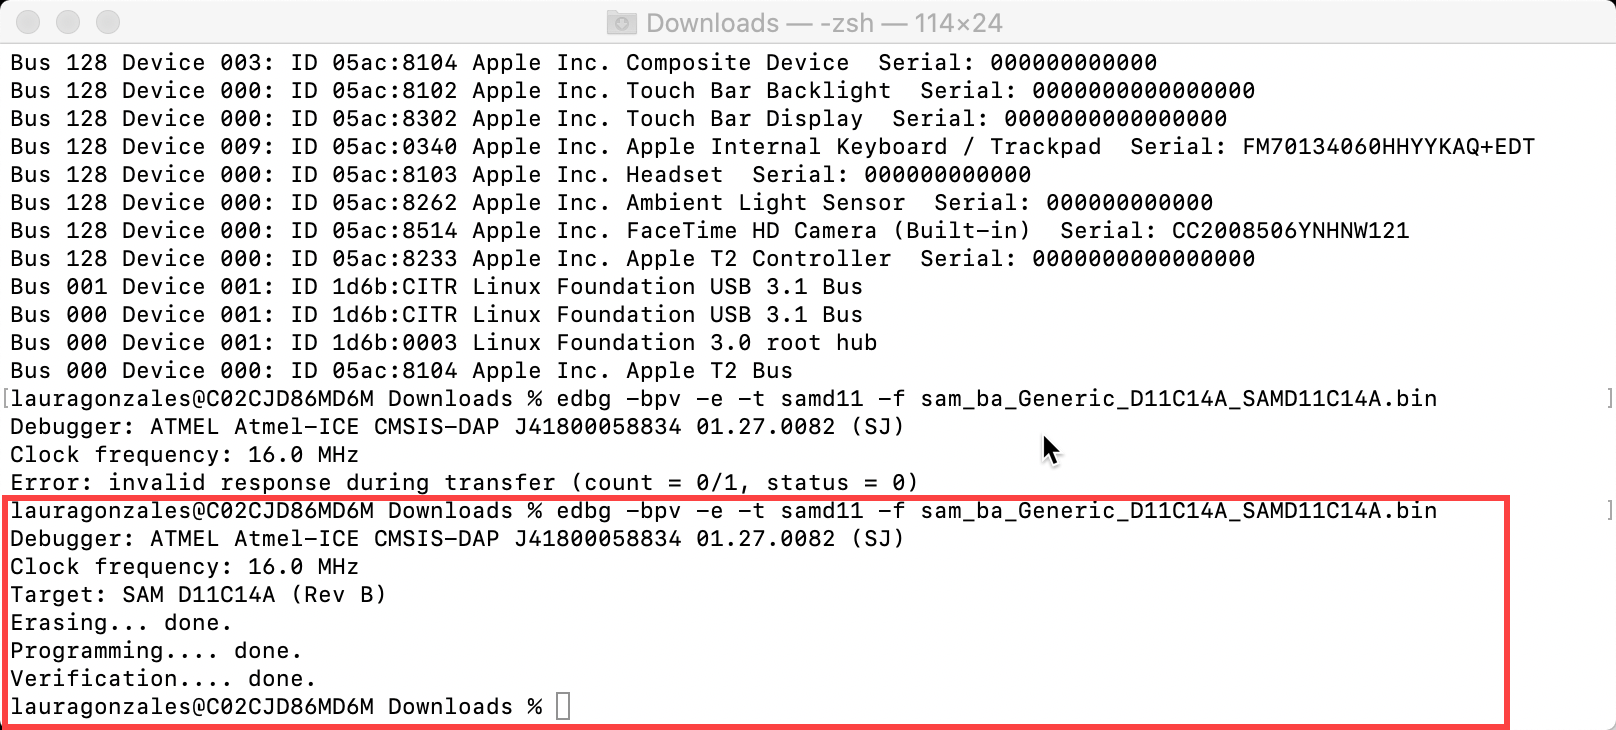
"edbg -bpv -e -t samd11 -f sam_ba_Generic_D11C14A_SAMD11C14A.bin"
If all goes well you should get the same message as before in the terminal letting you know that the erasing, programming, and verification is done.

BUT here is where i ran into the mac specific issue. When trying to load the binary into the hello serial d11c board I got the error "Error: incorrect DAP_INFO_CAPABILITIES size" This error does not occur when loading the free-dap binary file onto the 10 pin d11c board from the atmel-ice. It only occurs when trying to use that board to program the hello serial d11c board. For now we can use the shop computers to program the hello serial boards for mac users. However, all other steps should work just fine.
After your bootloaders are successfully installed you can jump to the arduino portion of Quentin's page. I didn't run into any unforseen errors there.
Hope this was useful!