Group Assignment
Characterize the Design Rules for our 3D Printer
Our group collectively printed all of the test pieces, and through this we learned how to operate the Sindoh 3D printers available to us. Given that the Sindoh is a relatively advanced 3D printer, the process was really easy - we just loaded the STL files into the 3DWOX application, sliced it, and saved it as G-Code. We then transfered the G-Code to either the 3DWOX (older) or 3DWOX1 machine, and clicked print! You'll see our prints below, and a table summarizing our observations.


Individual Assignment
Design and 3D print an Object That Could Not Be Made Subtractively
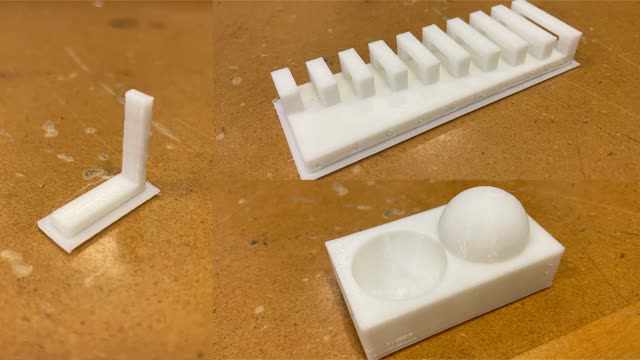
I wanted to use this weeks assignment as an opportunity to test out a mechanism I think I will use for my final project. My final project goal is to make an automatic page turning device for a book, and for this, I will need some sort of size adjustment mechanism to fit a given book. My idea is to use incorporate a gear and two rails that move in opposite directions. Imagine that each rail is attached to a a hook or latch, and as you turn the gears, it would bring the two ends closer together or further apart. To make this a design that can't be made subtractively, rather than print each component individually, I decided to print the whole model together. Take a look at my model!


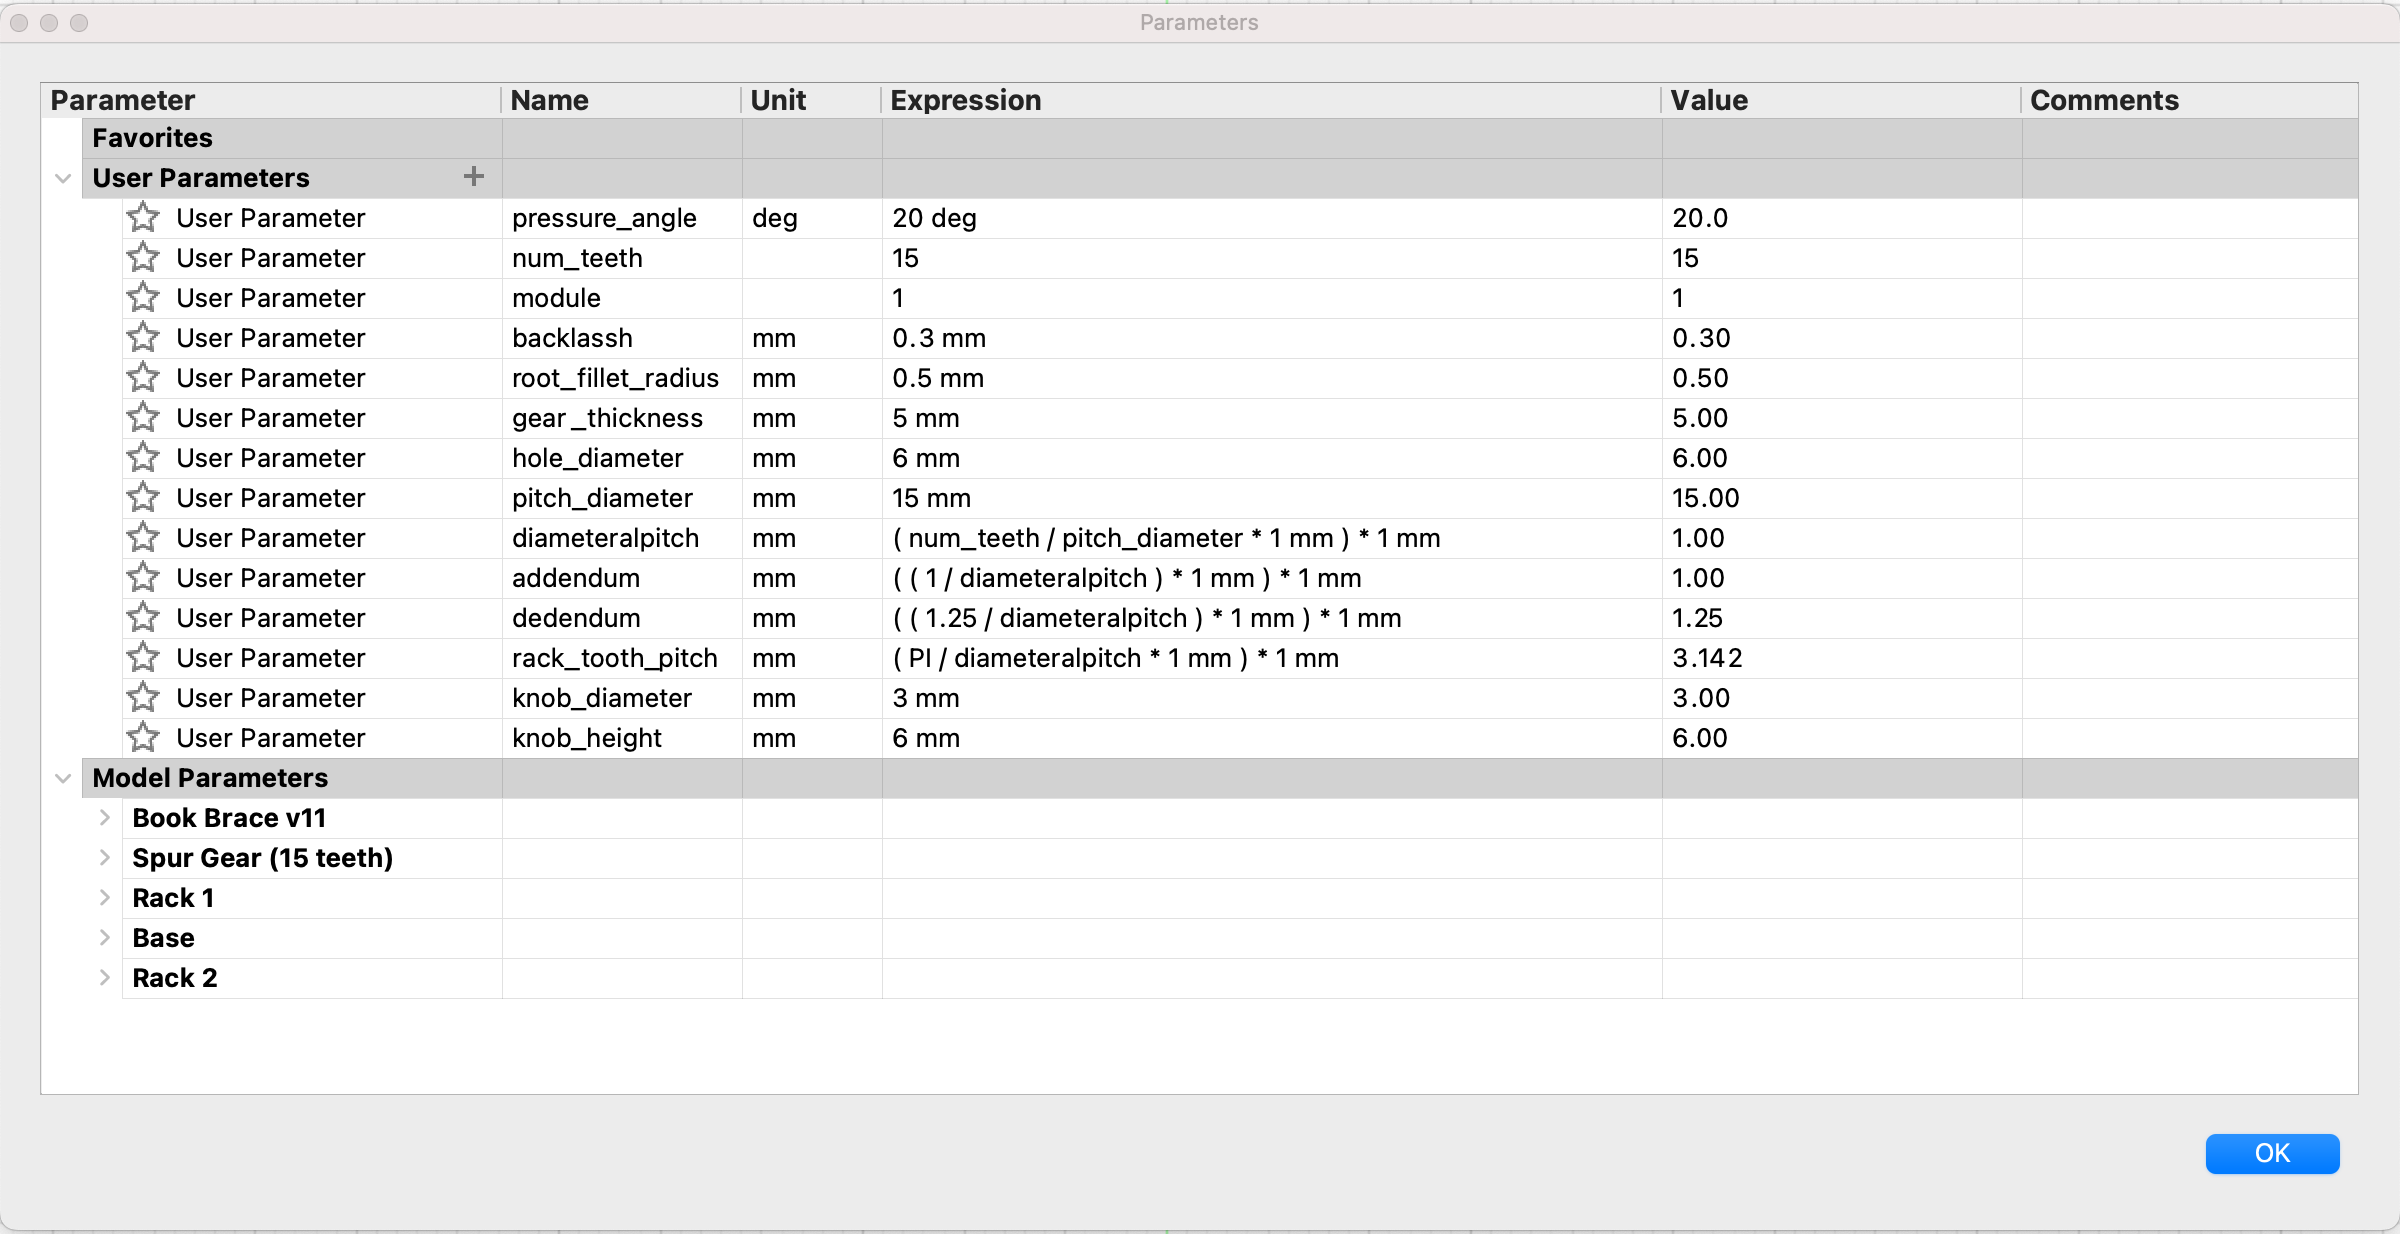
To build the gear, I used the built-in Spur Gear script in Fusion 360 (you'll see how it's parameterized below). I then had to design the teeth that would compose the rack, and make sure that these teeth will be compatible with my gear. As you can see, I defined a bunch of gear parameters.


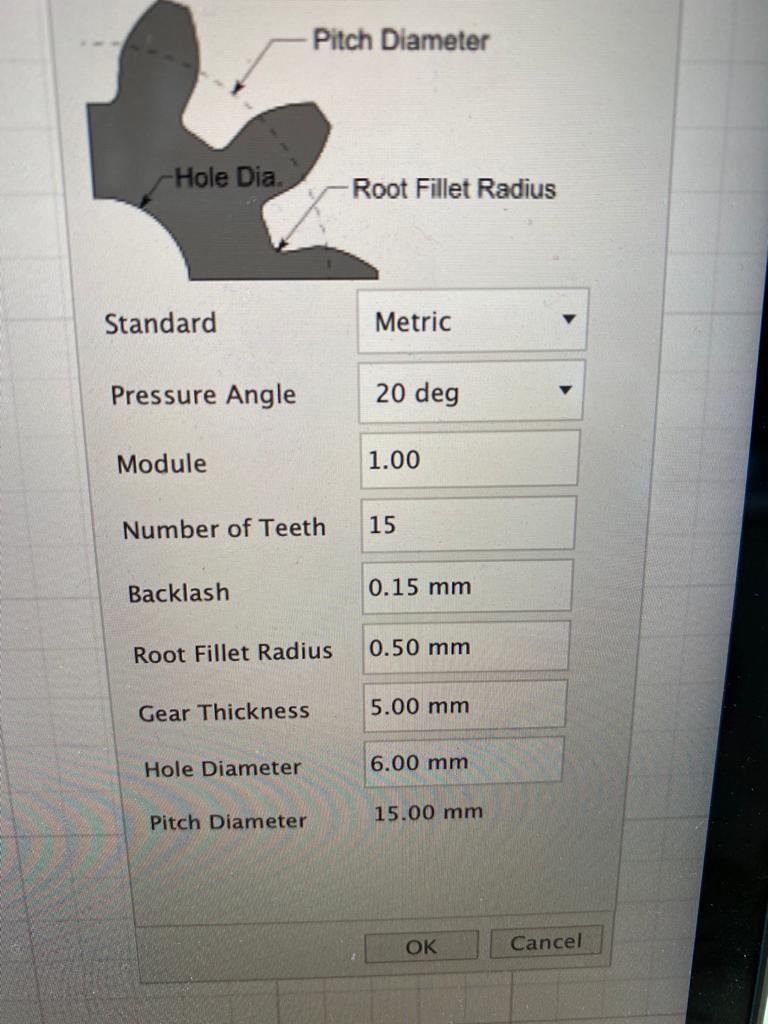
The most important parameter above is the 'backlash', and this essentially controlled my tolerance. I had to tweak this parameter three times to find the right balance.
Next step was to print! It was very straightforward. I just saved my CAD model as a mesh (STL file), and imported it into the 3DWOX app. From there, I sliced it and saved it as a G-Code. Below you'll see how it looked in the software.


And this was what my first attempt looked like! It looks super clean, but unfortunately the tolerance was not enough, and all the parts fused together!


After increasing 'backlash' to 5mm, there was finally enough tolerance to start picking apart the components. I still had to use my kitchen knife too scrape the supports, but it turned out okay! Also, the mechanism works decently well.

3D Scan and Print an Object: My Llama
I decided to 3D scan my llama side table, and I used the iPhone app Polycam! I placed my llama in the center of my apartment (where the lighting is even), and using the Polycam app I took 74 photos while slowly walking around it. Note, the reason I walked slowly was because I had to make sure there was at least 50% overlap between sequntial photos. I also made sure to take photos from as many different angles as possible. As you can see, the 3D scan turned out really well, though the bottom of the llama did not come out as cleanly. This is probably because I did not take enough photos around the bottom.


Next, I exported my scan from Polycam as a GLTF file (it was the only export type that was free), and I then converted it to a OBJ file. I then imported this into Fusion 360 as you can see. From there I followed the same procedure as above (saved as mesh, imported into 3DWOX, sliced, and then saved as G-Code).


And here are the results of my print! As you can see, the llama is adorable :)


I just couldn't help myself...

Files
Double Rack Pinion CAD (Fusion 360)Double Rack Pinion Mesh
Llama CAD (imported into Fusion 360)
Llama Mesh