Computer Controlled Machining
This week we used ShopBot to make something Big! I was terrified of using this machine after Neil's class but thanks to Tom and John in the shop - it wasn't so scary if I remembered to do all the things we were taught during training. Plus taking a video of Tom talking during training helped quite a bit.
Initially I wasn't sure about what I wanted to make.I was talking to my sister about this class and she mentioned I should make a Charkha or a weaving loom or both (I definitely didn't make both). Charkha is a spinning wheel used to make thread from raw cotton. Mahatma Gandhi and other leaders of Indian independence images/project_images/ement used it as a symbol of Indians achieving self-sufficiency.

It's a simple machine consisting of one large gear and a smaller spinnable needle and spun using a handle on the larger wheel.
I noticed that most of the designs had individual spokes of the wheel glued on top of each other. I made the following very simple designs in Fusion 360 because this is the tool I am now most used to.
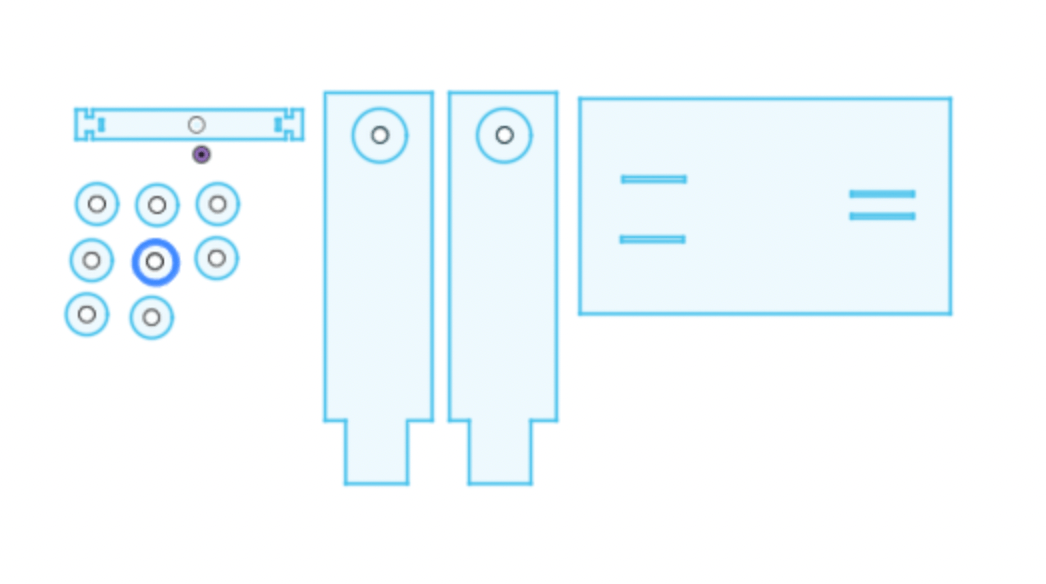
I then exported it as a DXF and downloaded it onto the work station attached to the shopbot. because I had copy pasted my designs sometimes while on Autodesk - when I generated the tool paths it had duplicate lines - I deleted those. My holes were about 8mm diameter. I did everything in mm so had to convert everything to mm while on vcarve. Tom helped me as I was doing this. I want to remember how to do this in the future so I made some notes about all the steps I need to do.
Steps
1) Make sure the bed is clean - Vacuum any dust left over from the previous job. Put a new sheet on the bed - doesn't really matter wher.
2) Nail it to the bed so it's as flat as possible
3) Open your file in vcarve. First make a new project - set the job dimensions and click ok. The vcarve will let you import vectors. I imported my dxf file.
4) I copy pasted my spokes design 6 times.
5) I clicked on the tool paths - pin it so it doesn't images/project_images/e.
6) Then select the end mill parameters we are using.
7) I could have added tabs from the tool paths tab but I didn't because Tom said it didn't seem like I needed them.
8) Click to generate the tool paths. Check the 2d view to make sure it's going to mill where I want it
9) Next step is to zero the end mill. To do this save tool paths file and the project and exit out of VCarve.
10) Open the shopbot panel - click on the yellow button on it. And then use the up down arrow keys to get it to XY zero position we want.
11) Then open the shopbot terminals' and so the XY zero. Also remember to close the yellow screen before doing.
12) Next select z zero after I put the metal plate down. Click ok→ when it's done zeroing put the metal plate back in the side.
13) Now I can load my tool paths file and cut.
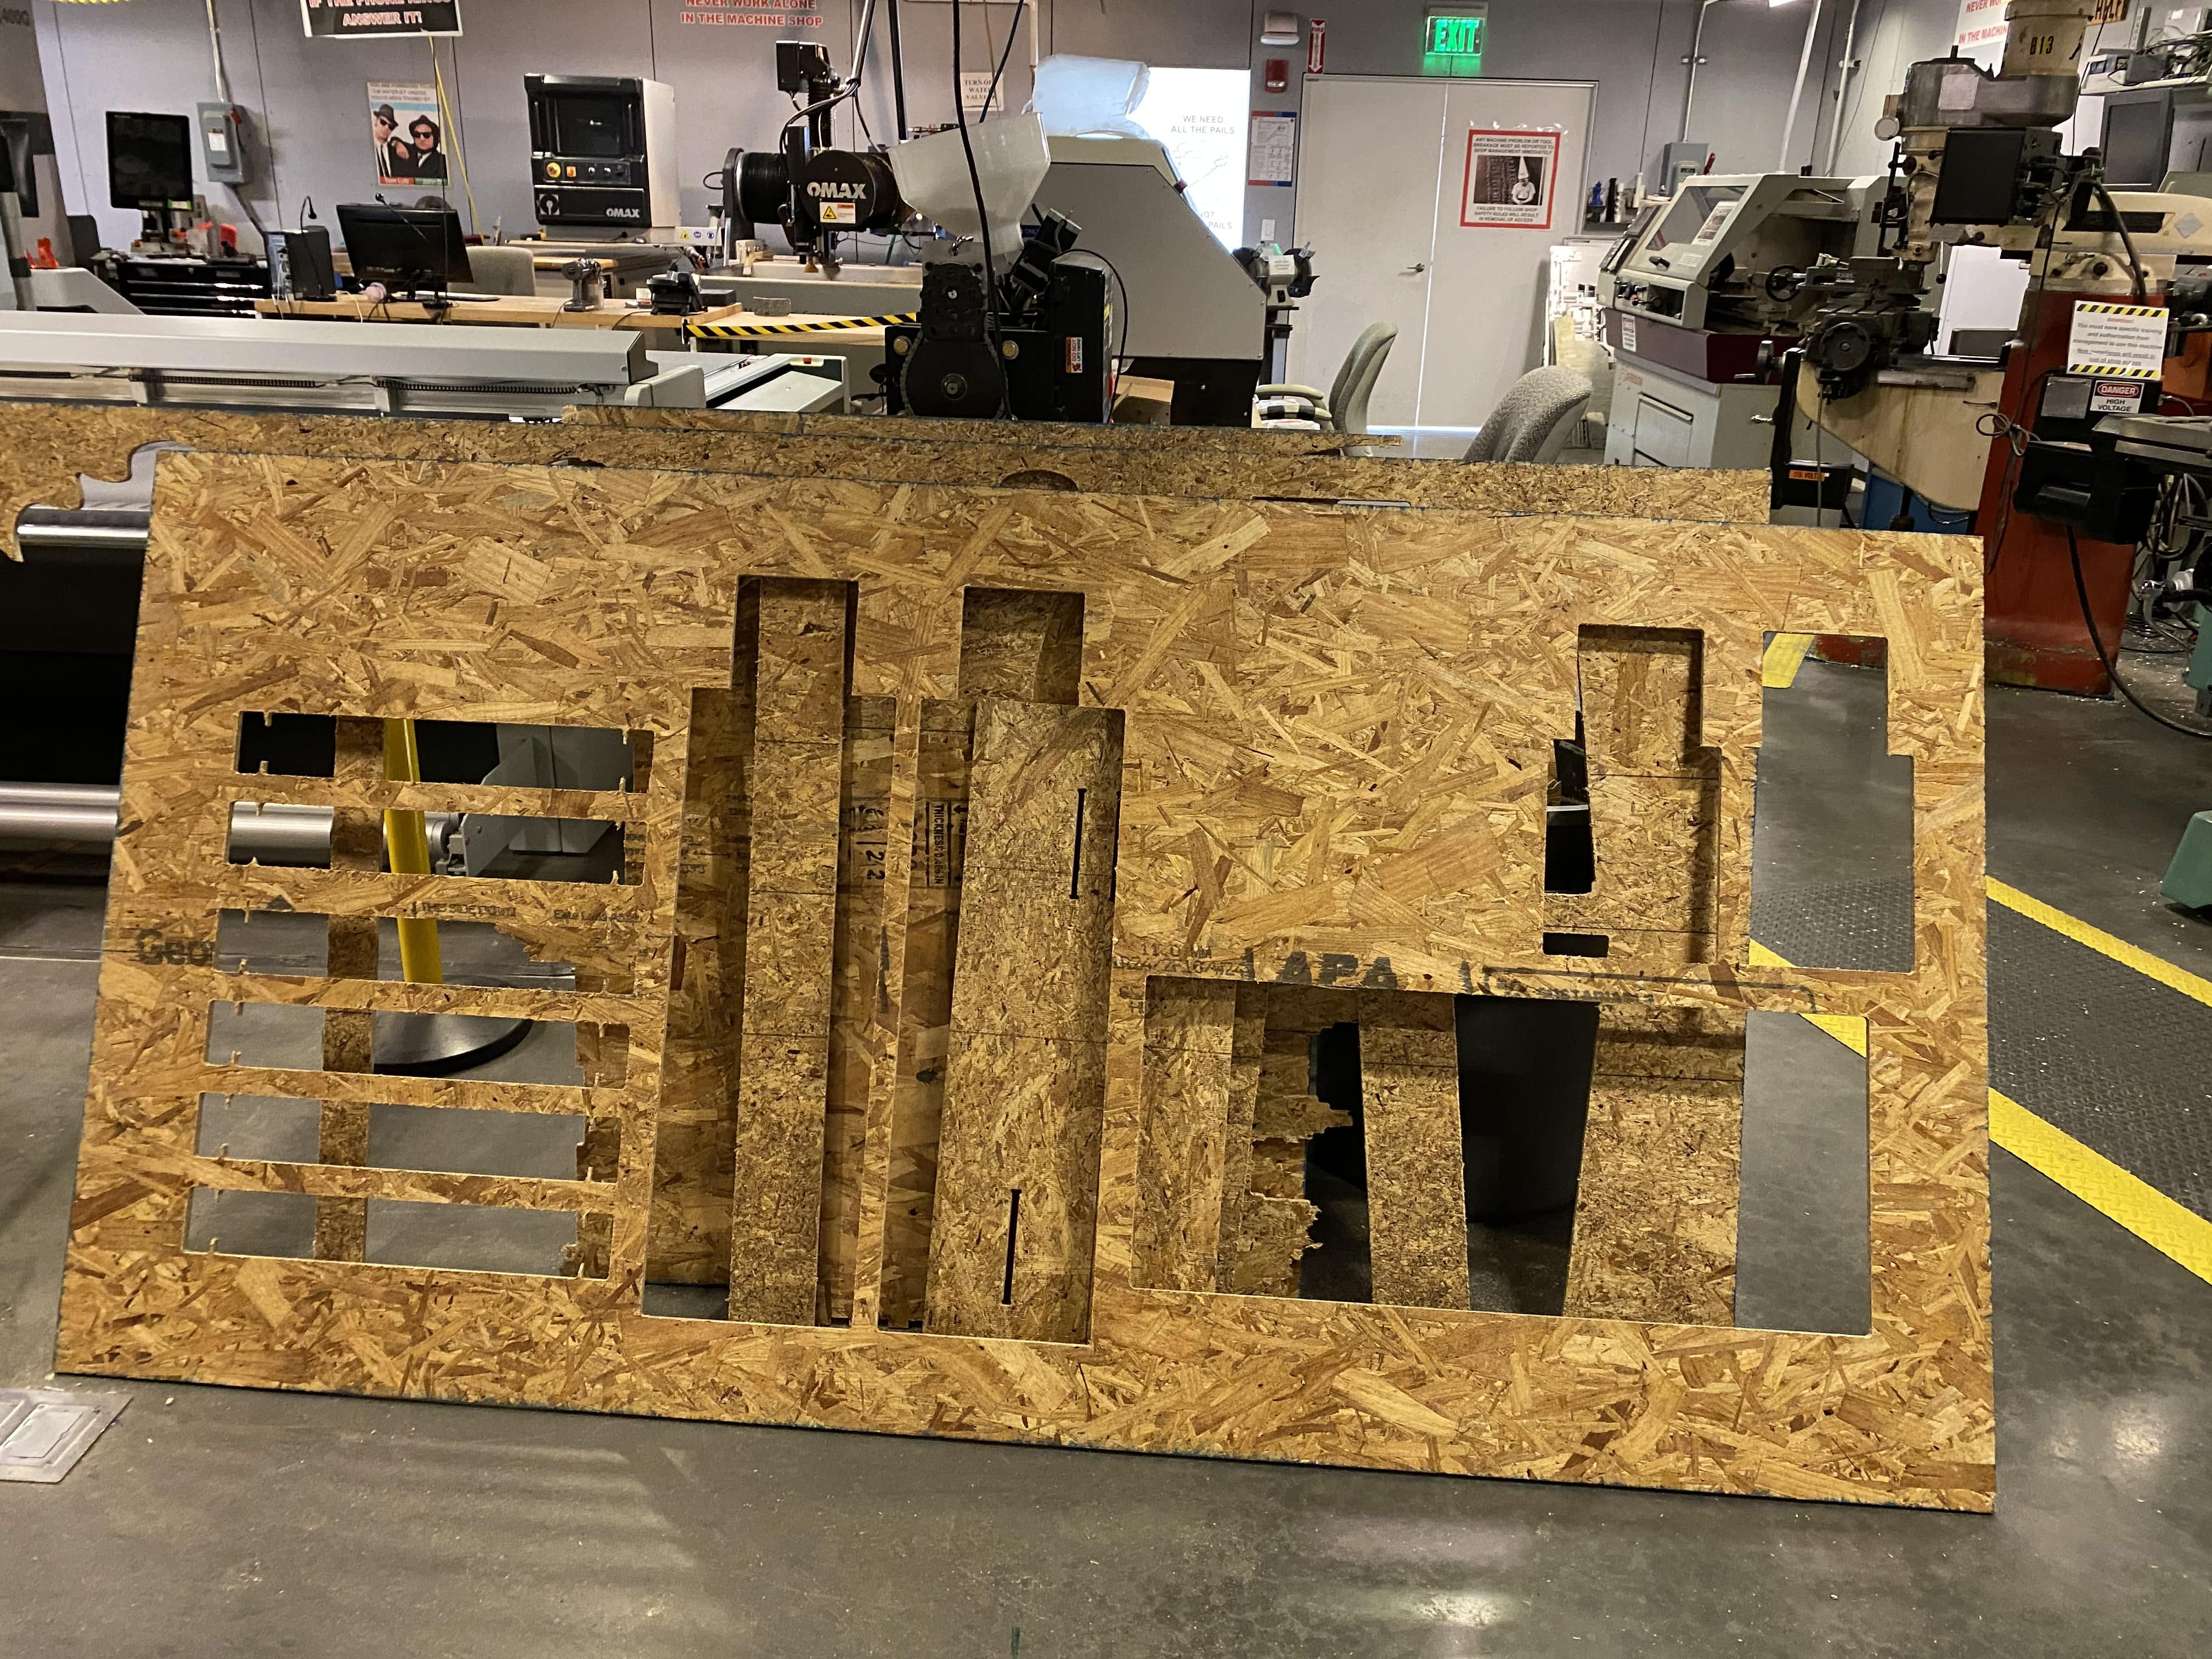
I made six of the top left spokes. I included a dent for the thread to hook on to. With Tom's help I cut these out on the shopbot. Thankfully it only took one attempt because I used up all of the sheet.
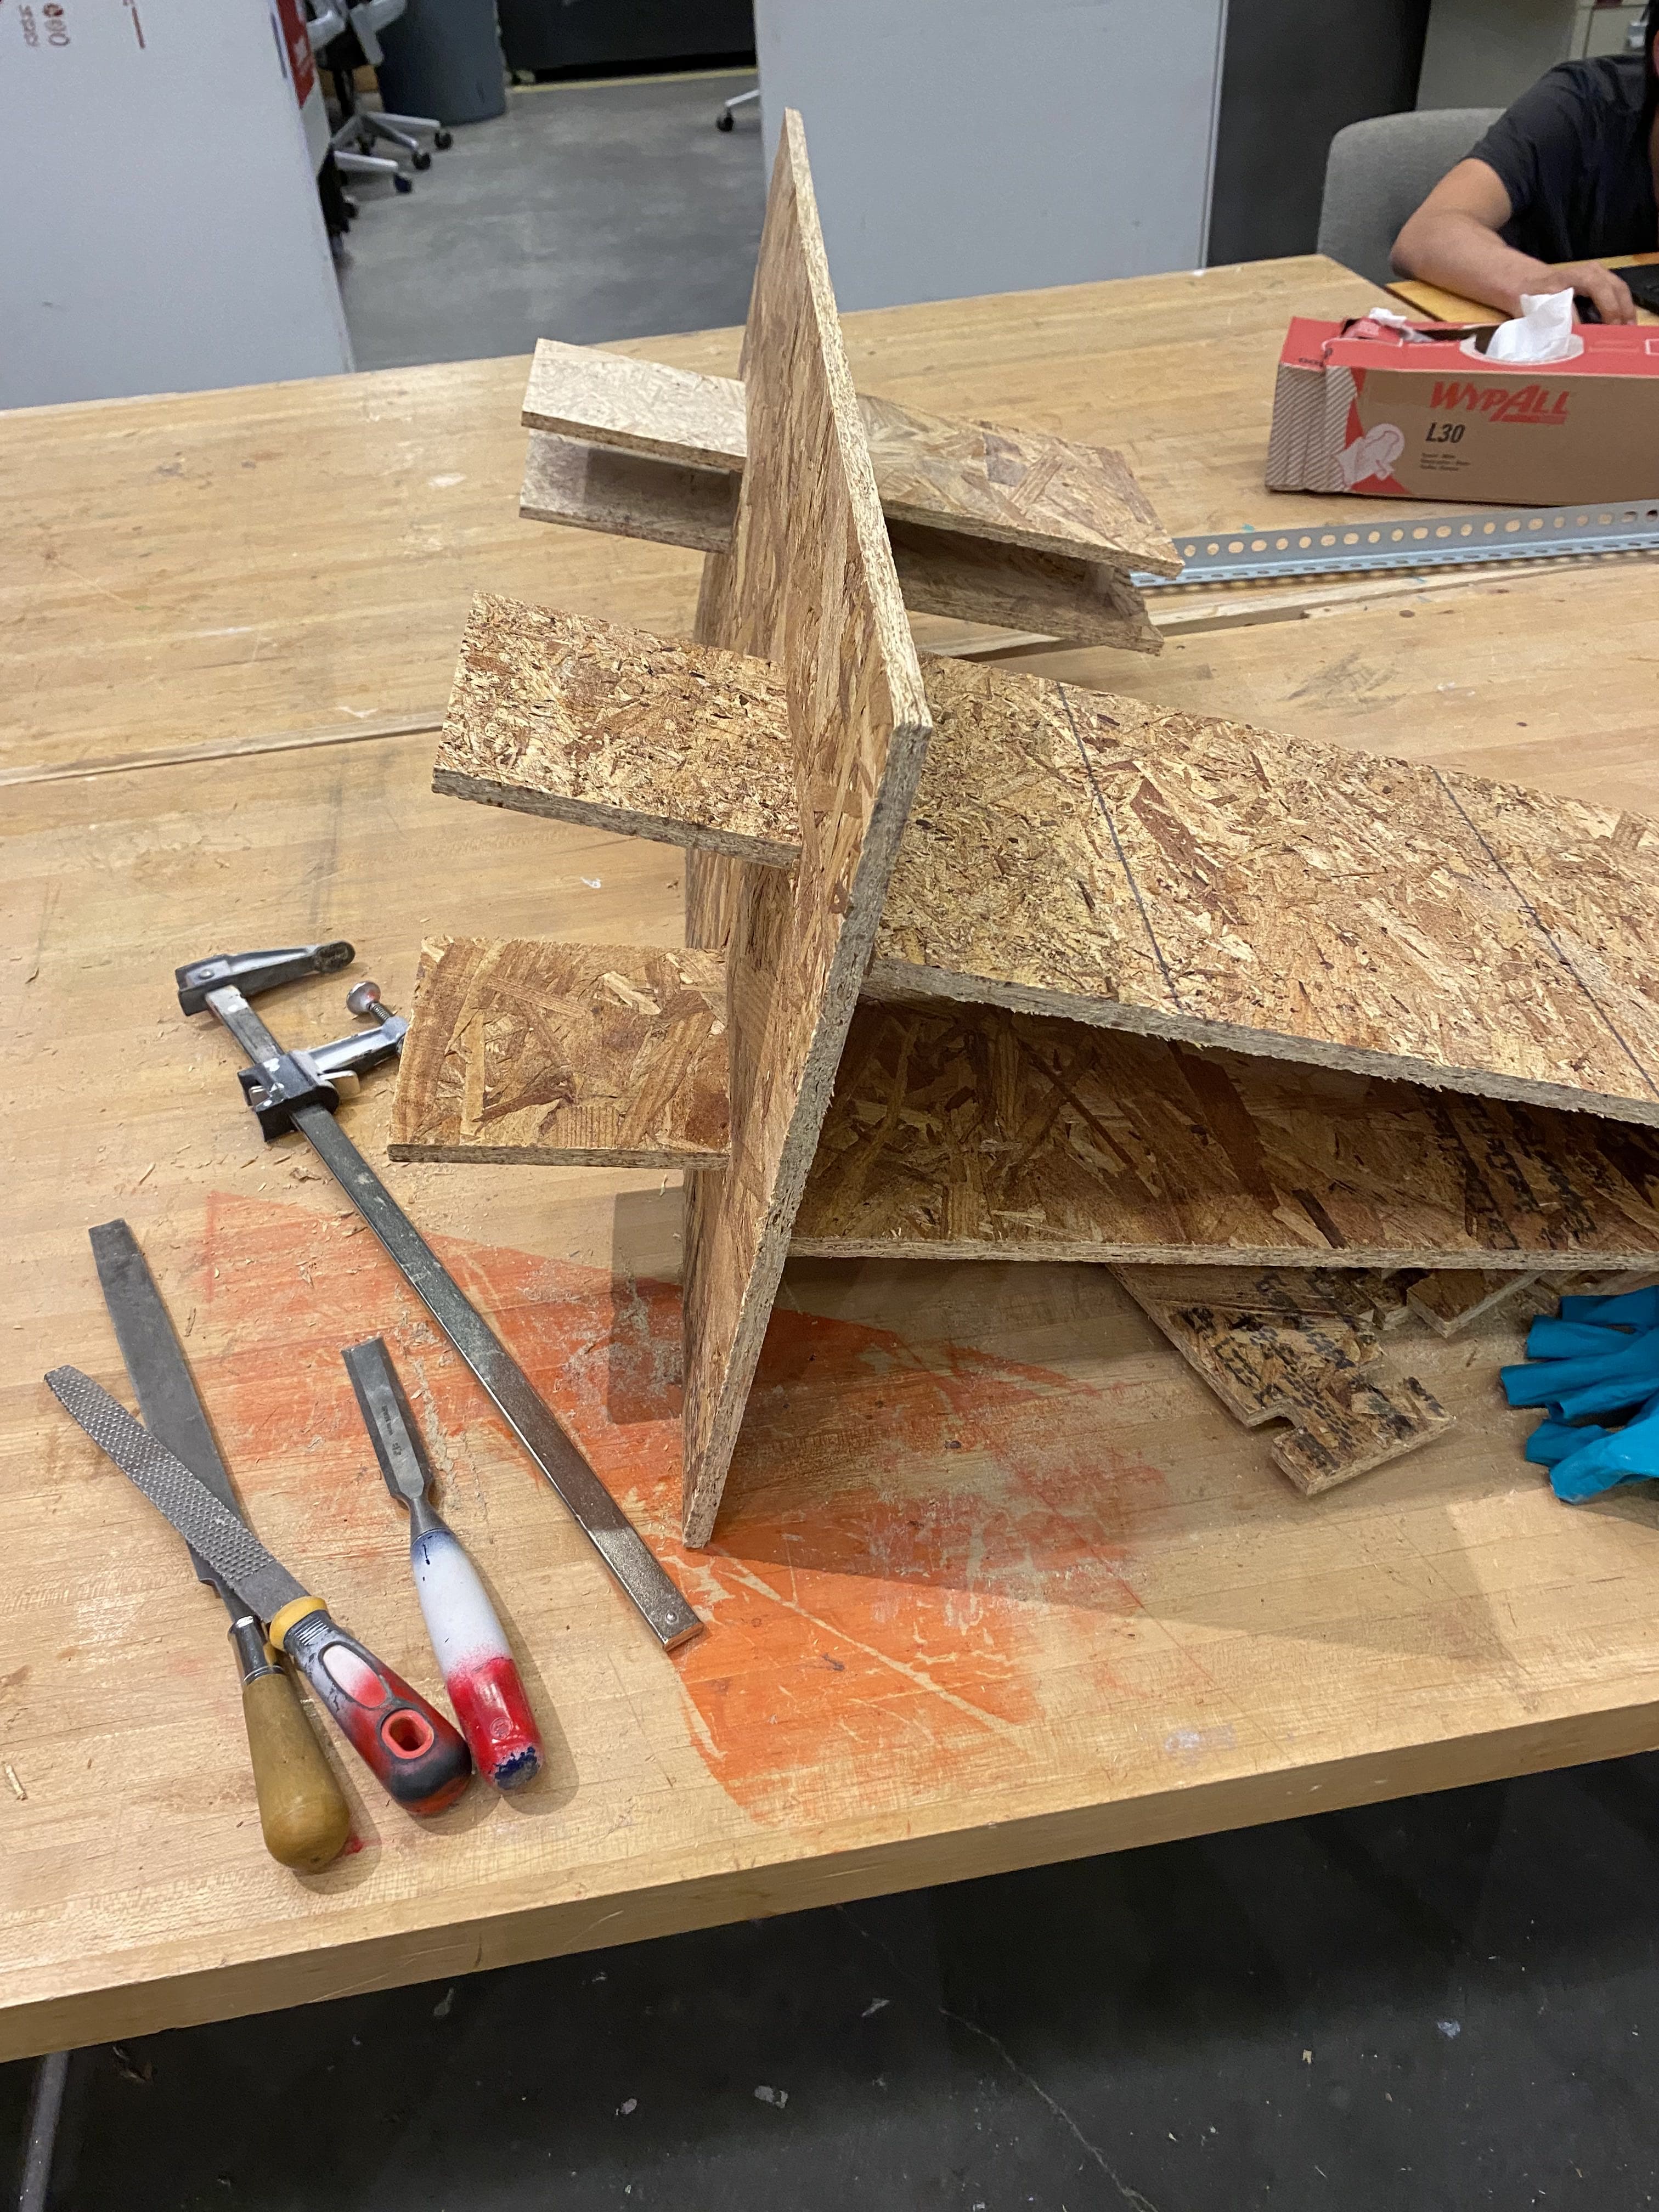
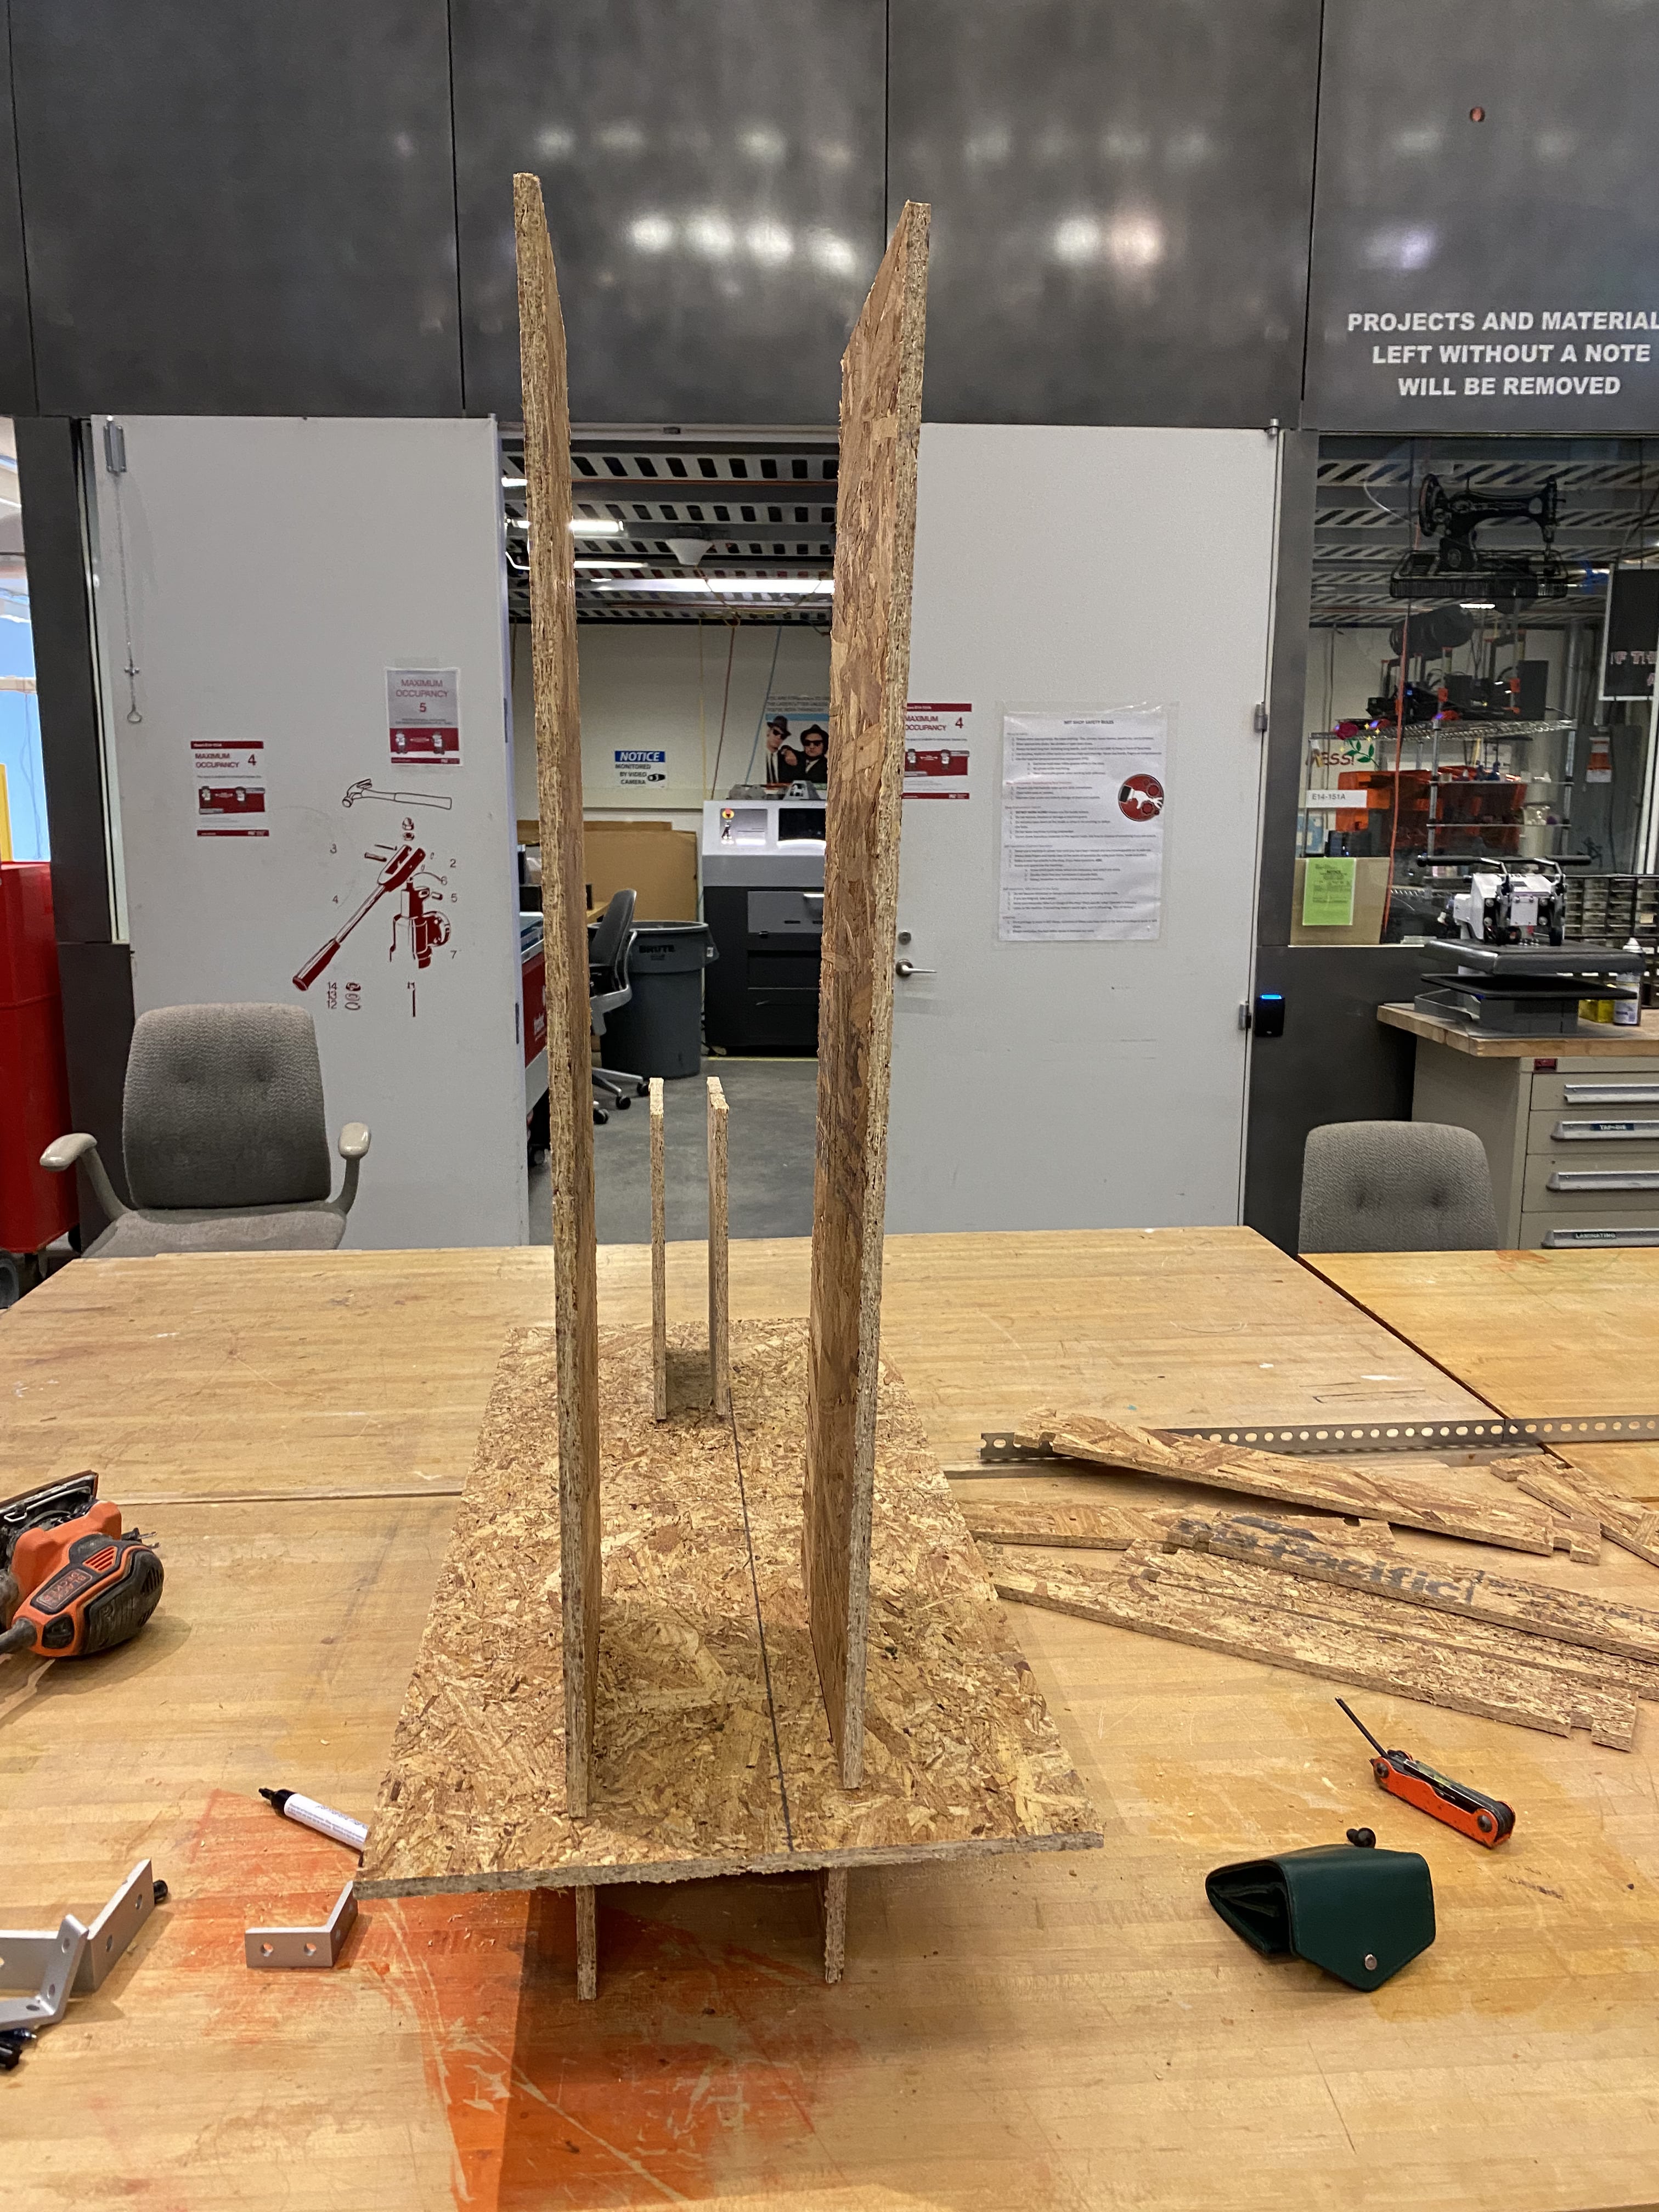
Time to assemble, I was able to slot the long pieces into the base very easily. But when I tried to slot the tiny pieces - they wouldn't go in. I made the slots to be the same thickness but since OSB thickness varies across the board, it makes sense. So I had to sand the shorter pieces and also make the slot wider using a plier . I was going to do this by hand but luckily thais lent me their sander so it was easier. Later on, karsten showed me where the shop sanders were and I used them to make my piece a bit smaller. Once I was satisfied, I was able to hammer the pieces in.
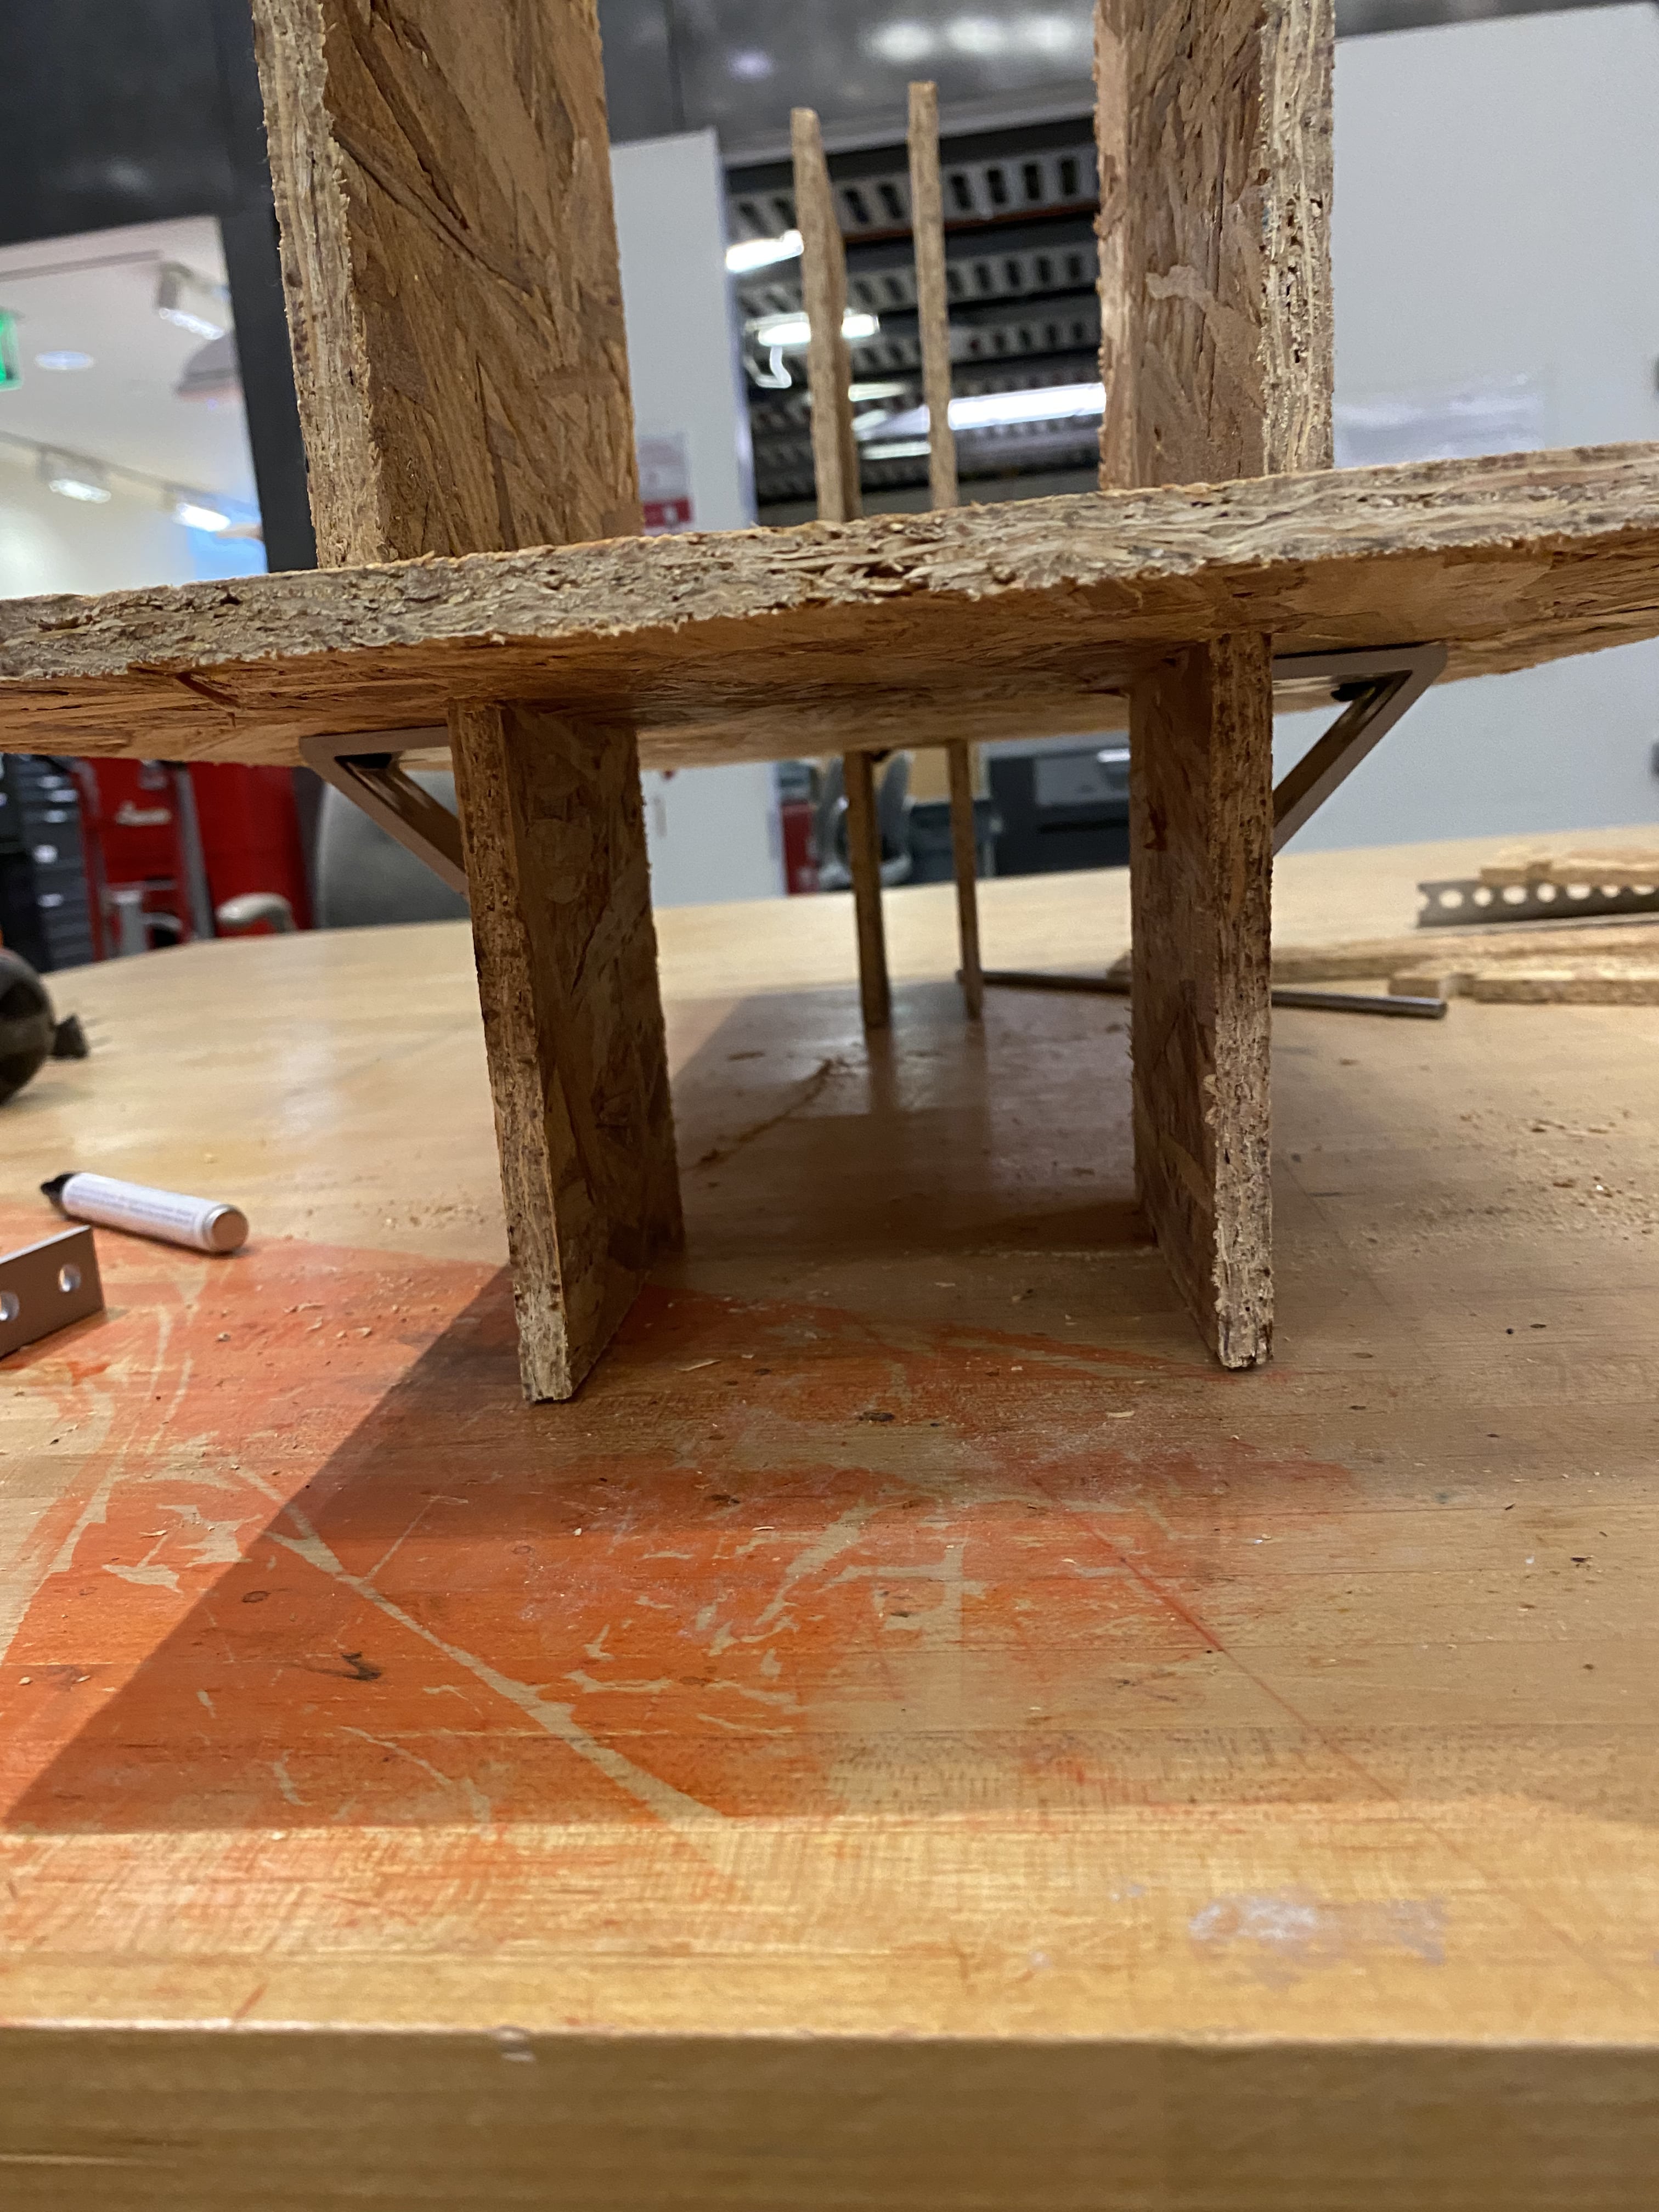
My original plan was to make the whole thing stand up on the four protruding parts of the panels I inserted. But because the joints were still loose and the height of the board made the whole thing too heavy - it kept falling down
Zach came by and he suggested I screw some wedges in at the bottom and he got me some spare ones he had lying around so I used those. Now it stands up and is stable
Next, I used gorilla glue to glue the spokes in. Three on each size - for some reason of the spokes refused to stay glued down so I taped it down for now till I can find time to reglue it. I then used some thread I found in the shop to thread the wheels. And it looked like this
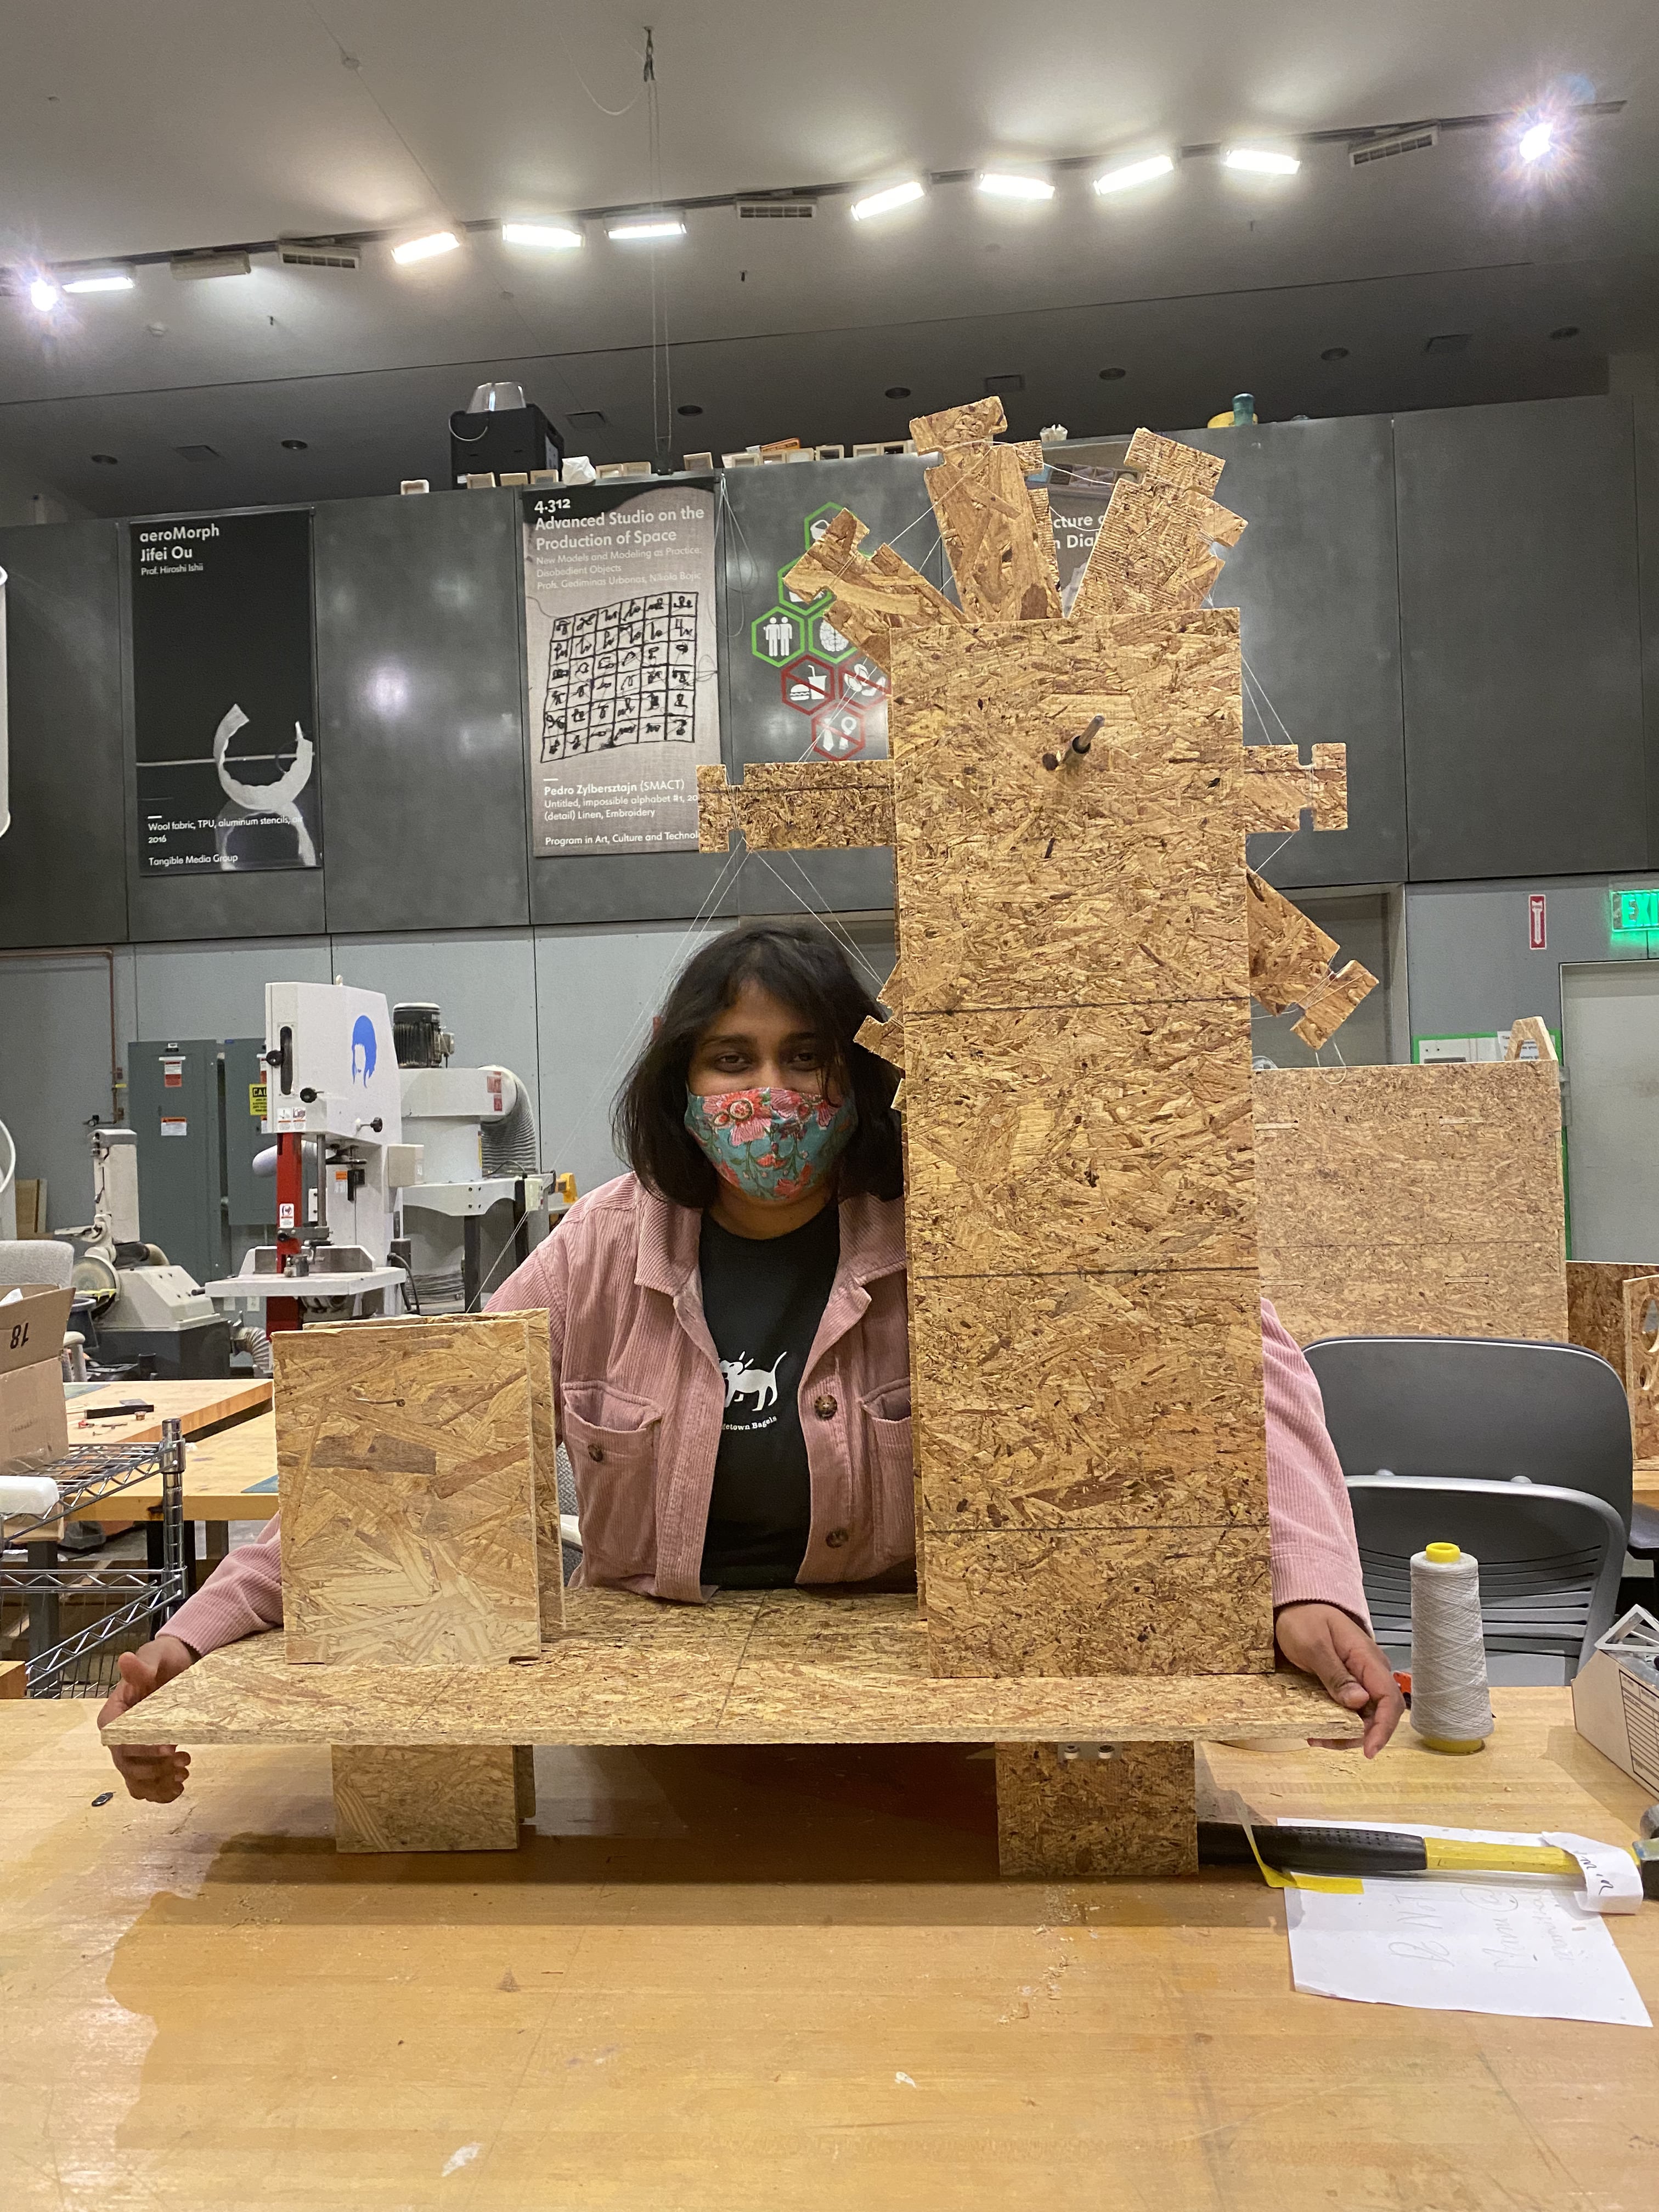
The thread is super thin and would snap very easily. Plus the wooden spokes are took heavy to images/project_images/e just using the rod and I forgot to cut out a handle. So I have to fix those two issues before I try to spin any raw cotton into thread. Now, I have to figure out where to store this.