Week 6 Embedded Programming
I programmed my board last week with SAMD11 to drive a stepper motor with pololu breakout board. I had an issue where forgot to solder on RST pins correctly and I had to test by manually holding the wires I needed near the pins so I fixed it with some solder this week. I should definitely mill another board for my final project. The schematic and the breakout board I made are on my Week 5 page
I also wanted to make an LED but instead of making one LED blink on and off I wanted to make myself a visualizer/speaker for my home. I was inspired by the work of Mohit Bhoite https://twitter.com/MohitBhoite/status/1050930090060595201 and Eirik Brandal - https://hackaday.io/project/182215-ddrysfed who uses an ESP32 and a acrylic sheets to create this beautiful sculpture below - he has a steel plate fo this base - which I couldn't buy/cut in time.
I started with wanting to. make myself a breakout board with ESP32 so I can use it to program various peripherals. As I was drawing my schematic - I found this project https://gitlab.com/fablabbcn-projects/electronics/barduino - a ESP32 dev board designed by Eduardo Chamorro Martin with the help of Josep Marti and Oscar Gonzalez in Fab Lab Barcelona 2020. I decided to just use that board - I might change some of the pins later on when I get around to programming my motors for the final project
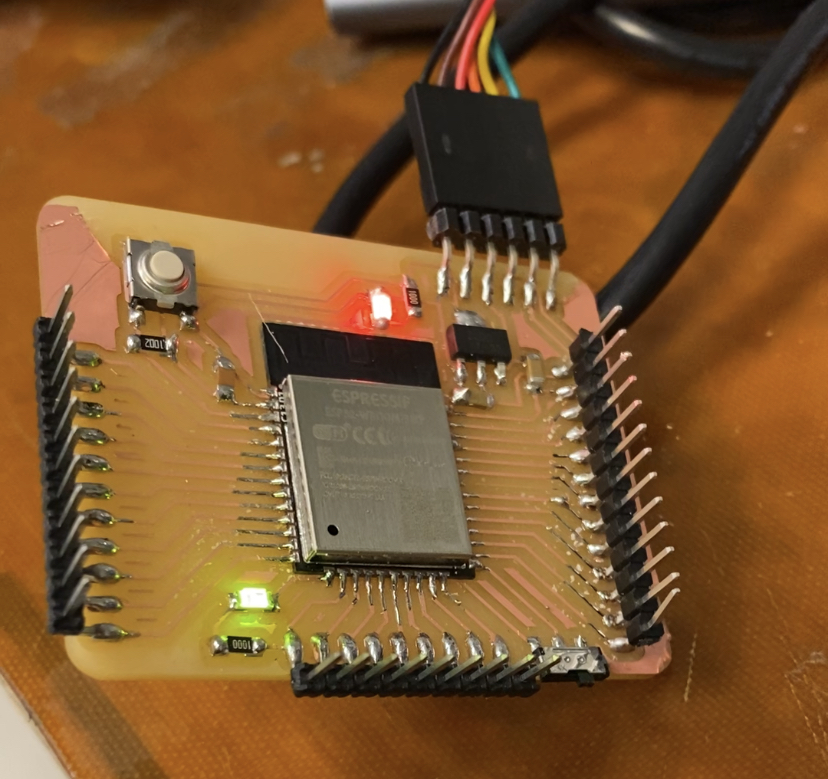
I used their kicad and exported the SVGs I needed - I didn't make the visa they had in their designs. Milled and soldered my board. ESP32 has sooooo many things I have to solder - luckily my hand remembered how to solder again so it was able to not make a mess and got it to work on my first attempt
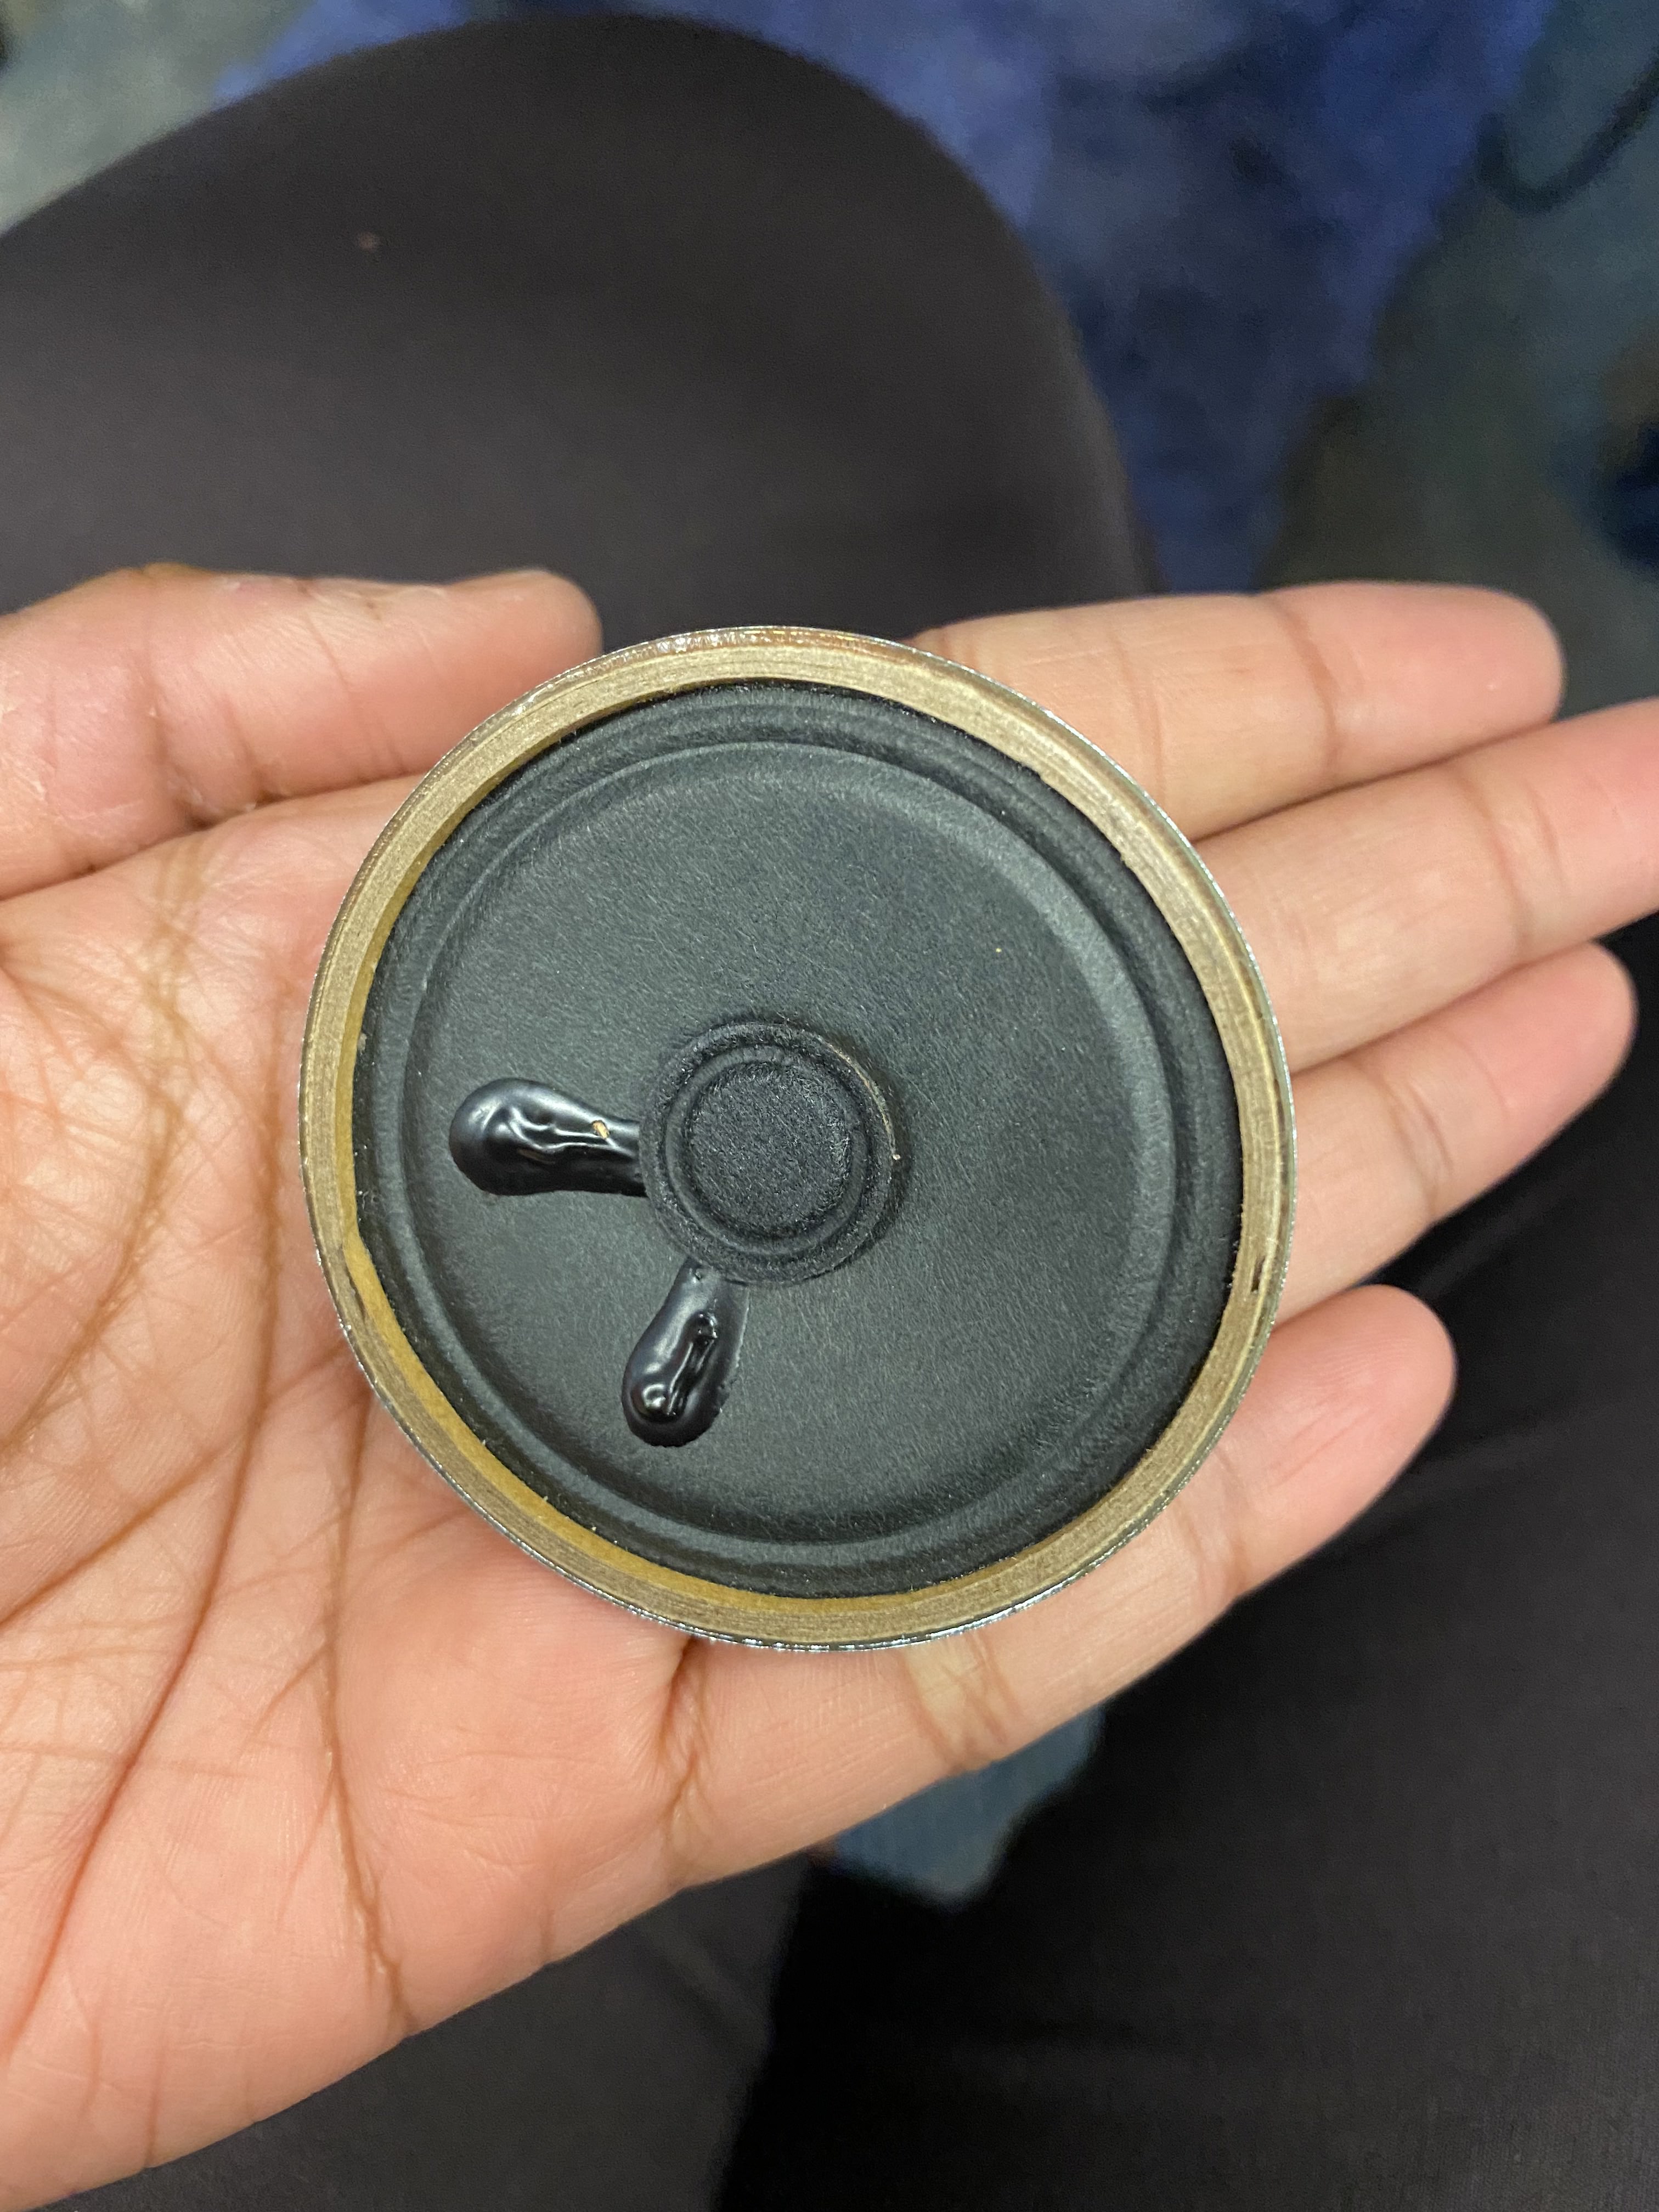
Now to this weeks' actual assignment - make it do something. I found a 16x16 256 LED array WS2812B - So I decided to see if I can recreate Eirik Brandal speaker for my apartment - I found a 8 ohm 0.2 watt speaker - which I don't have an amplifier for - I wrote the code for this already but I will have to attach the pins when I make an amplifier - I am going to attempt make my amplifier board if I can find all the right parts.
First, I needed to test if I can program the LED array before I went and got acrylic sheets (Which are expensive as I found out). because it is W2812B - I used the FastLED library since I wanted the ability to program my lights in response to some music later on. I checked their support page - https://github.com/FastLED/FastLED/wiki/Chipset-reference to make sure this would work. I also picked up a 5V 3A voltage regulator. I guess 2A would have been enough too.
This board - has a switch to toggle from programming to execution mode which I kept messing up as I was uploading my code. I have not used FastLED but it took some tutorials to learn how to write the code - https://www.instructables.com/Basic-of-FastLED/ and http://fastled.io were the pages I used as a reference.
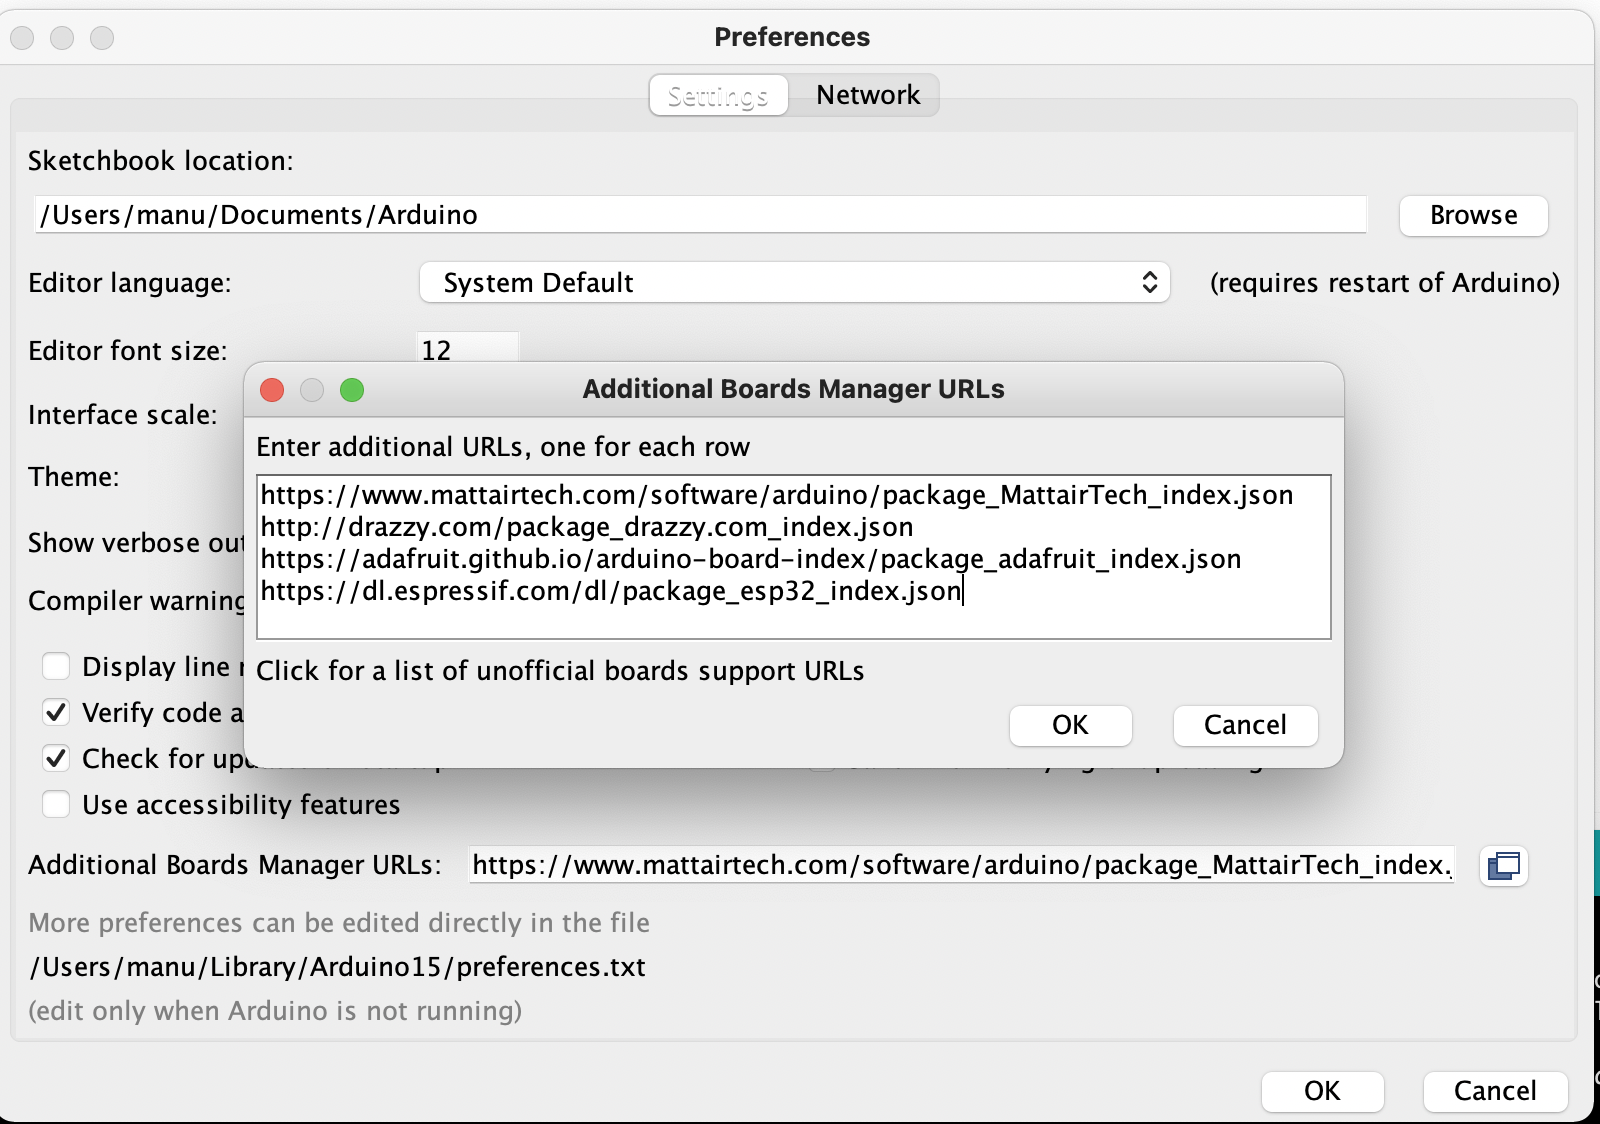
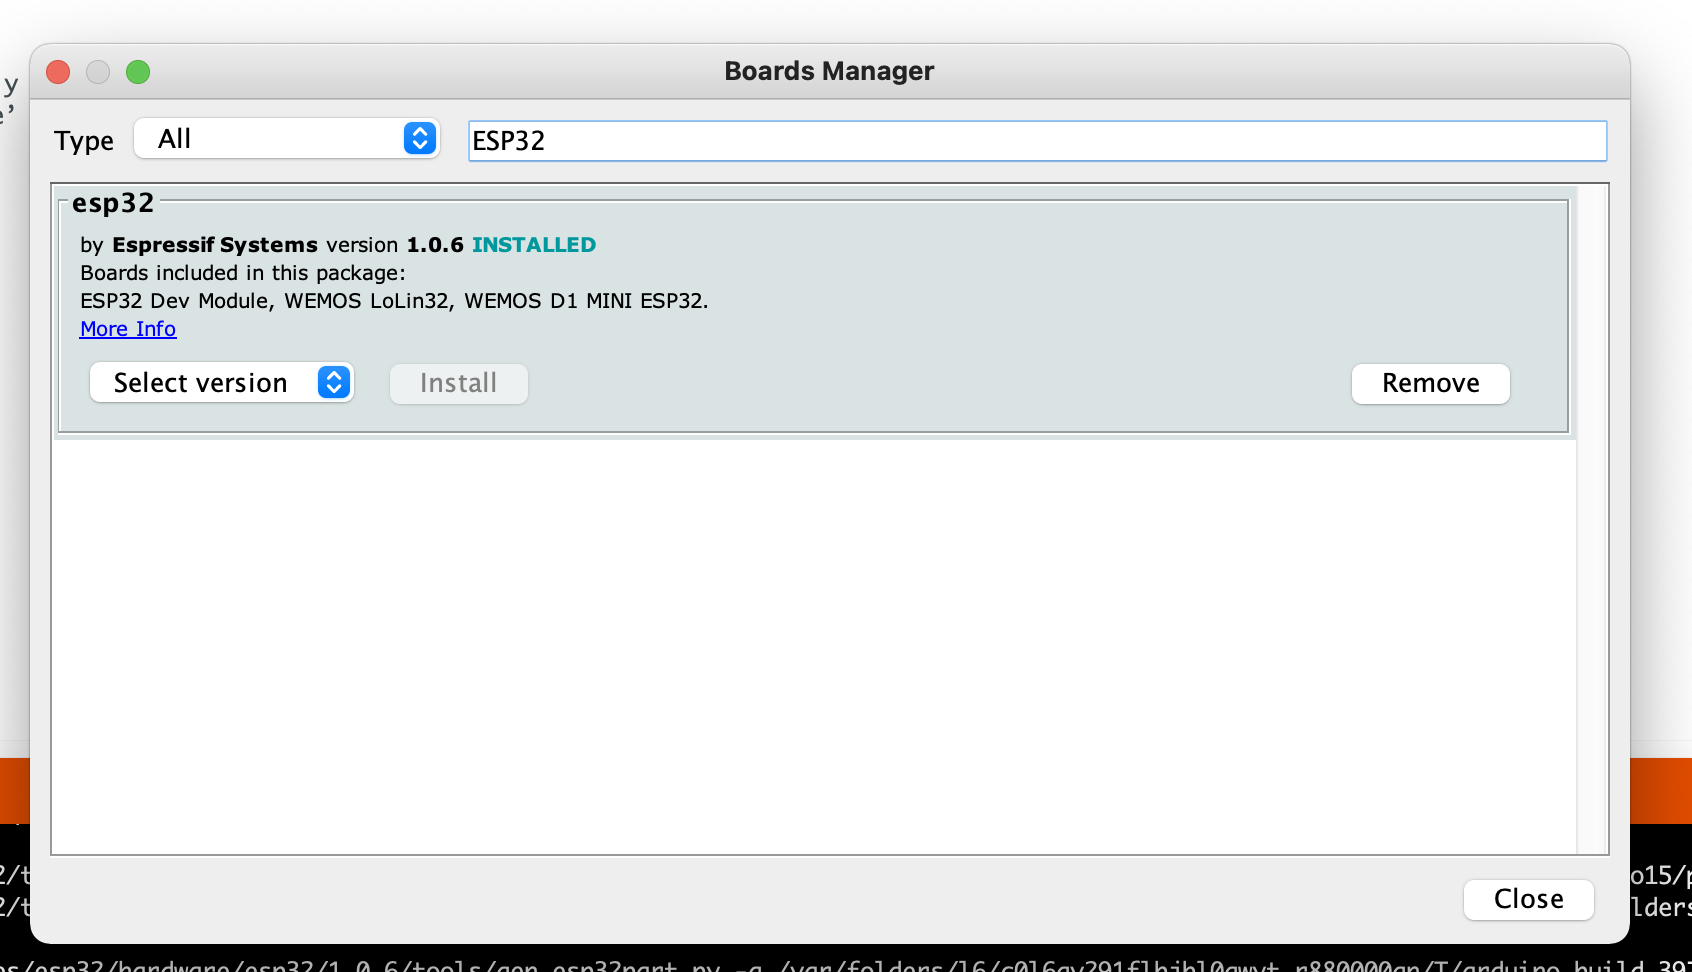
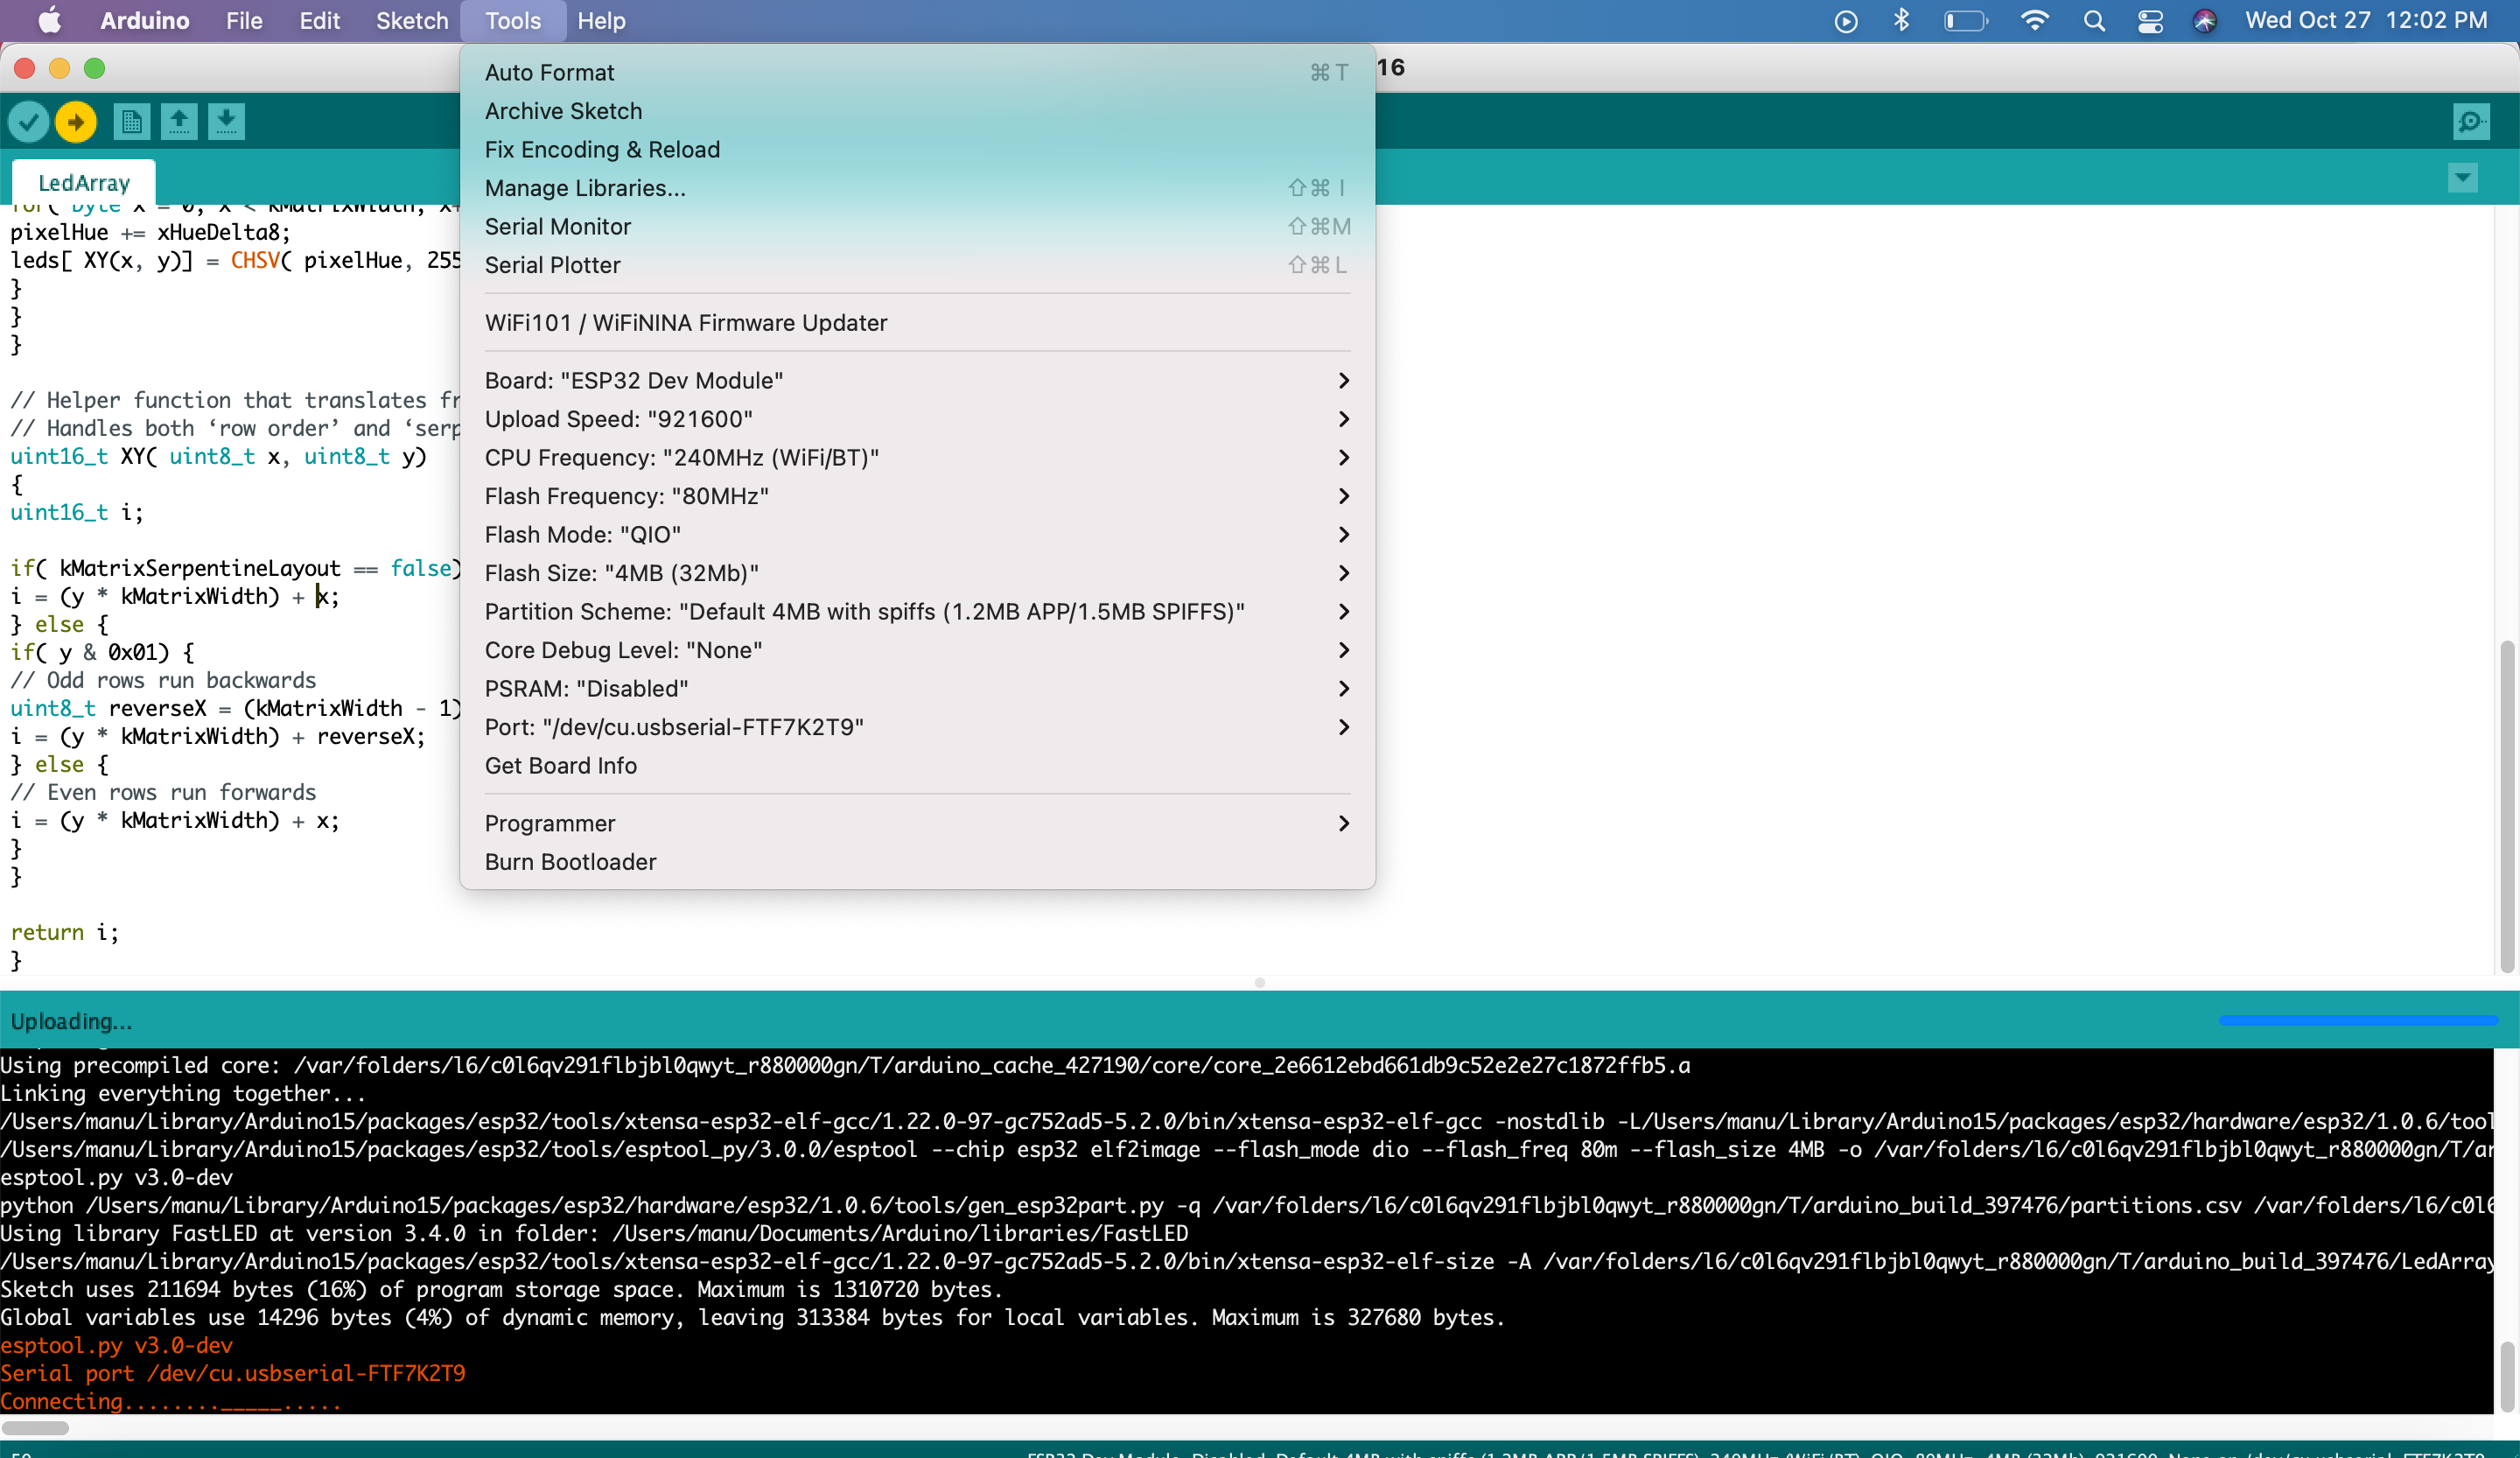
To program the ESP32 with the Arduino IDE you need to do the following
Next connected the pins of the LED array as - DIN to Pin 12 on the board ESP32 - Note that this didn't work on all GPIO pins of ESP32 - so I did some poking around - https://randomnerdtutorials.com/esp32-pinout-reference-gpios/. Next I connected the Vin of the led to the 5V power supply and the ground to a common ground with the ESp32.
My board is now recognized on the port on the Arduino IDE
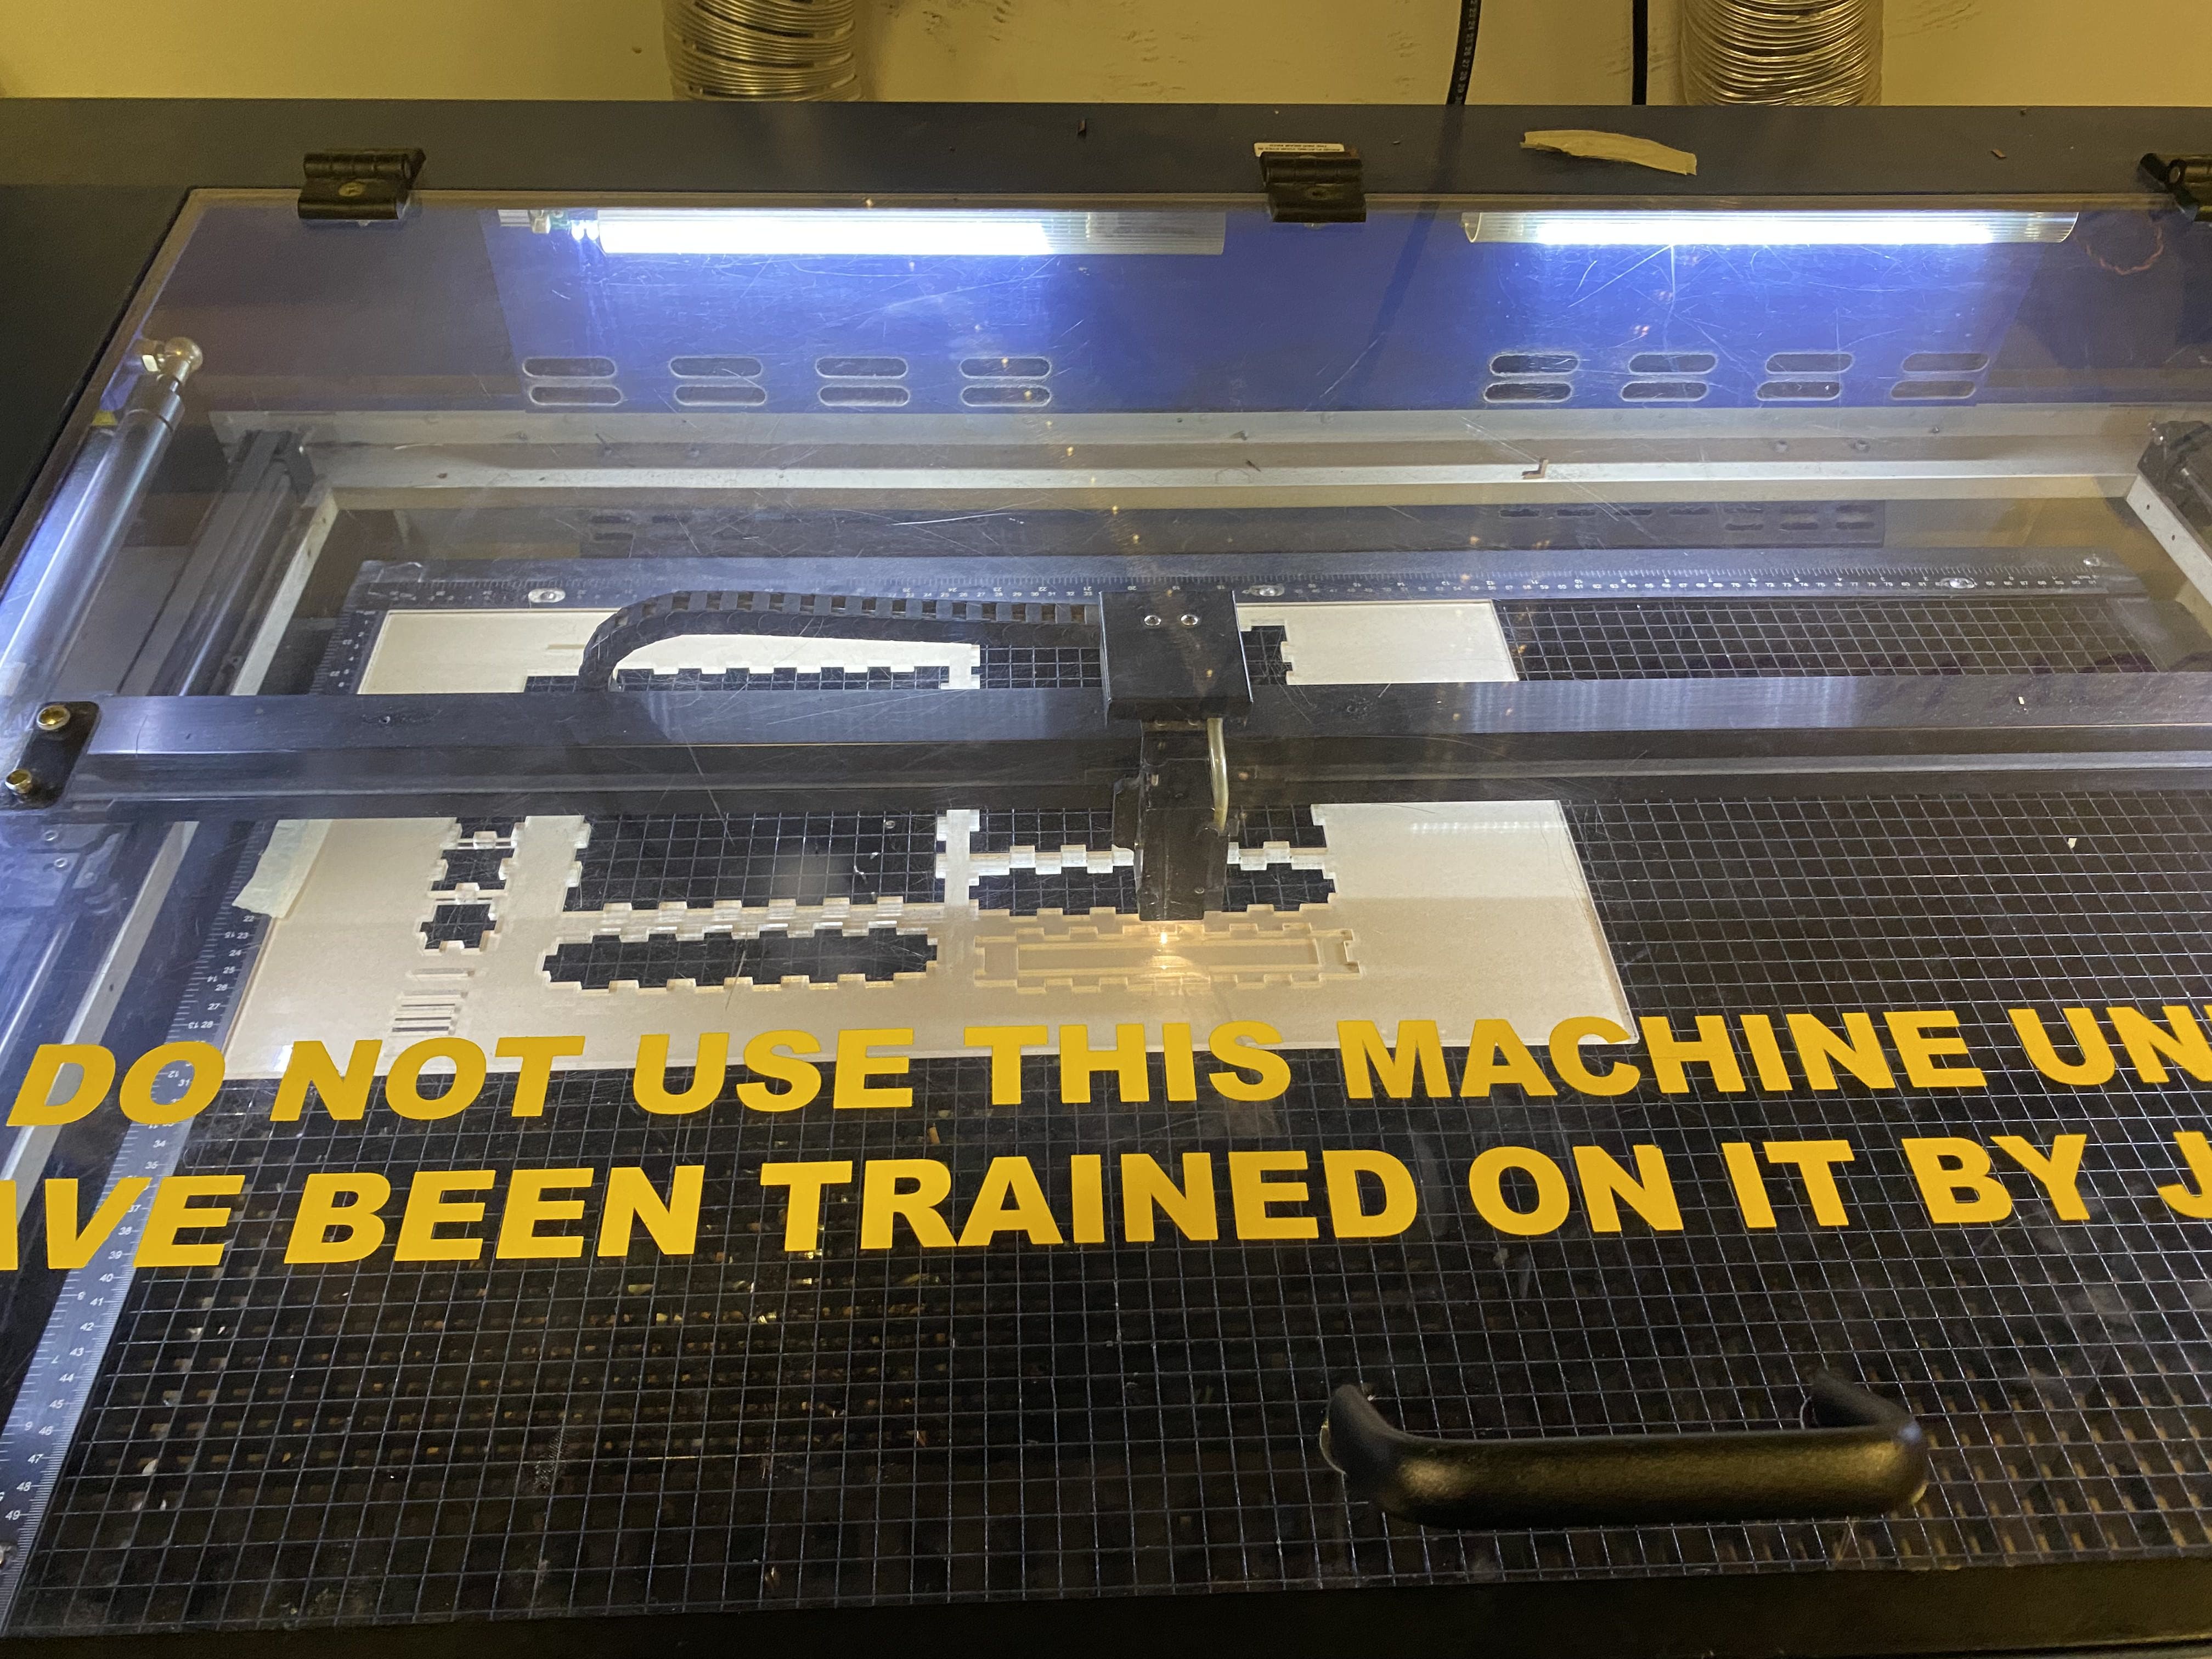
Okay - awesome - time to program the LEDs. I went to Altec Plastics and got small sheets of a mirror acrylic ,a fluorescent acrylic and a clear acrylic sheet. Which I then laser cut - first I made a interlocking finger joint acrylic box
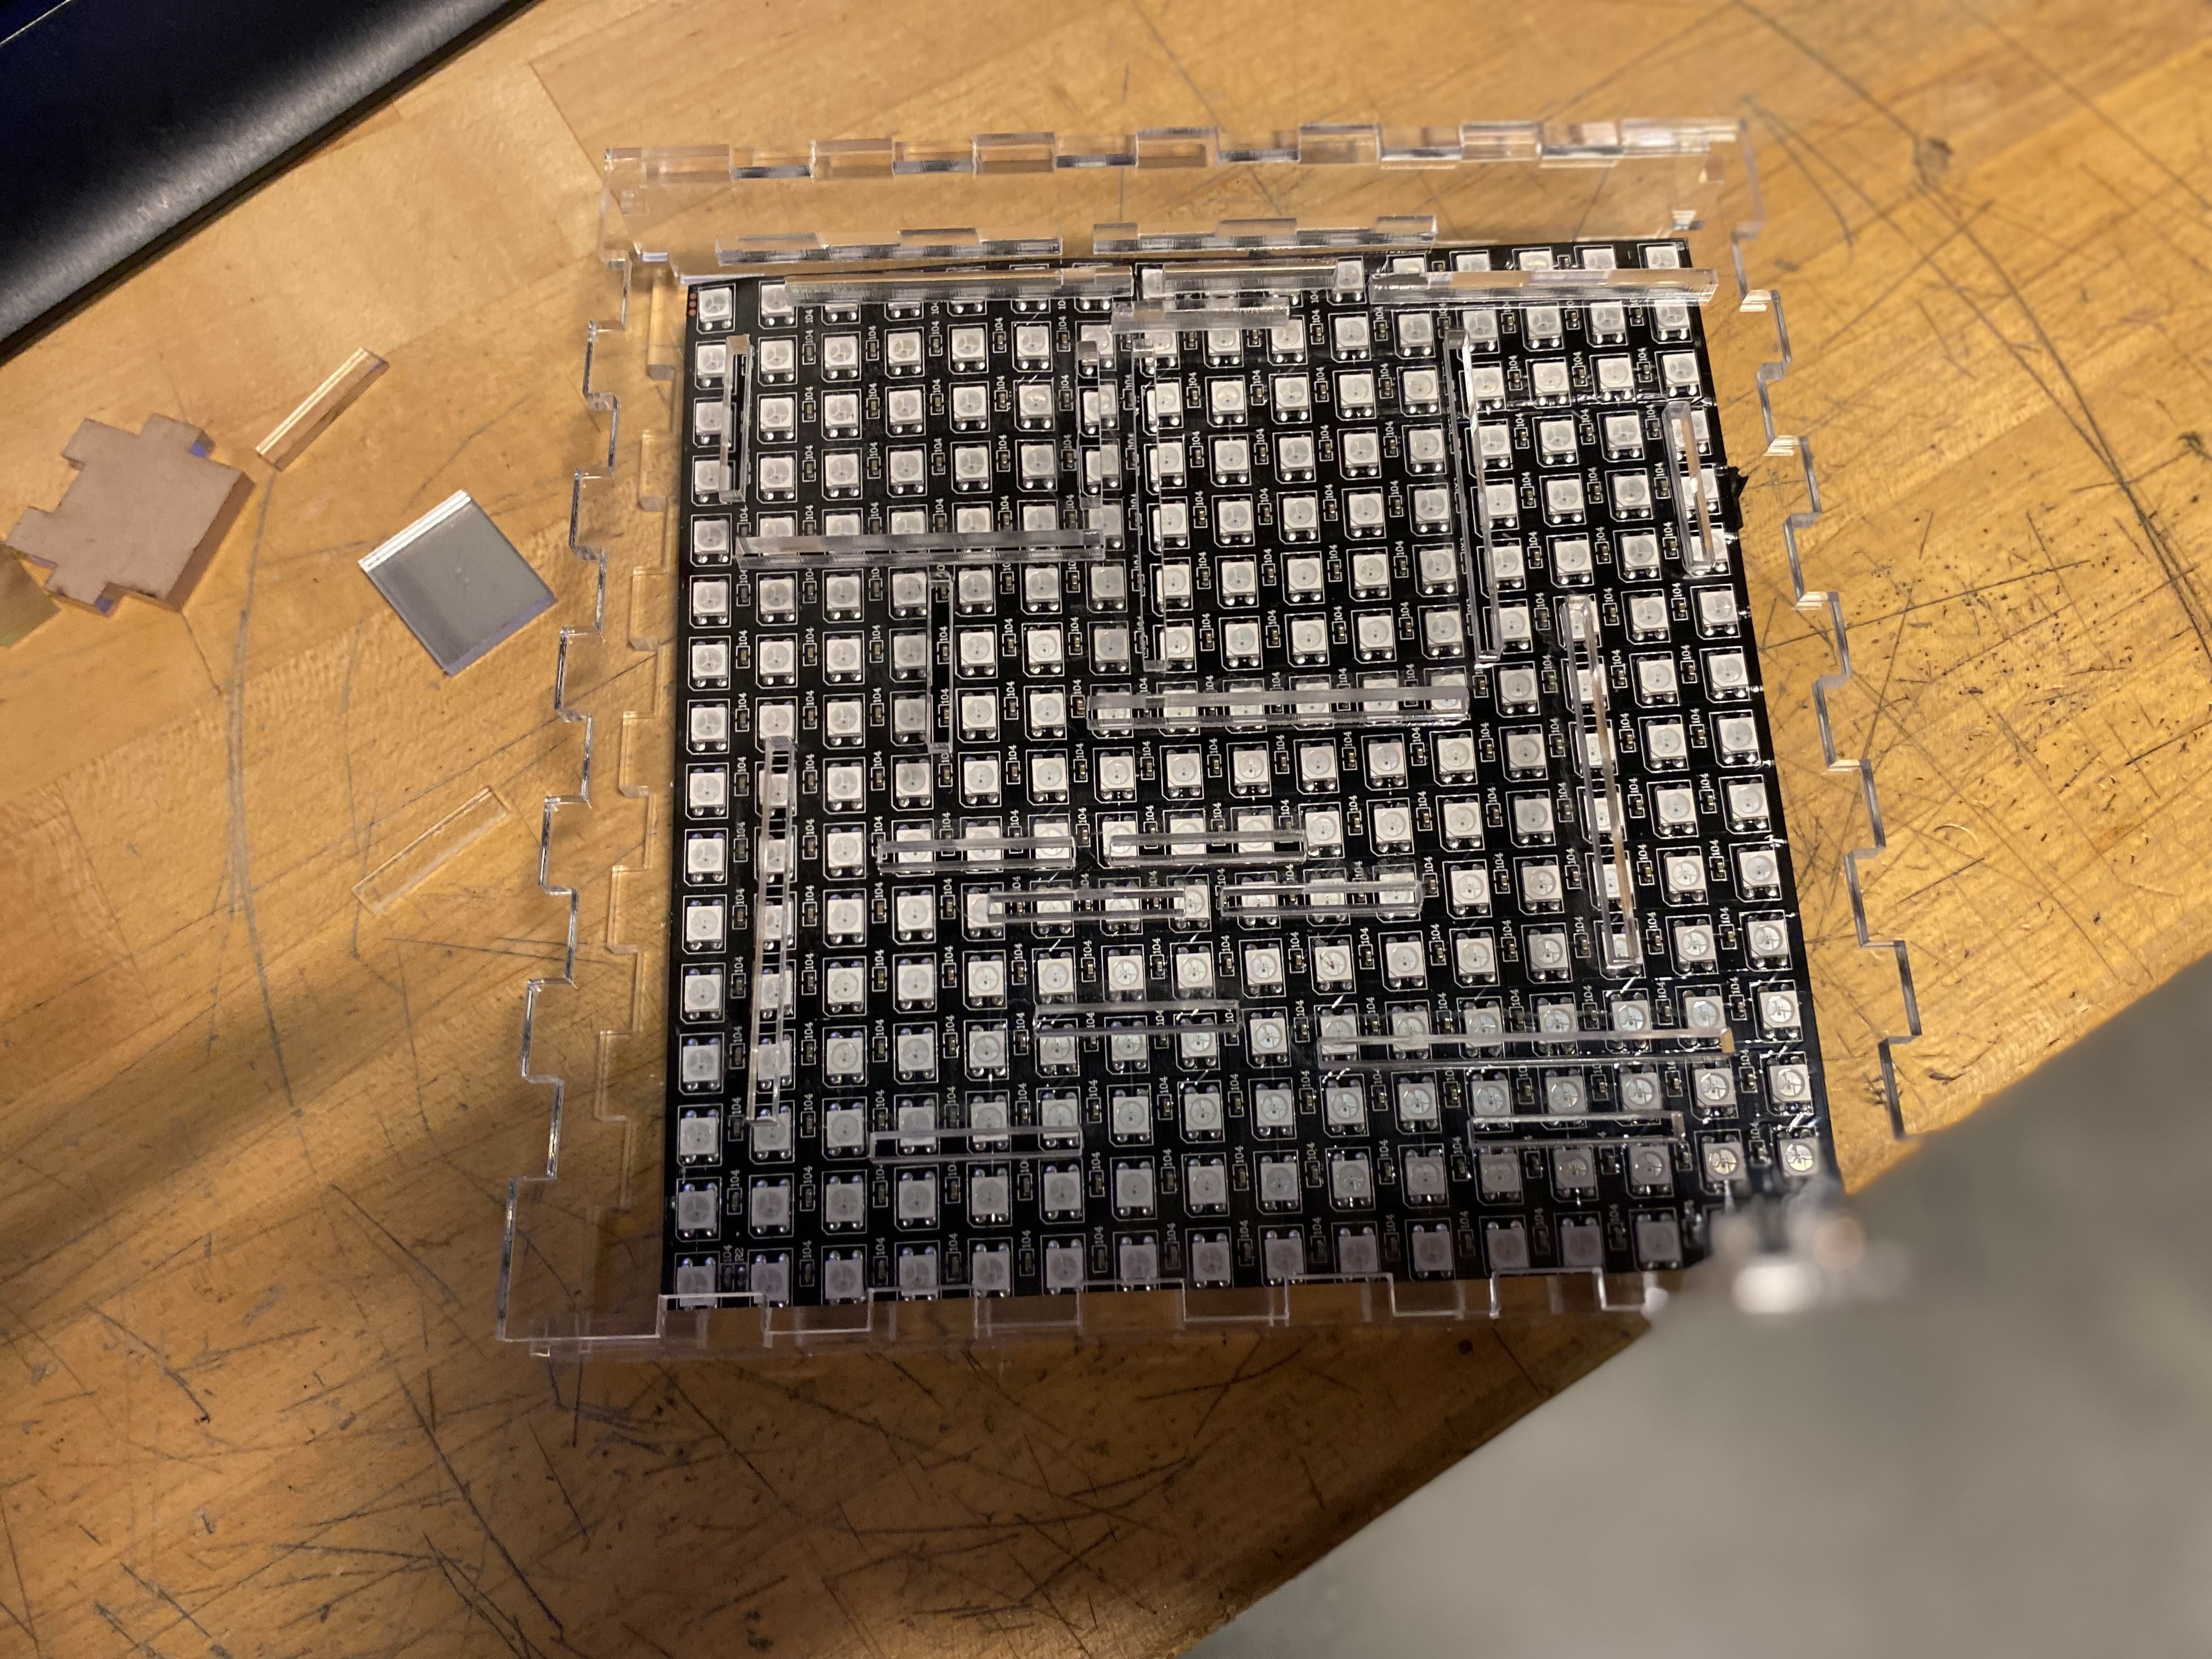
I placed the LED panel inside - I left the sides disconnected to I can to them when I need to hook up the circuit and to wire the speaker through. The top panel of the acrylic has some slots I can insert various acrylic pieces into. This is the ugly mess it looked like in the end
I uploaded my FastLED Sketch - code here - https://drive.google.com/drive/folders/1H9UYk2NjE9a7HS8oQjy9jpA9kI_7GSGa?usp=sharing
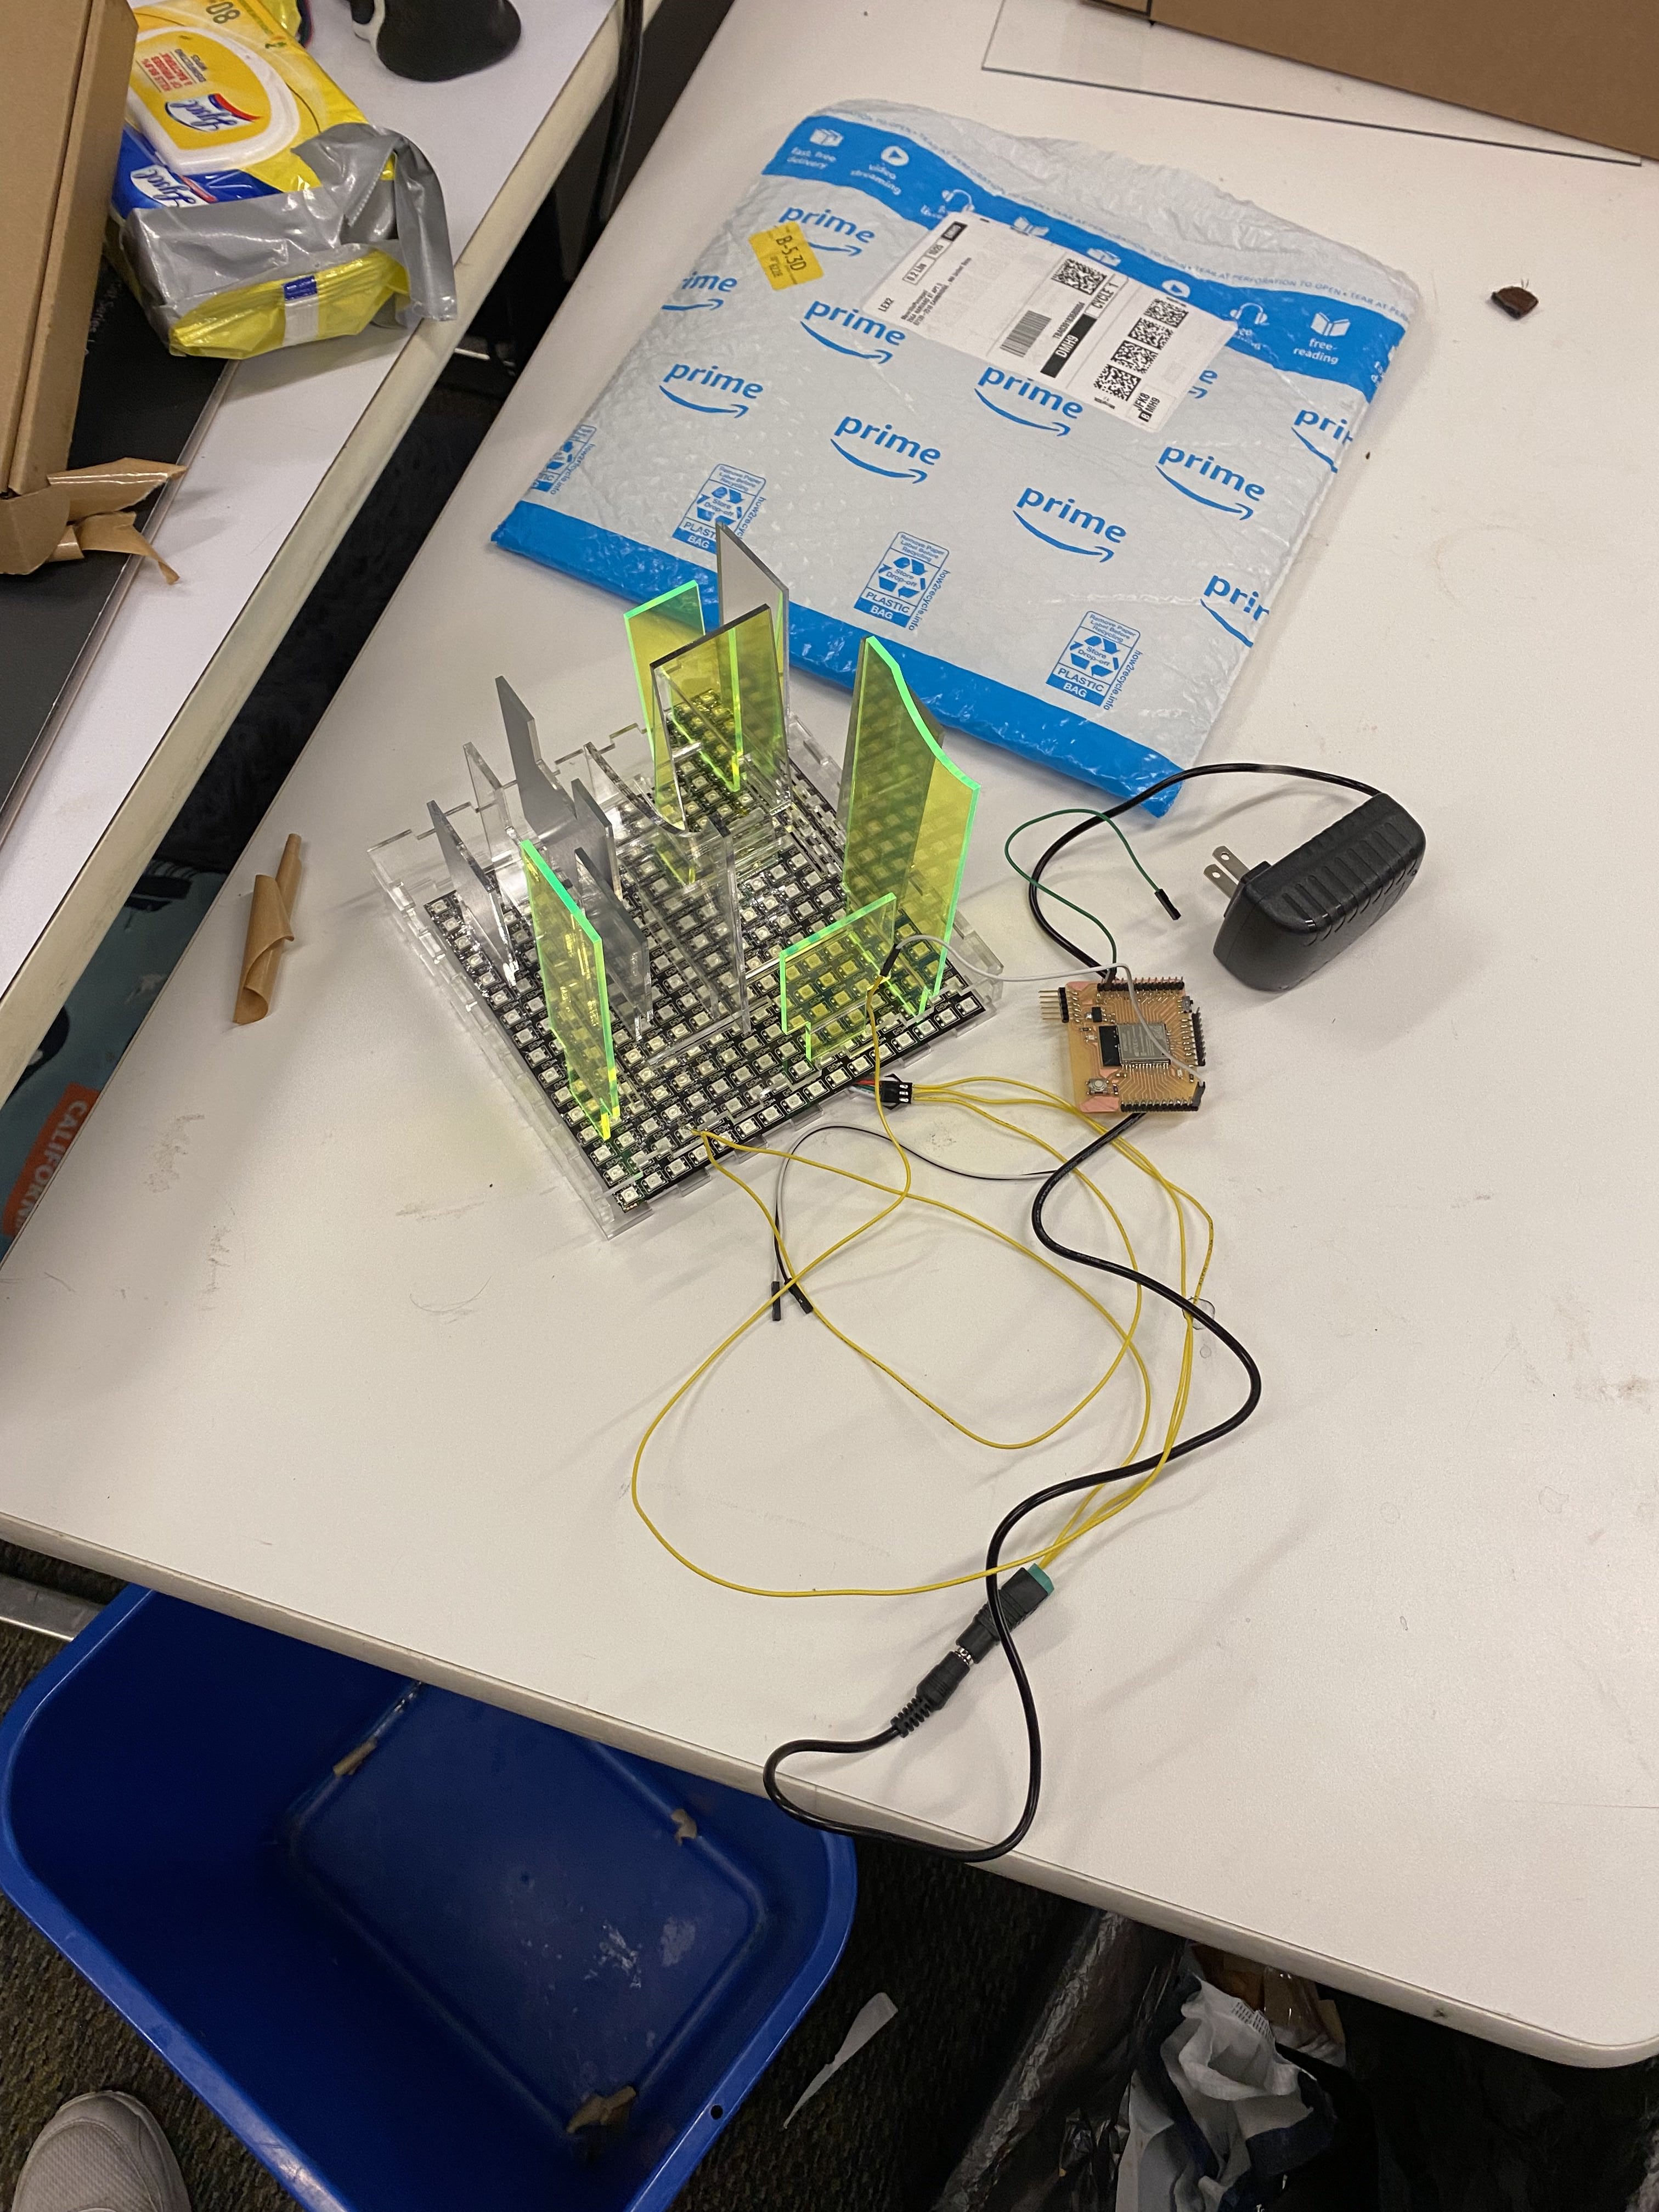
Time to see if it works
Yay it does - I like the use of mirror acrylic - I kind want to find a two way mirror sheet so I can create infinity mirror maze.
Next Steps
1) It looks cool - well it's colorful LEDs but I need to cover the base so only the acrylic edge lit pieces will show through - Maybe I can spray paint the top panel of the LID.
2) Add the speaker - I picked up a cheap 8 Ohm Speaker with 0.2 W power.
To drive this I am going to make my own Audio Amplifier with a Bass boost (You really only need a capacitor and a potentiometer). I designed one when I was in grad school a while ago. I have to go dig up those files. I got a LM386 - https://www.amazon.com/gp/product/B00CN8487S/ref=as_li_qf_asin_il_tl?ie=UTF8&tag=circbasi-20&creative=9325&linkCode=as2&creativeASIN=B00CN8487S&linkId=5de5eafa2141645d27873626196612bd