Week 09 : Input Devices
This week - I wanted to make a glove that can respond to taps and flexing of my fingers. When I listen to music sometimes I tap my fingers if I am really into a song. I wanted to convert that into some form of music visualization. I needed three different kind of sensors
1) A Flex Sensor - To recognize bending of my fingers. These usually cost 10$ a piece.
2) A pressure sensor or a knock sensor - To recognize my taps. These were pretty cheap
3) An accelerometer - To recognize the rotation of my hand in 3D
Things I did this week
- I had to do my molding and casting project from last week since I was out sick
- I got a Class D amplifier for my speaker from the light and sound sculpture I made last week
- I also experimented with making my own flex sensors. You can see the results below.
Making my own flex sensors
Flex sensors can get expensive for a responsive glove - Since they cost 10$ per finger and for one glove, the flex sensors alone would be 50$ - I could have obviously spent the 50$ for my sanity but well - I got into trying to make these and that quickly consumed all my time. DIY flex sensors are not knew. There are so many different tutorials out there. I followed each one and tried them all. But in the end the ones that worked at least reasonably were my weird combination of pieces from knee brace and a variable resistance stretch fabric I found for 15$. Considering one of this piece can probably make about 15 flex sensors - the cost made sense to me. I also compared this to the paper, aluminum foil, copper braid ones.
Flex Sensors depend on the bend creating either a resistance change or a capacitance change. In my case, I made a voltage divider with two resistors - One as a variable resistor from my flex sensor and one as a resistor of about 49K Ohms. For testing various flex sensors I made, I made one breakout board to function as my voltage divider piece. The code uses the GPIO 12 to provide the 3.3 V voltage and reads the analog input on GPIO 34. Code for simply getting the analog print and doing a serial print is
int analog_val = 0;
const int analog_channel_pin = 34;

void setup()
{
	Serial.begin(115200);
	pinMode(12,OUTPUT);
	digitalWrite(12,HIGH);
}
void loop()
{
	digitalWrite(12,HIGH);
	analog_val = analogRead(analog_channel_pin);
	delay(200);
	Serial.println(analog_val);
}
First I tried to use the strategy described here
1) I vinyl cut two copper strips
2) Pasted them on cardboard pieces I got from the COVID test bag I was gonna through out
3) took a piece of paper and coated in it graphite pencil on both sides.
4) sandwiched the graphite paper in between two cardboard pieces stuck with copper strips on both sides.
5) soldered wires on
As you can see it doesn't do very well. Number of reasons for this imo - I don't think I stuck the pieces together properly - they keep sliding around. Once I tried to secure it - it became hard to bend it properly. Plus the stripped parts of the wire on both ends seem to touch. Could be any number of reasons.
The next two designs I tried are using a material that I think is this - https://www.adafruit.com/product/3669 . It is a discontinued product - I randomly came across it at You Do it electronics store in Needham.
1) First I tried to use the fabric as is. I connected it to the multimeter and when I stretch the fabric - it's resistance changes - not a lot - so I didn't expect a lot of resolution in my values for flexing.
Next, I decided to take pieces of my knee brace - My sad knee brace at the end of these experiments 🤢. I picked my knee brace since it's stretchy and has a good bend to it unlike the cardboard covered in sticky tape from the experiment above.
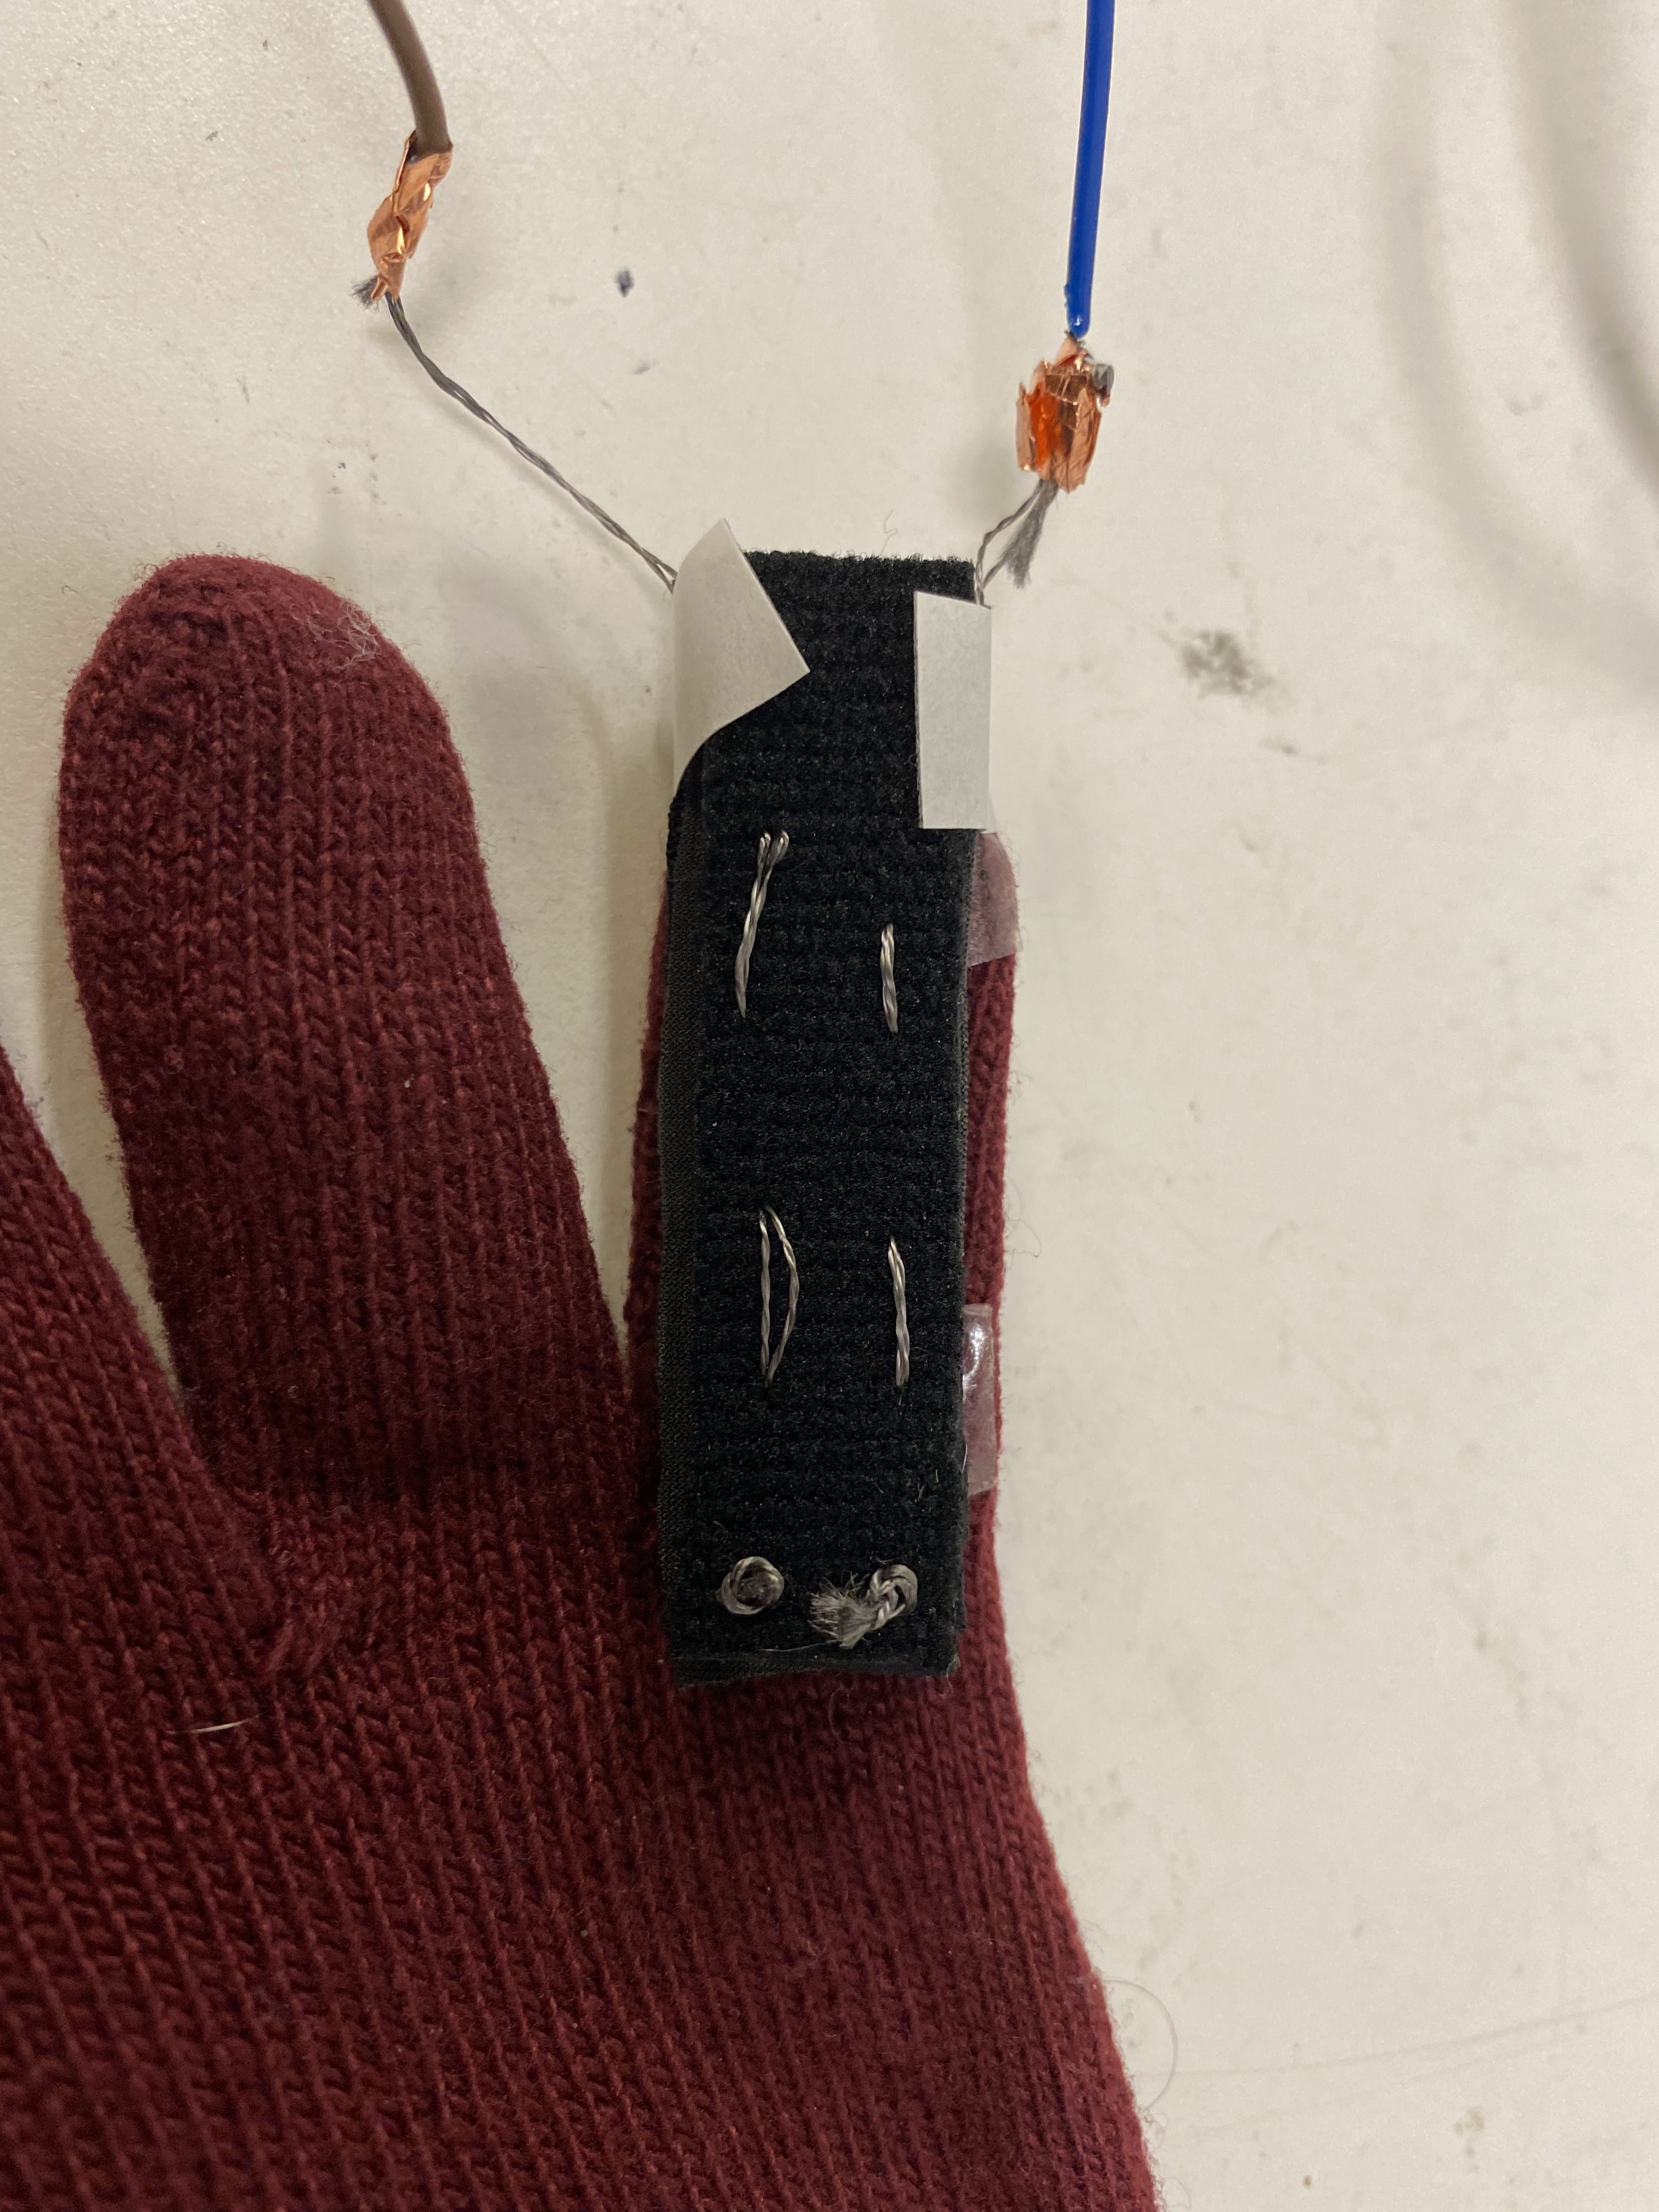
I got some conductive thread and a needle and sewed tiny pads of the knee brace to the fabric. I added some copper tape for the solder and the conductive wire to sit on. Actually soldering on wires to the conductive threads this was much easier - I guess I could have also made more robust copper pads probably using the copper braid - flow the solder on everything. This is what it looks like
I decided to test this by pasting into on to a glove I had lying around. When I tried to bend I noticed that because the resistance doesn't change all that much my sensitivity is quite small but I can recognize the different between the curl up and curl down in the video you can see. I guess good enough ?
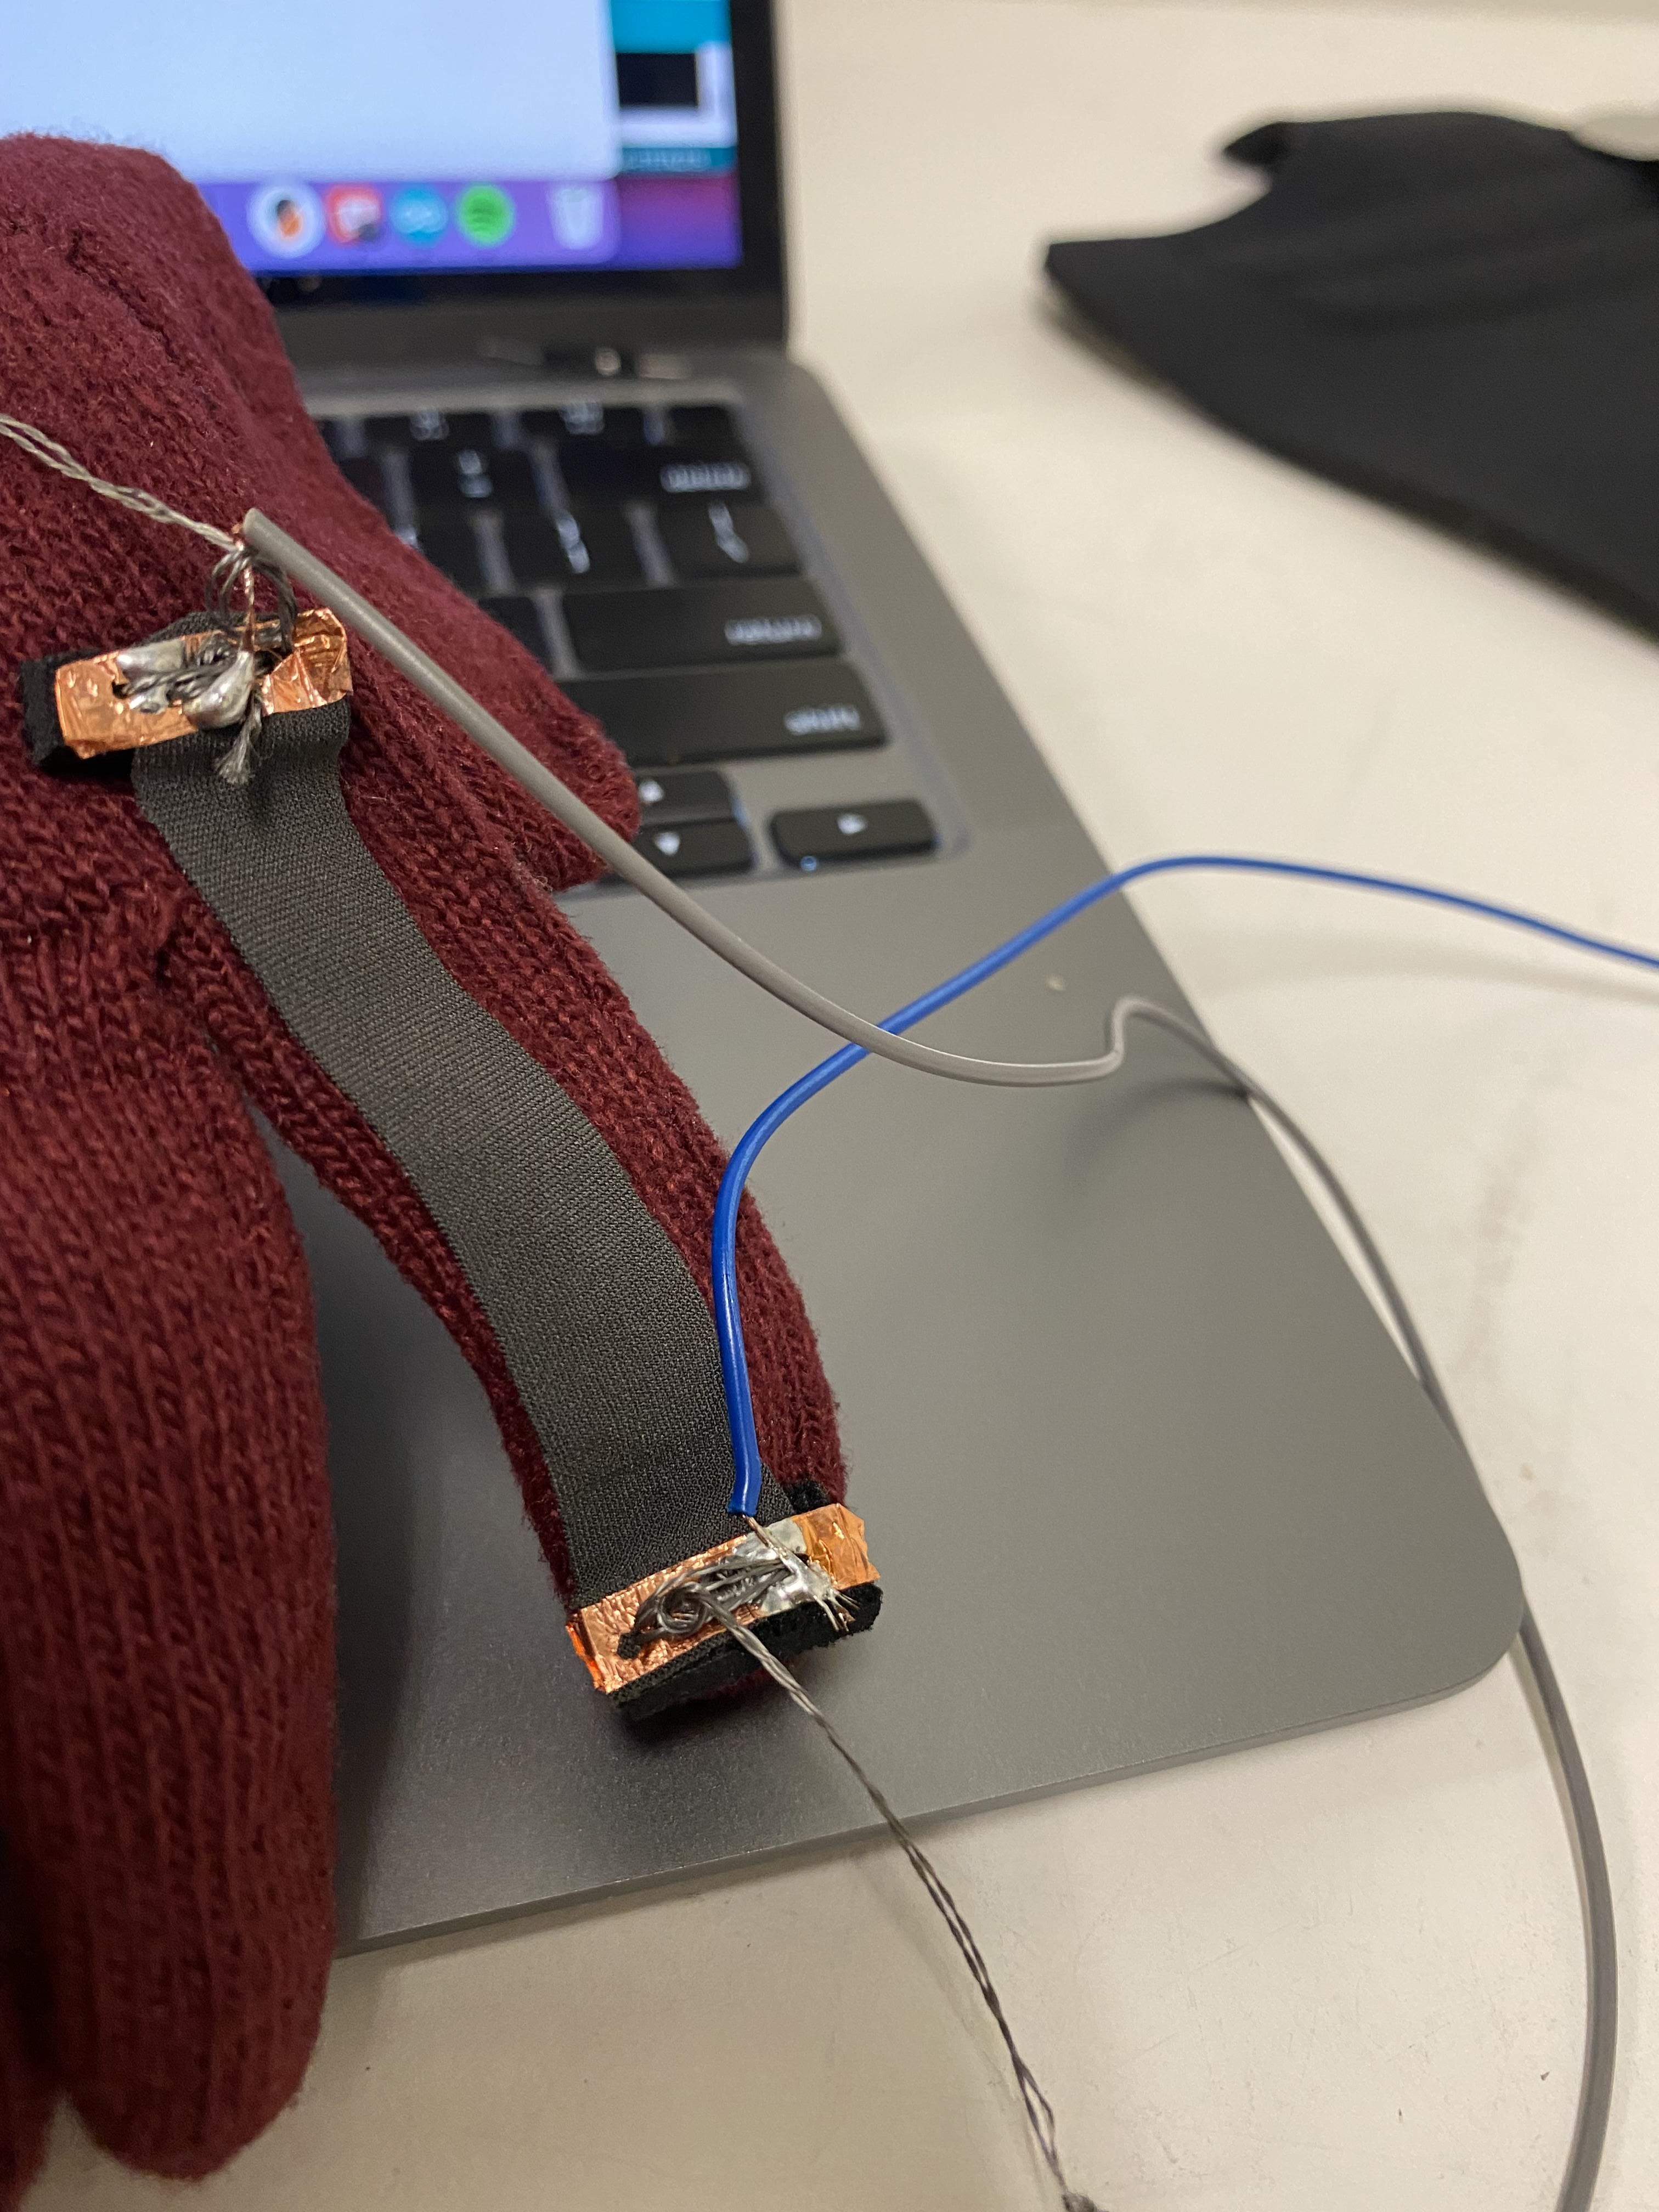
Well I wasn't happy with this. So I tried to do another approach that I actually like better. I took the fabric and see a conductive thread on two ends like below
And then I pasted two flat pieces from my knee brace onto it. I then pasted it on the pinky finger of my glove. Turns out that particular finger of mine is very inflexible - but you can see the demonstration of the analog values in the video below
I
This is by far the best one. It's good enough to reasonably have three states - FLAT/CURL DOWN/CURL UP.
In the next iterations, I will probably play with Velostat bags and other materials to increase the sensitivity
Also since I tried all of this, I also bought one flex sensor to compare and contrast. And as expected it's flex sensing is a lot smoother.
Knock, Knock .. who's there ?
Next, I needed some thing to measure the tap response if I tapped my fingers on a surface. I could think of three ways to do this - Cheap to Expensive
1) I have all the material - I needed from my flex sensors above and pressure sensors aren't really that different or difficult. So here is a bad attempt at one. I milled two small flat copper plates. and soldered a wire on both sides. I then connected both the plates using some of my conductive material.
2) a Piezo element (I didn't realize I mispronounced this all my life and no one corrected me :O ).
Here is the video with the piezo element. Made an LED on board blink. Code here -
3) Next time, I used one fo the more epxneisve force sensor - that Zach Gave me and attached to the voltage divider from earlier. You can see the knock sensor in effect below. It toggles between a 0 and a non zero state pretty reliably to use as a knock/tap sensor.
4) But I didn't go with 1) 2) or 3) this time and instead went with 4) - I bought a bunch of cheap mechanical knock sensors 5 for $9. Its a variable resistor with a spring inside - https://arduinomodules.info/ky-031-knock-sensor-module/ . It's resistance changes when you knock. This was a pain to actually program and get any signal from. Zach suggested, I do an interrupt since KY 031 response is very short. And he also suggested I use a global variable I change between the interrupt response. Here is the code for it and the knock sensor in action. They are pretty reliable for less than $2 a piece.
const byte interruptPin = 12;
int val=0;
void setup() {
Serial.begin(115200);
pinMode(interruptPin, INPUT_PULLUP);
attachInterrupt(digitalPinToInterrupt(interruptPin), StartKnocking, CHANGE );
}
void StartKnocking() {
val=1;
Serial.println("A");
}
WEIRD Behavior - So I tried to initially do the Knocking routine on RISING and FALLING edge and wrote two interrupt service routines but for some reason only one would trigger. Not sure why - saw more users with the same issues online will investigate later. For now I call the start knocking subroutine any time I find a change on the interrupt pin. It took me a lot of time to do this unfortunately - not all the modules worked and some were dead on arrival. So simple yet so much time!!
But it works :D
Accelerometer
I didn't really need to use an accelerometer but they are so fun and Zach mentioned I could use a accelerometer as a knock sensor too but that's too expensive and seems like a waste of other functionality to get one for each finger. I tried to use a simple 6 DoF accelerometer I found in my office. And a mini E-ink display in action (I didn't realize they were so expensive - it was a splurge but I really wanted to try one so I bought a 2.13 inch one). There is something wrong with my ESP32 I2C connection.
I first did a I2C scan to make sure my MPU6050 is recognized and it does.
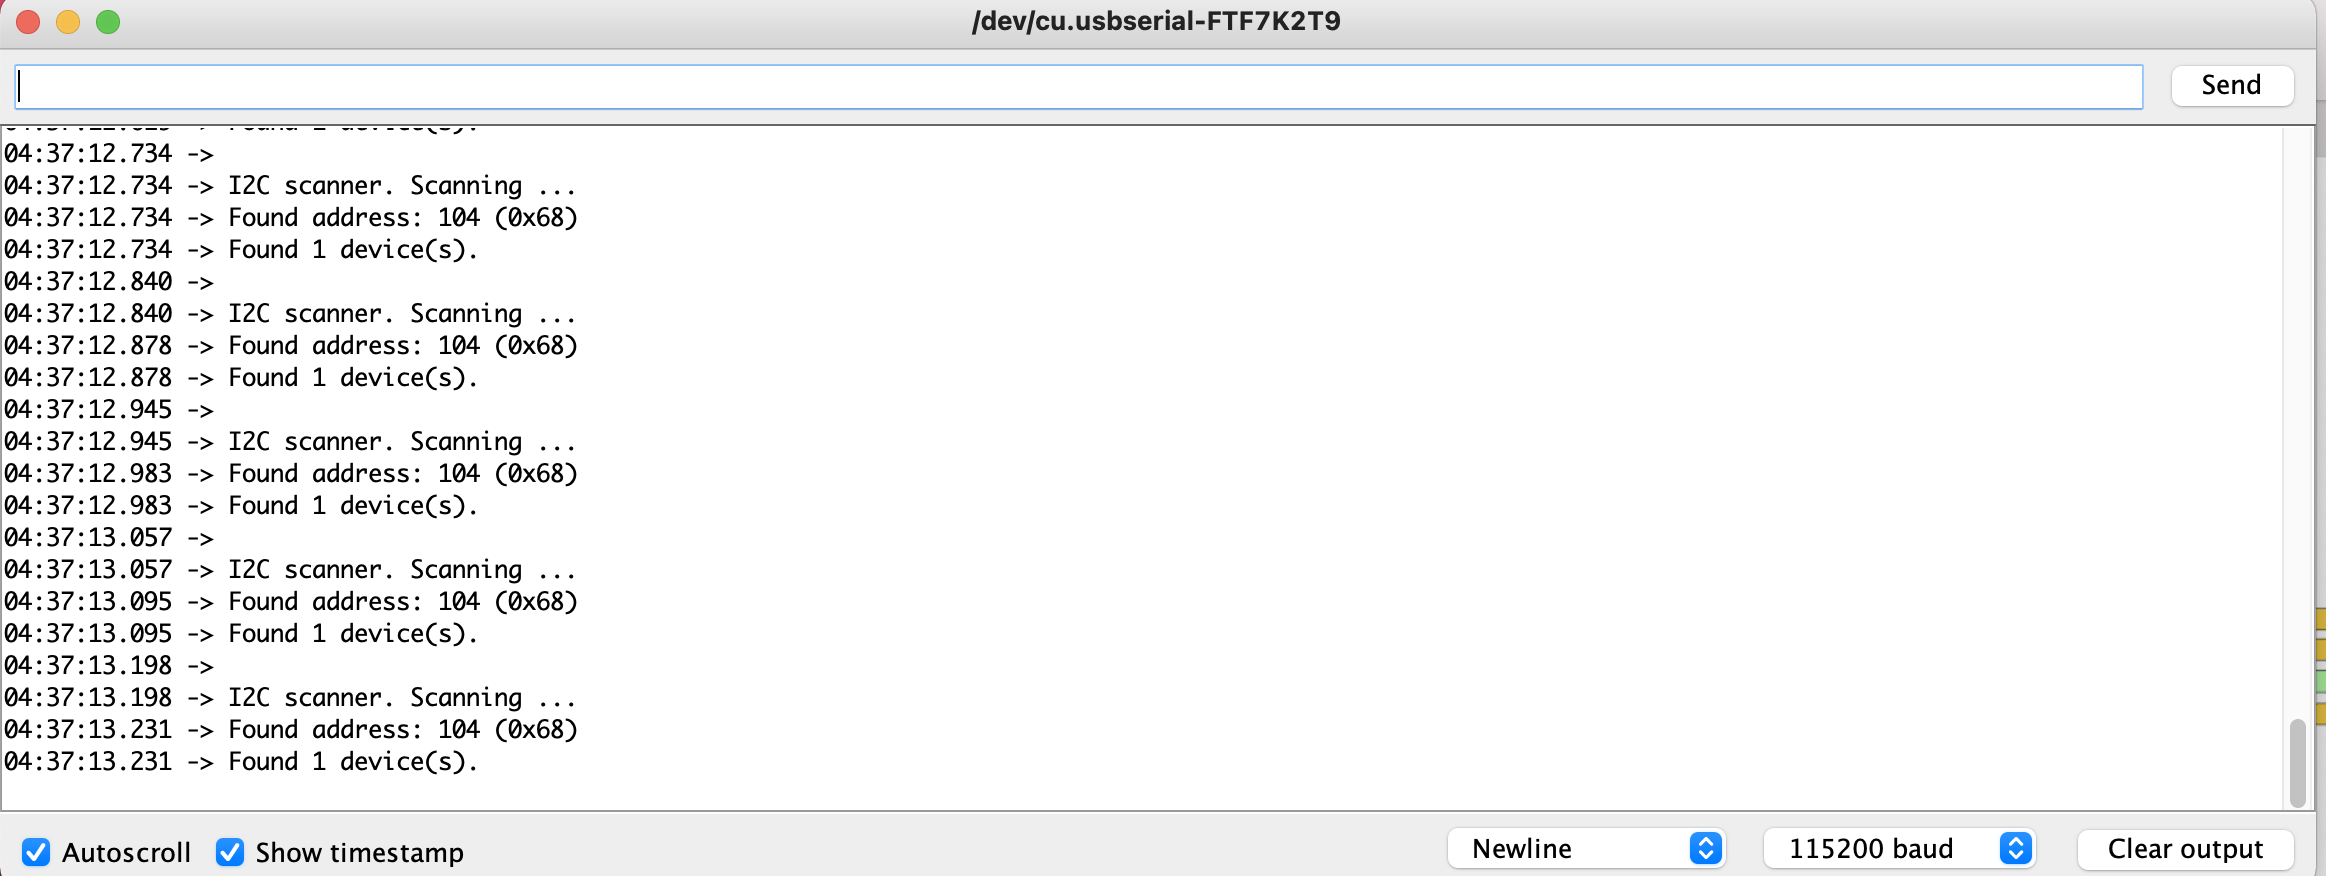
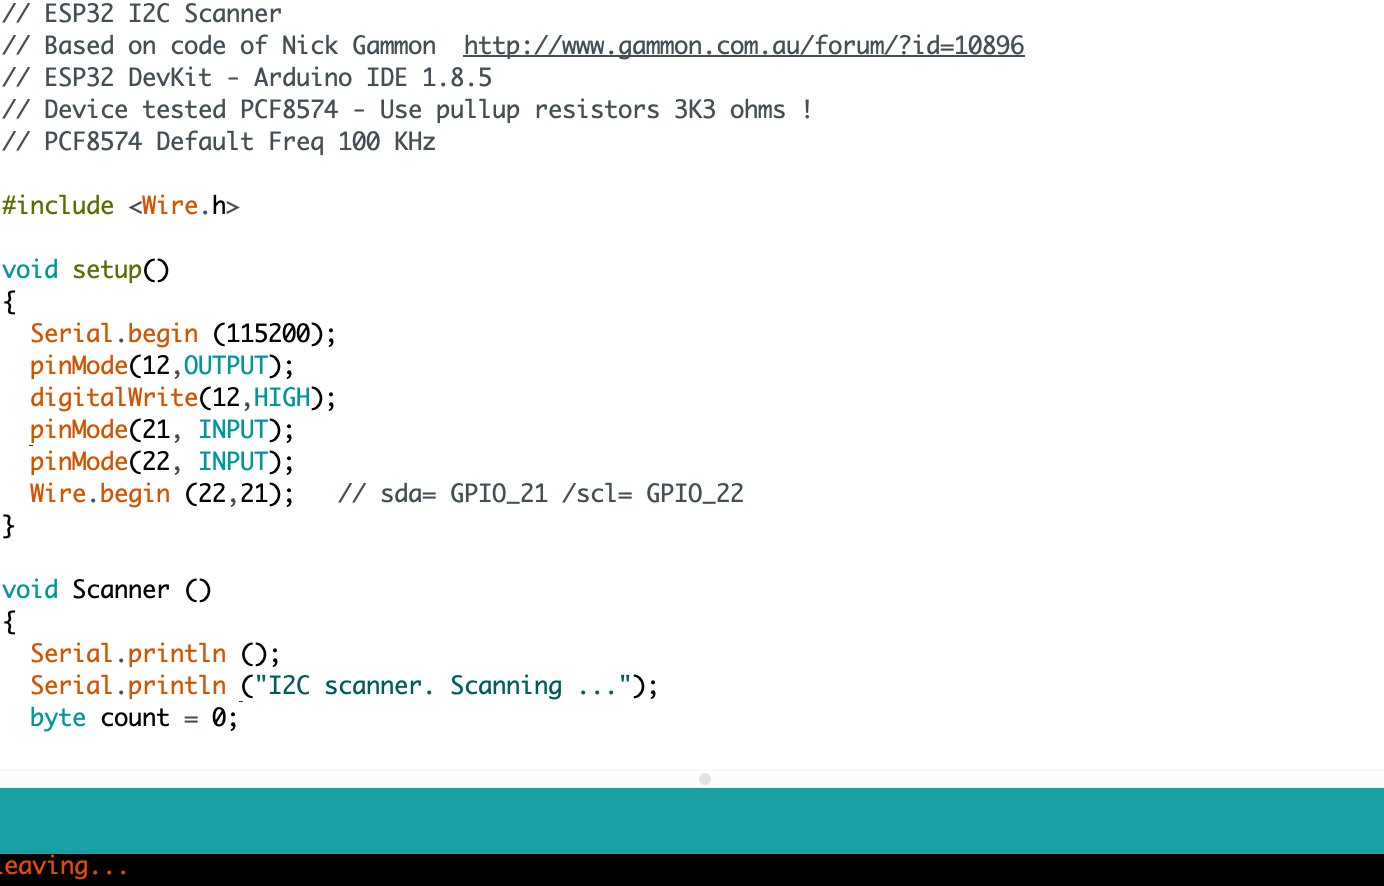
But ithe accelerometer readings are stuck and doesn't report anything. I will figure this out during out put weeks.
Note to self - Don't do everything on Tuesday - Inevitable sleep based induced exhaustion and I forgot to cast resin into my molds till this morning
Now I have everything I need to make a fun animation using all these inputs. I started doing tis already - see progress below - more to come after thanksgiving. I was able to interface this with processing for a visualizer when I tap.
Here is the visualizer in action