Very long time ago, when I was in high school, I once casted alluminium with a friend of mine who had a furnace at his place (weird no?).
Since then I actually never learnt how to properly make molds and cast materials, but it's a very fascinating topic as most plastic pieces around us are made through injection molding.
For this week I decided to try to make a two part molds for a little [BB8](https://starwars.fandom.com/wiki/BB-8).
# CAD design
I used Fusion 360, as I now feel quite comfortable with many commands and especially with the history feature that turned quite useful. [Fusion design](./files/BB8_fusion.f3d)
I wasted a bit of time because I was sloppy with my sketches and did not fully constrain them, but it was easily fixable.
One interesting part of the design was making the orange gear drawings on the side, that I wanted to emboss to make my BB8 more realistic.
Turns out that the emboss command does not work on a sphere, so I first embossed on a cylinder, than use the "replace face" command to move the embossed faces from the cylinder to the sphere.
It worked out quite well.
I then split my BB8 into two parts, and designed the two antennas as the sprue and the vent.
However, they turned out to be too close and too small to be used separately, as I did not fully take into account the resolution that was achievable with our bits.
I placed the two parts on two stocks of size 76x85x38 mm as this was the standard size of the blocks in our shop.
The parts differed because one side has the eyes and the other one does not, but they are otherwise pretty similar.
I would have preferred to machine both parts in one larger stock.
[Left part STL](./files/left.stl) [Right part STL](./files/right.stl)
I added registration pieces in the form of four little spheres around the shape of BB8.
The top left and bottom right is positive in the left mold and negative in the right one and viceversa.
I was expecting to use the Roland SMR20 and Mods, and so I designed my mold so that the deepest point was at 20 mm.
This is achievable with the machine and the endmills we have but I think it's at the edge, and probably using the shopbot would have been better.
# Machining wax
## Making the wax stock
Unfortunately the moment I try to machine there were no pieces of wax left, so I spent some time melting chips in the baking oven and casting it in a mold I just made for this purpose.
The mold was made with scrap pieces of metal kept together with tape, and was not very accurate. However, the sizes here do not matter too much as you machine in the inside of the stock.
What was worrysome is that the surfaces were not very flat, and the blocks definitely look less sharp than the ones we were provided with.
<video width="500" controls>
<source src="./vid/pouring_wax_red.mp4" type="video/mp4">
</video>
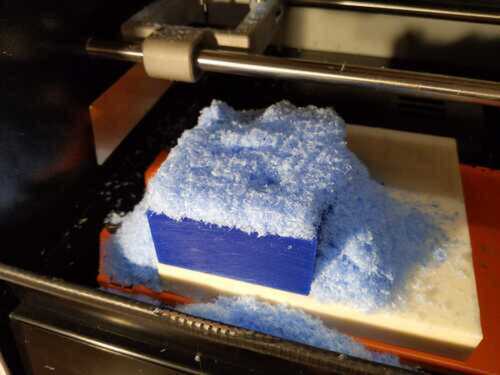
However, in the afternoon, by the time I started machining, two untouched pieces of wax became available, so I used them instead.
I later ended up using one of the two I made.
## First attempt with the Roland SMR20 and Mods
I did my first attempt to machine the wax with the Roland SMR20 and Mods.
I first used a 1/8" inch flat endmill, to make the rough cut, using the 2.5D setting.
Then I used the 3D setting and the 1/16" to finish, but the wax block started moving out from its original position.
I realised I did not glue it correctly, because I applied glue on the bottom of the part.
The best way is instead to press the piece on the sacrifical layer and spread glue on the sides in contact with the sacrificial layer.
I tried again with another piece of wax, and this time the 1/16" endmill slipped off the collet.
I re-started the job, and it worked fine until 70% or so, then the endmill slipped off the collet again. The quality of the features, however is not fantastic.
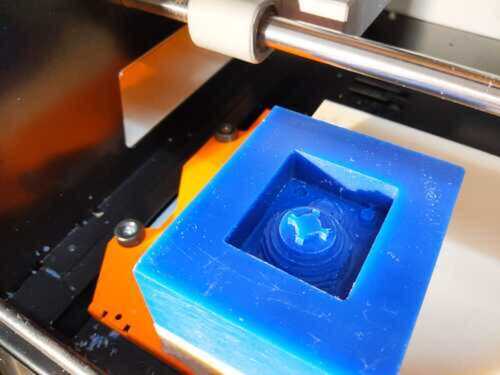 
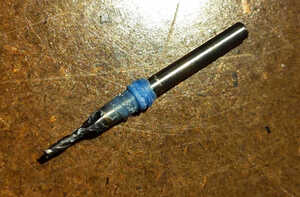 I believe the reason why it slipped off the collet is that the 1/16" inch endmills are wider than 1/16" above the flutes. I don't think Mods takes this into account, and so the endmill was smashing against the stock in the higher part. Continuously touching the sides of the wax box put force on the collet at the point it made it slip.
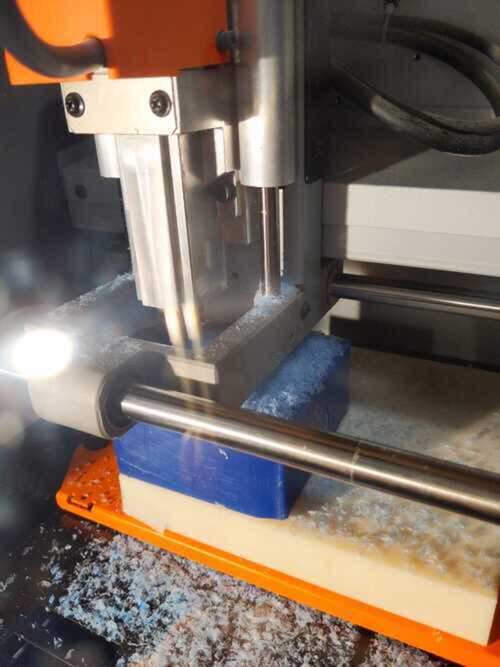
## Second attempt with Aspire and the Desktop Shopbot
Given the previous result I decided to try again with the Shopbot.
Ibrahim helped me make the 3D toolpath with Aspire, using a 1/4" for the rough cut, and a 1/16" ball end (I did not find a flat end with the same collet in the shop) for the finishing cut.
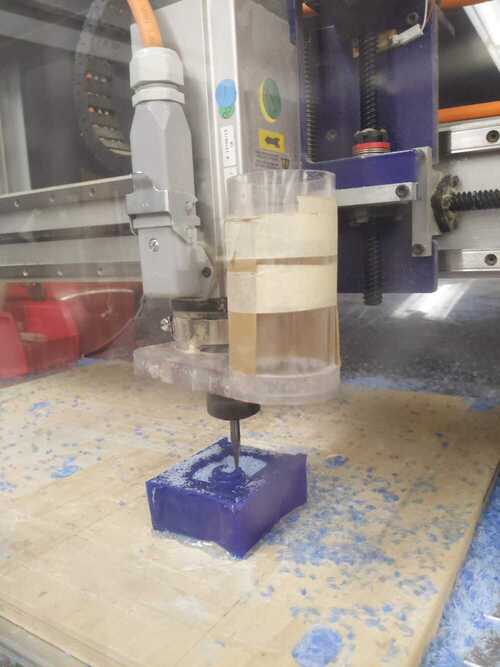 
The rought cut was very quick, about two minutes, while the other cut took much longer, like one hour, as we try to tweak the feed rate and the overlapping part to make it a smoother cut, but the result was really nice!
<video width="500" controls>
<source src="./vid/shopbot_coarse_machining_red.mp4" type="video/mp4">
</video>
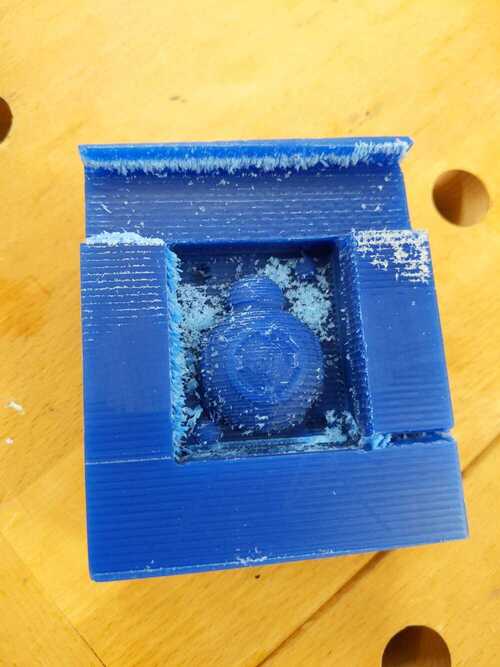
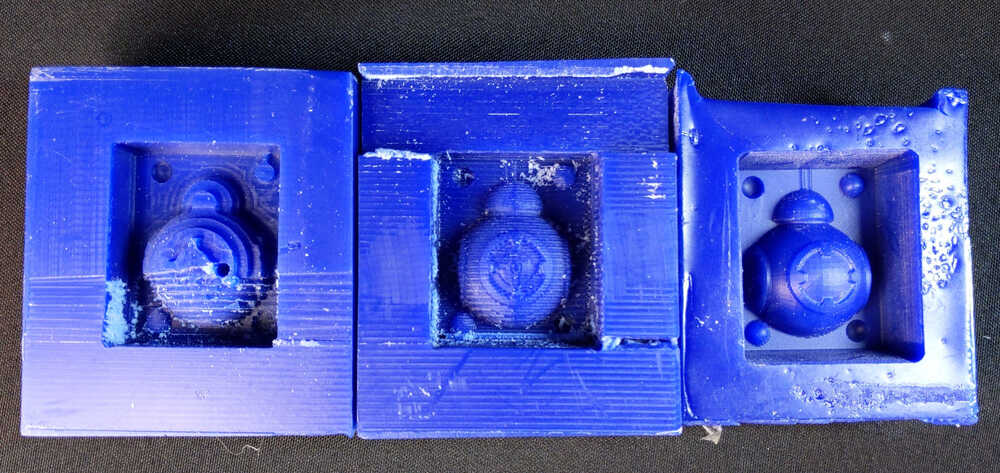
Here are the three different attempts, showing failures and successes.
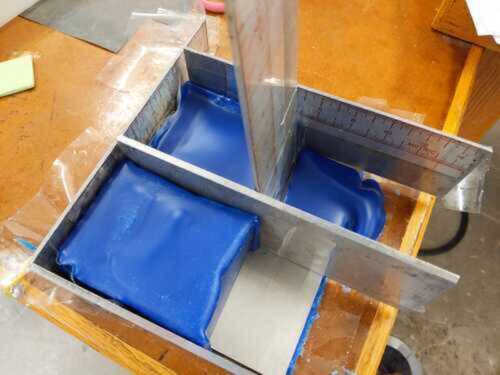
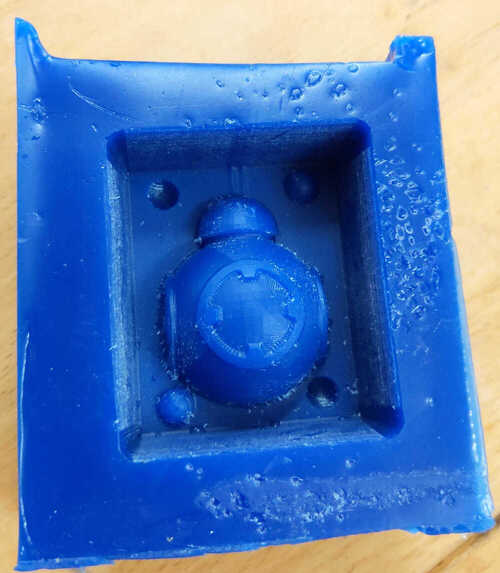
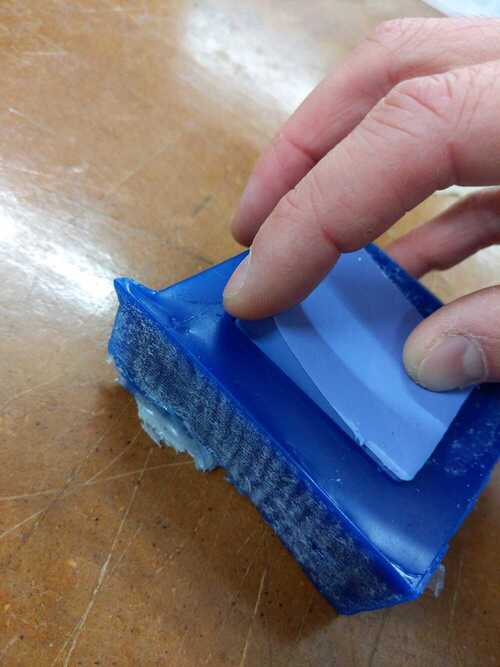
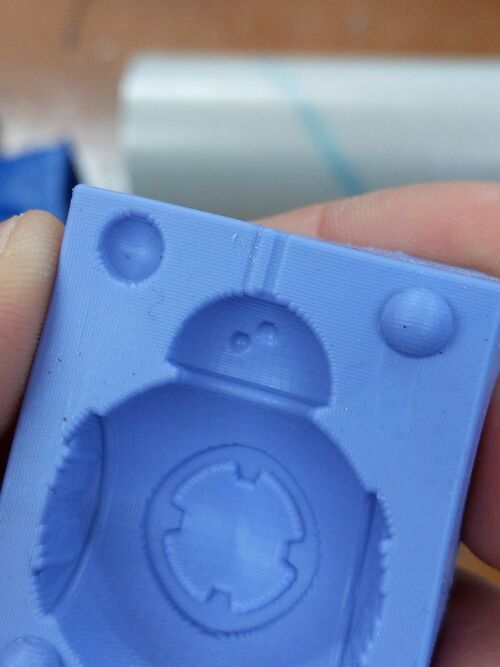
# Making the mold
I prepared my mold with oomoo silicon, by mixing one part of each component.
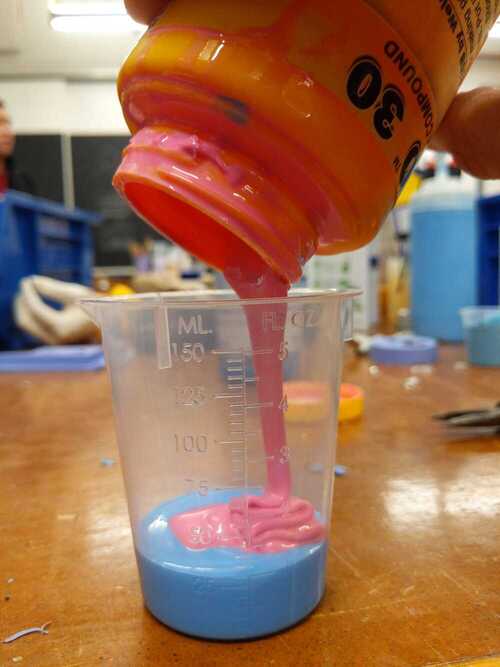 
Despite I did not scoop while mixing, I ended up with several bubbles in the mold.
I believe this is related to the stick which was significantly large for the cup I was using.
I will try again with a smaller stick.
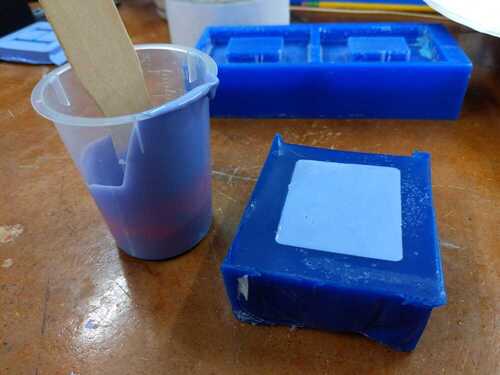
The mold cured over night, and it was ready for casting the morning after.
 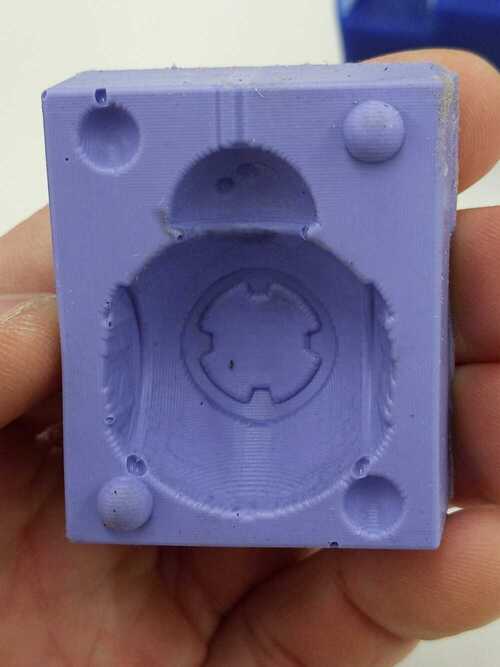
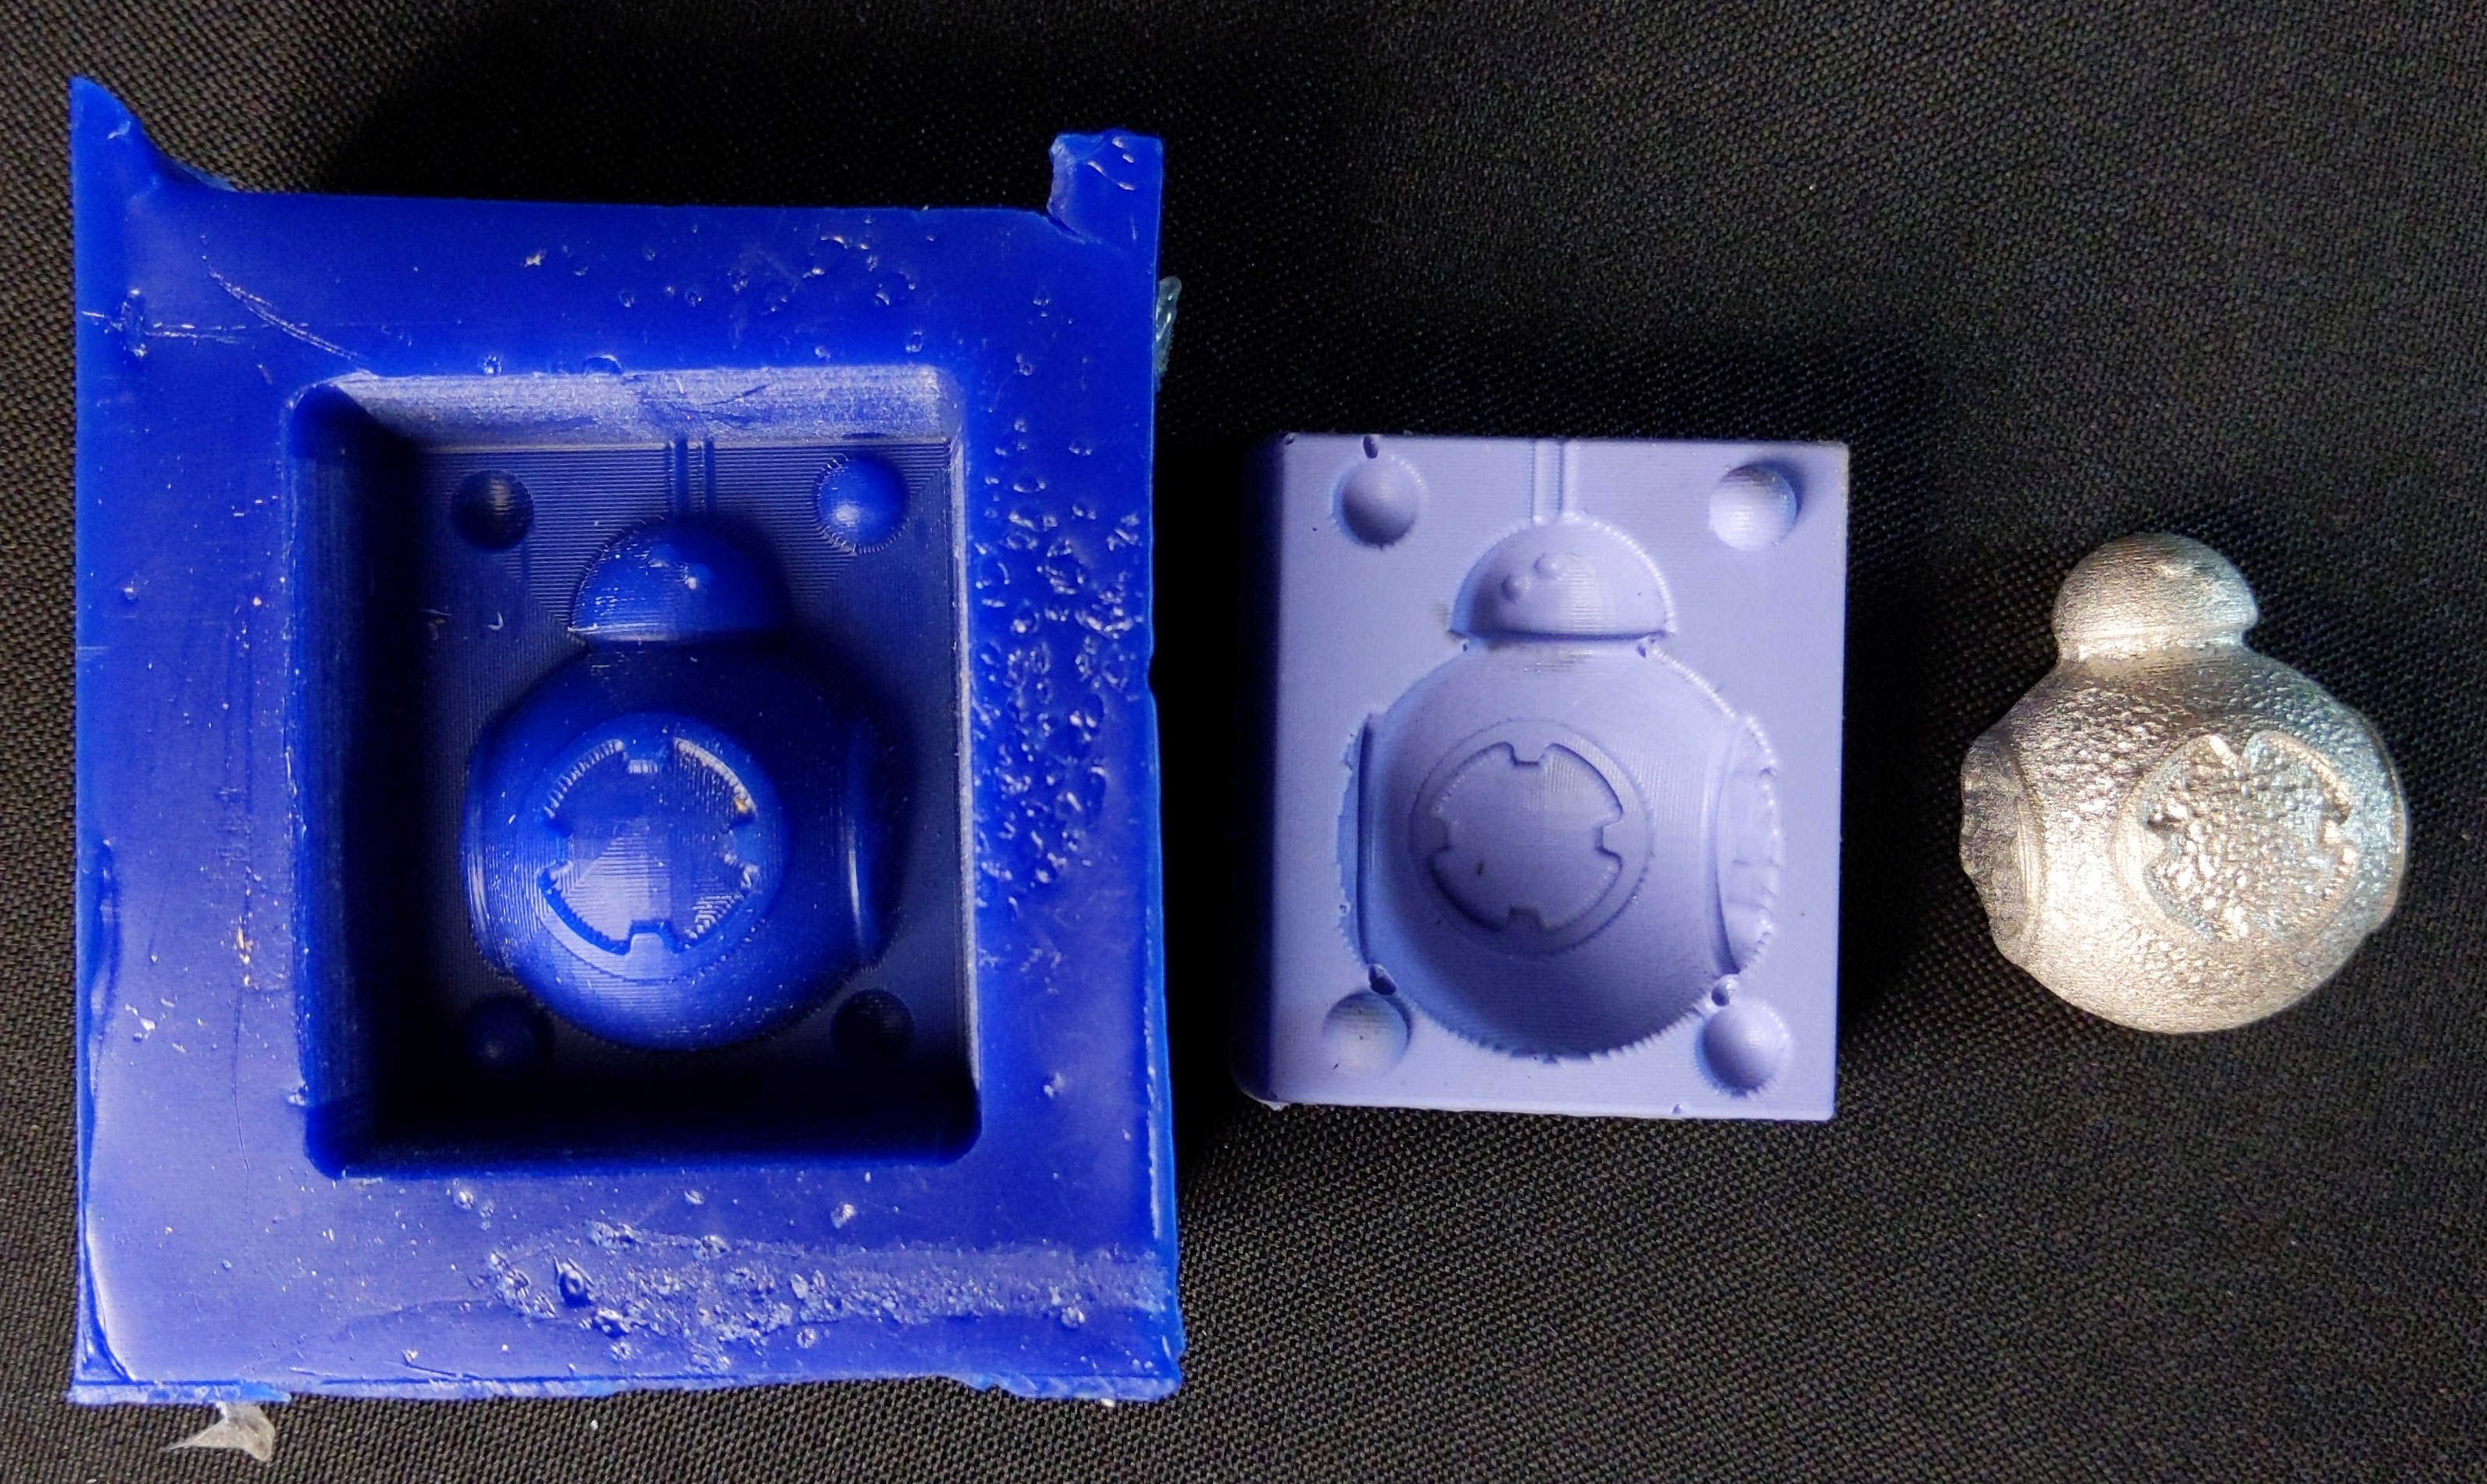
We can see that the mold contains several bubbles, and the way I poured the material created some at the contact with the surface.
# Casting
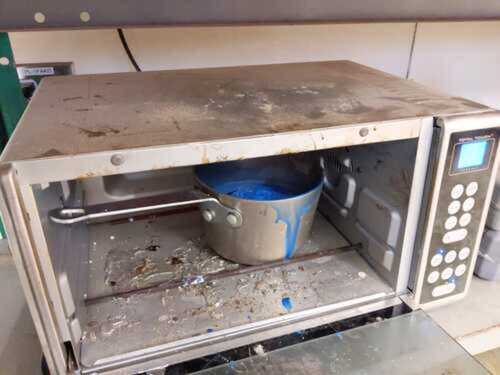
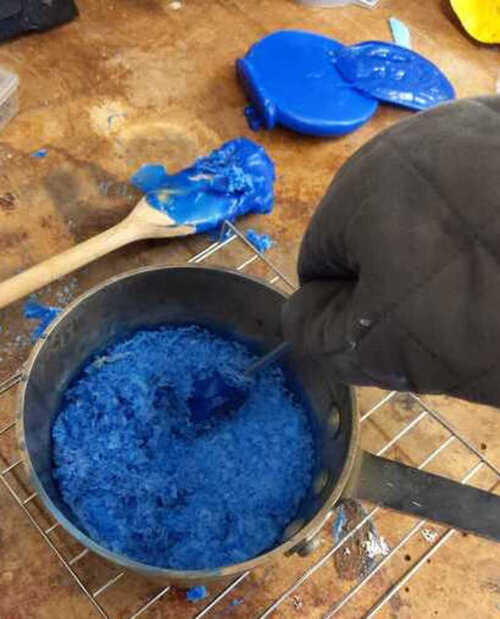
Given the short time, and the fact I did not complete the second mold to make the entire object, I decided to cast the bismuth-tin alloy which we have in the shop, which liquifies at around 200 C and solidifies quickly.
<video width="500" controls>
<source src="./vid/first_cast_red.mp4" type="video/mp4">
</video>
My half BB8 is here, but I hope to complete the second mold soon and try the entire process out.
The features are not fantastic because this material has a strong superficial tension and solidifies super quickly, so it doesn't spread well enough on the surface of the mold.
# My takes
- Keep in mind the sizes of your design: designin features smaller than you can achieve is not particularly useful.
- Decide the stock size and the machine you are using before designing the part. Using the Shopbot and Aspire I could have made a larger piece with better details, as the endmills are longer and can go deeper without risk of hitting the stock with the collet or with the higher part of the endmill.
- Always make well constrained and parametric sketches in Fusion, it will save time later.
- Apply glue with a glue-gun on the sides of the stock touching the sacrificial layer, rather than underneath the stock. The glue solidifies quickly, and it could solidify even quicker than the few seconds it takes to spread the glue and attach the stock to the sacrificial layer.
- Ask to your friends who already started for suggestions, sharing failures and successes. If you work on different times than your friends, make an effort! It saves time than trying to figure out a many things on your own.
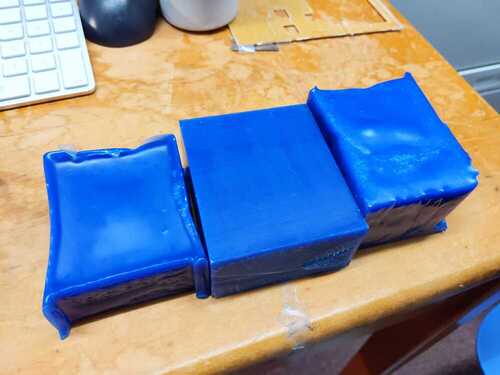
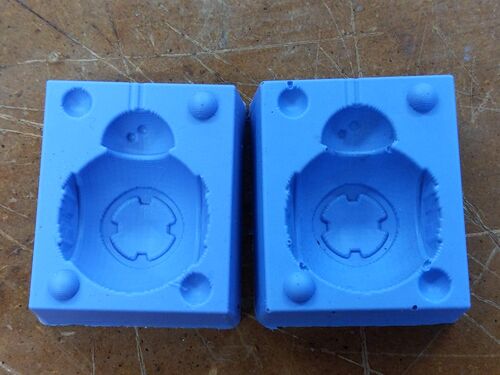
# Second mold and second casting
The day after I continue working to finish up the original two-molds design.
I made a second mold by using the same wax piece.
In principle, the details on the two sides are slightly different, so I should have machined a different mold negative.
However, as I already struggled enough with machining, I preferred making a second mold that looks exactly the same.
In fact, my mold design with registration marks allowed this, despite not being fantastic while casting material in it - it would have been much better to have a significantly stronger constraint between the two molds.
While making the second mold, this time I paid attention to painting with liquid oomoo the wax surface before casting it.
Oomoo flows better on other oomoo, reducing the chance of bubbles, and modifying or damaging the features of the mold.
This second mold is much better with respect to the first one in terms of the quality of the details, although it's quite thin on one side, as I should have poured more oomoo.
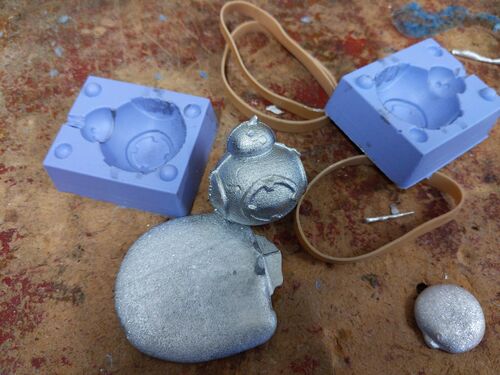
Then I put together the two molds with registration marks and tighten them together with rubber bands.
I first realised that the two antennas of BB8, designed to be the sprue and the vent, were definitely not wide enough.
I then cut the oomoo with a knife in order to make them larger.
As it turned out, it did not really matter as the details of the antenna did not turn out well because of the poor registration of the two molds.
I wanted to use talc to reduce the surface tension of the metal and make it adhere better to the mold, but I could not find it in the shop, so I just did the same as before.
The two part molds was not very tight: in fact, the weight of the metal made the two molds opening up a bit and some of the metal flowed out on the sides.
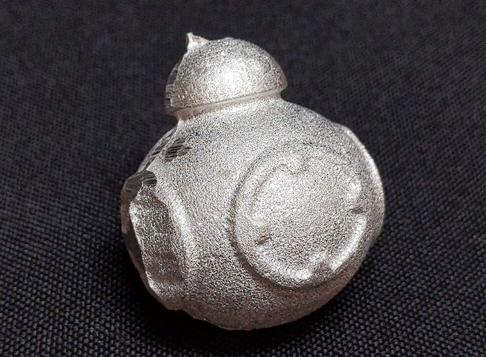
Moreover, the main body, instead of being a sphere, got squeezed down and looks more like an ellipsoid, but that's fine.
<video width="500" controls>
<source src="./vid/final_cast_metal_red.mp4" type="video/mp4">
</video>
After letting sit for a while and opening the mold to let it cool down - it is significantly heavy and very warm, it took it one hour or so to cool down - I sanded it a bit to remove the imperfections on the sides.
The result is quite decent for my first molding-and-casting exercise, I am pretty happy with it!!!