As discussed in last class, I set out to research more on the topic of the "milk scanner". I was able to find a lot of useful and interesting information online related to milk/ink scanner. The basic idea behind this process is that you can capture the silhouette of an object easily when it is surrounded by a high contrast fluid, such as milk or ink. When lowering the object into the fluid, the silhouette changes gradually, as the fluid obstructs more and more of the objects shape. By capturing the silhouette of an object at different stages of submersion, one can generate slices, that, if properly stacked together, can be interpreted as 3D data.

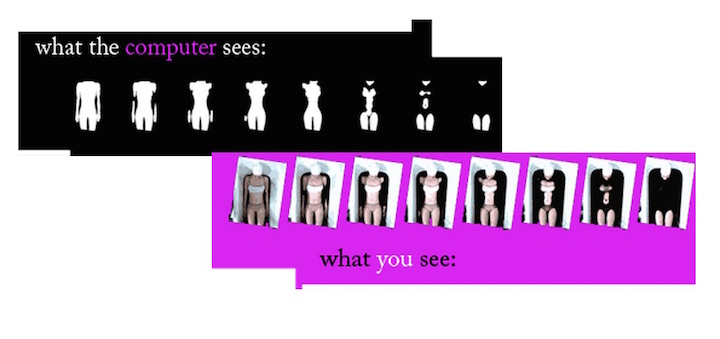
This is an example of a human-sized scanning project where the person is undergoing a full-body scan using a kiddie pool and ink. As the human is submerged (with a helmet over the head) into the pool full of ink, a camera on the top is taking different images at different levels of submersion which the person is going through.

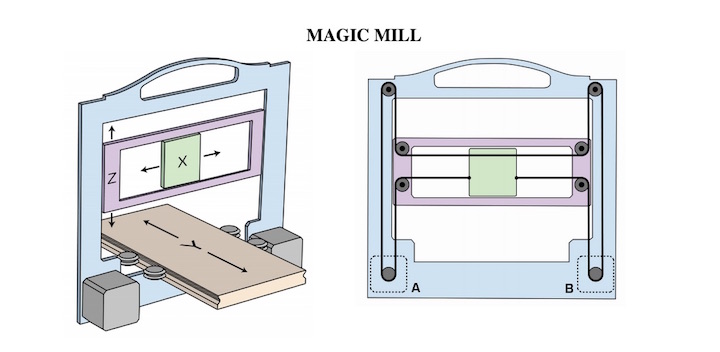
This is a picture of a smaller set-up with the web-cam on the top. For a good example of a video, we can check out this video on the milk scanner. The set-up is created such that it will be able to capture different images at different angles and places. Note that the scanner only scans half an object at a time. You then cover it half in milk. The milk basically "slices" through the object. The more different angles that camera can take, the better, as a better displacement map can be later created. As you can see from the set-up, the stand is moveable on the x-axis such that different angles of pictures can be taken. You can subtract the white part form the picture the webcam takes and the rest serves as your "slice".
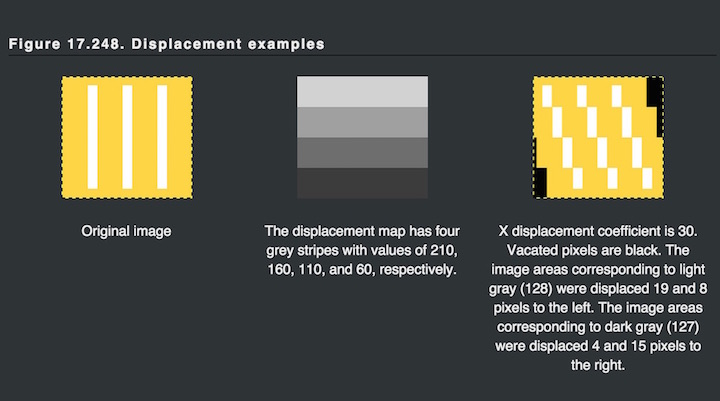
On this point, I will like to explain a bit on what a "displacement map" is for the layman. From the image above, you can see a very good example of how the pixels of a picture is moved and displaced, in order to create a different picture, often when several images is displaced with each other, a more 3D picture or effect can be created. In essence, displacement mapping is a computer graphics technique, using a texture or height map, to cause an effect where the actual geometric position of points over the textured surface are displaced, giving surfaces a great sense of depth and detail, creating self-shadows and silhouettes. For more information, one can read more on displacement mapping, on displacement examples, or on on this displacement tutorial.
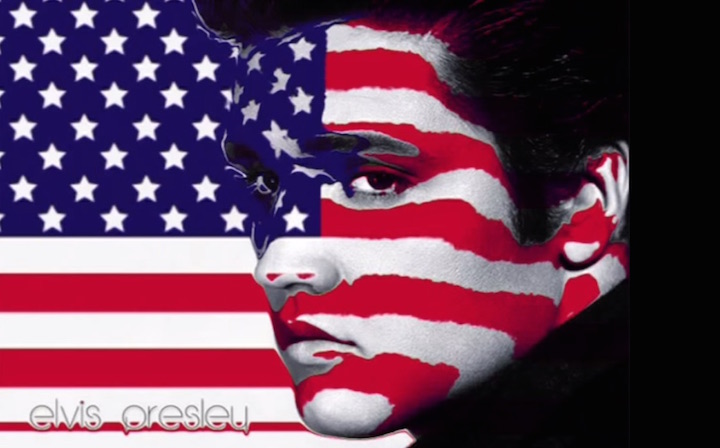
Often, photoshop is used to "displace" two pictures or images into one to create perception of depth of 3D. A simple example is the one above where the US flag is transposed onto an Elvis image which has been displaced (as you can see on the right part of the image), and with the two images, it creates a 3D effect.
This is another image to show the difference between an image that has been "displaced" and one that has not been. After taking images of the 3D milk scanned item, one can use one of several ways to displace the image. One way is using OpenCV (Open Source Computer Vision Library), which is an open source computer vision and machine learning software library. OpenCV was built to provide a common infrastructure for computer vision applications and to accelerate the use of machine perception in the commercial products. The library has more than 2500 optimized algorithms, which includes a comprehensive set of both classic and state-of-the-art computer vision and machine learning algorithms. These algorithms can be used to detect and recognize faces, identify objects, classify human actions in videos, track camera movements, track moving objects, extract 3D models of objects, produce 3D point clouds from stereo cameras, stitch images together to produce a high resolution image of an entire scene, find similar images from an image database, remove red eyes from images taken using flash, follow eye movements, recognize scenery and establish markers to overlay it with augmented reality, etc. OpenCV has more than 47 thousand people of user community and estimated number of downloads exceeding 7 million. The library is used extensively in companies, research groups and by governmental bodies. For more information on OpenCV, one can find them on the about OpenCV page, or on the introduction to OpenCV page, or even check out the about github repository which has 15,765+ commits. On top of OpenCV, there are also other software including Blender, Maya, Moviesandbox, which can be used for this purpose.
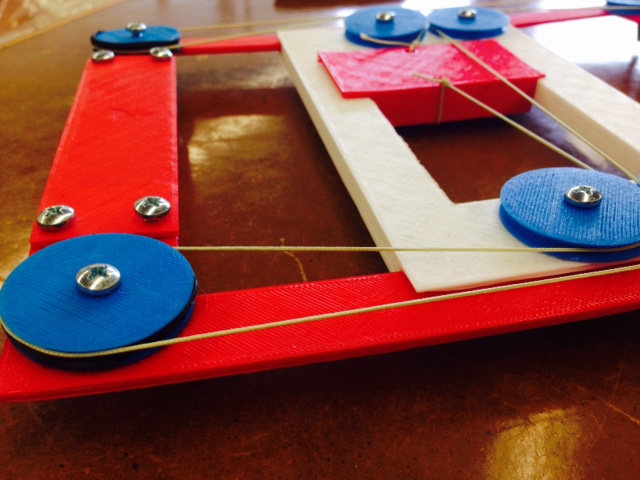
For the purpose of this week's class, I set out to create a mechanism that can move - I wanted to create a set-up like the one above so that I can move the camera around on the x-axis, y-axis, and z-axis. In order to break down the project into manageable parts, I decided to focus on making the set-up that will move x-axis and z-axis for this week, before I focus on other parts of the set-up and the displacement logic behind this.
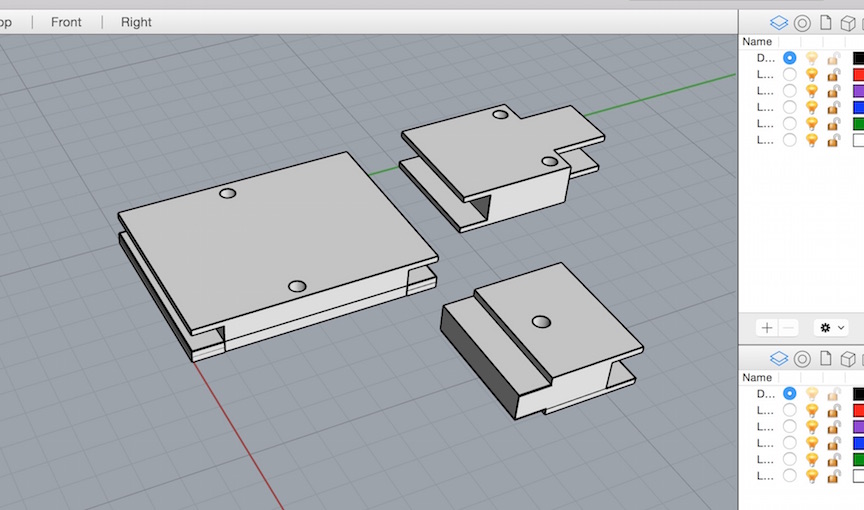
I used Rhino to model some of the parts which I will be using for the set-up. It was pretty good for me to re-learn some simple functions including boolean, surfaces, unions, etc.
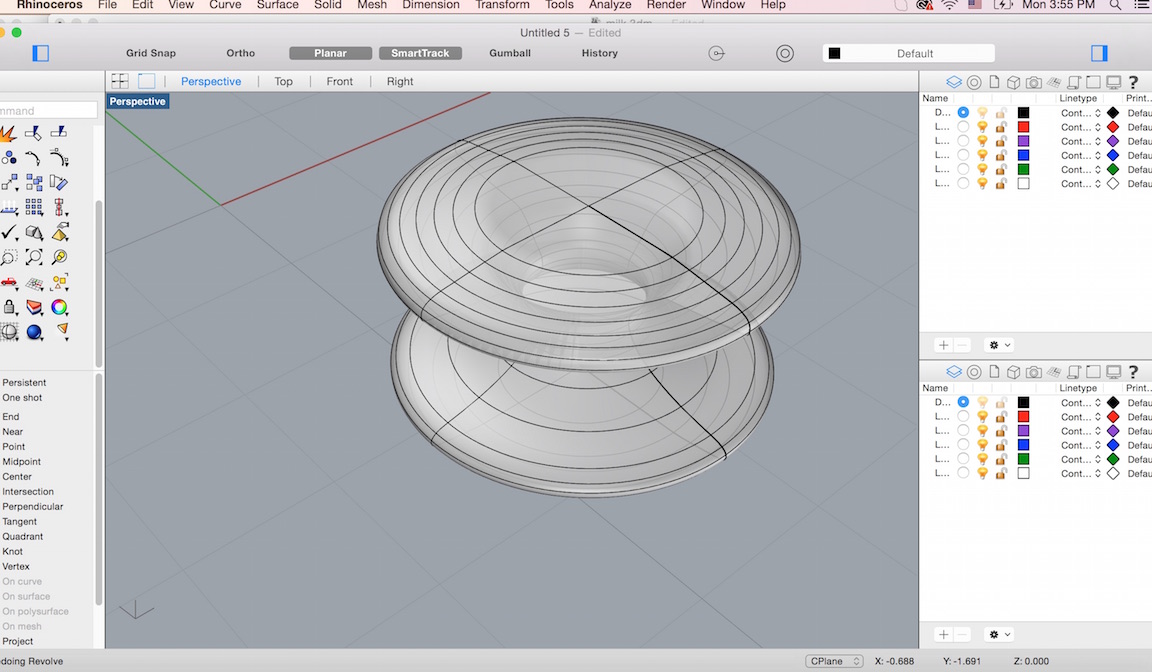
Another Rhino image where I created the pulley or wheel for the set-up using the surface function. Through trial and error, I find that making the pulley wider and taller will provide more grip and surface area.
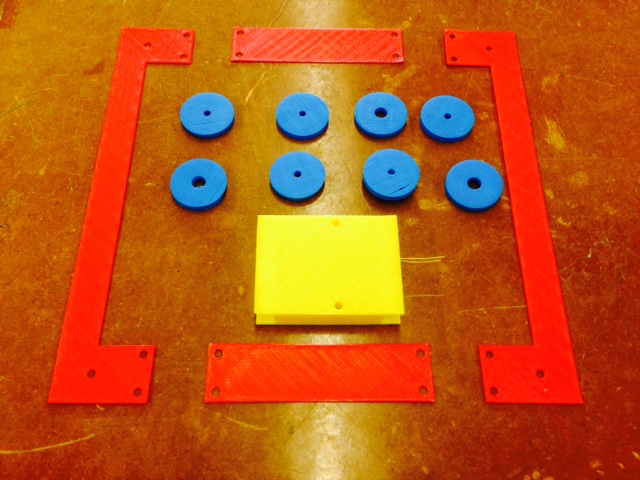
Next, I went on to 3D print the parts, which took pretty long, average of 30 min for each part and for all the parts collectively it took me 1.5 days to trial and error through the right parts necessary for this set-up. There were several points to note including how tight the parts needed to be, and how thick each parts needed to be. Also, do I create a closed structure versus an open structure as I need to fit various parts A, B, and C together to make the structure.
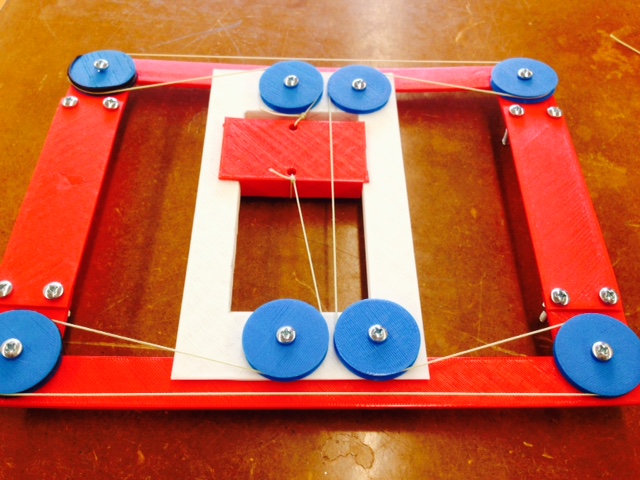
Here is the complete set-up, complete with the pulleys and strings attached. I needed to pull the strings as tight as can be, but it was still at times not as turgid as I would like it to be.