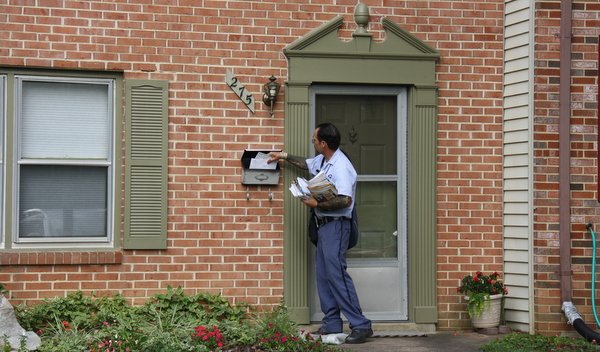
Problem I am trying to solve
1) I wanted to know who is at my front door
2) What day and time they came
3) I wanted to be notified when they arrive
4) Examples: Contractors, Postman, Neighbors, Friends, Strangers lurking around
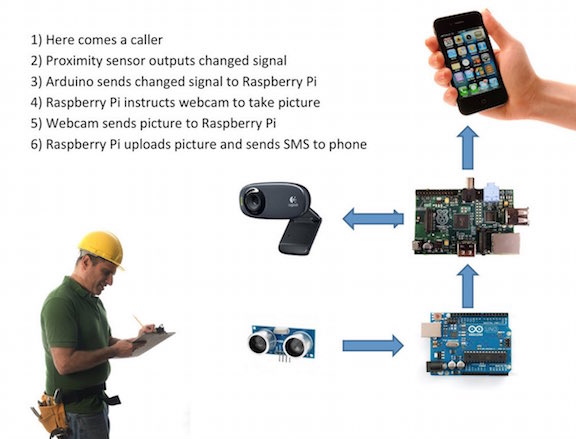
This is the setup of things that I am trying to build. Using four items, they will talk to each other send me a text and a picture on my mobile phone when someone shows up at my house. Next, I am going to bring you through all the hardware and software that I used.
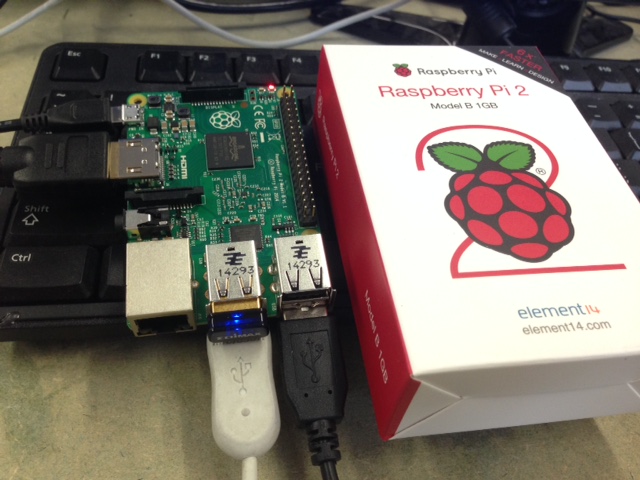
It is my first time using the Raspberry Pi, so I wanted to set it up
and use it for something simple first. Therefore, I decided to set up my Raspberry Pi as a home computer system.
There is a very good setup tutorial guide that can be found on Raspberry Pi homepage
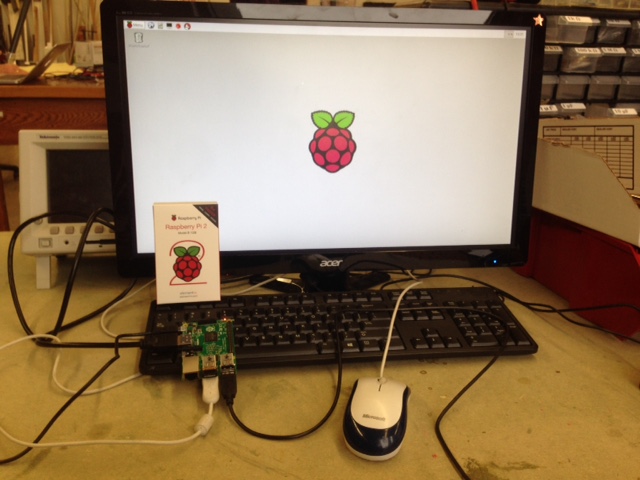
The entire setup process was pretty smooth and the steps are (1) Download the software onto the SD card (it came pre-packaged in my case) (2) Use a LCD screen and connect HDMI/DVI to use as a display for the Pi.
(3) Connect the wireless adaptor, the keyboard, the mouse, and the power supply. (4) Turn it on!
The software drivers necessary to kickstart the Raspberry Pi is called Raspbian and can be found here.
Next, I am going to try and set up my home security system to monitor my house. Therefore, I am going to need a few tools.
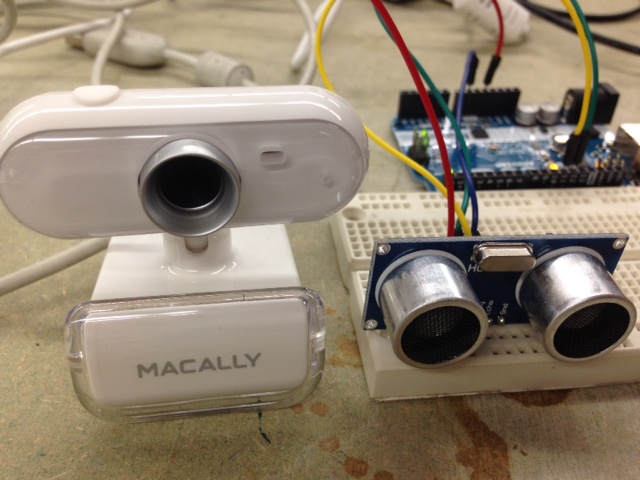
I managed to get my hands on HC-SR04 proximity sensor and
a simple Macally Webcam.
The proximity sensor worked really well and was highly sensitive, detecting anything that comes near it pretty much well. The webcam did not had too good
a resolution, but it worked simply when you plugged it in which is what i like about it!
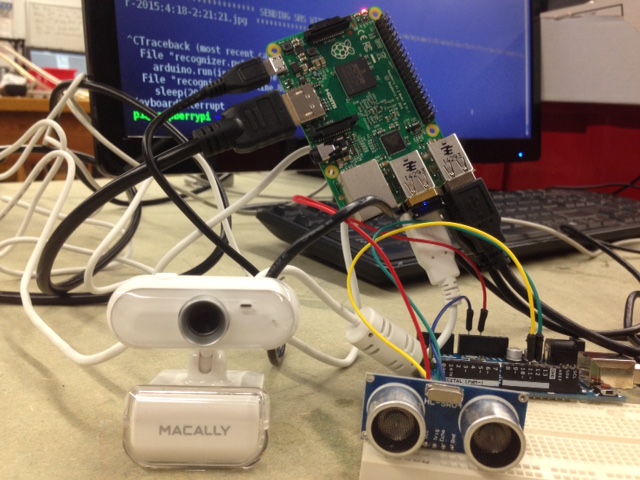
Over here you will see me setting all four items up so they are connected to each other. I needed to spend some effort getting myself familiarized
with the Arduino but it was not so hard. Connecting the Arduino to the proximity sensor, I needed it to talk to it to sense and detect when someone comes near.
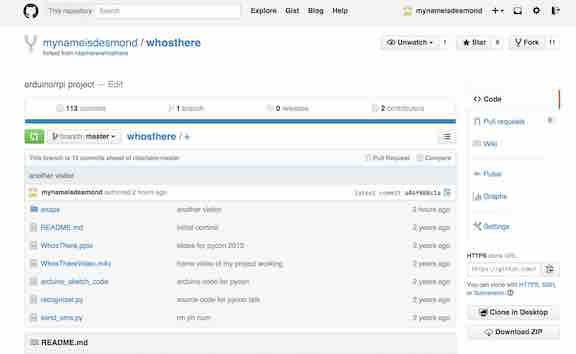
The code I used for that can be found on my Arduino GitHub page.
It was fun getting the right pins into the Arduino but it was easier than I thought as there are many online tutorials who help on this. Basically, there needs to be
at least one wire going into "GND" and one going into "VCC", and based on your inputs and outputs on your code, you should connect the pins accordingly.
The software I used to program the hardware
In order to program both the Arduino and Raspberry Pi, I needed to write some software, which I uploaded onto GitHub in order to access it easily.
Arduino software
Arduino to read output from the Proximity sensor, the code can be found on my Arduino GitHub page
Raspberry Pi software
Raspberry Pi python code - 2 scripts --> Recognizer.py --> (1) Read sensor output from Arduino (one thread) --> Code is here for Recognizer.py
(2) Detect Object
(3) Take photo by sending message to webcam
(4) Upload the photo to a site (GitHub)
(5) Call send_sms.py with URL to photo
Second code for Raspberry Pi --> Send_sms.py --> Code is here for Send_sms.py
Twilio software
Use Twilio to send URL to photo as an SMS/Text msg. There is pretty good documentation online on how to get this done too!
Basically, you will need to log into Twilio, get a free trial account and start trying. After using Twilio, I really fell in love with it, and love how simple and easy
it is to use. To try things out, you can try sending a sms to your phone from Twilio. Basically, you can then use the API from Twilio to incorporate into
any software or application that you are working on. More details can be found here on how to start using Twilio to send yourself a SMS or even phonecall.
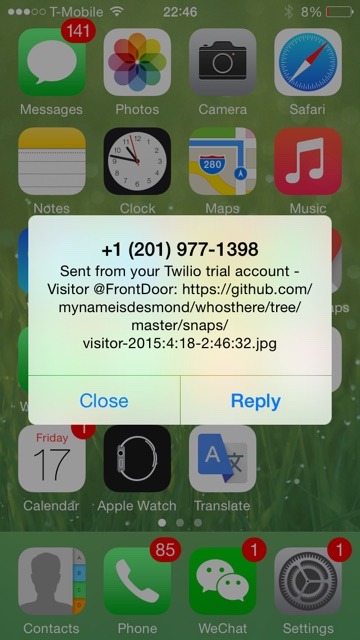
Therefore, over here you will see the SMS that was sent to my mobile phone with the time, date, and a link to the picture of the person who showed up in front of my house!
The entire setup process was pretty smooth and the steps are (1) Download the software onto the SD card (it came pre-packaged in my case) (2) Use a LCD screen and connect HDMI/DVI to use as a display for the Pi.
(3) Connect the wireless adaptor, the keyboard, the mouse, and the power supply. (4) Turn it on!
The software drivers necessary to kickstart the Raspberry Pi is called Raspbian and can be found here.
Next, I am going to try and set up my home security system to monitor my house. Therefore, I am going to need a few tools.
I managed to get my hands on HC-SR04 proximity sensor and
a simple Macally Webcam.
The proximity sensor worked really well and was highly sensitive, detecting anything that comes near it pretty much well. The webcam did not had too good
a resolution, but it worked simply when you plugged it in which is what i like about it!
Over here you will see me setting all four items up so they are connected to each other. I needed to spend some effort getting myself familiarized
with the Arduino but it was not so hard. Connecting the Arduino to the proximity sensor, I needed it to talk to it to sense and detect when someone comes near.
The code I used for that can be found on my Arduino GitHub page.
It was fun getting the right pins into the Arduino but it was easier than I thought as there are many online tutorials who help on this. Basically, there needs to be
at least one wire going into "GND" and one going into "VCC", and based on your inputs and outputs on your code, you should connect the pins accordingly.
The software I used to program the hardware
In order to program both the Arduino and Raspberry Pi, I needed to write some software, which I uploaded onto GitHub in order to access it easily.
Arduino software
Arduino to read output from the Proximity sensor, the code can be found on my Arduino GitHub page
Raspberry Pi software
Raspberry Pi python code - 2 scripts --> Recognizer.py --> (1) Read sensor output from Arduino (one thread) --> Code is here for Recognizer.py
(2) Detect Object
(3) Take photo by sending message to webcam
(4) Upload the photo to a site (GitHub)
(5) Call send_sms.py with URL to photo
Second code for Raspberry Pi --> Send_sms.py --> Code is here for Send_sms.py
Twilio software
Use Twilio to send URL to photo as an SMS/Text msg. There is pretty good documentation online on how to get this done too!
Basically, you will need to log into Twilio, get a free trial account and start trying. After using Twilio, I really fell in love with it, and love how simple and easy
it is to use. To try things out, you can try sending a sms to your phone from Twilio. Basically, you can then use the API from Twilio to incorporate into
any software or application that you are working on. More details can be found here on how to start using Twilio to send yourself a SMS or even phonecall.