With guidance from Nadya, I started to go through the manual process of milk scanning to better understand how it works.
I fixed up a simple tripod, and got ready a ton of milk and got down to scanning.
I collected a few interesting pieces of objects which I thought will be a good start to milk-scan with!
The steps I took are as follows:
1. Use a measuring cylinder to measure an appropriate amount of milk that will bring about a 0.1 inche increase in the level of milk
2. Pour the milk
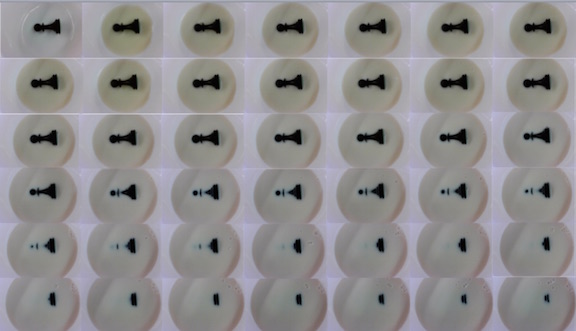
3. Take a picture from my webcam
4. Repeat steps 2 and 3 the object is fully submerged in the milk (around 80 to 100 times on average)
5. Trace the outline (initially I used Inkscape / Gimp / "Loft" function in Rhino but that did not work too well). On Tomo's advice and help, I started to use a software called
ImageJ to create the outline.
6. Export the .dxf file into Rhino and clean up the mesh!
In this video, you can see the outline of the chess piece that I processed using ImageJ. The mesh is not perfect, as I realized that there are a couple
of factors that will affect how good the quality of the images / 3D image will be including:
1. Amount of light
2. Amount of contrast between object and background
3. Quality of webcam (resolution / pixels)
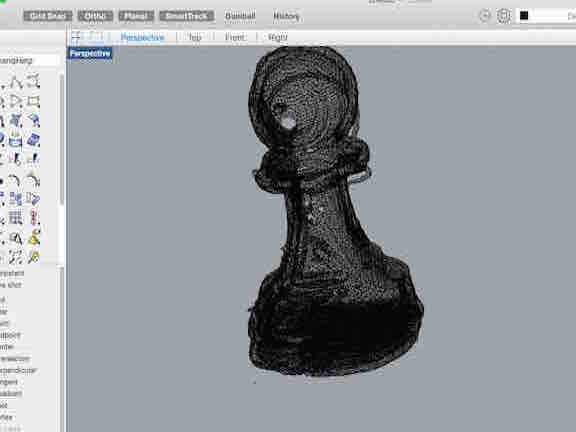
After putting the outline through ImageJ, I exported the image as a .dxf file and opened up in Rhino. The mesh is not perfect,
but I used a few functions including "ExtractConnectedMeshFaces" to repair the mesh and make it look better. There is a good tutorial that
can be found at the Rhino online tutorial
Once again, the mesh can be improved
by going through the steps mentioned earlier on regarding light, contrast and webcam.
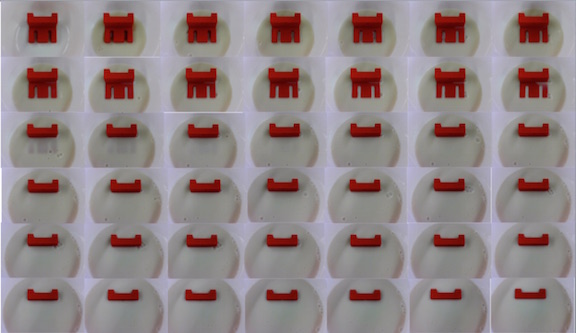
Once again, in this process, I repeated the same process but with a different object as I wanted to test an object with a better variance in depth
and a flat base.
In this video, you can see the time-lapse effect of me pouring milk into the container of both the actual image and the outline of the red object.
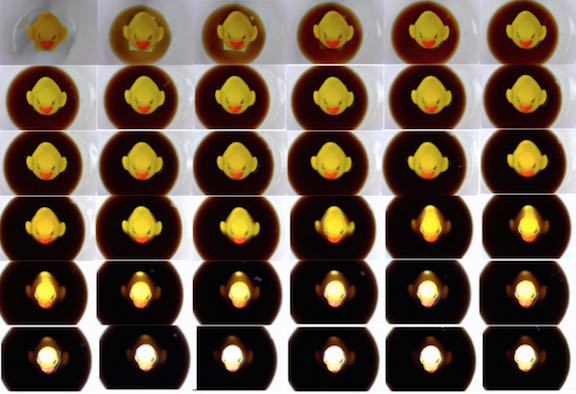
Finally, I wanted to try and contrast diet coke with a bright object to test and see the effects of that.
Therefore, I went on to put a Duckie, and poured diet coke into the container to see the effects of that.
In this video, you can see the time-lapse effect of me pouring milk into the container of both the actual image and the outline of the duck.
After going through the milk scanning process, I will like to solve the problem of step 2 and 3 - by automating the pouring milk and taking photos.
My plan for the final project is
to automate the process of pouring the milk and photo-taking.
In order to do that, I plan to build a platform that will move the scanned object up and down in the bowl of milk, and I will synchronise the movement of the
platform with the photo-taking.
For the photo-taking, I plan to use a Raspberry Pi camera module to time the photo taking at fixed intervals of 2 to 5 seconds, and the movement of the platform upwards
will be timed at the same fixed intervals of 2 to 5 seconds. In that way, I will be able to coordinate the photo taking of different milk levels of the scanned object.
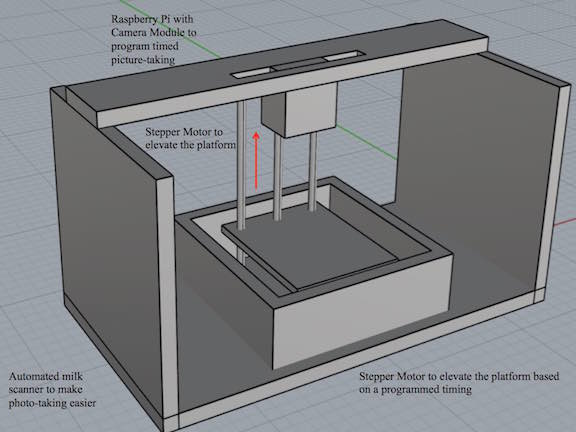
I will use a stepper motor and attach it to a pole with screws that will move the platform up and down. There will be two other poles on the side as support.
In essence, it will create an up and down motion in a staggered manner so that the milk scanner / webcam can take multiple photos of the scanned object
as it moves up and down.
Point to note, the platform should be perforated (or have holes in it) so that they will be less resistance when moving the
platform up and down. Also, there should be a velcro to strap the object down to the platform to stabilize it.
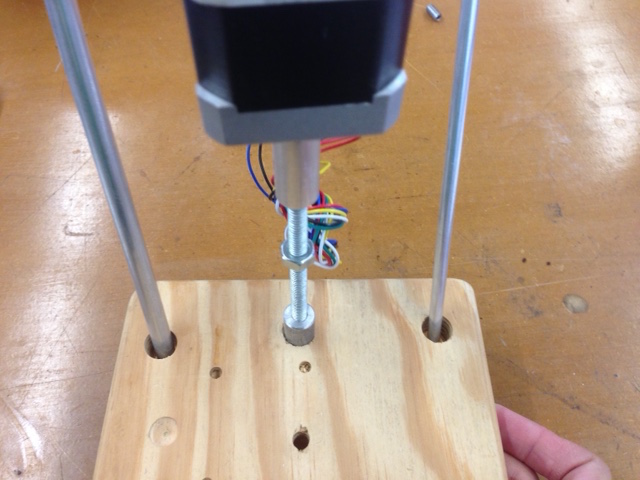
Here is the mechanism of how the platform will move up and down with the stepper motor, and pulley system.