Weeks 11 & 12 - Networking and Application Programming
Send me a cute message from anywhere
I was really looking forward to this week. However, I feel quite exhausted and behind with other HTMAA projects, so I chose to keep it simple this time.
I had initially thought to use this week to connect the ESP32-S3 Sense to wifi and resound some OpenAI TTS through the speaker and/or text on the OLED board. However, since I had to switch the ESP32S3 Sense on last week’s board with the SAM-D21 (as only that had a DAC), and, tbh, had not soldered that analog speaker board yet, I wasn’t really motivated to do that.
TRYING TO THINK SIMPLE. I went back to the 4xMAX7219 LED screens I had. Back in week 3, I had already used SPI for networking and it had been my hope to connect it to ChatGPT. Application programming is only due next week really, so I thought a simpler alternative could be to connect the ESP32 to a webpage that would send it text to display.
This time, I am going backwards: start with the programming, make and solder the board later. What I am doing, unless I get tempted again to sabotage myself by being more ambitious with my time than I should be, should be feasible with a simple board. If I have time, I might make a cute case with Lego bricks (simple).
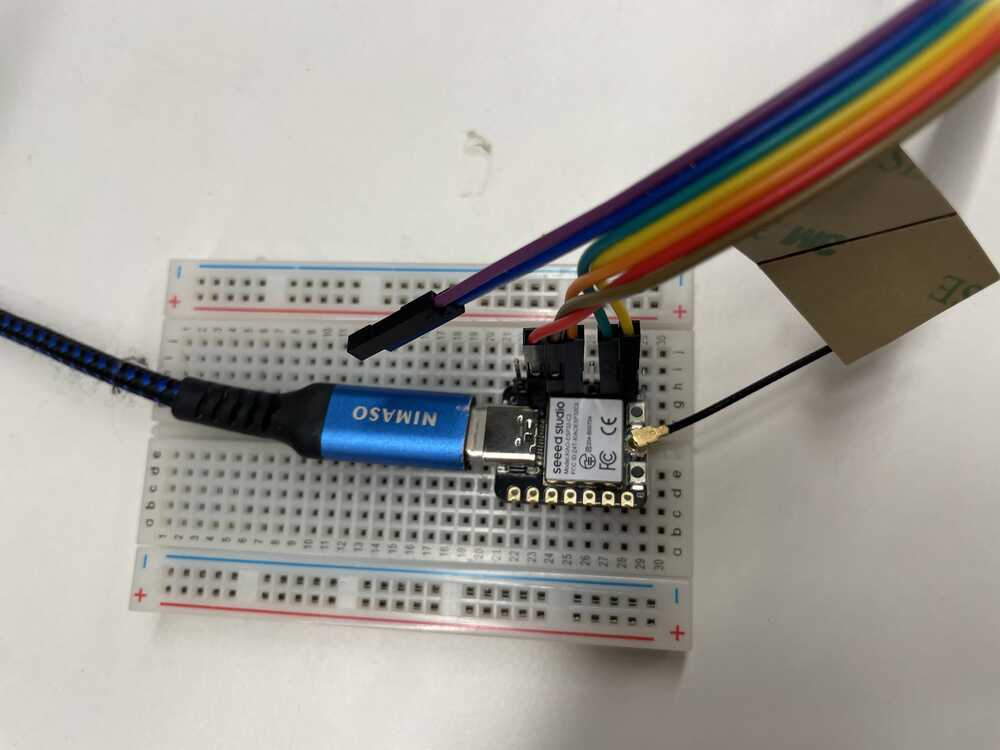
The Xiao ESP32-S3 Sense modules are in high demand and the most expensive so I decided to go with the slightly cheaper (and more available) Xiao ESP32-C3 instead, which also supports wifi and Bluetooth. As they are both part of the Xiao family, the core pinouts are the same.
The idea
What I decided on was to have anyone from anywhere send me a message on the MAX7219. I went back and forth thinking whether I should create a server with it, using the microdot library that Neil had used in one of his examples.
Thoughts:
the microcontroller needs to provide a POST endpoint
then the outside app has to post to the microcontroller

alternative is that the outside app provides a GET endpoint
that the microcontroller queries periodically
Eventually, I went with this process:
- Connect ESP32-C3 to wifi and act as a client, displaying messages on the display: After tinkering with the microdot library for quite a bit, I realized that a simple fetch service would be enough. I used the micropython urequests library for that.
- Node server and simple static webpage on Glitch: Through the webpage, users could send messages that would be stored as the latest message on the server. An GET endpoint would allow the ESP32-C3 to get the latest message.
Breadboard
Starting with programming was such a good idea. I could easily prototype and test the software just connecting the Xiao to a few pins. I actually didn’t even need a breadboard for the connection to work.
I’m starting to like breadboards. Sorry, Neil.
Pinouts for SPI
As already described in week 3, the MAX7219 uses SPI. The Xiaos share the basic pinout but my guess is that the C3 is older and therefore somewhat differs in their naming convention regarding pinouts.
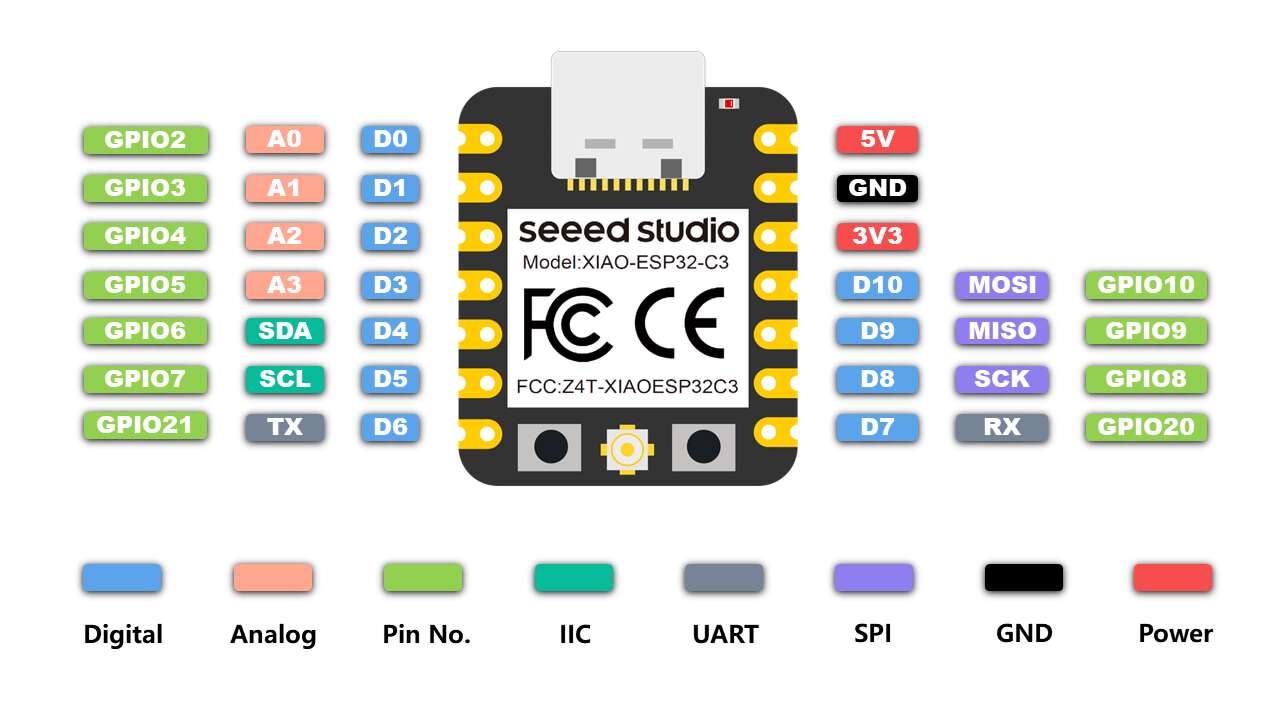
Nonetheless, making the correct mapping for the MAX7219 was way simpler this time:
VCC -> 3V3 (3rd on right)
GNG -> GNG (2nd on right)
DIN -> GPIO10/MOSI (4th on right)
CS -> GPIO20/CSn (7th on right)
CLK -> GPIO08/SCK (6th on right)
Installing Micropython on the Xiao ESP32-C3
Unlike the other Xiao boards, I had to download micropython for the C3 as a binary file and flash it (? - I’m still unfamiliar with bootloading etc.) to the chip through the terminal. The Xiao wiki documentation was sufficient in guiding me through that.
Using the microdot & microdot-asyncio Python scripts for Micropython
As mentioned, I played a bit around with these modules. Initially, I thought that the microcontroller could provide a POST endpoint that other clients could post to. However, I found out that it would be really hard to get a unique IP address for peripherals so that people outside of the network could post to it (would need to create a private tunnel, VPN, etc.). I wasn’t ready for that on a Tuesday night, so I gave up on that idea. However, here are some of my thoughts when I was still looking at the microdot library:
(microdot) is available on PyPi, however, there was a more recent development version on GitHub. The PyPi module for microdot-asyncio on PyPi was completely out of date (from 2021), likely because they integrated it into the main microdot module.
I had trouble downloading the PyPi module from Thonny directly, so I just copy-pasted the scripts directly.
Glitch and ChatGPT
Glitch is a wonderful service for quick prototyping and deploying simple websites. The only thing that annoyed me was that there Node template was so messy and unneccessarily pre-populated. Since it was already quite late and I had spent too much time thinking about API endpoints, I directed ChatGPT to create my endpoint with express.
And tadaa - we have our simple webpage:
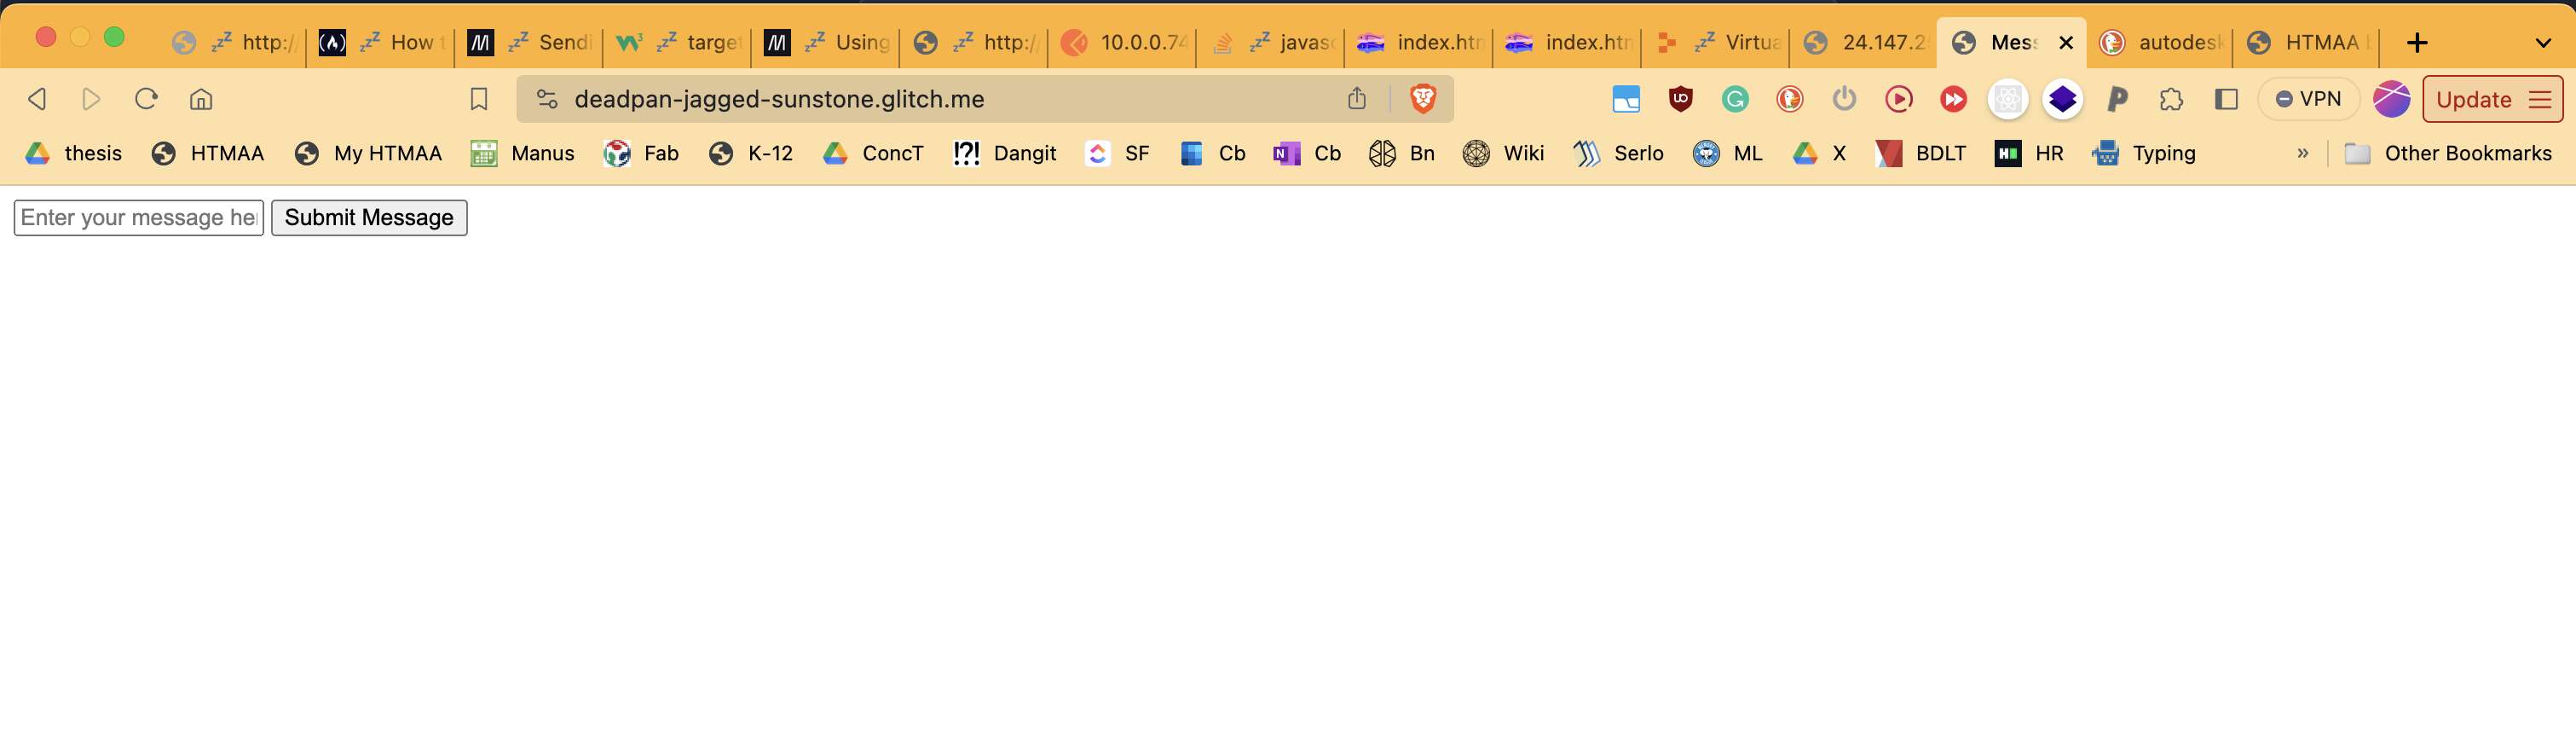
If I had more time, I would style it nicely with CSS. But I don’t. 😢
It works! Omg!
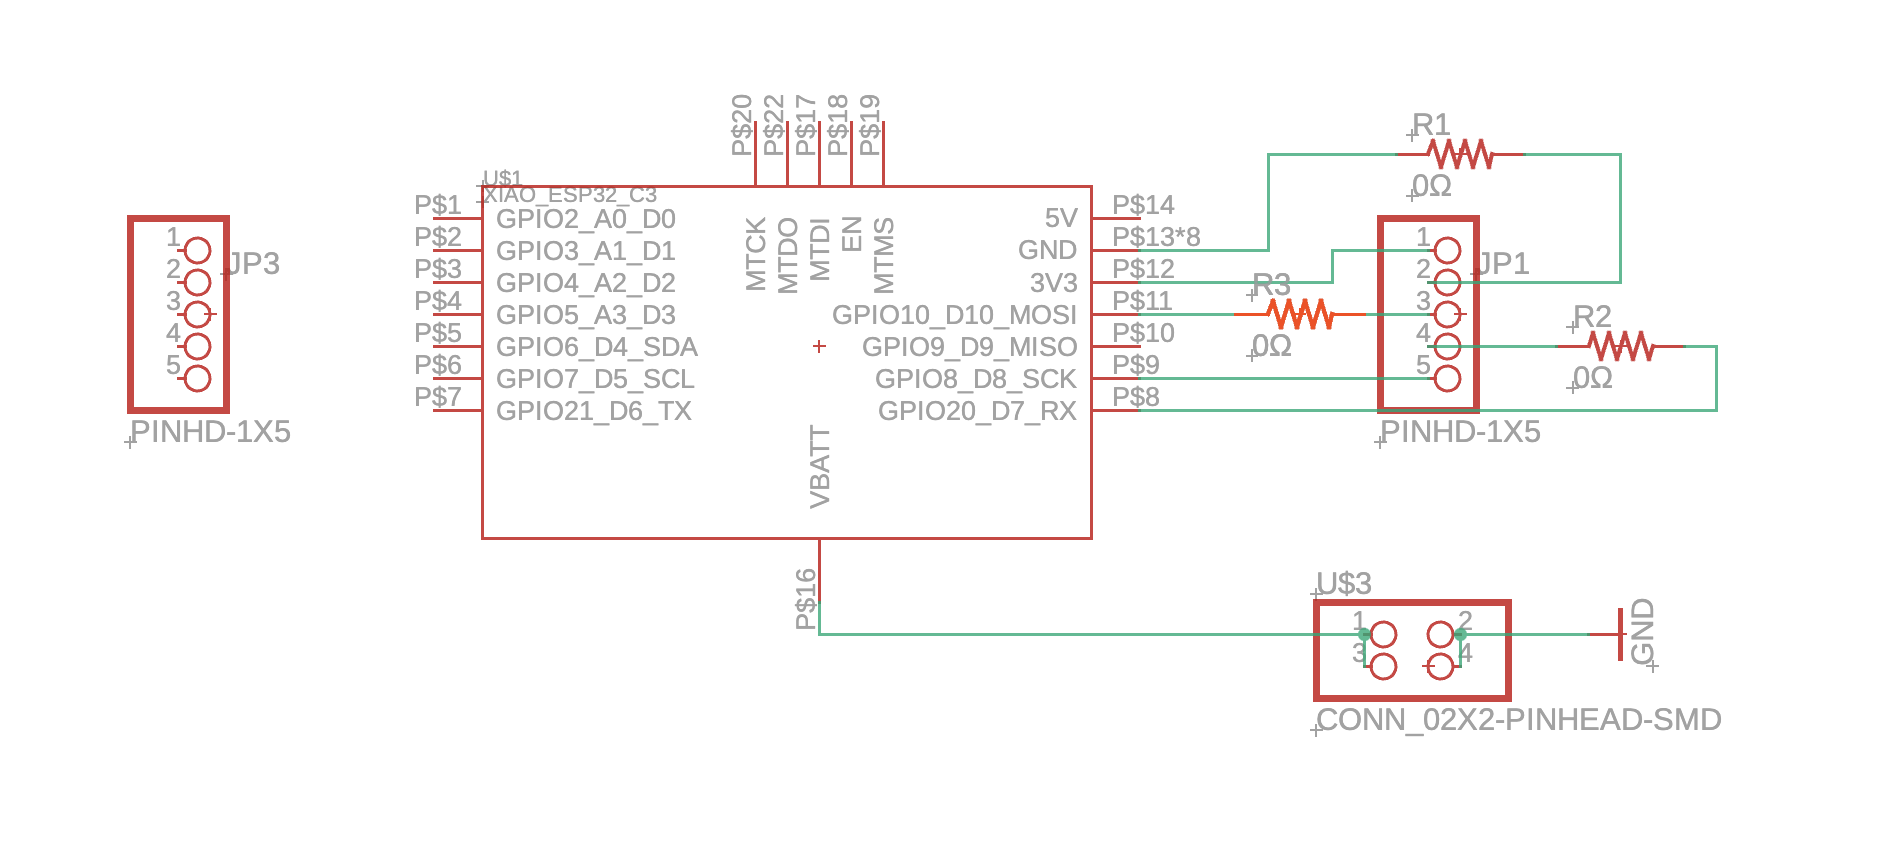
Making the Board
1st round
Yes, and now I had to turn that all into a working board. Unfortunately, I did not finish before the weekly review. :(
Based on what I did in the Electronics Design and Production weeks, I considered it best to indeed hide the board behind the 4x4 display. Some learnings I had taken from those weeks:
- Make the copper plate a bit smaller so you have more flexibility to exactly fit the throughholes
- Add a battery option
- Think ahead about where the USB-C power outlet should go to
Regarding the latter, I decided to have the USB-C port stick out on the side. This forced me to add another 0 Ohm resistor to the circuit.

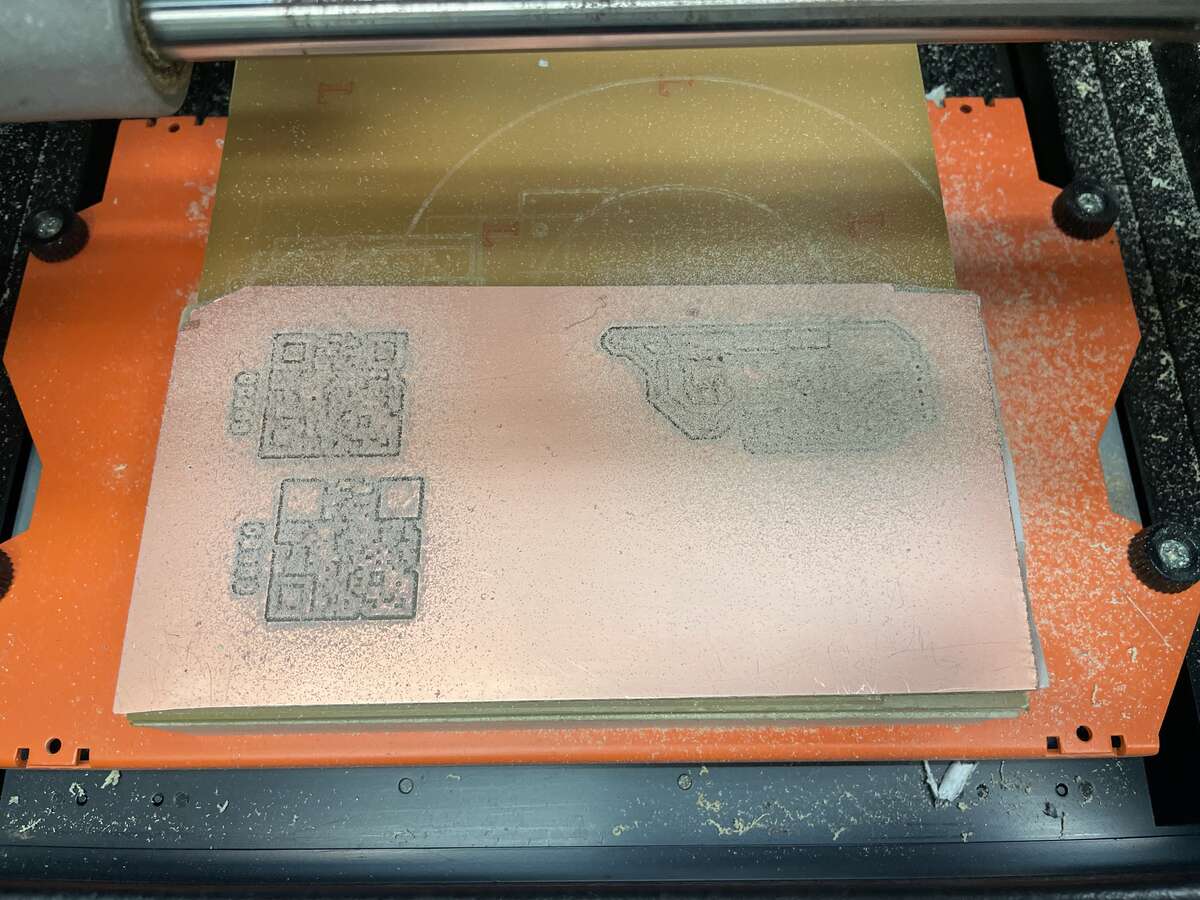
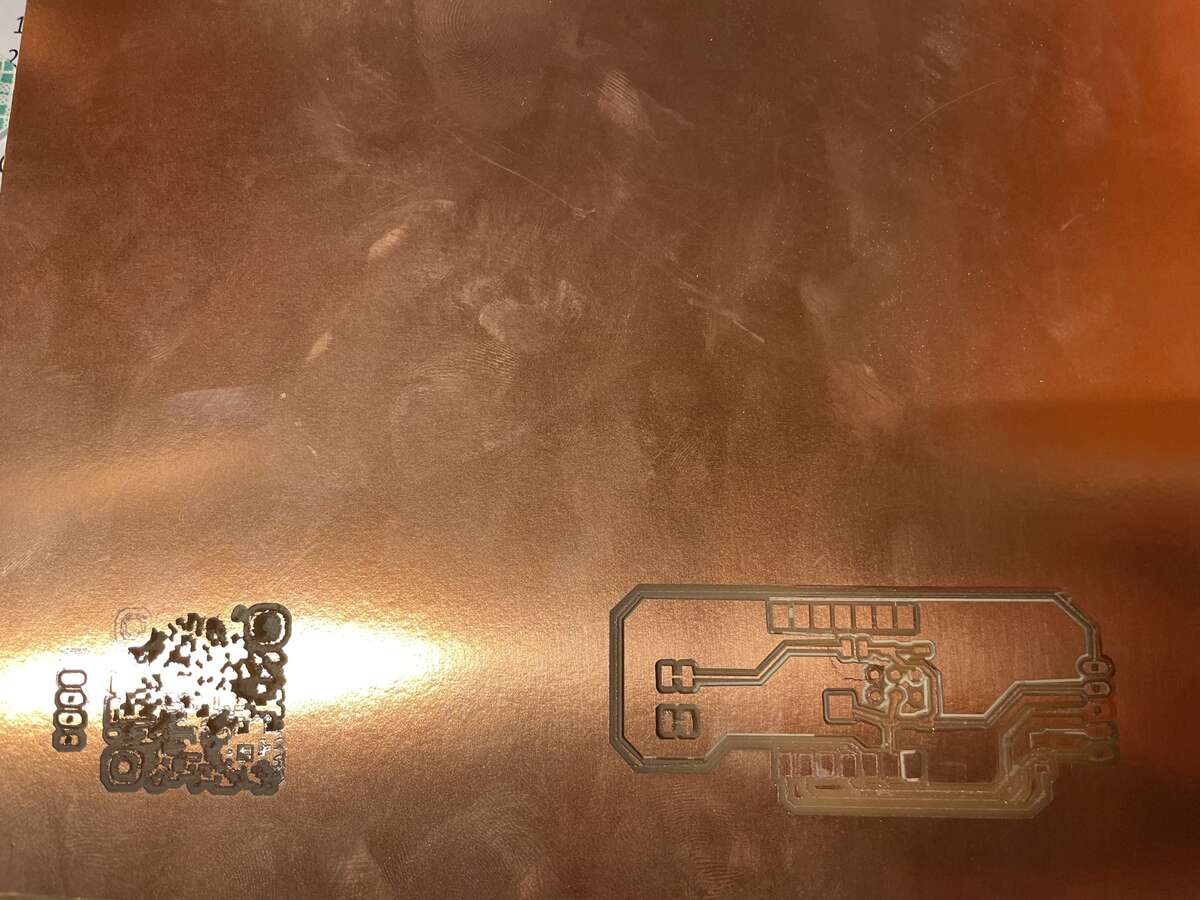
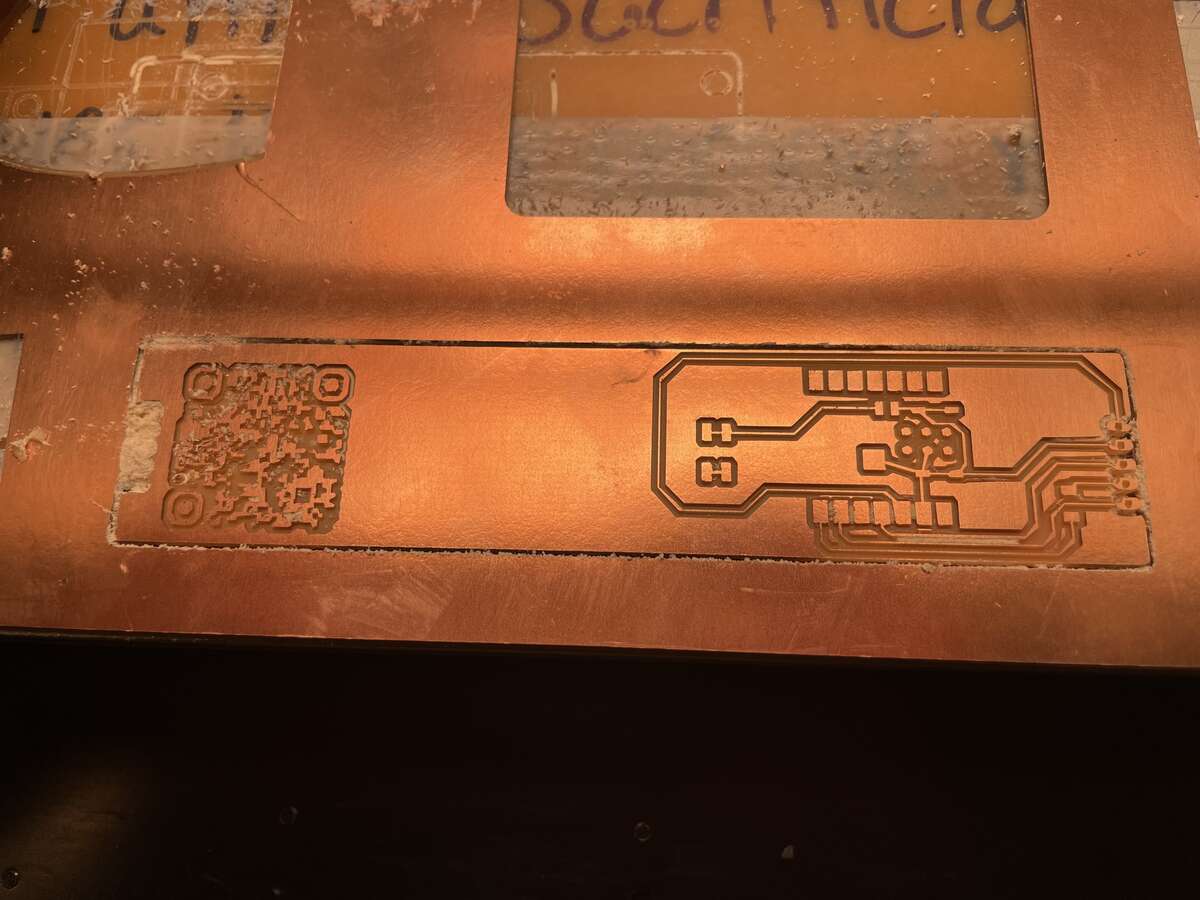
I milled on the Othermill in the EDA section. However, I soon realized that I’d have trouble plugging in the USB-C cable on the side. Also, I got the idea of adding a QR code to the board! So, another round.
2nd round
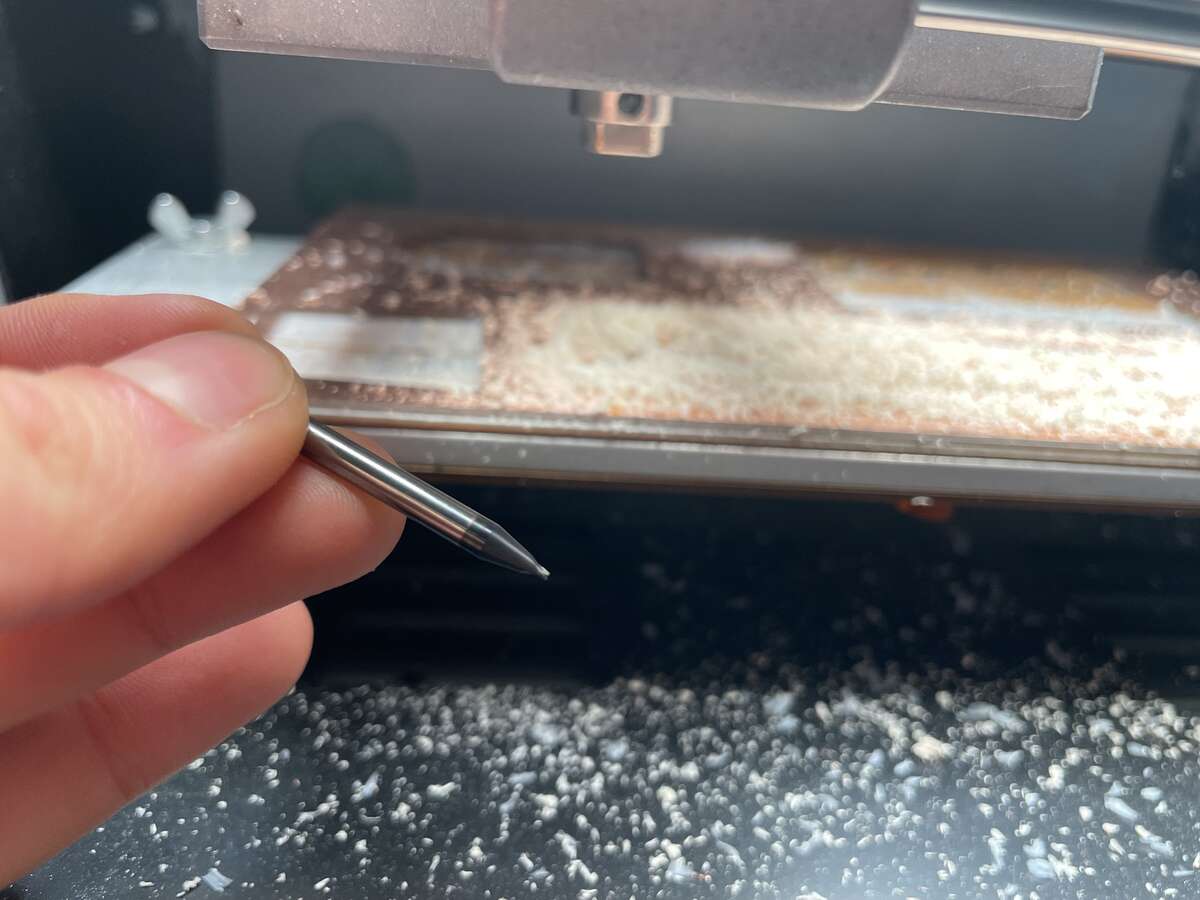
I added the QR code and (attempted to) milled on the Roland at the Harvard section. Boards 2 & 3 both were a failure, resulting from human error in using MODS (as explained by Anthony to me later). Besides, the bed at Harvard didn’t seem to be level.
3rd round
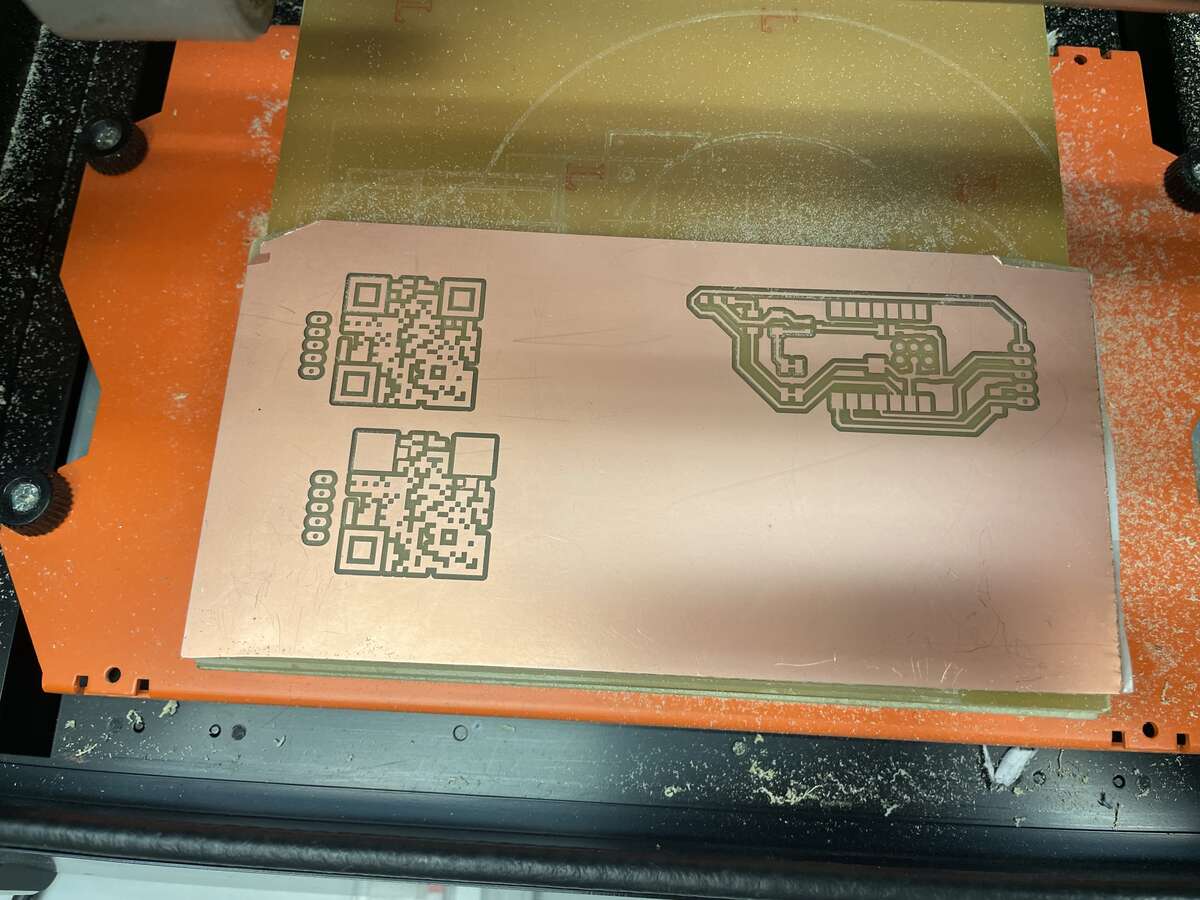
I chose to add a button to turn the display on and off when on battery. Also, I changed the traces from not running an outline anymore, as it would just require more current (I believe?).
Having given up on the Roland, I first tried to mill on the Othermill at Metropolis but then realized that it only accepts Gerber, while my QR code design was based on png. So I had to use the Roland (this time at EDS) after all - not getting away from this machine.
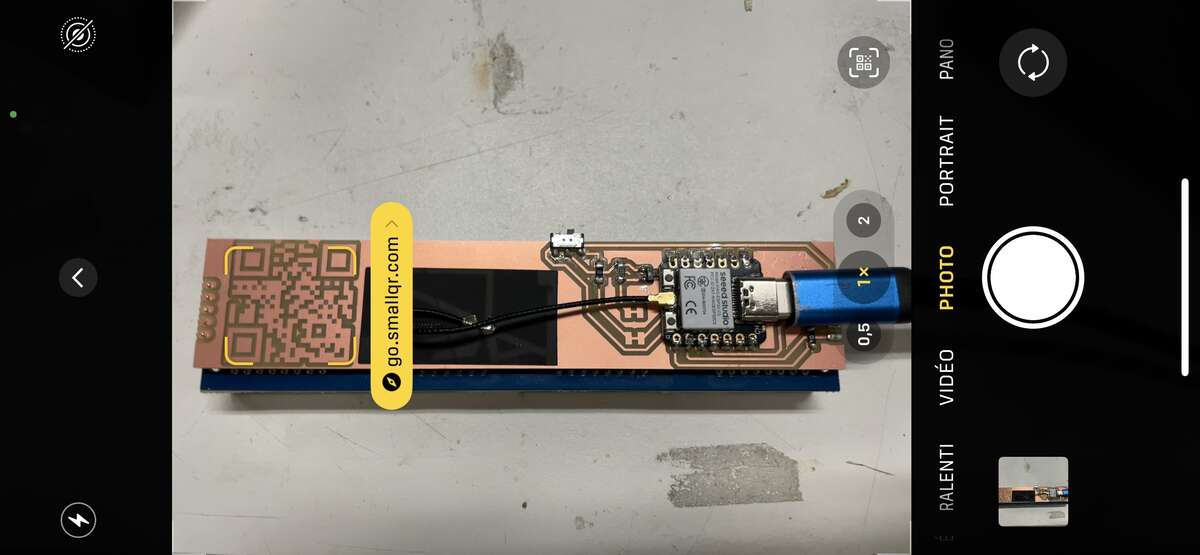
After another failure due to the USB cable disconnecting from my laptop, attempt #5 finally worked!