Week 7 - Molding & Casting
Oh my, this week I was a bit overambitious again! Molding and casting got me excited since I felt it to be an underexplored (by me), or underused field - and seems so playful! I did learn, however, that this week’s topic is just really an excuse to practice 3D modeling and CNC milling.
Usually, the order of this week is flipped with the “Computer Controlled Machining” (or “Make Something Big”) week. In that week, the class is introduced to 2D milling, and advances to 3D milling in the Molding and Casting week. The reason they reversed the order, as we found out, was that the Harvard section (my section) didn’t have the machine (a ShopBot) for the CCM week yet! 🤯
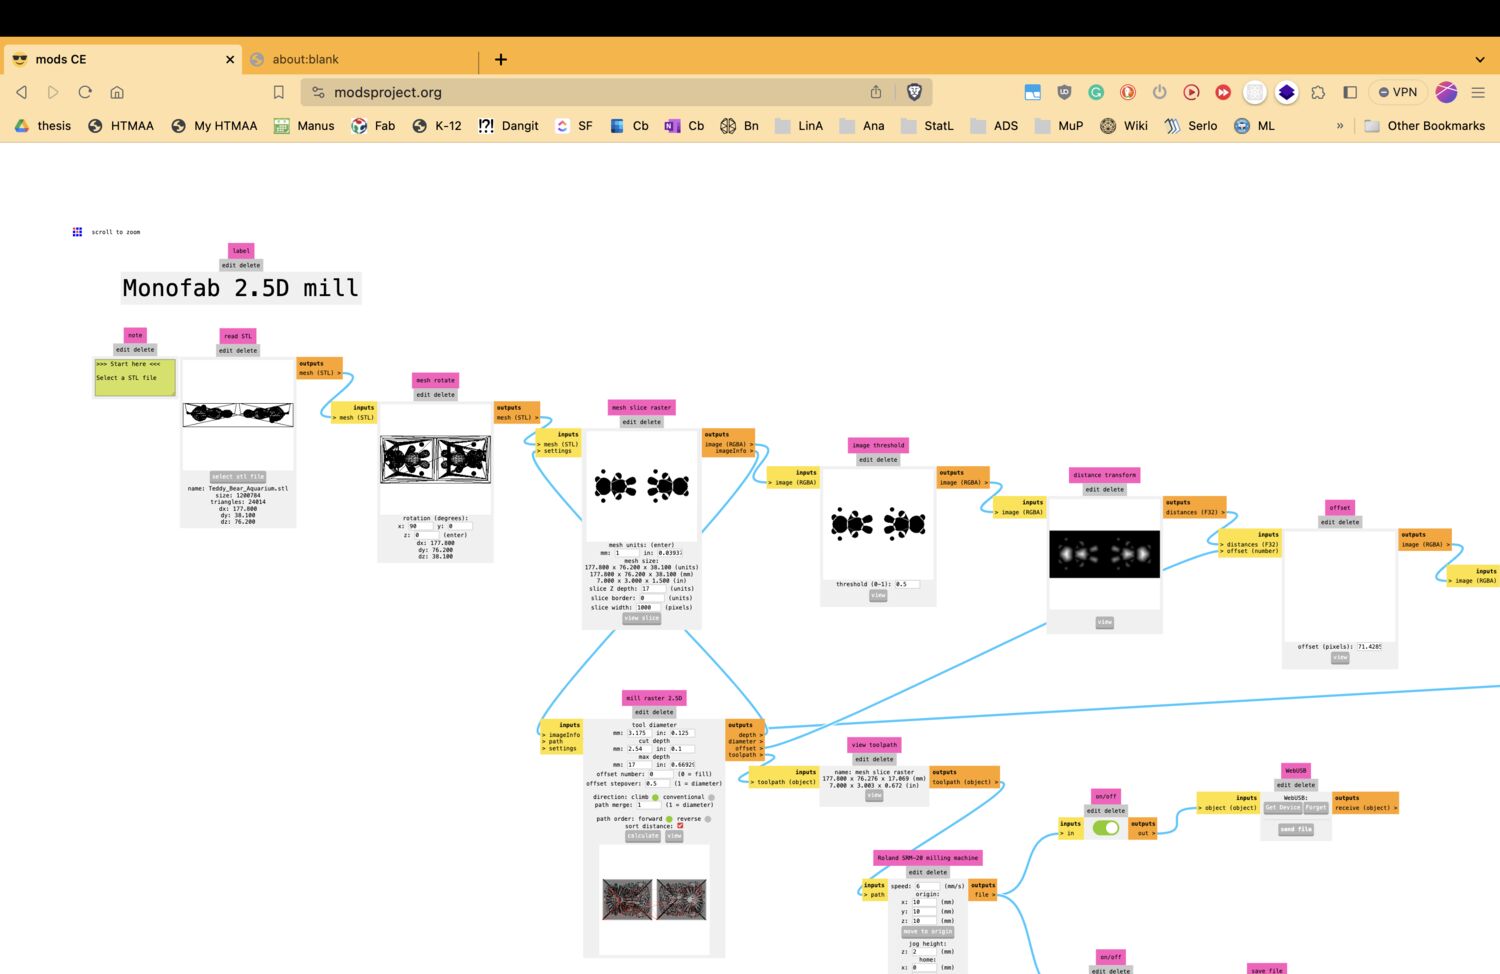
Instead, we used the Roland at the Harvard section. Brief comment on that: I do not like the Roland. Maybe my dislike is unjustified. It has multiple reasons: the biggest one is that there is only one machine for the entire Harvard section. Also, I find it slow, and it bothers me a little that we’re using MODS. I really like MODS (a bit more of a user manual or info hover effects would be helpful), however, I want my skills to be quite universal, and I doubt most CNC machines use MODS. I was worried my learnings would be too specific for the class environment and makerspace we’re in, and I’d have trouble handling another CNC machine later.
So, as always, Project Manus to my help (rescue). The student-run makerspaces are so amazing and I was incredibly lucky - The Deep had a CNC Milling training lined up on Saturday, immediately followed by a Moldmaking workshop! I started a miller’s cube and cast a little frog with a witch hat. Documentation about my learnings from them can be found in their respective pages.
What are we making this week?
Initially, I thought I could make something either in combination with last week’s assignment or for my final project (at this point, the Star Trek badge). So, my ideas were either a neighbor Totoro figure to enclose my LED and PCB, or a transparent enclosing for my Star Trek badge PCB.
However, the material properties of molds made me curious, and I took some notes of interesting properties Graham mentioned during Molding & Casting training at the CBA shop:
- Hydrocal: if you let it wait, it becomes like icing, which can be smeared and shaped
- Silicone likes to stick to silicone -> can be used to stick casts together in a row
- Bubbles: Can they be used intentionally to make something interesting?
I was curious about all of them but particularly the bubbles idea. Where would we need intentional bubbles? One idea was a Spongebob Squarepants figure, since his body is all holed up. However, those are bubbles, not holes, also his eyes shouldn’t be bubbly/hole-y. But the ocean was a good start. Water has bubbles. I thought of casting a fish enclosed in transparent, bubbly epoxy. Close. It just didn’t seem creative enough yet.
Human-AI Collaboration
As always, ChatGPT was a great brainstorming partner.
I loved its suggestions:
What a fascinating concept! The idea of suspending an object amidst bubbles in resin evokes feelings of stasis, preservation, and perhaps the challenges of perception or the imperfection of memory. Here's a potential breakdown for your project:

1. Resin as "Water": Symbolizes time or memory, with its clear yet solid nature representing the paradox of how memories are fluid and ever-changing yet feel so solid in our minds.

2. Bubbles:
    * Can represent the imperfections or distortions in our memories.
    * Might symbolize moments of breath, or the fleeting moments of life that have passed.
    * Can denote the disruptions, challenges, or obstacles we face in life.

3. Object Suspended in Resin: Considering the themes of memory, time, and life's fleeting moments, here are a few objects that might fit well artistically and philosophically:
    * Pocket Watch or Hourglass: Represents the inexorable passage of time. The stillness of the object in the resin contrasts the ticking or flowing of time these objects usually represent.
    * Feather: Symbolizes fragility, fleeting moments, or perhaps freedom. The paradox of a feather, something so light and free, being trapped could represent the confines of our memories or past.
    * Old Photograph: A literal representation of a frozen memory. Choosing a photograph that means something personal to you, or even an ambiguous or vague image, can create an emotional connection.
    * Key: Represents secrets, memories locked away, or opportunities. The idea that it's submerged could indicate a lost opportunity or a memory/secret kept hidden.
    * Crumbled Paper or Letter: Represents words left unsaid, regrets, or memories we try to forget but still remain.
    * Rose or Flower: Symbolizes beauty, the fleeting nature of life, or a specific memory associated with a certain time or person. Watching a beautiful object like a flower encased and "drowning" amidst bubbles can evoke feelings of nostalgia or melancholy.

4. The Shape and Size of the Resin: Think about how the shape and size of the resin block itself can add to your narrative. A cube might represent containment, a sphere might indicate a world or bubble of memories, and a more irregular or free-form shape could symbolize the unpredictable nature of memories.
The idea of representing the imperfections of memory speaks to my heart. How we lose our childhood joy, youth, and memories is a topic I care about in particular, so I wanted to cast a childhood toy or object in “water.” One of my favorite books is “The Miraculous Journey of Edward Tulane”, in which the main character, a porcellan bunny (now that I’m writing this I realize it would have been brilliant to cast a drystone bunny) is temporarily lost in the sea. However, I thought a bunny would be a little tricky to mill and cast, plus quite specific, so I settled for a more general children’s toy: a teddy bear. ChatGPT is more eloquent at explaining how it could be interpreted:
Childhood Memories: A teddy bear can evoke feelings of nostalgia, innocence, and the uncomplicated emotions of childhood. By encapsulating it in resin, you're emphasizing the preservation of those innocent moments and the desire to hold onto them.

Comfort and Security: Teddy bears often serve as a source of comfort for many during their childhood. It's a confidante, a silent friend. By submerging it in the resin, there's a bittersweet sentiment of wanting to preserve that comfort while also recognizing that it's trapped or inaccessible.

Lost Innocence: The act of submerging and 'drowning' a symbol of innocence can also signify the loss of that innocence, possibly due to the challenges and 'bubbles' of life that come in the way.

Imperfections of Memory: Just as with the bubbles representing imperfections or distortions in memory, the teddy bear can represent how sometimes the memories we hold dearest are also the ones that get distorted, forgotten, or trapped deep within us.

Growth and Transformation: A teddy bear can signify a phase of life that one has moved past. By preserving it, it can reflect the human desire to remember where we came from, even as we grow and evolve.

Loneliness: The solitary teddy bear trapped in the resin can also depict feelings of loneliness, isolation, or being stuck in a moment.
So, I decided that I’ll make a teddy bear trapped in time / resin, perhaps with a few fish floating around.
> Some Papers on Bubbles in Resin
- Bubble behavior in the slab continuous casting mold: Physical and mathematical model
- Modeling of bubble behaviors and size distribution in a slab continuous casting mold
- The resin-fiber interface in polyurethane and polyurethane-unsaturated polyester hybrid
- The Mechanism of Bubble Damage in Castings
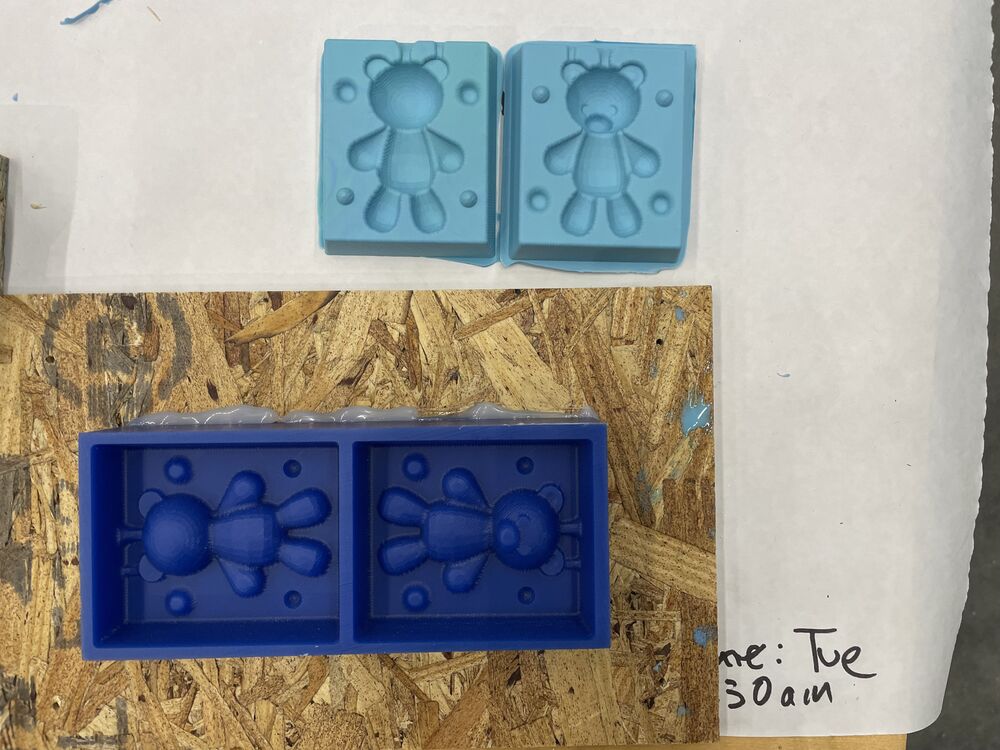
CADing the Bear
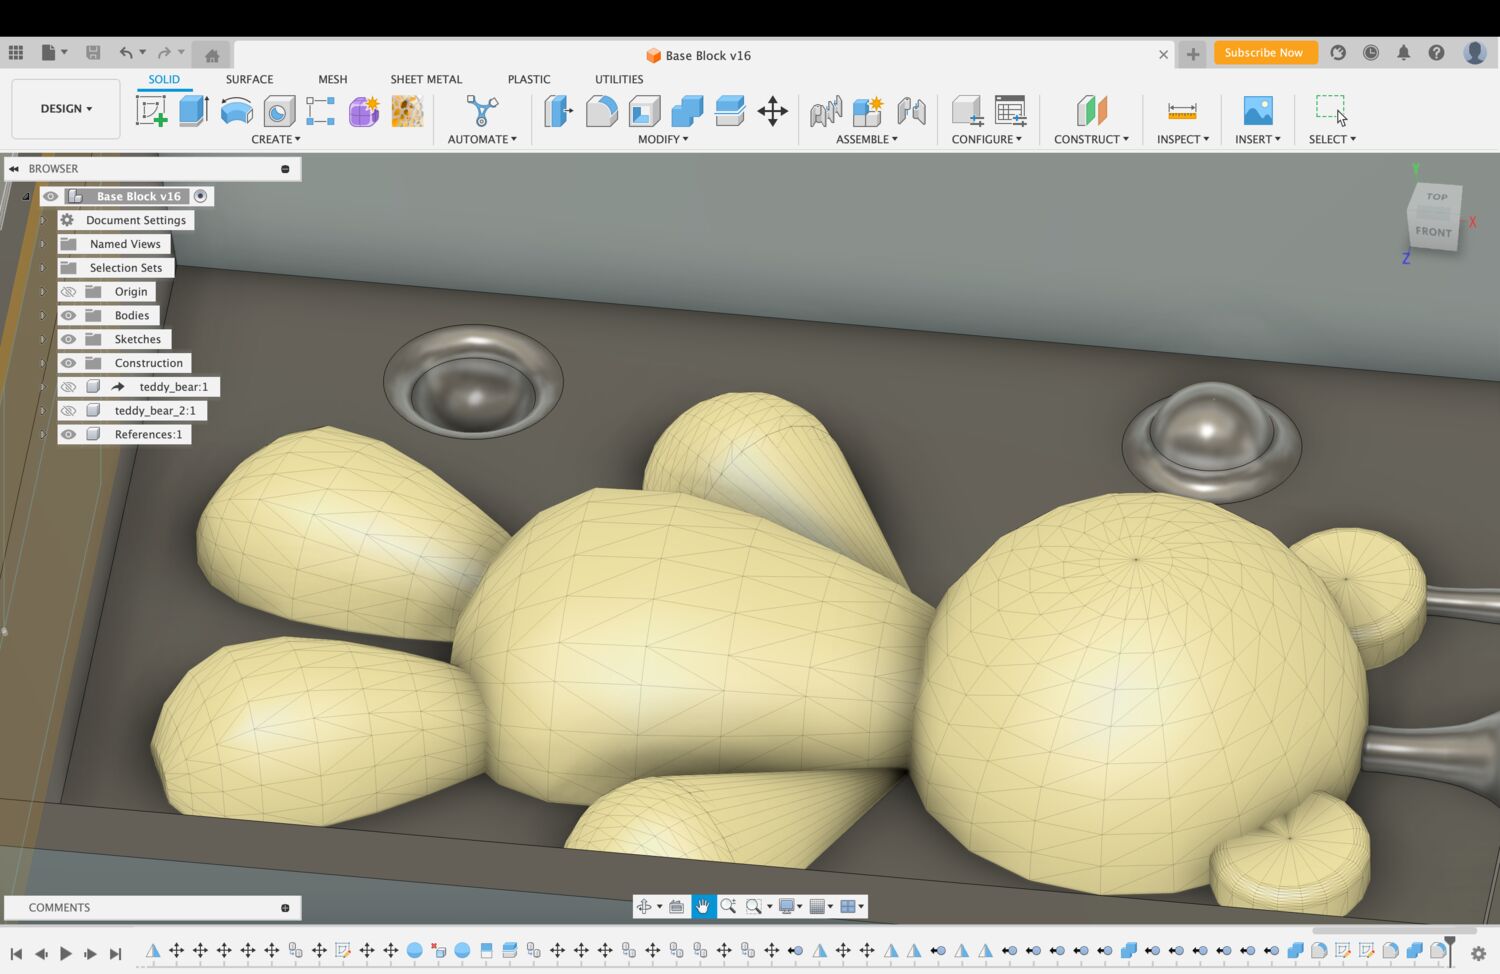
The CAD design took way longer than anticipated (6h+). First, I searched up a nice and usable teddy bear model from thingiverse, sketchfab, etc. There are surprisingly few cute teddy bears on those sites. Also, Julia, who had lots of moldmaking experience, explained to me how any inward angles would not work with the 3D milling machine. Eventually, I settled on this model by kylongtome on Sketchfab. Despite my considerations for the angles, Alfonso explained to me later that even this model wouldn’t quite work on the 3D mill due to the sharp corners where the belly hits the floor. 🫠 He said it was good learning haha.
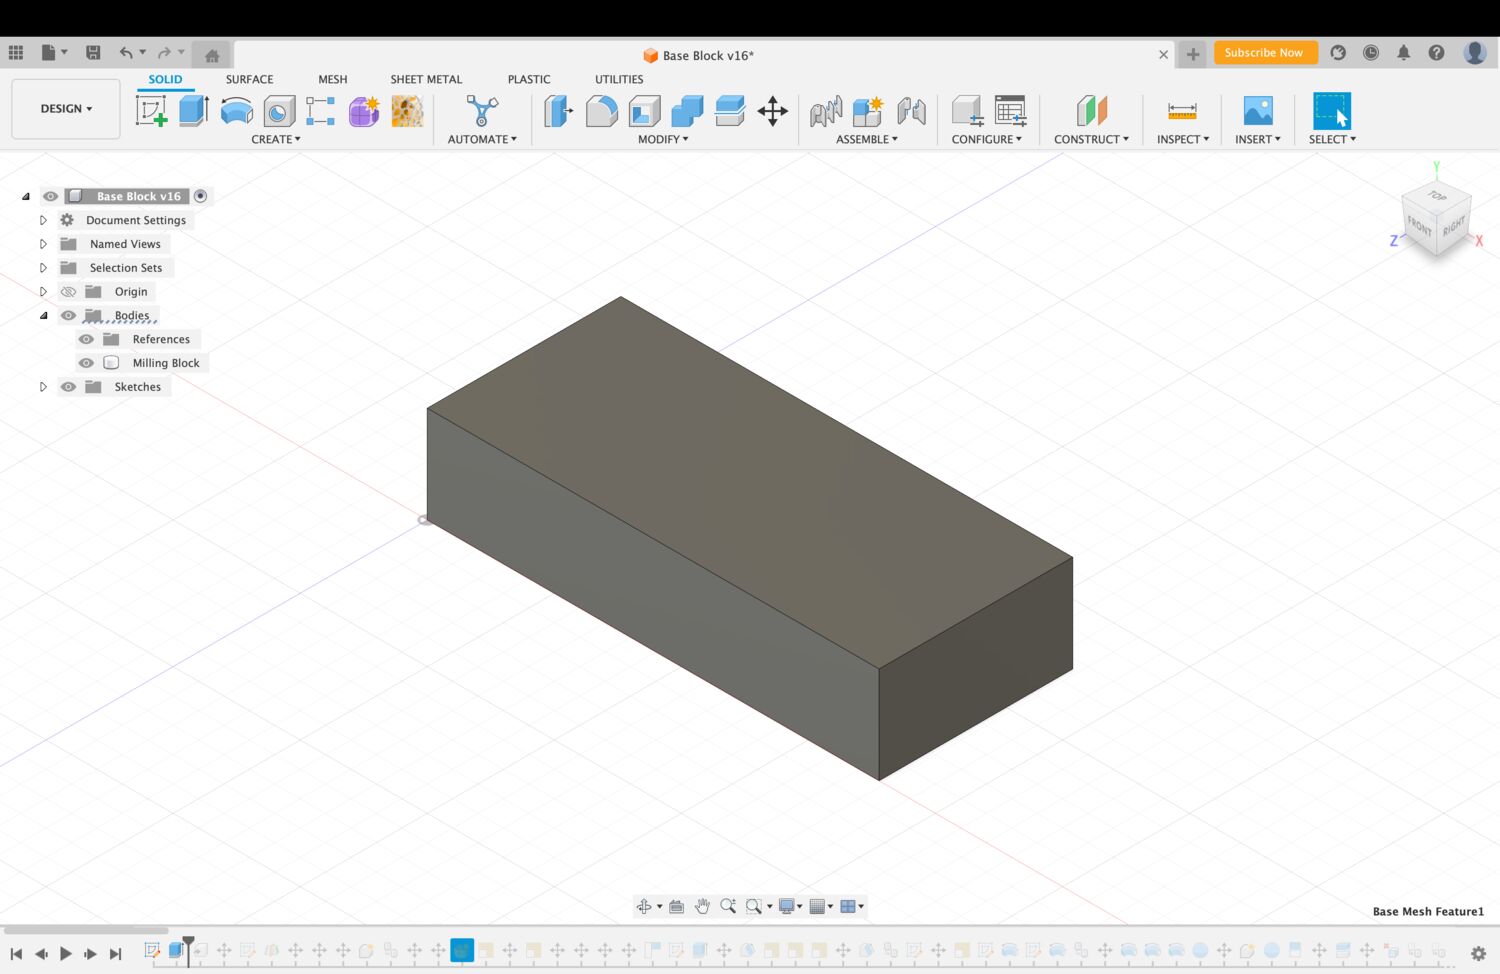
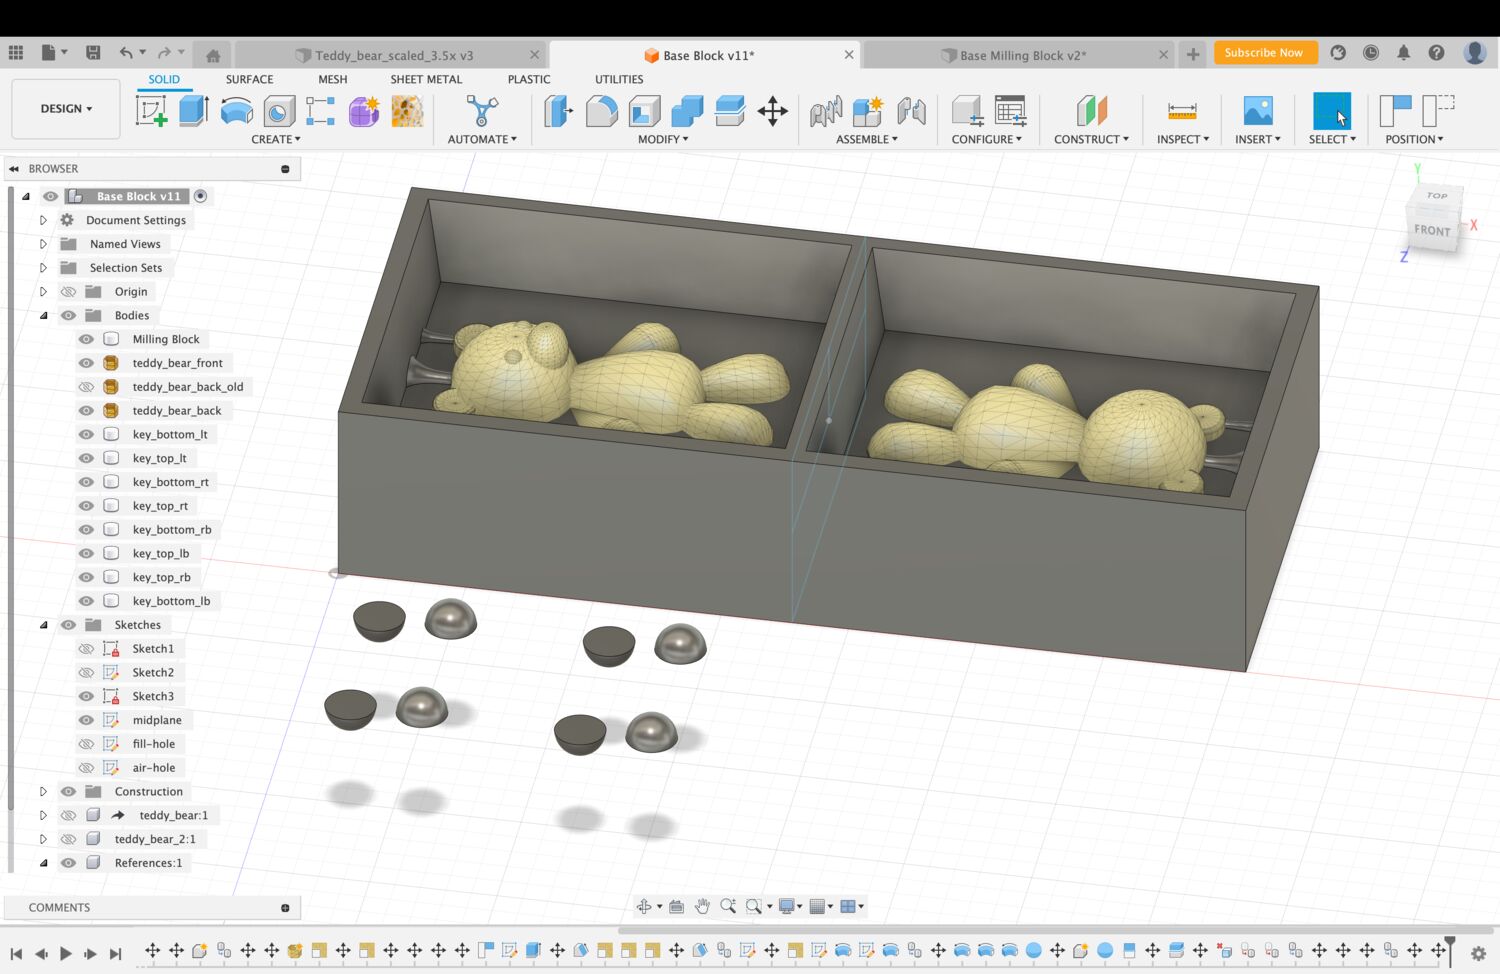
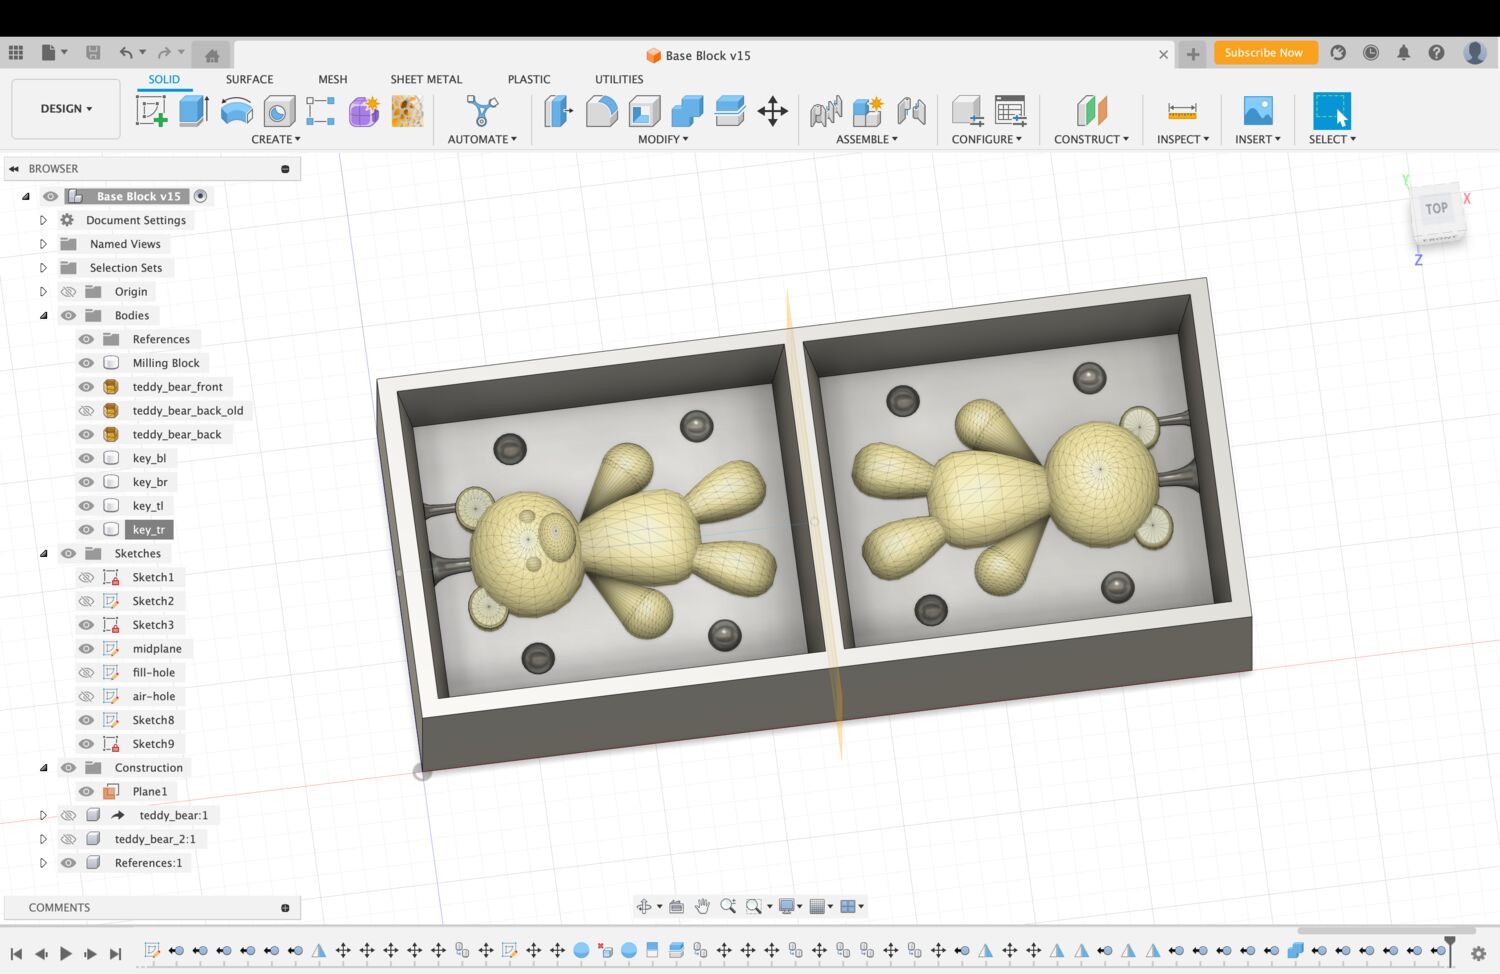
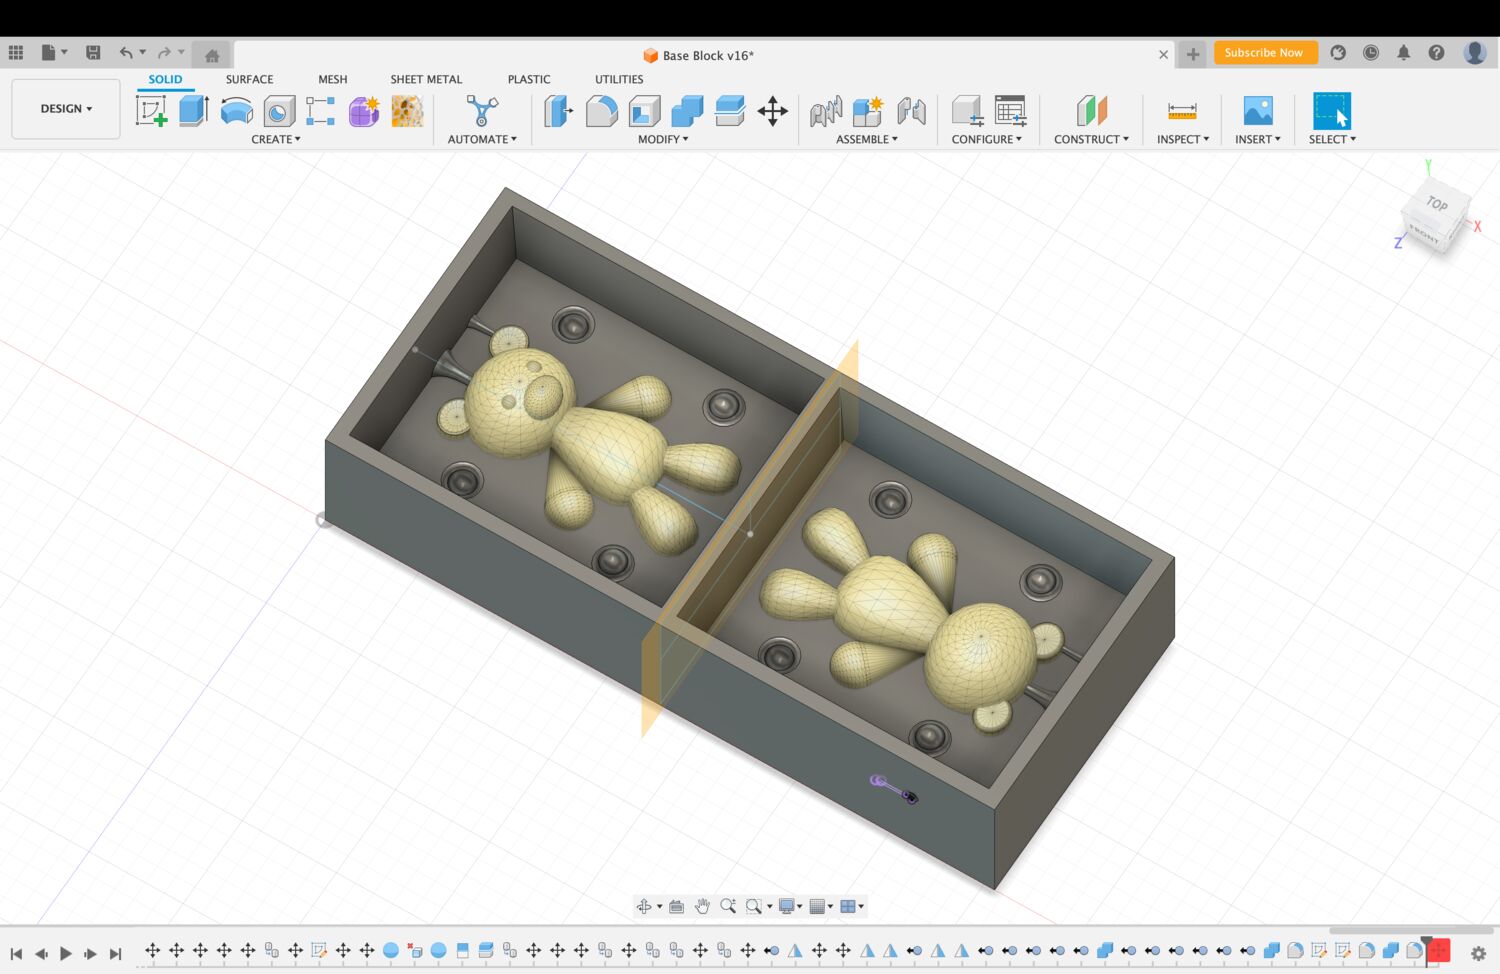
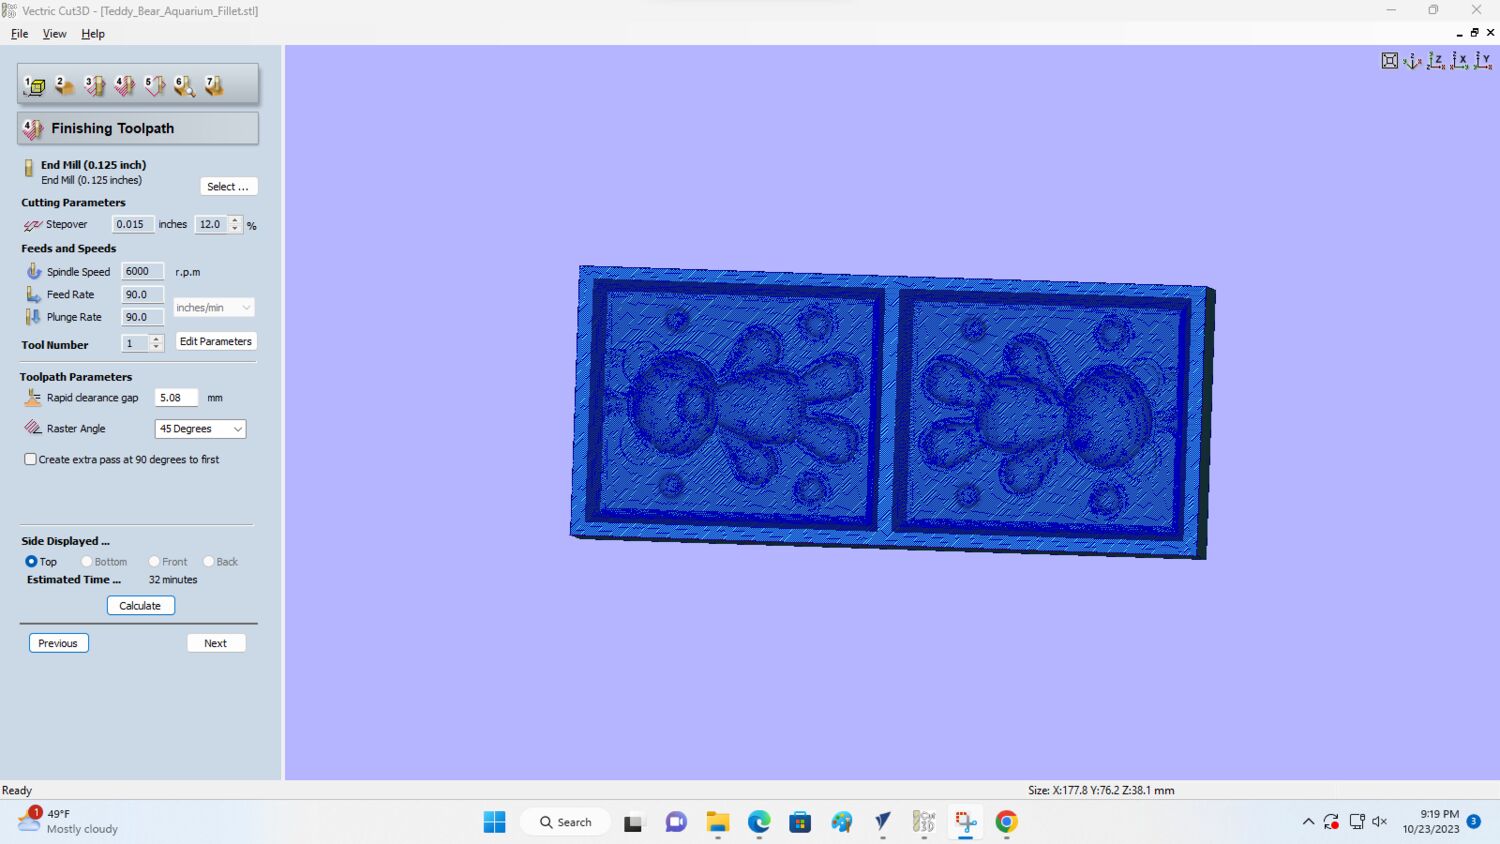
To create the CAD file, I first had to create my stock - a block of millable material we used. The dimensions were 7x5x1.5 inches.
Next, I had to import the Teddy Bear. This was a little difficult, since I’m still so new to Fusion 360. You can import an STL or OBJ file through the Insert Tab > Insert as Mesh in the Design Menu. However, the Teddy Bear model was only available in different formats. I used an online converter to turn the GLB file into STL (or OBJ, can’t remember). More on adding STL files to Fusion here (with Youtube video and sample/training files).
Now, we had a mesh in Fusion. I’m unfamiliar with meshes and all of that, but the mesh was contained in the “Bodies” folder by Fusion, but did not have the same properties as a body. I looked up a few ways of converting Meshes to Bodies but it resulted in a loss of shape with the teddy and it seemed fine to just work with the mesh. Meshmixer, which is apparently integrated in Fusion now, would have been an interesting way of converting, but I couldn’t bother with it this time.
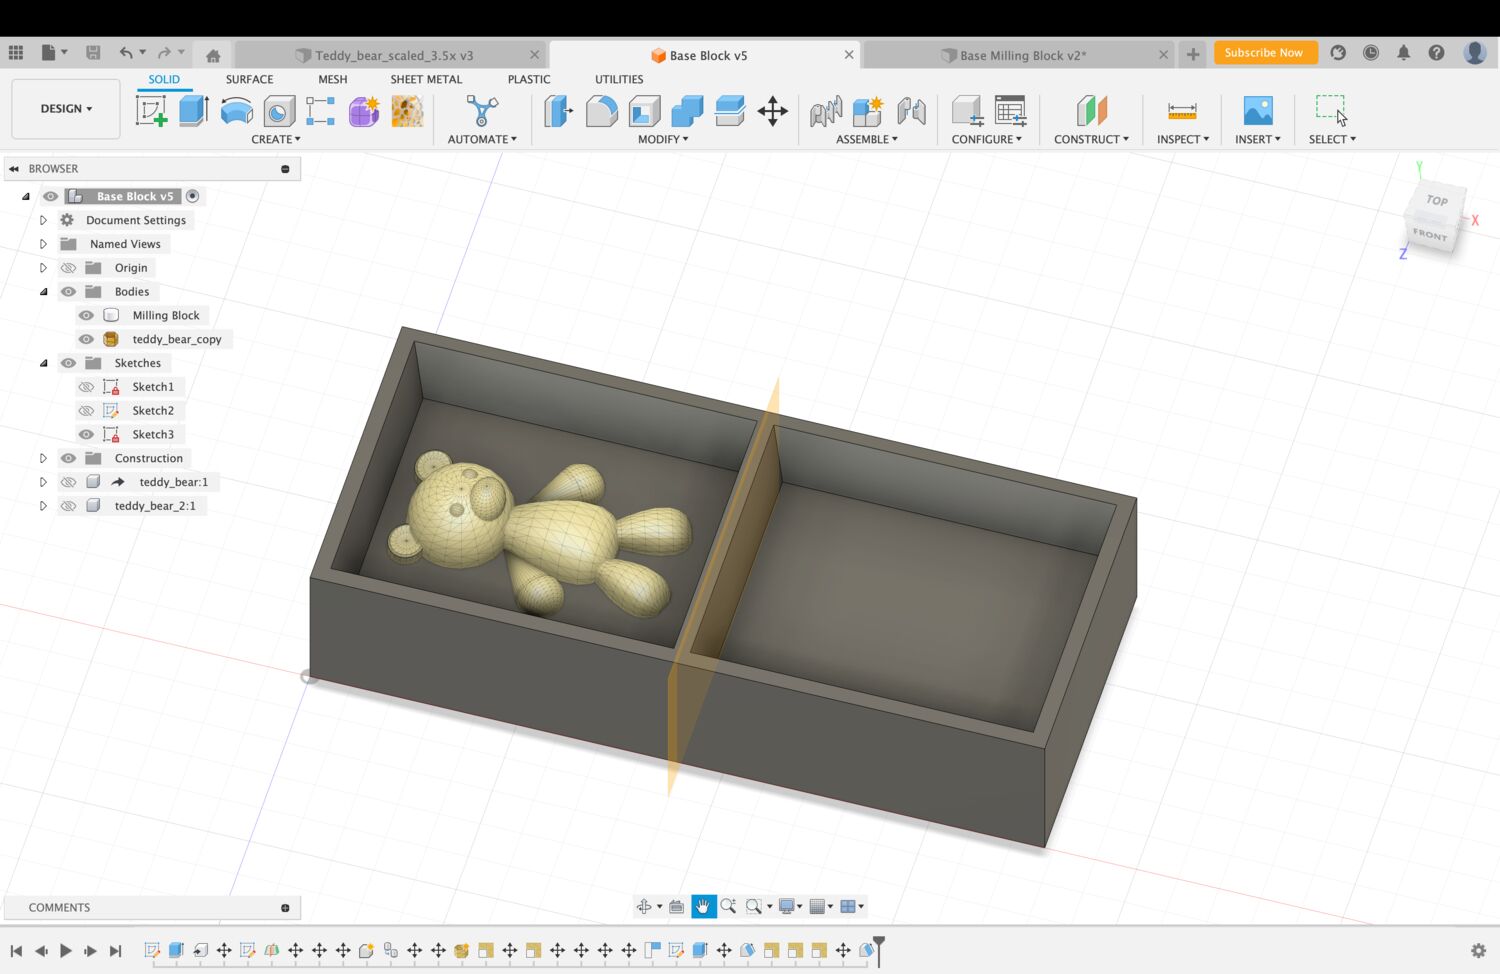
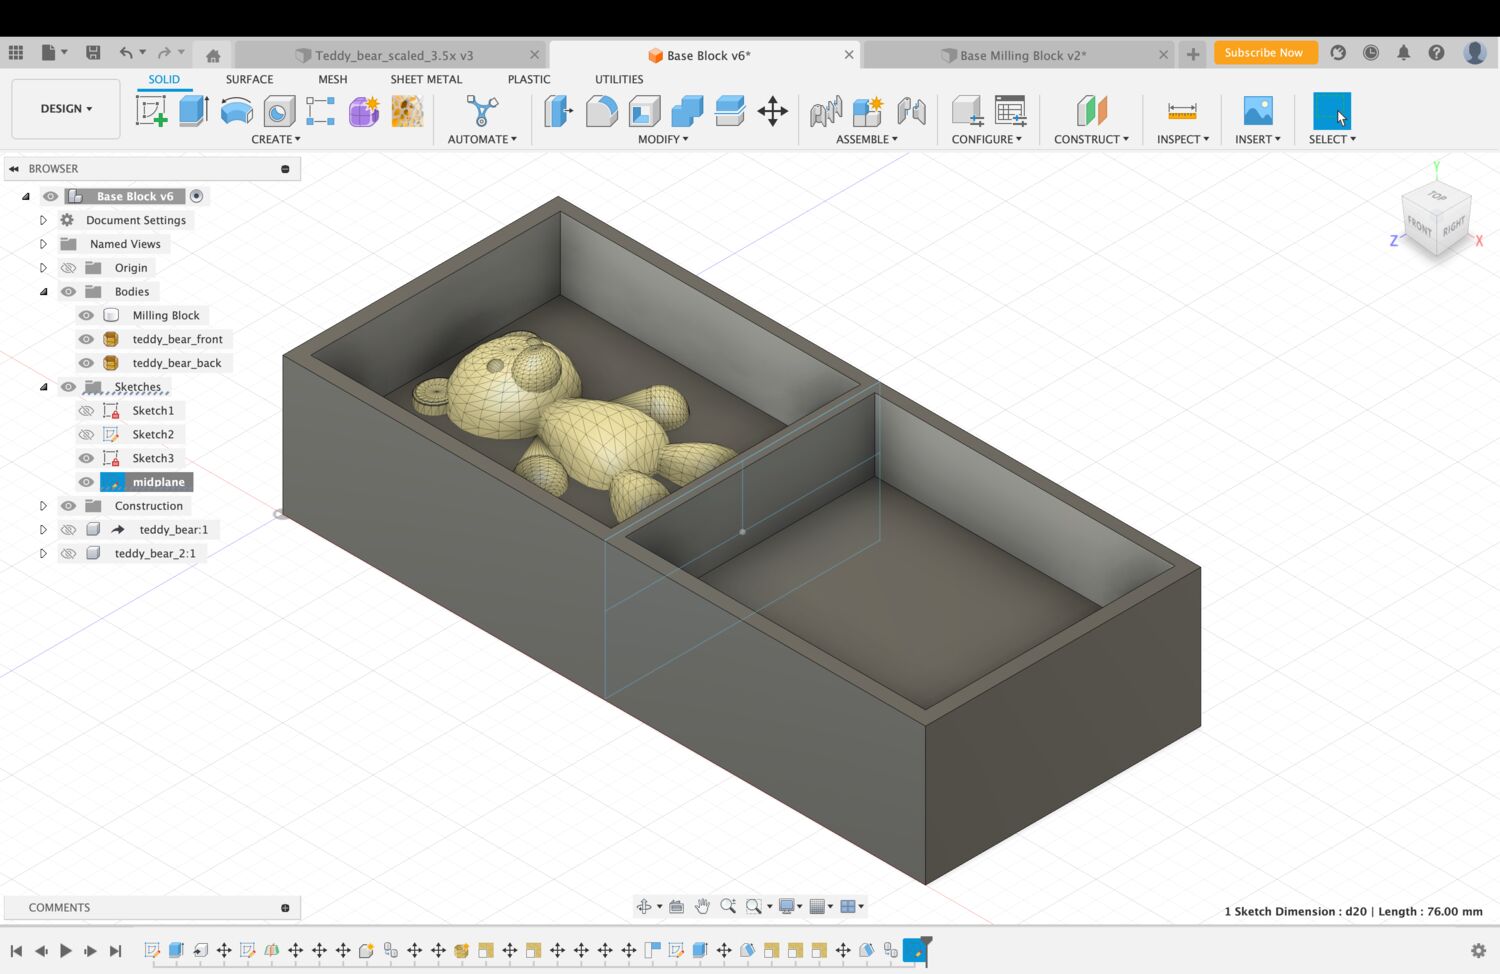
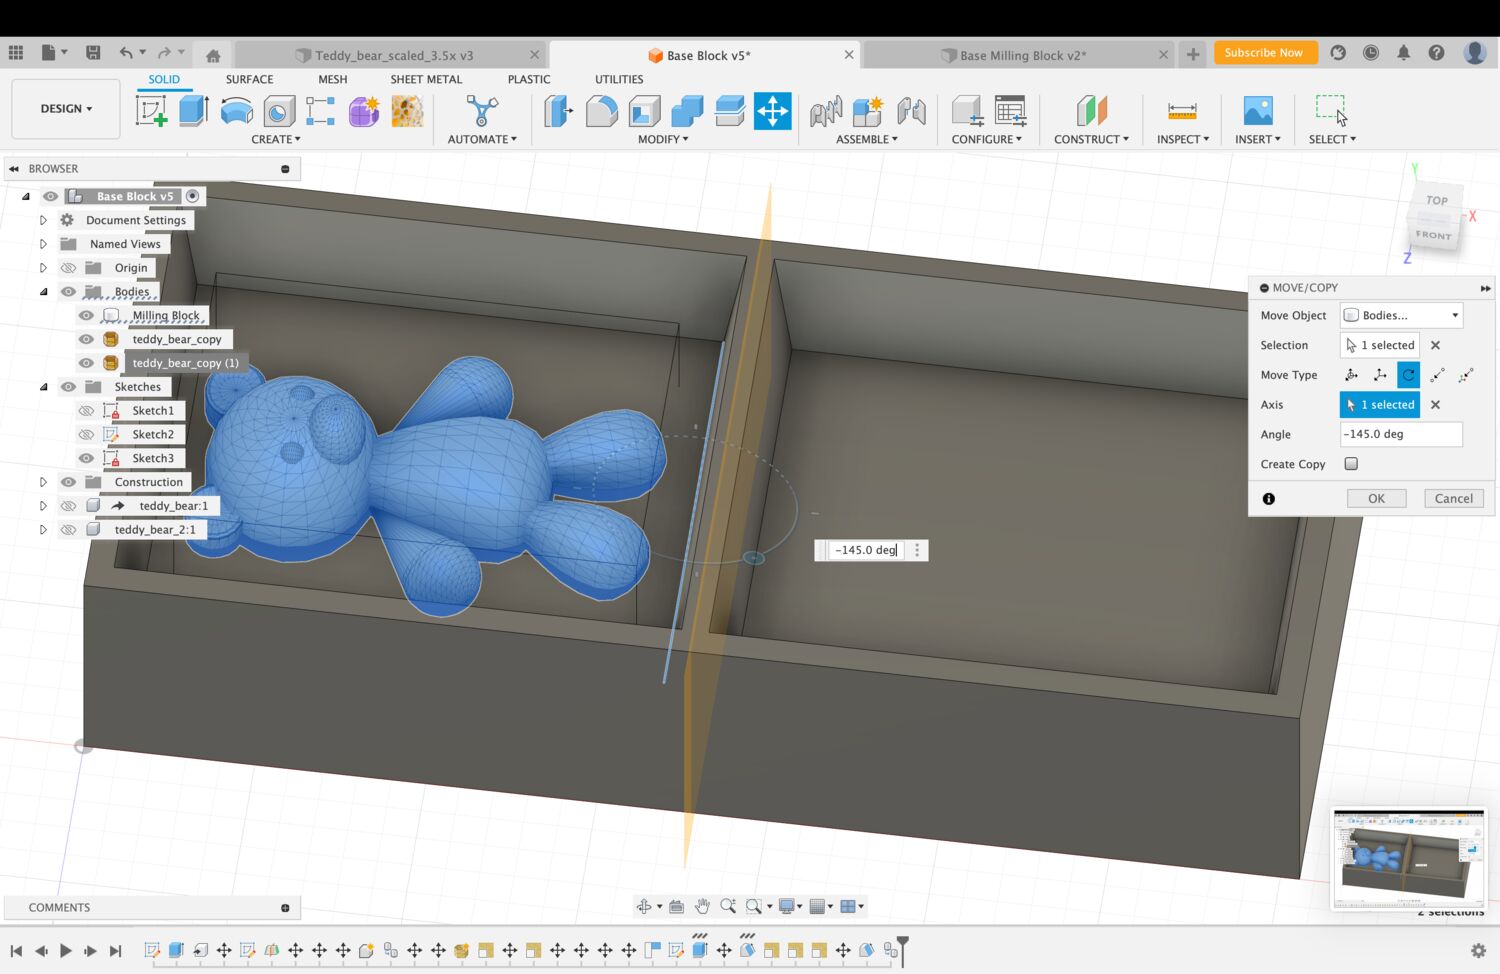
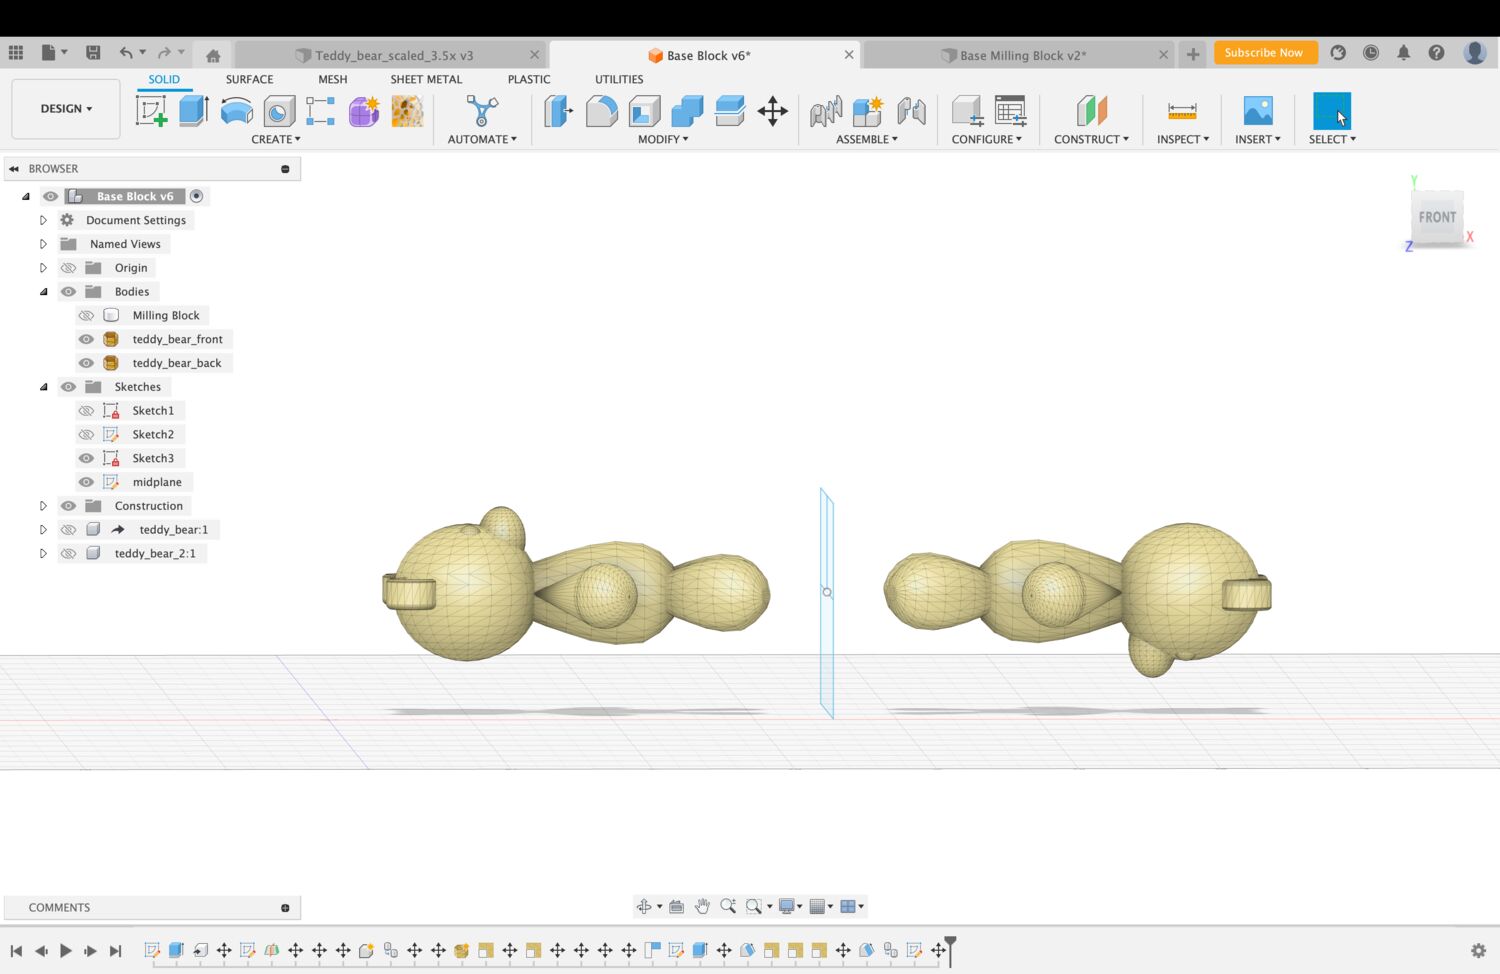
After positioning and scaling the teddy bear (scaling a mesh can be done in the Mesh tab > Modify > Scale), I created a midline, copied the teddy bear, and rotated it along the midline to face downwards. This way, I would create a 2-part mold that I could fill from the top to create a one-part piece of a teddy bear in the end.
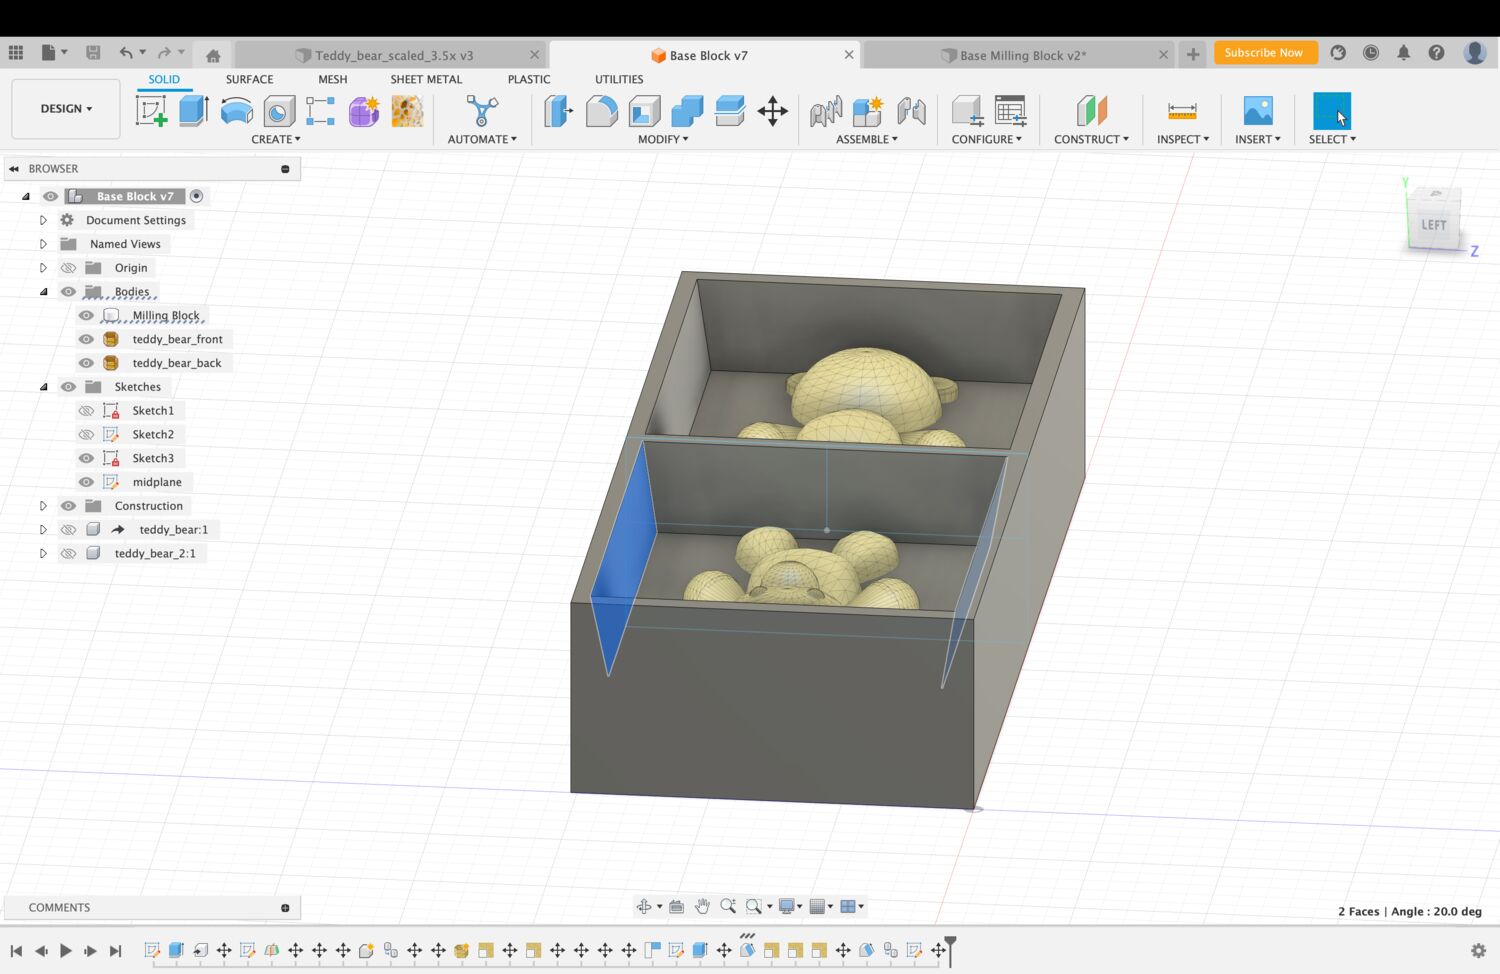
Next, I added a 10% draft angle to the walls, to make it possible to remove the omoo from the mold later. In Fusion, this is done in the Design tab: Modify > Draft. As Alfonso explained to me later, this is not necessary for parts like mine where I cut a figure inside the wax and there is sufficient distance between the figure and the walls. In fact, it increased my milling time significantly, so I would not recommend adding one unless necessary.
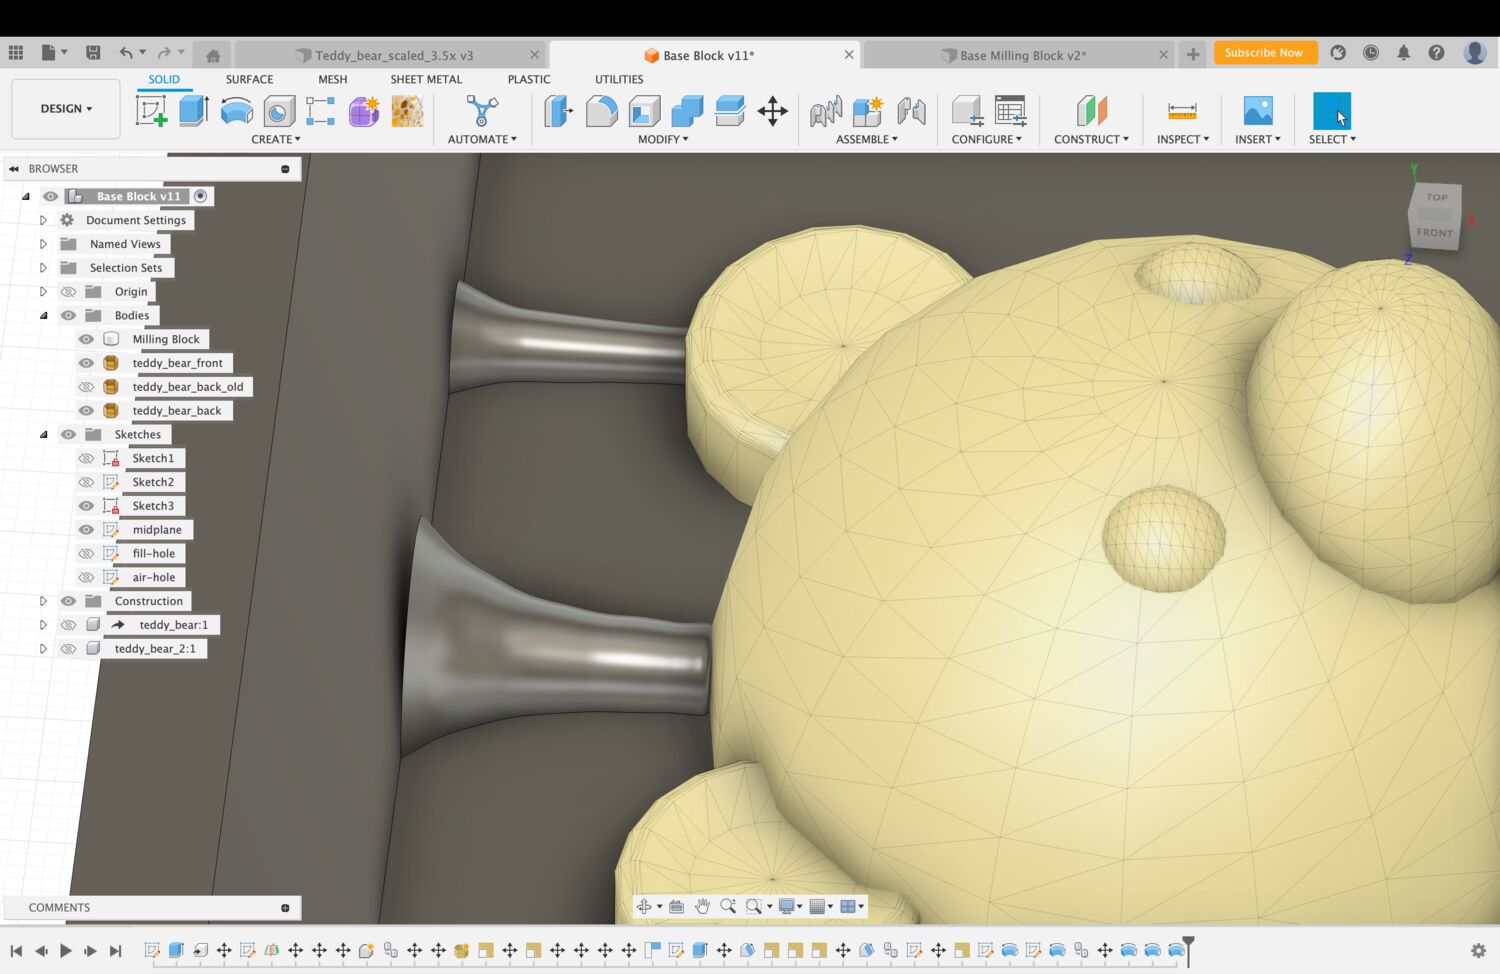
Then, I needed to add a fill hole (to fill the cast from above) and an air hole (so air bubbles can escape through when casting) to the bear. I just created a spline sketch and revolved it to create these little tubes.
BUT I got confused and initially CUT the revolve into the stock. Fortunately, Julia reminded me that we want to create the POSITIVE for our mold. Yes, this is confusing.
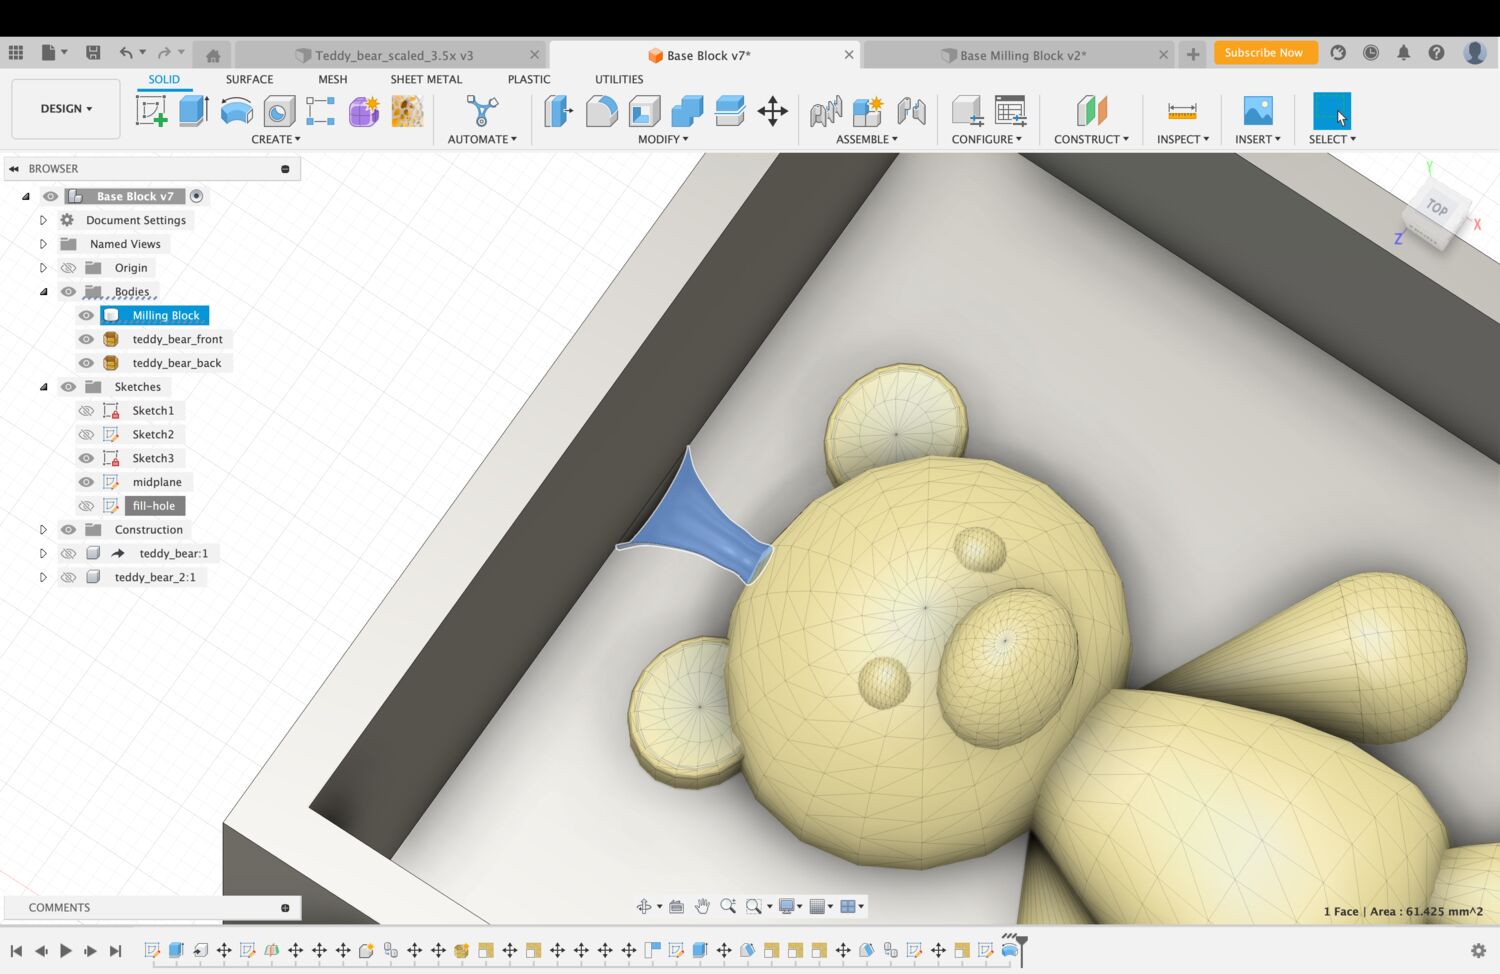
Lastly, I had to add references to my mold. These are little knobs (called keys) that are supposed to hold a two-part mold together (when I cast into it later it overflew so I’m a little sceptical of references now - a rubber band might be sufficient). I spent way too much time being inefficient with these. I followed this tutorial to cut a sphere in half (you first need to cut the Face, then the Body) and then duplicated the half-spheres. This was sooo inefficient and I went back and forth a lot.
Now, I would suggest the following workflow: create a sphere, use the mirror functionality to mirror along the midline(s) to your desired locations, and then use Modify > Combine to either merge or cut the sphere from the surface.
This setup went to the mill. However, Alfonso’s office hours revealed that I had forgotten to account for the sharp angle that my references make when they touch the floor. Besides the same sharp angles that my teddy bear body is making when touching the floor, but we didn’t fix that. The way to fix sharp angles is using Fillets.
Select your body part and use Modify > Fillet (or shortcut F). The fillet size should be half the width of the smallest endmill (since that one is making the finish cut, rounded corners from the larger tool can be fixed by that). In my case, when I found out, I was milling on the CBA ShopBot, so the tool size was 0.125 in. Therefore, the fillet size was 1/16 in.
And there we have it! The CAD file was ready to be exported as an STL.
Learnings:
- Watch some Fusion tutorials before starting with this. It might seem easy but it quickly gets more difficult than imagined, and some Fusion tricks can really help.
- Think whether you really need a draft angle. If you mill an object with enough (see below) distance to the wall of the stock, you don’t need one - which will save you lots of time.
- Leave at least 3mm (I believe it was about (half?) the size of the endmill) between your stock and the object your milling, or between objects if you’re milling multiple.
- Really learn about the end mill you’re using! Don’t go deeper than the Length of Cut (LOC) - more described next!
In the meantime: 3D printing some fish
I thought it would be cute to embed some fish and plants in the epoxy aquarium. But God, I wouldn’t CAD those! I found this nice model on thingiverse and 3D printed it.
Milling the Bear - Positive
> Milling on the Roland at Harvard
I milled my design twice. The first time, I used the Roland at the Harvard REEF + MODS. Josh helped me greatly with this, and also did my fine cut. 🙏 There was a huge issue with the machine not working and milling incorrectly, and my design took ages to mill (the machine is also very slow), so I felt bad for having blocked it. The process took 4h in total. 😥
Milling generally makes a mess - one of the better things about the Roland is that it has a container.
> The Floating End Mill Drama
At Harvard, we had lots of trouble with the one single Roland we had. Essentially, the machine was doing the rough cut but only milled the yz direction of the fine cut. In the xz direction, the end mill would continuously be lifted over the course of the mill.
All TAs got involved, Claire and Quentin came by multiple times on the weekend to troubleshoot, and Neil went so far to investigate MODS (it had only recently been migrated to a web version). After several days of deliberating, they found the issue: our cuts were going below the maximum Length of Cut (LOC) of the end mill, meaning they were deeper than the end mill! This resulted in the shaft eventually hitting the top of the stock, shifting the end mill up bit by bit until it was only milling in air. However, I still haven’t fully understood why the yz direction worked.
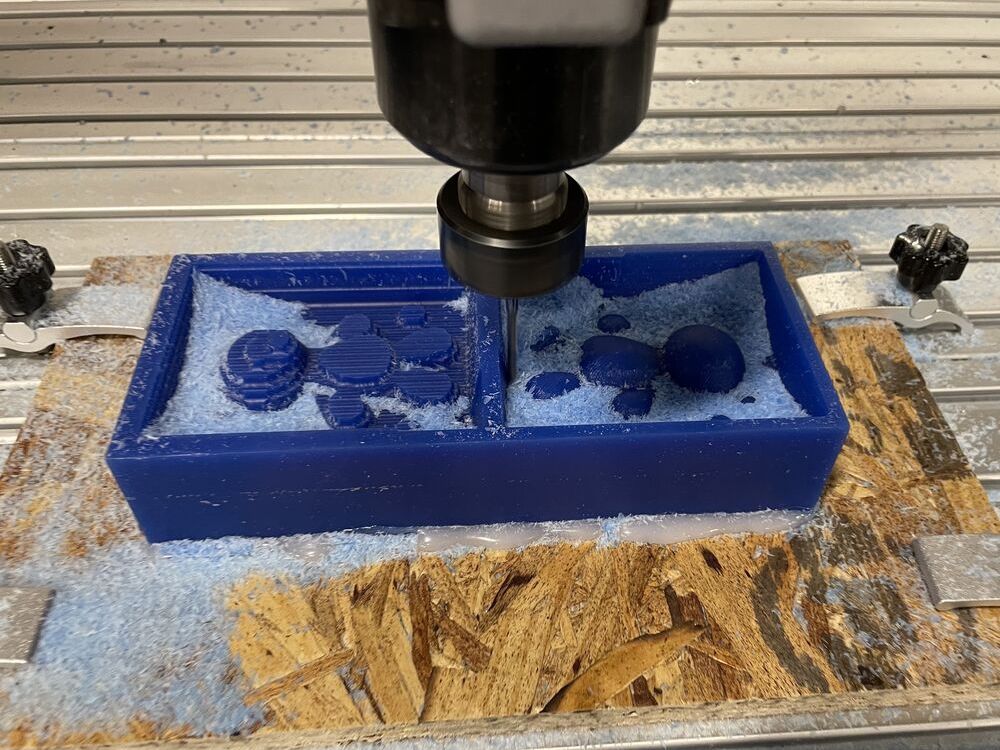
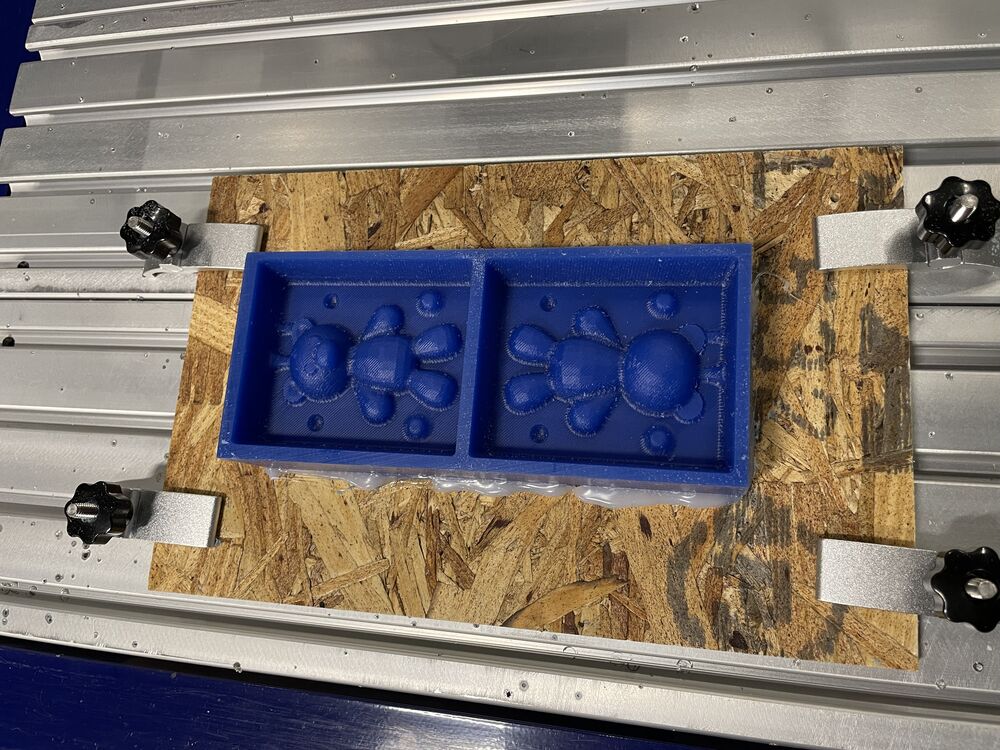
> Milling on the ShopBot at CBA
I was hoping to another part - a fish - and found a file on Thingiverse that looked like it would make a good mold. However, Alfonso also told me that wasn’t possible to mill on a 3D mill, and said it was really meant to be 3D printed. Maybe (unlikely due to time) I will 3D print and just cast the fish for fun in the future. After Alfonso had also told me about the fillets, I just redid my milling for the teddy bear.
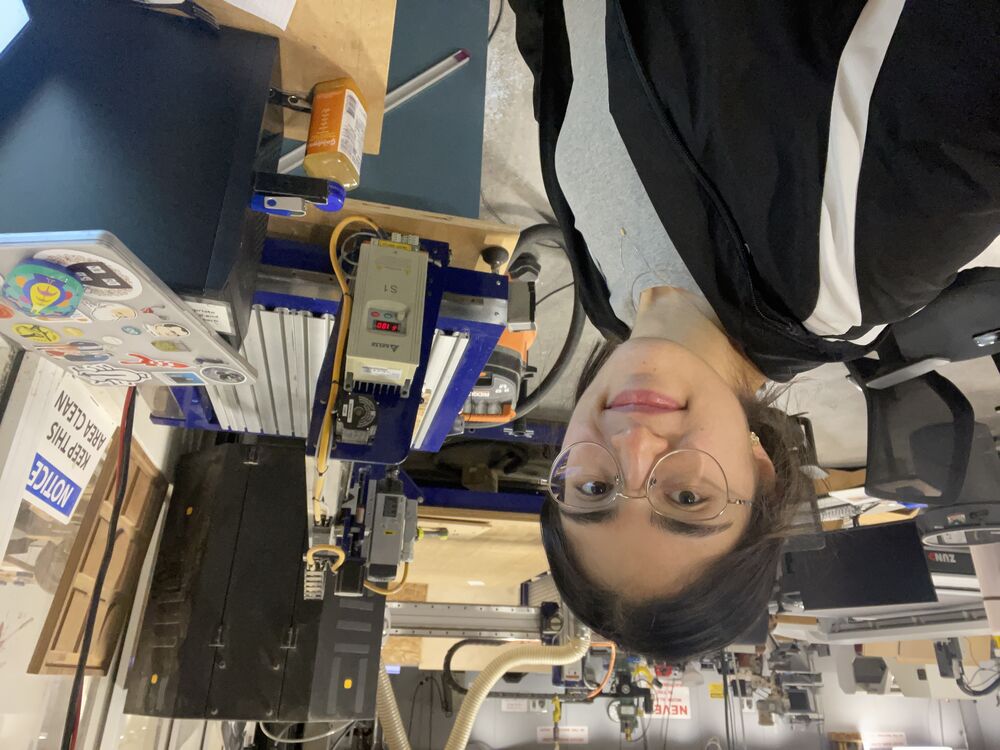
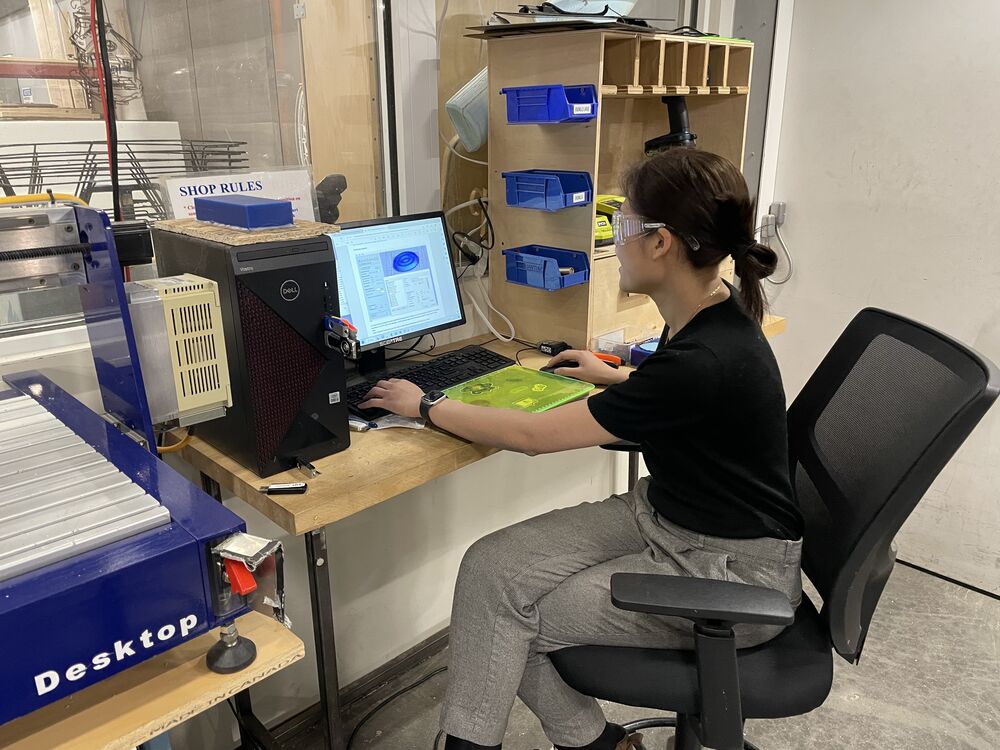
This time, I did it on the ShopBot at the CBA section, with the help of Sam, who stayed with me until 1:30am until my milling was finished. ❤️
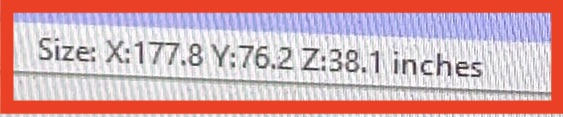
I went through the steps described on the Milling manual on the ShopBot. However, when I hit calculate, I was told my file would take about 7000 h to mill!!
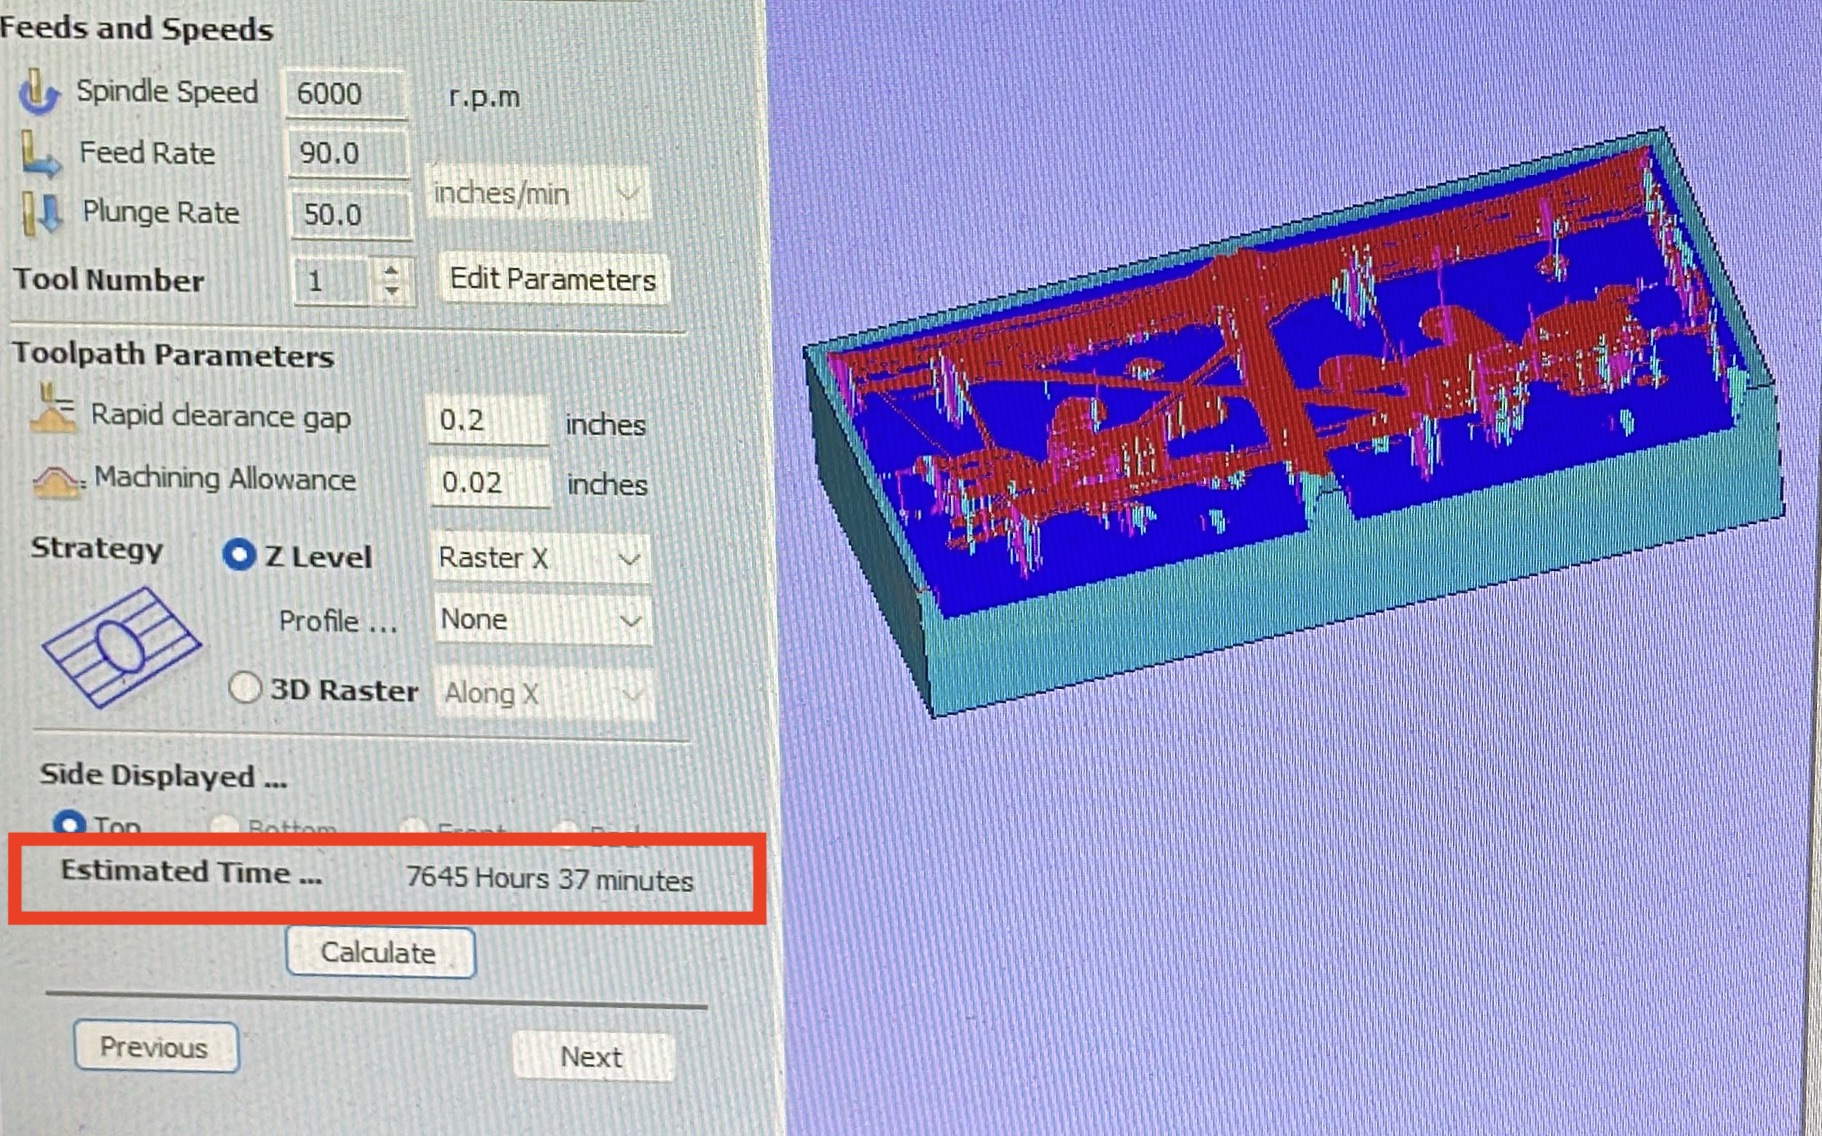
It took me a while to figure out what went wrong: the file was set to inches but the design was in mm!
Once I figured that out, we could start.
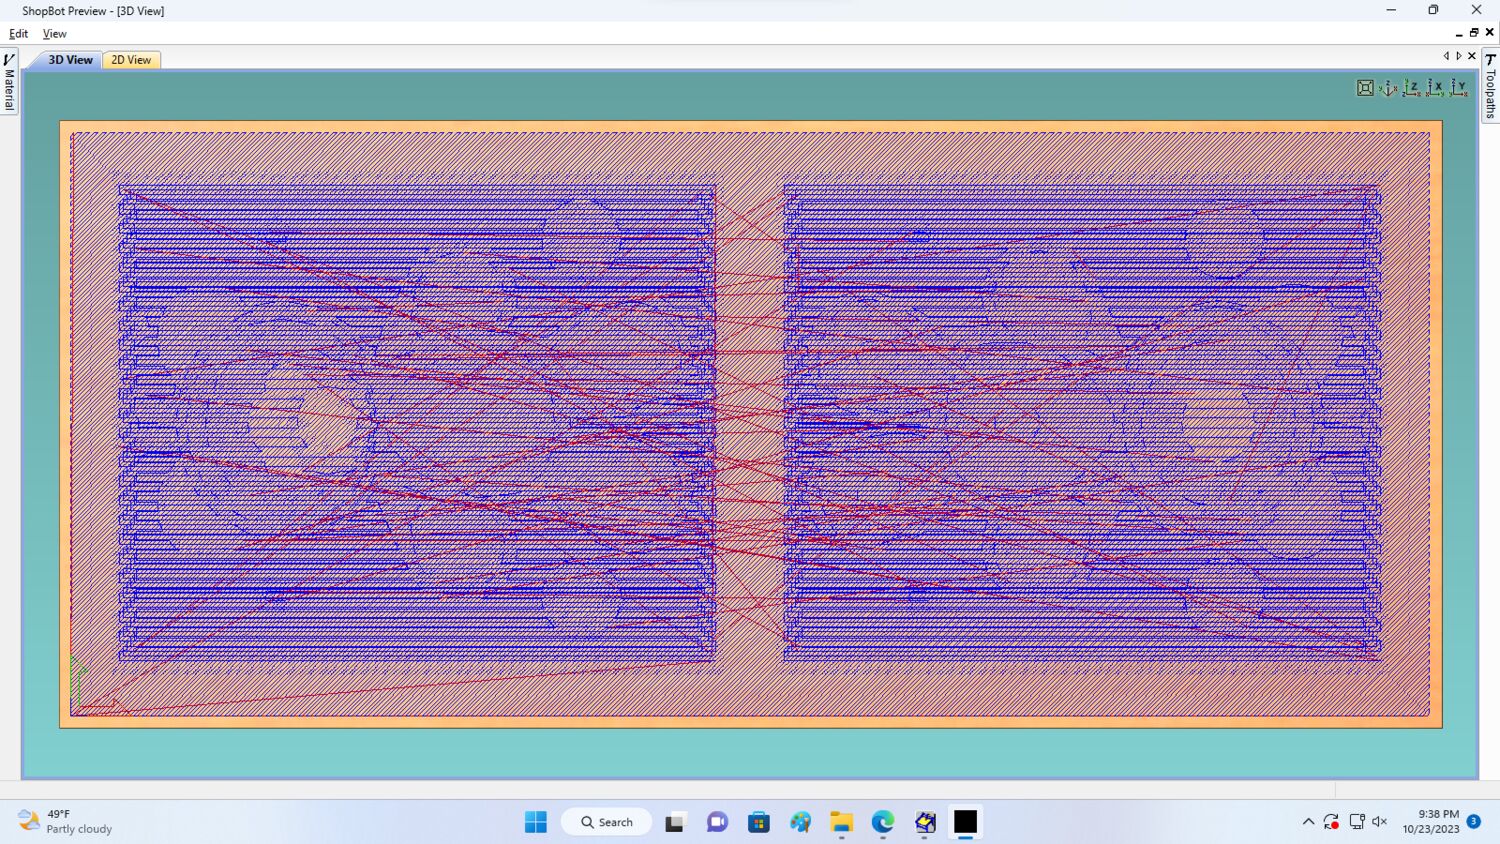
Here, we can really see why adding the draft angle took the machine sooo much longer to mill:

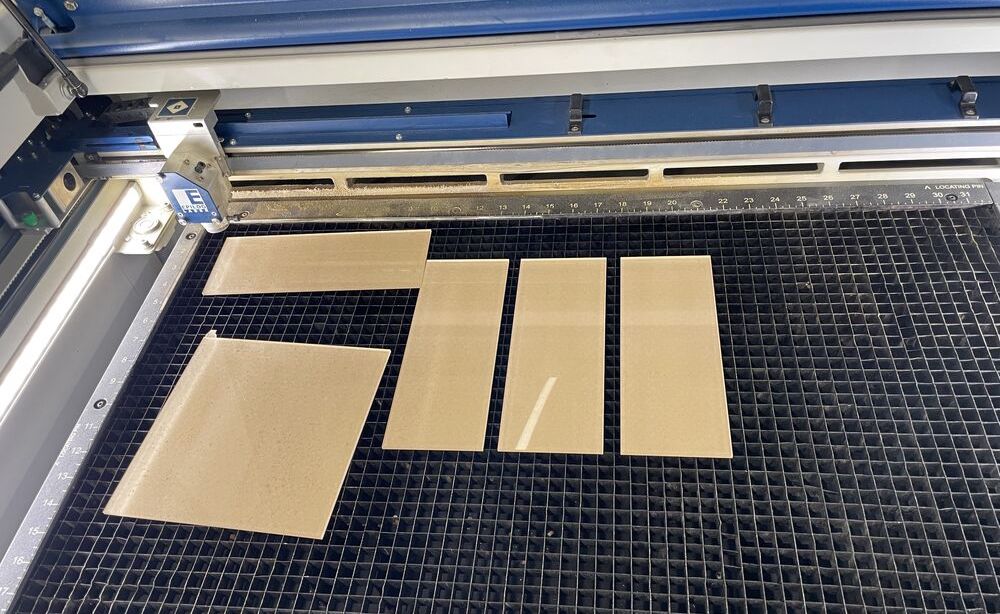
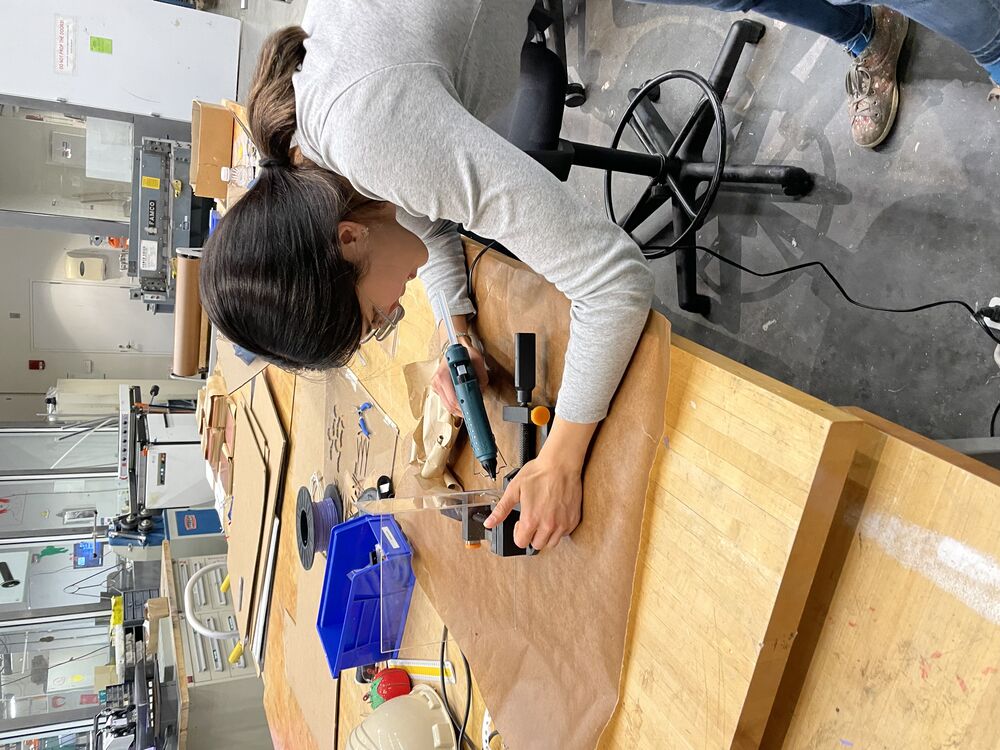
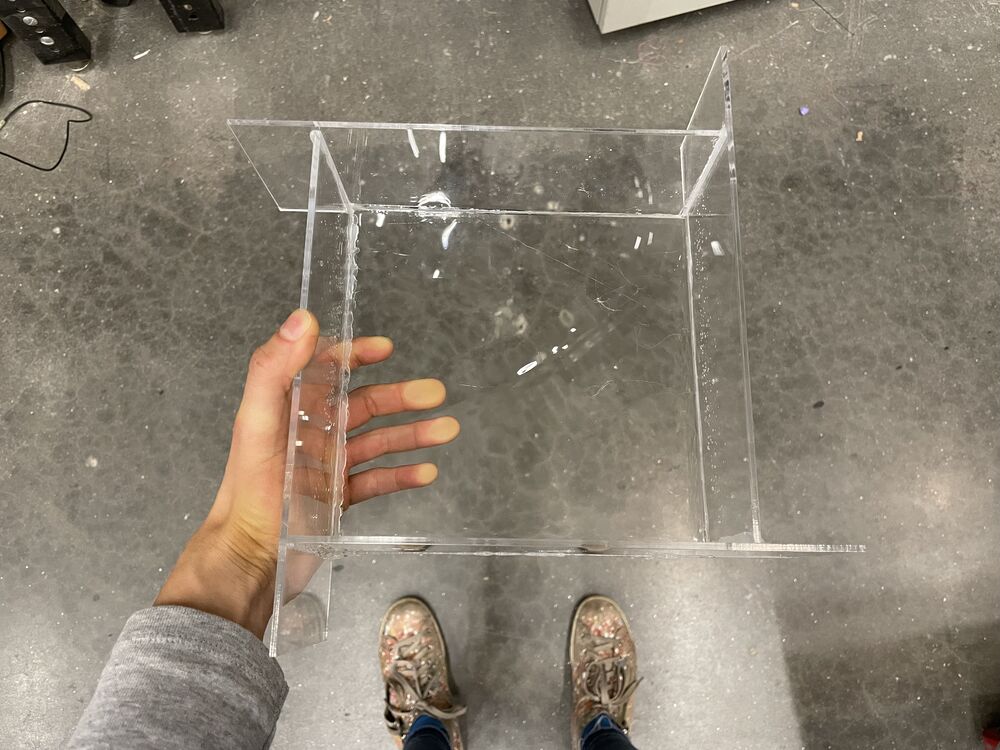
In the meantime: Lasercutting a container for the epoxy
In the meantime, I lasercut a container out of acrylic and glued it together. With the glue, I would need to account for draft angles to get the epoxy out when it was cured - “all” I’d need to do would be ripping out the sides of the container.
Making the Mold (omoo!) - Negative
I should not have decided to do this after the milling at 1:30am. -_- The morning would have been fine, as omoo just takes ~70 min to cure. However, I still had the 24h curing time of epoxy from the Project Manus workshop stuck in my head.
For making omoo, remember two wear gloves and glasses. How it works:
- prepare the two parts of the omoo - the base and the hardener (-> I’m curious how the physics of that works)
- mix them really well indiviudally but try to avoid mixing in bubbles
- a way to compensate for that is to degas (using little vaccum chamber) or put the container on a vibrating place (similar to vortext mixer in biology labs) -> makes the bubbles come up
- once you mix them together (again, try to avoid adding bubbles), you have 6m until the mixture solidifies -> mix them really well, until there is a uniform color
- pour the omoo mixture into your mold -> here, it’s important to pour in a small stream on one of the sides of the mold (not the center), letting the mixture spread by itself
- let it cure for the time specified on the packaging
I really wanted to avoid any bubbles and used the shaker/vibrating plate for the two parts and the mixture, however, that cost me time for pouring it in. Eventually, I did not mix it well enough so that you could still see some individual colors on the top of my cast. However, after curing, the bottom parts with the actual bear shape had a uniform color, and the omoo felt sold, so at least it had cured there.
Casting the Final Bear - Positive
Casting the bear, unfortunately, is where things turned into a tragedy. I did the casting of the bear in The Deep, as they colorants available there. I ended up using one of the opened bottles of Dragon Skin they had available there, as I did not want to open another bottle. This was probably my mistake.
Preparing and pouring the mixture, even with a 15 minute window (although with coloring - you really only need a little!), was a complete disaster. I messed up the mixing and did not account enough time to pour in the mixture into the mold (again). Also, the fill hole was too small for the viscocity of the Dragon Skin! Especially with the brown color, it became a mess, so I had to redo it. Even in the remake, I made similar mistakes and was too slow. The entire process took me 2h instead of 30m that I had planned for it.
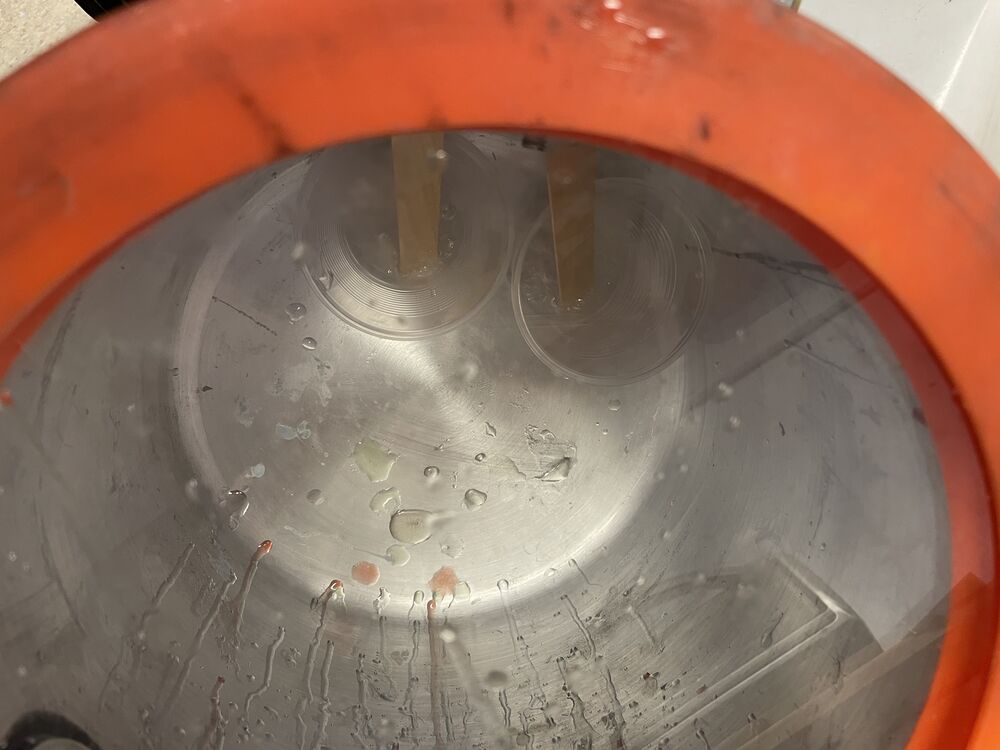
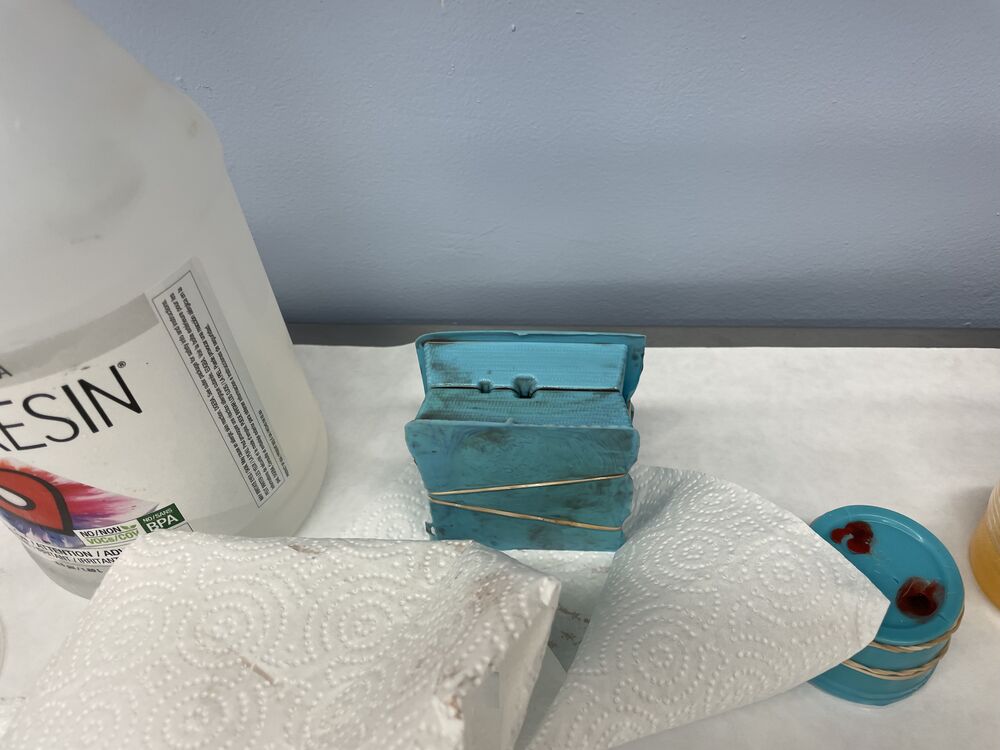
The Result
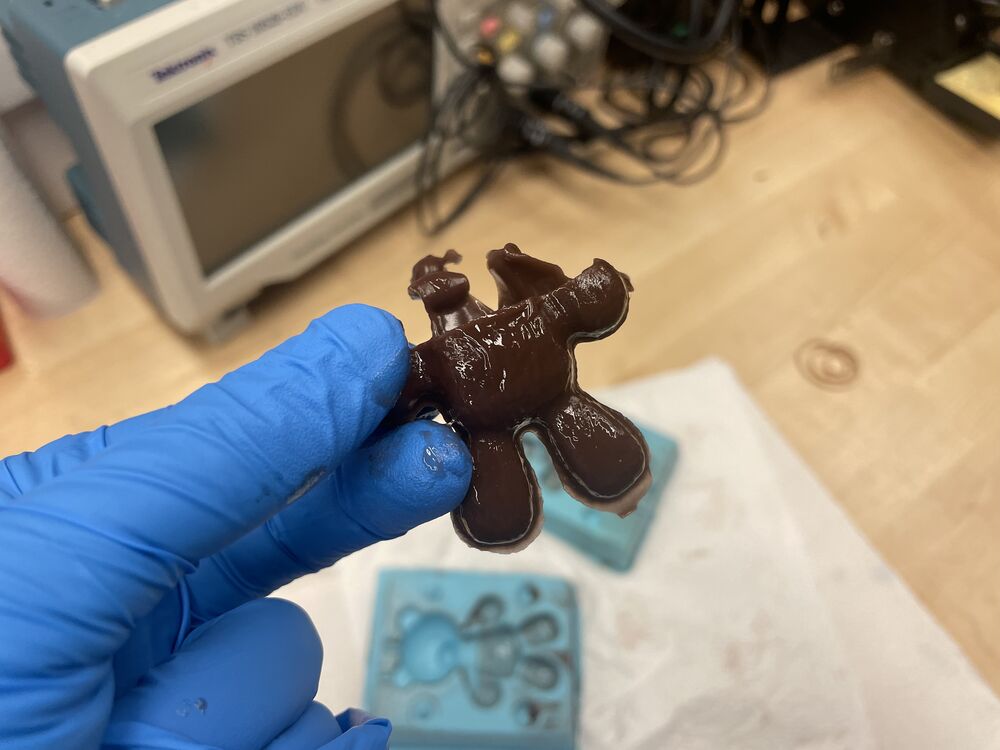
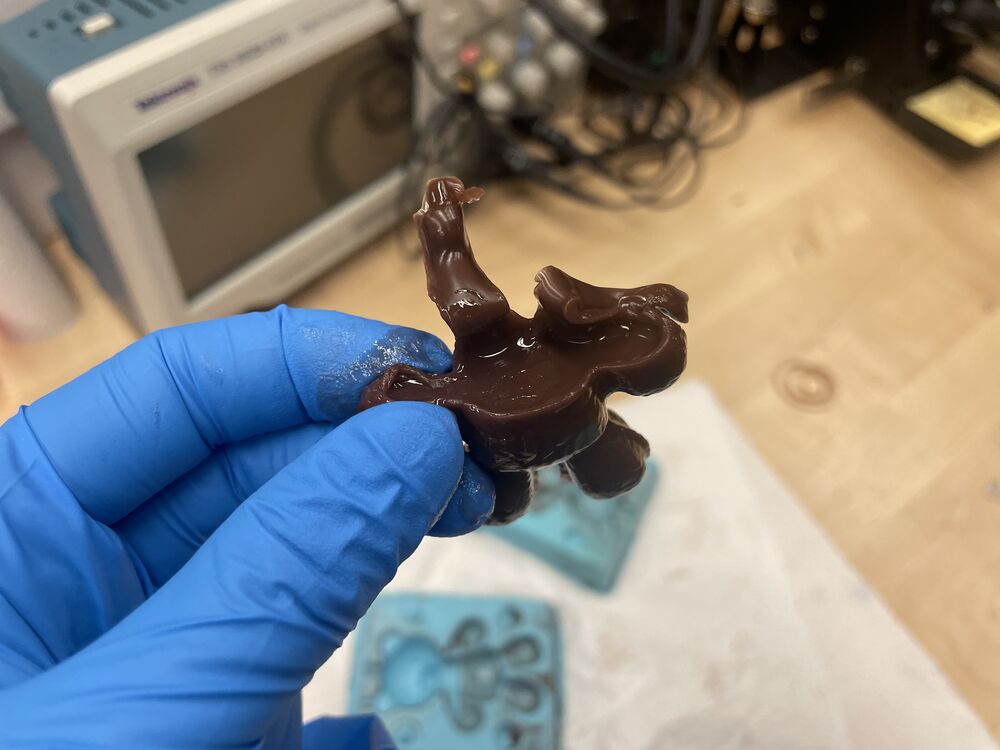
I don’t really think I need to say more about this…… The mixture leaked and I only got half a bear, which was still very wet after 3 days of curing. I believe the Dragon Skin had just expired.
What a week!
Future steps
- Redo the bear
- Get the 3D prints of the fish
- Pluck some plants for decoration
- Fill the epoxy into the container, embedding the individual components -> try to make as many bubbles as possible!
- Share some of the papers I looked at about bubble creation in resins