Week 7: Molding & casting
Background
For this assignment, we were asked to design a mold, mill it, and use it to cast parts.
Materials
Designing the mold
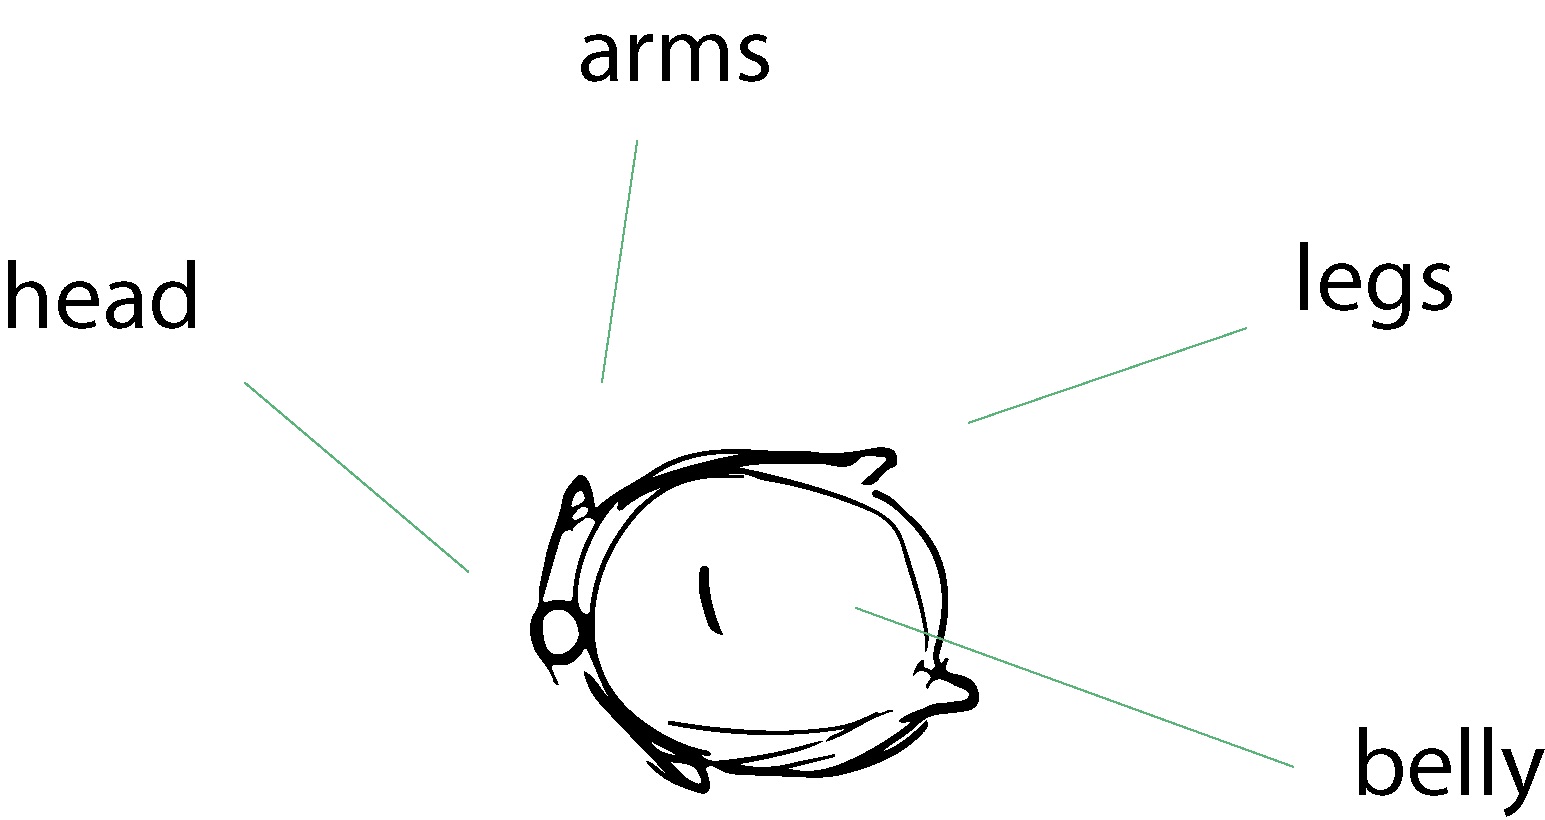
I wanted to create a cute jello mold of a cartoon blob person laying flat on their back. Dumb idea, I know. Here's an initial sketch:
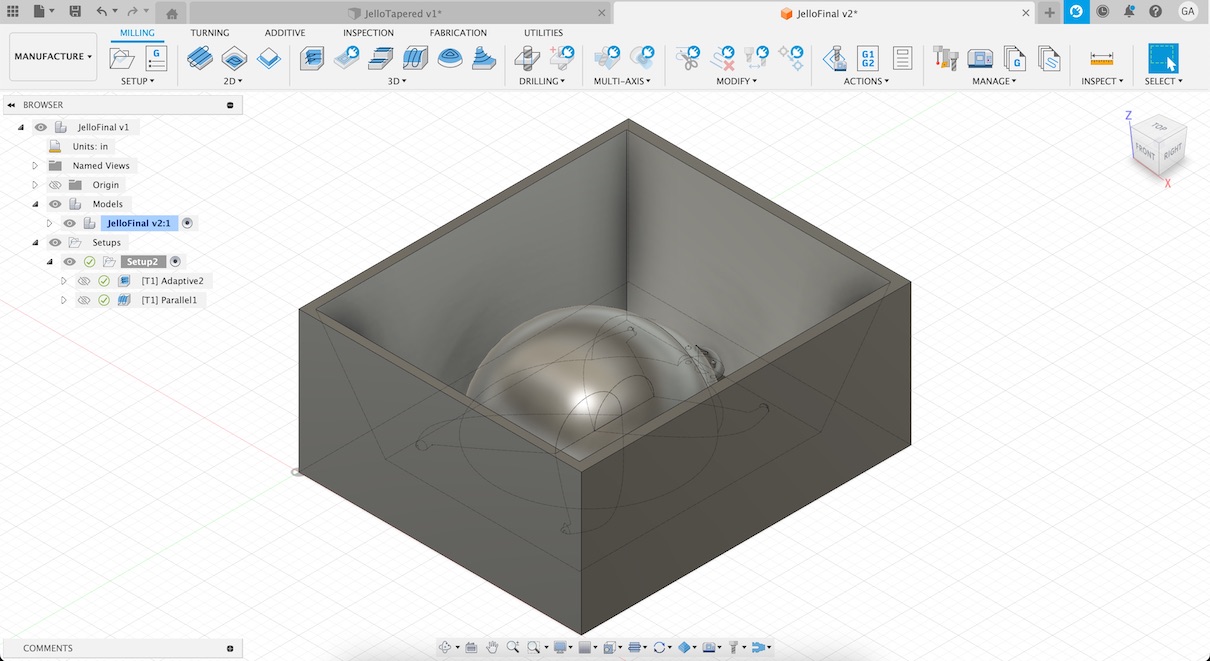
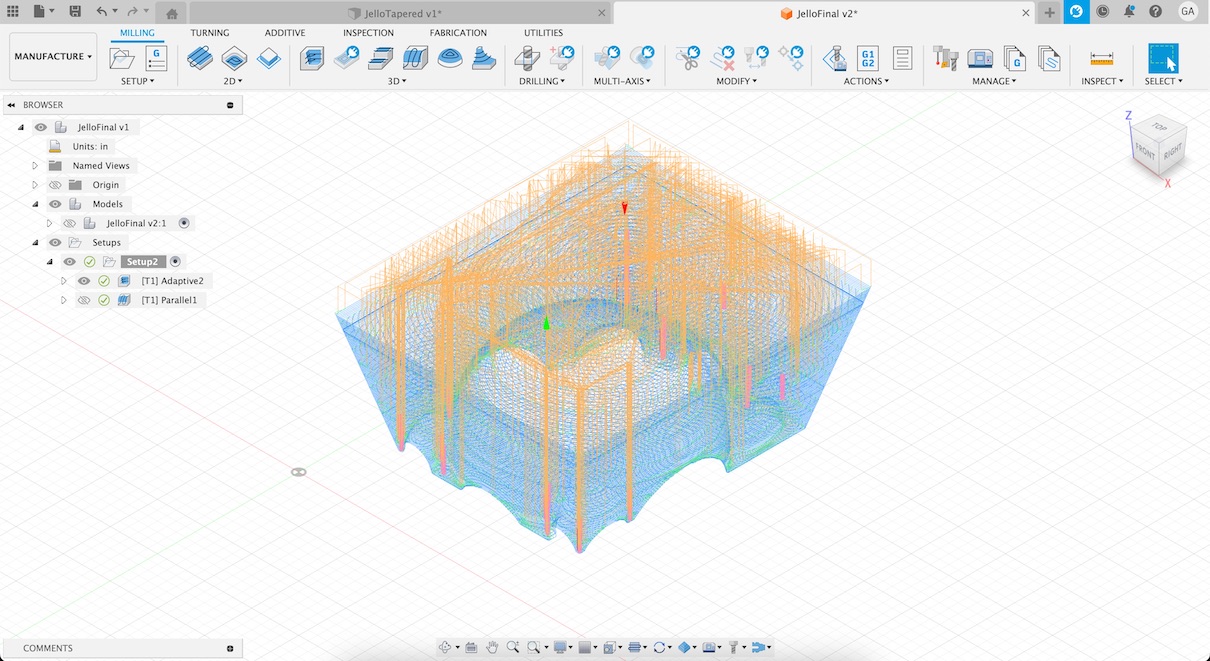
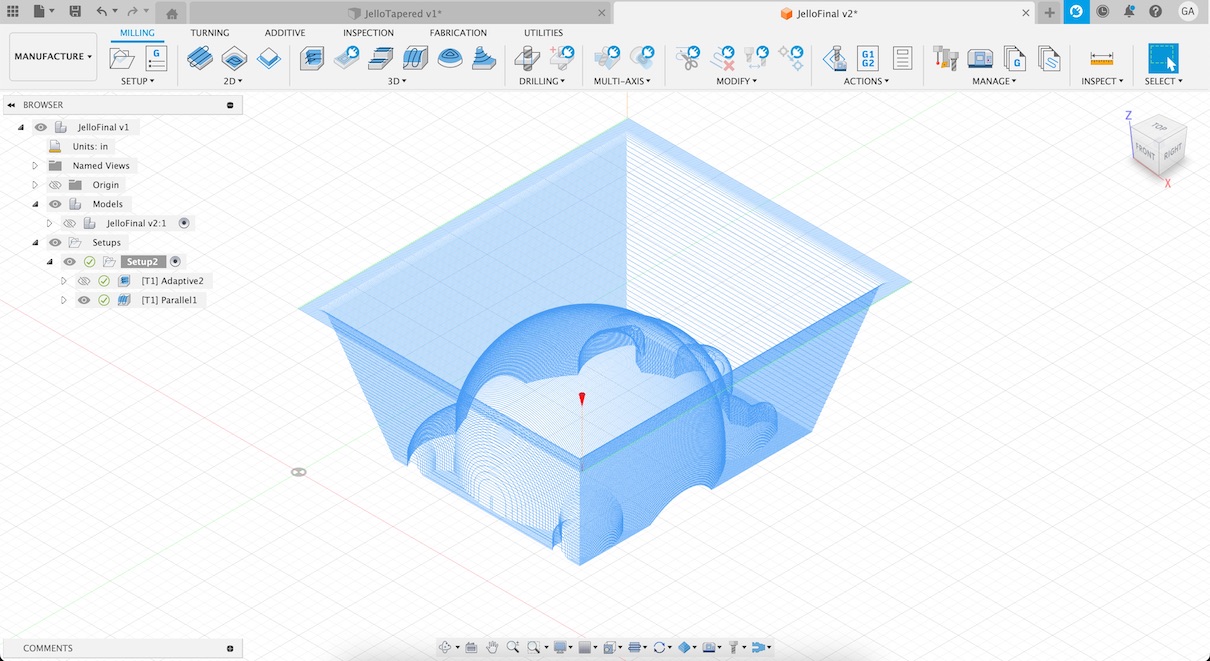
From there, I created my model in Fusion 360 fairly easily, and changed to 'Manufacture' mode in Fusion 360. This is Autodesk's CAM interface where you can generate toolpaths, simulate the milling process, and much more. Below if the final model I ended up with:
Milling the mold
Creating a mold out of machinable wax involves rough and fine passes for efficiency, surface quality, tool longevity, precision, heat management, and chip control. The roughing pass removes material quickly, while the finishing pass ensures a smooth, precise surface, meeting tolerance requirements and extending tool life. This process maintains quality and efficiency while preventing overheating and facilitating chip evacuation.
For the roughing pass:
- In Fusion 360, select the program you want for your 2.5D cut (select 'Adaptive Clearing')
- Create a tool that represents your 1/8" endmill - at this point, I ran into some warning about collisions on my walls, so I tapered the walls to a 10 degree incline so the endmill wouldn't run into the sides of the mold.
- Orient your model if necessary - I had to reset my origin to the bottom right corner. If I didn't catch this, my whole mold would've missed the wax stock.
- Calculate the toolpath
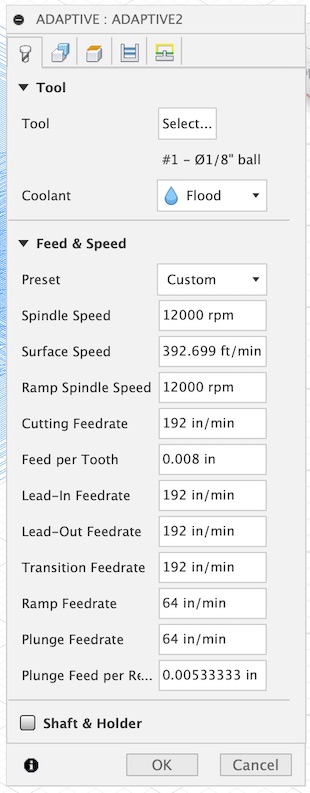
- Preview the toolpath - I set my settings as follows, with 12000 RPM for the spindle speed and .08 for the 'Feed per tooth' to speed things up.
For the finishing pass:
- In Fusion 360, select the program you want for your 3D cut (select 'Parallel')
- Select the tool you created earlier (the 1/8" endmill)
- Calculate the toolpath
- Preview the toolpath
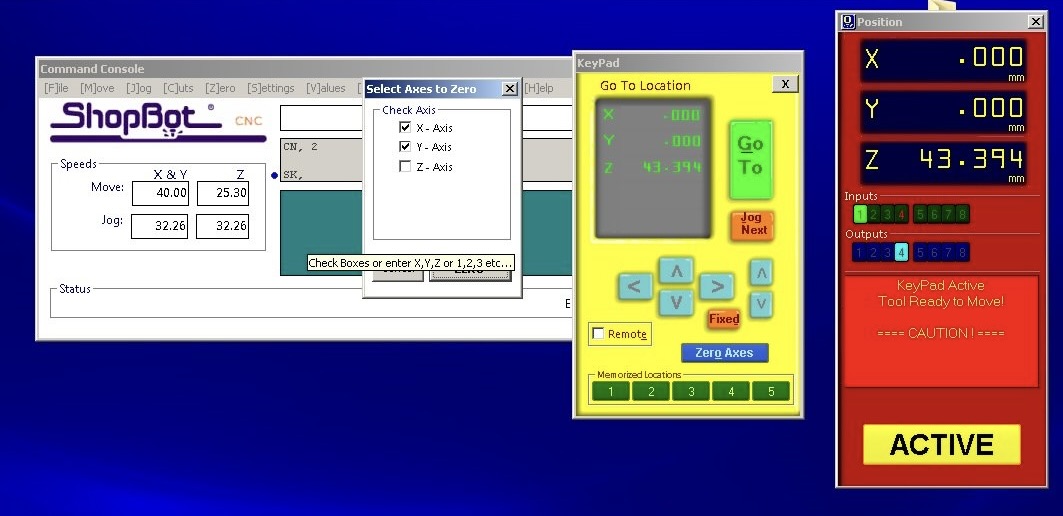
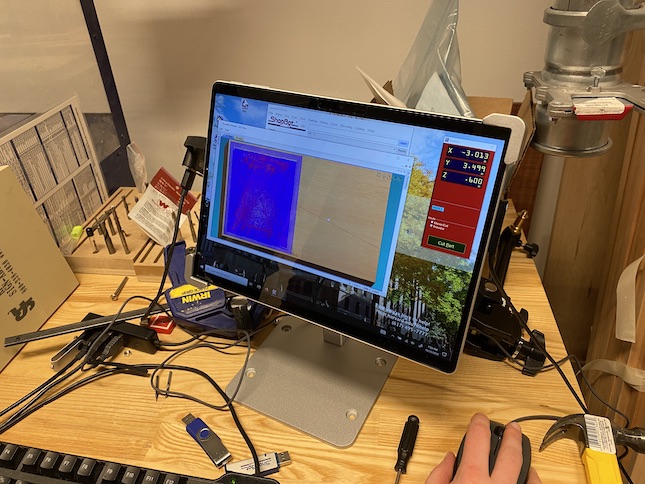
To move from Fusion 360 to ShopBot software:
- Click on your grouping of tool paths and select 'Post Process'
- Select a file location to export your .sbp - this is a file type ShopBot will be happy with
- Plug USB with your .sbp file into computer attached to ShopBot
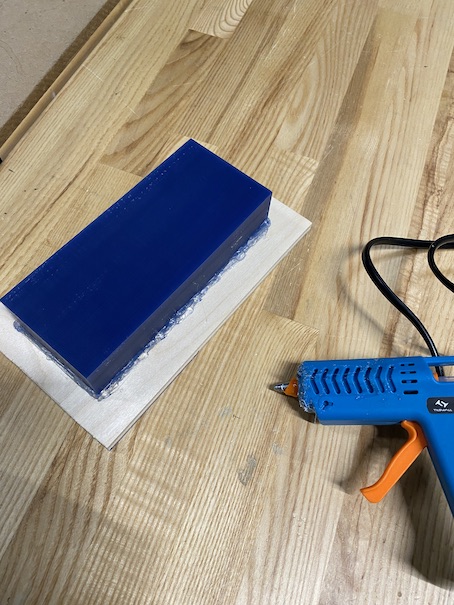
- Hot glue your machinable wax down to a small board you can nail into the bed of the ShopBot
- Cry a little bit at ShopBot's software from the 1990's
- Zero your machine
- Preview the toolpaths - because we're using the ShopBot, both cuts will be done sequentially with the same endmill because ShopBot can run a bit faster than something like the Roland SRM-20.
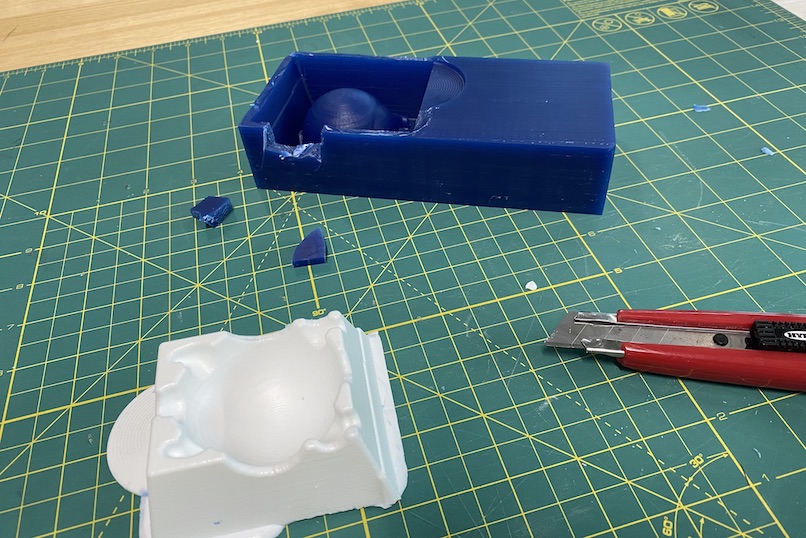
Casting the jello mold
Now that we have our machined wax block, we can start casting our plastic mold that will cast our finished jello project. In order to end up with a food safe jello product in the end, I'd have to ensure that each and every step was food safe-- from milling the wax mold to casting my jello mold with food safe polymers. We had limited materials in time in the span of this one week project, so I'm just going to pretend that I'd ever eat this jello guy.
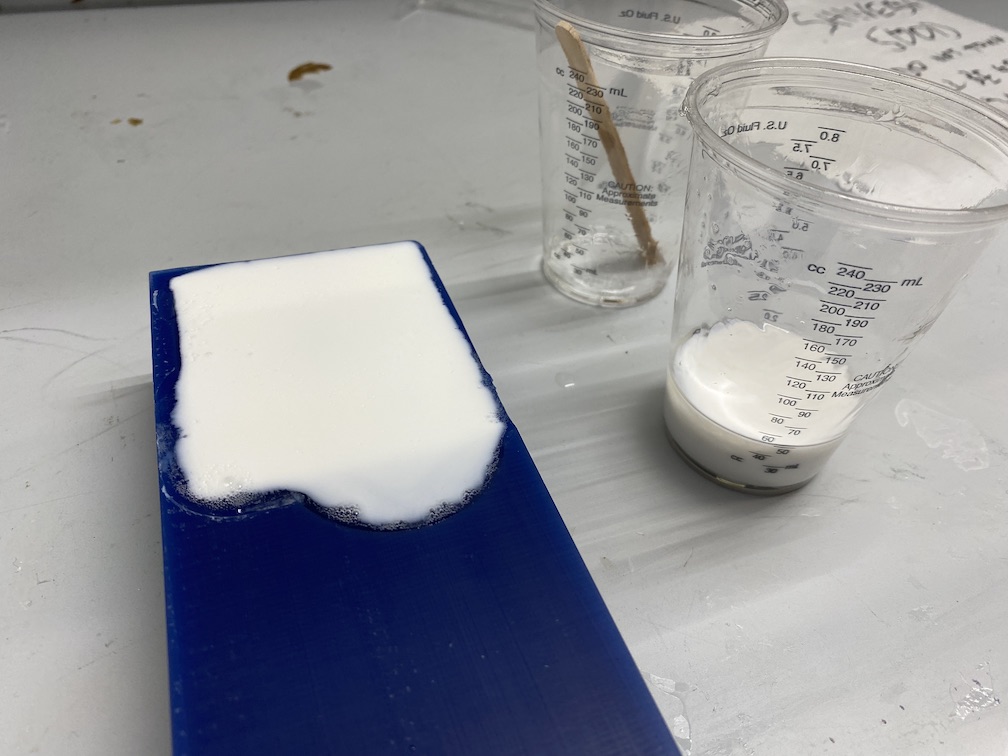
Every silicone, rubber, resin, or putty has different instructions for use. For this project, I used Smooth-Cast 300Q, which is a white plastic that cures within 5 minutes.
- Put on gloves, mask, and move to fume hood or well ventilated area
- Mix two curing agents together, trying not to introduce bubbles to mixture
- Slowly pour mixture in a thin thread into mold, starting in deepest pockets first. Remember: this material cures within minutes, so work quickly!
- Dispose of trash and wait 5+ minutes for mold to cure
- Once curing has completed, twist mold like an ice cube tray to pop out parts of the design gently
- If that doesn't work, hack at it with a box cutter like so:
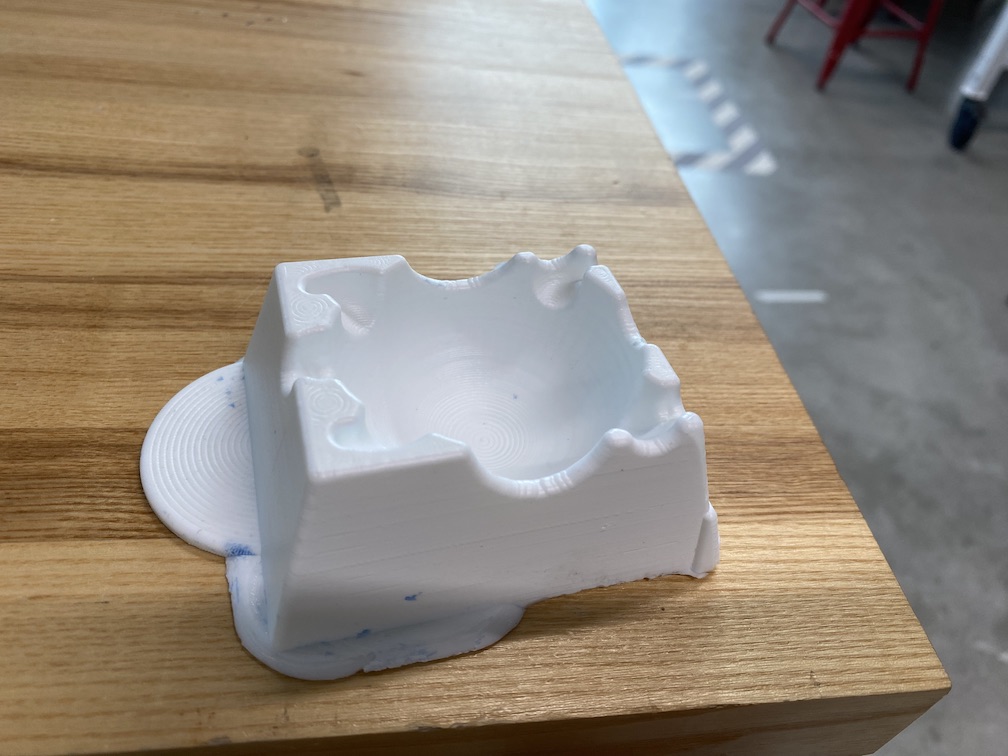
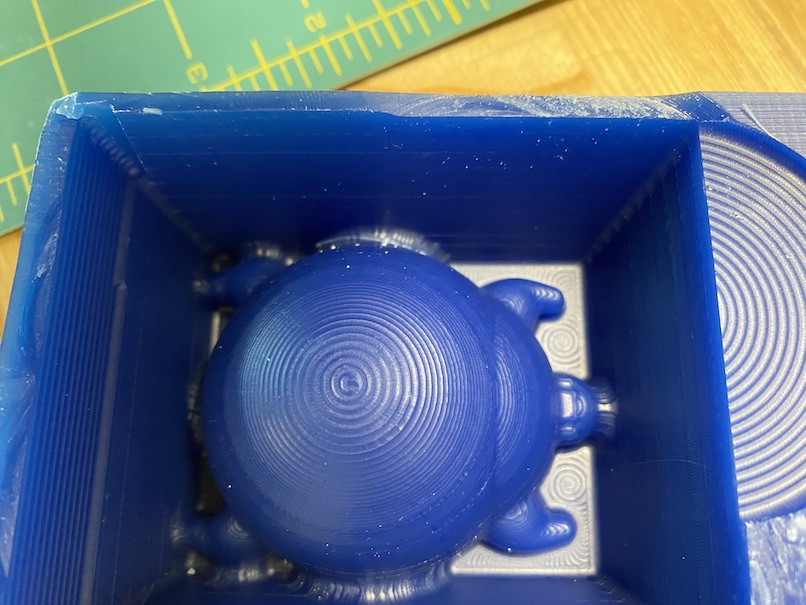
Finished product
This project was... humbling, to say the least. It wasn't my first time working with molding and casting, but it was my first time working with a larger milling machine like the ShopBot. My finished product here looks super wonky, almost like a turtle.
If I could go back and do this again, I'd be more adamant about using a 1/32" endmill for a my finishing pass-- I was told by teaching staff to use the same endmill for both the rough and finishing pass to save time given the limited resources we had available in the lab. This finer point would have given me more detailed features. Additionally, I would've requested a longer endmill for the ShopBot. Given we only had a short endmill available, it was unable to drill deep into my mold without the collet hitting my mold's walls.
If you'd like to recreate this project, you can download my STL and SBP files here.