Week 3 - 3D Print (almost) anything
Working in fusion has never been a strength of mine, so I started this week by working on a model which I believed could not be made subtractively.

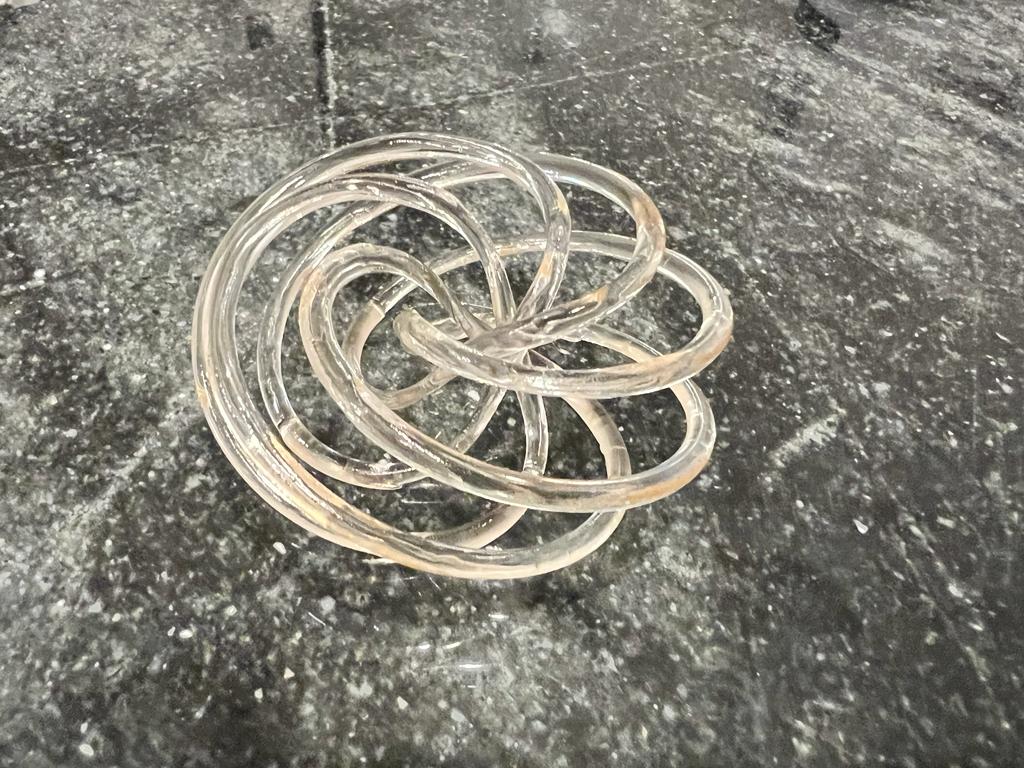
I began with a simple sketch of a hexagon, and added a small circle in each corner.

I then added a perpendicular sketch of a circle where the radius corresponded to the side length of the hexagon.

Using this, I rotated the circles along the hexagon, and then extruded the circles to create aset of tubes.

I then cut the rotation to 30 degrees, resulting in the a set of elbow macaroni shapes.

By rotating each of these by 40 degrees, I then was able to repeat the revolution of the solid to create the rotated bands, each of which flows into the next.


Then, I began printing. I started with an FDM printer, but the supports failed after a layer shifted early in the print which I caught and cacelled.

The next print I made used vertical supports instead of treelike ones, which did not fail after small layer shifts, but which ultimately resulted in underextrusion.
I then tried to rotate the model to print vertically with fewer supports, and this was far more successful, with minor layer shifting.

Next I moved to an SLA printer. My first print was small, printing the longest side on the bed, and I used treelike supports as recommended by the slicer, but since the print was so small and fragile, the support material was hard to separate without breaking the model.

I then tried printing unsupported, and got by far the cleanest print of my model.
I tried printing a larger version vertically, but the unsupported model failed. The supported model, though it was not as clean as the smaller one, was stable enough to allow for pruning ofthe supports.
The FDM printer was certainly less stable than the SLA printer. Both were very budget-friendly printers with frustrating proprietary slicers, but the SLA printer was far more successful with much higher resoultion and stability. The resin required final curing, however, and was rather hazardous in comparison to the harmless PLA that I could use in the FDM printer, so I certainly think each has its place.
For a fininshing step, I designed a small box with open sides that was slightly larger than my small initial print, and printed it on the FDM printer. I paused this print halfway, and placed the small print inside before resuming the print, creating a ship in a bottle effect with a paradoxical placement of a large object inside small openings.

Week 4 - 3D Scan (almost) anything
Next, for the scanning portion of the assignment, I began with the Leo scanner in the fab lab, but I quickly found it cumbersome and laggy in comparison to the phone apps on the market for phones equipped with lidar. I then tried to use the lidar on my phone, and I got fantastic results. First I scanned my print, and while the resolution was fantastic, it struggled to close allthe small gaps, making it dificult to print

I then scanneed a more simple model, and found that the camera did a fantastic job with it, so I took it home to scan some still life, and the result is shown below!