Week 5 - How to Produce (almost) any Circuit
Continuing with the circuit designed last week, I began by redesigning the PCB to comply with the router's fabrication specifications. I then moved to the Gerber files, and found a somewhat tedious process of exporting the files as PDFs, converting them to PNGs, and cropping them to fit within the edge traces.

I then moved to the CNC router, and after a few failed attempts due to my foolish door openings, I was able to get the router to respond to my inputs.


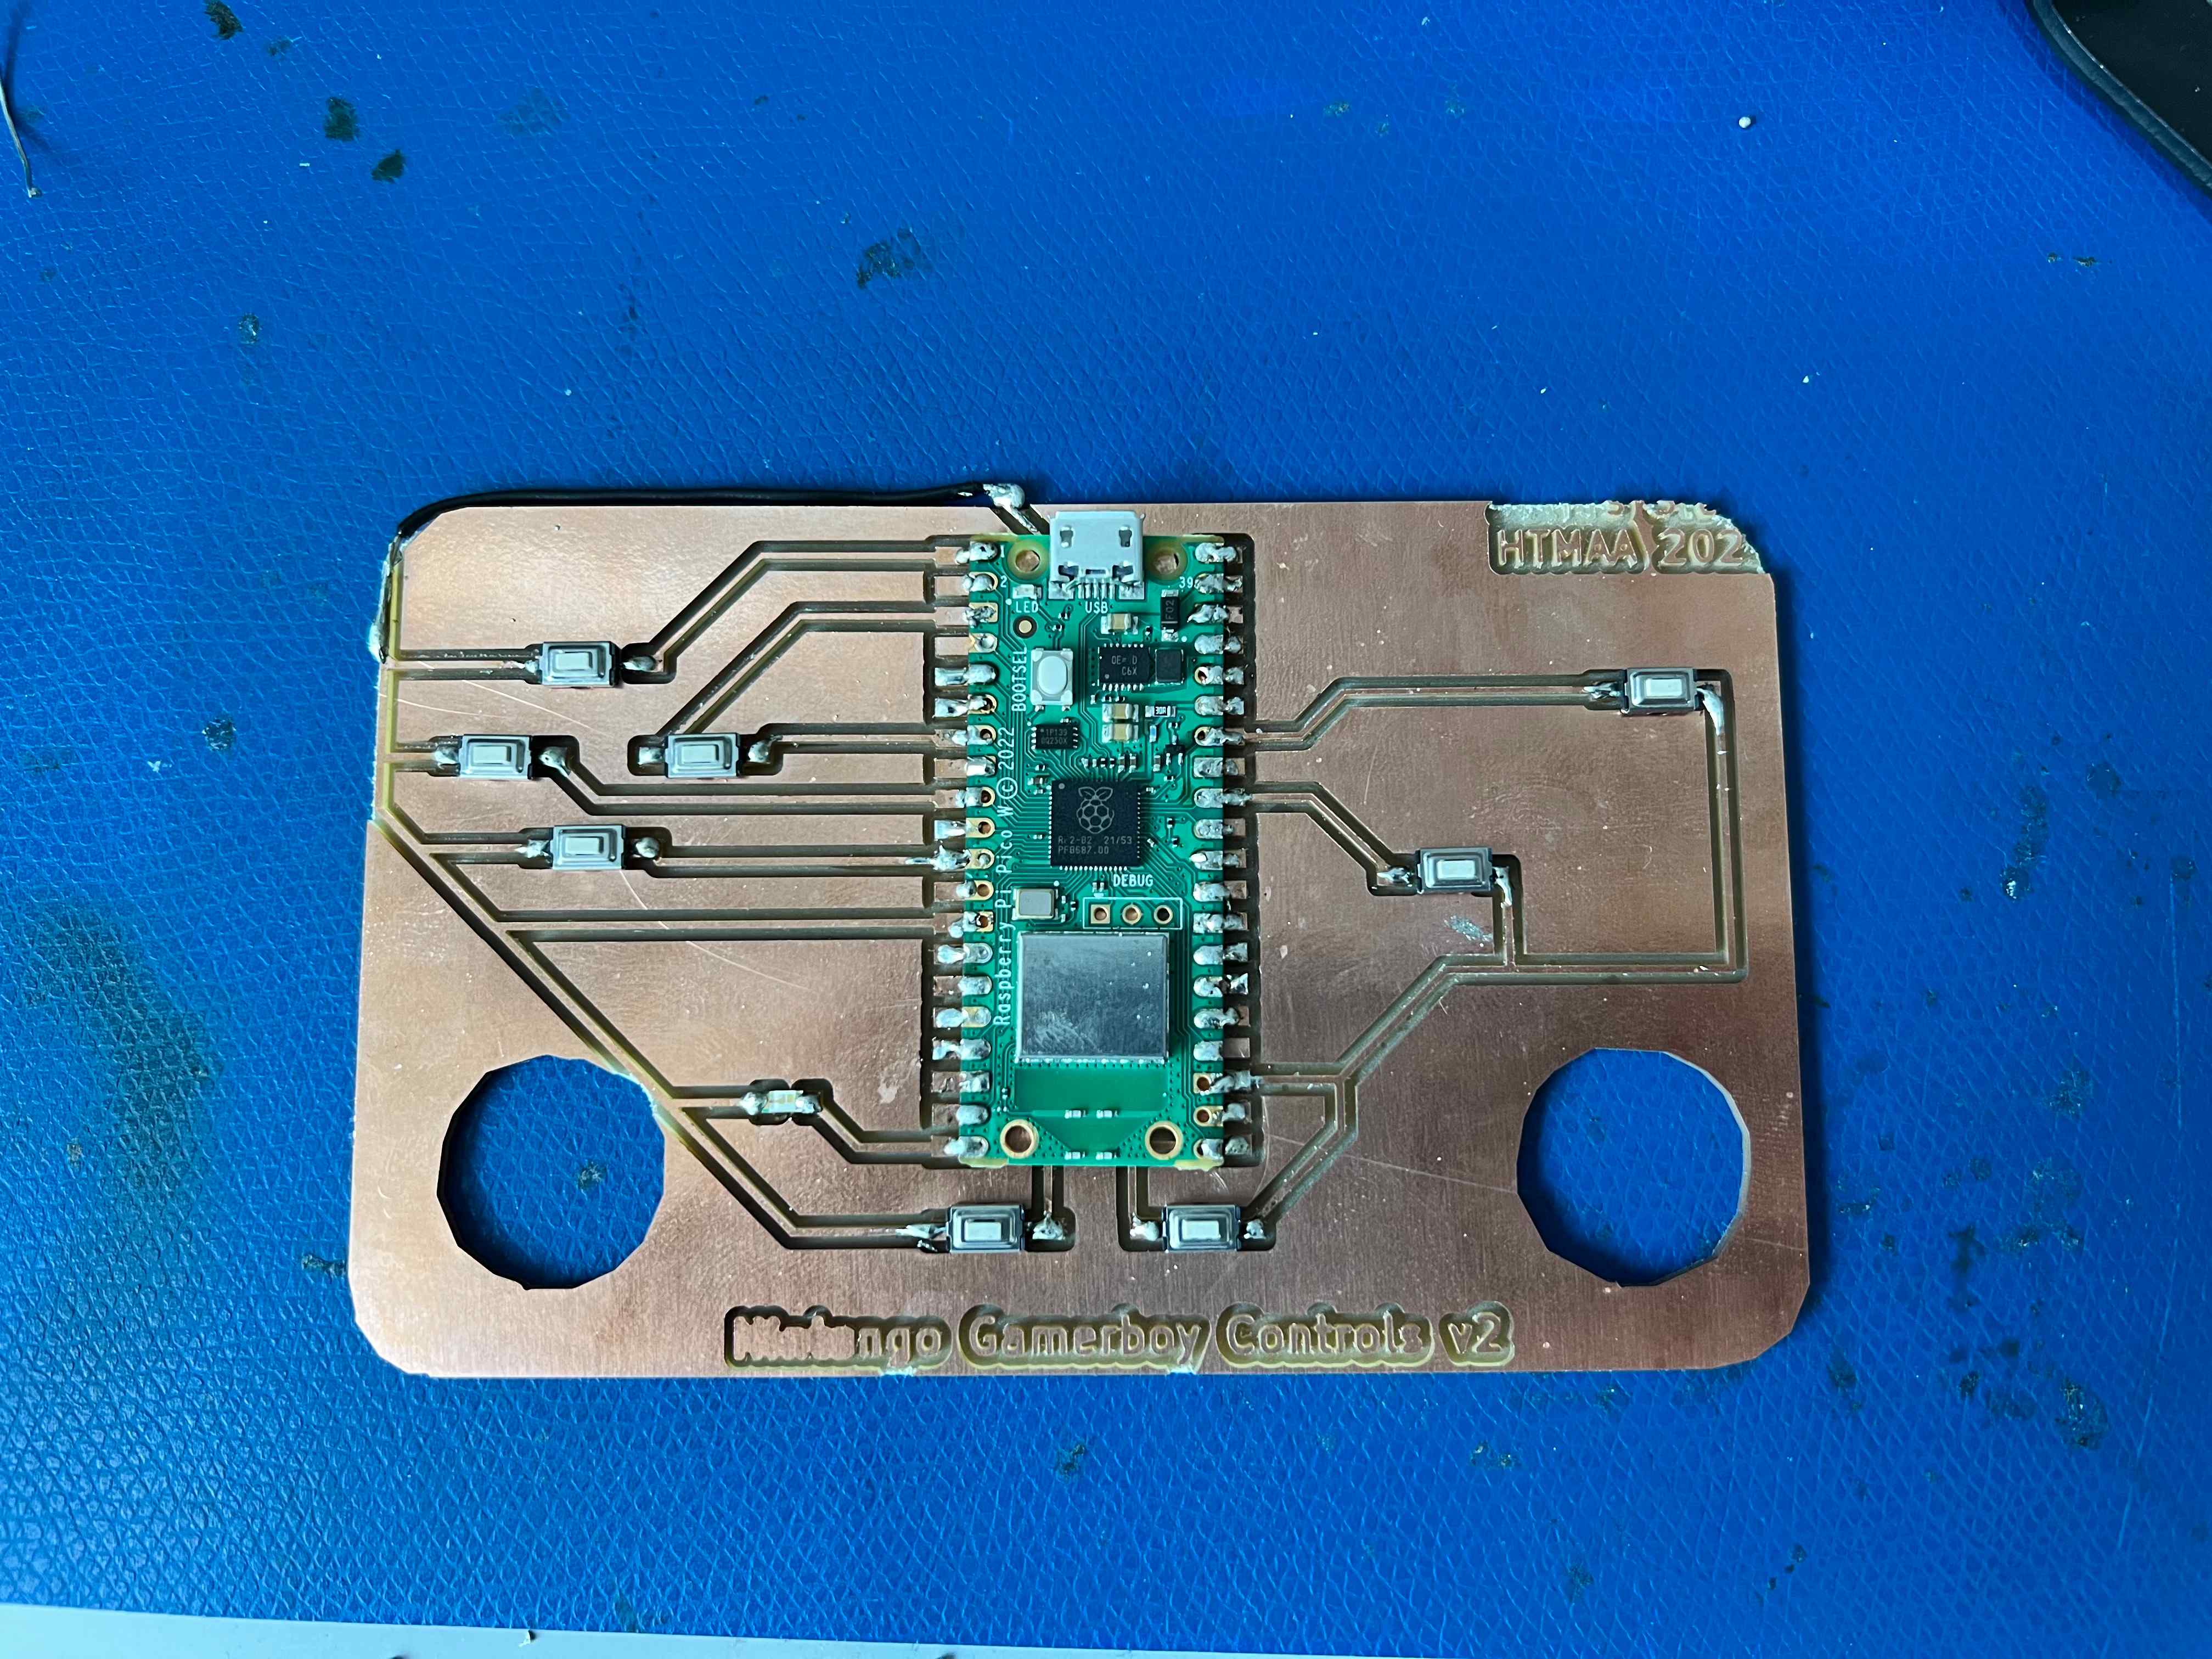
After milling, I noticed that I had locked the file size to the dimension of the traces first, so I had accidentally scaled down the edge cut png resulting in a cut trace at the top of the board. I soldered the buttons onto the board, along with the Pi Pico that I intend to use for the final project even though its pins are not yet necessary. I found that the buttons were not working, and after some troubleshooting, I found that the traces were not connected to the buttons. I then resoldered several buttons until I was able to get a working test output.
For my script, I wrote a loop that would iterate through each button, and if it was pressed, it would print the name of the connected pin to the console. This was helpful for debugging errors in which buttons had been erroneously soldered to the wrong pins.