
[^click them!]
this week we dove into embedded programming, aka in our case, and this week,
setting up and sending simple instructions to micro-processers development boards and receiving
signals back.
ok, pausing here because the next section may be boring to you (yes, you), so click here
to skip ahead to the fun part
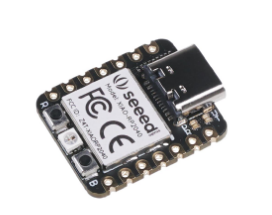
we started with a choice in micro-processor between the ESP32 and the RP2040. both are super super cheap but as i'm learning, very powerful.
we got a little bit of advice about the pros and cons to choosing one micro-processor
over the other, with some highlights being that the ESP32 has built-in wifi support while the
RP2040 has exceptional documentation, although both can be written in either C/C++ and micro-python.
the assignment this week was to choose a micro-processer and write a program for a microcontroller
development board that can interact with local input or output and communicate. we get *fake*
extra credit if we use different languages or development environments or connect external components to the board.
ok so this time i didn't start off drawing because i would have no idea what to draw
...instead, we started by setting boards in python and in the arduino ide by mapping the micro-processor pins
to the board pins using the *exceptional documentation*.

even despite exceptional documentation, it gets tricky because there are many more pins in the micro-processor
than in the development board so there are some weird mappings to be done, and it gets trickier because the
cores required to interpret the code have different definitions for the pins as well.
the most simple place to start was just to play around with the built-in leds so we started there.


diagramming shows that the blue led is pin 25, green is 16, and red is 17, so we could define those in
the ide and start playing around with blinking and exchanging signals back and forth with the processor.
one interesting thing to note about this board is that because the led is connected to power instead
of ground, the opposite logic as expected would apply: 0V means on while 3.3V would mean off (right?). if i don't
provide more detail it's because i didn't get time to investigate.
this might not look exciting but technically the assignment was fulfilled by this little code that
just turns off the blue and green leds and has the red light flashing every second, sending back a signal
that continues counting as it changes.
code is here.
i wanted to do something interesting, so i attempted to make a sensor
that could text you when your fly was down.

image credit to rawpixel.com on Freepik
this is inspired by the time i was standing in front of a full bank of seated people
on the crowded 5am U8 train in Berlin with my fly as wide open as it could be, and
someone who was sitting at head height and very much too close to me had to ask me to
close my fly.
because this is such a common and such a humiliation problem, i figured, who better
than i and when better than now to solve it!
1. the first challenge was to design the mechanism for detecting whether your fly was
open. i was originally thinking that the best method would be a light detector but Quentin
suggested simply using a circuit that's completed when the zipper touches it (presumably
high enough up on your zipper to be considered close). i went with this approach for
simplicity but i think if i iterated on this it would need to change - to be discussed
later on.
2. i also realized that it could be pretty annoying if you got texted everytime you wanted
to use the bathroom so there needed to be a second circuit that relayed data on whether your
top button was buttoned (if it was also open, you can be pretty sure that it's purposeful,
and if it's opened proximately to your fly also being undone, this is similarly likely to be
intentional)
~the design~ then was to simply wire two circuits on a rp2040 w (pico). i used micropython
and thonny to write some if else statements, connect to wifi, and use the twilio api to send
a text given condition satisfaction.
if you're curious, the code is here.
ok, so i started with using some metal foil as a flexible material, easily prototypable,
that can be connected to fabric extremely easily, and set up a simple pico board with
tape points on an old pair of jeans.
i originally cut out some connectors using the cricuit cutter, but for this iteration,
it got a little messy as i played around.


in combination, we get a pretty messy but cute prototype that is a bit finicky. i would
love to do a second iteration of this prototype using magnets to help close the circuits,
or playing around with other sensors, specifically for the zipper component. i think if
i could solder to the zipper it would be much cleaner (i couldn't, probably shouldn't have
tried), but there's lots i'd still like to do here.
a great success is that twilio is super adaptable and both texting and calling works great
and it's really cool to see how easy it is to work with the rp2040s and get them to do pretty
complex and intereting stuff really fast!
to annotate the video above, you can see that while the top button is open
there is no phone call or text triggered, but when the fly is undone and the top button
is open, a 5 second timer starts (waiting for you to remedy the issue on your own),
and then at 5 seconds, you get a call (and a text, you could choose).
you can simply turn away and take the call, and subtly zip up your fly! perfect!