MAS.S62 how to make anything that makes almost anything!
Mission: Build an entry level EDM machine for making carbide/HSS tooling and lead screws.
Build log/ process documented below. Reverse chronological order.
May 18, 2012: The pencil is mightier than the sword!
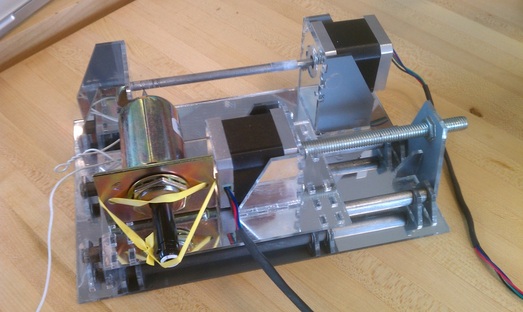
Boom. CNC EDM Lathe.
Video below.
Last update, see final presentation for full recap.
Part layouts below.
Video below.
Last update, see final presentation for full recap.
Part layouts below.
| edm_final.cdr | |
| File Size: | 50 kb |
| File Type: | cdr |
| edm_final.dwg | |
| File Size: | 196 kb |
| File Type: | dwg |
This setup is a little sketchy. This machine really needs a more robust and safer redesign, but it seems to do the job ok for these tests. See a crappy lead screw below!
May 15, 2012
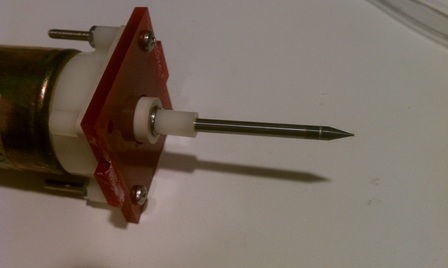
I've been putting a lot of thought on how exactly to best shape a drill bit with the EDM. Ideally a CNC setup would take care of it, but I tried a simple rotary attachment to test how well a EDM lathe works.
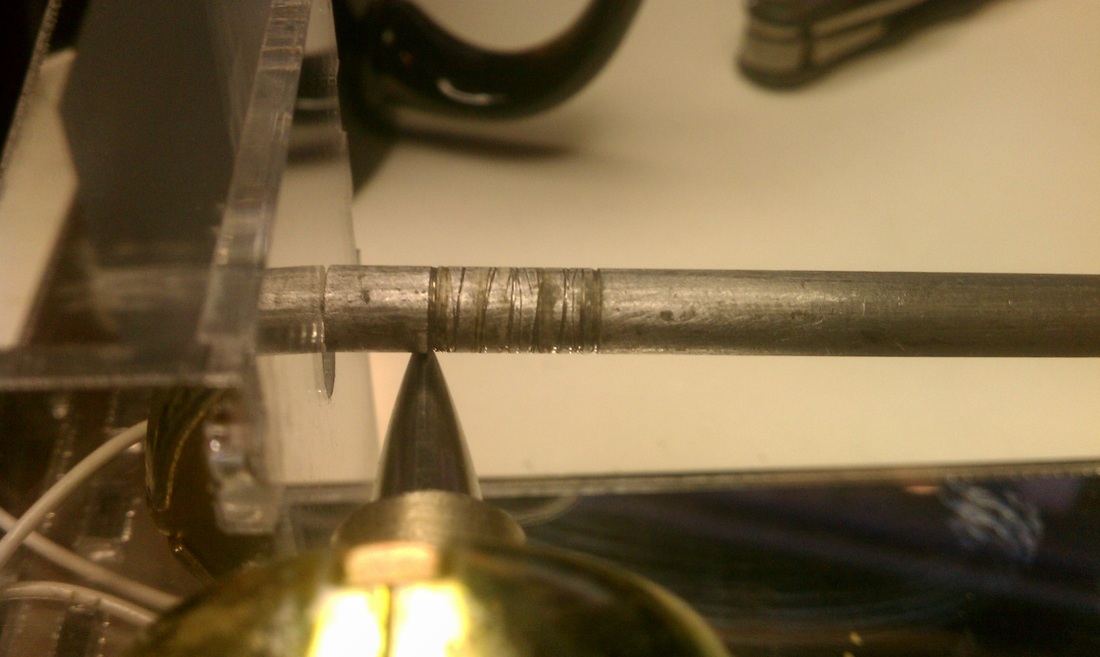
Turns out... (joke!) it works pretty well! I cut a notch in a tungsten carbide drill bit seen on the left.
Getting the complex geometry on a rig like this to cut a simple drill bit might not be worth the time, especially with the price of drill bits/milling bits. Short video below.
Turns out... (joke!) it works pretty well! I cut a notch in a tungsten carbide drill bit seen on the left.
Getting the complex geometry on a rig like this to cut a simple drill bit might not be worth the time, especially with the price of drill bits/milling bits. Short video below.
May 8, 2012
Ran a few more cuts with the current rig to test feasibility of graphite as a cutting electrode (it seemed to eat up a lot of it, so i figured it would be good to run the numbers).
Cutting time:
Calculations put the cutting rate of HSS (high speed steel) at: 0.001 in/min or roughly 1/16" per hour.
This means it would take about 2 hours to cut through a 1/8" drill bit (for the Modella).
Total cut time for a 4 fluted bit = ~8 hours
This rate isn't really that slow for EDM, it's actually right around normal cutting speed.
Graphite consumption:
8 hours of cutting time: 24 inches of graphite = ~10 sticks
A typical mechanical pencil can fit around 20 sticks easily. Should be good to go! Onward!
May 2, 2012: EZ-EDM
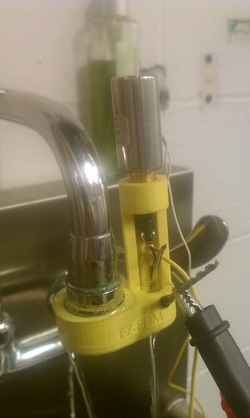
It works! Video below.
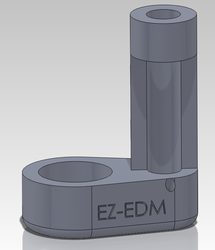
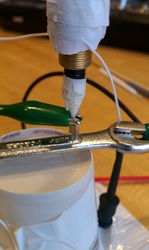
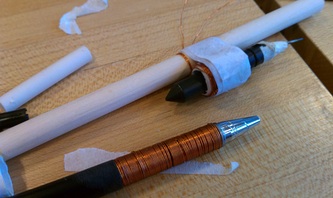
The first version is almost entirely composed of a 3d printed unibody. The structure presses onto the end of a faucet, using the flowing water to continually flush the point of operation.
A solenoid is screwed into the top for the feedback actuation.
I ran it for a few minutes and cut a bit out of a steel drill bit. The idea is that you can just set it up and forget about it. The structure/graphite loading is a bit hacked together right now and difficult to set up and use.
Goals for iteration 2:
- Better graphite loading mechanism (maybe use the pencil mechanism itself? ie. build the device around a mechanical pencil)
- Onboard power source (stepped up 9V), optimized voltage for gravity/spring bias and solenoid coil strength.
April, 12 2012
Bought many different diameters of graphite for testing of EDMing. Pencil graphite is made from a mixture of graphite and clay, rated by hardness from 9H to 9B (H is hard and B is soft). The more clay in the graphite, the harder the composite is (and less conductive). Tests should be done to determine the best type of graphite to use, so that it is conductive enough to last long as an EDM tool and hard enough to last as a structural element.
The current plan is to attach the device to a faucet in a kitchen/shop sink and use the constant flowing of the water as the flushing dielectric. Overall the design should cost more than a few dollars and will be able to cut simple, straight flute milling bits.
The current plan is to attach the device to a faucet in a kitchen/shop sink and use the constant flowing of the water as the flushing dielectric. Overall the design should cost more than a few dollars and will be able to cut simple, straight flute milling bits.
April 3, 2012
Filed provisional for technology though MIT Media Lab.
March 20, 2012
Was a bit busy with other projects, but finally ran the tests. Wowza! it actually works! Videos and slideshow below.
Initial setup
I bought a special sideways camera for this shot.
Moar power!
This test has a capacitor in parallel with the leads and increased voltage for bigger sparks! The final embodiment of this machine should have a trimming pot along with a capacitor to adjust the voltage for different materials.
EDM engraving tool
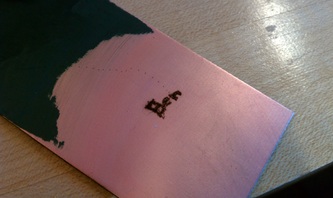
Another neat unexpected use of this tool is that it can be pretty easily used as a handheld engraver for hard metals.
March 16, 2012
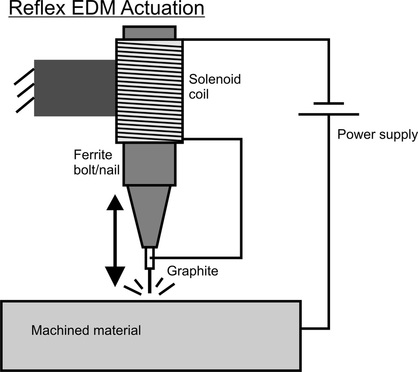
A quick schematic of how I hope this device will go together. A capacitor/power resistor could be added between the poles of the power supply for smoothing and providing more constant current.
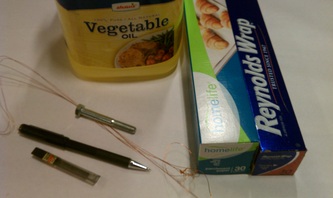
I hope to flow vegetable oil over the machining interface to flush the used up graphite. Flow will most likely come from a simple siphon. Graphite will come from a mechanical pencil. I really think that this device could be made very inexpensively out of common household components. Kitchen EDM? Grocery store EDM? Feedback EDM?
I hope to flow vegetable oil over the machining interface to flush the used up graphite. Flow will most likely come from a simple siphon. Graphite will come from a mechanical pencil. I really think that this device could be made very inexpensively out of common household components. Kitchen EDM? Grocery store EDM? Feedback EDM?
March 9, 2012
I'm really starting to like the idea of this bouncing Lorenz coil/solenoid electrode retracting system. "Pogo-EDM" or "Reflex EDM" I going to change gears in this project and focus more on making the device simple to build with conventional materials, using the pogo-retraction technique and continuous flow dielectric flushing technique (basically a large barrel of dielectric oil that is placed above the device and uses a gravity feed to continuously flush the sparking interface).
March 1, 2012
I had an interesting idea:
Typically, an EDM works by mechanically moving the electrode downwards into the material via a fine-pitch lead screw. There then is a clever analog circuit that will reverse the direction of the motor when the spark discharge occurs. The electrode will then peck away at the substrate you are machining. I really like this technique because the feed rate is governed not by external G-code but by the actual material removal rate of the process.
Taking this as an inspiration, I'd like to close the loop even further and literally use the energy of the discharged energy through the machined material to drive the withdrawing motion of the machining electrode. This could possibly be accomplished by two reverse wound concentric solenoid coils and a spring/damper. By tuning the spring/damper setup properly, you could build an EDM without a stepper motor or even a lead screw. A new direction for this project might be to design an "arts and crafts" kitchen build EDM machine from household components and a couple electronics to produce precise endmills and lead screws. The continuous erosion of the electrode is still an issue but could possibly be circumvented with a replenishing electrode like a wire edm.
