When I first started working with microfluidics, it was in a bioengineering lab and I was pretty spoiled. I had access to whatever equipment I wanted and needed and anything I put on the lab order sheet would just appear a few days later. Given that I was mostly working with cells or DNA/protein, I mostly used soft lithography techniques. It wasn't until I joined a smaller non-microfluidics focused lab and started doing my own ordering that I noticed how expensive the equipment and materials were. Although I could sink a few grand into building a microfluidic setup, it didn't really make sense to do so when I wasn't using it on a daily basis.
Below are some notes on how to make one-off devices cheaply and easily based on things I've read and tried. A lot of this is summarized from various publications and will be labelled as such.
Things made for the purposes of MAS.S62 (i.e. PDMS+Shrinky Dink valving, DIY mini gear pump, etc) are specificaly noted.
It is worth noting that if you just want a multilayer soft lithography device in your hands, the Stanford Microfluidics Foundry willl make them for you for a reasonable cost if you send them your mask files. If you need a somewhat complicated thing that you think you'll mess us several times (multiple height wafer features, lots of hard to align layers, etc) it might actually be more cost and time efficient to go with them even if you have access to everything you need...
People have come up with several inventive ways of making relatively low cost microfluidics using all sorts of materials. Here is a quick overview of some of the methods and their pros and cons.
a. Biaxially Stretched Polystyrene/Shrinky Dinks
This method uses sheets of oriented polystyrene as either the device itself or as molds for elastomeric devices. It's fairly cheap (especially if you just snag plastic clamshells from a cafeteria) and requires little else than a toaster oven. The mold methods requires a laser printer though certain pens may also be used. The device method is more reproducible with a laser cutter or a desktop mill but can be done with any small pointy object (i.e. X-Acto knife or needle).
This method uses a UV cure epoxy (often sandwiched between glass slides or plastic sheets) to form the walls of the channels. It's not exactly the cleanest method and devices that I've successfully made have been in the millifluidic and not microfluidic realm but it's quick and easy if you want to demonstrate a concept. Just don't expect to be able to get features smaller than a couple millimeters. I've never come across multilayer devices made this way but I've also never had the inclination to try given other easier methods.
c. Vinyl Cutter
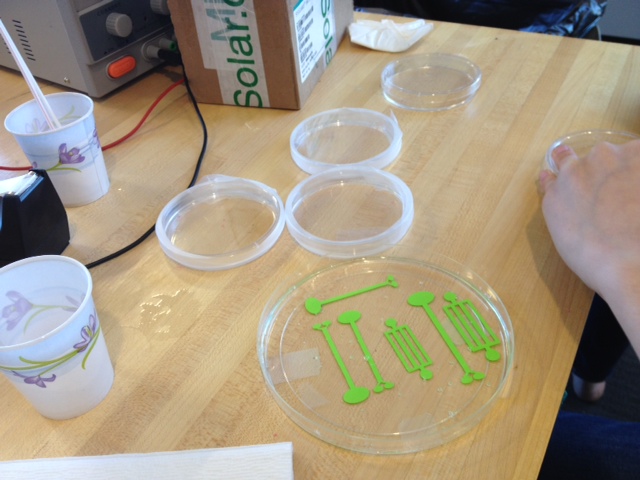
This one is pretty self explanatory, a desktop cutter is used to either cut an outline of channels to be used as a mold or to cut layers of tape or plastic transparencies to be used as the channel itself. It's somewhat similar in spirit to the shrinky dink method above without the shrinking step, but you are a bit more limited in channel geometries and heights. The resolution you can get depends on your desktop cutter. The paper below cites feature sizes down to 200 microns. Personally I've had trouble going below 500 microns using the mold method. Below is a picture of some vinyl molds that one of my UROPs (Ben Lehnert) made last semester while learning to use the vinyl cutter.
Relevant Publications:
e. Paper/Wax/thread/etc
These methods use different materials such as wax or photoresist to control fluid flow by forming hydrophobic boundaries on hydrophilic paper. Different layers are then generally assembled by double sided tape. I played around a bit with these methods when the Lab Chip and PNAS papers from the Whitesides group came out a few years ago. They were interesting and definitely would be low cost in bulk but they weren't really suited for my purposes (usually shuttling around cells or particles). The discussion below mostly does not apply to these devices.Relevant Publications:
This is all fun and good, but not terribly useful without ways to control the fluids and build more complex devices.
One of the first things you might want to be able to do is to control how quickly, when, and where different fluids move. For example, you may want external valves or pumps controlling the flow rate of fluids into the device. Alternatively, you may want valves in your device to regulate fluid flow.
a. Valves!
These can be either part of the device (i.e. membrane valves) or external or a combination of both. If you're going to control fluid flow external to the device you'll need some lightweight solenoid valves. I usually just look for small low power plastic body valves, i.e. these . External fluid control is a pretty good way to do it but if you, for example, have multiple flow streams sharing a junction and you want to keep them from mixing, you might want to put a valve right at the junction.
With monolithic soft lithography valving, this is accomplished by having a flow layer and a control layer. When pressurized, the control layer presses up or down into the flow layer and inhibits flow. The valving can be complete or partial depending on relative channel geometries and level of pressurization. (See Diagrams here) If your entire device is made of something like PDMS, there are some tricks to getting the profiles correct, but it's pretty straightforward. If, however, your device is a hunk of hard polystyrene, this is a little bit more difficult. The link below explores the possibility of sandwiching an elastomeric layer between polystyrene layers to make valves.
PDMS+Shrinky Dink Valvesb. Mixing!
Mixing on these scales is likely going to be diffusive and slow. While you can just allow for a long channel length of incorporate various bends and geometries to accomplish mixing, sometimes you just want mixing to be done quickly or actively, i.e. if you are running an experiment in a channel and want to keep the reagents mixed. In PDMS devices, this is usually done in a way similar to valving where multiple "fingers" extend below the flow channels are the fluid within them is pulsed to create pneumatic mixing. Active mixing with moving parts is a bit more complicated, especially if going the DIY path.
c. Pumps!
Now that you have valving sorted out, you might also want to use different pumping mechanisms to drive your device. A compressed air source combines with solenoid valves is simple but doesn't give you as much control over flow rates unless you stick a digital pressure regulator in the line. Syringe pumps make it easier to control volume flow rates and there are several leadscrew and linear actuator DIY versions on the internet. Here I explored the possibility of DIY mini gear pumps that can possibly be used to control flow rates, especially of viscous fluids.
Mini Gear PumpShrinky-dink multilayer bonding is covered above. Multilayer PDMS bonding will be addressed here
There are three main approaches to bonding PDMS (other than clamping them together I suppose). You can either assemble the layers when they are still tacky and not entirely cured, you can reversibly bond them by cleaning with ethanol, leaving to dry, and then assembly, or you can modify the surface chemistry by using a plasma bonder or a corona surface treater. The latter is possibly the most robust method. Next up: DIY corona treater.