Experiment overview
Note that many of the chemicals used in this experiment are very toxic. Wear gloves and a lab coat at all times. In particular, the chemicals used to make the swellable gel are toxic (TEMED, 4-hydroxy TEMPO, ammonium persulfate, and Stock-X, which contains acrylate and acrylamide). Acryloyl-X is also toxic. Disposal of these chemicals should be done using a chemical waste stream.
On the first day, you will treat a brain slice with acryloyl-X, which involves an overnight (or >6 hrs) incubation. The acryloyl-X molecule has two important components: 1) An acrylamide group, which can participate in free-radical polymerization, and 2) an NHS ester that reacts with amine groups to form a covalent bond. ( See the structure of acryloyl-X here ). Incubation of the brain slice with acryloyl-X will covalently modify the amine groups on proteins such that they will be covalently linked to the gel during polymerization. If we had applied fluorescent antibodies to the sample, they would also be covalently labeled. Before treating the sample with acryloyl-X, you will examine it under the microscope to see what it looks like before expansion.
On the second day, you will embed the brain slice in a polyacrylate-polyacrylamide co-polymer gel. During polymerization, the gel will form throughout the tissue, and any acryloyl-X-modified proteins in the sample will be incorporated into the gel. Following polymerization, you will incubate the gel in a digestion buffer, including the protease Proteinase K, overnight to digest proteins and mechanically homogenize the sample. Fortuitously, the beta-barrel structure of YFP makes it more resistant to protease digestion than most other proteins, so the YFP expressed in the neurons of the Thy1-YFP mouse will retain their fluorescence.
On the third day, you will expand and image your samples. Expansion is accomplished by performing a few washes in pure water to remove salt from the sample. The polyacrylate is very hydrophilic and will absorb water. It is more hydrophilic in the absence of salt, because salt ions shield the carboxyl groups on the polyacrylate. Thus, washing out the salt will cause the gel to absorb water and expand. Following expansion, you will image the sample to observe the resolution gains achieved by the expansion process.
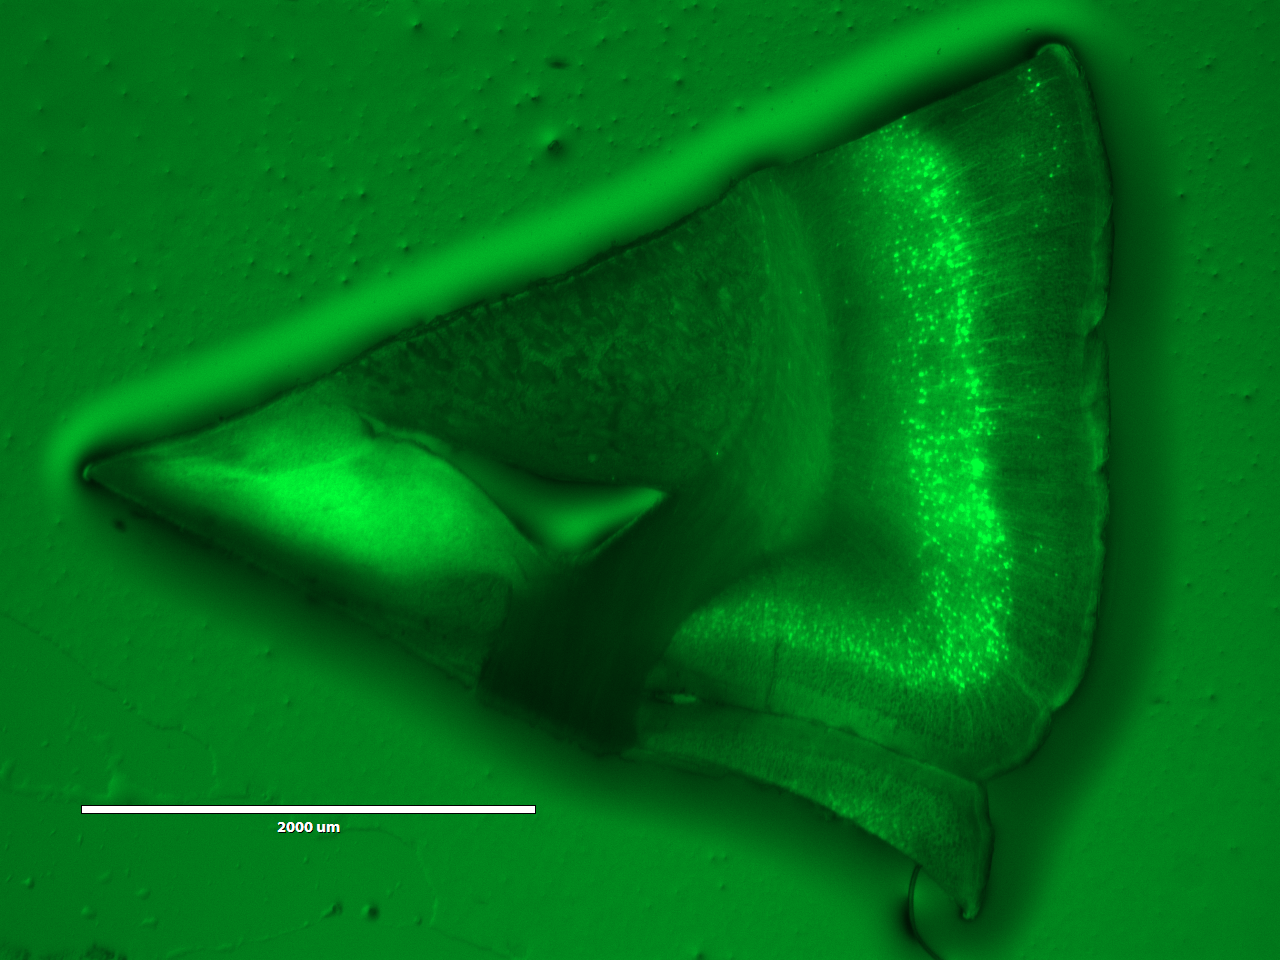
Looking at the mouse brain under the microscope with GFP on was really interesting. It should where the cell bodies and it was actually possible to adjust the focus of the microscope to look at the layers beneath and estimate the density of the cell bodies.
This isn't really the first time for me to work with mouse brains, and I have read a few papers prior to this lab regarding expansion microscopy from another class focusing on neuron-controllled prosthesis. However, the interesting factor was the fact that I had an unusual piece of brain shaped like a pizza.
Protocol:
Day 1: Acryloyl-X Treatment
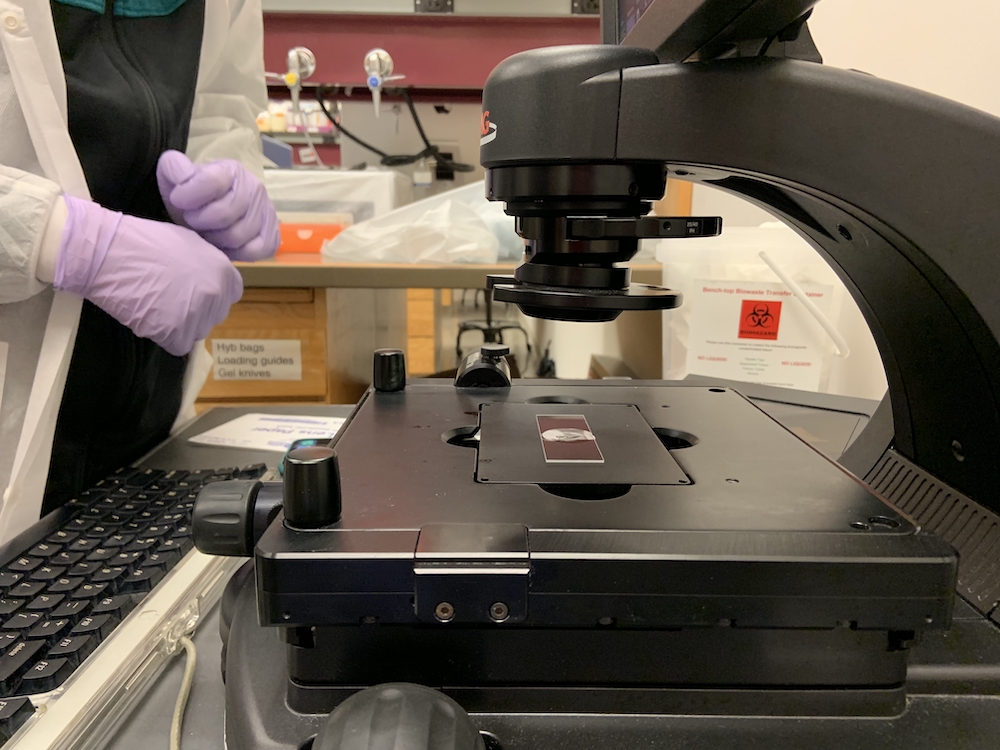
To see what the brain slice looks like before expansion, look at it on the microscope using settings for GFP. Place the brain slice on a microscope slide so that it can fit on the microscope stage. Keep the tissue moist with PBS during this process so it does not dry. Use a paintbrush to gently transfer the brain tissue to the slide.
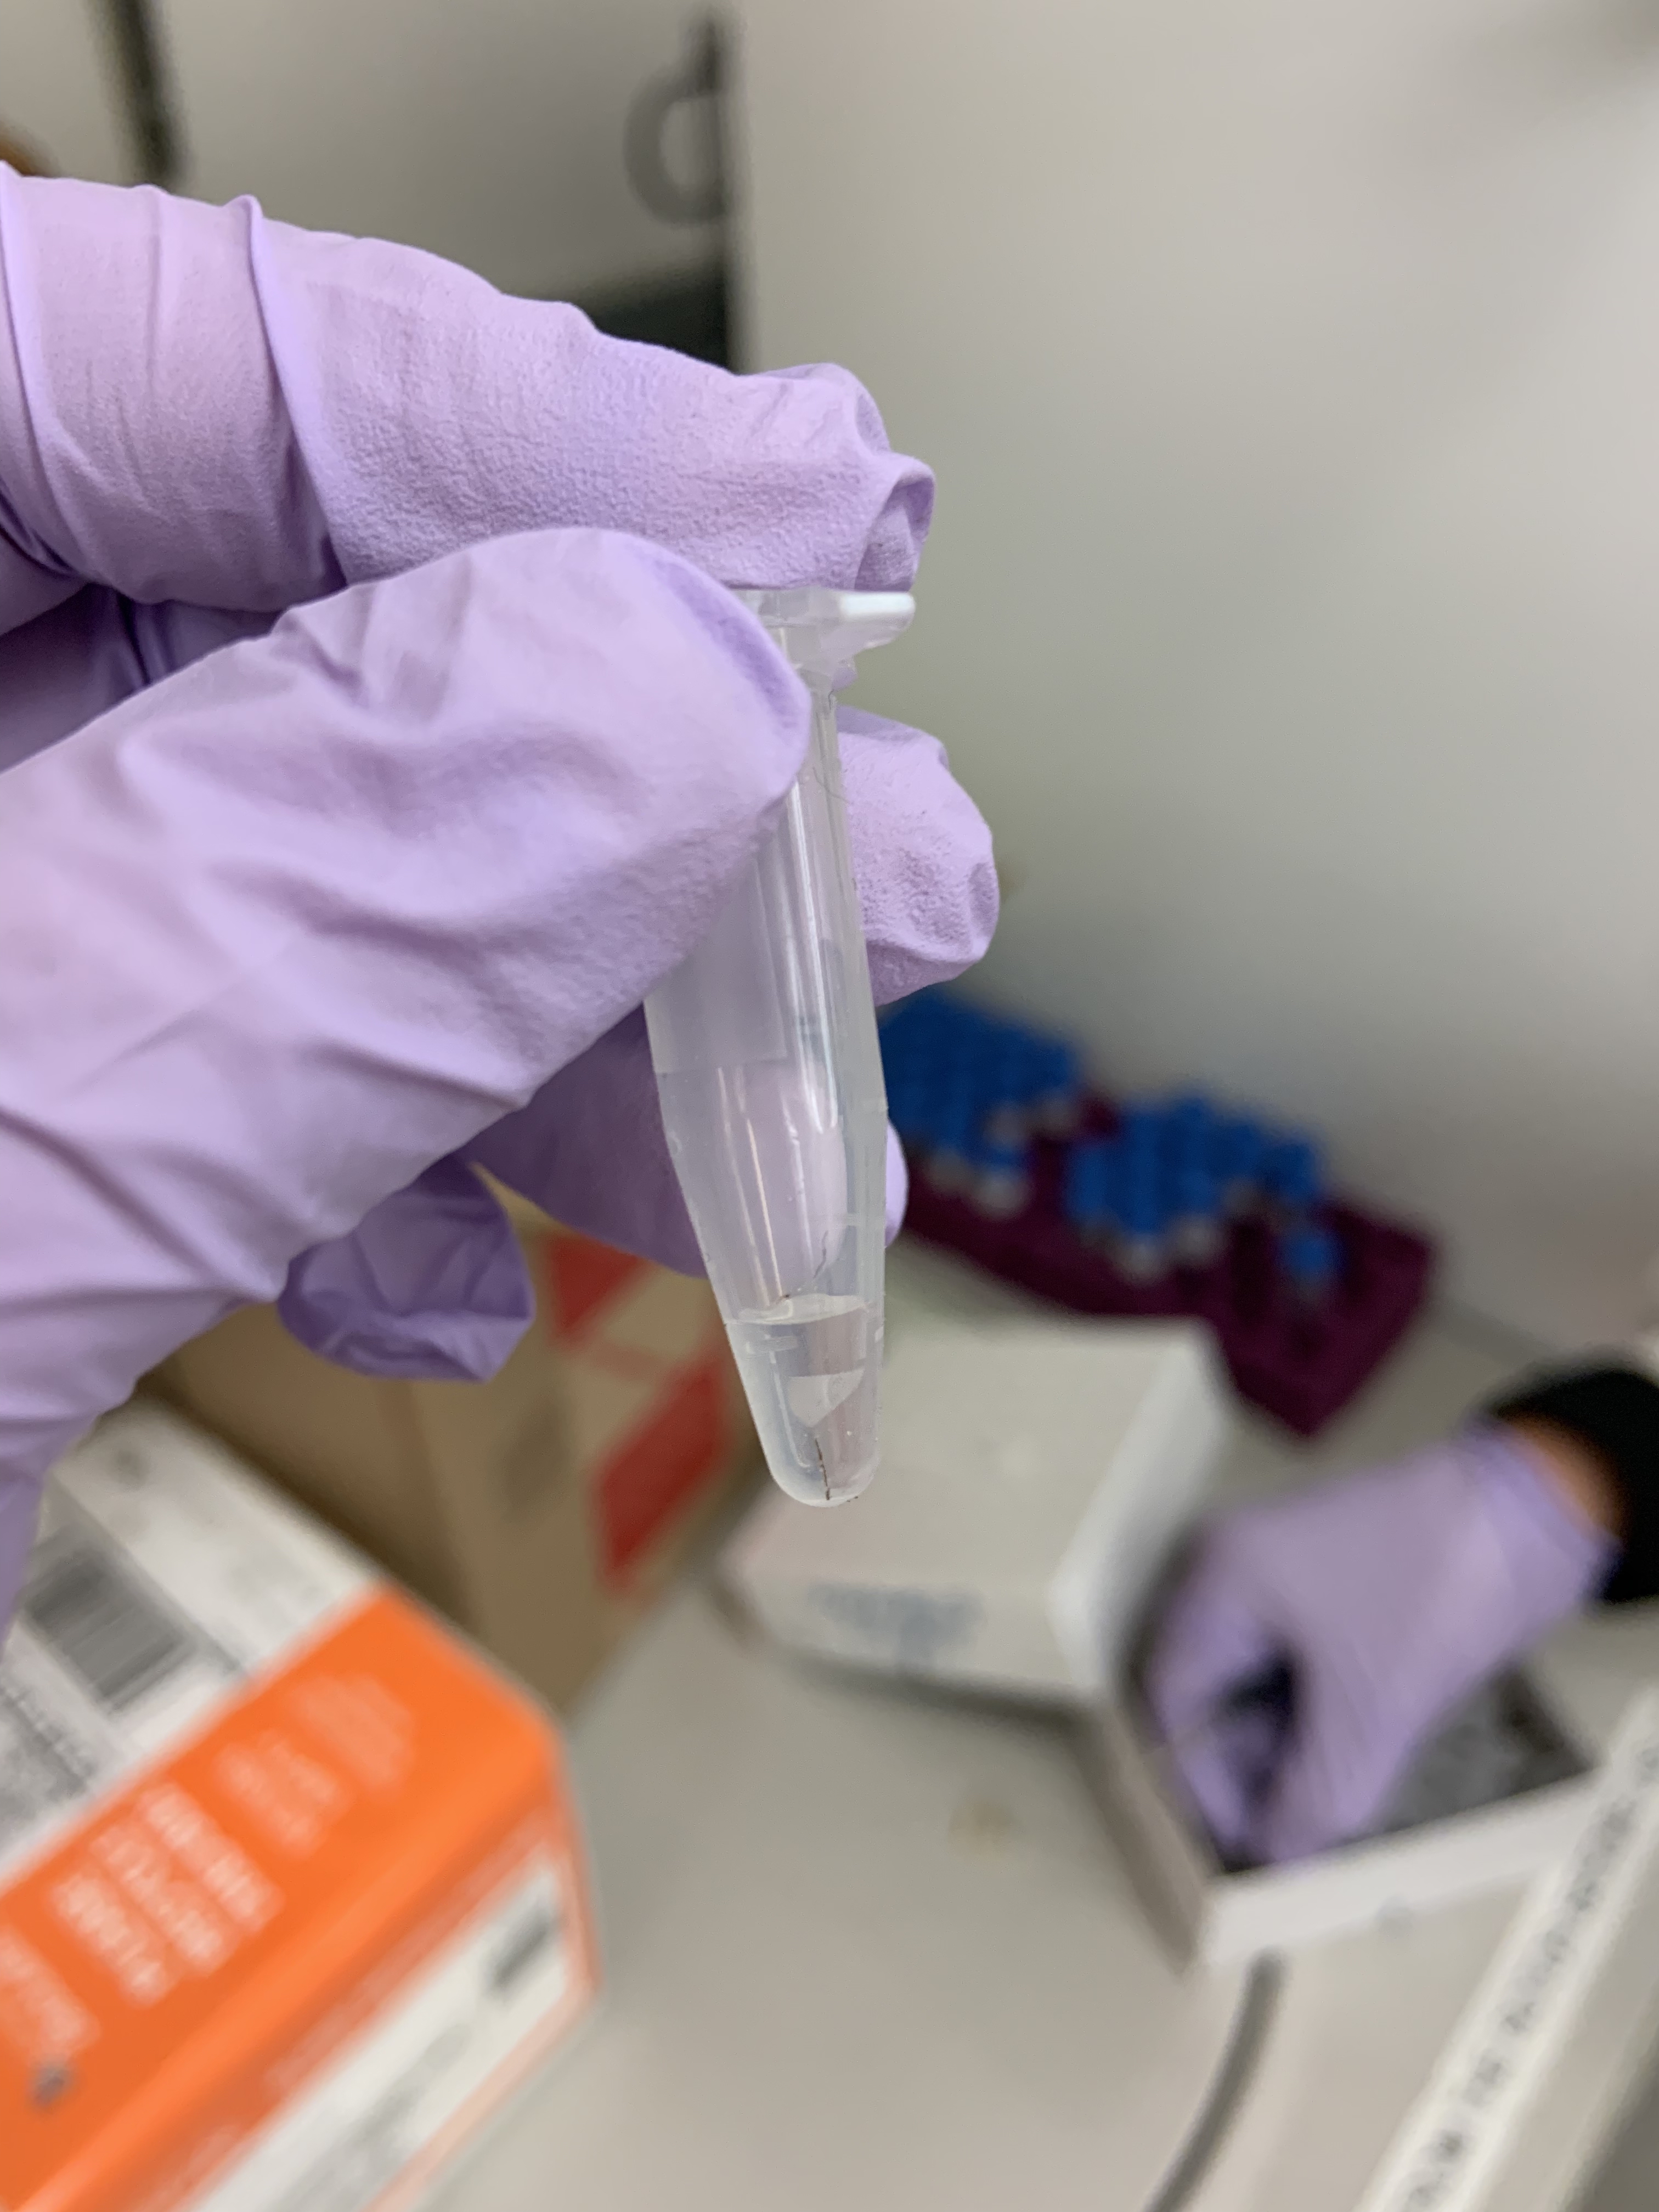
Prepare 100 uL of 0.1 mg/mL acryloyl-X in PBS by diluting the 10 mg/mL stock 1:100 in PBS. Put the brain slice into the solution and incubate >=6 hours at RT (overnight incubation is ok).
Day 2: Gel-embedding and digestion
Set an incubator oven to 37C and place an open container containing water (eg a petri dish) in the bottom, to humidify the incubator.
Rinse the brain slice with PBS to remove residual AcX, and then wash it twice for 3 minutes with PBS.
Prepare monomer solution ON ICE. Vortex the solution immediately after adding each component. Keep the solution on ice while not vortexing. 4HT is an inhibitor of polymerization, and should be added first to prevent premature gelation. APS generates free radicals to initiate polymerization. TEMED accelerates radical generation by APS.
Using a paintbrush, gently transfer the brain slice into the activated monomer solution so the solution can permeate the slice. Gently flick the tube several times so that residual PBS on the slice disperses through the monomer solution. Incubate on ice for 30 mins.
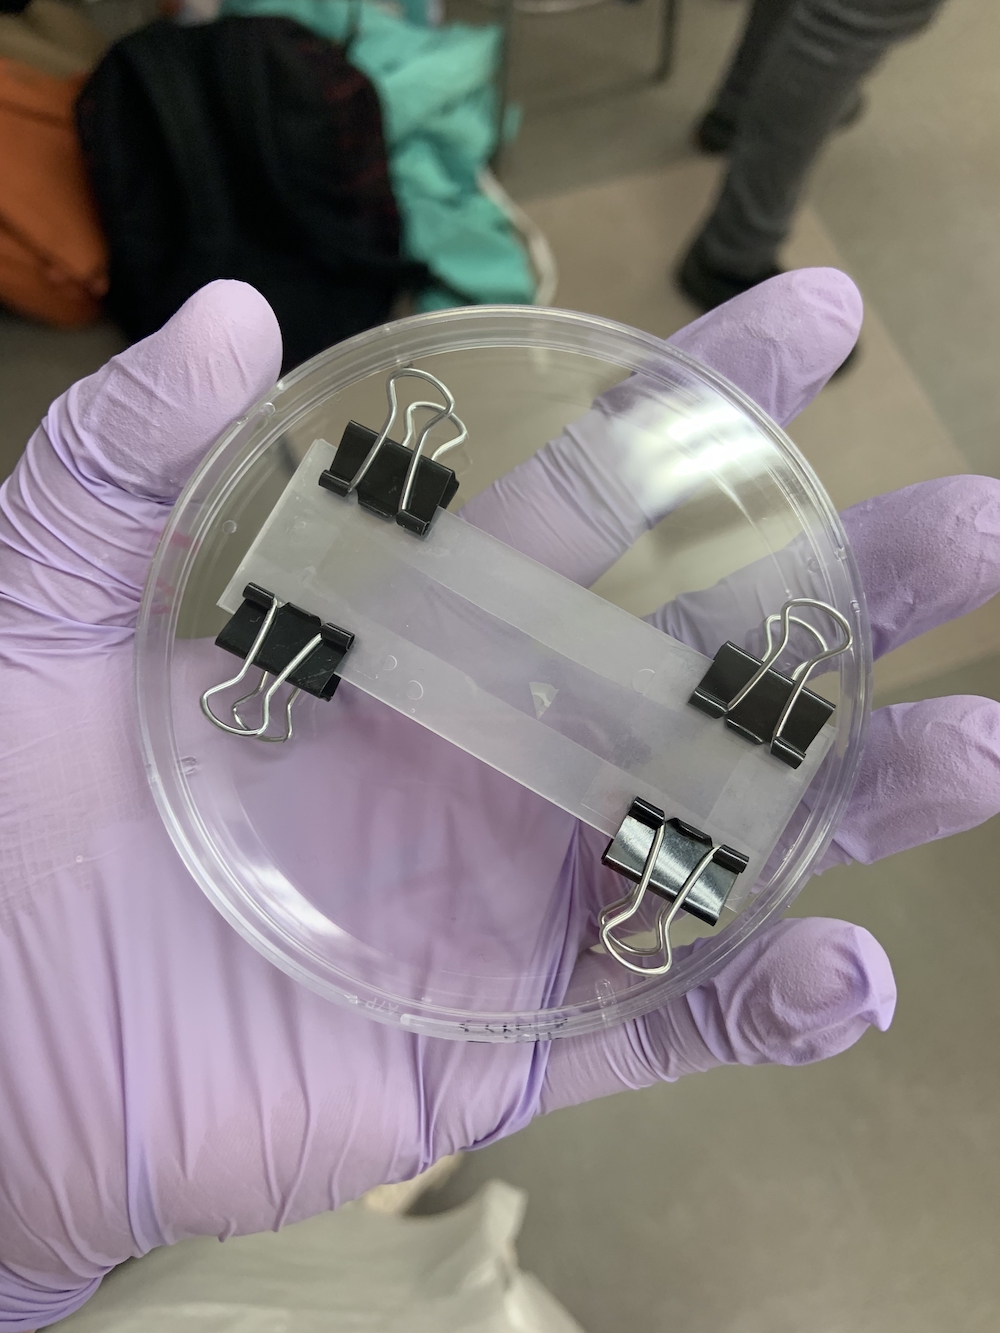
While the brain slice incubates in monomer solution, prepare a gelation chamber. Obtain two glass slides (~ 3"x1"), two coverslips (~ 22mmx22mm), and some parafilm. Wrap one of the slides in parafilm such that one face of the slide has a smooth flat surface one parafilm layer thick. (The other face of that slide will have the folded edges of the parafilm on it.) Press the parafilm on the flat side to ensure there is no gap between the parafilm and the slide. Place a coverslip at each end of the smooth face of the parafilm-wrapped slide. Place this assembly into a 10 cm petri dish, and keep the second microscope slide ready at hand.
When the brain slice has incubated nearly 30 mins, prepare 200 ul of fresh activated monomer solution by repeating the procedure in 3). Keep it on ice and immediately proceed to the next step.
Using a paintbrush, transfer the brain slice onto the parafilm-coated slide so that it lies flat. (Keep in mind that your paintbrush is now contaminated with toxic acrylamide and other chemicals.)
Pipet 40 ul of the freshly made activated monomer solution onto the brain slice.
Place the second glass slide on top of the two coverslips so that the brain slice is sandwiched between the slides, surrounded by activated monomer solution. Avoid bubbles, since oxygen inhibits the polymerization reaction.
Apply two binder clips on each end of the sandwich to hold it together.
Fill the remainder of the chamber with activated monomer solution by carefully pipetting between the microscope slides into the chamber. Avoid bubbles.
Place the sample into a petri dish, and incubate it in a humidified 37C incubator for 2 hours for polymerization. (1.5 hrs or 1 hr incubation is ok in a pinch, but signal will be stronger with 2 hour incubation because more fluorescent proteins will be retained when the gel polymerizes more completely.)
When the gel has almost finished polymerizing, prepare digestion solution. Put the digestion solution into a 35 mm petri dish.
Open the gelation chamber by gently separating the two glass slides with a razor blade. The gel should stick to the slide without parafilm.
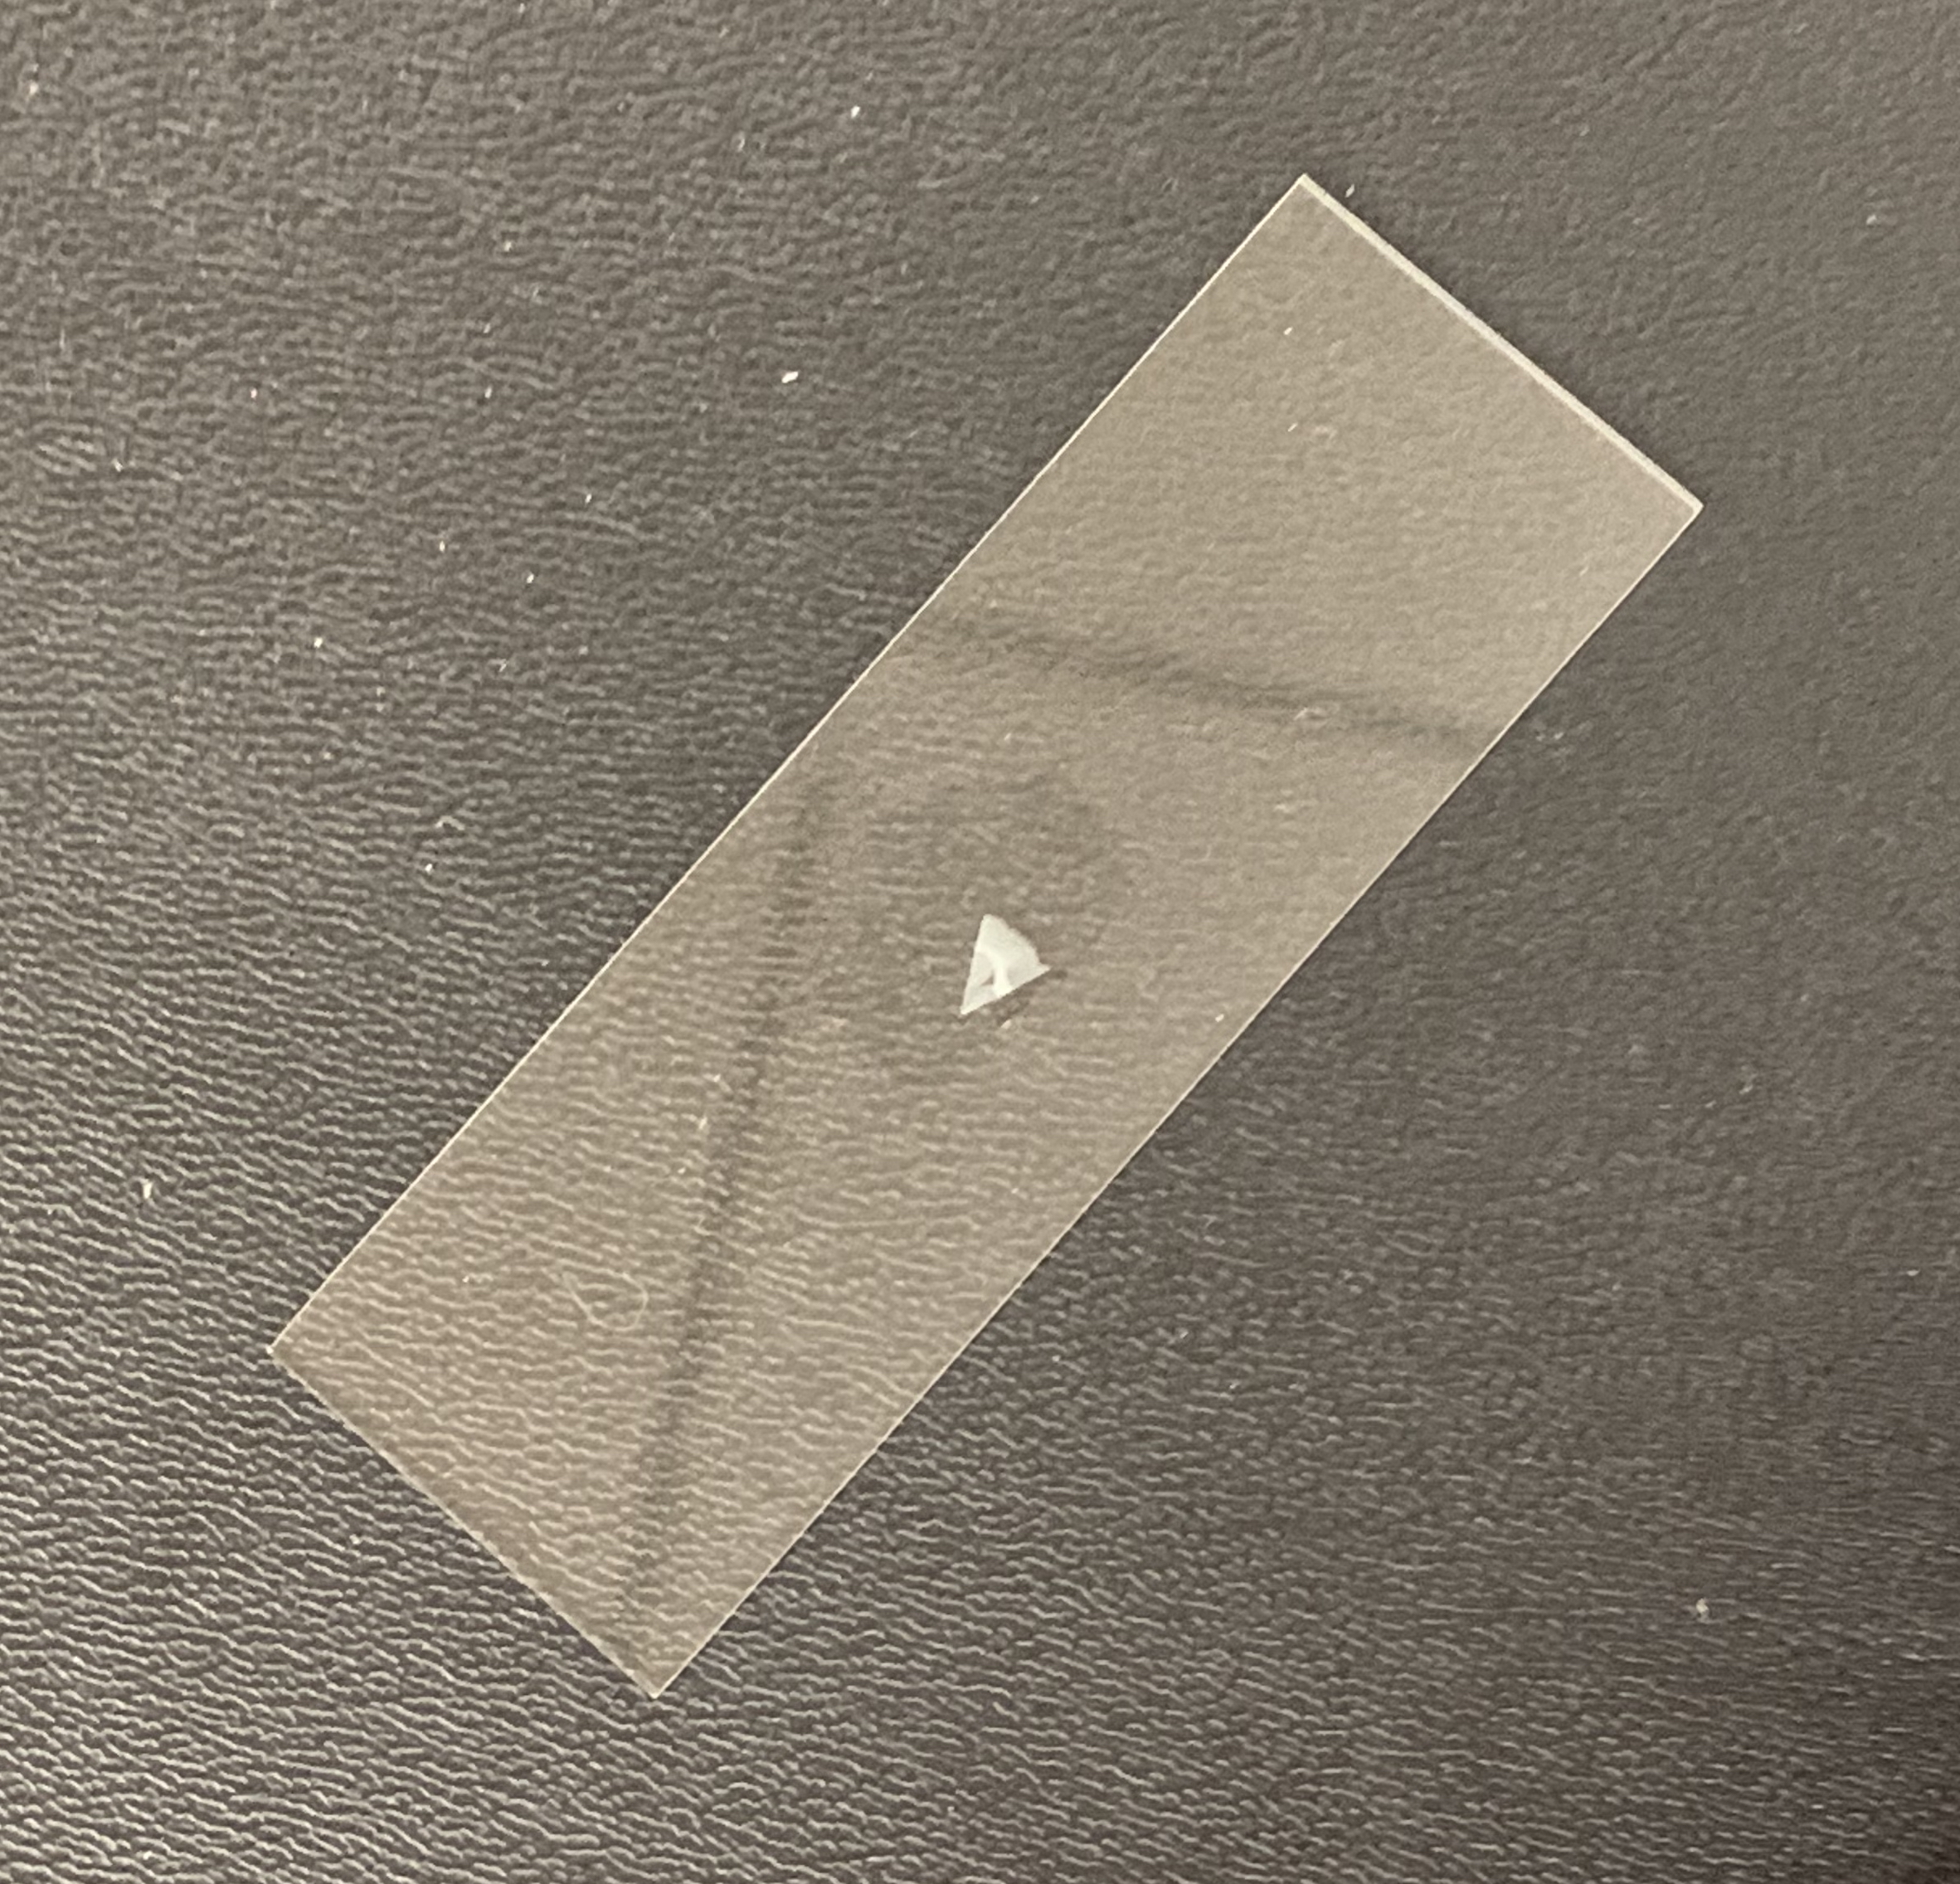
Cut away the gel surrounding the brain slice using a razor and dispose of it as chemical waste. Keep in mind that your piece of gel should be small enough that it will fit in a 35 mm petri dish after ~4.5-fold expansion in each dimension.
Carefully pick up the gel-embedded brain slice using a moist paintbrush and place it in the digestion solution in the 35 mm petri dish. Incubate overnight at room temperature.
Day 3: Expansion and visualization
VERY CAREFULLY pipet away the digestion solution. Be careful not to damage the gel with your pipet. The gel will already have expanded ~ 2-fold and can be difficult to see.
Gently rinse the gel and petri dish with deionized water to remove residual digestion solution.
Wash the gel 3 times for 10 minutes in deionized water. The gel will expand during these washes, which makes it increasingly important to be careful not to damage the gel with your pipet as you remove water from the dish. Be very careful as you pipet.
Remove the water from the dish, and image the expanded brain slice on the microscope using the settings for GFP.
That was a rather long procedure. The transferring of the mouse brain between was hard to do with the brush and I kind of hoped that there would be better and easier ways to do so, and the injection of the gel / polymer was also difficult considering the fact that the brain slice was already firmly clamped in between the two class cover slips.
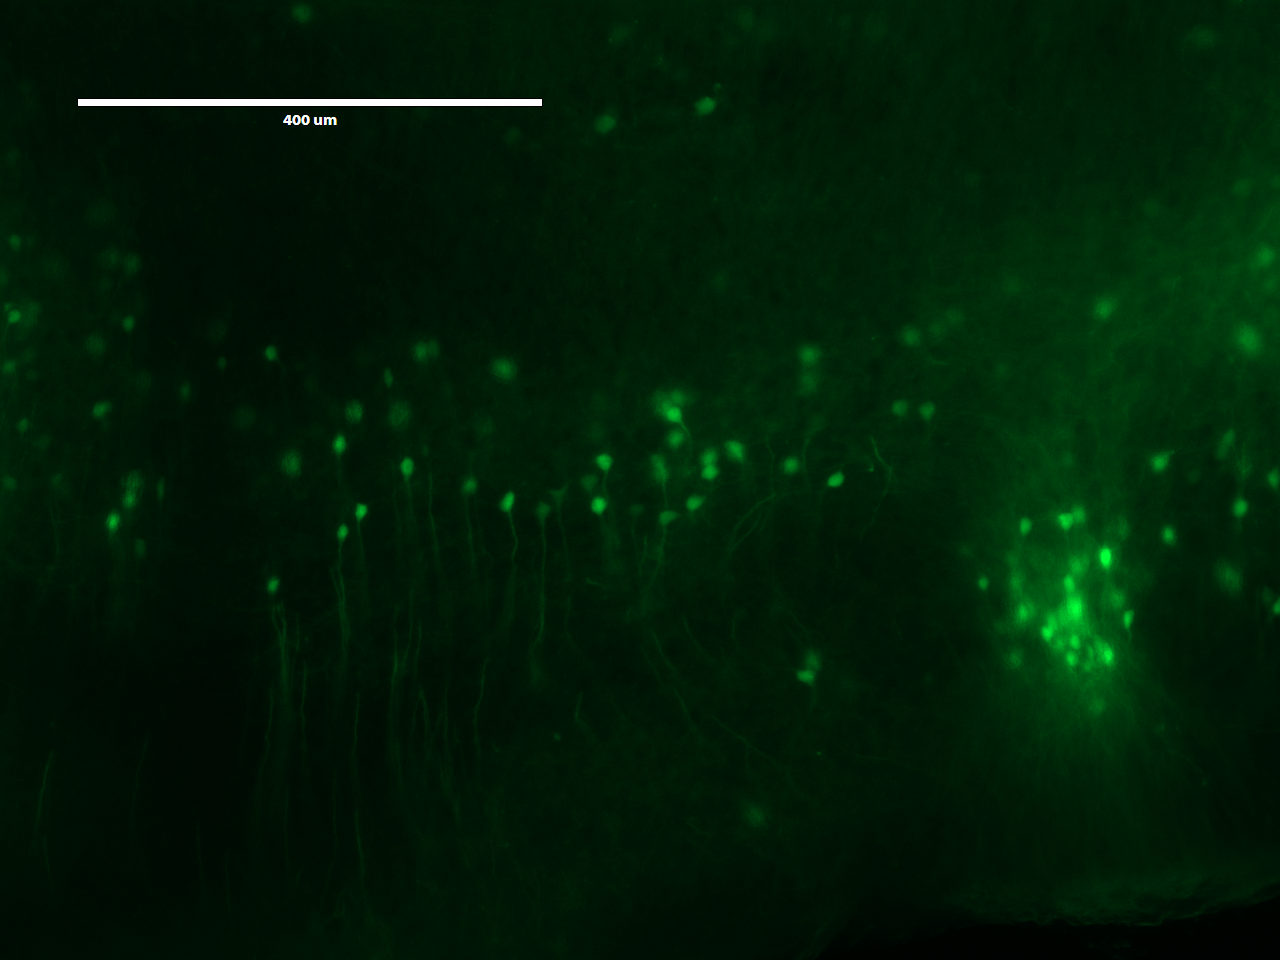
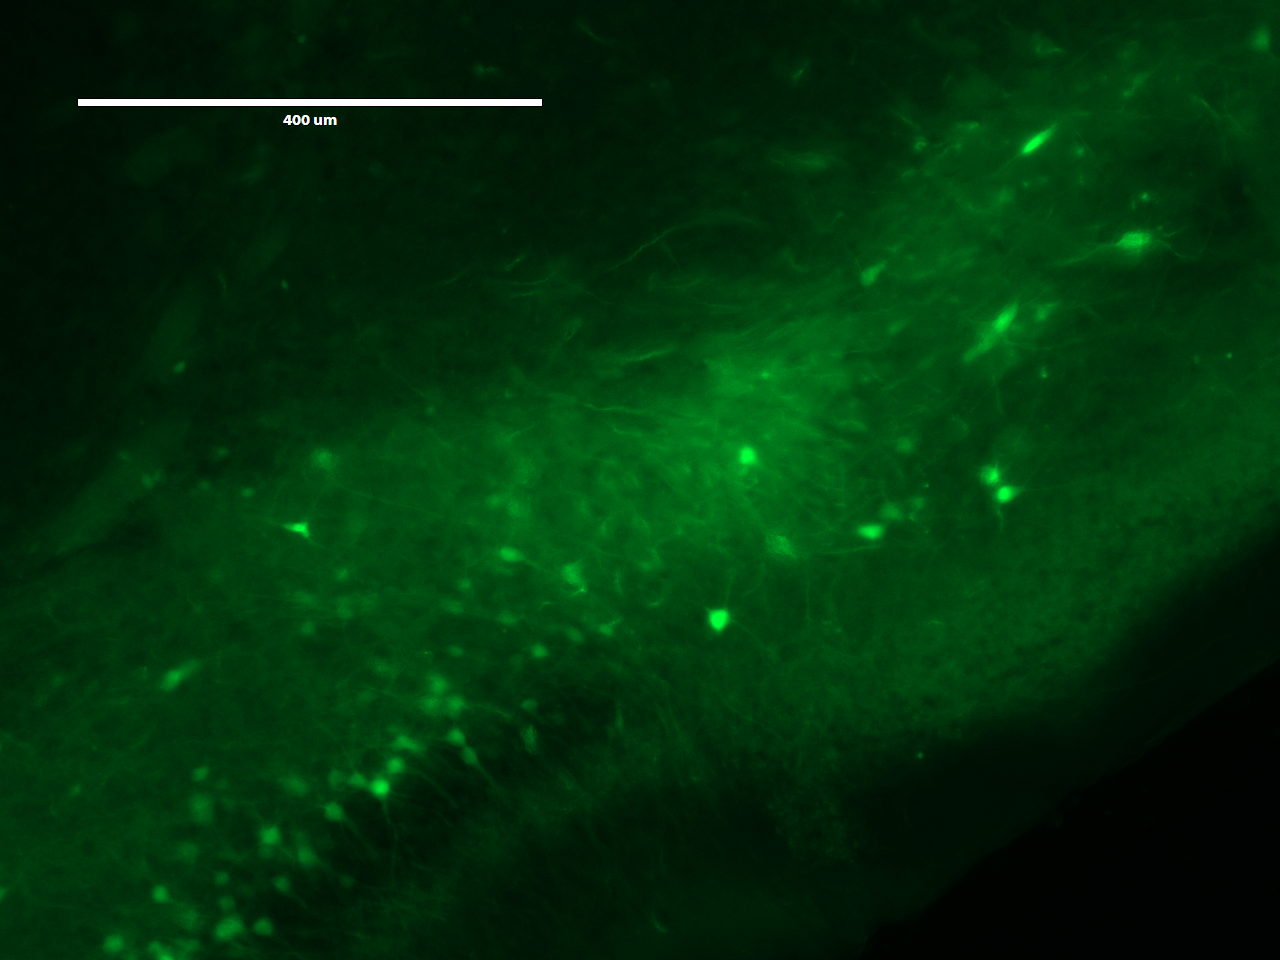
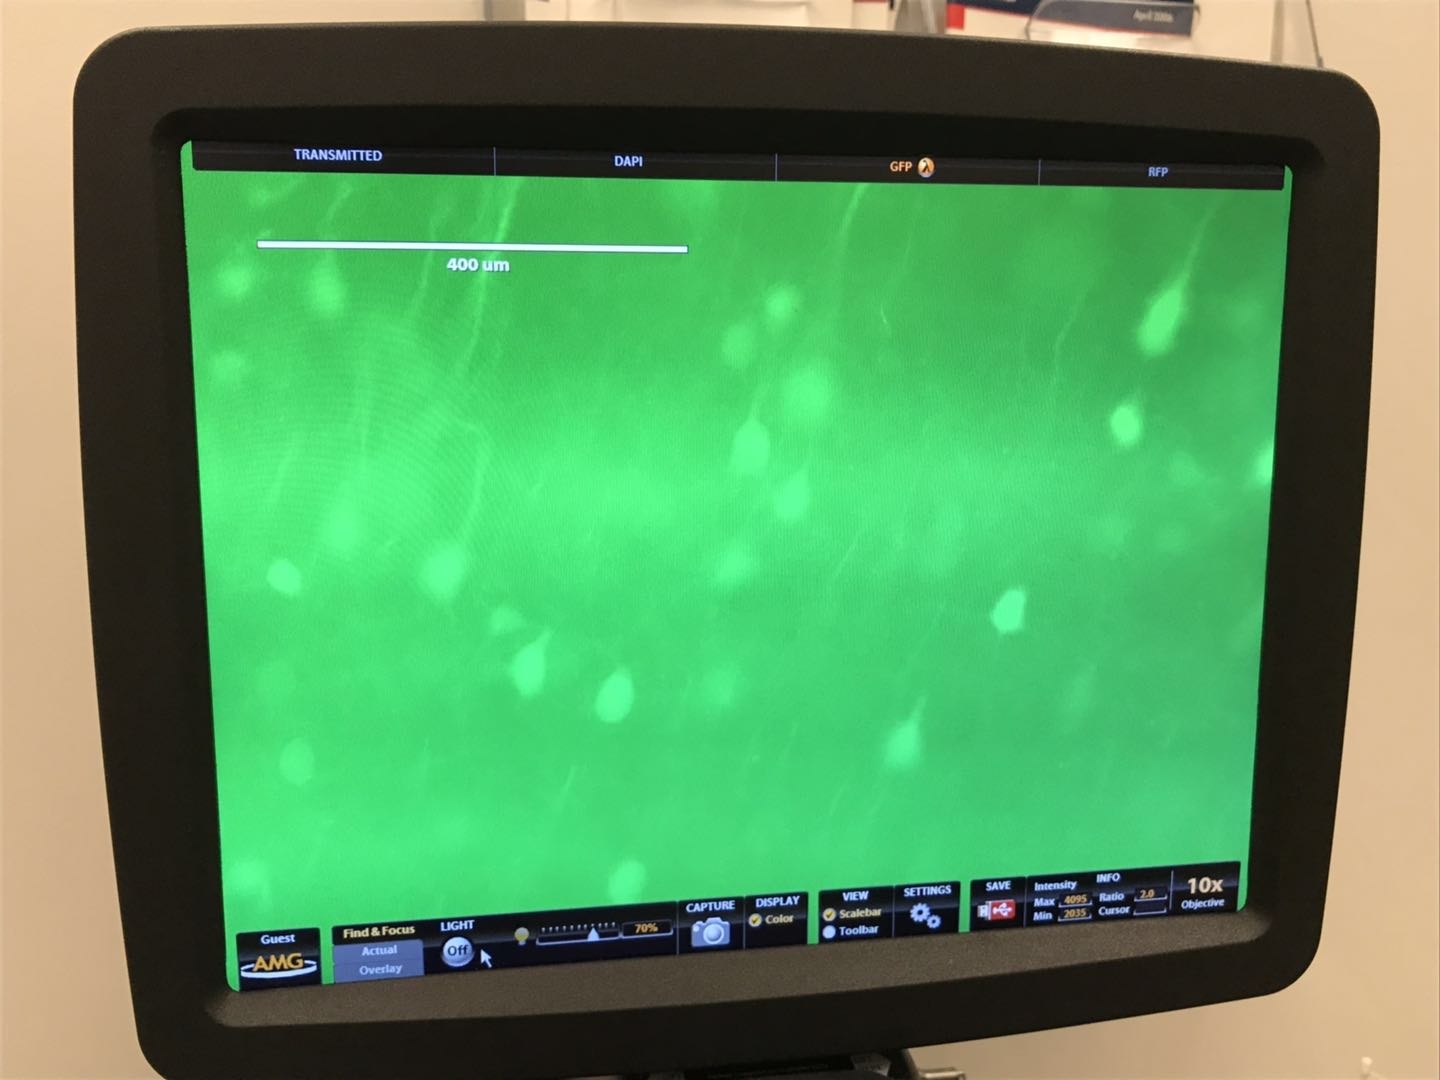
The top two images shows an expanded view of the original slice of brain, while the bottom image (shame that the USB was full and we couldn't print screen) showed a much zoomed in version of the image under the same microscope setting. It is hard for me to judge if expanding the brain slice helped with identifying anything else than the cell body, but seeing the upgrade in definition definition definitely suggest greater implications of this technology.