
The modela is a nice little milling machine that cranks out most of the circuits you will need for HTMAA. To be able to mill on it, you need to have FR1 which is a paper based copper plate. You cannot mill the fiberglass copper plates on the modela as it will break your bit and the dust it will create is irritant. The FR1 is more tan than the fiberglass, which is more green, and the FR1 is in stock in 016 in 2x3 inch and 4x6 inch pieces.
This tutorial is for using your own .pngs (e.g. exported from Eagle). If you are using a .png, the traces should be white and the background should be black. Do not make the edges of your board too wide, as it will just be more work for the modela to mill those out. If you need help designing the board, check out the PCB design page.
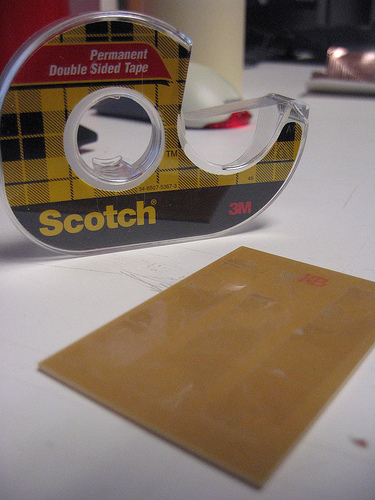
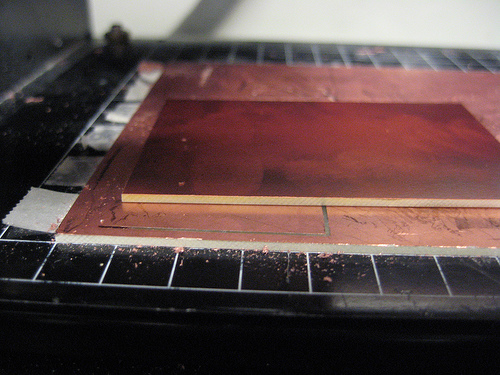
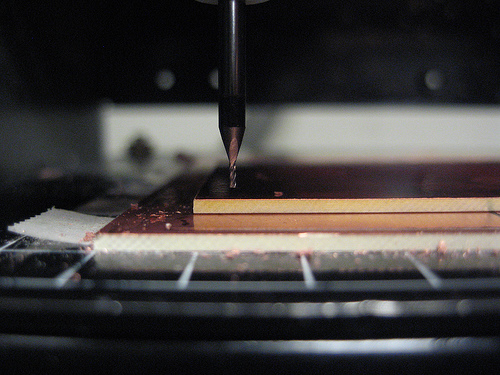
First make sure you have a sacrificial board underneath the board that you are milling. When you drill out the PCB you are making, you might go further than the actual thickness of the board. Attach the sacrificial board and the board you are milling out to the modela with double sided tape. Make sure the tape is not overlapping in any way as to not make the base for your board uneven.


First, you need to use png_path to convert the png to a generic path file. This is the command that generates the contours which will form the toolpath. The example below uses 0.4 mm as the tool diameter; this corresponds to a 1/64" endmill. It creates four contours; you may want to use more (clears more of the board) or less (goes faster).
png_path fabisp-traces.png fabisp-traces.path 1 0.4 4 # in out error diameter contours
You can check the path using the path_view command:
path_view fabisp-traces.pathNext, you need to generate the machine-specific rml file that will be sent to the Modela. The speed should generally be 4 mm/s for milling out traces with a 1/64" endmill and the depth should be -0.1 mm. If your endmill is new, you might want to reduce the speed even further (e.g. 2 or 3 mm/s) as they tend to be more brittle for the first few boards. The (x, y) origin (in mm), here (25, 25), indicates where, relative to the lower-left corner of the grid on the bed of the Modela, the origin of your board will be.
path_rml fabisp-traces.path fabisp-traces.rml 4 25 25 -0.1 # in out speed x0 y0 z0
Picking a bit
To mill out the traces of a circuit board you will generally want to use a 1/64th endmill, but if you have a particularly rough circuit you might be able to get away with 1/32nd (if so, you'll need to adjust the commands in the previous section for a 1/32" endmill).
Putting the bit in
Turn the Modela off and then on again to make it forget its previous z-zero setting. You'll probably need to press the view button to take it out of view mode. Then, slide the bit into the modela. When you put the bit into the modela, you don't have to tighten the set screws all that much. Snug is fine.
rml_move 25 25 # x y
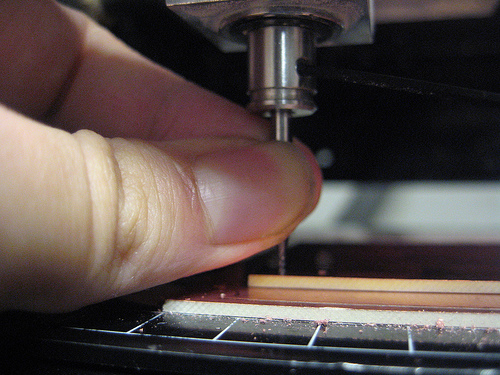
Then lower the bit as close as you can get to your copper plate but without touching it by keeping the down button pressed. If you only press the button once, the head will move the bit down exactly 7 mills.


Once you have the bit as close to the copper, loosen the set screws again and push the bit all the way onto the copper. You should hear a small tick. Hold the endmill against the board and tighten the screws again. Don't overtighten. You have now set the z origin.
To send your job to the modela, use the rml_send tool:
rml_send fabisp-traces.rml
It will take a while to cut. If something seems wrong, you can press the view button to pause the job. Once it's done, you can press view to get at the board, and then vacuum up the dust with the dust buster.
This is the same as sending a job for the traces, only you have to use the 1/32 bit, which has a different speed, diameter, and depth. For example, you might use the following to generate your rml file:
png_path fabisp-dim.png fabisp-dim.path 1 0.8 1 # in out error diameter contours
path_rml fabisp-dim.path fabisp-dim.rml 0.5 25 25 -1.65 # in out speed x0 y0 z0
You'll need to re-zero the Modela for the 1/32" bit. Follow the procedure above, remembering to turn the Modela off and on again to forget the previous zero setting.
From: Agnes Chang's general guides
First, pause the modela immediately: hit the View button on the machine to send the head back to its resting position. Hold down the Up and Down buttons simultaneously until the view light is blinking. This indicates that the modela still has an unfinished job in queue; if you try to shut off the modela now and turn it back on, it will resume the job from where it left off.
Then stop the computer from sending the rest of the job: fire up the Terminal and type in the command
ps -aux | grep catthis will show you the process IDs of all currently-running processes that have "cat" in the name (you can find out more about any Unix command by googling, or through Wikipedia, such as the ps command page here.) In our case, cat is the process that sends print jobs to the modela. Look for its process ID, and terminate the modela job by entering
kill xxxxwhere xxxx is the process number. If you are successful in killing the job (which might take a second), the View light on the modela should stop blinking, thereby indicating that the machine is once again ready to receive a job. If you cannot kill the cat process, just restart the computer.
In our class we had two instances of this and the problem+solutions were: