
Beam Dynamics Laser Cutter Tutorial
Beam Dynamics
laser cutter.
Creating a
Drawing
1. Create the
pattern you are going to cut using a drawing program like
CorelDraw
2. Export
your drawing as a dxf or in HPGL (.plt) format
The Beam's LaserLink software can import HPGL
files (.plt), and Drawing Exchange Format files (.dxf).
If having problems opening dxf file in Laserlink open in Rhino
and save as default dxf this should work.
Some have had more success with HPGL files. CorelDraw11 lets
you export drawings as .plt files. An HPGL file is
also easy to generate programmatically--it's a list of x,y
coordinates that are preceded by either Pen Up (PU) or Pen
Down (PD) commands. A PU command moves the plotter to
the specified point without cutting/drawing and a PD command
moves the head while cutting or drawing.
If you must
use .dxf files, make sure all of the lines in your drawing are
on the same layer and that your drawing contains no groups.
Nested groups especially cause all sorts of problems in the
LaserLink software.
Laser Link
Software
LaserLink
software manual
3. Open the
LaserLink software
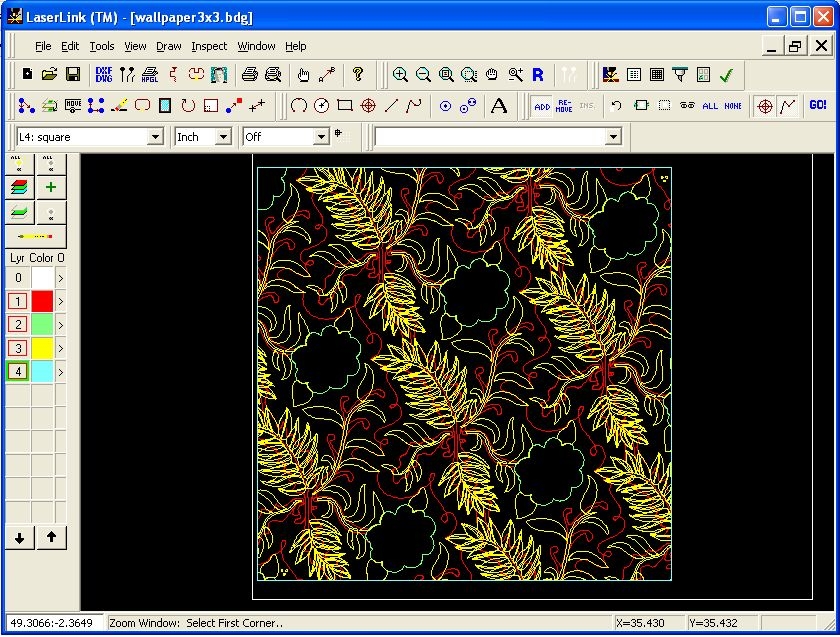
Here's what
the software looks like with a 4 layer drawing. (Each layer was
imported as a separate HPGL file.)
4. Import
your drawing
Go to
File/Import and select the appropriate file format
5. Editing
your drawing
The LaserLink
software is not terribly user friendly. To accomplish any
action:
a) left mouse
click
b) select the
area of the drawing you want to modify
c) left mouse
click again
d) right
mouse click
e) left mouse
click to begin your action (moving, copying, etc.)
6. Save your
drawing.
If you don't
save your drawing, edits that you made may not be reflected in
the toolpaths.
7. Create the
toolpaths for your drawing
a) Create a new material entry in the "database
table" with the speed and power settings appropriate for your
material. Click on the "database table" icon and fill in the
entries for your material.

b) Define the
"process table", the laser cutter toolpath, for your drawing.
Click on the "process table" icon. For each layer in your
drawing, select the appropriate material.

c)
Create the "process" by clicking the "process" icon or by
clicking "process" after you've created the process table. Save
the process file to: C:/BeamDynamics/JOBS.

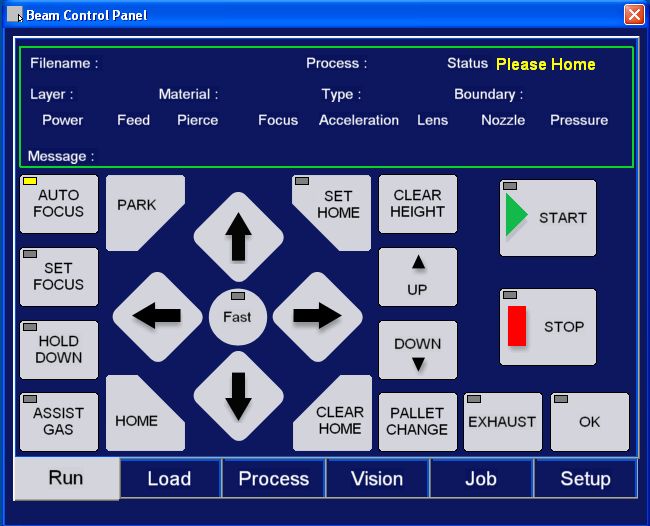
8.Open the
Beam HMI software
This is the
control interface to the machine. This is what the main window
looks like.
9. Home the
machine
If you get a
motor fault message (which I sometimes get the first time I try
to home the machine), turn the machine off with the key and with
your hand move the head around a bit in the x and y directions.
Turn the machine back on & rehome.
10. Load your
job
Click on the
Load button and browse to your file.
11. Press
start to begin cutting.
Troubleshooting
Note: the
machine and software are pretty buggy, frequently exhibiting
inexplicable behavior and errors. I've listed a few of the
problems (& solutions) I've encountered below, but the list
is by no means exhaustive. When in doubt, home the machine. If
that doesn't work, cycle power. If that doesn't work, restart
the software.
Problem: I
press Start in the Beam HMI software, but nothing happens.
Solution: Home the
machine and try again.
Problem: I
press Start, and the head moves, but it doesn't cut.
Solution: Make sure
the laser cooler is turned on and try again. If that doesn't
work...
Home the
machine and try again.
Problem:
Motor head fault.
Solution: Turn off the
machine, manually move the head around with your hands. Turn the
machine back on. Home.
Problem:
Focusing error/fault.
Solution: Home the
machine and try again. If that doesn't work...
Move the Z
axis up or down a bit using the controls in Beam HMI (Be careful
not to crash the table into the head of the laser!). Home the
machine & try again.
Problem:
Laser head keeps "crashing" into loose material on the table.
This tends to be a problem with soft/light materials that are
blown around by the ventilation system.
Solution: To help fix
the problem, temporarily remove the bottom cone nozzle from the
laser head.