Roland CAMJet Pro II Quick Reference/Guide
This is a quick reference guide for the Roland CAMJet Pro II Plotter. This machine performs 2 basic functions; printing and cutting. The general purpose of this machine is to print and cut to size images that you import into the COLORIP software.
The software package that accompanies this machine, COLORIP, is primitive in that you cannot edit images in the software itself. A third party software is
necessary for image editing; CorelDRAW is installed on this machine and is a user-friendly software (those of you familiar with the lasercutter should be able to use this software with ease), although other software may be used provided that you can save/export your image as a .ps, .pm, .pdf, .eps, .tif, or .jpg file.
The Basics
1). Choosing and Loading Paper
Choose an appropriate paper - a vinyl or matte paper, which can be found along the wall in the white wire bins.
In the back of the machine, the roll of paper sits on top of the two aluminum bars, use the white collars flanges to prevent side-to-side motion of the paper roll. Lift the paper loading lever (top of machine), load the paper into place aligning the front edge of the paper and close to right side of the machine, and pull the lever down again. The machine display will read: Roll Piece and a blinking black cursor appears, make sure the cursor is on Roll. Press enter. The display will say press Setup, do so, and the paper should be loaded. If the display has errors or the paper rolls out for a good 7 ft, repeat this MAKING SURE that the black cursor is on Roll NOT Piece.
2) The Software
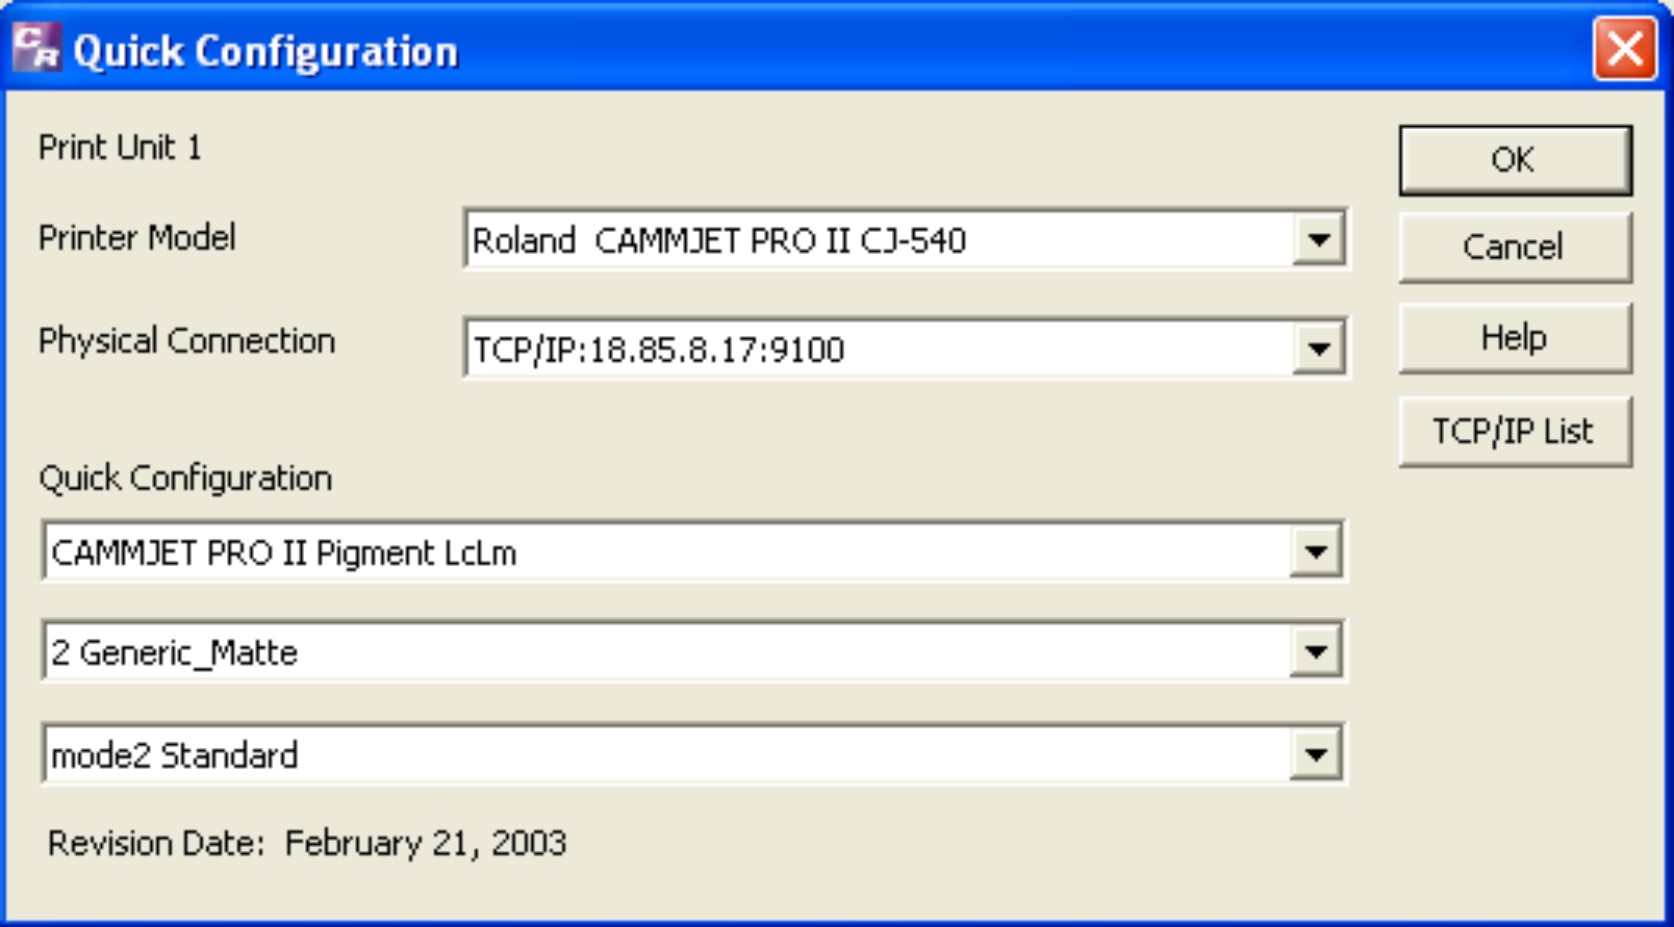
Open COLORIP, the software for the Roland plotter. Next open the image you wish to print. You need to check a few configurations at this point:
Under Configure -> Check Configuration this menu appears:
On this page, the only pull-down menu that changes is the paper type, which is second from the bottom. Here, 2 Generic_Matte is selected as the paper type. Each paper type has its own quality selection: For vinyl paper, select WMWV Matte Vinyl, Heavy 150g matte paper (a regular paper in the bins) select PMP2 Heavy Matte 150gram.
Next we need to check cutting options: At the bottom of the Options menu, select Cutting. There are two options here:
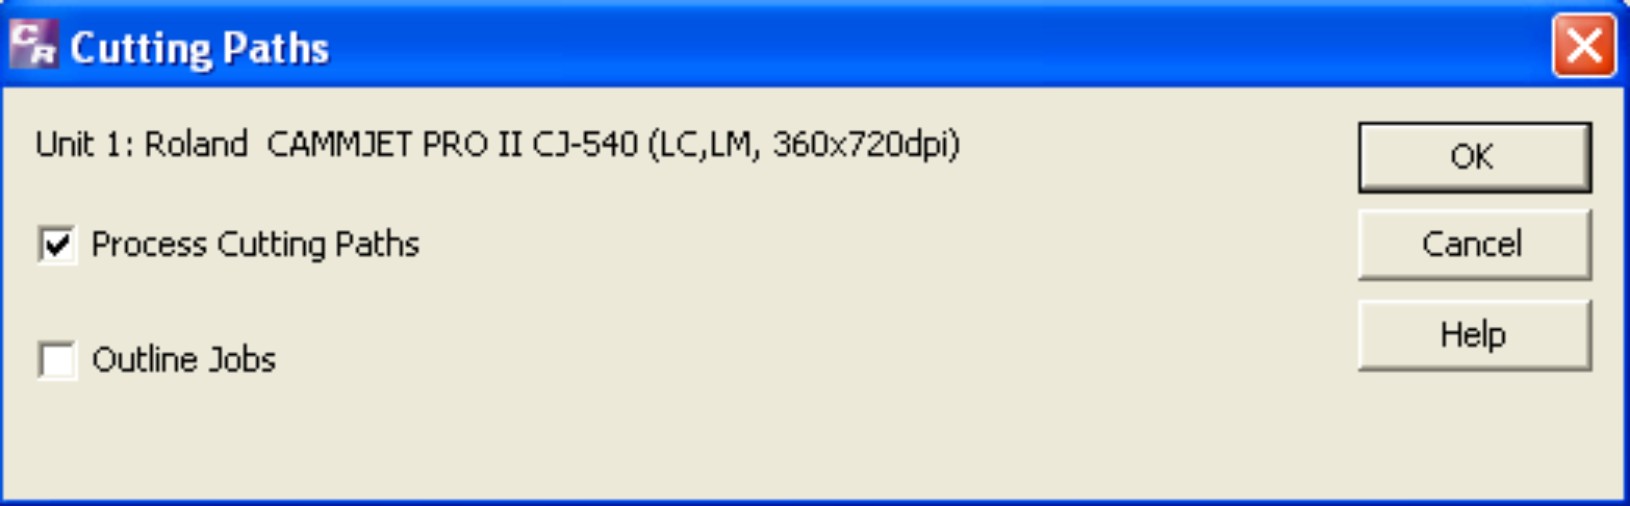
Process Cutting Paths, for cutting manually made paths, and Outline Jobs, for cutting Outlines of the imported image.
3) Printing
When Printing, there are 3 options: Rip and Print, Rip, or Add to Rip Queue
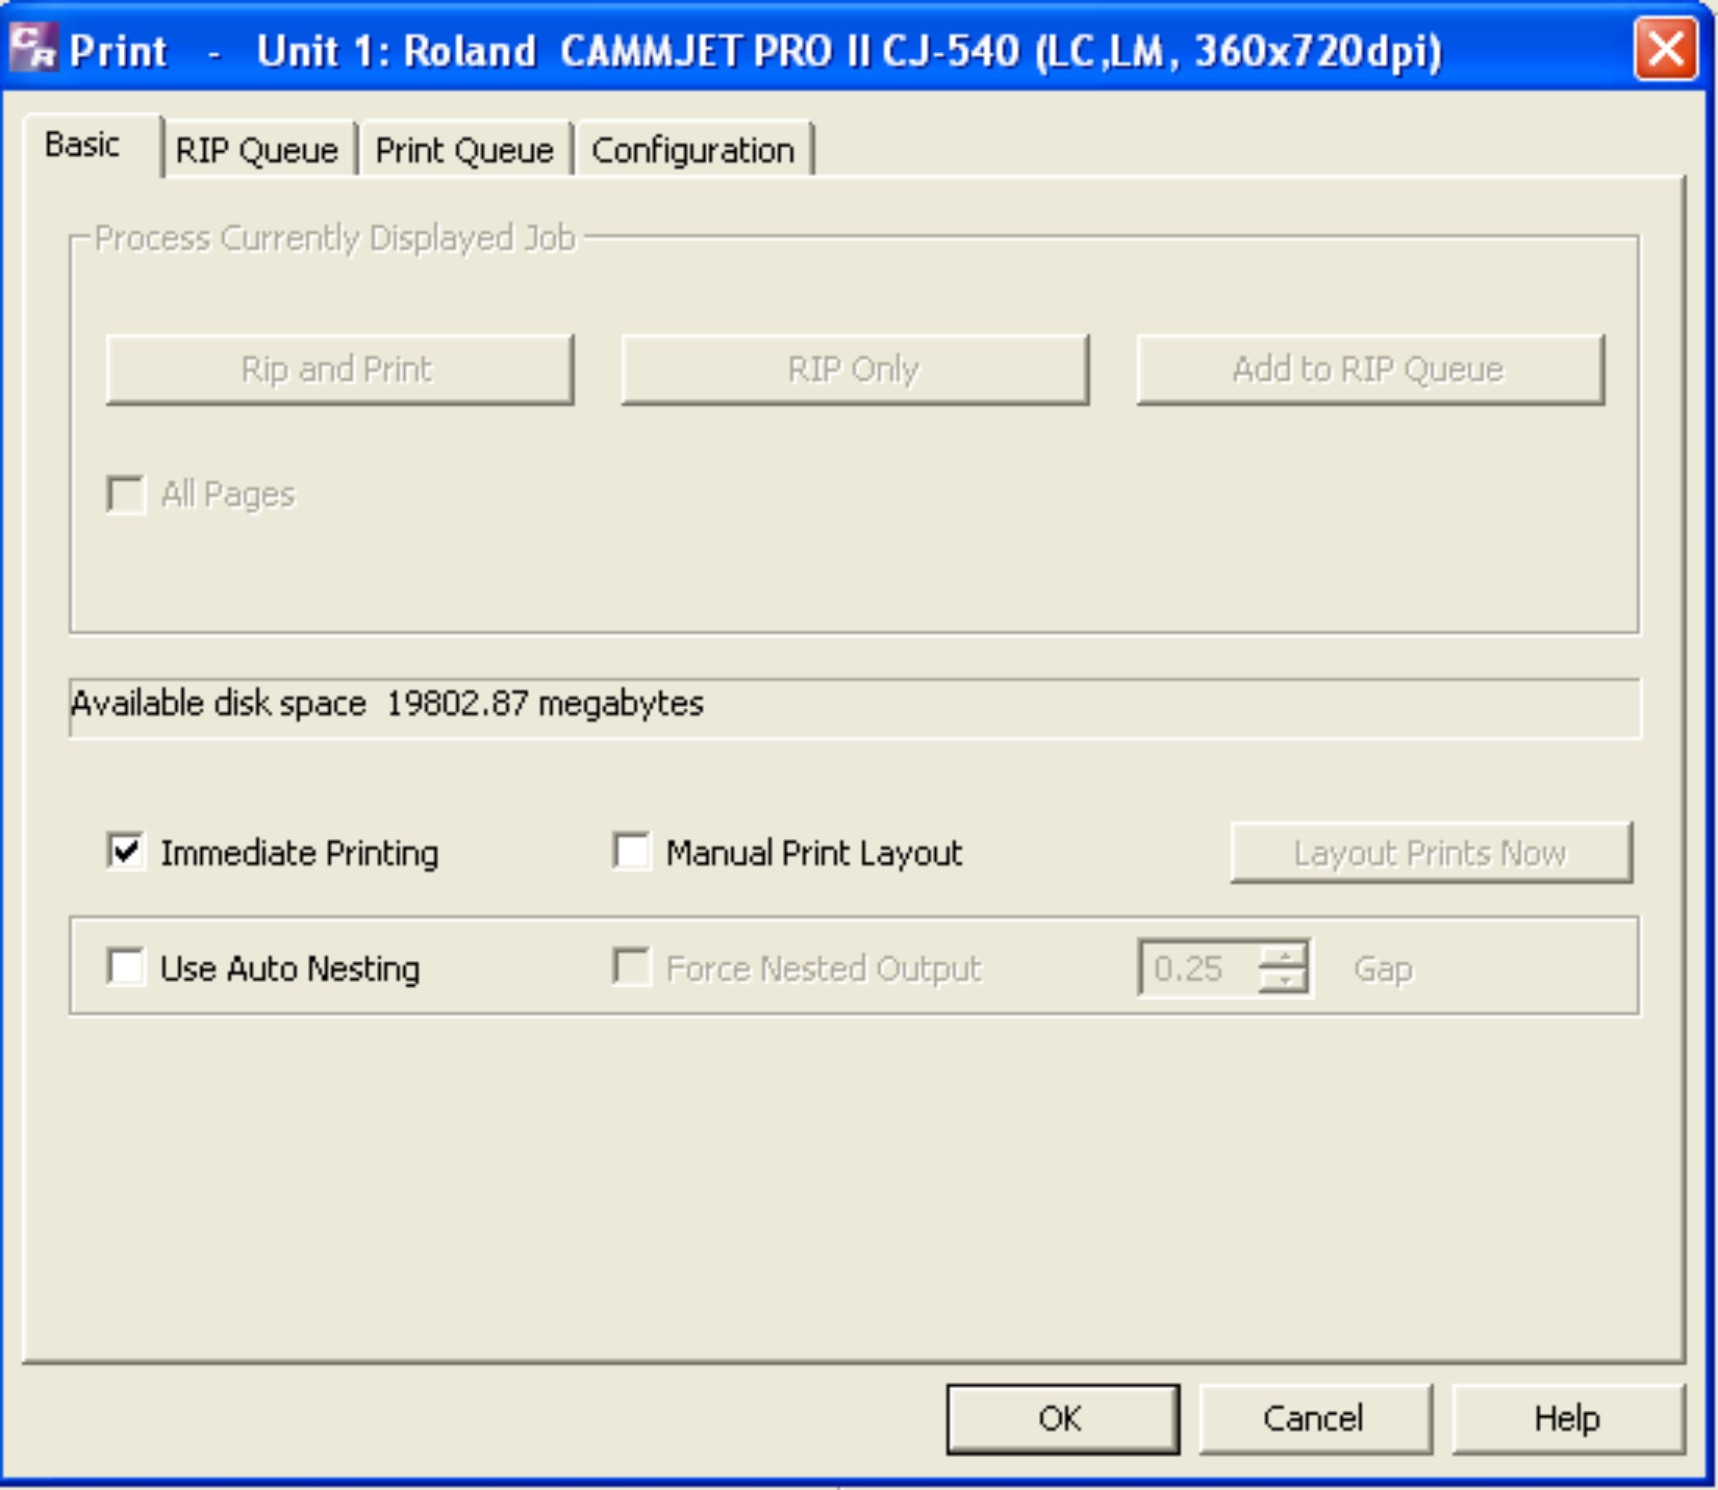
Selecting Rip and Print will print and then perform the cuts you designated earlier. Rip Only will cut the paper to the size of the image, and Add to Rip Queue will add you file to the Rip Queue At the next screen, select your file and print.